
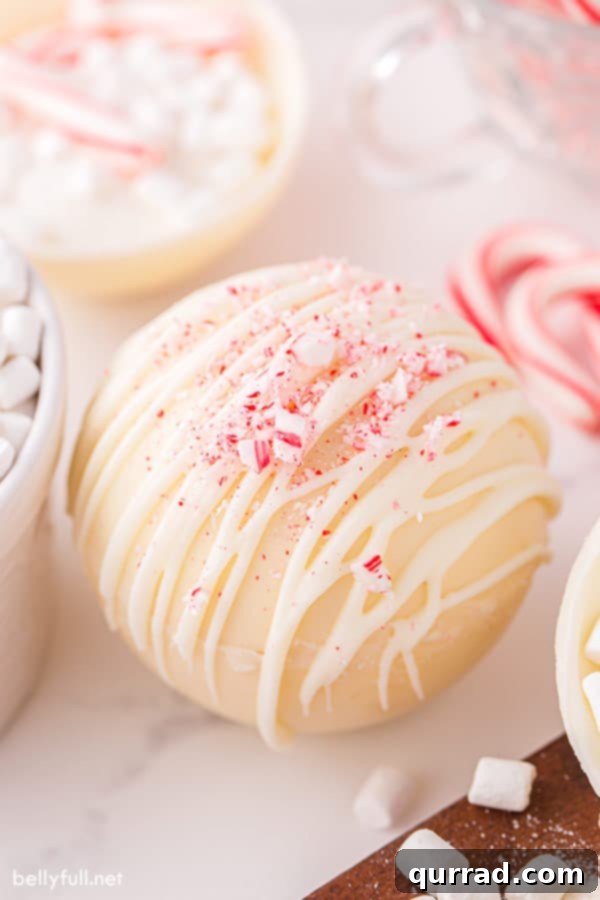
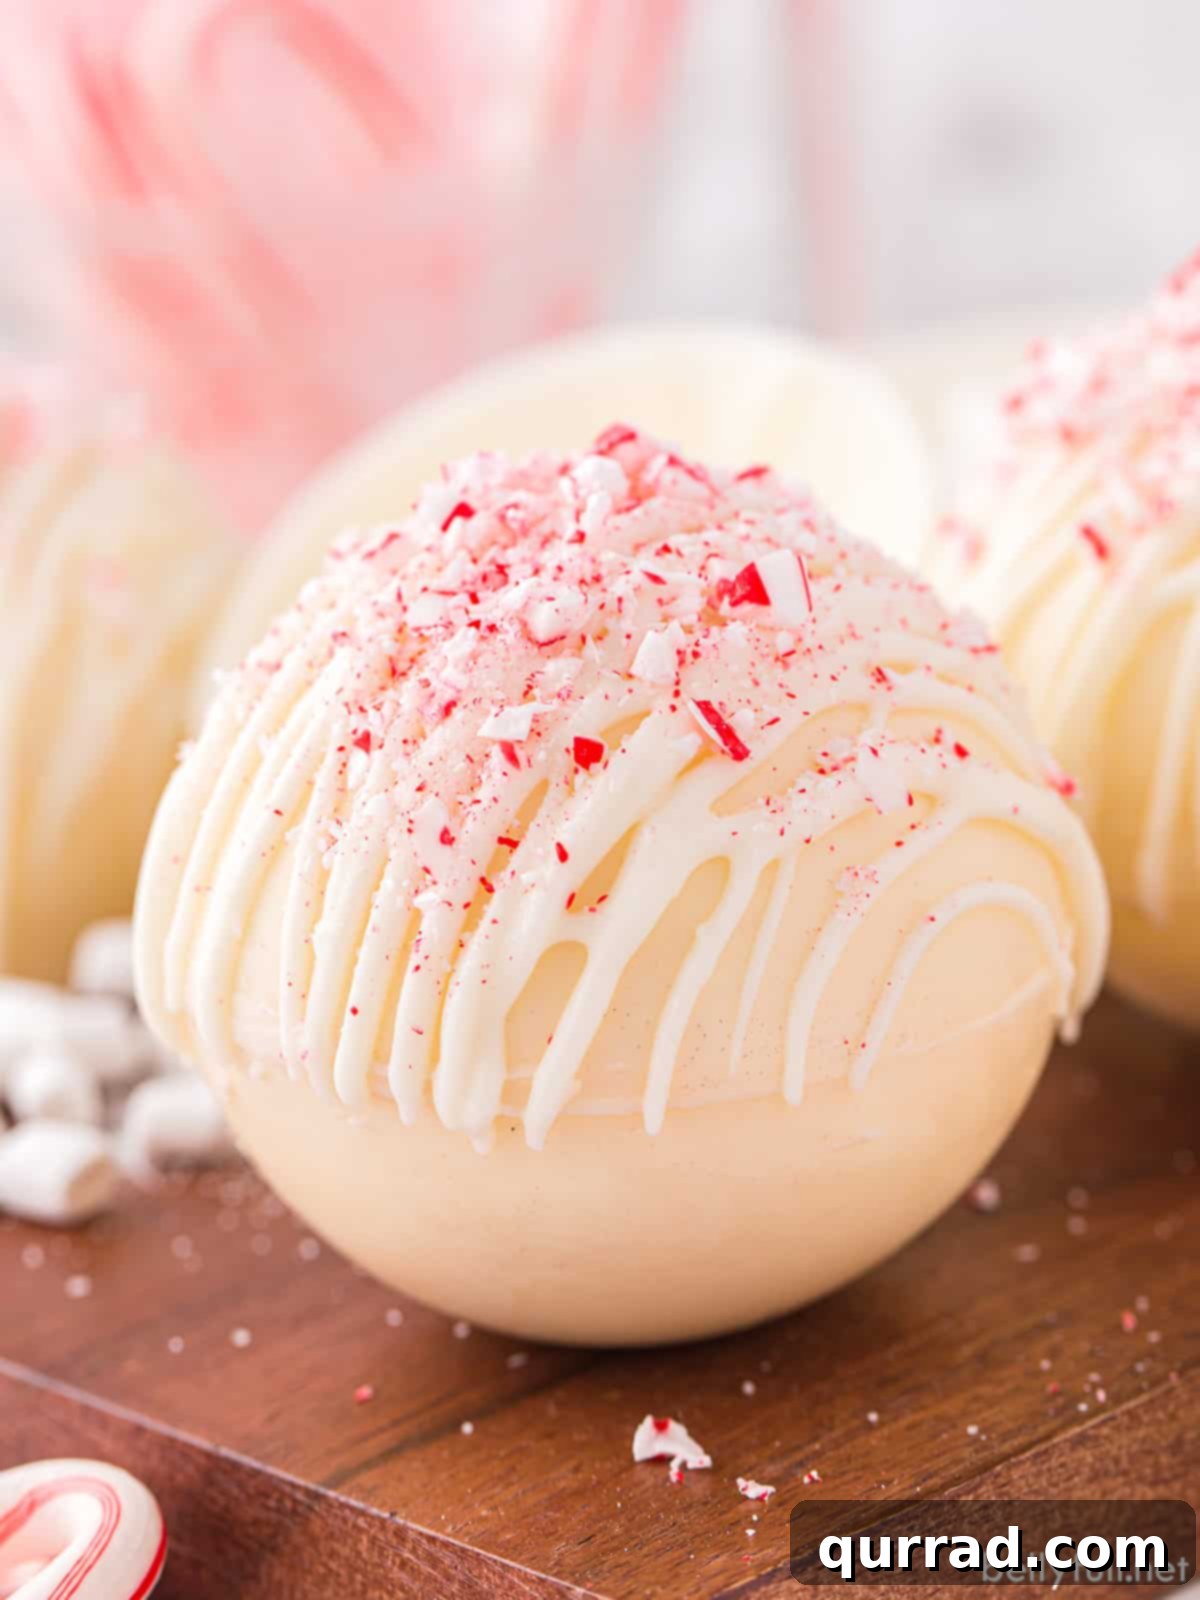
Prepare to elevate your hot chocolate experience with these exquisite White Hot Chocolate Bombs! Crafted from premium white chocolate and generously filled with a velvety hot chocolate mix, miniature marshmallow bits, and crushed candy canes, these delightful spheres promise a luxurious beverage like no other. Simply drop one into a mug of steaming hot milk, give it a gentle stir, and watch as it transforms into an incredibly rich, decadent, and utterly luscious cup of next-level white hot chocolate.
These enchanting creations aren’t just for indulging yourself; they also make for extraordinary DIY holiday gifts. After all, who could possibly resist the charm and warmth of a homemade chocolate gift, especially during the colder months?
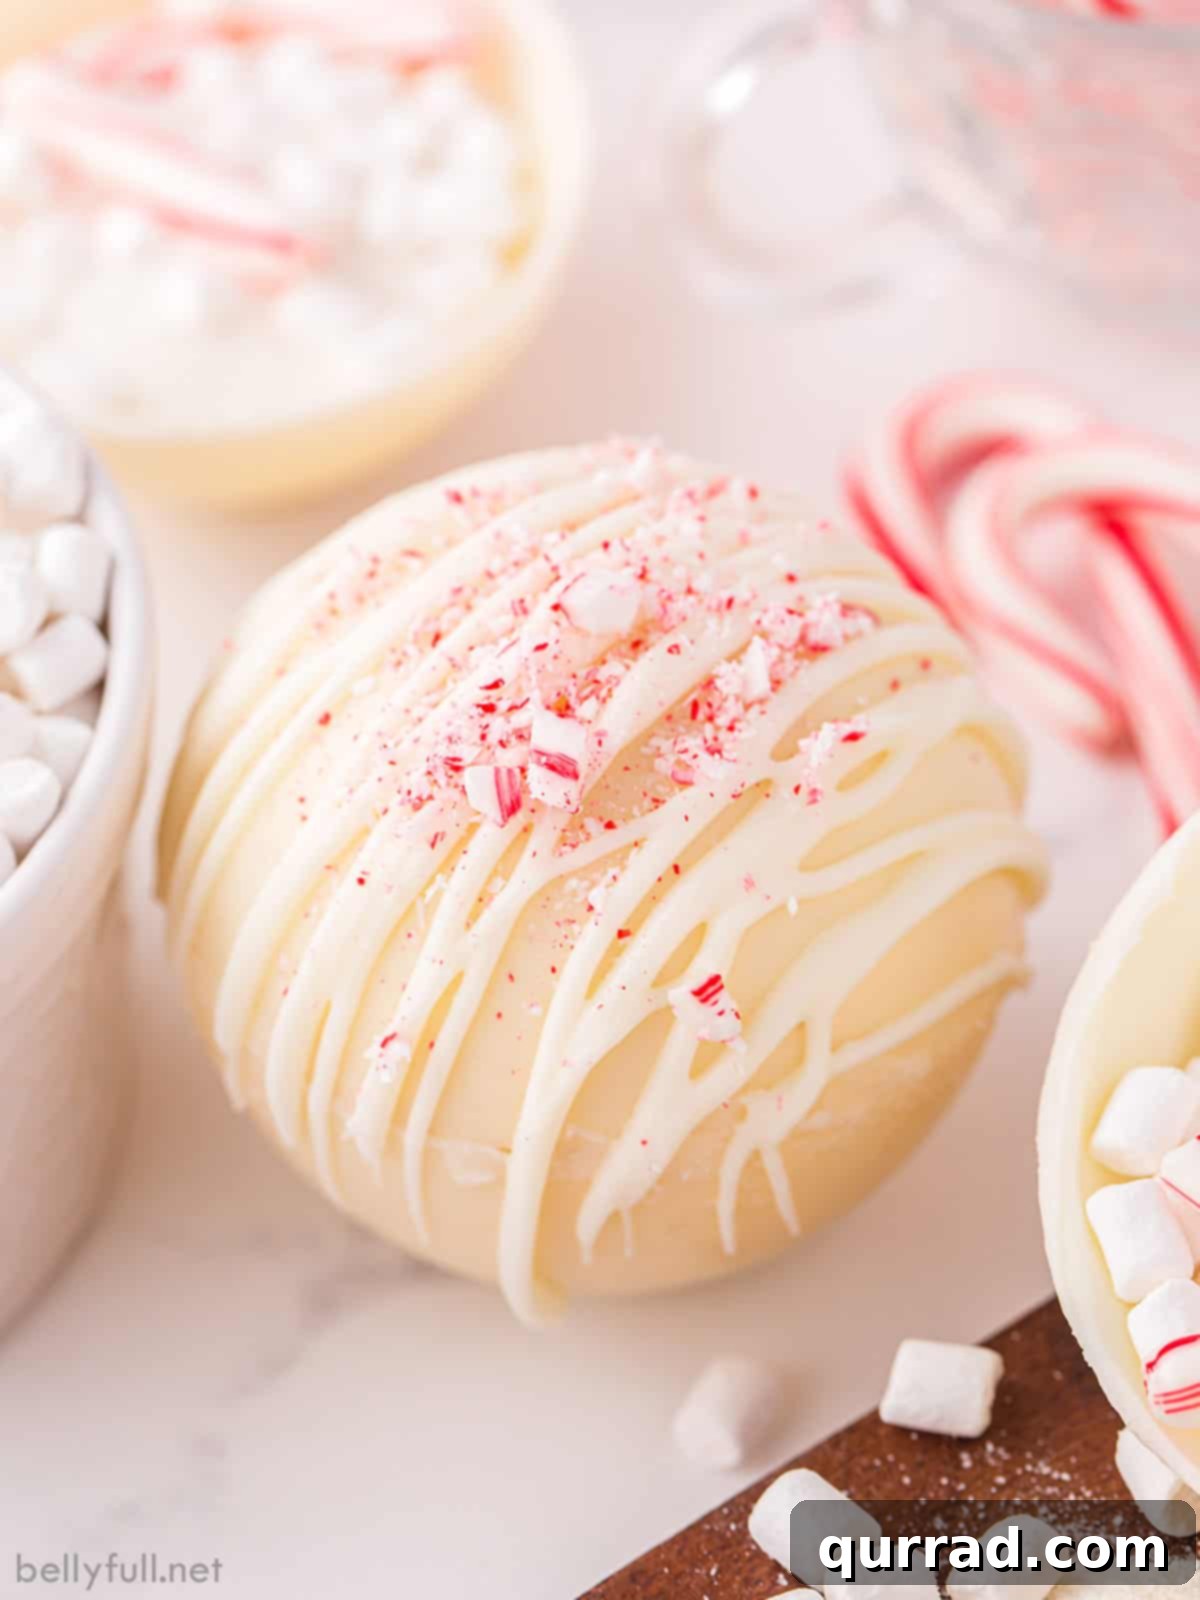
Crafting the Perfect White Hot Chocolate Bombs: An Easy and Fun Recipe
Never thought you could create a magical “bath bomb” for your hot chocolate, did you? Welcome to the wonderful world of White Hot Chocolate Bombs, meticulously designed to transform your ordinary hot milk into an extraordinary indulgence! With just one bomb nestled in your favorite mug, a pour of hot milk, and a quick stir, you’ll be treated to a rich, supremely decadent, and magnificent white hot chocolate experience that will warm you from the inside out.
These charming white hot chocolate bombs offer a truly fantastic and engaging way to infuse your drink with silky-sweet white chocolate flavor. They are incredibly enjoyable to make, serving as a creative kitchen project, and even more so to watch as they “erupt” with deliciousness in your mug. For a delightful festive twist, I’ve incorporated crushed candy canes into mine, making them an ideal minty treat for sharing during the holiday season or for cozy winter evenings. The best part? You can easily prepare these in advance, making them perfect edible gifts that bring joy and warmth to anyone lucky enough to receive them, whether for birthdays, Christmas, or just a thoughtful gesture.
Unlocking the Magic: What Exactly is a Hot Chocolate Bomb?
Hot cocoa bombs captivated the culinary world a few years ago and have since remained a beloved trend, offering a wonderfully fun and interactive method to elevate your hot chocolate game. Imagine a delightful sphere of chocolate, hollow inside, brimming with all the ingredients needed for a perfect cup of cocoa. At its core, a hot chocolate bomb consists of two main components: the elegant outer shell, meticulously crafted from melted chocolate (for which a specialized silicone mold is essential for shaping), and the delightful interior, typically brimming with high-quality hot chocolate mix and an assortment of your favorite toppings, such as fluffy mini marshmallows.
Once the hot chocolate bomb is artfully assembled and thoroughly set, the real magic begins. You gently place it into a mug and then pour approximately 8-10 ounces of hot milk (or even water, though milk offers a creamier, richer result) over it. As the warm liquid embraces the bomb, the outer chocolate shell gracefully dissolves, dramatically releasing the enclosed hot chocolate mix and marshmallows. The warmth of the milk melts the chocolate shell and activates the cocoa mix. A final stir ensures the chocolate is fully melted and the hot chocolate mix is completely dissolved, leaving you with a steaming, fragrant mug of unbelievably decadent hot chocolate, ready to be savored. It’s an experience that’s as delightful to watch as it is to taste, providing a moment of pure comfort and indulgence.
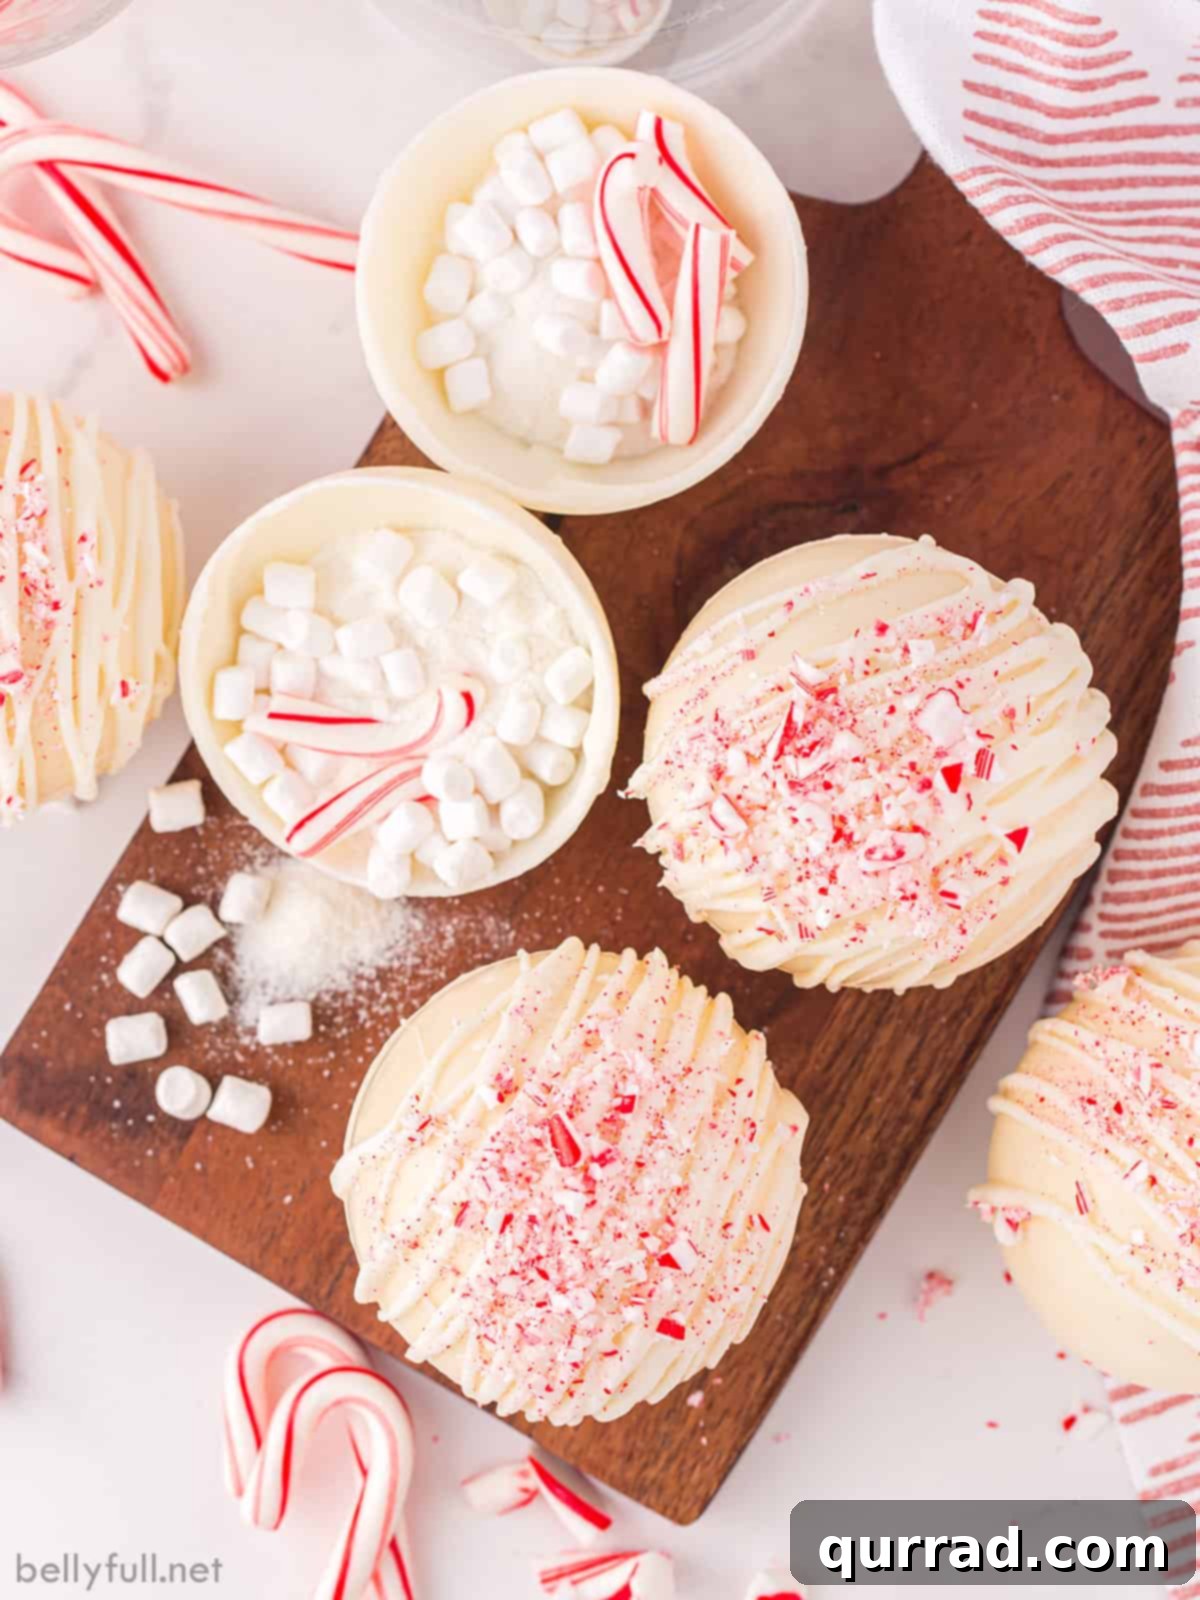
Essential Ingredients for Your Decadent White Hot Chocolate Bombs
Crafting these wonderfully easy and impressive white hot chocolate bombs requires just a handful of quality ingredients. Each component plays a vital role in achieving that perfect balance of flavor and texture, ensuring your homemade treats are nothing short of spectacular. Focus on quality ingredients for the best possible outcome.
- Vanilla Almond Bark: This is my go-to choice for melting and molding due to its smooth consistency and excellent setting properties, making it ideal for creating sturdy yet delicious outer shells. While I highly recommend it for its ease of use, you can also achieve great results with high-quality white candy melts.
- White Chocolate Chips: These are crucial for imparting that rich, creamy, and undeniably sweet white chocolate flavor that defines these bombs. Opt for a premium brand like Ghirardelli for the best taste and melting characteristics, contributing significantly to the luxurious feel of your hot chocolate.
- White Hot Chocolate Mix: To perfectly align with our “white hot chocolate” theme and ensure a cohesive flavor profile, I strongly recommend using a white hot chocolate mix. You’ll typically need about three standard 1.25-ounce packets to ensure each bomb delivers a robust, satisfying flavor.
- Marshmallow Bits: What’s a cup of hot chocolate without the joyful addition of marshmallows? These tiny, fluffy bits are perfect for the filling, as they melt beautifully and rapidly, adding a delightful sweetness and textural contrast to your drink. If you can’t find bits, mini marshmallows work just as well.
- Candy Canes: For that refreshing and festive minty kick, mini candy canes, meticulously broken into small, irregular pieces, are absolutely perfect. They introduce a lovely crunch and a burst of invigorating peppermint flavor that wonderfully complements the sweet white chocolate, making these bombs especially delightful for holiday enjoyment.
Unleash Your Creativity: Exciting Variations and Simple Substitutions
One of the greatest joys of making your own White Hot Chocolate Bombs is the inherent freedom to customize them to your heart’s desire. Whether you’re looking to experiment with new flavors, cater to specific dietary preferences, or simply can’t find a particular ingredient, here are some fantastic suggestions to inspire your next batch and make them uniquely yours:
- Candy Melts Instead of Almond Bark: While vanilla almond bark is praised for its superior melting and molding properties, high-quality candy melts are a perfectly viable and fun alternative. They are available in a vibrant array of colors, allowing you to add a playful, visual element to your bombs, perfect for themed parties or celebrations.
- Alternate White Chocolate Options: If white chocolate chips aren’t readily available in your pantry or local store, you can easily substitute them with more vanilla almond bark, or opt for premium white chocolate baking bars. Approximately 8 ounces, or two standard 4-ounce bars, should be sufficient to achieve the desired richness and consistency.
- Marshmallow Marvels: Can’t locate those adorable marshmallow bits in your local store? Don’t fret! They are widely available online through retailers like Amazon, or you can simply chop up regular mini marshmallows into smaller, more manageable pieces. Their melt-in-your-mouth texture is non-negotiable for a true hot chocolate experience.
- Classic Hot Chocolate Mix: If white hot chocolate mix proves elusive or if you simply prefer a more traditional flavor, feel free to use your favorite regular milk chocolate or dark chocolate hot chocolate mix. This will still result in a delicious and exciting hot chocolate bomb, just with a classic cocoa flavor profile.
- Peppermint Perfection: Beyond the traditional candy canes, consider using round peppermint candies, finely crushed into small pieces, for that invigorating minty flavor. Alternatively, a tiny drop of food-grade peppermint extract can be mixed into the melted chocolate for a subtle, even infusion (use sparingly, as extracts are potent).
- Add a Pop of Sprinkles: For an extra festive touch, incorporate some colorful sprinkles directly into the filling, or sprinkle them on the outside while the chocolate drizzle is still wet, creating a visually appealing and celebratory treat.
- Coffee Lover’s Twist: For adult palates, a teaspoon of instant espresso powder or finely ground coffee in the filling can add a sophisticated depth and subtle coffee kick, transforming it into a mocha-inspired white hot chocolate.
- Spiced Delights: A tiny pinch of ground cinnamon, nutmeg, or even a dash of pumpkin pie spice can introduce a warm, aromatic dimension to your white hot chocolate bombs, making them perfect for autumnal gatherings or a cozy winter evening.
- Caramel Swirl: Drizzle a little caramel sauce inside the chocolate shell before sealing, or add a few caramel bits to the filling for a sweet, buttery counterpoint to the white chocolate.
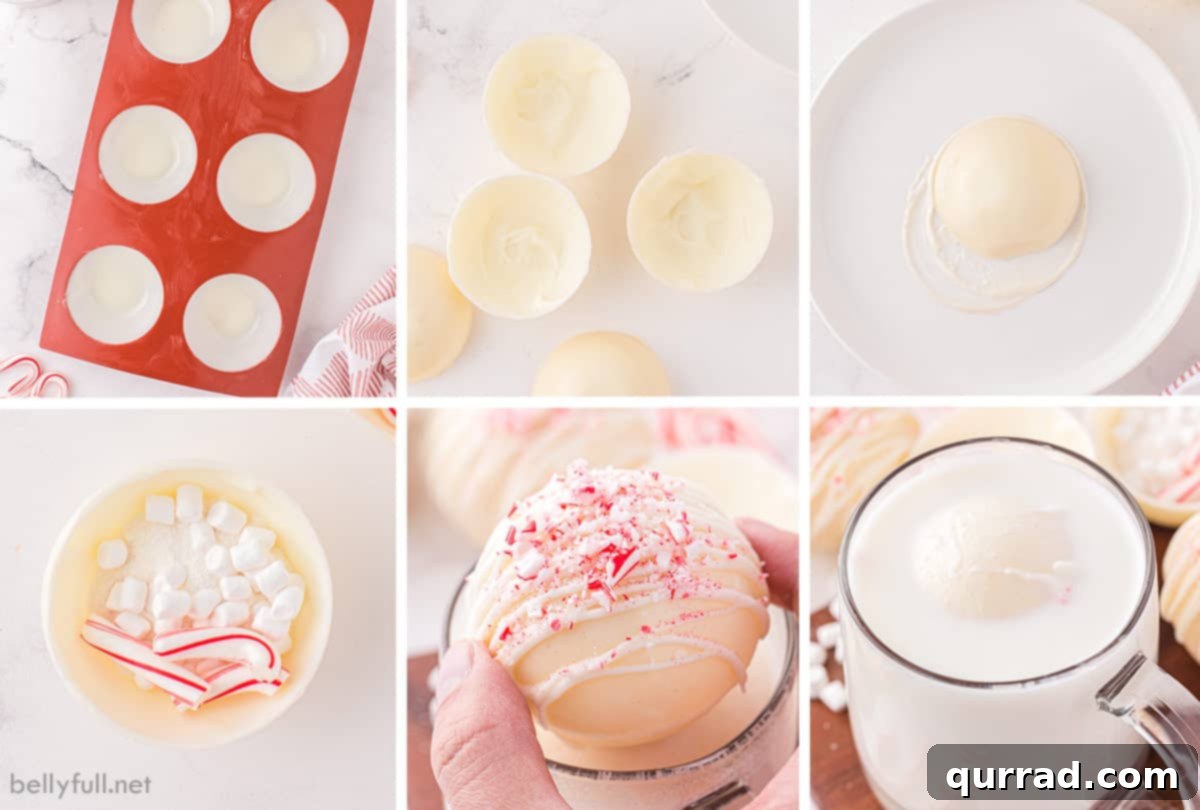
Crafting Your White Hot Chocolate Bombs: A Step-by-Step Guide
Making these delightful white hot chocolate bombs is a surprisingly easy and rewarding endeavor. The most crucial piece of equipment you’ll need is a set of silicone chocolate bomb molds (typically half-sphere shaped) for shaping the outer shells. Beyond that, a little patience is key, as the chocolate requires adequate chilling time between steps to ensure a perfect, durable set. Follow these detailed instructions to create your own edible masterpieces.
Below is a detailed summary of the process. For precise measurements and a full printable recipe card with all the specific quantities, please refer to the dedicated section further down this page.
- Step 1: Prepare Your Workstation & Melt the Chocolate. Begin by arranging large sheet pans on your counter to hold your silicone molds, ensuring a clean and organized workspace. In a medium-sized microwave-safe bowl, combine the vanilla almond bark and white chocolate chips. Microwave the mixture in short, 20-second bursts, stirring thoroughly after each interval, until the chocolate is completely melted and beautifully smooth. This gradual melting prevents scorching and ensures a silky consistency.
- Step 2: Form the Outer Shells (First Layer). Into each cavity of your silicone mold, drop 1 to 2 tablespoons of the melted white chocolate. Using the back of a round measuring tablespoon, quickly and carefully spread the chocolate evenly along the bottom and up the sides of each mold. The goal is to achieve a uniform, opaque coating that isn’t too thin.
- Step 3: Remove Excess Chocolate & Initial Chill. Once coated, invert the silicone molds and allow any excess chocolate to drip out for approximately 20 seconds. This step is crucial for creating thinner, more uniform shells. Use a straight knife or a bench scraper to meticulously scrape away any chocolate that has seeped over the edges of the molds; this ensures clean edges for easier sealing later. Place the molds into the freezer for 10 minutes to allow the chocolate to firm up completely. During the last few minutes of chilling, gently reheat any remaining melted white chocolate if it has started to thicken, ensuring it’s ready for the second coat.
- Step 4: Apply the Second Layer & Final Chill. Remove the molds from the freezer. Apply a second, reinforcing coat of chocolate by repeating the process: add another tablespoon of melted chocolate to each cavity, spread it evenly, and ensure good coverage. This second layer adds crucial strength and durability, preventing breakage during demolding and handling. Return the molds to the freezer for another 10 minutes.
- Step 5: Release and Prepare Halves. Carefully take the chilled molds from the freezer. Gently peel back the silicone to release the hardened white chocolate bomb halves from their cavities. Handle them with extreme care as they can be delicate. It’s perfectly normal if some edges aren’t absolutely perfect or if there are minor imperfections; we’ll address this in the next step.
- Step 6: Assemble the Hot Chocolate Bombs. Heat a microwave-safe plate in the microwave for about 1 minute until it’s comfortably warm to the touch. Place one of the chocolate bomb halves, rim-side down, onto the warm plate for just a few seconds. This gently melts and smooths the edges, preparing it for a tight, secure seal. Quickly remove it and fill the half with a generous tablespoon of white hot chocolate mix, a handful of marshmallow bits, and a few pieces of crushed candy cane.
- Step 7: Seal Your Bombs. Take a second chocolate bomb half and smooth its rim on the warm plate in the same manner as the first. Immediately place this softened half on top of a filled half, gently but firmly pressing them together to create a seal. Hold for a few seconds as the chocolate sets. You can use your finger to gently smooth any excess melted chocolate from the seam for a cleaner finish. Repeat this process for all remaining halves until you have beautiful, perfectly sealed white hot chocolate bombs.
- Step 8: Decorate (Optional). For a final, elegant flourish, drizzle any remaining melted white chocolate over the assembled bombs using a spoon. While the drizzle is still wet, sprinkle with additional crushed candy canes for an extra touch of festive appeal, visual texture, and a burst of peppermint flavor, if desired.
Expert Tips for Hot Chocolate Bomb Perfection
Achieving flawless and beautiful hot chocolate bombs is simpler than you think with these insider tips. Even experienced confectioners appreciate a few pointers to ensure every bomb is a masterpiece of deliciousness and charm, ready to impress.
- Embrace Imperfections: Don’t be disheartened if the edges of your chocolate shells aren’t perfectly even or smooth when you first remove them from the molds. This is entirely normal! The brilliant trick is to briefly use a warm plate to gently melt and soften the rims of both halves. This slight melt allows you to press them together for a much cleaner, more secure, and aesthetically pleasing seam.
- Master the Warm Plate Technique: While the warm plate is undoubtedly your ally for achieving smooth, seamless edges, exercise caution and precision. Do not leave the chocolate on the warm plate for too long. Just a few seconds are typically enough to achieve the desired softening. Prolonged contact will cause the chocolate to melt excessively, leading to uneven, messy sides and potentially compromising the structural integrity of your bomb.
- Ensure a Robust Chocolate Coating: When spreading the melted chocolate into your molds, strive to coat the rim and sides as thoroughly and evenly as possible. A good rule of thumb is that you should not be able to see through the chocolate layer. A generous, opaque coating on the sides and rim makes it significantly easier to demold your delicate chocolate shells without breakage and ensures they are durable enough to hold their shape and contents until ready to use.
- Consider a Pastry Brush for Precision: For even greater control and to minimize potential mess during the molding process, try using a clean, food-safe pastry paintbrush instead of the back of a rounded measuring tablespoon to coat the molds with melted chocolate. This method allows for more precise application, reducing the amount of excess chocolate that drips out and needs to be meticulously scraped away.
- Maintain Dry Fillings: This is a crucial and non-negotiable rule for hot chocolate bomb success: ensure that whatever ingredients you choose for the inside of your chocolate bomb are completely and utterly dry. Avoid incorporating any liquids or moisture into your filling, such as syrups or fresh fruit. Moisture can cause the chocolate shell to degrade prematurely, leading to a less stable and less appealing final product that might fall apart before it even reaches the mug.
- Temper Your Chocolate (Optional but Recommended for Pros): For a truly professional finish, especially if you desire shinier, snappier shells that are less prone to melting at warmer room temperatures, consider tempering your white chocolate. While not strictly necessary for this recipe due to the inclusion of almond bark (which contains stabilizers), proper tempering can significantly enhance the quality, appearance, and shelf stability of your bombs.
- Work Quickly and Efficiently: Remember that chocolate sets relatively fast, especially after being chilled. Work efficiently during the molding, filling, and sealing stages to ensure smooth, unblemished results. If your melted chocolate thickens during the process, simply re-microwave it in very short, 5-10 second bursts, stirring frequently, until it returns to a perfectly workable consistency.
Serving Your White Hot Chocolate Bombs: The Grand Reveal
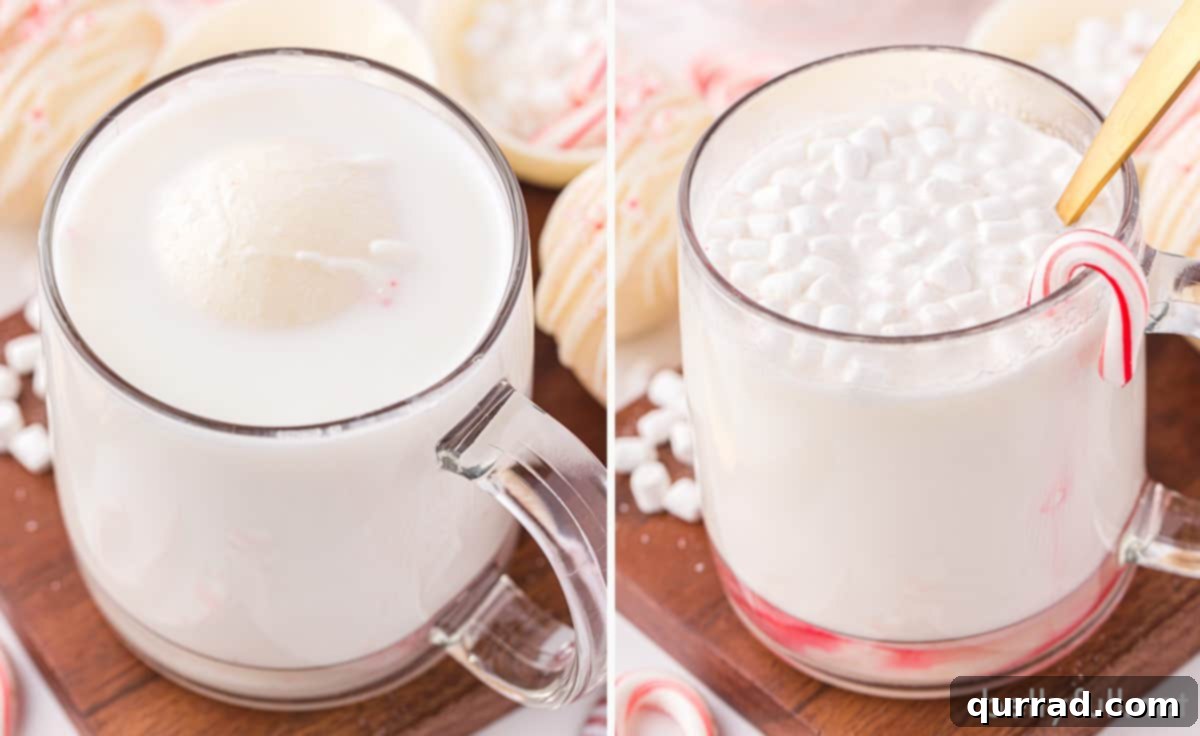
The moment of truth – serving your meticulously crafted white hot chocolate bomb – is truly a delightful spectacle that brings joy and anticipation. To unleash its full potential and experience the magic, simply heat up about 8 ounces of milk (or water, if preferred, but milk yields a significantly richer and creamier drink) until it’s steamy and piping hot, just as you would for a regular cup of hot chocolate or tea. Then, with anticipation, gently drop your beautiful masterpiece into the warm beverage.
Watch in awe as the outer chocolate shell begins its graceful melt, slowly dissolving into the hot liquid. This leads to the exciting “explosion” where all the delicious ingredients tucked inside are dramatically released into your mug. The marshmallows will float to the top, and the hot chocolate mix will begin to infuse the milk. Give it a good stir with a spoon until the hot chocolate mix has fully dissolved and the chocolate from the shell has completely melted into the liquid, creating a uniform, delicious drink. Now, take a deep breath, savor the inviting aroma of white chocolate and peppermint, and enjoy your steaming mug of luxurious white hot chocolate! It’s an experience that’s not just a drink, but a moment of pure comfort and wonder.
Storage Solutions for Lasting Enjoyment of Your Hot Chocolate Bombs
Proper storage is absolutely key to maintaining the integrity, fresh taste, and deliciousness of your homemade White Hot Chocolate Bombs. When handling these delicate creations, always proceed with utmost care and a gentle touch, as their hollow structure can make them susceptible to accidental breakage. However, even if a bomb accidentally breaks during storage or handling, don’t despair! It can still be perfectly used to create an absolutely amazing, albeit less dramatic, cup of hot chocolate.
- Storing at Room Temperature: For immediate enjoyment or short-term gifting, these hot chocolate bombs can be safely stored at room temperature for up to 2 days. It is crucial to ensure they are kept in an airtight container, away from any direct sunlight, sources of moisture, or high humidity, all of which can cause the chocolate to bloom (develop a whitish film) or melt. A cool, dry pantry is ideal.
- Refrigeration: To significantly extend their freshness and prevent melting in warmer climates, you can refrigerate your hot chocolate bombs for up to 2 weeks. Again, use an airtight container to protect them from absorbing any unwanted odors from other foods in the fridge. Before use, it’s a good practice to allow them to come closer to room temperature for about 15-30 minutes; this helps with the melting process and ensures the chocolate fully dissolves into your hot milk.
- Freezing for Longer Term Storage: Yes, these delightful treats are remarkably freezer-friendly! For longer preservation, perfect for preparing ahead for gifts or future indulgence, hot chocolate bombs can be frozen for up to a month. To freeze effectively, wrap each bomb individually and tightly in plastic wrap to prevent freezer burn and condensation. Then, place the individually wrapped bombs in an airtight freezer-safe container or a heavy-duty freezer bag. When ready to use, simply take one out of the freezer and allow it to come to room temperature for at least an hour before dropping it into hot milk.
Explore More Cozy Winter Drink Recipes:
- Slow Cooker Hot Chocolate
- Homemade Eggnog
- Hot Buttered Rum
- Mulled Wine
- Hot Cranberry Apple Cider
We genuinely hope you adore this delightful and easy recipe for White Hot Chocolate Bombs! If you’ve tried it and loved it, please consider leaving a star rating and a review below to share your experience with other home bakers and hot chocolate enthusiasts. Your feedback is invaluable! And don’t forget to connect with us and discover even more delicious, comforting recipes by following Belly Full on TikTok, Facebook, Instagram, Pinterest, and YouTube! Stay warm and enjoy your culinary adventures!
White Hot Chocolate Bombs
A magical twist on a classic, these White Hot Chocolate Bombs are perfect for cozy nights, holiday gifts, or just a delightful treat!
- Prep Time: 25 minutes
- Cook Time: 10 minutes
- Chill Time: 20 minutes
- Total Time: 55 minutes
- Yields: 6 chocolate bombs
White Hot Chocolate Bombs are made with quality white chocolate and filled with hot chocolate mix, marshmallow bits, and candy canes. Add one to a mug of hot milk, stir, and you’ll have decadent and luscious next level white hot chocolate!
Equipment
- Chocolate Bomb Silicone Molds (half-sphere molds)
- Medium microwave-safe bowl
- Large sheet pans
- Straight knife or bench scraper
- Round measuring tablespoon (or food-safe paintbrush)
Ingredients
- 12 ounces vanilla almond bark, chopped (approximately 1 1/2 cups or 6 squares)
- 1 cup white chocolate chips (premium brand like Ghirardelli preferred for best results)
- 3/4 cup white hot chocolate mix (equivalent to three 1.25-ounce packets)
- 3/4 cup marshmallow bits
- 6 mini candy canes, broken into 3 smaller pieces each
- Optional: Additional crushed candy canes or sprinkles for garnish
Instructions
- Melt the Chocolate: Add the vanilla almond bark and white chocolate chips to a medium-sized microwave-safe bowl. Microwave in 20-second increments, stirring thoroughly after each addition, until the chocolate is completely melted and beautifully smooth.
- Prepare Molds: Set out large sheet pans on your workstation and place the silicone molds on them for stability.
- First Chocolate Layer: Drop 1 to 2 tablespoons of the melted chocolate into each mold cavity. Using the back of a round measuring tablespoon, quickly spread the chocolate evenly along all sides and the bottom of each mold to create a uniform coating.
- Remove Excess: Turn the silicone molds over and let any excess chocolate drip out for approximately 20 seconds. This helps create thinner, more uniform shells. (You can do this over the chocolate bowl to minimize mess.)
- Clean Edges: Flip the molds back over and use the back of a straight knife or a bench scraper to meticulously scrape away any chocolate that has seeped out over the edges of the molds. This ensures clean, defined edges for sealing.
- Initial Chill: Place the molds in the freezer for 10 minutes to allow the chocolate to firm up. Towards the end of this chilling time, gently reheat any remaining white chocolate if it has started to thicken, ensuring it’s ready for the second coat.
- Second Chocolate Layer: Remove both molds from the freezer. Apply a second, reinforcing coat of chocolate by repeating steps 3 through 5: add another tablespoon of melted chocolate, spread it evenly, let excess drip off, scrape away excess, and then return the molds to the freezer for another 10 minutes. This second layer adds crucial strength.
- Demold Halves: Carefully remove the hardened white chocolate bomb halves from the cavities of the molds and set them aside. It’s common for edges not to be perfectly smooth at this stage; don’t worry, we’ll fix this.
- Smooth Edges for Sealing: Place a microwave-safe plate in the microwave and heat it for 1 minute until it’s comfortably warm to the touch. Place an empty white chocolate bomb half, rim-side down, onto the warm plate for just a few seconds until the rim of the half-sphere begins to soften. This will smooth out the edges, preparing it for a tight seal.
- Fill the Bomb: Quickly remove the smoothed half from the warm plate and fill it with approximately one tablespoon of white hot chocolate mix, one tablespoon of marshmallow bits, and three mini candy cane pieces.
- Seal the Bomb: Take another chocolate bomb half and smooth its edges on the warm plate in the same manner. Immediately place this softened half on top of the filled white chocolate bomb half to create a seal. Gently press the two halves together for a few seconds while the white chocolate dries and sets. You can use your finger to gently smooth any excess melted chocolate from the seam for a neater finish.
- Repeat: Continue this process for all the chocolate bombs. You should yield 6 finished white hot chocolate bombs.
- Decorate (Optional): If desired, drizzle any remaining melted white chocolate over the outside of the assembled bombs with a spoon. While the drizzle is still wet, sprinkle with additional crushed candy canes or festive sprinkles for decoration.
- Serve and Enjoy: To serve, heat up 8 ounces of milk until it’s steaming hot. Drop one white hot chocolate bomb into the hot milk, stir until it dissolves completely, and enjoy your rich, festive drink!
Notes
- Uneven Edges are Normal: Don’t be concerned if the edges of your chocolate shells aren’t perfectly even when you first remove them from the molds. The warm plate technique is designed to help you create a better, smoother seam for sealing the halves together.
- Be Quick with the Warm Plate: Avoid leaving the chocolate on the warm plate for too long. Just a few seconds will suffice to soften the edges without causing excessive melting and leading to uneven, difficult-to-seal sides. Speed is key here.
- Ensure a Thick Coating: When coating the molds, aim for a thick enough layer of chocolate such that you cannot see through it. A good, robust coating on the sides and rim makes demolding much easier and results in more durable bombs that are less prone to breaking.
- Consider a Paintbrush: For enhanced precision and to potentially reduce excess drips, a clean, food-safe paintbrush can be used instead of a measuring spoon to coat the molds with melted chocolate.
- Dry Fillings are Essential: All ingredients placed inside your chocolate bomb must be completely dry. Any moisture, even a tiny bit, can cause the chocolate to degrade or “bloom” over time, affecting the bomb’s integrity and appearance.
Nutrition
Nutritional information (per serving, estimated): Calories: 559kcal | Carbohydrates: 73g | Protein: 2g | Fat: 28g | Saturated Fat: 24g | Polyunsaturated Fat: 1g | Monounsaturated Fat: 3g | Trans Fat: 1g | Cholesterol: 6mg | Sodium: 174mg | Potassium: 86mg | Fiber: 1g | Sugar: 70g | Vitamin A: 11IU | Vitamin C: 1mg | Calcium: 75mg | Iron: 1mg
Nutritional information provided is an automatic calculation and can vary significantly based on the exact products and brands you use, as well as any changes you make to the recipe. If these numbers are critically important to your dietary needs, it is highly recommended to calculate them yourself using your specific ingredients.