
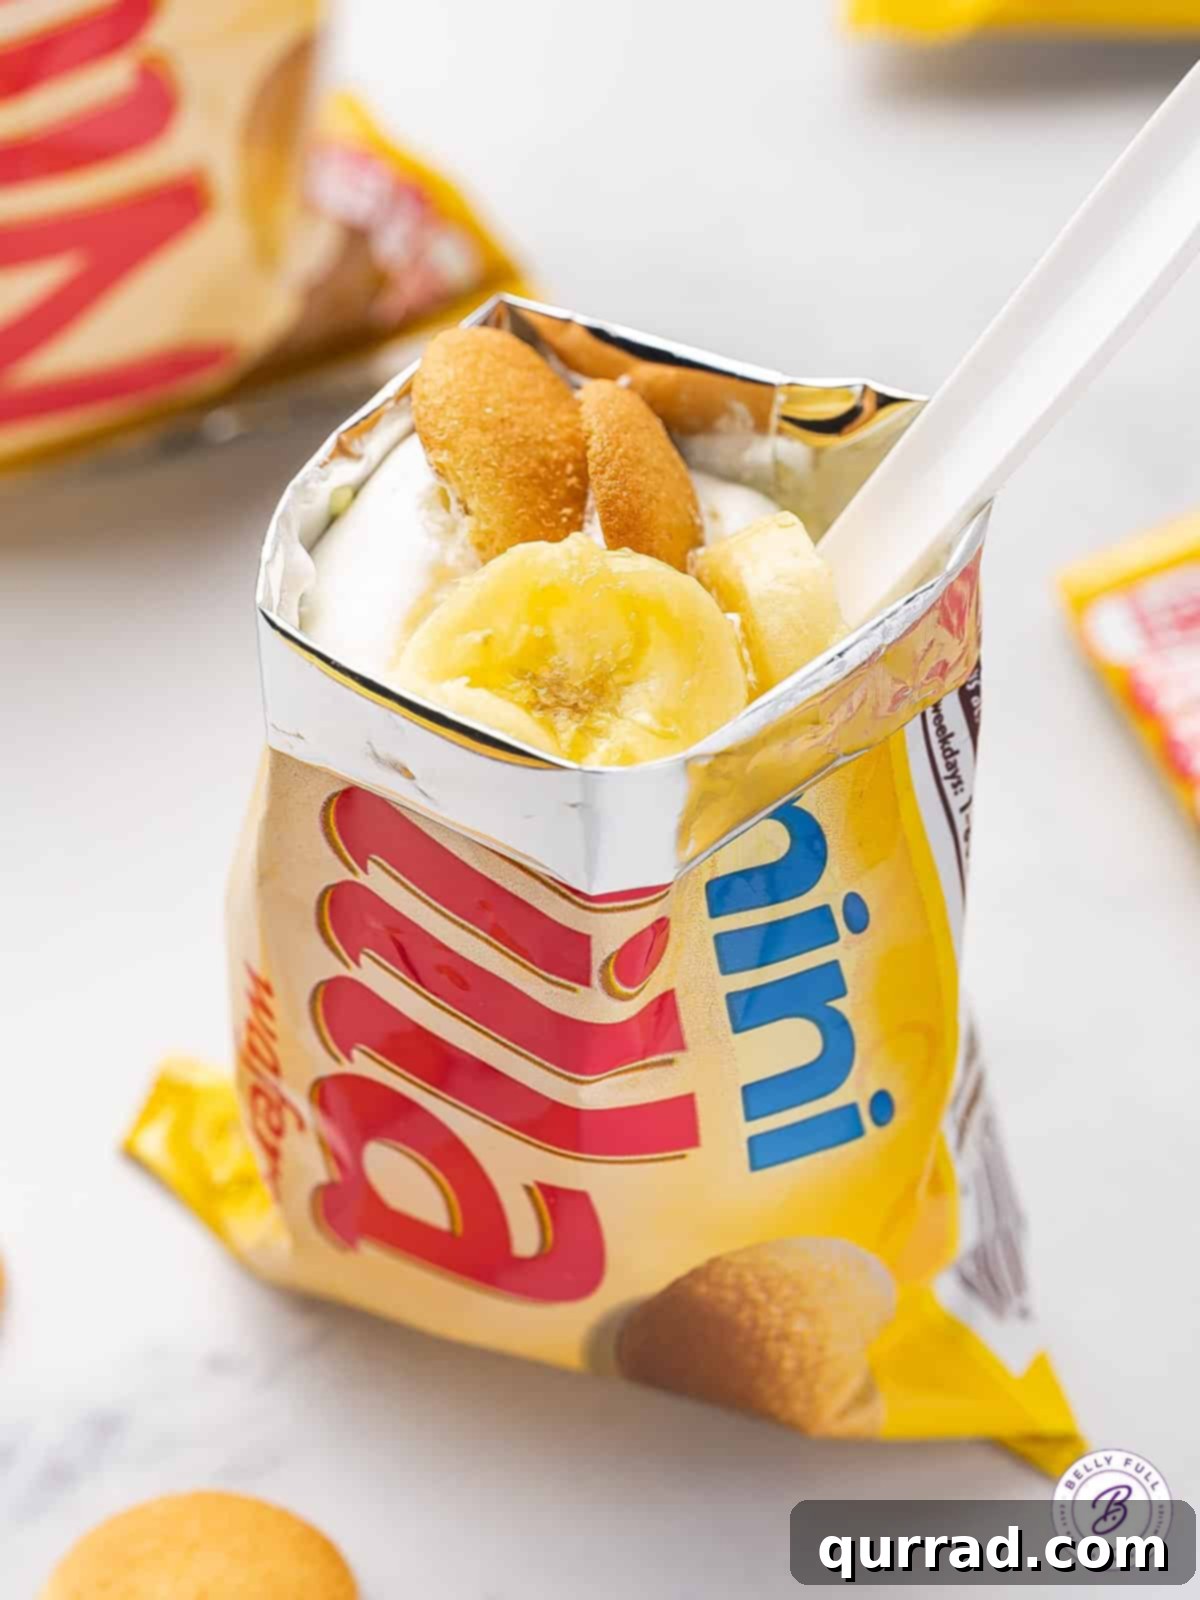
Welcome to the delightful world of **Walking Banana Pudding**, the ultimate portable dessert that promises a burst of classic flavor with unmatched convenience. Imagine your favorite banana pudding, but reimagined for a grab-and-go experience. This no-bake wonder is a breeze to prepare, requiring just a handful of ingredients, and embodies the sweet, creamy essence of traditional banana pudding in every spoonful.
Forget the fuss of plates and extensive cleanup; these individual servings are perfect for any gathering. Whether you’re hosting a lively graduation party, a casual summer BBQ, a charming baby shower, or simply enjoying a relaxing day outdoors, Walking Banana Pudding offers an ideal solution for feeding a crowd without the usual stress. It’s a dessert designed for enjoyment, allowing your guests to mingle, celebrate, and savor a sweet treat with ease.
Discover the Charm of Quick & Easy Walking Banana Pudding
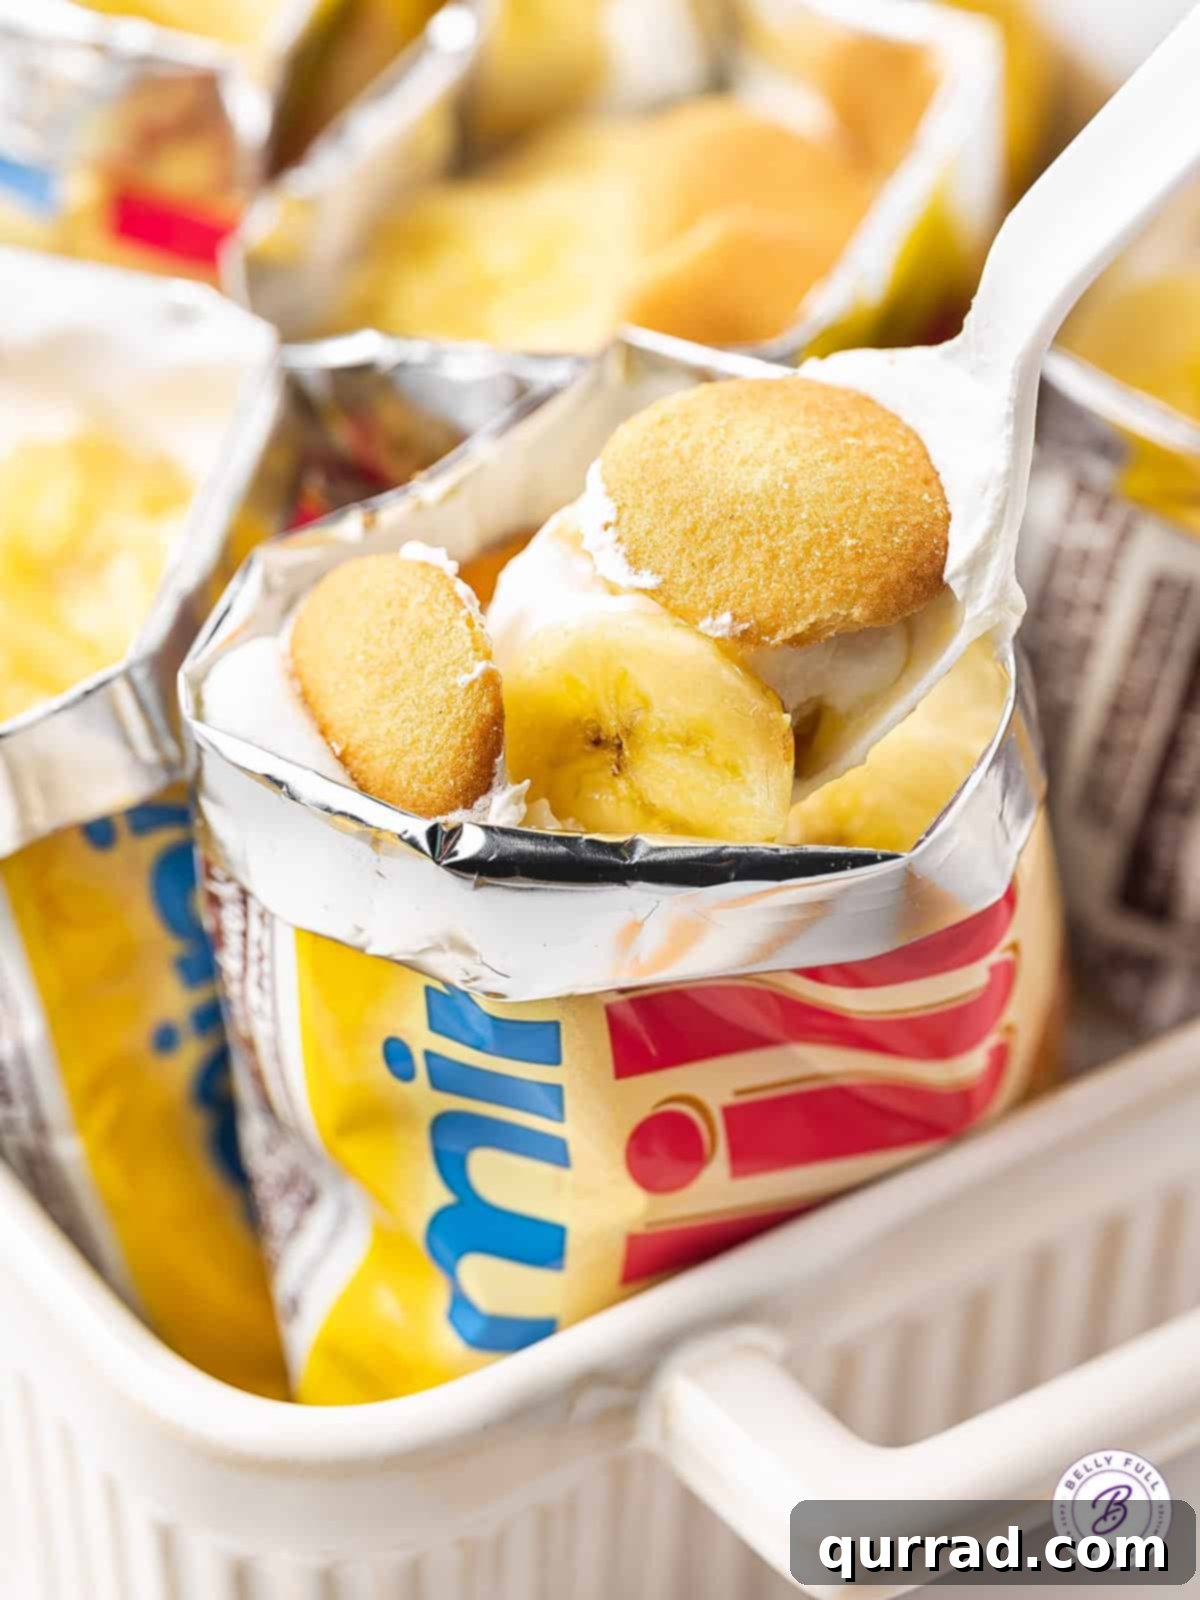
If you’re a connoisseur of classic homemade banana pudding, prepare to fall in love with its innovative, portable cousin: Walking Banana Pudding. This recipe takes the beloved flavors of creamy banana pudding, tender Nilla wafers, and fresh banana slices, and packages them into individual servings that are both fun and incredibly easy to handle. It’s the perfect sweet companion for any relaxed occasion, from lounging by the pool to unwinding at the beach or enjoying a camping trip under the stars.
Inspired by the convenience of savory walking tacos, this dessert eliminates the need for formal seating arrangements or the dread of a mountain of dirty dishes. Each “pudding-in-a-bag” is a self-contained delight, making it an excellent choice for dynamic social settings where guests are on the move. The genius lies in its simplicity and portability, allowing everyone to enjoy a delicious dessert without missing a beat of the party.
Beyond its practicality, Walking Banana Pudding shines in its quick preparation. You can whip up a batch of these delightful treats in under 20 minutes, delivering all the comforting, nostalgic flavors of a traditional banana pudding without the lengthy chill times or complex assembly usually required. It’s an instant crowd-plepleaser that truly delivers on both taste and convenience.
Why This No-Bake Dessert Will Become Your New Favorite
This fun and flavorful banana pudding dessert has quickly become a household favorite, and for good reason. Here are just a few compelling reasons why you’ll adore it:
- Effortless, No-Cook Preparation: Say goodbye to hot ovens and stovetop stirring! This recipe is entirely no-bake and no-cook. All you need is a whisk and a bowl to bring this delightful dessert to life, making it perfect for sweltering summer days or when you simply don’t want to turn on the heat.
- Minimal Ingredients, Maximum Flavor: You’ll be amazed at the rich, satisfying taste achieved with just 6 simple, readily available ingredients. Instant pudding, fresh bananas, and Nilla wafers form the core of this classic treat, proving that you don’t need a long shopping list for exceptional flavor.
- The Ultimate Party Dessert: Designed with gatherings in mind, these individual walking puddings are a dream for summer BBQs, graduation celebrations, family reunions, and any event where ease of serving and cleanup is paramount. Serve them with disposable spoons, and your post-party chores become virtually nonexistent, allowing you more time to enjoy your guests.
- Portability Redefined: The ingenious packaging in individual Nilla wafer bags makes this dessert incredibly portable. Guests can easily carry their dessert as they mingle, explore, or relax, making it suitable for picnics, beach trips, camping, or simply enjoying outdoors.
- Kid-Friendly Fun: Not only do kids love eating these, but they can also get involved in the assembly process. Layering the pudding, whipped cream, and bananas into the bags is a simple and enjoyable task for little helpers, making it a fantastic family activity.
Essential Ingredients for Your Walking Banana Pudding
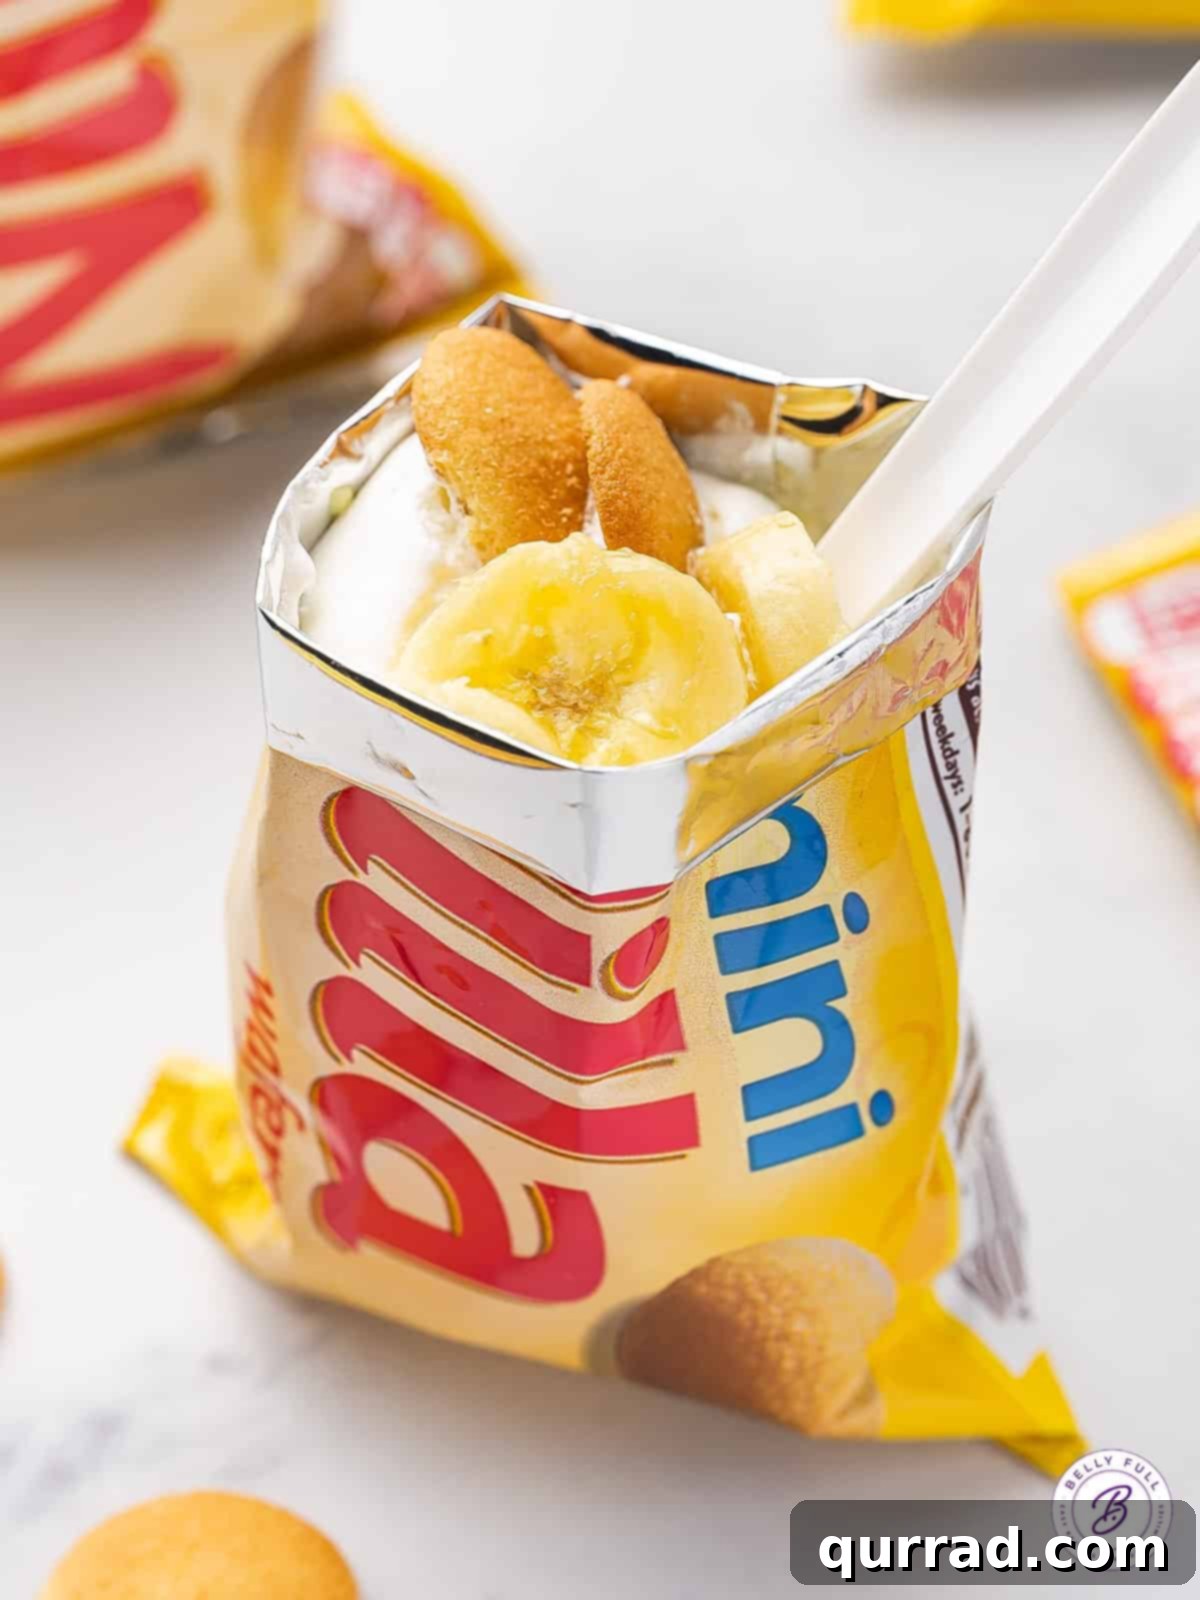
Crafting this delightful banana pudding dessert requires only a short list of 6 accessible ingredients. Each component plays a crucial role in recreating that beloved classic banana pudding taste in a convenient, portable format.
- Instant Banana Cream Pudding: The foundation of our creamy dessert. It is absolutely essential to use INSTANT pudding mix. Cook-and-serve varieties require heat to thicken and will not achieve the desired consistency for this no-bake recipe. Look for a 3.4-ounce box, which typically yields 4 servings when prepared conventionally, but works perfectly for our purpose here.
- Whole Milk: The key to a rich, thick, and luxurious pudding texture. While other milk types can be used, whole milk provides the optimal fat content for a truly creamy result that won’t become too thin or watery. Avoid skim milk, as it will likely produce a runny pudding.
- Individual Nilla Wafer Packages: The iconic base and texture of banana pudding. The 1-ounce individual packages are crucial for the “walking” concept, serving as both the container and a delicious component. These mini bags make portioning and eating incredibly convenient. If individual bags aren’t available, you can use a larger box and portion them into small, sturdy containers.
- Heavy Whipping Cream: The secret to light, airy, and homemade whipped cream that adds an irresistible layer of indulgence. Ensure it’s very cold for the best whipping results.
- Powdered Sugar: Used to sweeten and stabilize our homemade whipped cream. Powdered sugar dissolves easily, creating a smooth, lump-free texture, and prevents the cream from feeling gritty.
- Ripe Bananas: The star of the show! Choose bananas that are ripe but still firm, with perhaps a few brown speckles, indicating sweetness. Avoid overly soft or bruised bananas, as they will brown too quickly and become mushy. Thinly slicing them ensures they integrate well into each layer and are easy to eat.
Creative Recipe Variations to Customize Your Dessert
One of the best aspects of Walking Banana Pudding is its versatility. Feel free to experiment with these easy variations to tailor the dessert to your personal taste or dietary needs:
- Embrace Homemade Pudding: For those who enjoy a truly from-scratch experience, substituting the instant mix with your own homemade banana pudding recipe elevates the flavor profile even further. Just ensure it’s fully chilled and set before assembly.
- Explore Different Pudding Flavors: While banana cream is traditional, don’t hesitate to switch things up! Vanilla pudding offers a classic, comforting alternative, while chocolate pudding can transform this into a delightful chocolate-banana treat. You could even try butterscotch or coconut for an exotic twist.
- Speed Up the Process with Prepared Ingredients: If time is of the essence, convenience is key. Individual Snack Pack puddings can replace boxed or homemade pudding entirely, eliminating the whisking step. Similarly, using store-bought whipped toppings like Cool Whip or Reddi-Wip instead of making homemade whipped cream will save you precious minutes without sacrificing much flavor.
- Alternate Nilla Wafer Formats: For a slightly sturdier base that might be easier to fill for some, consider using Nilla wafers sold in larger containers. You can crush some for the bottom layer and keep others whole for texture. While individual bags offer peak portability, a small, clear cup or jar can also be a great alternative for individual servings.
- Add Extra Crunch: Introduce different crushed cookies like graham crackers, chocolate cookies, or even shortbread for varying textures and flavors.
- Introduce Toppings Galore: Elevate your walking puddings with exciting toppings. A drizzle of caramel or chocolate sauce, a sprinkle of toasted coconut flakes, mini chocolate chips, chopped nuts, or even a dash of cinnamon can add layers of flavor and visual appeal.
- Fruity Additions: While bananas are paramount, consider adding other soft fruits that complement banana, such as sliced strawberries, raspberries, or even a few blueberries for color and tang.
Step-by-Step Guide: How to Make Walking Banana Pudding
Creating this effortless no-bake dessert is incredibly simple and takes just a few minutes of active preparation. Follow these straightforward steps to assemble your delicious Walking Banana Puddings:
- Prepare the Instant Pudding: In a medium mixing bowl, combine the instant banana cream pudding mix with the cold whole milk. Whisk these two ingredients vigorously for a full 2 minutes. It’s crucial to whisk energetically to ensure the pudding thickens properly. Once thoroughly mixed and starting to thicken, transfer the bowl to the refrigerator and allow it to chill and set for at least 5 minutes. This brief chill time helps achieve the perfect creamy consistency.
- Whip Up the Cream: While your pudding is chilling, turn your attention to the whipped cream. In a separate, clean mixing bowl, combine the heavy whipping cream and powdered sugar. Using an electric mixer (handheld or stand mixer), beat the mixture on medium-high speed until stiff peaks form. This means when you lift the beaters, the whipped cream should hold its shape firmly. Be careful not to overbeat, or you’ll end up with butter!
- Ready the Nilla Wafer Bags: Carefully take each individual Nilla wafer package. Using a pair of kitchen scissors, cut across the top seam of each bag to open it. Gently empty the Nilla wafers into a separate bowl – you’ll add them back in layers. To create a sturdier eating experience and prevent spills, fold over the top opening of each empty bag to form a ½-inch collar. This small edge provides a more stable structure for holding and filling.
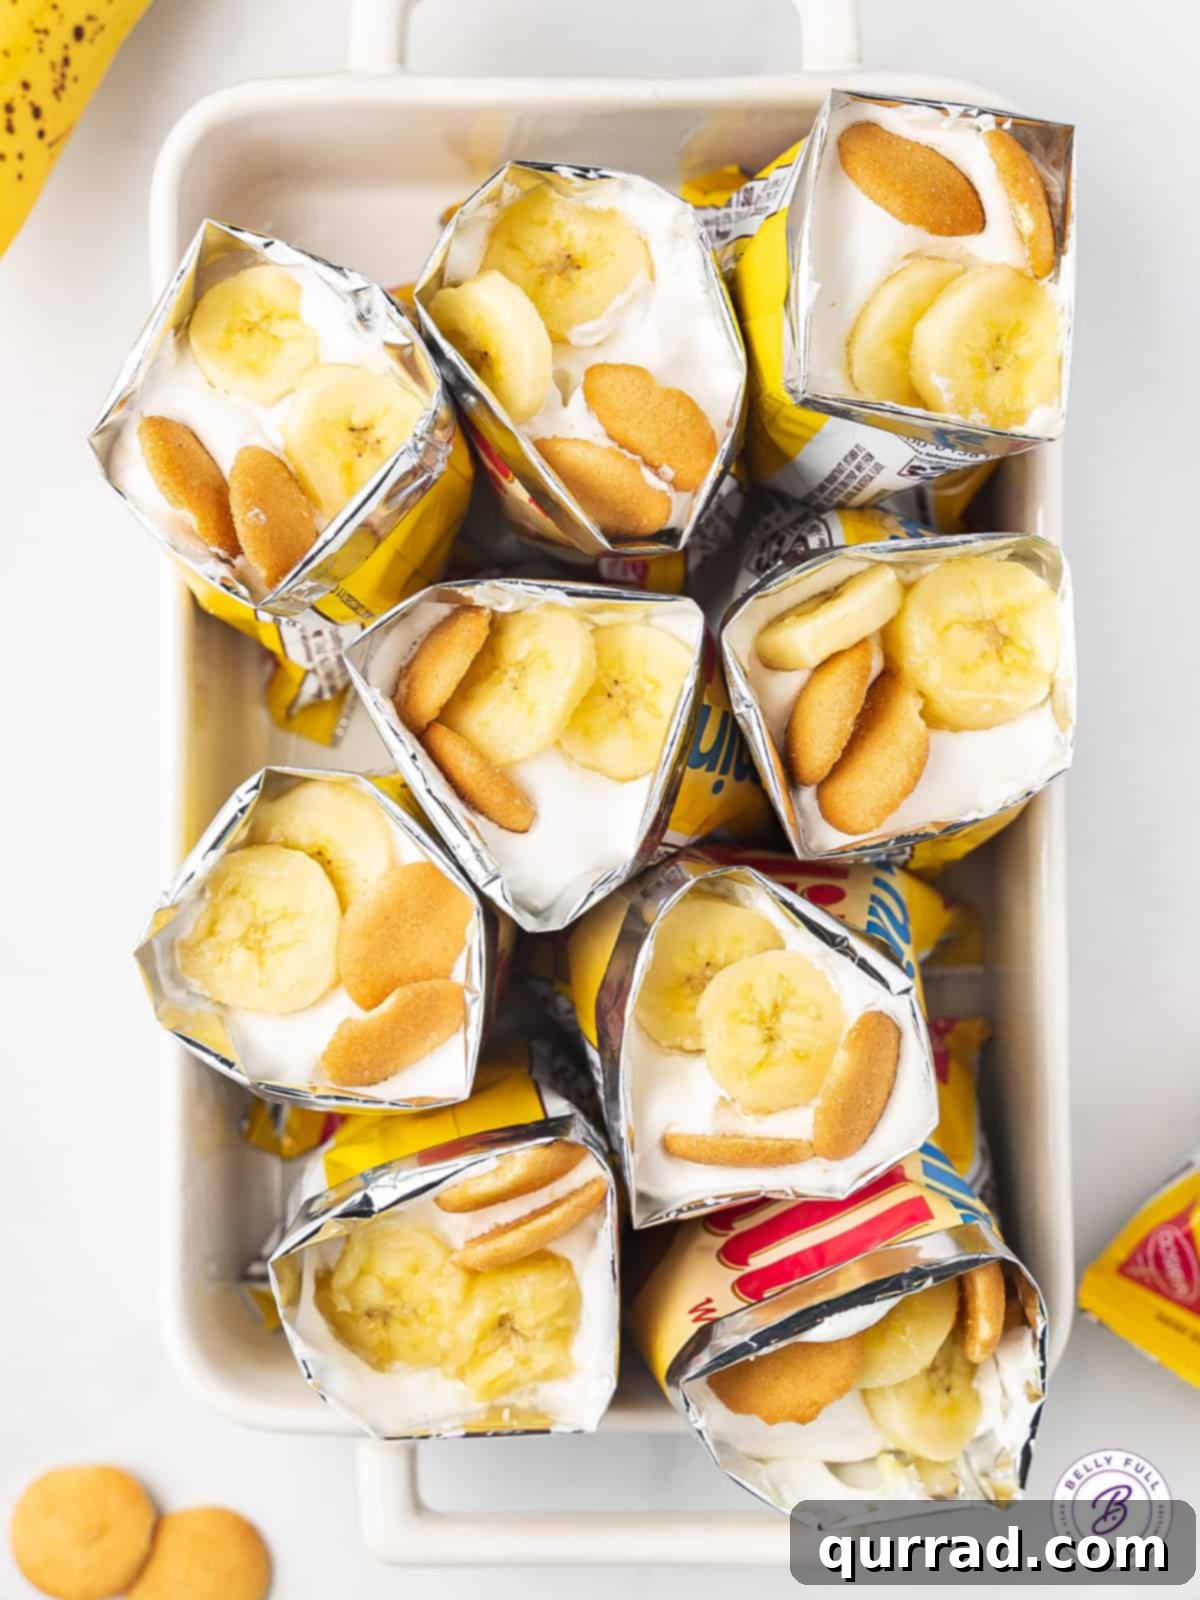
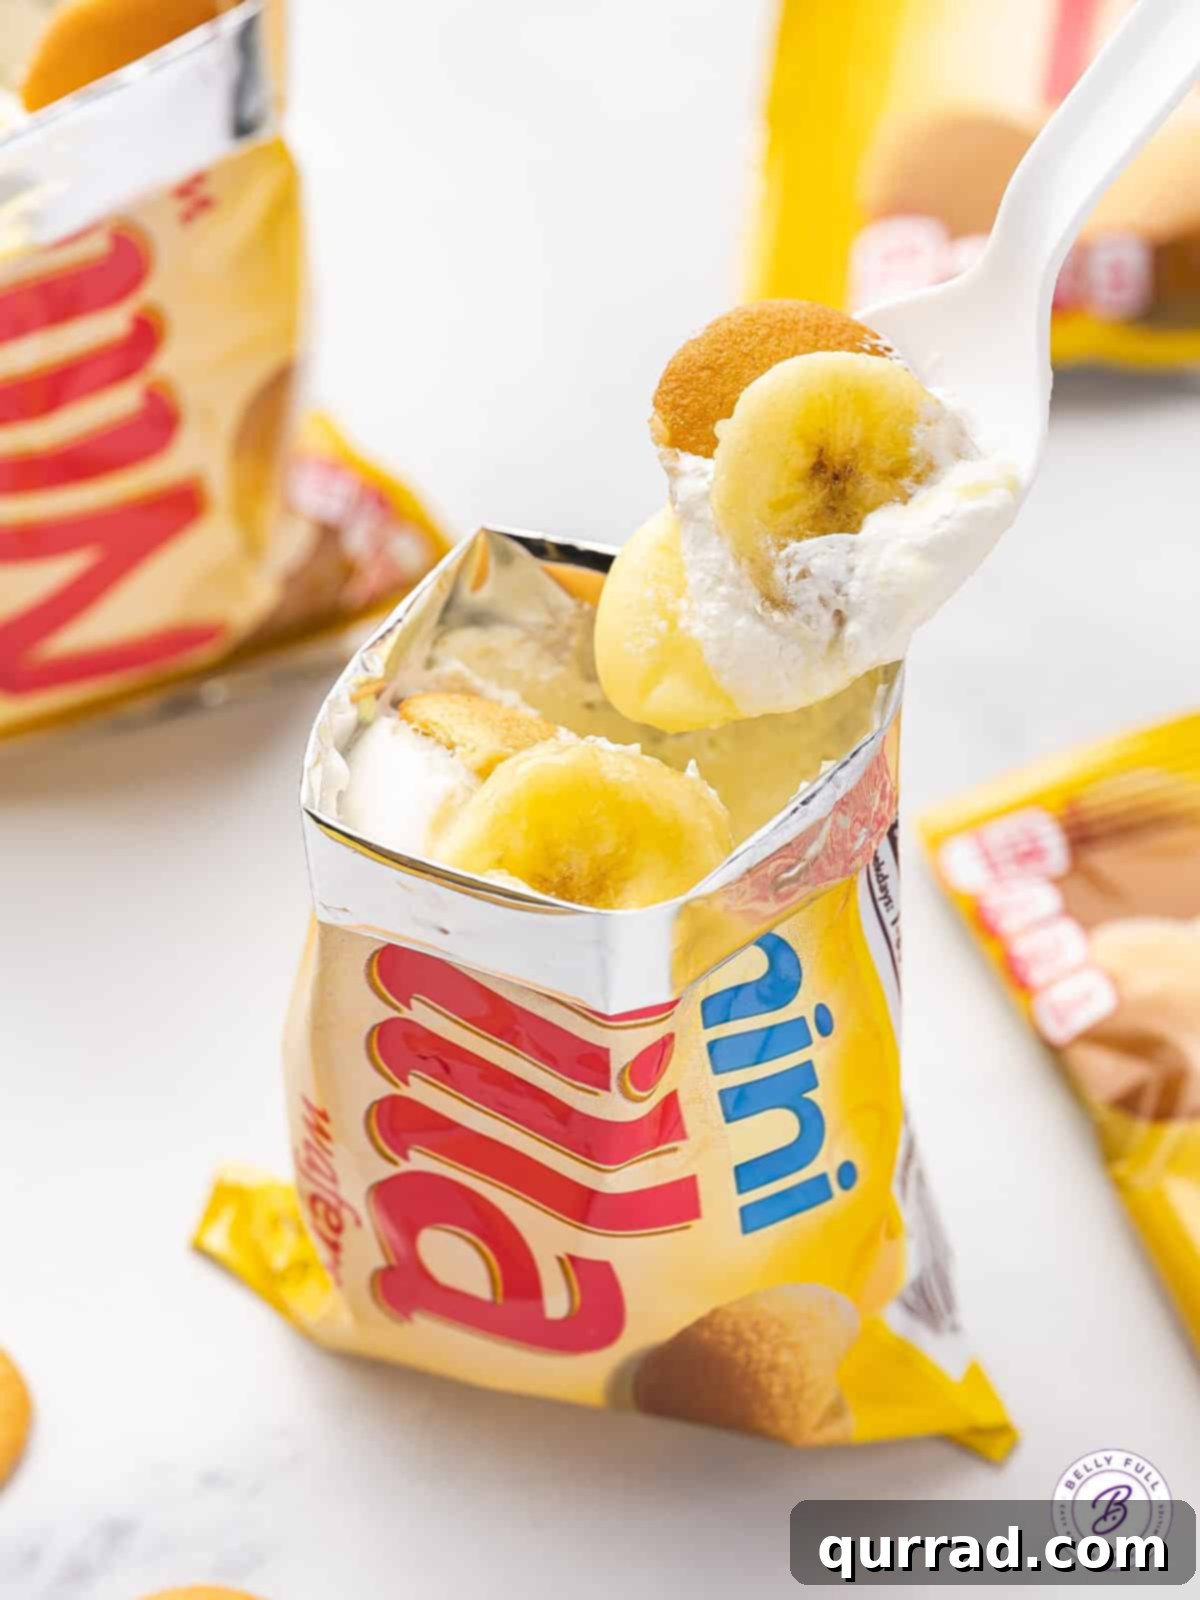
- Assemble Your Portable Puddings: Now comes the fun part – layering! Begin by placing a few of the reserved Nilla wafers back into the bottom of each prepared bag. On top of the wafers, add a generous spoonful of the banana pudding, followed by a spoonful of your freshly whipped cream, and then a couple of thin slices of fresh banana. Repeat these layers until the bag is nearly full, ensuring an even distribution of all components. For an appealing presentation, aim to finish with a few extra Nilla wafers and banana slices on the very top.
Tip: This assembly step is significantly easier if you stand the bags upright. A baking dish with higher sides or a loaf pan works perfectly to hold the bags steady while you layer the ingredients. This also makes for a neat and attractive way to transport and serve them to a group. - Serve and Savor: Once assembled, these delightful Walking Banana Puddings are best served immediately to ensure optimal freshness and texture. Provide disposable plastic spoons for each serving to maintain the no-fuss, no-cleanup ethos of this amazing dessert. Guests can then grab, walk, talk, and enjoy their sweet treat anywhere!
Thoughtful Serving Suggestions for Maximum Enjoyment
To enhance the visual appeal and overall experience of your Walking Banana Puddings, consider adding a few more Nilla wafers on top of each assembled bag just before serving. This not only makes them look even more appetizing but also provides an extra delightful crunch. As previously mentioned, serving with disposable spoons is a game-changer for reducing post-party cleanup, allowing you to focus on enjoying the event and your guests. This dessert is truly designed for mobility – everyone can grab their personalized pudding and enjoy it while mingling, dancing, or simply strolling around.
When you’re assembling, be mindful of the layering order, as it can impact the texture of your cookies. If you prefer your Nilla wafers to soften quickly and blend seamlessly into the creamy pudding, layer the pudding and whipped cream directly on top of the cookies. However, for those who appreciate a bit more crunch and structural integrity in their cookies, a clever trick is to place a thin slice of banana directly on top of the initial cookie layer before adding the pudding and whipped cream. The banana acts as a barrier, slowing down the softening process of the wafers, giving you a varied texture experience with each bite.
Can Walking Banana Pudding Be Prepared in Advance?
While the allure of preparing desserts ahead of time is strong, Walking Banana Pudding is truly at its best when assembled and served immediately. There are a few key reasons for this recommendation:
- Banana Browning: Fresh banana slices, once exposed to air, will begin to brown relatively quickly. While this doesn’t affect the taste significantly, it can make the dessert less visually appealing.
- Texture Compromise: The delicate layers of pudding, whipped cream, and bananas tend to meld together over time, potentially losing their distinct textures. The Nilla wafers, being porous, will also soften considerably, which some prefer, but others might miss the initial crunch.
For these reasons, I highly recommend serving this delightful treat as soon as possible after assembly to enjoy its optimal freshness, vibrant appearance, and delightful textural contrast. However, if you’re looking to streamline your party prep, you can certainly take some shortcuts:
- Pudding & Whipped Cream Prep: The pudding and whipped cream can both be prepared a few hours in advance and stored separately in airtight containers in the refrigerator. This allows you to tackle the whisking and beating steps when you have more time, making the final assembly a quick layering task.
- Bag Preparation: The Nilla wafer bags can be pre-cut, emptied, and folded into their ½-inch collar well before your guests arrive. You can even return a few wafers to the bottom of each bag to be ready for the first layer.
- Banana Slicing: Slice your bananas just before assembly. To slightly delay browning, you can toss them in a tiny bit of lemon juice, though this might slightly alter the flavor.
By preparing these components individually, you can significantly reduce the last-minute stress, allowing for a swift and easy assembly right before serving.
More Easy No-Bake Dessert Recipes to Explore:
If you loved the simplicity and deliciousness of this Walking Banana Pudding, you’re in for a treat! Here are more fantastic no-bake dessert ideas that are just as easy and satisfying:
- Oreo Mug Cake: A single-serving delight that comes together in minutes.
- No Bake Cookies: A classic, chewy, and chocolatey favorite that requires no oven.
- Dole Whip: Recreate the magical, refreshing pineapple treat from Disney right at home.
- Chocolate Eclair Cake: Layers of graham crackers, creamy vanilla pudding, and rich chocolate frosting.
- Carlota de Limon: A vibrant, tangy Mexican lime icebox cake perfect for citrus lovers.
I sincerely hope you enjoy this incredibly delicious and convenient Walking Banana Pudding recipe. If you try it, please be sure to leave a review below and share your experience! And don’t forget to connect with Belly Full for more delightful recipes and inspiration. You can find us on TikTok, Facebook,Instagram,Pinterest, and YouTube!
Walking Banana Pudding
Pin
Ingredients
- 1 box (3.4 ounce) Instant banana cream pudding
- 2 cups cold whole milk
- 12 individual packages (1 ounce each) mini Nilla Wafers
- 1 cup heavy whipping cream
- 3 tablespoons powdered sugar
- 2 ripe bananas, thinly sliced
Instructions
-
In a large mixing bowl, combine the instant pudding and milk. Whisk vigorously for 2 minutes until thickened, then place in the fridge for 5 minutes to set.
-
While the pudding chills, in another bowl combine the heavy whipping cream and powdered sugar. With an electric mixer, beat until stiff peaks have formed.
-
Using scissors, carefully cut the top across the seam of the mini Nilla wafer packs. Empty out the wafers into a bowl. Fold over the top opening of the bags to form a 1/2″ collar (this will make the packet a little sturdier for eating out of.)
-
Put a few of the cookies back into the bottom of each Nilla wafer bag, then top with a spoonful of pudding, a spoonful of whipped cream, and a couple slices of bananas. Repeat those layers until full to the top (finishing with a couple Nilla wafers and banana slices for presentation, if desired.)
(TIP! This is easier if you have a tray or baking dish with higher sides so you can stand them up while filling. It’s also a great way to serve them to a group.)
-
Serve with some disposable plastic spoons for virtually no clean-up!
Notes
Make it even quicker! For a super quick shortcut, Snack Pack pudding can be used instead of boxed or homemade pudding and you can also use Cool Whip or Reddi Whip instead of homemade whipped cream.
Nutrition
Nutritional information given is an automatic calculation and can vary based on the exact products you use and any changes you make to the recipe. If these numbers are very important to you, I would recommend calculating them yourself.