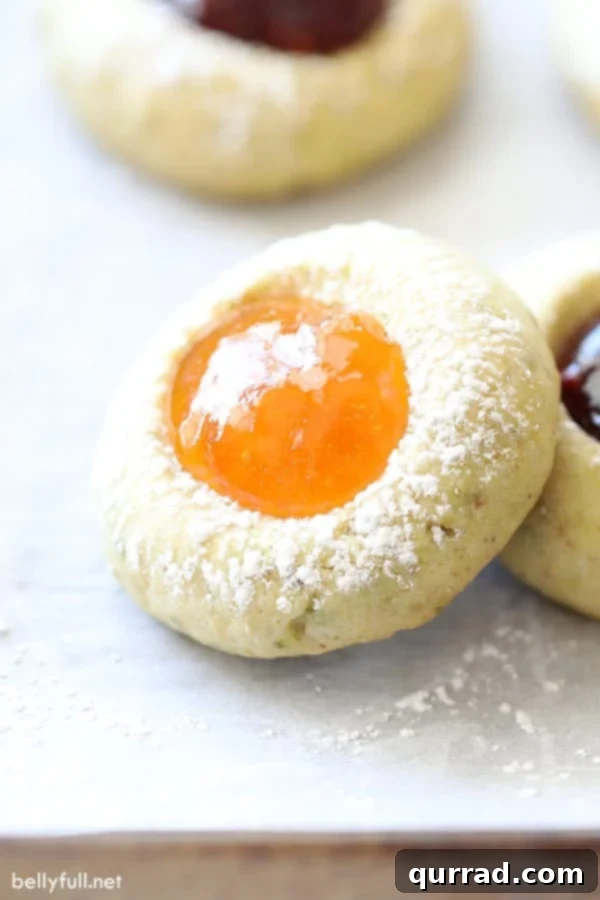
Thumbprint cookies, with their delightful buttery shortbread base and sweet jam filling, are a timeless classic that brings joy to any occasion. These charming treats, often dusted with a delicate layer of powdered sugar, are a staple for holiday cookie platters but are equally welcome any time you crave a touch of sweetness. Join us as we delve into the art of making these irresistible shortbread cookies, featuring a unique pistachio twist that elevates their flavor to new heights.
Planning your next cookie assortment? These beautiful cookies pair wonderfully with festive sugar cookies and rich peanut butter blossoms for a truly memorable spread.
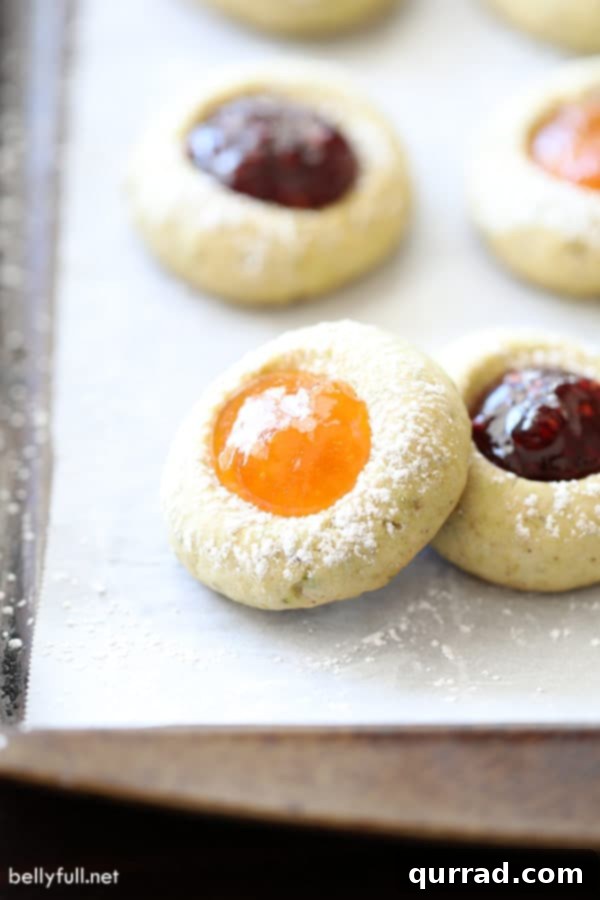
Why These Thumbprint Cookies Are a Must-Try
For many, thumbprint cookies aren’t just a dessert; they’re a cherished memory, a comforting taste of home, and an essential part of holiday traditions. Their light, flaky texture and customizable fillings make them incredibly versatile and universally loved. I remember my best friend’s mom, Doris, whose Christmas cookie spread was legendary. Her thumbprints, alongside her snowballs, were always the first to disappear. There’s something undeniably captivating about a cookie covered in a veil of powdered sugar, adding a touch of magic to every bite.
This recipe, however, takes the classic thumbprint to an extraordinary level by incorporating finely ground roasted pistachios into the shortbread dough. This subtle addition introduces a nutty depth and a hint of sophistication, transforming a beloved treat into something truly exceptional. It’s a delightful surprise for your palate, offering a more complex flavor profile than your standard shortbread base. Whether you’re making them for a festive gathering, a cozy afternoon tea, or simply to treat yourself, these pistachio thumbprint cookies promise a fantastic experience that will leave a lasting impression.
The Anatomy of a Perfect Thumbprint Cookie: A Sweet History
Thumbprint cookies get their charming name from the simple act of pressing a thumb (or a rounded teaspoon) into the center of the unbaked cookie dough, creating a small well that’s perfect for holding a sweet filling. While often associated with Swedish heritage (sometimes known as Hallongrottor or “raspberry caves”), variations of these delightful jam-filled shortbreads can be found in many culinary traditions around the world. Their enduring popularity lies in their simplicity, beautiful presentation, and the delightful contrast between the crumbly, buttery cookie and the vibrant, fruity jam.
At their core, thumbprint cookies are a type of shortbread – a tender, rich, and crumbly biscuit traditionally made with flour, sugar, and a generous amount of butter. The high butter content gives them their signature melt-in-your-mouth texture, which is the perfect canvas for a variety of fillings. While classic versions often feature raspberry or apricot jam, the possibilities are truly endless, allowing for creative experimentation with different flavors and colors.
What makes this particular recipe stand out is the inclusion of ground roasted pistachios within the dough. This isn’t just a garnish; the pistachios are integral to the cookie’s structure and flavor. Roasting the pistachios before grinding enhances their natural nutty notes, which then infuse every bite of the shortbread. This unexpected ingredient adds a layer of sophisticated flavor and a subtle green hue, making these cookies as visually appealing as they are delicious. They’re easy to make, yet the taste is fantastically unique.
Selecting Your Signature Jam (and Other Delicious Fillings)
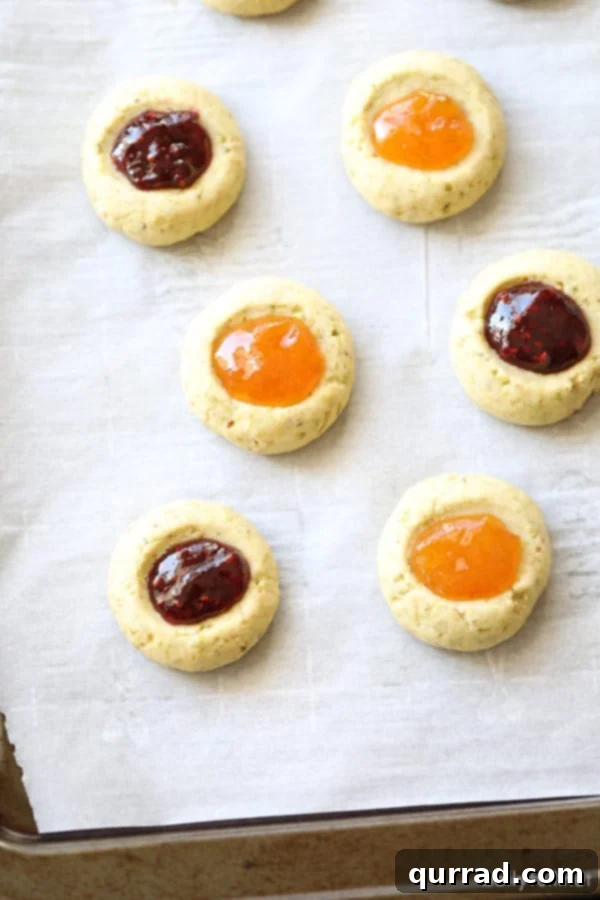
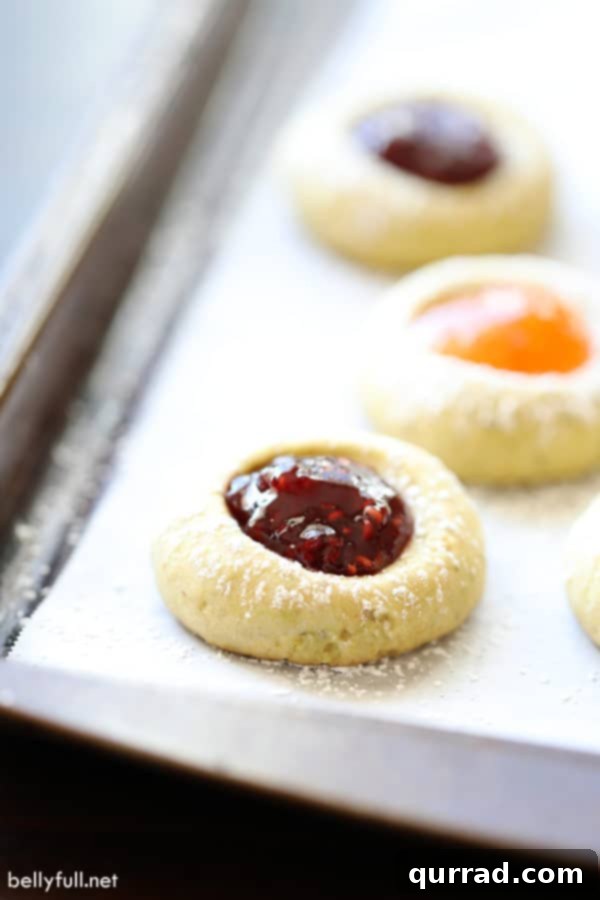
While the pistachio shortbread base is undeniably a star, the filling is where these cookies truly shine, adding a burst of color and a delightful tang or sweetness. The beauty of thumbprint cookies lies in their adaptability, allowing you to personalize them with your favorite jams or explore other creative fillings.
For a classic touch, vibrant fruit jams are always a winner. Consider:
- Raspberry Jam: A popular choice, offering a perfect balance of tartness and sweetness that beautifully complements the buttery cookie. Its bright red color is also incredibly festive.
- Apricot Jam: Provides a rich, mellow sweetness with a subtle tang. It’s a sophisticated choice that works wonderfully with the nutty pistachios.
- Strawberry Jam: A universally loved flavor, bringing a familiar, sweet fruitiness that appeals to all ages.
- Blackberry Jam: Offers a deeper, slightly more intense berry flavor, with a lovely dark hue.
- Cherry Jam: For a bold, sweet-tart profile that evokes traditional holiday flavors.
- Orange Marmalade: If you prefer a citrusy, slightly bitter counterpoint to the sweet cookie.
Beyond jams, don’t hesitate to experiment! Other popular and delicious fillings include:
- Melted Chocolate: A dollop of melted dark, milk, or white chocolate in the center creates a decadent treat. You can even drizzle a contrasting chocolate over the top once set.
- Lemon Curd: For those who love a zesty, creamy, and tangy filling that cuts through the richness of the shortbread.
- Caramel: A small spoonful of soft caramel, perhaps with a sprinkle of sea salt, offers a chewy, sweet, and salty indulgence.
- Nutella or other Nut Butters: For a rich, chocolate-hazelnut flavor that’s incredibly satisfying.
- Cream Cheese Frosting: A small swirl of cream cheese frosting can turn these into mini cakes.
When selecting your jam, opt for a good quality preserve with a fairly thick consistency. This will prevent it from spreading too much during baking and ensure it holds its shape nicely in the cookie indentation. Whether you stick to a single favorite or create a colorful assortment, the filling is your chance to add your personal flair to these delightful cookies.
Pro Tips for Flawless Thumbprint Cookies
Achieving perfectly tender and beautiful thumbprint cookies is easy when you follow a few key guidelines. These tips will help you avoid common pitfalls and ensure your cookies turn out beautifully every time.
- Measure the Flour Correctly: The Spoon & Level Method. This is perhaps the most crucial tip for any baking, especially for shortbread. Do not scoop your flour directly from the bag with your measuring cup. Instead, use a spoon to lightly scoop flour into your measuring cup until it’s overflowing, then use the back of a knife or a straight edge to level it off. Too much flour will result in a dry, dense, and crumbly cookie that lacks the signature melt-in-your-mouth texture of shortbread. Conversely, too little flour can make the dough overly sticky.
- Ensure Your Butter is Properly Softened. For the best results, your unsalted butter should be softened to room temperature. This means it should be pliable enough to leave an indentation when gently pressed but not so soft that it’s greasy or melted. Properly softened butter creams beautifully with sugar, incorporating air and creating a light, tender crumb.
- Achieving Smooth Dough Balls to Avoid Cracks. Cracks in thumbprint cookies can be a common issue, but it’s easily avoidable. After forming your dough, roll each portion between the palms of your hands until it is truly smooth, with no visible lines or cracks. The warmth from your hands will help the dough become more pliable. If you notice any small cracks after placing them on the baking sheet and making the indentation, gently press the dough back together with your fingertips before baking. This extra minute of care makes a big difference in the final appearance.
- The Art of the Indentation. While they are called “thumbprint” cookies, you don’t *have* to use your thumb. A rounded teaspoon or the end of a wooden spoon handle can create a perfectly uniform indentation. The key is to press firmly enough to create a distinct well for the jam, but not so deep that you go all the way through the cookie base. You’ll also need to quickly remake the indentation after the initial bake, as the dough tends to puff up slightly in the oven. Do this while the cookies are still warm and pliable.
- Don’t Over-bake: The Golden Rule for Shortbread. Over-baking is the enemy of tender shortbread. These cookies should be baked just until their tops are set and the very edges or bottoms are very lightly golden, almost pale. They should not be deeply browned. Over-baked shortbread becomes dry, hard, and crunchy rather than delicate and crumbly. Keep a close eye on them during the last few minutes of baking, as oven temperatures can vary.
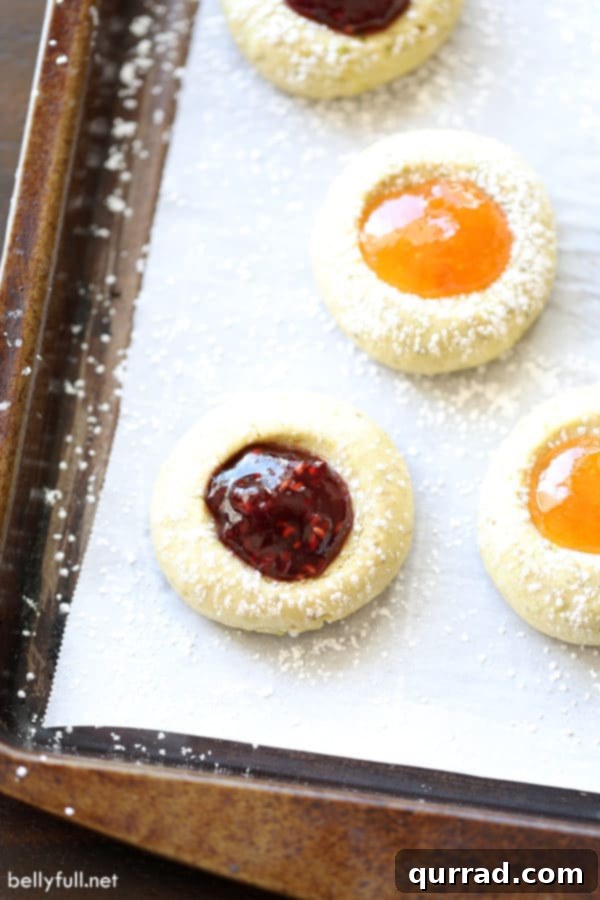
- Cooling and Finishing Touches. After baking, transfer your cookies to a wire rack to cool completely. Resist the urge to fill them with jam while they are still hot, as the jam can melt and spread excessively. Once cooled, fill each indentation with your chosen jam. For that iconic festive look, a light dusting of powdered sugar over the cooled, filled cookies is the perfect finishing touch. If you plan to freeze the cookies, dust with powdered sugar just before serving.
Freezing and Storing for Future Enjoyment
One of the many great things about thumbprint cookies is how well they store and freeze, making them perfect for preparing ahead of time, especially during busy holiday seasons. You can enjoy these delicious treats for weeks or even months to come with a few simple steps.
- Freezing Baked Cookies (Unfilled): If you want to prepare a batch and fill them later, bake the cookies according to the recipe, then allow them to cool completely. Once cooled, arrange them in a single layer on a baking sheet and flash freeze for about an hour until solid. Transfer the frozen cookies to an airtight freezer-safe container or a heavy-duty freezer bag, separating layers with waxed paper or parchment paper to prevent sticking. They can be frozen for up to 1 month. When ready to serve, thaw at room temperature, then fill with jam and dust with powdered sugar.
- Freezing Baked Cookies (Filled, without powdered sugar): If you want to freeze the cookies with their jam filling, make sure they are completely cooled after baking and filling (but *do not* dust with powdered sugar yet). Place them in an airtight container in single layers, using waxed paper between each layer to prevent sticking. Freeze for up to 1 month. When ready to serve, thaw in the refrigerator or at room temperature, then dust with powdered sugar right before presenting them.
- Freezing Cookie Dough: You can also freeze the unbaked cookie dough. Form the dough into balls, then press the indentations. Arrange them on a baking sheet and flash freeze until solid. Transfer to a freezer bag and freeze for up to 2-3 months. When ready to bake, thaw the dough balls slightly in the refrigerator, then bake as directed, adding a few minutes to the baking time if they are still partially frozen.
Proper storage ensures your thumbprint cookies retain their delicious flavor and tender texture, allowing you to enjoy a homemade treat whenever the craving strikes!
Serving Suggestions & Pairings
These delightful pistachio thumbprint cookies are versatile enough to grace any table, from a casual coffee break to an elegant dessert spread. Here are a few ideas to make them shine:
- Classic Cookie Platter: Arrange them alongside other holiday favorites like Easy Sugar Cookies, festive Snowball Cookies, and aromatic Molasses Cookies for a colorful and varied selection.
- Coffee or Tea Companion: Their buttery texture and sweet filling make them the perfect accompaniment to a warm cup of coffee, tea, or even a rich hot chocolate.
- Brunch or Breakfast Treat: A lighter alternative to pastries, they can be a delightful addition to a special brunch spread.
- Gift Giving: Package an assortment of these cookies in decorative tins or boxes for a thoughtful and homemade gift that everyone will appreciate.
- Dessert Course Accent: While delicious on their own, they can also accompany lighter desserts like fruit tarts or ice cream for an added layer of flavor and texture.
More Holiday Cookie Inspiration:
- Easy Sugar Cookies
- Snowball Cookies
- Eggnog Cookies
- Molasses Cookies
- Ritz Cracker Cookies
We hope you adore this delicious and easy recipe! Don’t forget to leave a review below and share your creations. Follow Belly Full on TikTok, Facebook, Instagram, Pinterest, and YouTube for more incredible recipes!
Thumbprint Cookies with Pistachios and Jam

Pin
Ingredients
- 1/2 cup unsalted butter, softened
- 1/4 cup + 1 tablespoon powdered sugar (plus more for dusting)
- 1 cup all-purpose flour, spooned and leveled
- 1/8 teaspoon salt
- 1/2 teaspoon vanilla extract
- 1/3 cup finely ground roasted pistachio nuts
- 1/4 cup jam (raspberry, apricot, blackberry, strawberry – any!)
Instructions
-
Preheat oven to 325 degrees F (160 degrees C). Line a baking sheet with parchment paper or a silicone mat.
-
In a large bowl, using an electric mixer on medium speed, beat the softened unsalted butter and powdered sugar until light and creamy, about 2-3 minutes. Scrape down the sides of the bowl as needed.
-
Add in the spooned and leveled all-purpose flour, salt, vanilla extract, and finely ground roasted pistachios. Mix on low speed until just combined and a soft dough forms. Be careful not to overmix.
-
Roll the dough into 1 1/4-inch (approximately 3 cm) balls. To ensure smoothness and prevent cracks, roll each ball firmly between your palms until it’s completely smooth. Place the dough balls about 1 inch apart on the prepared baking sheet.
-
Using your thumb or the back of a rounded teaspoon, gently press an indentation into the center of each cookie. Make sure the indentation is deep enough to hold jam but does not go all the way through the cookie. If cracks appear, gently press them back together with your fingers.
-
Bake for 14 to 16 minutes, or until the tops are set and the bottoms are very lightly browned. Avoid over-baking to maintain a tender, crumbly texture.
-
Immediately after removing from the oven, quickly and gently remake the indentations with your thumb or the back of a spoon, as they tend to puff up during baking.
-
Transfer the hot cookies to a wire cooling rack and let them cool completely for at least 20 minutes. This is crucial before filling.
-
Once completely cooled, fill each thumbprint with about 1/2 teaspoon of your chosen jam. For a classic finish, lightly sprinkle additional powdered sugar over the top of the cookies before serving. Enjoy your delicious homemade thumbprint cookies!
Notes
Nutrition
Nutritional information given is an automatic calculation and can vary based on the exact products you use and any changes you make to the recipe. If these numbers are very important to you, I would recommend calculating them yourself.