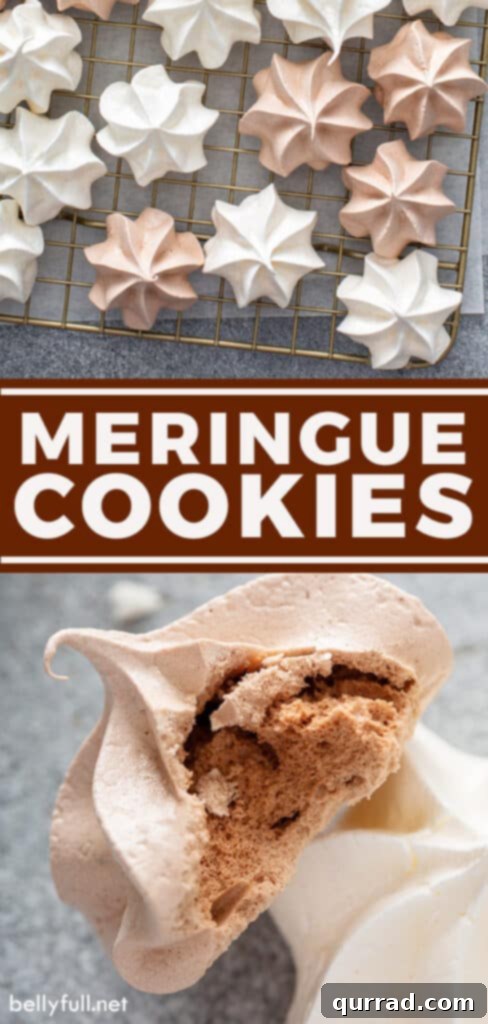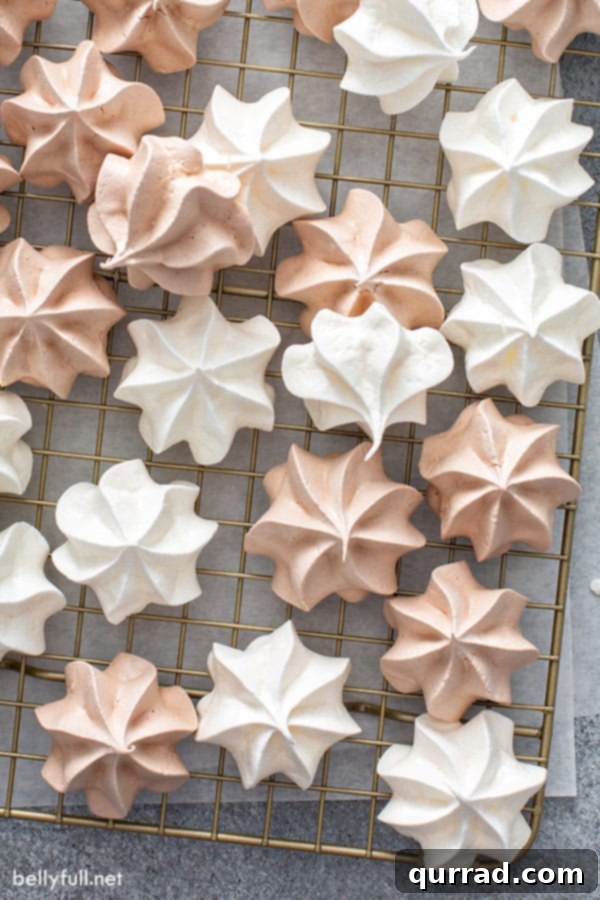
Welcome to the enchanting world of Meringue Cookies, where simple ingredients transform into delicate, ethereal treats! These lovely little cookies are truly a marvel: impossibly light and airy, perfectly crisp, wonderfully delicate, and just sweet enough to satisfy any craving. They are also naturally gluten-free and surprisingly low in calories, making them a delightful indulgence you can feel good about. Ideal for a quiet moment with a cup of coffee or as a stunning addition to any entertaining platter, Meringue Cookies are far easier to master than their elegant appearance suggests. Follow our detailed guide and expert tips, and you’ll be baking flawless meringues every single time.
If you’re a fan of uncomplicated yet delicious baking, you might also love our other easy cookie recipes, including our 3-Ingredient Sugar Cookies, 5-Ingredient Peanut Butter Cookies, and our incredibly simple No-Bake Cookies, which require no oven at all!
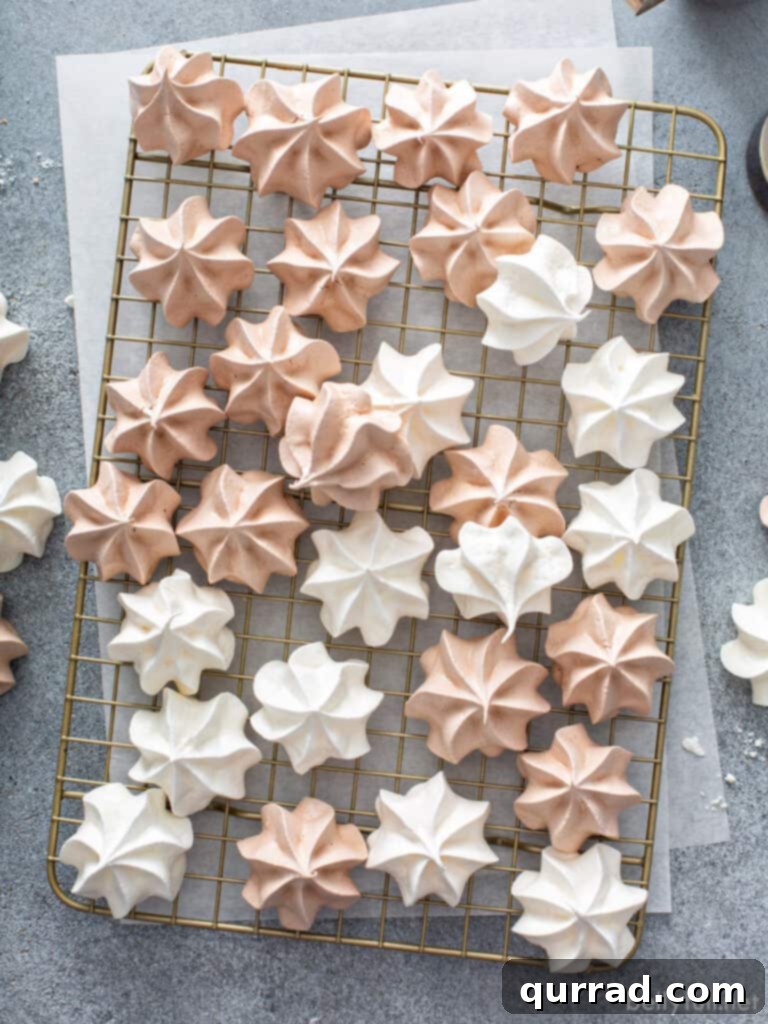
The word “meringue” often evokes images of complex pastry techniques and daunting culinary challenges. Many home bakers shy away, intimidated by its fancy reputation. However, we’re here to tell you that these delightful cookies are, in fact, one of the most straightforward desserts you can make. While they do have a few specific nuances that require attention, there’s nothing inherently difficult about them. With a clear understanding of the recipe and a keen eye on our baking tips, you’ll not only ace your first batch but find yourself eager to make them again and again. Get ready to transform humble egg whites into edible works of art!
Meringue Cookies: Tiny Clouds That Taste Like Heaven
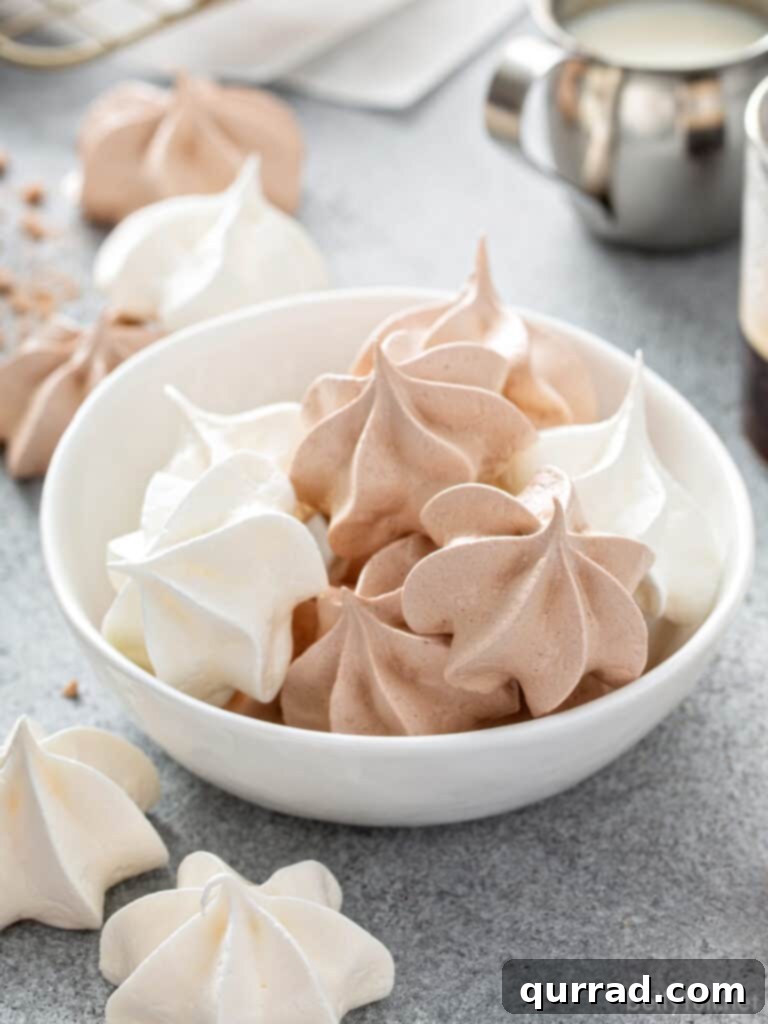
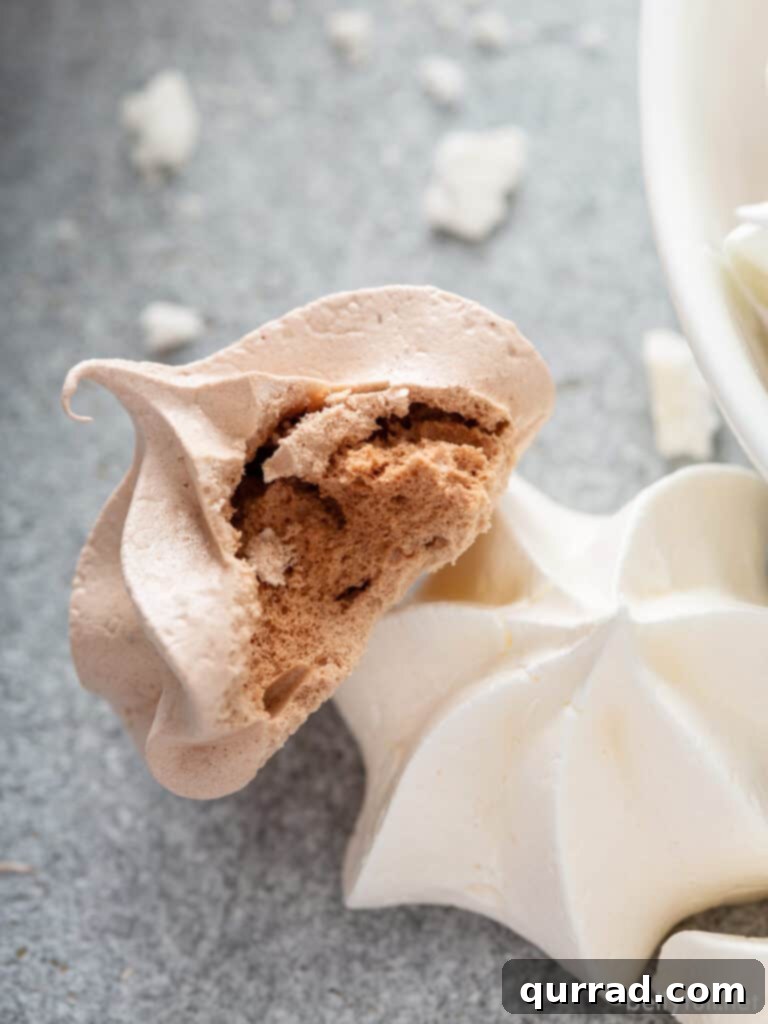
If you’ve ever savored the delightful experience of a Pavlova, you’ll find Meringue Cookies incredibly familiar, almost like their bite-sized cousins. At their core, meringues are delicate confections crafted from just two main ingredients: whipped egg whites and sugar. They undergo a unique baking process at a very low temperature for an extended period, which slowly dries them out rather than bakes them, resulting in a distinct texture that is crisp on the outside and subtly chewy within. Many describe their melt-in-your-mouth quality as akin to a light, airy marshmallow. They are lighter than air, perfectly sweet, and incredibly satisfying, making it hard to stop at just one. Plus, their inherently low-calorie nature means you can enjoy a few without guilt. Beyond their delightful taste and texture, meringues are incredibly versatile, easily customized with different flavors and colors to perfectly match any celebration, from festive holidays to elegant baby showers.
The Simple Magic Behind Meringue Cookies: Essential Ingredients
Creating these heavenly “clouds” requires remarkably few ingredients – just five pantry staples transform into something truly special. While the full, printable recipe card below details exact measurements, let’s explore the role of each component and why quality matters.
- Fresh Egg Whites: These are the undisputed star of our meringue show! For the best results, your egg whites must be fresh, at room temperature, and absolutely free of any fat or speck of yolk. Even a tiny bit of yolk can prevent the whites from whipping into the voluminous, stable foam we need.
- Fine Granulated Sugar: While regular granulated sugar can work, super-fine sugar (also known as caster sugar) is truly ideal. Its smaller crystals dissolve more rapidly and thoroughly into the egg whites, ensuring a smooth, glossy meringue free from any gritty texture. If super-fine sugar isn’t available, don’t fret! You can easily make your own by pulsing regular granulated sugar a few times in a food processor until it reaches a finer consistency. The key is to add the sugar slowly and gradually, allowing each addition to dissolve before adding more, which helps prevent grittiness and promotes stable peaks.
- Cream of Tartar: Technically optional, but highly recommended for consistently perfect meringues. Cream of tartar is an acidic salt that acts as a stabilizer for egg whites. It helps them reach stiff, voluminous peaks faster and, crucially, prevents them from deflating once whipped. Think of it as your insurance policy for stable, impressive meringues.
- A Pinch of Salt: Just a tiny amount of salt makes a surprisingly big difference. It enhances the overall flavor profile of the cookies and beautifully balances out the sweetness of the sugar, preventing the meringues from tasting overly saccharine.
- Pure Vanilla Extract: A touch of quality vanilla extract elevates the flavor of these simple cookies, adding a warm, classic aroma that makes them irresistible. But don’t feel limited to vanilla! This is where you can begin to explore variations, using other flavored extracts or even cocoa powder for chocolate meringue cookies (more on this in our variations section below!).
Expert Tip: Separate Whole Eggs While They’re Still Cold
Achieving perfect meringues starts with perfectly separated eggs. While room temperature egg whites whip best, separating cold eggs from the fridge is significantly easier and reduces the risk of the yolk breaking and contaminating the whites. After separating, simply allow the egg whites to sit at room temperature for about 30 minutes to an hour before you begin whipping.
Unleash Your Creativity: Meringue Cookie Variations
One of the most exciting aspects of Meringue Cookies is how easily they can be customized to suit any taste or occasion. While classic vanilla is always a hit, don’t hesitate to experiment with these delicious variations:
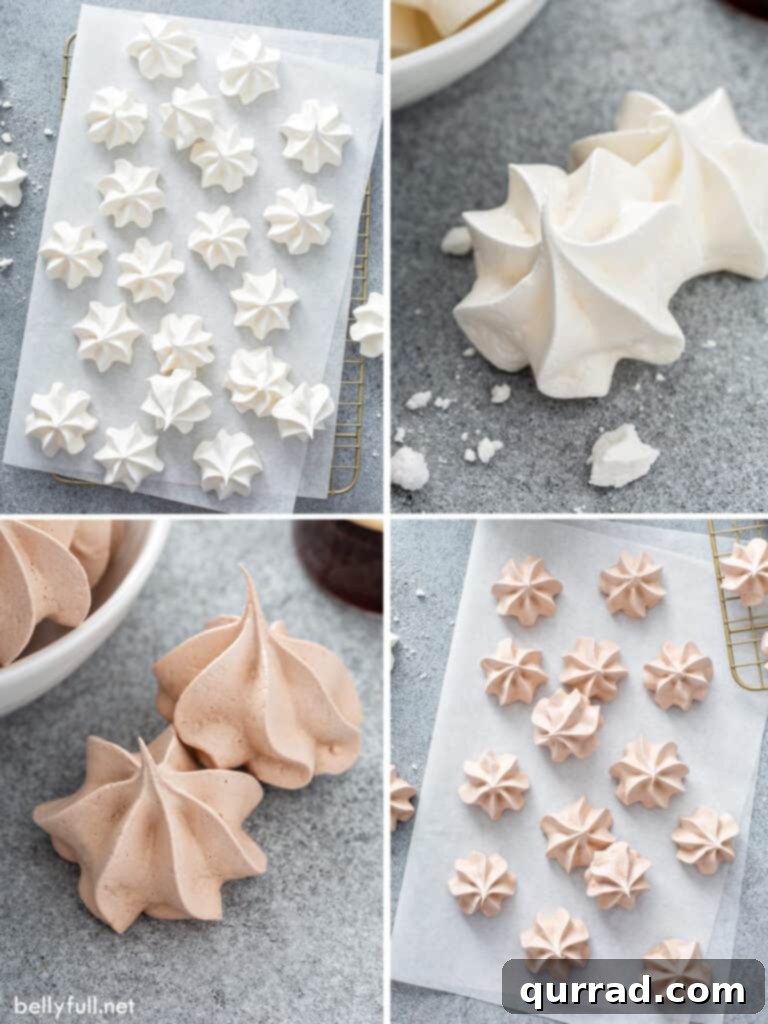
- Decadent Chocolate Meringue Cookies: For a delightful twist, transform half of your meringue batter into rich chocolate meringues. After incorporating the vanilla, simply divide the mixture and gently sift in about 4 teaspoons of unsweetened cocoa powder into one half, folding until just combined. This allows you to have a beautiful assortment of both vanilla and chocolate cookies. Alternatively, you can make an entire batch chocolate by sifting in up to 3 tablespoons of cocoa powder into the full meringue mixture. The key is to sift the cocoa powder to prevent lumps and ensure a smooth, even color.
- Explore Different Flavor Extracts: Vanilla is wonderful, but other extracts can create entirely new taste sensations. Try substituting the vanilla extract with almond extract for a subtle, almost cherry-like note, or use peppermint extract for a refreshing holiday treat. Lemon extract or a hint of citrus zest can also add a bright, zesty flavor. Remember that many flavored extracts are much stronger than vanilla, so use them sparingly – often just half the amount of vanilla is sufficient.
- Add a Splash of Color: For festive occasions or themed parties, tint your meringues with food coloring. Gel food coloring works best as it’s concentrated and won’t add excess liquid. Add 1 or 2 drops of gel food coloring when you add the extract, folding gently until the desired hue is achieved.
- Incorporate Finely Chopped Nuts or Mini Chocolate Chips: These additions bring wonderful texture and flavor to your meringues. Fold in finely chopped pistachios, almonds, or mini chocolate chips at the very end. Be aware that if you add solid ingredients, you likely won’t be able to pipe the meringues with a star tip; instead, you can dollop small mounds of the mixture onto your baking sheets using a spoon or a round piping tip.
- Dazzling Decorations: Meringues are a fantastic canvas for further decoration. Before baking, you can sprinkle festive sugar sprinkles, edible glitter, or colored sanding sugar over the piped cookies. After baking and cooling, consider dipping them in melted dark or white chocolate, as we did for these charming Peppermint Meringue Cookies, or drizzle with a contrasting chocolate for an elegant touch.
Mastering the Art: How to Make Flawless Meringue Cookies
While the detailed, step-by-step recipe is provided in the recipe card below, here’s an expanded overview of the process to help you understand each stage of creating these delicate cookies:
- Preheat and Prepare: Begin by preheating your oven to a low 225 degrees F (107 degrees C). Position your oven rack in the absolute center for even baking. Line a large cookie sheet (or two standard sheets, ensuring both fit comfortably side-by-side in your oven) with parchment paper. This non-stick surface is crucial for easy removal of the baked meringues.
- The Foundation: Whipping Egg Whites: In an impeccably clean, dry, and grease-free large mixing bowl, combine your room temperature egg whites, cream of tartar, and salt. Start beating on low speed with an electric mixer or a stand mixer fitted with the whisk attachment. Continue until the mixture becomes foamy and opaque. Once foamy, increase the speed to high.
- Gradual Sugar Addition for Structure: With the mixer running on high speed, begin to slowly and gradually add the fine granulated sugar, approximately one tablespoon at a time. Beat thoroughly after each addition for about 15-20 seconds, ensuring the sugar completely dissolves into the egg whites before adding the next spoonful. This slow incorporation is vital for creating a stable meringue structure and preventing a grainy texture. Continue beating until all the sugar is incorporated.
- Achieving Stiff, Glossy Peaks: Continue beating the meringue mixture on high speed. You’ll observe a remarkable transformation: the mixture will significantly increase in volume, becoming incredibly thick, sticky, and brilliantly glossy, reminiscent of marshmallow cream. You’ll know you’ve reached the coveted “stiff peaks” when you can lift the beater straight up, and the meringue stands tall without collapsing or folding back into itself. To double-check, rub a tiny bit of the meringue between your fingers; it should feel completely smooth, with no grittiness from undissolved sugar.
- Flavor Infusion: Once stiff peaks are achieved, beat in the vanilla extract (or your chosen flavored extract) until just combined. Be careful not to overmix at this stage.
- Piping for Perfection: Carefully transfer the meringue mixture to a large disposable piping bag fitted with an open star tip. We recommend an Ateco 846 tip for beautiful, consistent swirls. Pipe 1×1-inch small swirls onto your parchment-lined cookie sheets. Meringue cookies do not spread during baking, so you can pipe them relatively close to each other, optimizing space on your baking sheet.
- The Low and Slow Bake: Gently place your prepared cookie sheets into the preheated oven. Bake for precisely 1 hour. This low temperature and extended bake time are essential for drying out the meringues without browning them, achieving that signature crisp texture.
- Cooling in Silence: After the 1-hour baking time, turn off the oven heat. This next step is crucial: absolutely do NOT open the oven door. Allow the meringue cookies to cool completely inside the oven for another 1-2 hours. The residual heat in the oven will continue to dry them out slowly and prevent them from cracking due to a sudden temperature change. Only remove them once the oven is completely cool and the cookies are firm.
- Enjoy and Store: Once fully cooled and crisp, your beautiful meringue cookies are ready to be enjoyed or stored for future indulgence.
The Secrets to Perfect Meringues: Essential Tips & Tricks
Meringues, while simple in ingredients, thrive on precision. Here are our top tips to ensure your meringues turn out flawlessly crisp and beautiful every single time:
- Always Use Fresh Eggs: The fresher your eggs, the stronger and more stable their whites will be, leading to better volume and structure in your meringue. Older eggs tend to have thinner whites which don’t whip as well.
- Room Temperature Egg Whites are Key: Cold egg whites are resistant to whipping. Room temperature egg whites (allowed to sit for 30-60 minutes after separating from the yolk) will whip up faster and achieve much greater volume and stability than cold ones.
- Separate Eggs Meticulously: Before adding egg whites to your main mixing bowl, crack each egg individually into a small, separate bowl. This prevents a broken yolk from contaminating your entire batch of whites. Even the tiniest speck of yolk (which contains fat) will prevent your egg whites from whipping to stiff peaks. (Don’t let those yolks go to waste – they’re perfect for making a rich lemon curd!)
- Ensure Impeccably Clean and Dry Equipment: This is a non-negotiable rule for meringue success. The mixing bowl (preferably glass or metal, as plastic can retain grease) and your beater attachments must be absolutely free of any grease, oil, or moisture. Any residue can act as a deflator, preventing the egg whites from whipping properly and achieving stiff peaks. A quick wipe with a paper towel dampened with lemon juice or vinegar can help ensure a grease-free surface.
- Do Not Skip the Cream of Tartar: As mentioned earlier, cream of tartar is your meringue’s best friend. It provides crucial stability to the egg whites, helping them emulsify and hold their structure, ensuring they reach those perfect stiff peaks without collapsing.
- Add Sugar Gradually, Bit by Bit: Patience is a virtue here! Drizzling the sugar in very slowly, about a tablespoon at a time, and allowing it to fully dissolve after each addition is vital. This gentle approach ensures the sugar crystals integrate smoothly into the egg whites, resulting in a stable, glossy, and non-gritty meringue.
- Beat Until Stiff Peaks Form: Don’t rush this step. It will take several minutes of continuous beating for the meringue to reach stiff peaks. Look for a mixture that is significantly increased in volume, very thick, and has a beautiful sheen. When you lift the whisk, the peaks should stand tall and firm without drooping.
- Avoid Over-Beating: While stiff peaks are essential, over-whipping can also be detrimental. Over-beaten egg whites can become dry, granular, and brittle, leading to meringues that lose their crispness and may collapse or crack during baking. Stop beating once firm, glossy peaks are achieved.
- Pipe the Meringue Immediately: Once your meringue is ready, transfer it to the piping bag and begin piping right away. If the meringue sits for too long, it can start to lose its consistency and stability, making it harder to pipe and potentially affecting the final texture.
- Center Oven Rack Position is Best: For even heat distribution and consistent baking, always place your baking sheet on the center rack of your oven. This prevents the bottom from cooking faster than the top.
- Resist the Urge to Open the Oven Door: Once baking is complete and the heat is off, the meringues need to cool gradually inside the closed oven for 1-2 hours. Opening the door too soon introduces a sudden change in temperature, which can cause your delicate meringues to crack, deflate, or become chewy.
A Golden Rule: Avoid Making Meringues on a Humid Day
Humidity is the ultimate adversary of meringue cookies. The moisture in the air can be absorbed by the sugar in the meringue, preventing them from drying out properly and resulting in sticky, chewy, or collapsed cookies. For best results, choose a dry, low-humidity day for your meringue-making endeavors.
How to Know When Your Meringues Are Perfectly Done
Knowing exactly when your meringue cookies are ready to come out of their prolonged low-temperature “bake” is key to their delightful crispness. After the prescribed baking and cooling time in the oven, your meringues should exhibit several tell-tale signs of perfection. They should feel incredibly light and crisp to the touch, be completely dry throughout, and show absolutely no color around their edges or on their tops. The very low baking temperature prevents any browning, ensuring they retain their pristine white or pastel hue. Most importantly, a perfectly baked meringue cookie will lift easily and cleanly off the parchment paper without sticking or leaving any residue behind.
Troubleshooting: Why Are My Meringues Cracked?
Seeing cracks appear on your beautifully piped meringues can be disheartening, but it’s a common issue with clear causes. The most frequent reasons for cracked meringues include the meringue batter being over-whipped (making it too dry and brittle), the oven temperature being too high (causing the exterior to bake too quickly), or the cookies being cooked for too long (over-drying them). While cracks might impact their aesthetic appeal, rest assured that this is purely cosmetic. Cracked meringues are still wonderfully delicious and perfectly safe to eat!
Troubleshooting: Why Are My Meringues Chewy?
Instead of the desired crispness, sometimes meringues turn out unpleasantly chewy. This can be attributed to a few culprits: under-baking (they haven’t dried out enough), not allowing them to cool and dry in the oven for the full recommended time, or absorbing excess moisture from the air (especially on a humid day, or if left out in an airtight container). The good news is, chewy meringues can often be salvaged! Try placing them back in a preheated oven at 225 degrees F (107 degrees C) for an additional 10-15 minutes. Then, turn off the heat and let them cool completely in the oven for another hour. This usually does the trick to restore their crisp texture.
Storing Meringue Cookies to Maintain Their Crispness
Proper storage is paramount for keeping your Meringue Cookies perfectly crisp and delightful. Because they are so susceptible to moisture, a little care goes a long way:
- Optimal Storage Conditions: Meringue cookies should always be stored in a cool, dry place within an airtight container. This protects them from humidity and maintains their delicate crunch. Crucially, they should never be refrigerated, as the humidity inside a refrigerator will quickly soften them. Keep them away from any sources of heat, moisture, or other foods that might release moisture.
- Shelf Life of Meringue Cookies: For the absolute best texture and flavor, meringues are typically best enjoyed within a few days of baking. If you reside in a particularly humid climate, their shelf life will be even shorter. Conversely, in very dry climates (or during the dry winter months), properly stored meringues can remain fresh and crisp for up to two weeks. Always check for any signs of stickiness or softening, which indicate they’ve absorbed moisture.
- Can You Freeze Meringue Cookies?: While not ideal, meringue cookies can be frozen, though their texture might be slightly compromised upon thawing. To freeze, ensure they are completely cooled, then arrange them in an airtight freezer-safe container, layering them between sheets of parchment paper to prevent crushing and sticking. Be extra cautious during defrosting to prevent them from absorbing any moisture, which, as we know, is their greatest enemy. They can be stored in the freezer for up to one month. Thaw at room temperature in their airtight container.
Meringue Cookies Recipe
These delightful cookies yield approximately 80 individual 1×1 inch cookies. Enjoy the process of creating these light, airy, and perfectly sweet treats!
Ingredients
- 4 large egg whites, at room temperature
- 1/2 teaspoon cream of tartar
- 1/8 teaspoon salt
- 1 cup fine granulated sugar (or regular granulated sugar, finely processed)
- 1 teaspoon vanilla extract
- 4 teaspoons unsweetened cocoa powder, optional (for chocolate variation)
Instructions
- Preheat your oven to 225°F (107°C) with the oven rack positioned in the center. Line a large cookie sheet (or two regular-sized sheets, ensuring they fit side-by-side) with parchment paper.
- In a large, impeccably clean, dry, and grease-free mixing bowl, combine the room temperature egg whites, cream of tartar, and salt.
- Using an electric mixer or a stand mixer with the whisk attachment, beat the mixture on low speed until it becomes foamy. Then, increase the speed to high.
- With the mixer running on high, slowly and gradually add the sugar, approximately 1 tablespoon at a time. Beat thoroughly after each addition for about 15-20 seconds to ensure the sugar is fully dissolved. Continue until all sugar is incorporated and the mixture is thick, glossy, and has significantly increased in volume. It should form stiff peaks (when you lift the beater, the meringue stands tall without drooping) and feel smooth, not gritty, between your fingers.
- Beat in the vanilla extract until just combined.
- Transfer the meringue mixture to a large disposable piping bag fitted with an open star tip (such as Ateco 846). Pipe 1×1-inch swirls onto the prepared parchment-lined cookie sheet. Meringues do not spread, so they can be piped relatively close together.
- Bake for 1 hour.
- After 1 hour, turn off the oven heat. Do NOT open the oven door. Allow the cookies to cool completely inside the oven for 1-2 hours. They should be light, crisp, completely dry, show no browning, and lift easily from the parchment paper.
- Enjoy your meringues immediately, or store them for later as directed in the storage section.
- {To Make Chocolate Meringues: After adding the vanilla extract, transfer half of the mixture to a separate piping bag. To the remaining half in the mixing bowl, gently beat in 4 teaspoons of sifted unsweetened cocoa powder until just combined. Then, transfer the chocolate mixture to another separate piping bag. Alternatively, you can make the entire batch chocolate by incorporating up to 3 tablespoons of sifted cocoa powder into the full meringue mixture. Proceed with the rest of the recipe as written; both vanilla and chocolate meringues bake identically.}
Nutrition Information (per 1×1 inch cookie, approximate)
Calories: 11kcal | Carbohydrates: 3g | Protein: 1g | Fat: 1g | Saturated Fat: 1g | Sodium: 6mg | Potassium: 7mg | Fiber: 1g | Sugar: 3g | Calcium: 1mg | Iron: 1mg
Please note: Nutritional information provided is an automatic calculation and may vary based on the exact products you use and any modifications made to the recipe. If precise nutritional values are crucial for your dietary needs, we recommend calculating them independently.
More Easy Cookie Recipes to Delight Your Palate
If you’ve enjoyed making these delightful Meringue Cookies, you’re sure to find joy in our other simple and satisfying cookie recipes:
- Easy Sugar Cookies: A classic, buttery favorite that’s incredibly versatile.
- Flourless Chocolate Cookies: Rich, fudgy, and naturally gluten-free – a chocolate lover’s dream.
- Coconut Macaroons: Chewy on the inside, crisp on the outside, and packed with tropical flavor.
- Lemon Crinkle Cookies: Bursting with bright lemon flavor and a beautiful crinkled finish.
We truly hope you adore this delicious and straightforward Meringue Cookies recipe! Don’t forget to leave a review below and share your baking success with us. You can also connect with Belly Full on Facebook, Instagram, Pinterest, and YouTube for more delightful recipes and inspiration!