
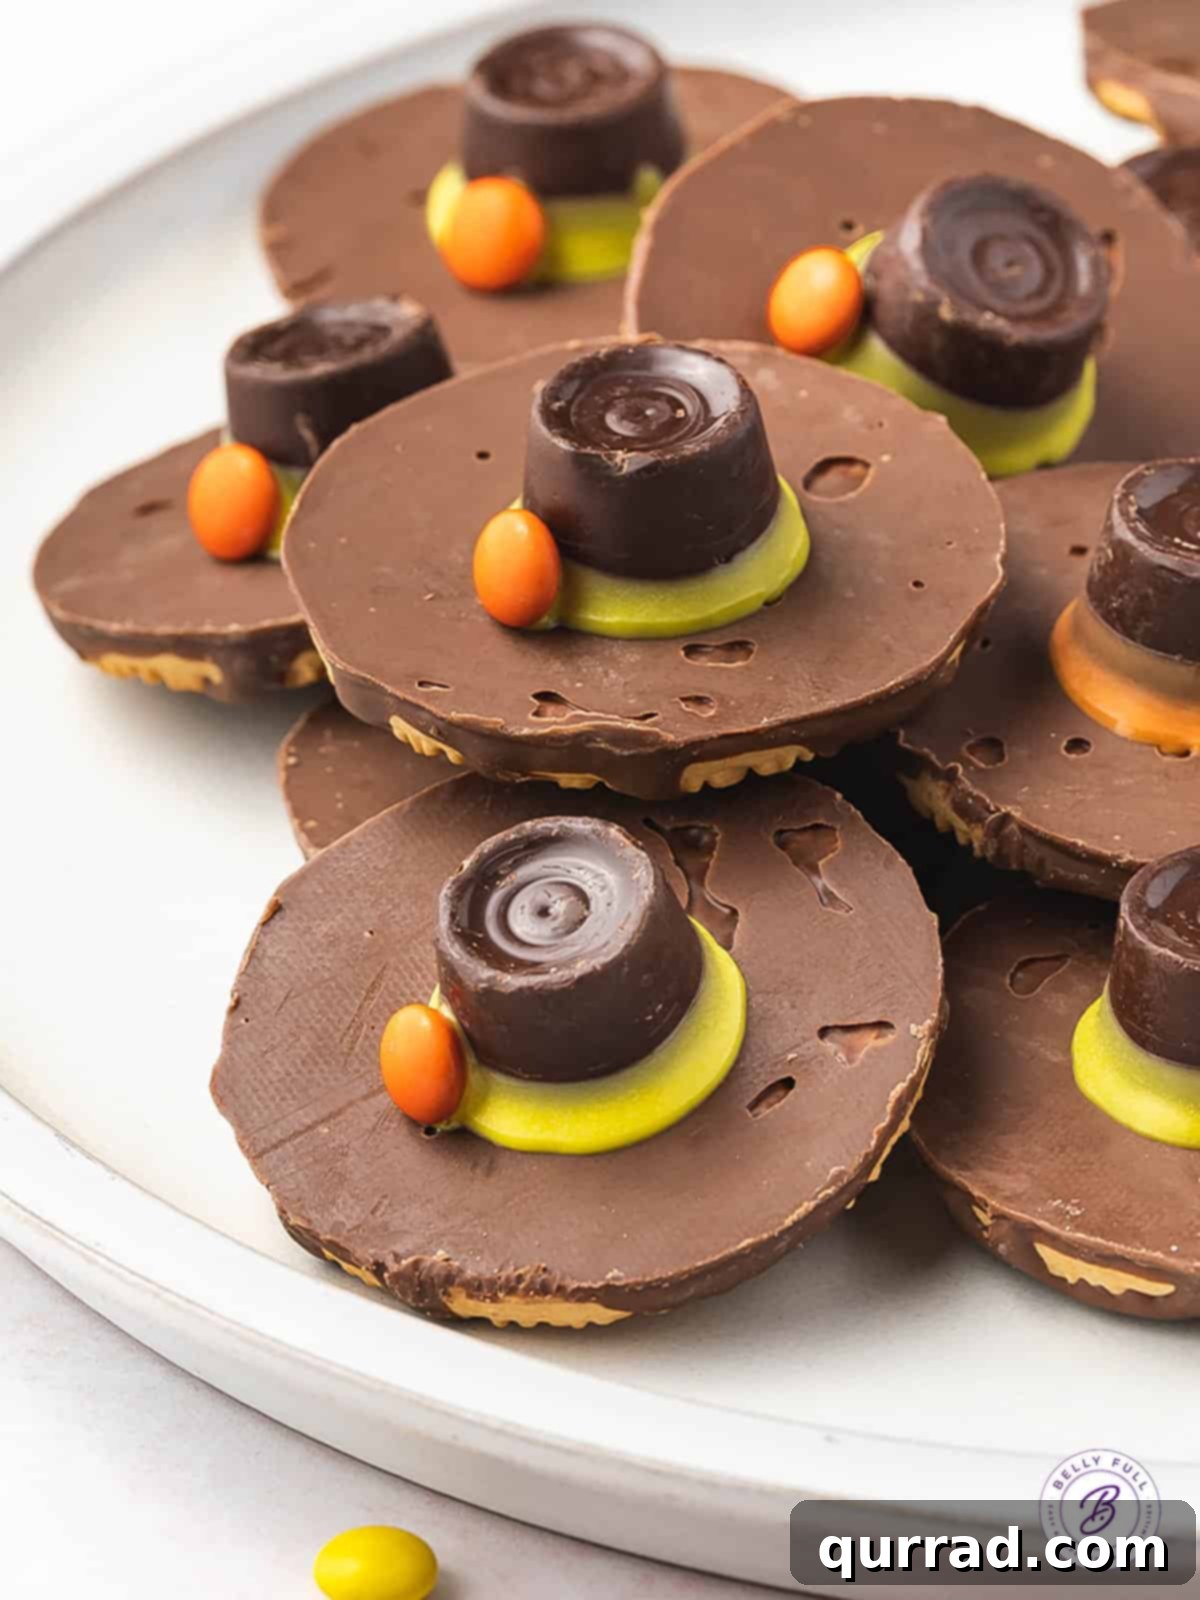
Easy No-Bake Pilgrim Hat Cookies: A Fun Thanksgiving Treat for All Ages
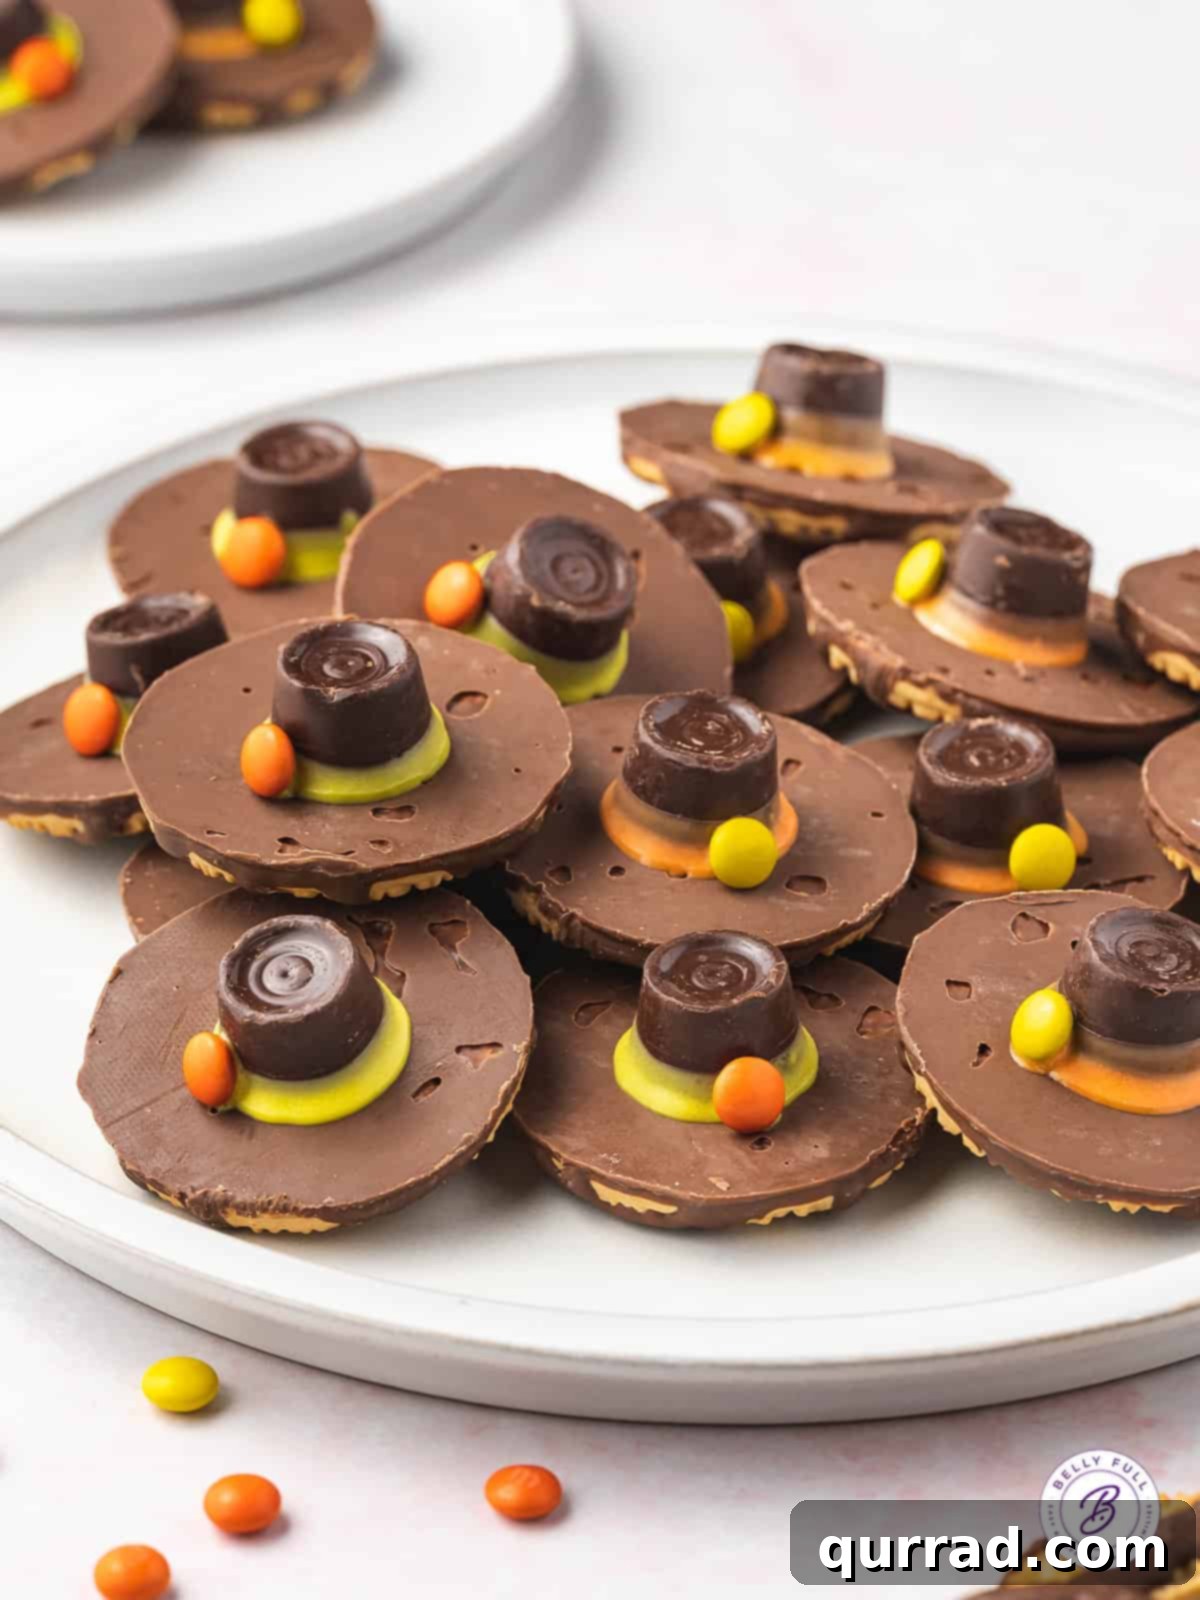
Welcome to the simplest and most charming addition to your Thanksgiving dessert table! These delightful Pilgrim Hat Cookies are a holiday dream come true, requiring just four basic ingredients and absolutely no baking. Perfect for busy hosts, last-minute dessert needs, or a fun kitchen activity with the kids, these cookies are quick to assemble, incredibly cute, and a surefire way to bring smiles to everyone.
Thanksgiving is a time for gratitude, family gatherings, and, of course, an abundance of delicious food. While your oven might be occupied with roasting turkey and baking casseroles, these no-bake treats offer a stress-free solution for a festive dessert. Imagine a platter brimming with these iconic little hats, ready to be enjoyed as a sweet finale to your holiday feast or as a delightful snack during the celebrations. Their playful design pays homage to the historical roots of Thanksgiving, making them not just tasty, but also a conversation starter.
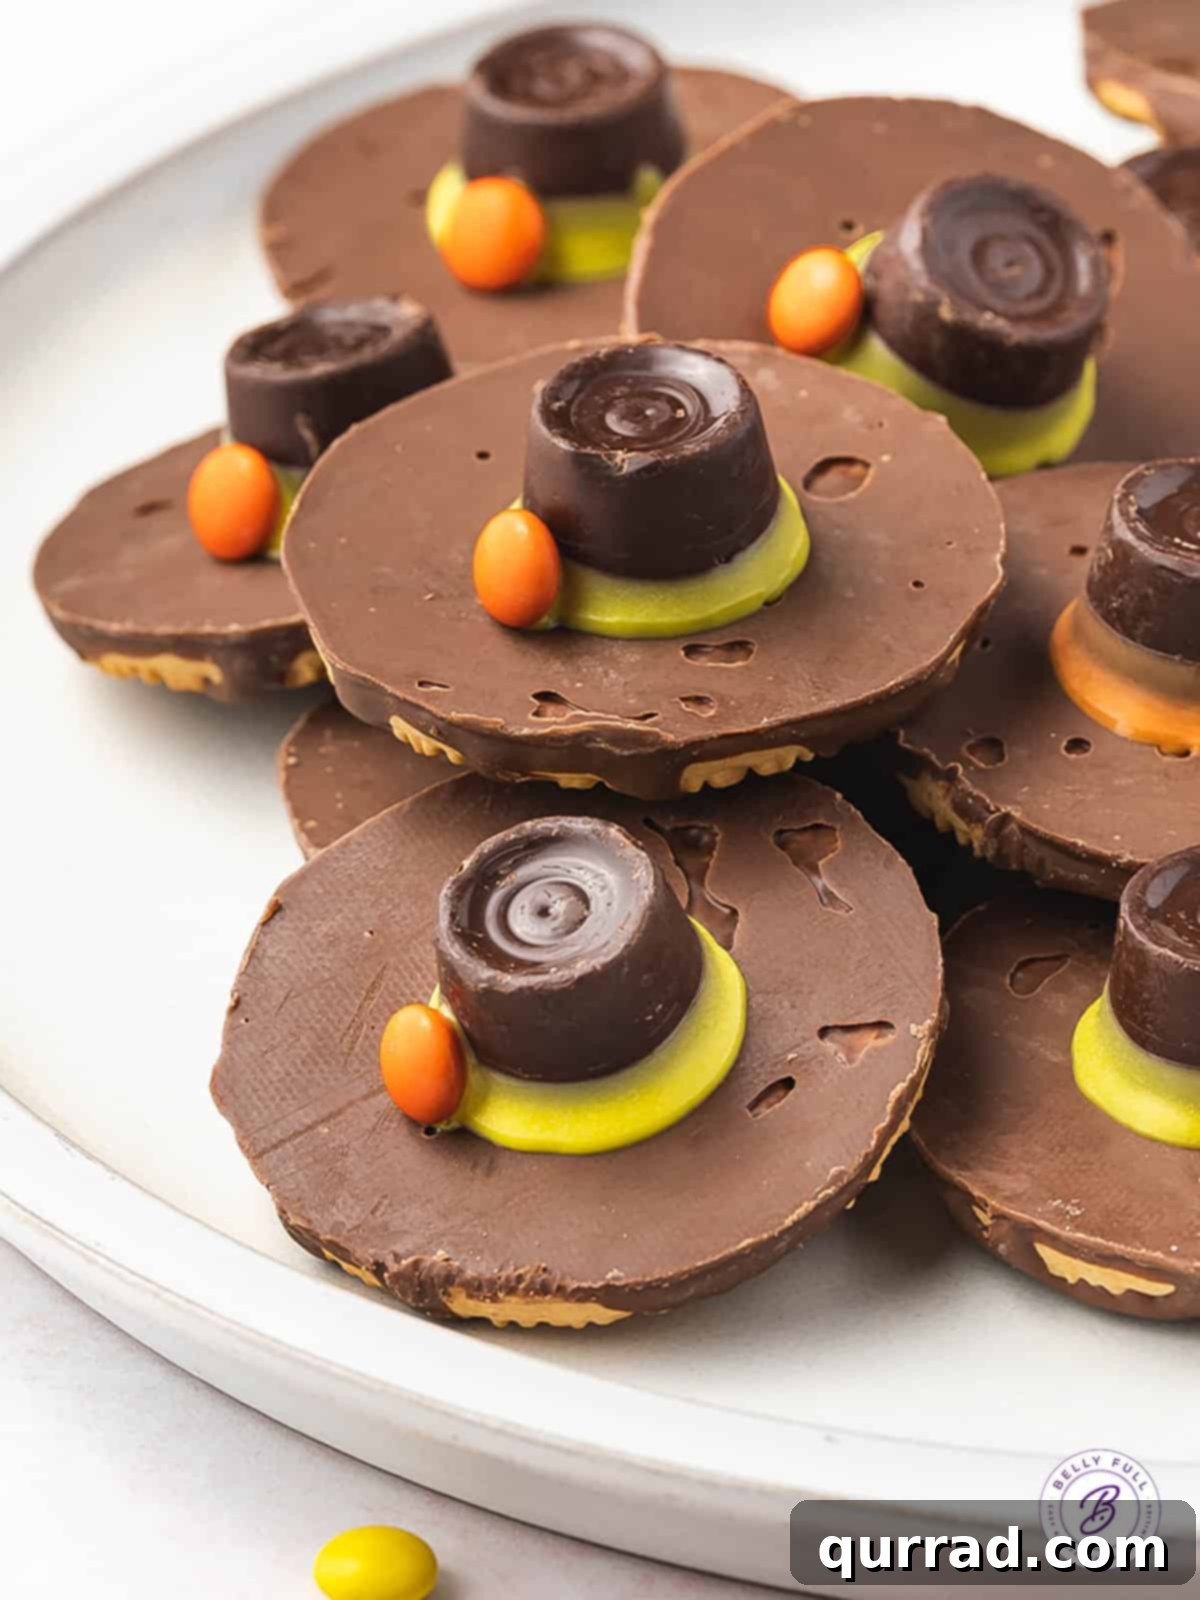
Why These Pilgrim Hat Cookies Are a Thanksgiving Must-Have
If you’re on the hunt for a festive, hassle-free dessert that stands out, these Pilgrim Hat Cookies are your answer. They’re an ideal treat for Friendsgiving celebrations, family dinners, or simply as a creative project to keep young minds engaged during the holiday season. Here’s a breakdown of why this recipe is destined to become a beloved Thanksgiving tradition:
- Unbelievable Simplicity: With only 4 core ingredients, you can skip the lengthy grocery list and complex preparations. Everything you need is readily available at most supermarkets.
- Absolutely No Baking: Free up valuable oven space for your main courses and sides. These cookies come together without any baking, making them perfect for crowded holiday kitchens.
- Kid-Friendly Fun: This is a fantastic recipe for involving children in the kitchen. Since no hot oven is required, little hands can safely help with unwrapping candies, dipping them into melted chocolate (with adult supervision), placing them on cookies, and adding the final decorations. It’s a fun and memorable activity for the whole family.
- Rapid Assembly: From start to finish, including the setting time, these charming cookies are ready in under 30 minutes. This makes them ideal for spontaneous holiday gatherings or when you need a quick dessert.
- Visually Appealing & Festive: Their distinctive pilgrim hat shape makes them an instant hit and a charming, whimsical addition to any Thanksgiving table. They’re a delightful edible craft!
- Highly Customizable: Easily adapt the colors of the candy melts and the style of the “buckle” to match your personal taste, specific autumn themes, or other holiday decorations.
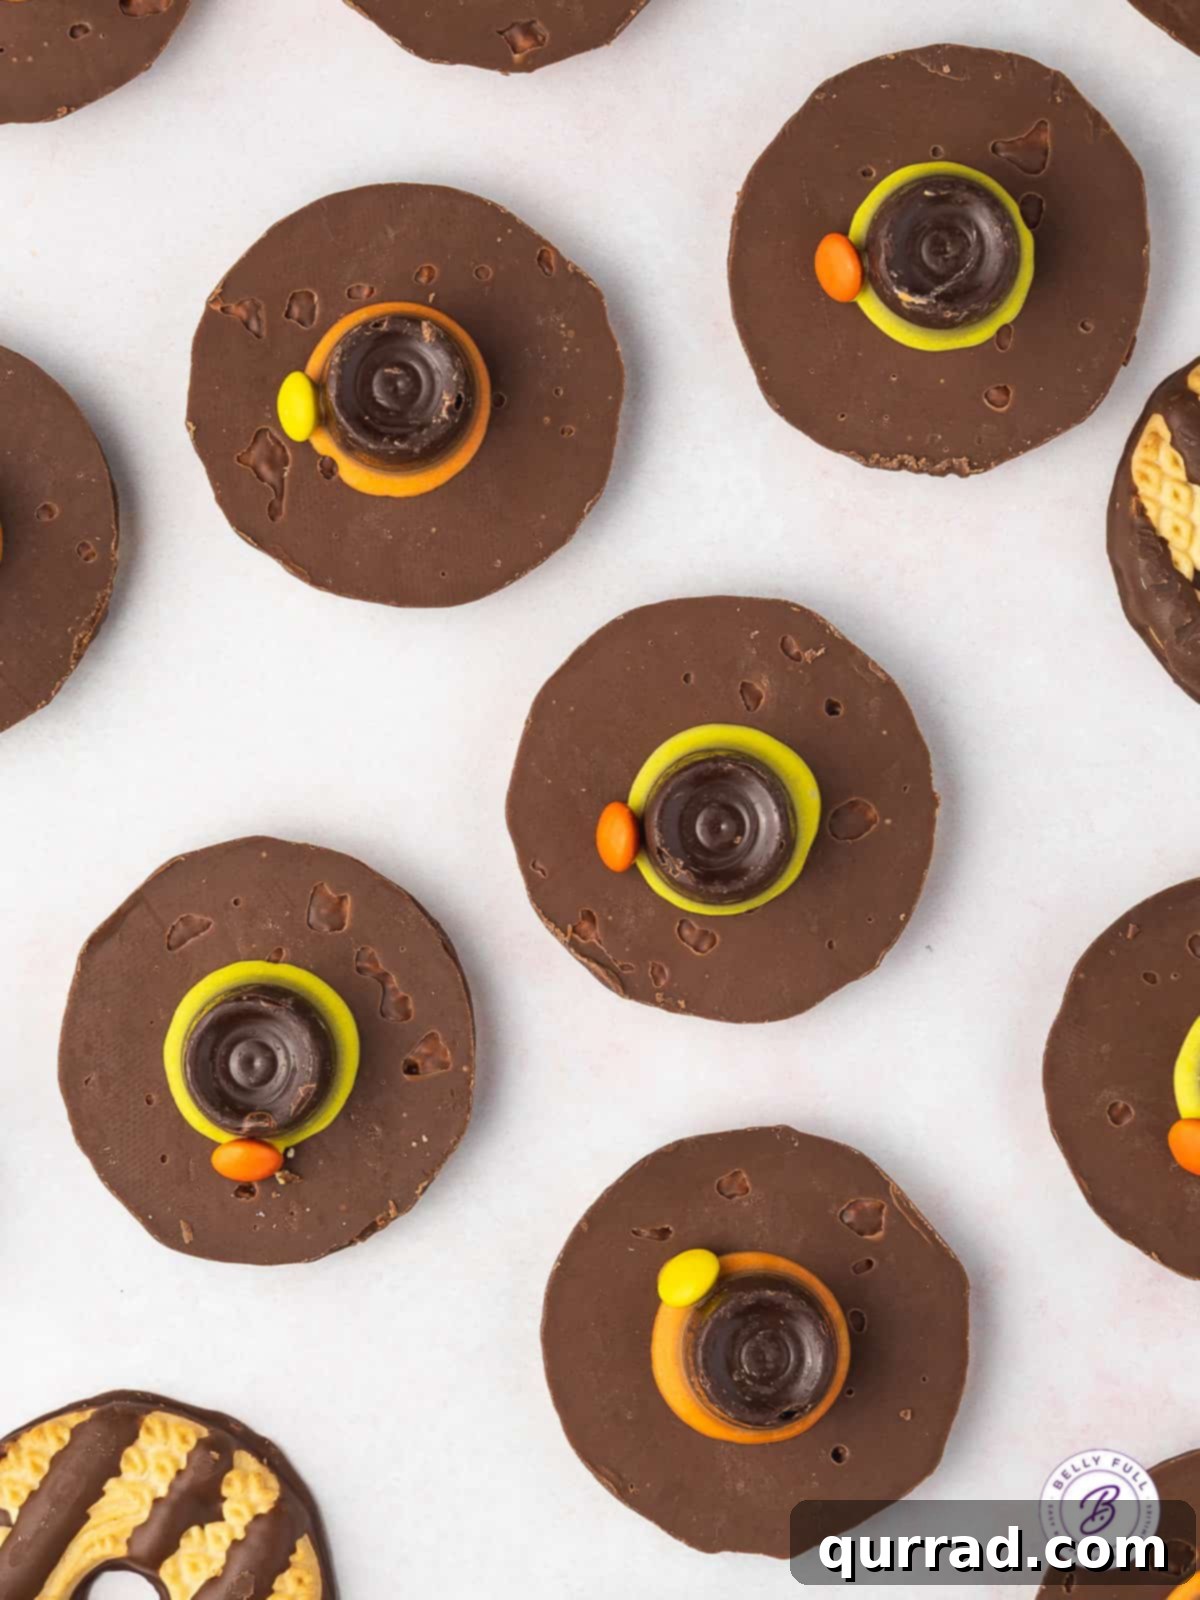
The Simple Ingredients You’ll Need
Preparing for these easy no-bake Thanksgiving cookies couldn’t be more straightforward. You only require four essential ingredients to craft these delightful treats. (For precise quantities and a printable version, please refer to the recipe card further down.)
- Striped Cookies: These form the ideal base for our pilgrim hats. Brands like Keebler Striped Cookies are excellent choices because of their flat, stable bottom and the pre-existing chocolate coating, which helps the “hat” component stand out beautifully. Their consistent size and shape make for uniform and appealing finished cookies.
- Candy Melts: These vibrant confectionery wafers serve a dual purpose: they create the colorful “hat band” and also act as the adhesive to secure the Rolo candy. For a classic fall and Thanksgiving aesthetic, we recommend using orange and yellow candy melts. However, feel free to get creative with other colors like brown, red, or even a mix to create a truly unique batch.
- Rolo Caramel Candies: These delicious, caramel-filled chocolates are the perfect choice for the crown of your pilgrim hats. Their distinct cylindrical shape and rich, chewy caramel interior make them both visually appealing and incredibly tasty. Remember the golden rule: unwrap them all before you start the assembly process to save time and sticky fingers!
- M&Ms: These small, iconic chocolate candies act as the charming “buckle” on the hatband, providing that final touch of detail and a pop of contrasting color. Orange and yellow M&Ms are perfect for maintaining the autumn theme. Alternatively, you can use mini chocolate chips, sprinkles in various fall colors, or even a small dab of decorative icing for the buckle effect.
Expert Tip: Candy Melts vs. White Chocolate Chips for Perfect Results
When crafting candy-based treats like these Pilgrim Hat Cookies, the type of melting chocolate you choose can significantly impact the final texture and appearance. We strongly recommend using Wilton candy melts or Ghirardelli White Melting Wafers. These products are specifically designed for confectionery, offering a wonderfully smooth, fluid consistency when melted. Crucially, they harden perfectly at room temperature, ensuring your pilgrim hats hold their shape without becoming soft or sticky, even after sitting out for a while. This quality makes them superior for intricate detailing and stable structures.
If you prefer to use regular white chocolate chips, it’s certainly possible, but a small adjustment is advisable. White chocolate chips tend to be thicker and can seize up more easily. To achieve a smoother dipping consistency and promote quicker hardening, combine your melted white chocolate with a small amount of coconut oil. A good starting ratio is approximately 1 tablespoon of coconut oil per 1 cup of white chocolate chips. Heat the chocolate and coconut oil together gently, stirring until completely smooth. You can then use oil-based food coloring to achieve your desired colors. Always test a small amount to ensure it sets properly before proceeding with all your cookies.
Creative Recipe Variations to Personalize Your Treats
While the traditional Pilgrim Hat Cookie is undeniably charming, there are numerous ways to customize your batch, allowing you to infuse your personality and creativity into these festive treats. Don’t be afraid to experiment with these simple yet impactful modifications:
- Diverse Cookie Bases: Expand beyond the classic striped cookie. Any round, flat-based cookie can serve as the perfect brim for your hats. Consider fudge-covered Oreos for a richer, darker hat base that contrasts beautifully with bright candy melt bands. Vanilla wafers or shortbread cookies offer a lighter, buttery alternative. For a truly unique sweet-and-salty combination, try using Ritz crackers, either plain or lightly dipped in melted chocolate before assembly. Each cookie choice will bring a different flavor and texture dimension to your pilgrim hats.
- A Rainbow of Colors: While orange and yellow candy melts perfectly capture the autumnal spirit, don’t limit yourself! Use brown candy melts for a more historically accurate “felt” hat appearance, or even black for a truly traditional pilgrim look. You could also create an assortment of hats using various band colors like red, green, or even white, then mix and match them with contrasting M&Ms or other small candies for a vibrant, eclectic display. Imagine a tray featuring a collection of brown hats with yellow buckles, orange hats with green accents, and red hats with orange details – a true celebration of fall colors.
- Elaborate Decorative Touches: Elevate your pilgrim hats beyond a simple M&M buckle. For a more sophisticated look, use a small square of black licorice or a tiny piece of fruit leather cut into a buckle shape. Mini chocolate chips can be arranged to form a square buckle, or you can pipe a tiny dot or square of white or contrasting colored frosting for an intricate effect. Additionally, explore a variety of sprinkles in autumn hues, edible glitter for a touch of sparkle, or other small Thanksgiving-themed candies like candy corn or fall leaf sprinkles to add extra flair. This is an excellent opportunity to let children individualize their own edible masterpieces, fostering creativity and making each cookie unique.
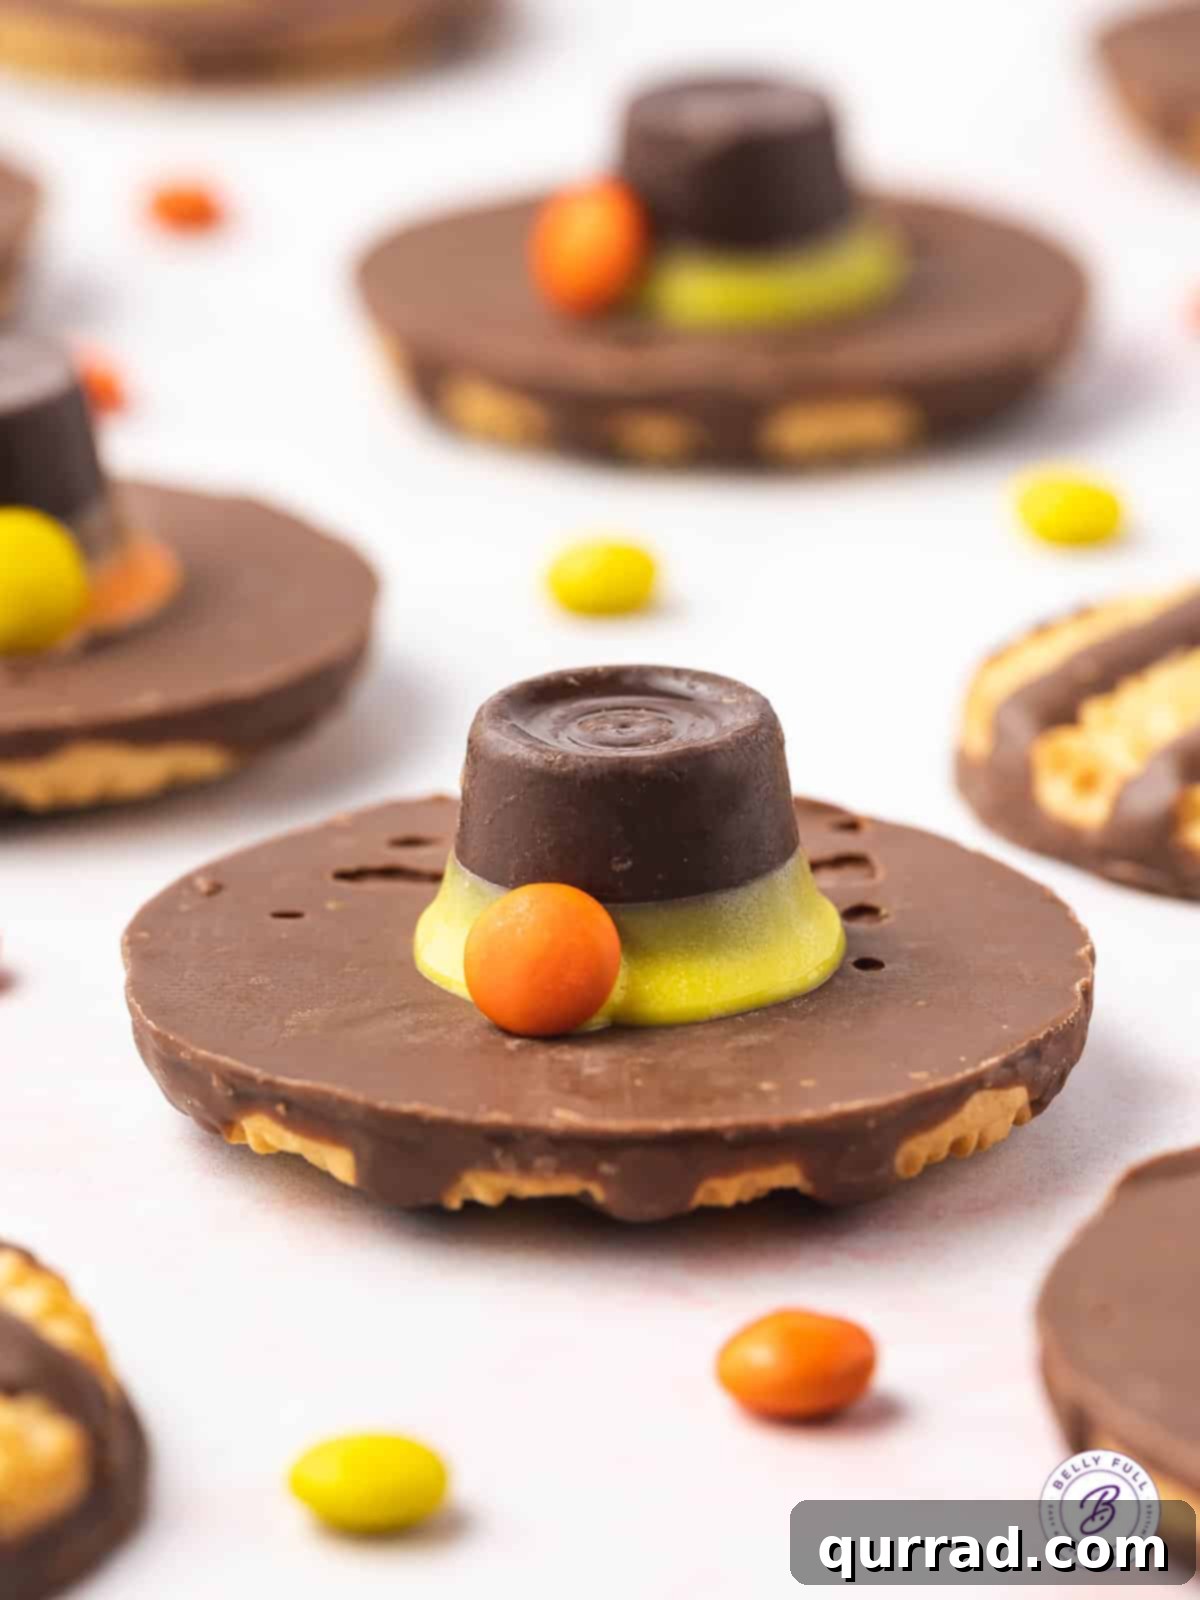
Step-by-Step: How to Make These Easy Pilgrim Hat Cookies
Creating these festive Thanksgiving treats is wonderfully simple and requires no specialized baking skills or equipment. Follow these straightforward steps to bring your adorable pilgrim hats to life! (For precise measurements and a detailed recipe, please refer to the comprehensive recipe card below.)
- Prepare Your Workspace and Cookies: Begin by lining a large baking sheet with parchment paper. This essential step prevents sticking and ensures effortless cleanup later. Carefully arrange your striped cookies upside down on the parchment paper, making sure the flat, solid chocolate bottom of each cookie is facing upwards. This creates the perfect stable and visually appealing base for your hats.
- Melt the Candy Melts: Separate your desired colors of candy melts (e.g., orange and yellow) into individual shallow, microwave-safe bowls. Melt each bowl of candy melts according to the package instructions, typically by heating in 30-second intervals, stirring thoroughly after each interval. Continue until the melts are completely smooth, fluid, and free of any lumps. It’s crucial not to overheat the candy melts, as this can cause them to seize and become unworkable.
- Dip the Rolo Candies: Take one unwrapped Rolo caramel candy at a time. Dip its flat bottom into the melted candy melts. Aim to coat just the bottom and a small portion (about a quarter-inch) up the side of the Rolo. Allow any excess melted candy to drip off briefly back into the bowl to prevent pooling on the cookie.
- Assemble the Pilgrim Hat: Immediately and gently place the dipped Rolo candy precisely in the center of an upside-down striped cookie. The still-wet melted candy acts as a strong adhesive, securing the Rolo to the cookie and instantly forming the iconic pilgrim hat shape. Work efficiently as the candy melts will begin to set.
- Add the Buckle Detail: While the candy melt band around the Rolo is still wet and pliable, carefully press one M&M onto the colored band. For a cleaner look, place the “M” side of the candy facing down, or upwards if you prefer the visible branding. This M&M serves as the charming “buckle” of the hat.
- Repeat and Allow to Set: Continue this dipping and assembly process with the remaining cookies, Rolo candies, and M&Ms until all your pilgrim hats are complete. Once assembled, allow them sufficient time to set completely. This typically takes approximately 15 to 30 minutes at room temperature. If you’re short on time, you can carefully transfer the baking sheet to the refrigerator for about 10-15 minutes to speed up the setting process. However, be aware that very cold chocolate can be slightly firmer and less pleasant to eat immediately.
Proper Storage for Lasting Freshness
To ensure your delightful Pilgrim Hat Cookies remain fresh, flavorful, and maintain their perfect texture, proper storage is essential. Luckily, these no-bake treats are quite sturdy and keep well:
- Room Temperature Storage: For immediate enjoyment and convenience, store your finished cookies in an airtight container or a robust, sealable plastic bag. Keep them in a cool, dry place at room temperature, away from direct sunlight or heat sources. This method effectively prevents the cookies from becoming soft, stale, or absorbing unwanted odors. Stored correctly at room temperature, these cookies will maintain their optimal quality for up to two weeks, making them an excellent choice for preparing in advance of your busy Thanksgiving schedule.
- Refrigeration: While not strictly necessary for such a robust treat, refrigerating the cookies can further extend their freshness, especially in warmer climates. If you opt for refrigeration, place them in an airtight container to protect them from moisture and fridge odors. Be mindful that both the chocolate and the cookies will become firmer when cold. For the best eating experience, allow them to return to room temperature for about 15-20 minutes before serving. This softens the chocolate and restores the cookie’s texture.
- Freezing for Extended Preservation: For long-term storage, these Pilgrim Hat Cookies freeze beautifully. To freeze, first arrange the completely set cookies in a single layer on a baking sheet and place them in the freezer until solid (this flash-freezing prevents them from sticking together). Once firm, transfer the frozen cookies to a freezer-safe airtight container or bag. If layering, place sheets of parchment paper between each layer to prevent sticking. They can be safely frozen for up to one month. When ready to enjoy, simply thaw them at room temperature for several hours before serving.
Frequently Asked Questions About Pilgrim Hat Cookies
Can I use different types of cookies for the base of the hat?
Absolutely! While striped cookies provide a distinct and traditional look, you are encouraged to experiment. Fudge-covered Oreos, Nilla wafers, classic shortbread cookies, or even plain graham crackers can all serve as excellent bases. The key is to select a cookie with a relatively flat surface to ensure the Rolo candy sits securely and the “hat” stands upright.
What if I don’t have candy melts available? Can I use regular chocolate?
Yes, you can substitute regular white chocolate chips, but with a slight modification for optimal results. Melt white chocolate chips with approximately 1 tablespoon of coconut oil per cup of chocolate. This addition helps achieve a smoother, more fluid consistency for easier dipping and also assists the chocolate in hardening more effectively at room temperature. You can then use oil-based food coloring to achieve your desired festive colors.
How far in advance can I prepare these cookies for Thanksgiving?
These Pilgrim Hat Cookies are an ideal make-ahead treat for the busy holiday season! When stored properly in an airtight container at room temperature, they will remain fresh and delicious for up to two weeks. This flexibility allows you to prepare them well in advance, freeing up your time for other Thanksgiving preparations closer to the main event.
Are these cookies suitable for children to help make?
Undeniably! This recipe is one of the best for involving children in the kitchen. Since no oven is required, it offers a safe and enjoyable activity for little ones. Kids can enthusiastically help unwrap the Rolo candies, dip them into the melted candy melts (with adult supervision for handling warm chocolate), carefully place them onto the cookies, and add the fun M&M buckles. It’s a wonderful way to create lasting holiday memories together.
Can I adapt this recipe to be gluten-free or nut-free?
To make these cookies gluten-free, you would need to use a certified gluten-free striped cookie or another suitable gluten-free cookie base. For a nut-free version, it is crucial to meticulously check the labels of all ingredients, including the striped cookies, candy melts, Rolo candies, and M&Ms, to ensure they are free from nuts and have not been cross-contaminated. Ingredient compositions can vary significantly by brand.
More Delightful Thanksgiving Desserts to Explore
If you’re seeking additional easy and delicious treats to enhance your holiday spread, or simply looking for more festive inspiration, explore these other fantastic recipes:
- Mini Pumpkin Pies: Individual portions of a timeless autumnal classic.
- Mini Pecan Pies: Another beloved bite-sized traditional holiday favorite.
- Cranberry Fluff: A light, airy, and refreshingly sweet side dish or dessert.
- Pumpkin Fluff: A creamy, smooth, and delightfully spiced pumpkin-flavored treat.
- Cranberry Almond Chocolate Bark: An elegant yet incredibly simple chocolate confection with festive flavors.
We sincerely hope you have a wonderful time creating and sharing these delicious, charming Pilgrim Hat Cookies. They truly add a special, heartwarming touch to any Thanksgiving celebration, making sweet memories for everyone involved!
Pilgrim Hat Cookies Recipe
This easy, no-bake recipe yields approximately 24 delightful Pilgrim Hat Cookies, perfect for adding a festive touch to your holiday gathering. With a quick prep time of just 15 minutes and an additional 15-30 minutes for setting, these treats are a breeze to make.
Ingredients
- 1 package (11.5 ounces) striped cookies (such as Keebler or a similar brand)
- 1/2 cup orange candy melts
- 1/2 cup yellow candy melts
- 24 Rolo caramel candies, completely unwrapped
- 24 orange and yellow M&Ms (or other small, coordinating candies)
Instructions
- Prepare Your Baking Sheet: Line a large baking sheet with parchment paper. Arrange the striped cookies upside down on the parchment paper, ensuring the flat, solid chocolate bottom of each cookie faces upwards to create a stable base.
- Melt the Candy Melts: Place the orange candy melts in one shallow, microwave-safe bowl and the yellow candy melts in another. Microwave each bowl according to package directions, typically in 30-second intervals, stirring thoroughly after each to achieve a smooth, lump-free consistency. Be careful not to overheat.
- Dip the Rolo Candies: Take one unwrapped Rolo candy and dip its flat bottom into either the orange or yellow melted candy melts. Coat the bottom and a small portion (about 1/4 inch) up the sides. Allow any excess candy melt to drip off briefly.
- Assemble the Hats: Immediately place the dipped Rolo candy firmly in the center of an upside-down striped cookie. The melted candy will act as an adhesive, securing the Rolo to the cookie and forming the iconic pilgrim hat shape.
- Add the Buckle: While the candy melt band around the Rolo is still wet, carefully press one M&M onto the colored band, creating a “buckle” effect. Repeat steps 3-5 with the remaining ingredients until all cookies are assembled.
- Set and Serve: Allow the completed pilgrim hats to set completely at room temperature for 15 to 30 minutes. For faster setting, you can transfer the baking sheet to the refrigerator for 10-15 minutes. Once set, your delightful Pilgrim Hat Cookies are ready to be shared and enjoyed!
Important Notes on Ingredients
Melting Wafers or Candy Melts vs. White Chocolate Chips: For the best texture, smooth consistency, and reliable hardening at room temperature, it’s highly recommended to use Wilton candy melts or Ghirardelli White Melting Wafers. If you choose to use regular white chocolate chips, you can improve their melting and setting quality by combining 1 cup of chocolate chips with approximately 1 tablespoon of coconut oil. Oil-based food dye can be used to color white chocolate if desired.
Estimated Nutrition Information (per cookie)
Calories: 151 kcal | Carbohydrates: 19g | Protein: 1g | Fat: 8g | Saturated Fat: 4g | Polyunsaturated Fat: 2g | Monounsaturated Fat: 1g | Trans Fat: 0.002g | Cholesterol: 1mg | Sodium: 82mg | Potassium: 28mg | Fiber: 0.3g | Sugar: 11g | Vitamin A: 26IU | Vitamin C: 0.1mg | Calcium: 12mg | Iron: 1mg
Please note: Nutritional information provided is an estimate and can vary based on the specific brands and types of products used, as well as any modifications made to the recipe. If precise values are critical, we recommend performing your own independent nutritional calculation.