
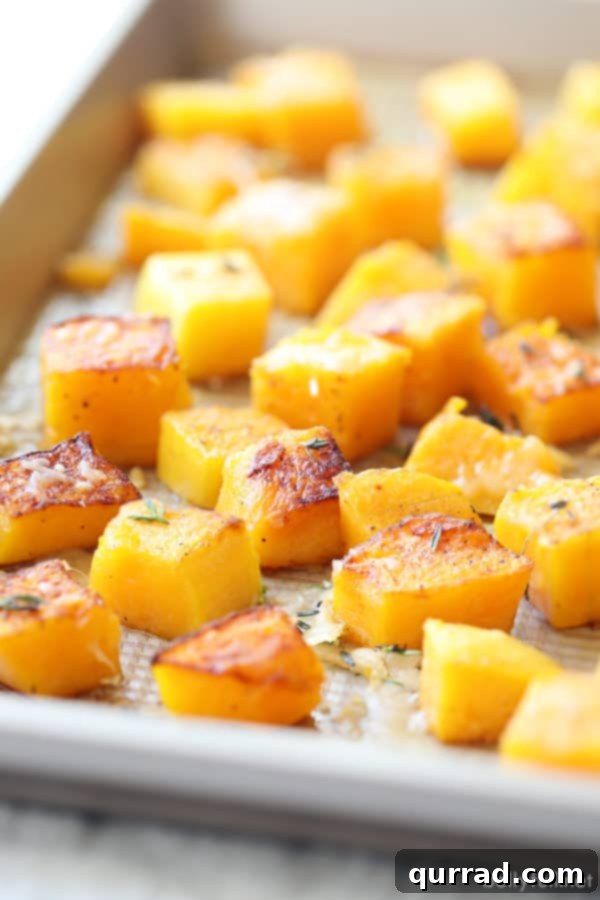
Welcome the vibrant flavors of autumn into your kitchen with this ultimate guide to crafting the most irresistible Roasted Butternut Squash. Infused with fresh herbs, rich Parmesan cheese, and perfectly caramelized vegetables, this recipe transcends a mere side dish – it becomes a culinary centerpiece that will quickly claim its spot as your new favorite!
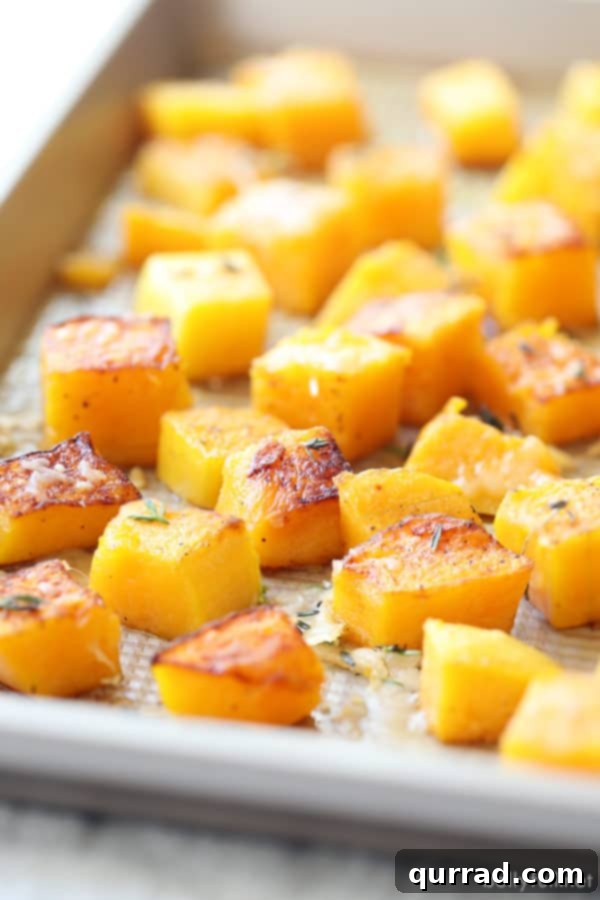
As the days grow shorter and the crisp scent of autumn fills the air, our culinary cravings naturally shift towards warming, comforting dishes. And what vegetable better encapsulates the essence of fall than the glorious butternut squash? Its sweet, nutty flavor and vibrant orange hue make it a star ingredient, perfectly complementing cozy meals and festive gatherings alike. If you’re anything like me, the arrival of autumn means an abundance of butternut squash recipes, and few preparations can rival the simple elegance and profound flavor of roasted butternut squash.
While butternut squash is undeniably a fall favorite, the thought of peeling and cutting this oddly shaped, dense gourd can sometimes deter even the most enthusiastic home cooks. But fear not! With the right techniques and a few helpful tips, you’ll be prepping butternut squash like a pro in no time, unlocking its incredible potential for deliciousness. This article will guide you through every step, from safe and efficient preparation to achieving perfectly tender, caramelized results, ensuring your roasted butternut squash is nothing short of spectacular.
Why Roasted Butternut Squash is a Fall Must-Have
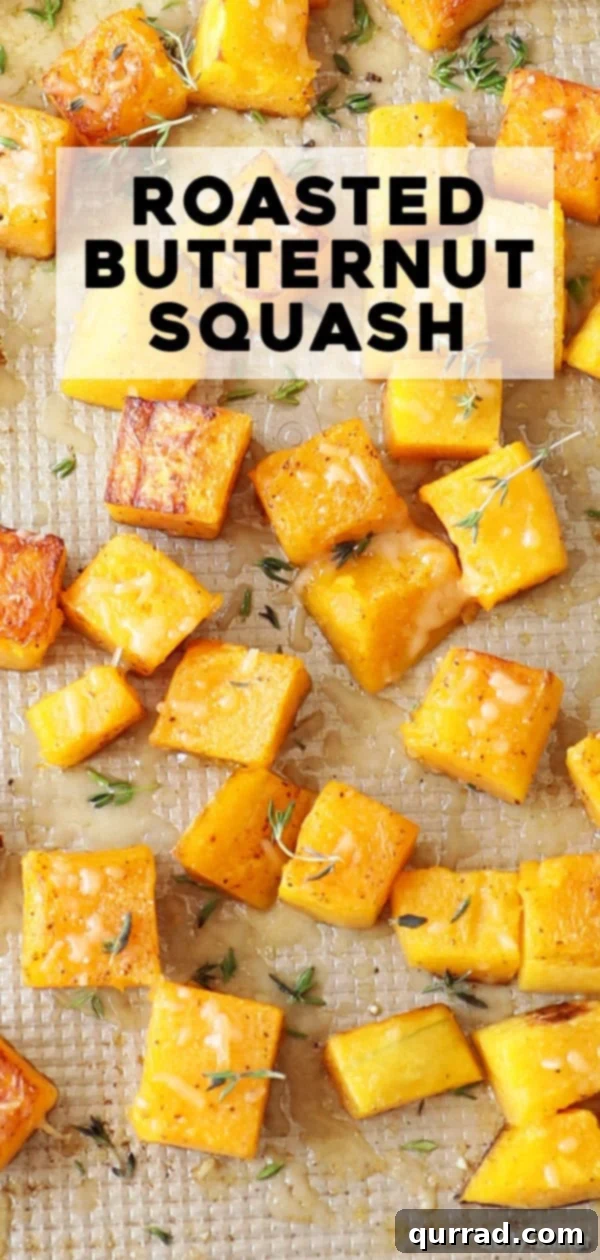
There’s a unique magic that happens when butternut squash meets the high heat of an oven. Roasting transforms its naturally sweet flesh, concentrating its sugars and creating a beautiful caramelization on the edges. This process develops a depth of flavor that boiling or steaming simply can’t achieve. The exterior develops a slightly crisp, golden-brown crust, while the interior becomes wonderfully tender and creamy. When combined with savory herbs and a touch of Parmesan, it creates a symphony of flavors and textures that is both sophisticated and comforting.
Beyond its incredible taste, butternut squash is also a nutritional powerhouse. It’s packed with vitamins A and C, essential for immune health and vision, as well as being a good source of fiber, potassium, and magnesium. Incorporating this versatile vegetable into your diet is a delicious way to boost your nutrient intake, making it a healthy and satisfying choice for any meal.
Essential Tools for Prepping Butternut Squash
Before we dive into the nitty-gritty of peeling and cutting, let’s ensure you have the right tools on hand. A sharp, heavy-duty chef’s knife is non-negotiable for safe and efficient cutting. A sturdy cutting board that won’t slip (you can place a damp towel underneath for extra stability) is also crucial. For peeling, a high-quality Y-peeler is often preferred for its ergonomic design and effectiveness, though a sharp vegetable peeler will also work. Having a spoon or ice cream scoop handy for deseeding will also make the process smoother.
How to Safely and Easily Peel Butternut Squash
Peeling butternut squash can be a bit of a workout due to its tough skin and awkward shape. However, a little trick can make this task significantly easier: softening the skin. Here’s my go-to method:
- Pre-soften the Skin: Using a fork, pierce the squash all over several times. Place it in the microwave and heat for about 1-2 minutes. This brief stint in the microwave won’t cook the squash through but will soften the skin just enough to make peeling much easier. Alternatively, you can blanch the squash in boiling water for about 2-3 minutes, then immediately transfer it to an ice bath before peeling.
- The Y-Peeler Method: Once slightly softened, place the squash on its side on your stable cutting board, or stand it upright if you feel confident. Using a good quality Y-peeler, peel in downward strokes, removing the tough outer skin. Work your way around the entire squash until all the orange flesh is exposed. The Y-peeler allows for a more natural downward motion, reducing hand strain and making the process faster.
- The Knife Method (if no Y-peeler): If you don’t have a Y-peeler, you can use your chef’s knife, though it requires more caution. First, carefully cut the squash in half horizontally. Lay each piece cut-side down on the cutting board. Then, using a very sharp knife, carefully slice off the peel in downward motions, following the curve of the squash. This method can be trickier and more time-consuming, so always prioritize safety and take your time.
How to Safely and Efficiently Cut Butternut Squash
Once peeled, the next step is to cut the butternut squash into uniform pieces suitable for roasting. Stability is key here, so ensure your cutting board is absolutely steady.
- Prepare for Stability: First, slice about 1/4-inch off the top (stem end) and an equal 1/4-inch off the bottom (blossom end) of the peeled squash. This creates two flat, stable surfaces, which is critical for safety when working with a round, dense vegetable.
- Halve the Squash: Stand the now-stable peeled squash upright on your cutting board. Using your heavy, sharp chef’s knife, make one long, careful cut straight down the middle from top to bottom. This will divide the squash into two halves.
- Deseeding: Lay the squash halves cut-side down. Using a sturdy spoon or an ice cream scoop, scrape out all the seeds and the stringy pulp from the cavities. Don’t discard these seeds immediately! Like pumpkin seeds, butternut squash seeds can be cleaned, tossed with a little oil and salt, and roasted for a delicious, crunchy snack.
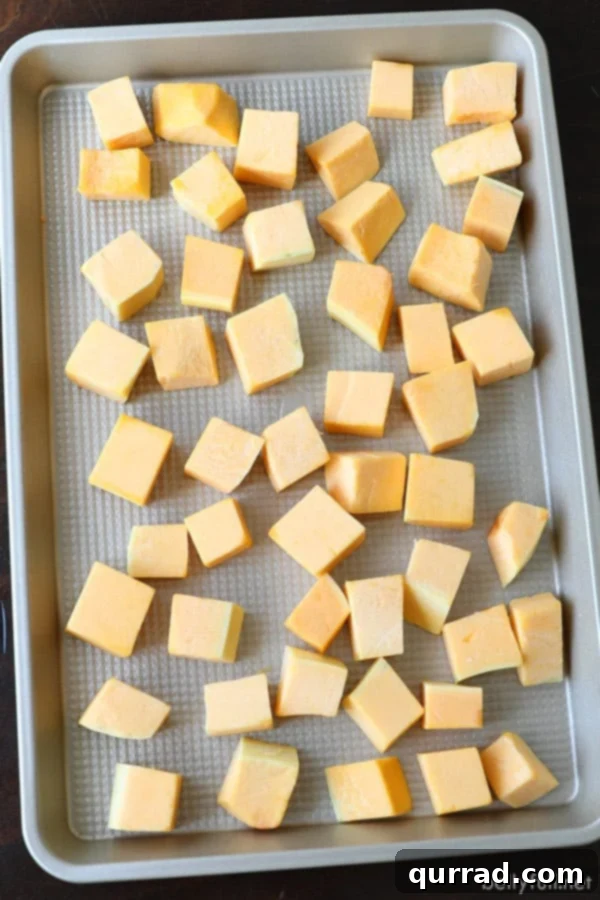
- Dicing into Cubes: Now that your squash is peeled and deseeded, it’s ready for dicing. Take each half and slice it into smaller, manageable pieces (e.g., crescent shapes for the neck, and flatter pieces for the bulbous end). Then, lay these pieces flat and cut them into uniform 3/4-inch cubes. Uniformity is important for even roasting, ensuring all pieces cook at the same rate.
A typical 1 1/2 pound butternut squash will yield approximately 2 cups of diced squash after you’ve removed the stem, peel, and seeds. This is a good measurement to keep in mind for various recipes.
The Art of Roasting: How to Cook Butternut Squash to Perfection
Now that your butternut squash is prepped, it’s time to transform it into a delectable roasted delight. The key to perfect roasting lies in high heat and even distribution, which promotes caramelization and a tender interior.
- Preheat for Success: Always start by preheating your oven to 450 degrees F (230 degrees C). High heat is crucial for achieving that desirable crispy exterior and sweet, tender interior. Prepare a 15×10-inch (or larger, depending on the quantity of squash) roasting pan or baking sheet by coating it with a nonstick cooking spray or lining it with parchment paper for easy cleanup.
- Season Generously: Place your evenly cut butternut squash cubes into the prepared pan. Drizzle generously with high-quality extra-virgin olive oil. The oil helps with browning and provides a rich flavor. Sprinkle with kosher salt and freshly ground black pepper. Toss the squash gently but thoroughly to ensure every piece is lightly coated with oil and seasoning. Don’t be shy with the seasoning – it enhances the natural sweetness of the squash.
- Don’t Overcrowd the Pan: This is a critical tip for successful roasting. Arrange the squash in a single layer, ensuring there’s enough space between each piece. Overcrowding will steam the squash instead of roasting it, resulting in mushy rather than caramelized pieces. If you have too much squash, use two pans.
- First Roast: Transfer the pan to the preheated oven and roast for 15 minutes. After this initial roasting period, carefully remove the pan from the oven and gently toss the squash with a spatula. This ensures even cooking and browning on all sides.
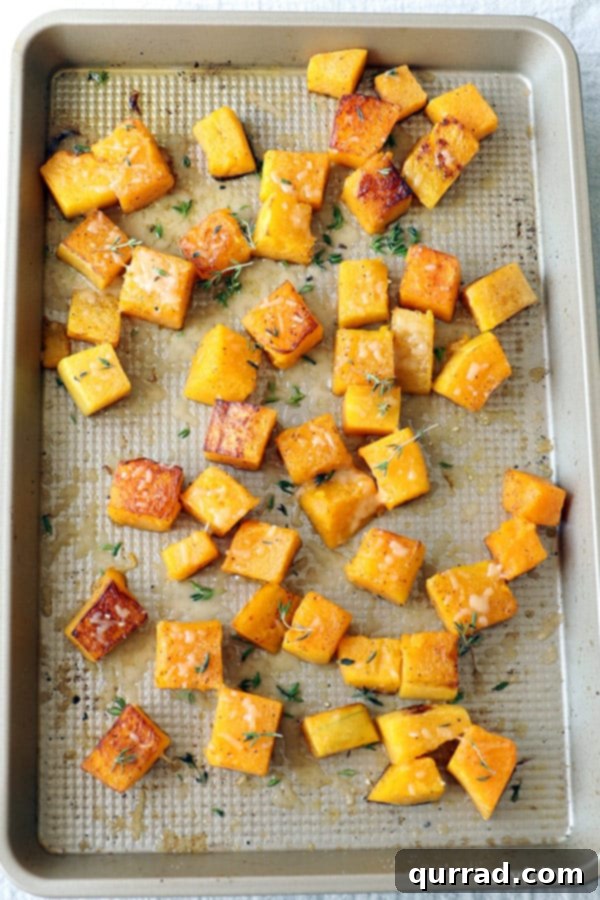
- Infuse with Flavor: This is where the magic happens! Stir in fresh thyme sprigs and grated Parmesan cheese. The thyme adds an earthy, aromatic note that beautifully complements the squash, while the Parmesan contributes a salty, savory depth and a delightful crust.
- Final Roast: Return the pan to the oven and roast for another 5-10 minutes, or until the squash is perfectly tender when pierced with a fork and has achieved a beautiful golden-brown caramelization on the edges. Keep a close eye on it during this final stage to prevent burning.
*Find the full printable recipe with precise quantities and detailed instructions below.
Beyond the Side Dish: Versatile Uses for Roasted Butternut Squash
While roasted butternut squash makes an incredible standalone side dish – perfect for a quick, healthy lunch or an elegant dinner – its versatility extends far beyond. I often make a large batch just to have on hand. It’s fantastic in my Butternut Squash Soup, which is truly a revelation and will absolutely knock your socks off!
Consider these other delightful ways to incorporate roasted butternut squash into your meals:
- Salads: Add cooled roasted squash to your favorite fall salads for a hearty, flavorful addition. It pairs wonderfully with spinach, goat cheese, pecans, and a balsamic vinaigrette.
- Grain Bowls: Combine with quinoa, farro, or brown rice, along with other roasted vegetables, a protein source, and a flavorful dressing for a wholesome and satisfying grain bowl.
- Pasta Dishes: Toss with pasta, sage butter sauce, and a sprinkle of Parmesan for a simple yet elegant vegetarian meal.
- Pizzas and Flatbreads: Use as a topping for seasonal pizzas or flatbreads, often with caramelized onions, goat cheese, and fresh rosemary.
- Tacos and Burritos: Roasted squash can be a delicious and healthy filling for vegetarian tacos or burritos, especially when seasoned with smoky spices.
Creative Variations and Customizations
While the Parmesan and thyme combination is classic and delicious, don’t hesitate to experiment with other flavors to personalize your roasted butternut squash. Here are a few ideas:
- Sweet and Savory: Drizzle with maple syrup or brown sugar before roasting for a sweeter profile. A pinch of cinnamon, nutmeg, or allspice can also enhance this.
- Garlic and Herbs: Add minced garlic or garlic powder along with other fresh herbs like rosemary or sage for a more robust, earthy flavor.
- Spicy Kick: A pinch of red pepper flakes or a dash of cayenne pepper can add a subtle warmth and heat.
- Balsamic Glaze: Drizzle with balsamic glaze after roasting for a tangy, sweet finish that complements the squash beautifully.
- Nutty Crunch: Toss with chopped pecans or walnuts during the last few minutes of roasting for added texture and flavor.
How to Store Butternut Squash for Maximum Freshness
Proper storage ensures your butternut squash remains fresh and delicious, whether whole, prepped, or cooked.
- Whole Butternut Squash: Uncut, whole butternut squash has an impressive shelf life. Store it in a cool, dark, and dry place (like a pantry or basement) for 1 to 2 months. Avoid refrigeration for whole squash, as it can shorten its lifespan.
- Peeled and Diced (Uncooked) Butternut Squash: Once you’ve peeled and diced your squash, it needs to be refrigerated. Place the uncooked cubes in a tightly sealed airtight container or a zip-top bag. It will stay fresh in the refrigerator for 3 to 4 days, making it perfect for meal prepping.
- Cooked Butternut Squash: Leftover roasted butternut squash should also be stored in a tightly sealed airtight container in the refrigerator. It will remain delicious for up to 3 days. Reheat gently in the oven or microwave.
Can You Freeze Butternut Squash?
Yes, butternut squash freezes beautifully, both raw and cooked! This is a fantastic way to preserve your harvest or prepare ahead for busy weeks.
- Freezing Raw Diced Butternut Squash: If you’ve prepped a large batch and want to save some for later, flash freeze the raw cubes. Spread the diced squash in a single layer on a baking sheet and freeze for 1-2 hours until solid. Once frozen, transfer the cubes to a freezer-safe bag or airtight container. This prevents them from sticking together. Raw frozen squash can be stored for up to 6 months and can be roasted directly from frozen, though it might take a little longer to cook.
- Freezing Cooked Butternut Squash: Cooked roasted butternut squash can also be frozen. Allow the squash to cool completely, then transfer it to freezer-safe containers or bags. It will maintain its quality for 3-4 months. Thaw in the refrigerator overnight before reheating.
Roasted butternut squash is more than just a recipe; it’s an experience. It’s a celebration of seasonal flavors, a simple technique that yields incredible results, and a versatile dish that can elevate any meal. Whether you’re serving it as a humble side, incorporating it into a comforting soup, or experimenting with new flavor combinations, this guide ensures you’ll achieve perfect results every time. So go ahead, embrace the season, and let the inviting aroma of roasted butternut squash fill your home!
Other delicious squash recipes we love!
Roasted Spaghetti Squash with Onion, Garlic, and Parmesan
Creamy Butternut Squash and Potato Mash
The Best Yellow Squash Casserole
Sweet Corn and Zucchini Sauté
Roasted Butternut Squash
Pin
Ingredients
- 1 1/2 pounds butternut squash, , peeled, seeded, cut into 3/4-inch cubes
- 2 tablespoons extra-virgin olive oil
- 1 teaspoon kosher salt
- 1/4 teaspoon black pepper
- 4 sprigs fresh thyme, (or 1/2 teaspoon fresh thyme leaves, or 1/4 teaspoon dried thyme)
- 1/3 cup grated Parmesan cheese
Instructions
-
Preheat oven to 450 degrees F (230°C). Coat a 15×10-inch roasting pan or baking sheet with nonstick cooking spray, or line with parchment paper. Place the prepared butternut squash pieces in the pan.
-
Drizzle with olive oil and sprinkle with kosher salt and black pepper; toss gently to ensure all squash pieces are evenly coated. Arrange in a single layer without overcrowding the pan.
-
Transfer squash to the preheated oven and roast for 15 minutes. Carefully remove from the oven and gently toss the squash with a spatula to promote even cooking.
-
Stir in the grated Parmesan cheese and fresh thyme sprigs. Return to the oven and roast for 5 to 10 more minutes, or until the squash is tender when pierced with a fork and beautifully caramelized on the edges.
-
Serve immediately as a delicious side dish and enjoy!
Notes
- For comprehensive instructions and helpful tips on how to efficiently peel and safely cut a whole butternut squash, please refer to the detailed guide within the full article above.
- This versatile roasted butternut squash can also be used as a key ingredient for my fantastic Butternut Squash Soup, adding a rich depth of flavor.
- Storage Tips: Whole, uncooked butternut squash can be stored in a cool, dark place for 1-2 months. Peeled and diced (uncooked) butternut squash should be refrigerated in a tightly sealed container for 3-4 days. Cooked roasted butternut squash should be refrigerated in an airtight container for up to 3 days. For longer storage, both raw diced and cooked squash can be frozen for several months (see article for details).
- Variations: Feel free to customize with other herbs like rosemary or sage, or add a touch of sweetness with maple syrup or brown sugar for the last few minutes of roasting. A pinch of garlic powder or red pepper flakes can also enhance the flavor.
Nutrition
Nutritional information given is an automatic calculation and can vary based on the exact products you use and any changes you make to the recipe. If these numbers are very important to you, I would recommend calculating them yourself.