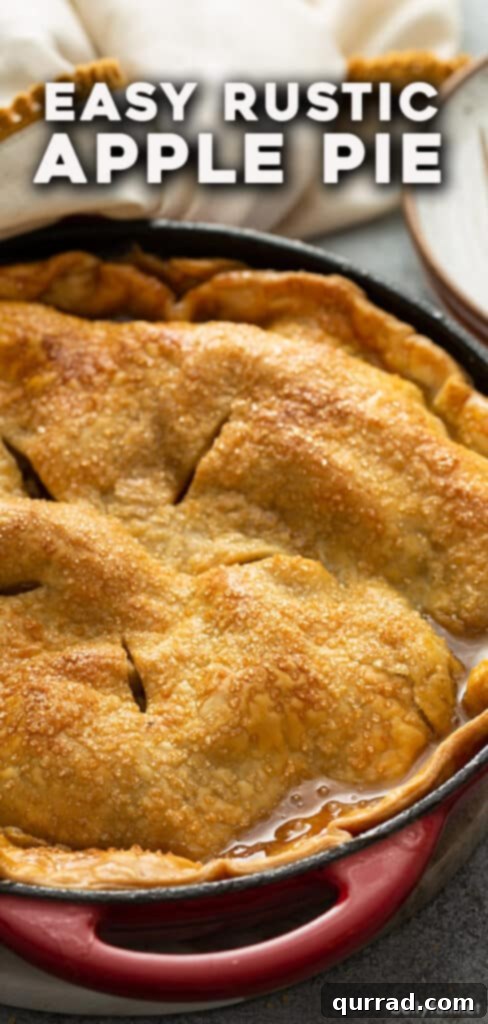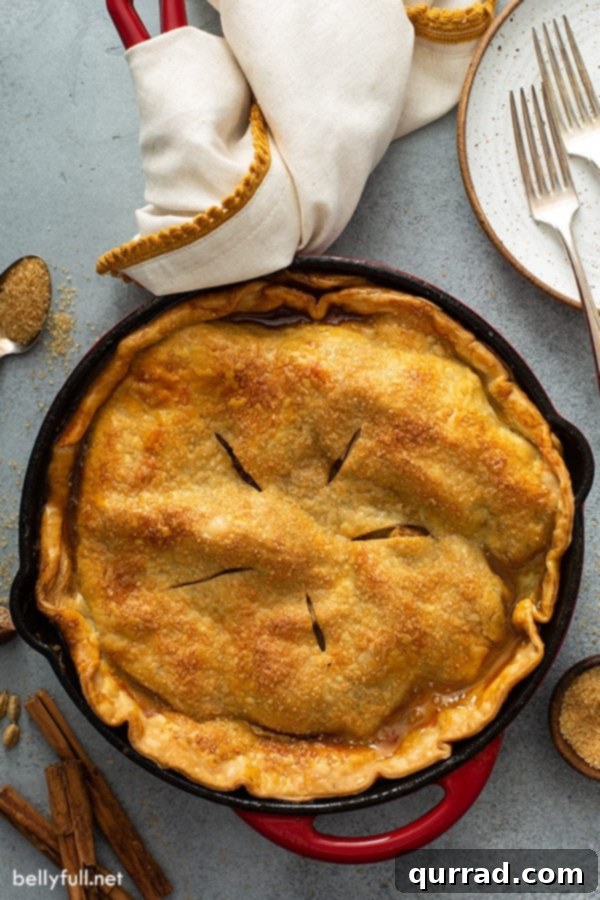
There’s something uniquely comforting about a slice of warm apple pie, especially when it’s homemade. It evokes memories of cozy gatherings, autumn harvests, and the simple joy of a truly satisfying dessert. Our easy apple pie recipe takes this beloved classic and elevates it with a secret weapon: the cast iron skillet. This method not only simplifies the baking process but also delivers an incredibly crisp, golden-brown crust and a delightful toffee-like layer that will have everyone asking for a second slice. (Don’t worry if you don’t have a cast iron skillet – we include a variation that can be made in an oven-safe skillet or deep-sided pan.)
Love all things apple pie? We do, too! Don’t miss our Apple Pie Bars and Apple Pie Moonshine.
Easy Apple Pie Recipe: A Timeless Classic, Simplified
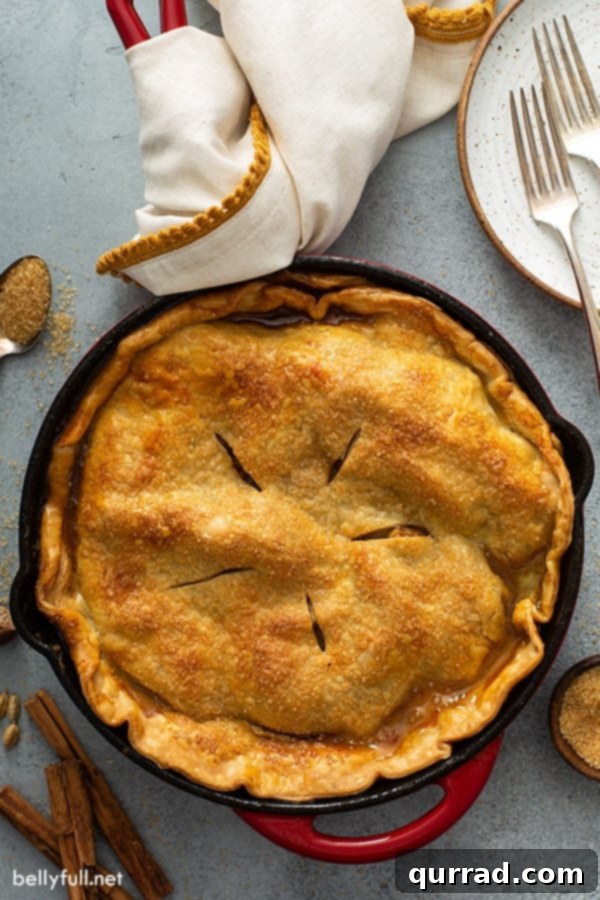
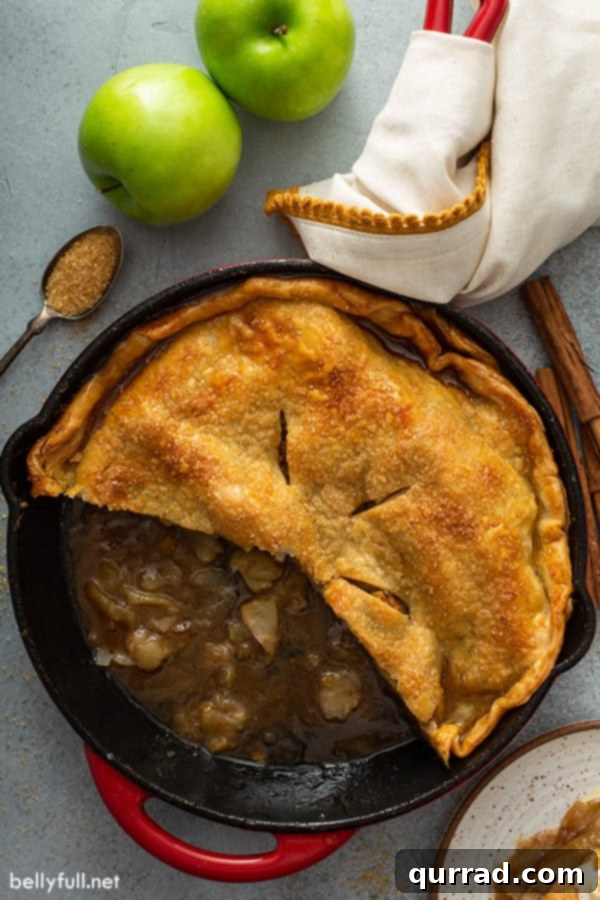
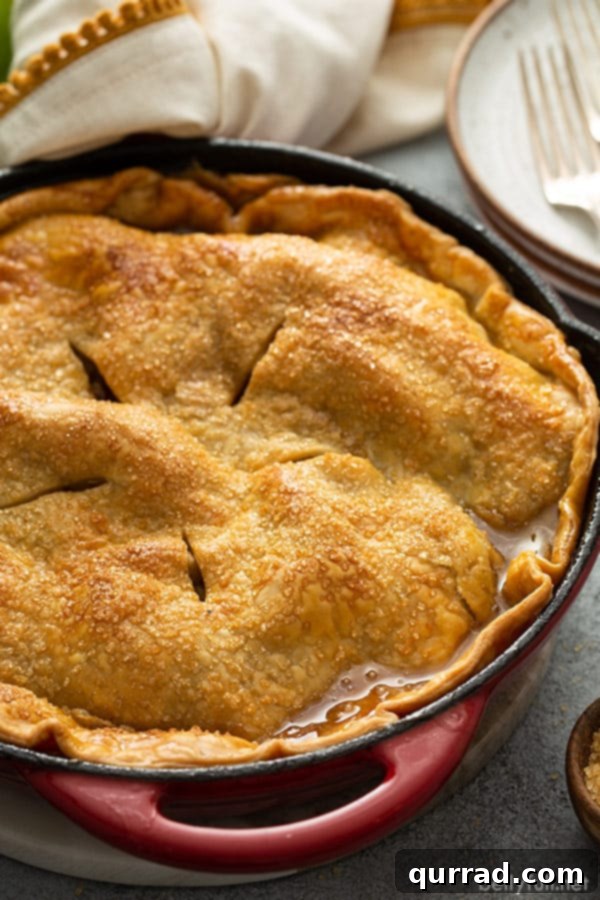
Few desserts capture the essence of home and comfort quite like a perfectly baked apple pie. While it might seem daunting, our easy apple pie recipe makes this culinary dream a reality for even the most novice bakers. What sets this particular recipe apart is its unique preparation in a cast iron skillet. This innovative approach yields a pie with tender, spice-coated apples, a luscious toffee-like sauce beneath the bottom crust, and an unparalleled crisp, golden-brown crust that’s truly a delight in every amazing bite.
Why Bake Apple Pie in a Cast Iron Skillet? Unlock the Crispiest Crust
As much as I appreciate specialized kitchen gadgets, a home cook truly only needs a good set of knives and a collection of high-quality pots and pans. However, I would strongly urge everyone to add two more items to their essential arsenal: a grill (because grilled food is undeniably amazing) and a versatile cast iron skillet. There’s nothing quite like the unique flavor and texture of food cooked in an iron skillet. It’s the secret behind favorites like my homemade cornbread, a perfectly seared skillet steak, rustic Irish soda bread, and, of course, this incredibly easy apple pie recipe.
Baking your apple pie in a cast iron skillet offers several distinct advantages that elevate it from good to outstanding. The heavy, even heat distribution of cast iron ensures that your pie crust cooks thoroughly and consistently, resulting in an exquisitely crisp, golden bottom that’s never soggy. This method also helps to create a unique, almost caramelized crust on the bottom, thanks to the brown sugar and butter layer, adding a depth of flavor and a wonderful textural contrast to the tender apple filling. Beyond its practical benefits, a cast iron skillet naturally lends a charming, rustic aesthetic to your pie, making it an impressive and heartwarming centerpiece for any gathering. And for those who don’t yet own a cast iron skillet, don’t despair! While a 12-inch cast iron skillet will deliver optimal results, this recipe is incredibly adaptable and can still be made successfully in another oven-safe skillet or deep-sided baking pan of similar dimensions.
The Anatomy of Our Perfect Skillet Apple Pie
This isn’t just any apple pie; it’s a carefully crafted symphony of flavors and textures designed to deliver pure indulgence with every forkful. Each component plays a vital role in creating a dessert that tastes like a treasured family recipe, yet remains surprisingly straightforward to prepare. We begin with a truly unique foundation: a rich, buttery brown sugar layer that melts and caramelizes into a luscious, toffee-like sauce directly beneath the bottom crust as it bakes. This unexpected twist provides an incredible depth of flavor and a hint of chewy sweetness that truly sets this pie apart from traditional versions.
Next, a generous, thick middle layer of tender, perfectly spiced apples takes center stage. These apples are meticulously tossed in a balanced blend of granulated sugar, flour, and aromatic apple pie spice, ensuring they soften to perfection while beautifully maintaining their shape, preventing any mushiness or watery filling. A decadent drizzle of our homemade (or high-quality store-bought) caramel sauce then weaves its way through the apple filling, adding an extra layer of gooey sweetness that perfectly complements the natural tartness of the fruit. Finally, the pie is crowned with a second flaky crust, lovingly brushed with an egg wash to achieve a beautiful golden sheen, and sprinkled with coarse turbinado sugar for an added crunch and sparkling finish. The combination of these layers creates a dessert that is not only visually stunning with its simple rustic charm but also utterly irresistible. Serve it warm with a generous scoop of vanilla bean ice cream, and you’ll discover what we mean by “pure nirvana” with every single bite.
What Are the Best Apples for Apple Pie? The Heart of Your Dessert
Choosing the right apples is a pivotal step in crafting a truly exceptional apple pie. For this recipe, you want apples that are firm enough to withstand the baking process, softening to a tender texture without dissolving into an unappetizing mush. My unwavering preference for this easy apple pie recipe is Granny Smith apples. Their distinctive tart flavor provides an ideal counterpoint to the inherent sweetness of the caramel and the added sugars, resulting in a perfectly balanced flavor profile that is both bright and deeply comforting. Moreover, their robust texture ensures they hold their form beautifully under the heat of the oven.
While Granny Smiths are my top recommendation, several other apple varieties also excel in baking and can be used interchangeably or in combination. Excellent alternatives include Braeburn, Jonagold, and Honeycrisp apples, all known for their superb texture and well-rounded flavor. For an even more complex and nuanced pie, don’t hesitate to experiment by combining two or three different apple varieties. This approach can introduce a wonderful range of flavors and textures, significantly enhancing the overall eating experience. Regardless of the varieties you choose, ensure your apples are consistently prepared: peeled, cored, and uniformly sliced. I typically aim for slices between 1/4 to 1/2-inch in thickness. Slices that are too thin tend to break down excessively during baking, leading to a mushy texture, while overly thick slices may not become tender enough within the recommended baking time. Uniform slicing is key to achieving even cooking and a consistent, delightful bite in every piece of your pie.
Essential Ingredients for Your Easy Skillet Apple Pie
Crafting this delightful homemade apple pie requires a few simple yet crucial ingredients, each playing a vital role in achieving its irresistible flavor and texture. Here’s a detailed breakdown of what you’ll need to gather to begin your baking adventure:
- Unsalted Butter: This forms the essential foundation of our pie’s rich flavor and creates the magical toffee-like layer at the bottom. Using unsalted butter is preferred as it gives you precise control over the overall saltiness of your finished dessert, allowing the sweet and tart notes to shine.
- Sugars (Granulated and Brown Sugar): A harmonious blend of both granulated sugar and packed brown sugar is critical for achieving the perfect sweetness and depth of flavor. Granulated sugar provides a clean, pure sweetness, while brown sugar contributes a lovely hint of molasses, enhancing that classic, comforting taste profile we all adore in apple pie.
- Pie Crusts: You will need two rolled pie crusts for this double-crusted masterpiece. Whether you opt for the convenience of high-quality store-bought crusts for a quicker preparation or prefer to showcase your baking prowess with our tried-and-true homemade pie crust recipe, ensure they are unbaked and ready to be shaped and filled.
- Apples (Granny Smith Recommended): As previously discussed, selecting firm baking apples is key. Five large Granny Smith apples, meticulously peeled, cored, and uniformly sliced, are the perfect choice for this recipe. Their inherent tartness beautifully balances the sweetness of the caramel and sugars, preventing the pie from being overly cloying.
- All-Purpose Flour: A small but important amount of simple all-purpose flour is used to lightly coat the apple slices. This acts as a natural thickener for the pie filling, preventing it from becoming watery and helping to create that perfectly gooey, luscious consistency that holds its shape when sliced.
- Apple Pie Spice: This aromatic blend is what truly makes an apple pie sing with festive, warming flavors. You can either use our signature homemade apple pie spice recipe, which typically features a balanced mix of ground cinnamon, nutmeg, cardamom, and allspice, or opt for a high-quality store-bought blend for convenience.
- Caramel Sauce: A generous drizzle of caramel sauce is incorporated into the apple filling, adding an irresistible layer of sweet, gooey richness. While homemade caramel sauce is wonderfully decadent and surprisingly easy to make, a good quality store-bought version works just as beautifully to enhance the pie’s overall appeal.
- Egg Wash: This simple mixture consists of one large egg beaten with just 1 teaspoon of water or milk. It is brushed over the top crust before baking and is the secret to achieving that gorgeous, appetizing golden-brown color and a subtle, attractive sheen on your finished pie.
- Turbinado Sugar: Also known as raw sugar, this coarse-grained sugar is sprinkled generously over the top crust. It not only provides a delicate hint of extra sweetness but, more importantly, adds a fantastic textural crunch and a sparkling finish, making each bite even more satisfying.
- Vanilla Ice Cream: (Optional, but highly recommended!) The perfect accompaniment for serving, providing a cool, creamy contrast to the warm, spiced apple pie.
Tips for Baking the Best Skillet Apple Pie
Achieving a truly remarkable apple pie involves mastering its four core components: the filling, the crust, the spice mixture, and the caramel sauce. Here are some expert tips to ensure your easy skillet apple pie turns out perfectly golden, crisp, and utterly delicious every single time:
- Apple Pie Filling Perfection: While I wholeheartedly adore my homemade apple pie filling for many applications, for this particular skillet pie, I strongly recommend using uncooked, freshly sliced apples. Simply toss them in the sugar, flour, and apple pie spice mixture. This method is crucial because it prevents the apples from becoming overly mushy during baking and ensures your pie won’t have a watery consistency, delivering that ideal tender-yet-firm apple texture. Save the pre-cooked filling for other delightful treats like apple hand pies instead!
- The Secret to a Flaky Pie Crust: A flaky, tender crust is paramount to any great pie. You can certainly use our detailed homemade pie crust recipe for this pie (you’ll need two crusts for this double-crusted creation). Alternatively, a 14-ounce package of good quality rolled, unbaked pie crusts offers a fantastic shortcut without sacrificing too much on texture. If making your own, remember that keeping your butter and water very cold is the ultimate secret to achieving unparalleled flakiness.
- The Magic of Apple Pie Spice: The aromatic blend that coats your apples is what truly makes an apple pie sing. Our recommended homemade apple pie spice typically includes a harmonious combination of ground cinnamon, nutmeg, cardamom, and allspice – a symphony of warm, inviting flavors. Making your own ensures peak freshness and allows you to customize the blend to your exact preference, though a quality store-bought version is also perfectly acceptable and convenient.
- Irresistible Caramel Sauce: I always endeavor to keep a batch of my homemade caramel sauce in my fridge because it’s surprisingly easy to make and adds an incredible richness and depth of flavor to so many desserts. However, if you’re pressed for time or simply prefer the convenience, don’t hesitate to use a high-quality store-bought caramel sauce. The goal is that luscious, gooey sweetness that complements the apples so beautifully!
- Don’t Overmix Your Dough: (Especially if making homemade crust) If you’re preparing your own pie crust from scratch, it’s vital to mix the dough as minimally as possible. Overworking the dough develops gluten excessively, which can lead to a tough, chewy crust rather than the desired tender, flaky texture.
- Chill Your Crust for Success: Whether you’re using homemade or store-bought pie crusts, chilling them before baking is a crucial step. This helps prevent the crust from shrinking excessively in the oven and maintains its structural integrity, ultimately contributing to a much flakier and more robust texture.
- Vent Your Pie Adequately: Always remember to make several small slits or decorative cuts in the top crust before baking. These vents are essential for allowing steam to escape from the hot apple filling during the baking process. Proper venting prevents the pie from potentially bursting and ensures that the apples cook evenly and thoroughly.
- The Importance of Resting Time: After the pie emerges golden and bubbly from the oven, it’s incredibly tempting to cut into it immediately. However, resisting this urge is critical! Allowing the pie to rest for at least 45 minutes to an hour after baking enables the hot filling to set properly. This crucial step prevents a runny, messy pie and ensures you achieve perfectly clean, beautiful slices that hold their shape.
How to Make the Best Easy Apple Pie: Step-by-Step Instructions
Once you’ve gathered all your essential ingredients and prepped your various components, it’s time to bring this delicious and visually stunning skillet apple pie to life. Follow these straightforward, step-by-step instructions for a truly rewarding baking experience that culminates in a dessert everyone will rave about:
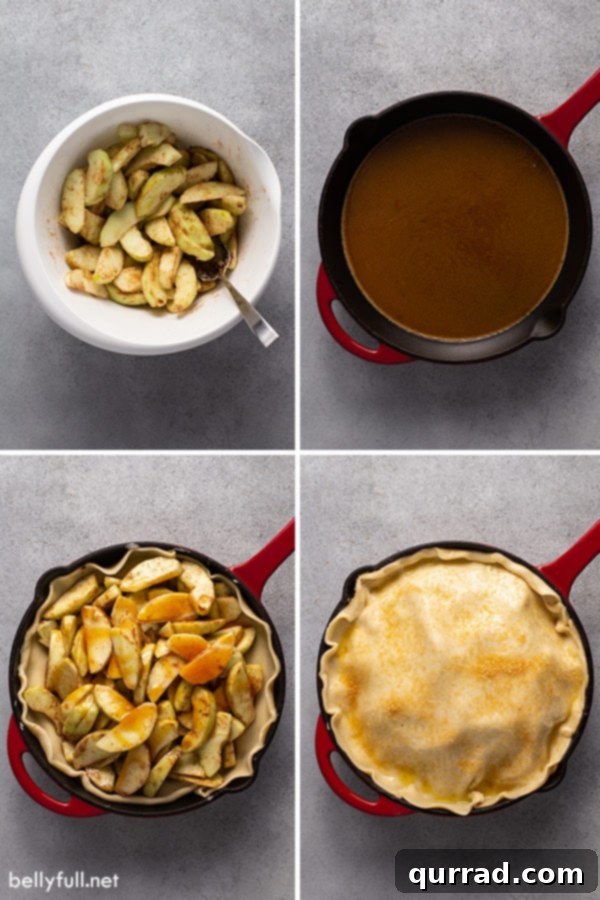
- Preheat Oven & Prepare Skillet Base: Begin by preheating your oven to a precise 350 degrees F (175 degrees C). In the bottom of a 12-inch cast iron skillet, combine the melted unsalted butter and the packed brown sugar. Whisk these two ingredients together thoroughly until they are well combined and the bottom of the pan is evenly coated. This mixture will transform into our unique and delicious toffee-like base as it bakes.
- Partial Bake the Bottom Crust: Carefully take one of your prepared pie crusts and gently lay it directly on top of the butter-sugar mixture in the skillet. It’s important not to press it down forcefully into the mixture; just allow it to settle and cover the bottom. Transfer the skillet to your preheated oven and bake for exactly 10 minutes. This crucial par-baking step helps to create that desired crisp, non-soggy bottom crust, preventing it from becoming damp from the filling.
- Prepare the Apple Filling: While your bottom crust is undergoing its partial bake, take this opportunity to prepare your delicious apple filling. In a large mixing bowl, combine your peeled, cored, and uniformly sliced apples with the granulated sugar, all-purpose flour, and apple pie spice. Toss all these ingredients together meticulously until all the apple slices are thoroughly and evenly coated with the spice and sugar mixture.
- Assemble the Filling: Once the initial 10-minute par-baking is complete, carefully remove the hot skillet from the oven. Arrange the coated apple slices evenly and attractively over the partially baked hot crust in the skillet. Then, generously drizzle the caramel sauce over the entire apple filling. The caramel will melt slightly into the apples, creating pockets of gooey sweetness.
- Add Top Crust & Seal: Gently lay the remaining pie crust over the mound of apples, positioning it carefully. Proceed to tuck the edges of the top crust down, allowing them to meet and connect with the bottom crust along the inner walls of the skillet. You can crimp the edges together for a traditional, decorative finish, or simply press them firmly to ensure a good seal, keeping all that delicious filling inside.
- Egg Wash & Sugar Topping: In a small bowl, whisk together the large egg with 1 teaspoon of water or milk to create an effective egg wash. Using a pastry brush, evenly brush this mixture over the entire top surface of the pie crust. This will give your pie a beautiful golden hue. Immediately after, sprinkle the turbinado sugar generously over the egg-washed crust for a delightful crunch and an attractive, sparkling finish.
- Vent the Pie: Using a sharp knife, make several small slits or decorative cuts in the top crust. These vents are absolutely essential as they allow steam to escape from the hot apple filling during the baking process, which prevents the pie from potentially bursting and ensures that the apples cook evenly and thoroughly throughout.
- Bake to Golden Perfection: Carefully return the skillet to the preheated oven. Bake for approximately 45-50 minutes, or until the top crust is a beautiful, deep golden brown, and you can see the apple filling bubbling enticingly through the vents. This bubbling indicates that the apples are tender and the filling is perfectly cooked.
- Rest Before Serving: This step is critical for a perfect pie! Once baked, remove the pie from the oven and, as tempting as it may be, let it rest for at least 1 hour (preferably longer) before attempting to slice it. This crucial resting period allows the hot filling to cool down and set properly, preventing it from being too runny and ensuring you achieve perfectly clean, beautiful slices that hold their shape.
- Enjoy! Serve your magnificent homemade skillet apple pie warm, ideally accompanied by a generous scoop of creamy vanilla ice cream. Pure bliss awaits with every bite!
Don’t have a cast iron skillet? No Problem!
While a 12-inch cast iron skillet provides the optimal rustic charm and incredibly crisp crust that truly makes this easy apple pie recipe shine, don’t let its absence deter you. You can absolutely make this delicious dessert in another oven-safe skillet or a deep-sided round baking pan of similar dimensions. Just keep an eye on the baking time, as it might vary slightly, and aim for that beautiful golden crust!
How to Store and Freeze Your Apple Pie: Maximize Freshness
One of the many delightful qualities of apple pie is that it often tastes even better the next day, as the flavors meld and deepen. Knowing how to properly store your pie ensures you can savor every last crumb and enjoy its homemade goodness for longer.
Does apple pie need to be refrigerated? Not immediately. Because this is a fruit pie made without eggs or high volumes of dairy (unlike a delicate custard pie), it can comfortably sit out on your kitchen counter at room temperature for up to 2 days. To protect it from air exposure and keep it fresh, simply tent it loosely with aluminum foil or plastic wrap. After these initial two days, to extend its freshness and ensure food safety, it is recommended to transfer it to the refrigerator.
How long does apple pie last? When stored correctly, a freshly baked apple pie will last for up to 4 days. If you’ve already allowed it to sit out at room temperature for a couple of days, transferring it to the fridge will typically grant you an additional 2-3 days of delicious enjoyment. Always ensure it’s covered securely to prevent it from drying out or absorbing any unwanted odors from other foods in your refrigerator.
Can you freeze apple pie? Absolutely! Apple pie freezes exceptionally well, making it a fantastic make-ahead dessert or a convenient treat to enjoy whenever a craving strikes. For the best freezing results, I highly recommend removing the pie from the cast iron skillet once it has cooled completely to room temperature. This step is practical as it prevents the heavy skillet from taking up valuable freezer space and makes the pie much easier to wrap securely. First, wrap the entire cooled pie tightly in several layers of plastic wrap, ensuring that no air can penetrate, which is key to preventing freezer burn. Then, wrap it again in a layer of heavy-duty aluminum foil for an extra layer of protection. For added security, you can transfer the double-wrapped pie to a large freezer-safe container or a dedicated freezer bag. Your apple pie will keep beautifully in the freezer for up to 3 months. When you’re ready to enjoy it, simply thaw the pie in the refrigerator overnight. Once thawed, you can gently reheat it in a preheated oven at 350°F (175°C) for about 20-30 minutes, or until warmed through, to regain that freshly baked taste and crisp crust.
More Delicious & Easy Apple Desserts to Try
If you’re an apple enthusiast like us, you’ll love exploring these other fantastic apple-based dessert recipes. Each one offers a unique and delightful way to celebrate the wonderful flavors of apples, from classic comforting dishes to creative twists:
- Warm & Cozy Apple Cobbler
- Easy Apple Crisp with Oat Topping
- Baked Apple Cider Donuts: A Fall Favorite
- Air Fryer Apple Hand Pies: Perfect Portable Treats
- Simple & Sweet Baked Apples
- Apple Pie Bars: Deconstructed Delight
Easy Skillet Apple Pie Recipe
This easy apple pie recipe is a quick and simple dessert, with tender apple pie spice-coated fruit, a toffee-like sauce, and a wonderfully crisp crust from baking in a cast iron skillet. Every bite is amazing!
Prep Time: 20 mins
Cook Time: 50 mins
Total Time: 1 hr 10 mins
Servings: 8

Pin Recipe
Print Recipe
Equipment
- 12-inch cast iron skillet
Ingredients
- 1/2 cup unsalted butter, melted
- 1/2 cup packed brown sugar
- 2 homemade pie crusts (or a 14 ounce package rolled, unbaked pie crusts)
- 5 large Granny Smith Apples, peeled, cored, and sliced
- 1/4 cup granulated sugar
- 2 teaspoons all-purpose flour
- 2 teaspoons apple pie spice
- 2 tablespoons caramel sauce
- 1 large egg, beaten with 1 teaspoon water or milk (for egg wash)
- 2 teaspoons Turbinado sugar
- Vanilla ice cream, for serving (optional)
Instructions
- Preheat oven to 350 degrees F (175 degrees C).
- Place the melted butter and brown sugar in a 12-inch cast iron skillet; whisk to combine and coat the bottom of the pan. Carefully lay 1 pie crust on top of the butter mixture (do not press down). Transfer to the oven for 10 minutes.
- In the meantime, toss together the apple slices, granulated sugar, all-purpose flour, and apple pie spice in a large bowl until all slices are thoroughly coated.
- Arrange apple slices on top of the partially baked hot crust. Drizzle generously with the caramel sauce.
- Lay the remaining pie crust on top of the apples. Gently tuck the top crust down to meet the bottom crust along the skillet walls, pressing to seal.
- Brush the top crust evenly with the prepared egg wash and sprinkle with the turbinado sugar.
- Make a few slits in the top crust to allow steam to escape during baking.
- Bake in the preheated oven for 45-50 minutes, or until the top crust is golden brown and the apples are bubbly and tender.
- Let the pie rest for at least 1 hour before slicing. This crucial step allows the filling to set properly, ensuring beautiful, clean slices.
- Serve warm with a scoop of vanilla ice cream and enjoy!
Note: A 12-inch cast iron skillet will deliver optimal results for this apple pie recipe, but if you don’t have one, it can be made successfully in another oven-safe skillet or a deep-sided round baking pan.
Video: How to Make Skillet Apple Pie
A video showing the step-by-step process of making this easy skillet apple pie will go here.
Nutrition Facts (per serving)
Calories: 493kcal | Carbohydrates: 65g | Protein: 4g | Fat: 25g | Saturated Fat: 12g | Cholesterol: 54mg | Sodium: 236mg | Potassium: 197mg | Fiber: 4g | Sugar: 32g | Vitamin A: 450IU | Vitamin C: 5mg | Calcium: 41mg | Iron: 2mg
Nutritional information provided is an estimate and can vary based on the exact products used and any modifications to the recipe. If precise nutritional values are important, please calculate them yourself.
Did you make this delicious skillet apple pie? We’d love to hear your thoughts and see your creations! Please leave a rating and comment below.
I hope you love this delicious and simple recipe – be sure to give it a review below! Also don’t forget to follow Belly Full on Facebook, Instagram, Pinterest, and YouTube!