
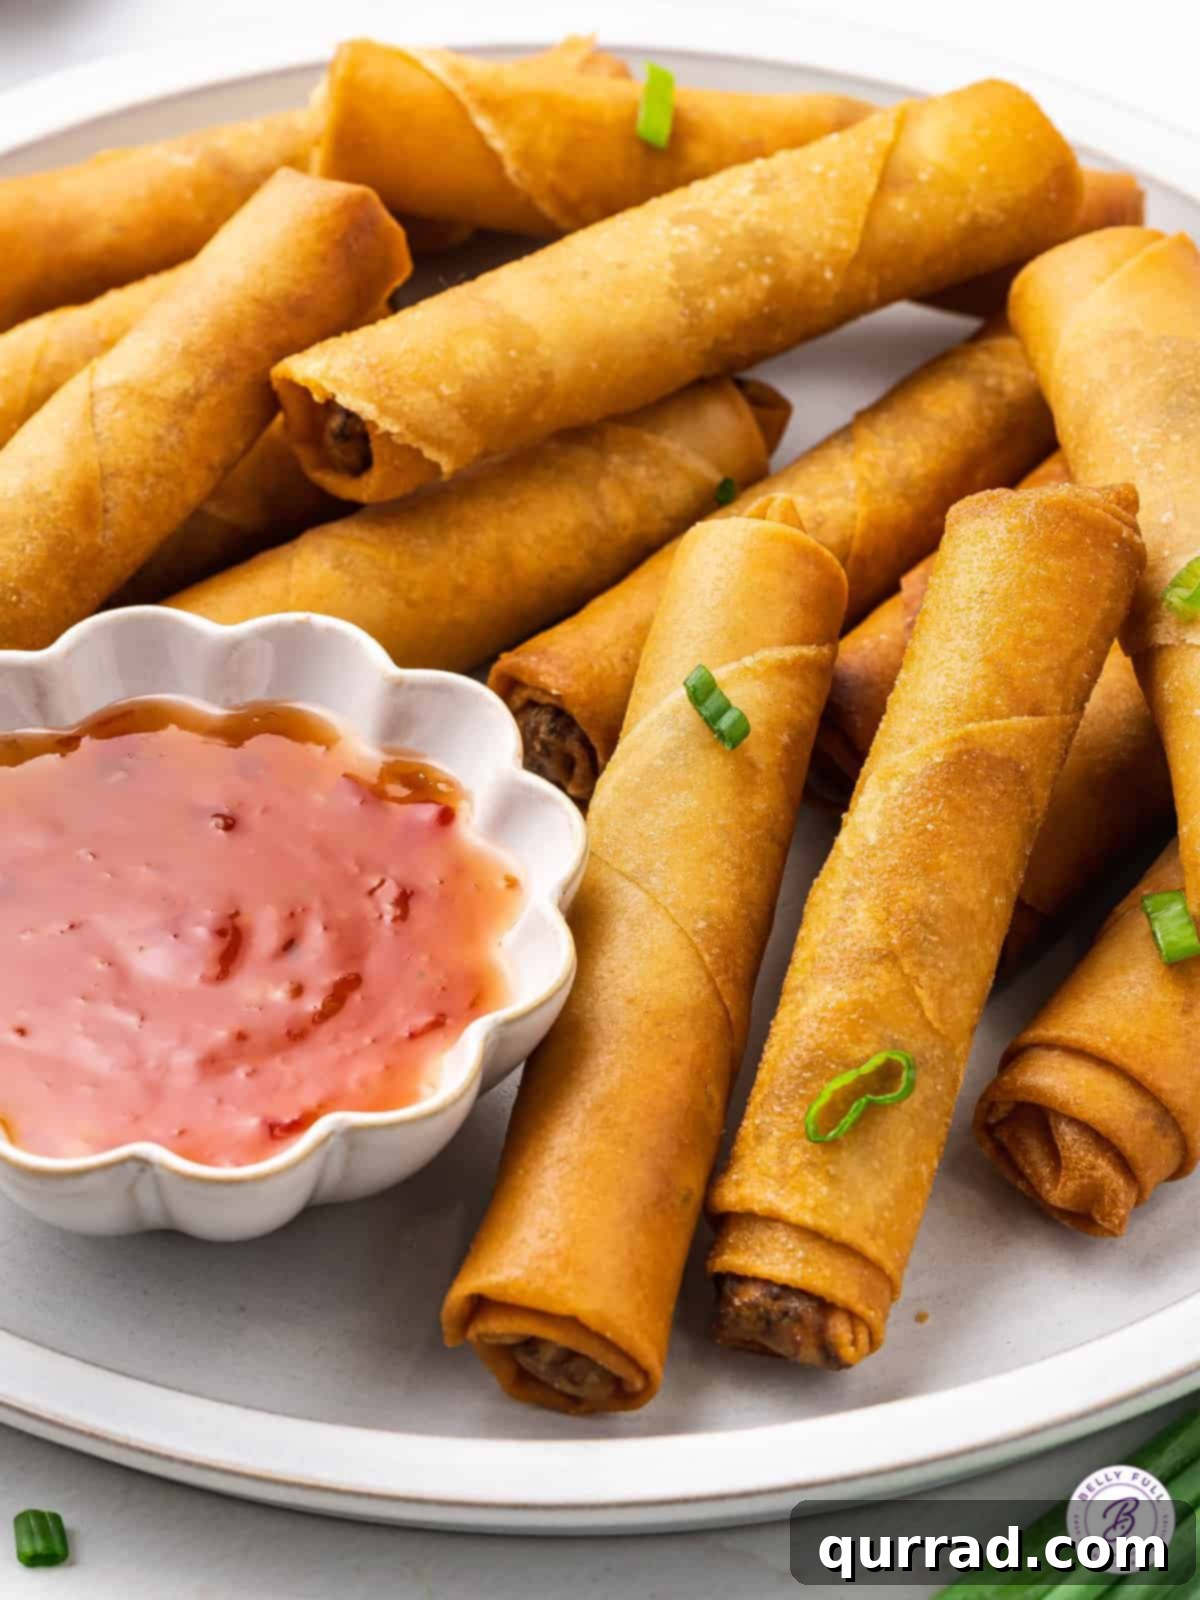
There’s an undeniable magic in that first bite of perfectly cooked lumpia – the crisp, golden wrapper giving way to a savory, seasoned filling. It’s a culinary experience that captivates, reminiscent of the best Filipino restaurants. This authentic lumpia recipe aims to bring that exact experience straight to your kitchen. Filled with a delightful blend of seasoned ground pork and finely diced vegetables, each roll is fried to crispy perfection, promising a taste that rivals your favorite Filipino eatery. Served ideally with a side of sweet chili sauce for dipping, these lumpia are not just food; they’re a celebration of flavor and tradition.
⭐⭐⭐⭐⭐ “So good!!!” – Jen
Crafting the Perfect Authentic Filipino Lumpia Recipe
If you’ve ever dreamt of recreating that unmistakable taste of perfectly seasoned, shatteringly crispy lumpia found at your local Filipino restaurant, then today is your lucky day! This guide will unlock the secrets to crafting a truly authentic batch of these beloved Filipino spring rolls right in your home kitchen. We delve into the traditional methods and essential ingredients that define a stellar lumpia, ensuring every bite is a delightful journey to the heart of Filipino cuisine.
This particular recipe for Filipino lumpia, often referred to as Lumpia Shanghai, holds a special place, graciously shared with me by the mother of my daughter’s best friend, a wonderful woman deeply rooted in Filipino culinary traditions. We’ve enhanced this cherished family recipe with specific vegetable additions and seasonings, detailed below, to achieve an unparalleled depth of flavor and texture that truly stands out. It’s more than just a recipe; it’s a culinary heirloom adapted for home cooks seeking genuine taste.
Lumpia is a cornerstone of Filipino gastronomy, a delightful variation of the widely recognized spring roll or egg roll. While they share similarities with their Asian counterparts, lumpia are characteristically longer and notably thinner, wrapped in delicate, ultra-thin wrappers that crisp up beautifully when fried. The beauty of lumpia lies in its versatility, with numerous regional variations across the Philippines, each boasting unique fillings and seasoning profiles. From savory pork and vegetable combinations to sweet dessert versions, the world of lumpia is vast and exciting.
As we explore these tantalizing Southeast Asian flavors, you might also find yourself craving another Filipino favorite: our authentic Filipino pancit recipe. Pairing these two dishes makes for an unforgettable feast!
Essential Tips for Perfect Lumpia
Achieving restaurant-quality lumpia requires attention to detail. Here are some invaluable tips to ensure your lumpia turn out flawlessly crispy and delicious every time:
- Always Have Extra Wrappers on Hand: Lumpia wrappers are delicate. It’s wise to have a few extra on standby in case one tears during handling, or if you find yourself with a surplus of delicious filling. This saves you from mid-prep frustrations and ensures a smooth rolling process.
- Choosing the Right Wrapper: While specialized lumpia wrappers offer the best authentic texture, good quality egg roll wrappers can be a suitable substitute if lumpia wrappers are hard to find. For an authentic lumpia aesthetic, consider trimming the square egg roll wrappers into a more rectangular shape, which will help achieve those signature long, slender rolls.
- Prevent Overcrowding When Frying: This is a golden rule for crispy results! Fry no more than 4-5 lumpia at a time, ensuring they have ample space in the pan and do not touch. Overcrowding drops the oil temperature, leading to soggy rather than crispy lumpia. Giving each roll enough space allows for even cooking and guarantees a beautiful, consistent golden color on all sides.
- Maintain Optimal Oil Temperature: Use a thermometer to keep your frying oil consistently around 350°F (175°C). Too low, and your lumpia will absorb excess oil and become greasy; too high, and they’ll brown too quickly on the outside, leaving the filling undercooked. Steady temperature is key for that perfect crisp.
- Keep Wrappers Moist: Lumpia wrappers can dry out quickly, becoming brittle and prone to cracking. Keep unused wrappers covered with a damp cloth or plastic wrap while you work to maintain their flexibility.
- Chill the Filling: Allowing the cooked filling to cool completely before assembling the lumpia makes it much easier to handle and prevents the wrappers from becoming prematurely soggy or tearing.
Authentic Crispy Pork Lumpia
Prep Time: 20 minutes |
Cook Time: 20 minutes |
Total Time: 40 minutes
Yields: 30 lumpia
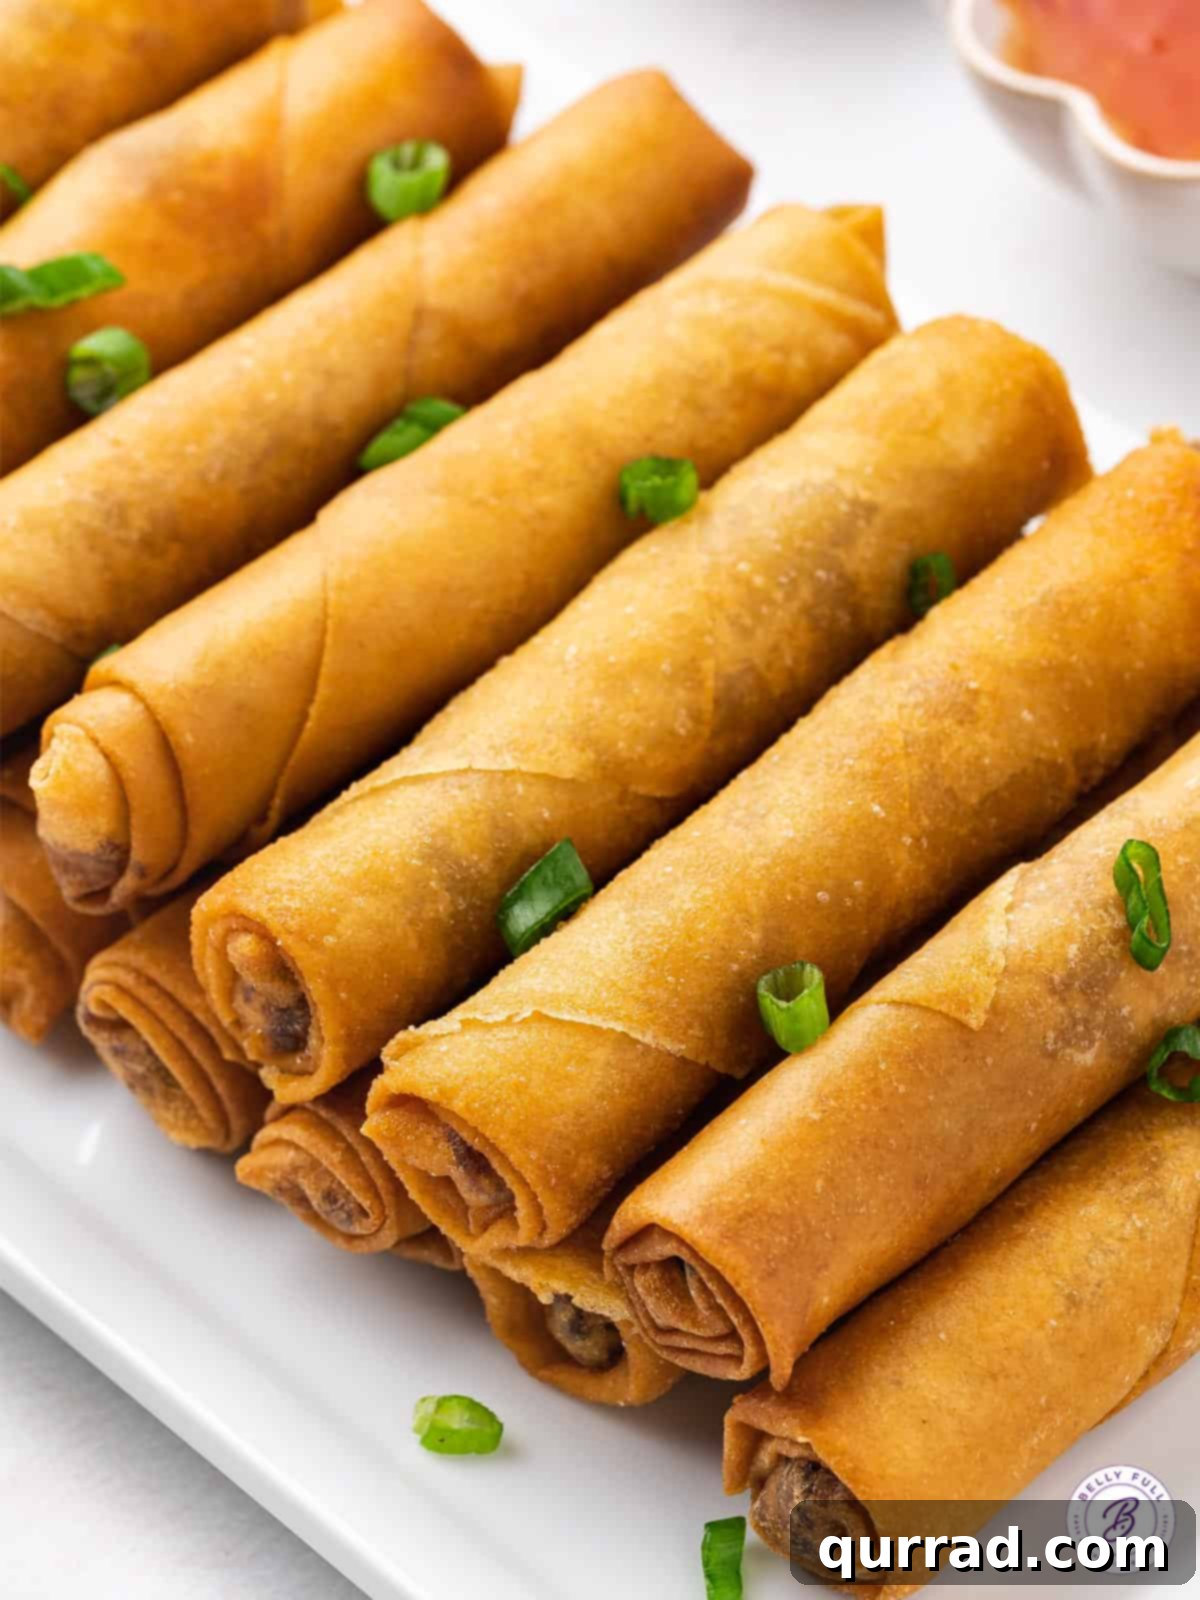
With a ground pork and finely minced veggie filling enveloped in a thin wrapper and fried to an exquisite crispy perfection, this Authentic Lumpia Recipe delivers a taste experience straight from the most cherished Filipino restaurants. The savory filling and the irresistible crunch make it an absolute crowd-pleaser. Enjoy each golden-brown bite with sweet chili sauce for dipping!
Refer to the step-by-step images provided below the recipe for visual guidance.
Ingredients
- 1 tbsp vegetable oil
- 1 lb. ground pork
- 2 cloves garlic, minced
- 1 inch fresh ginger, peeled and minced
- 1 small onion, finely minced
- 1 medium carrot, finely minced
- ½ cup thinly sliced green cabbage
- 1/3 cup finely minced water chestnuts
- 2 scallions, minced
- 1 tsp salt
- 1 tsp ground black pepper
- 1 tsp garlic powder
- 1 tbsp light soy sauce
- 1 tsp sesame oil
- 30 lumpia wrappers (or egg roll wrappers, trimmed)
- Oil, for frying (such as vegetable or canola oil)
- Sweet chili sauce, for dipping
Instructions
- Heat the vegetable oil in a large nonstick skillet over medium-high heat. Add the ground pork and cook, breaking it up into tiny crumbles with a spoon, until no pink remains, which usually takes about 5 minutes. Carefully drain off any excess grease to prevent the lumpia from becoming oily.
- Add the minced garlic and ginger to the skillet with the cooked pork. Sauté for about 20 seconds, or until they become fragrant, releasing their aromatic oils into the mixture. Be careful not to burn the garlic.
- Stir in the finely minced onion, carrots, thinly sliced cabbage, finely minced water chestnuts, and minced scallions.
- Continue to sauté the mixture for approximately 2 to 3 minutes, or until the vegetables have softened slightly but still retain a pleasant tender-crisp texture. Season the filling generously with salt, ground black pepper, garlic powder, light soy sauce, and sesame oil. Stir well to ensure all ingredients are evenly coated and flavored. Remove the skillet from the heat and allow the filling to cool completely for several minutes. This step is crucial before handling and assembling the lumpia.
- To assemble each lumpia, lay a wrapper on a clean work surface in a diamond shape, with one of the corners pointing towards you. Spoon approximately 2½ tablespoons of the cooled filling onto the bottom third of the wrapper, leaving about 1½ inches of space from the bottom point. Shape the filling into a neat, compact strip, roughly 4 to 5 inches long.
- Fold the bottom point of the wrapper tightly over the filling. Then, fold in the left and right edges towards the center, creating an ‘envelope’ shape that snugly encases the filling.
- Continue rolling the wrapper neatly and tightly upwards towards the top point. Maintain consistent tension to ensure a firm, compact roll. Stop when you have approximately 2 inches of the wrapper remaining.
- With clean fingers, lightly moisten the remaining 2 inches of the top wrapper point with a small amount of water. This acts as a natural adhesive. Finish rolling to seal the edge securely. This technique ensures your lumpia stay intact during frying. (For a more visual guide, refer to the accompanying photos or any instructional video if available.)
- Carefully transfer the assembled lumpia to a plate, placing them seam-side down to prevent unrolling. Cover the plate with plastic wrap to lock in moisture and prevent the wrappers from drying out. Repeat this process until all the filling and wrappers have been used.
- At this stage, your rolled lumpia can be frozen for future enjoyment, if desired. Alternatively, you can proceed directly to the cooking step.
- To fry, heat about 1 inch of vegetable oil in a heavy-bottomed skillet or a deep pot over medium heat for approximately 5 minutes, or until it reaches a consistent temperature of 350°F (175°C). It is important to try and maintain this temperature throughout frying to ensure the lumpia achieve a beautiful golden hue without over-browning or becoming greasy.
- Gently place about 4 lumpia into the hot oil at a time, starting with the seam-side down. Ensure they are not touching each other to allow for even cooking. Fry for 1 to 2 minutes per side, rotating carefully, until each lumpia is evenly golden brown and wonderfully crispy.
- Once cooked, transfer the golden lumpia to a plate generously lined with paper towels to drain any excess oil. This step is essential for maintaining their crispness.
- Serve your freshly fried lumpia immediately with your preferred sweet chili sauce! Enjoy the delightful crunch and savory flavors.
Video Tutorial
For a detailed visual walkthrough of the lumpia preparation and rolling technique, we highly recommend watching our instructional video. It offers clear demonstrations of each step, ensuring you master the art of making perfect lumpia.
Nutritional Information
Serving: 1 lumpia | Calories: 84kcal | Carbohydrates: 9g | Protein: 4g | Fat: 4g | Saturated Fat: 1g | Polyunsaturated Fat: 0.4g | Monounsaturated Fat: 2g | Cholesterol: 12mg | Sodium: 196mg | Potassium: 77mg | Fiber: 1g | Sugar: 0.4g | Vitamin A: 352IU | Vitamin C: 1mg | Calcium: 11mg | Iron: 1mg
Nutritional information provided is an automatic calculation and may vary based on the specific products you use and any modifications made to the recipe. If precise dietary figures are critical for you, we strongly recommend calculating them independently using your exact ingredients.
How to Make Lumpia: A Detailed Visual Guide
Making lumpia from scratch is a rewarding experience, and with our step-by-step guide, complete with visual aids, you’ll feel like a seasoned chef in no time. Follow along to create these crispy, flavorful Filipino delights.
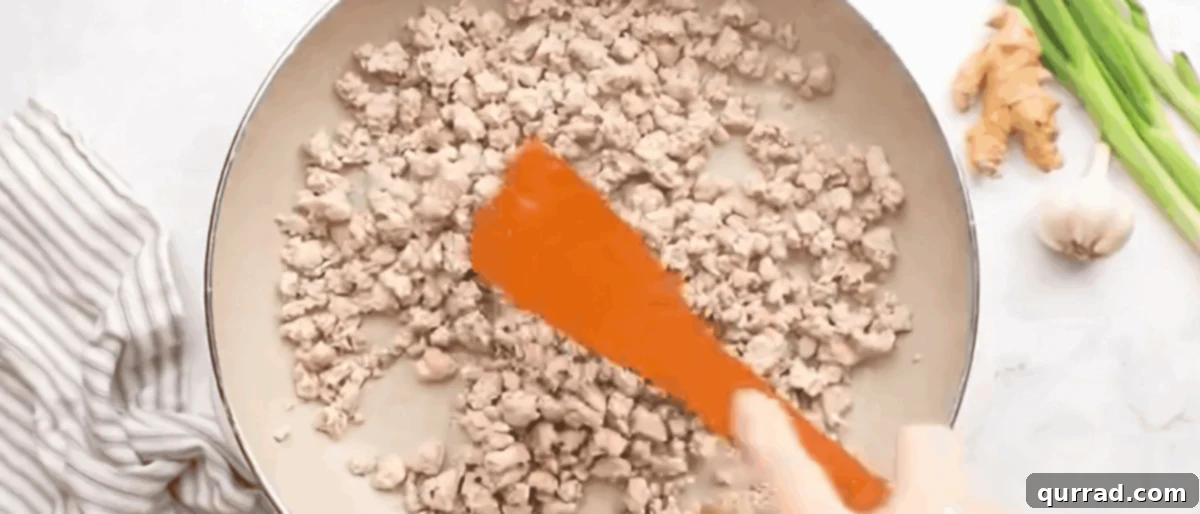
Step-by-Step 1: Cook the Pork to Perfection. Begin by heating the vegetable oil in a sturdy nonstick skillet over medium-high heat. Introduce the ground pork, breaking it into tiny, uniform crumbles as it cooks. Stir continuously to ensure even browning until absolutely no pink remains, typically around 5 minutes. This diligent browning is essential for developing deep flavor. After cooking, carefully drain any rendered grease from the skillet. This prevents your filling from becoming excessively oily and ensures a cleaner, more enjoyable texture in the finished lumpia. Next, add the finely minced garlic and fresh ginger to the pork in the skillet. Sauté for a brief 20 seconds, just enough time for their potent aromas to release and meld with the pork, infusing the filling with an irresistible fragrance. Be mindful not to let the garlic burn, as this can impart a bitter taste.
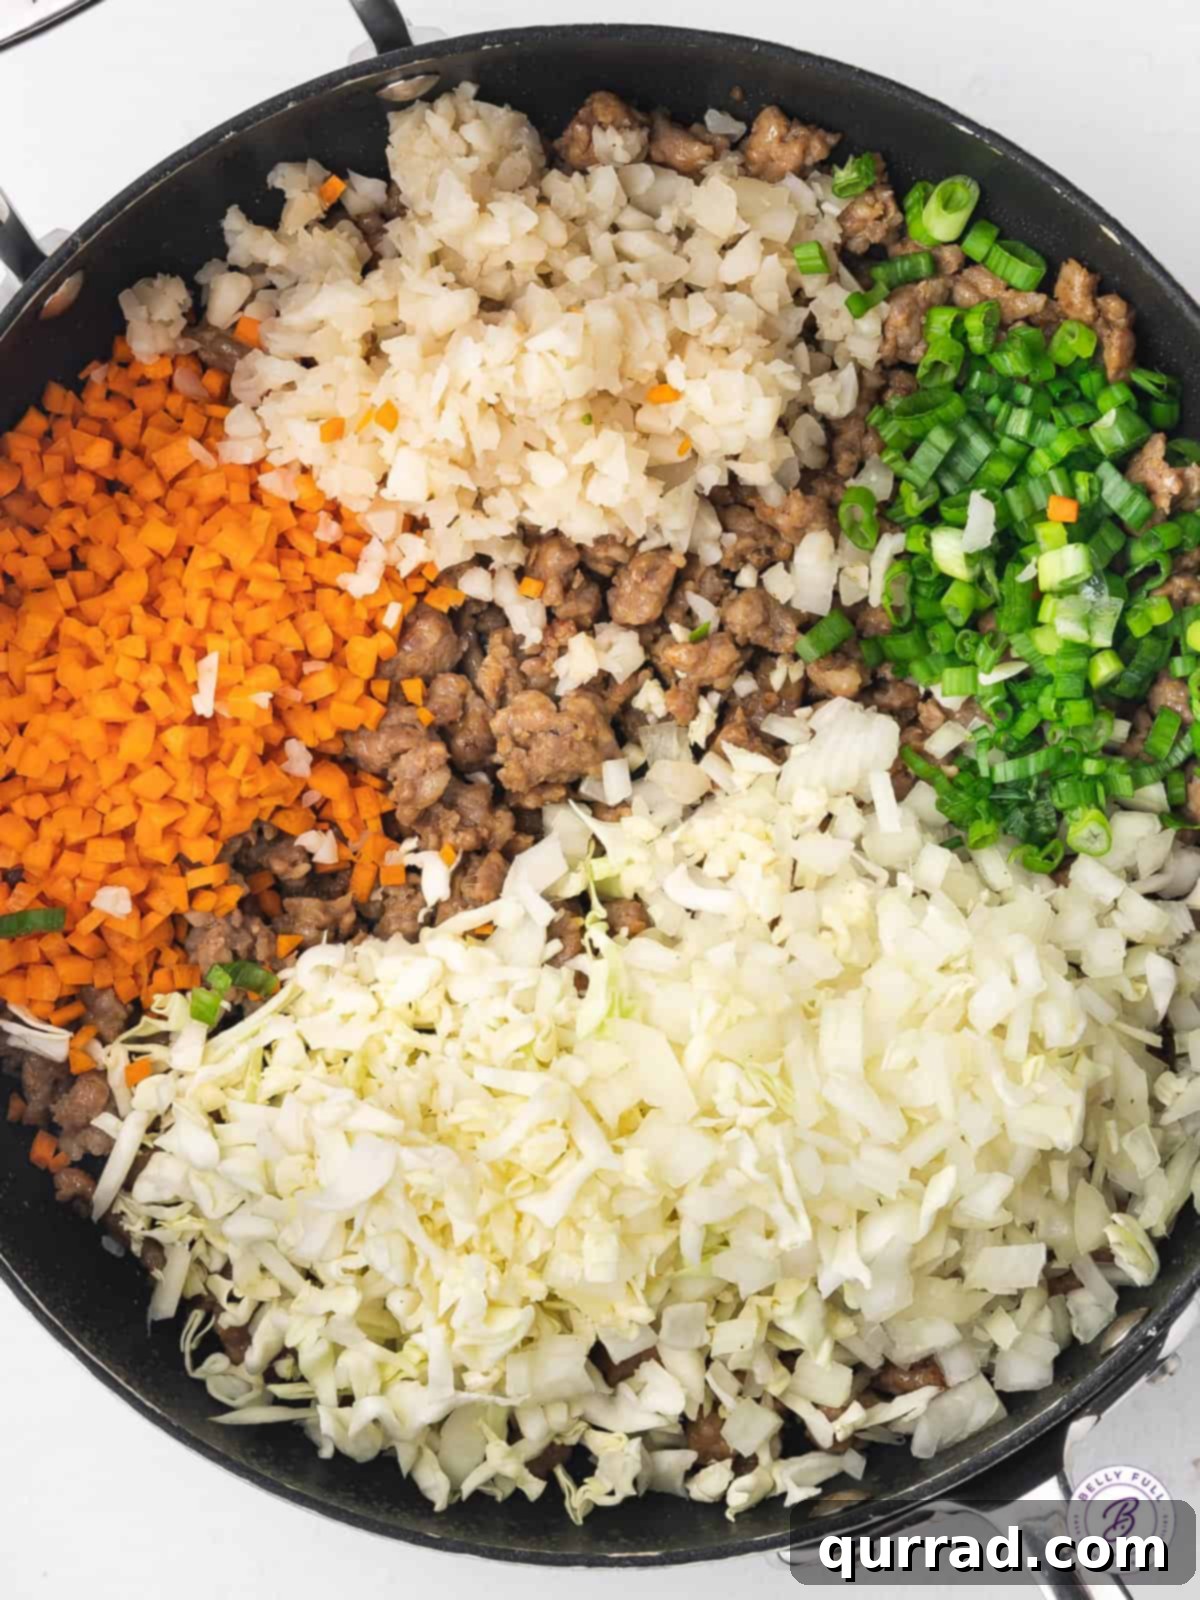
Step-by-Step 2: Incorporating and Seasoning the Vegetables. Once your pork and aromatics are fragrant, it’s time to introduce the vibrant medley of vegetables. Stir in the finely minced onion, shredded carrots, thinly sliced green cabbage, crunchy water chestnuts, and fresh scallions. Sauté these vegetables for approximately 2 to 3 minutes, or until they achieve a tender-crisp consistency. You want them cooked through but still retaining a slight bite, adding textural complexity to the filling. Following this, generously season the mixture with salt, ground black pepper, garlic powder, light soy sauce, and a hint of sesame oil. These seasonings are crucial for developing the authentic Filipino flavor profile. Mix thoroughly to ensure the spices are evenly distributed throughout the filling. Remove the skillet from the heat immediately and let the filling cool down completely. This cooling process is vital; attempting to roll hot filling can make the delicate wrappers soggy or cause them to tear, making assembly difficult.
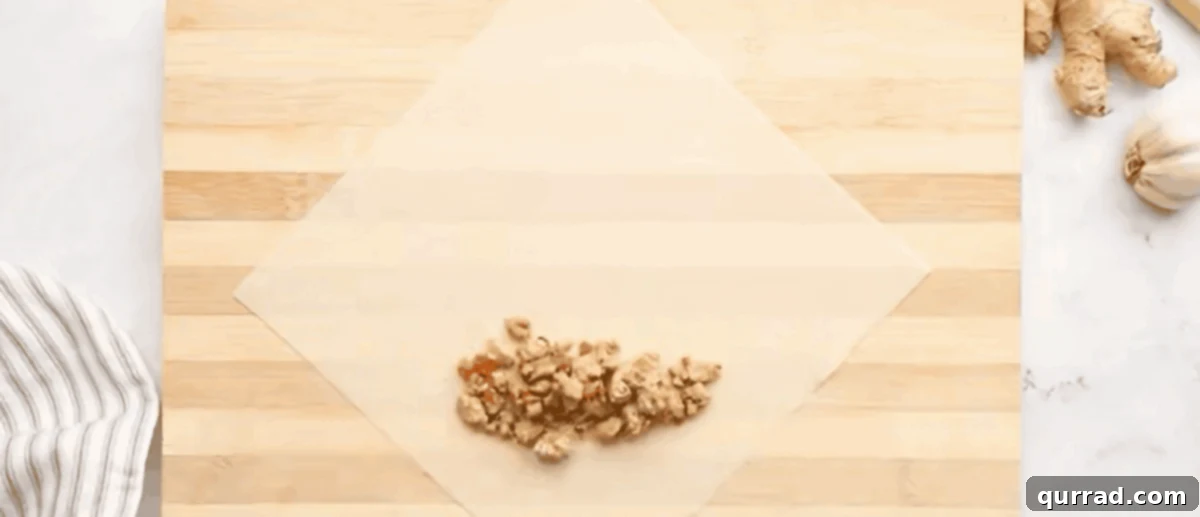
Step-by-Step 3: The Art of Assembling Lumpia – Initial Placement. Lay a single lumpia wrapper on a clean, dry work surface, orienting it in a diamond shape so one of the corners points directly towards you. This orientation is key for the traditional rolling method. Carefully spoon about 2½ tablespoons of the cooled filling onto the bottom third of the wrapper. Ensure you leave a margin of approximately 1½ inches of clear wrapper from the bottom point. This space is essential for the initial fold and creates a neat, sealed end. Take a moment to gently shape the filling into a compact, even strip, roughly 4 to 5 inches in length. This uniform shape will help you achieve a consistently rolled lumpia. Resist the urge to overfill, as too much filling can make rolling difficult and lead to burst wrappers during frying.
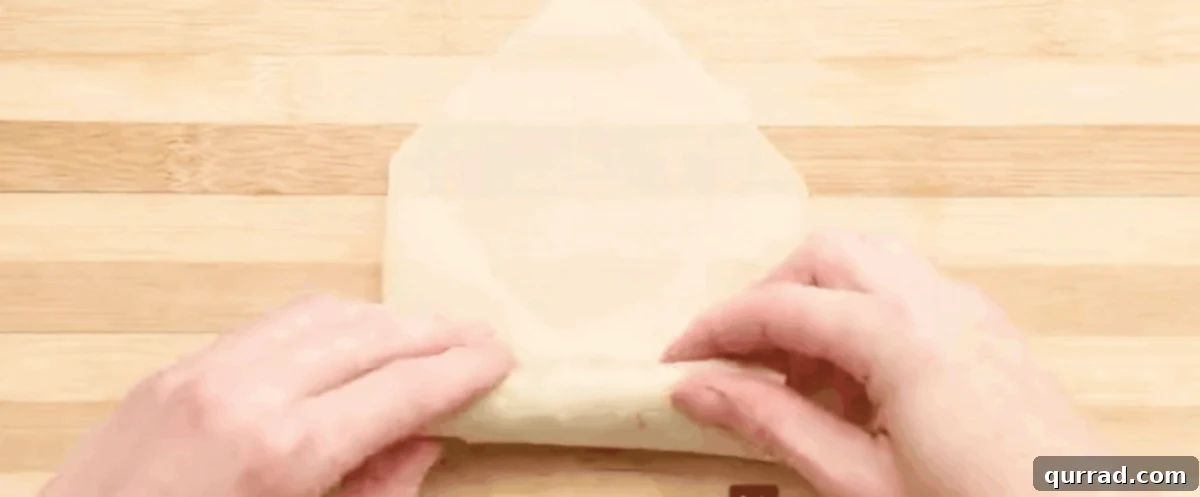
Step-by-Step 4: The Envelope Fold and Tight Roll. Once the filling is positioned, take the bottom point of the wrapper and fold it tightly over the filling, tucking it in to create a secure base. Immediately after, fold in the left and right edges of the wrapper towards the center. This creates a classic ‘envelope’ shape, encasing the filling snugly from the sides. Now, continue rolling the wrapper neatly and tightly upwards, moving towards the top point. The key here is to maintain consistent tension throughout the roll; a tight roll prevents air pockets and ensures the lumpia holds its shape beautifully while frying. Continue this rolling motion until you have about 2 inches of the top wrapper point remaining unrolled.
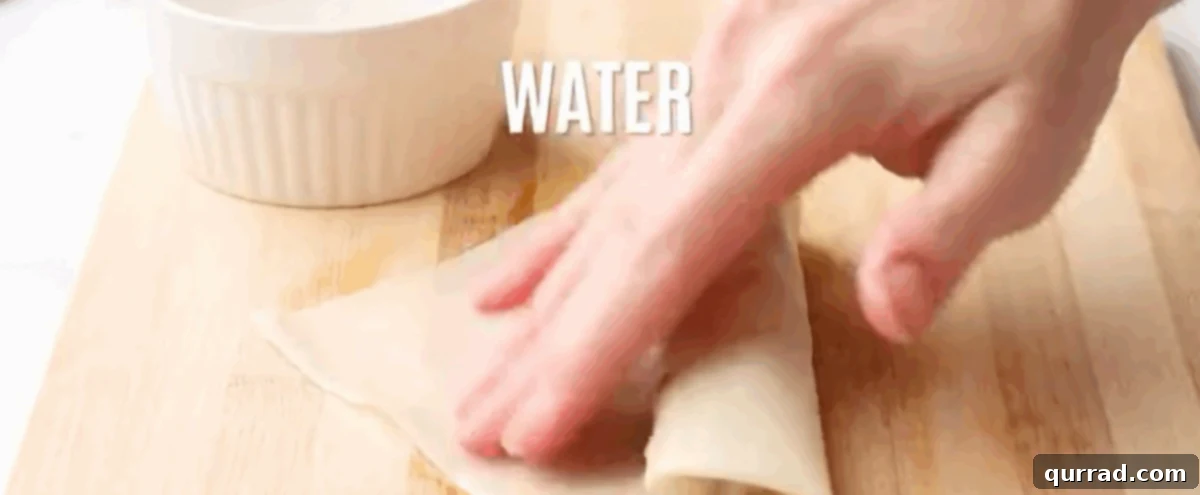
Step-by-Step 5: The Final Seal for Security. With clean fingers, lightly moisten the remaining 2 inches of the top wrapper point with a small amount of water. This thin layer of water acts as a natural adhesive, creating a strong seal. Finish rolling the lumpia, pressing down gently to ensure the edge is securely sealed. This critical step prevents the lumpia from unraveling during the cooking process. Once rolled, transfer the finished lumpia to a plate, placing it seam-side down to help maintain its sealed form. Cover the plate loosely with plastic wrap to prevent the delicate wrappers from drying out while you continue assembling the rest. Repeat these meticulous steps until all the delicious filling and wrappers have been used. At this juncture, you have the option to either cook your freshly prepared lumpia immediately or freeze them for later enjoyment.
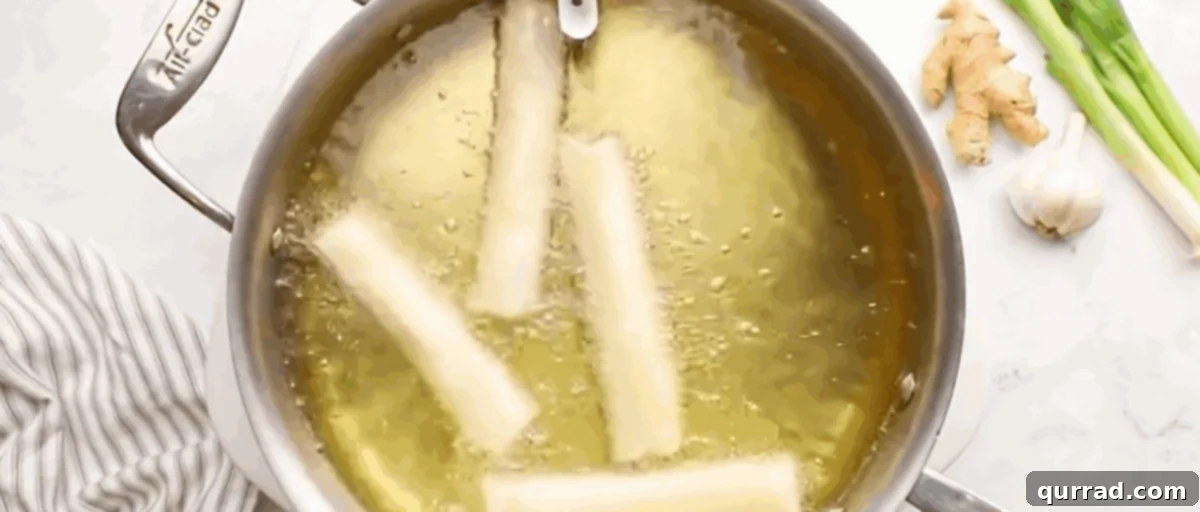
Step-by-Step 6: Frying to Golden Perfection. To achieve that signature crispy exterior, heat about 1 inch of your chosen vegetable or canola oil in a sturdy, heavy-bottomed skillet or a deep pot. Set the heat to medium and allow the oil to warm for approximately 5 minutes, or until it reaches a consistent temperature of 350°F (175°C). Using a kitchen thermometer is highly recommended here, as maintaining this precise temperature is crucial. It ensures the lumpia cook through and turn golden without over-browning or becoming greasy. Gently place about 4 lumpia into the hot oil at a time, always starting with the seam-side down to help seal it further. Ensure there is ample space between each roll; overcrowding the pan will cause the oil temperature to drop significantly, resulting in soggy lumpia. Fry each batch for 1 to 2 minutes per side, carefully turning them with tongs, until they are beautifully golden brown and irresistibly crispy on all surfaces.
Step-by-Step 7: Blotting for Extra Crispiness. As each batch of lumpia finishes frying, promptly transfer them to a plate generously lined with paper towels. The paper towels will absorb any residual oil, ensuring your lumpia remain incredibly crisp and not greasy. This small but important step makes a big difference in the final texture.
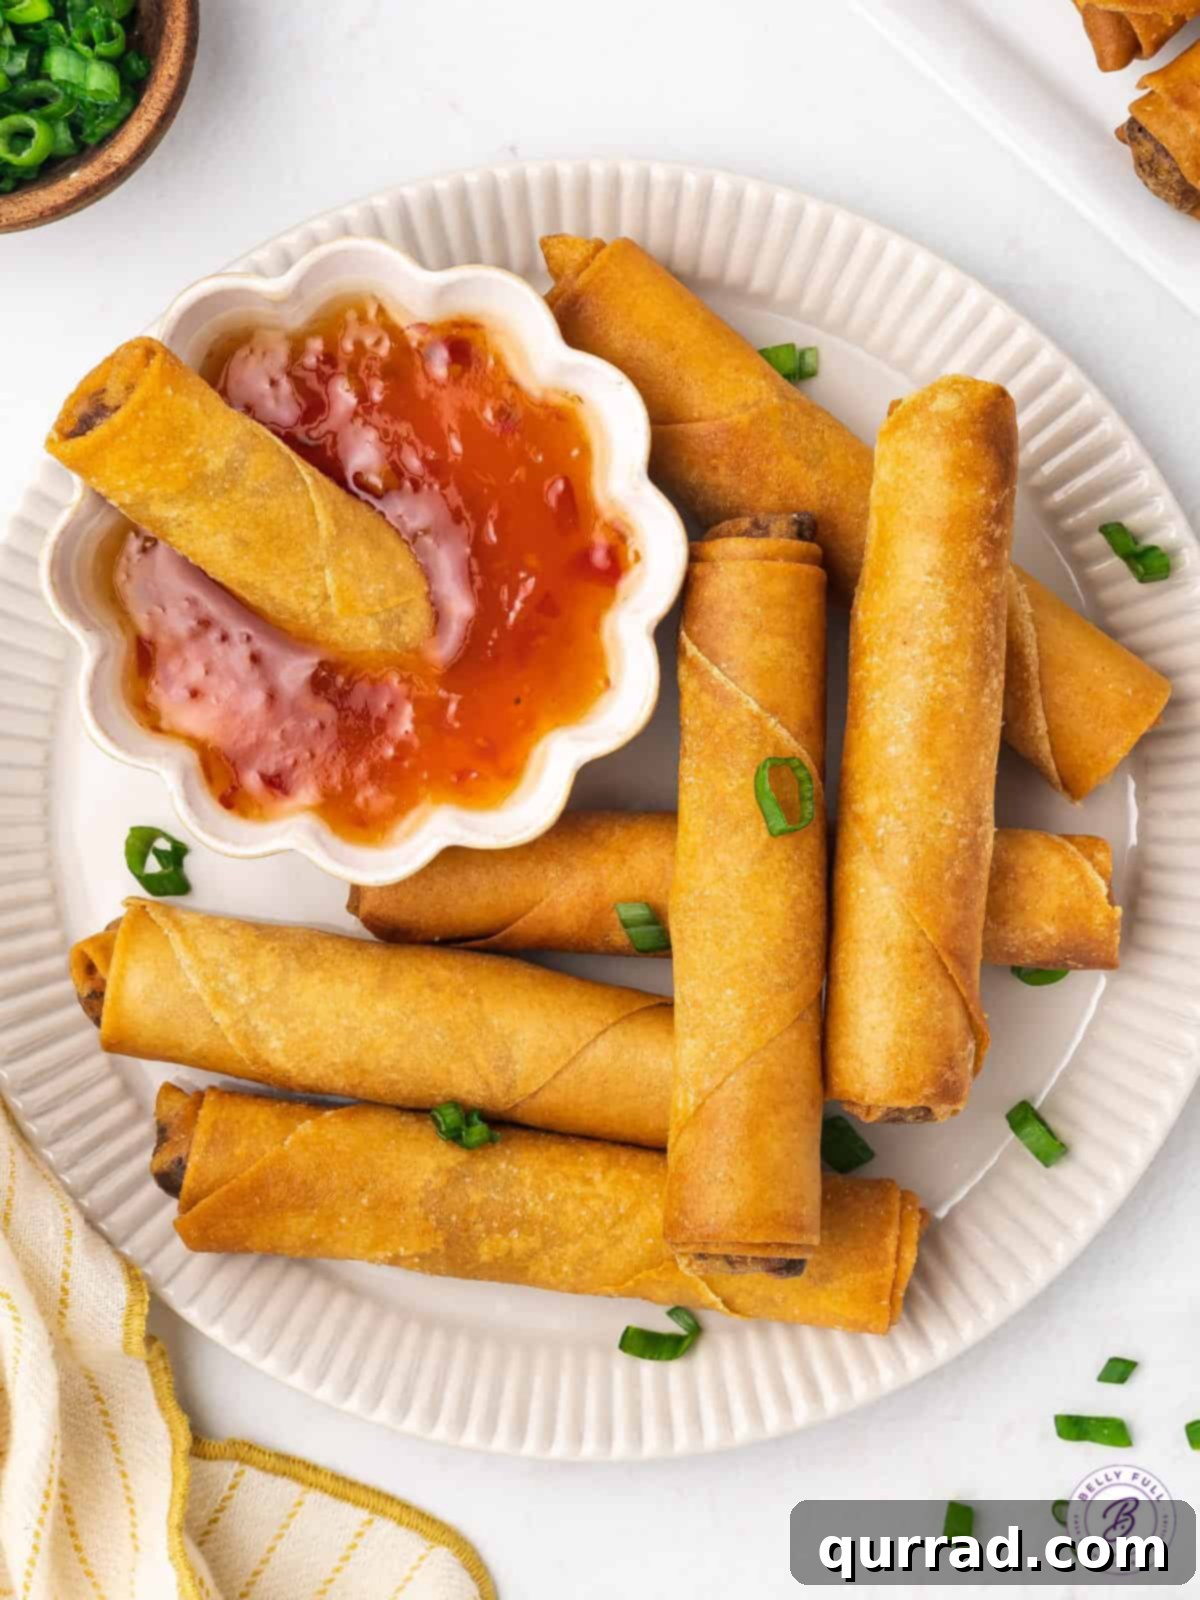
Step-by-Step 8: Serve and Enjoy! The ultimate moment! Serve your perfectly crispy, golden-brown lumpia immediately after they’ve been blotted. This ensures you experience them at their peak texture and flavor. The classic accompaniment is a vibrant sweet chili sauce, which provides a delightful balance to the savory filling. Prepare to savor every delicious bite!
Exploring Lumpia Cooking Variations
While deep-frying yields the most traditional and undeniably crispy lumpia, there are excellent alternative cooking methods for those seeking a lighter approach or simply wishing to avoid the frying process. Here’s how you can bake or air fry your lumpia:
- Baking Lumpia in the Oven: For a less oily option, baking is a fantastic alternative. Before wrapping each lumpia, lightly spray the entire wrapper with a thin layer of oil (a cooking spray works wonders here). Once the lumpia are fully assembled, give them another generous spray of oil on the exterior. This double oiling is crucial, as it helps achieve a crispy, puffed-up wrapper during baking; skipping it can result in a tough, chewy texture. Preheat your oven to 400°F (200°C). Arrange the lumpia in a single layer on a baking sheet, ensuring they don’t touch. Bake for approximately 8 minutes, then carefully flip them over and bake for an additional 6 to 8 minutes, or until they are uniformly golden brown and wonderfully crispy. Keep a close eye on them during the final minutes to prevent over-browning.
- Air Frying Lumpia for Crispiness: The air fryer is another excellent tool for creating crispy lumpia with significantly less oil. Just like with baking, generously spray both sides of each assembled lumpia with a nonstick cooking spray or brush lightly with oil. Arrange the lumpia in a single layer in your air fryer basket, ensuring they do not overlap; you may need to cook in batches. Air fry at 390°F (195°C) for an initial 5 minutes. After this time, carefully flip the lumpia and continue to air fry for another 4 to 5 minutes, or until they reach your desired level of golden crispness. The air fryer circulates hot air, mimicking the deep-fried texture beautifully.
Storing Your Lumpia for Future Enjoyment
Lumpia are fantastic for making ahead, whether you want to prepare them for a party or simply enjoy a quick snack later. Proper storage ensures they retain their quality and taste:
Storing Uncooked Lumpia: To store assembled but uncooked lumpia, arrange them in a single layer in a large freezer-safe Ziploc bag. For multiple layers, place a sheet of parchment paper between each layer to prevent sticking. Carefully squeeze out as much air as possible from the bag before sealing. Frozen uncooked lumpia can be kept for up to 3 months. When ready to cook, there’s no need to thaw! Simply cook them directly from frozen following the frying, baking, or air frying instructions, adding an extra minute or two to the cooking time to ensure they are thoroughly heated and crispy.
Storing Cooked Lumpia: Any leftover cooked lumpia can be stored in the refrigerator for a few days. For best results, wrap them tightly in plastic wrap or place them in an airtight container to prevent them from drying out or absorbing other odors. To reheat, avoid the microwave, as it will make them soggy. Instead, reheat them in the oven or air fryer until they are warmed through and regain their crispiness. While reheated lumpia may be slightly chewier than freshly fried ones, they will still retain a delightful crisp exterior, making for a satisfying snack or appetizer.
What to Serve With Your Crispy Lumpia
Lumpia, with its irresistible crunch and savory filling, is typically enjoyed as a fantastic appetizer or a delightful snack. The quintessential accompaniment is a vibrant sweet chili sauce, which offers a perfect balance of sweetness and mild heat that beautifully complements the rich pork and vegetables. However, don’t limit yourself to just one dipping option! For a classic, savory alternative, a simple soy sauce provides a salty umami kick. If you’re feeling adventurous and want to elevate your dipping experience, consider a rich and nutty savory peanut sauce or a homemade teriyaki sauce for a different flavor dimension.
To fully appreciate the delicate, crispy wrapper and warm, flavorful filling, we highly recommend serving these pork lumpia immediately after you’ve finished frying each batch. The fresh-from-the-oil crispness is truly unparalleled and makes for the best eating experience. For a more substantial meal, lumpia pairs wonderfully with other Filipino dishes like pancit (noodles) or garlic rice, creating a complete and satisfying spread that truly celebrates Filipino culinary heritage.
Discover More Asian-Inspired Recipes
If you’ve enjoyed making and savoring this authentic lumpia, we invite you to explore more delicious dishes from Asian cuisine. Expand your culinary repertoire with these enticing recipes:
- Air Fryer Crab Rangoon – Crispy, creamy, and made healthier in the air fryer.
- Fresh Spring Rolls – A light and refreshing alternative, packed with vibrant ingredients.
- Easy Wonton Soup – A comforting and flavorful classic, perfect for any occasion.
- Chinese Dumplings – Master the art of homemade dumplings with this savory recipe.