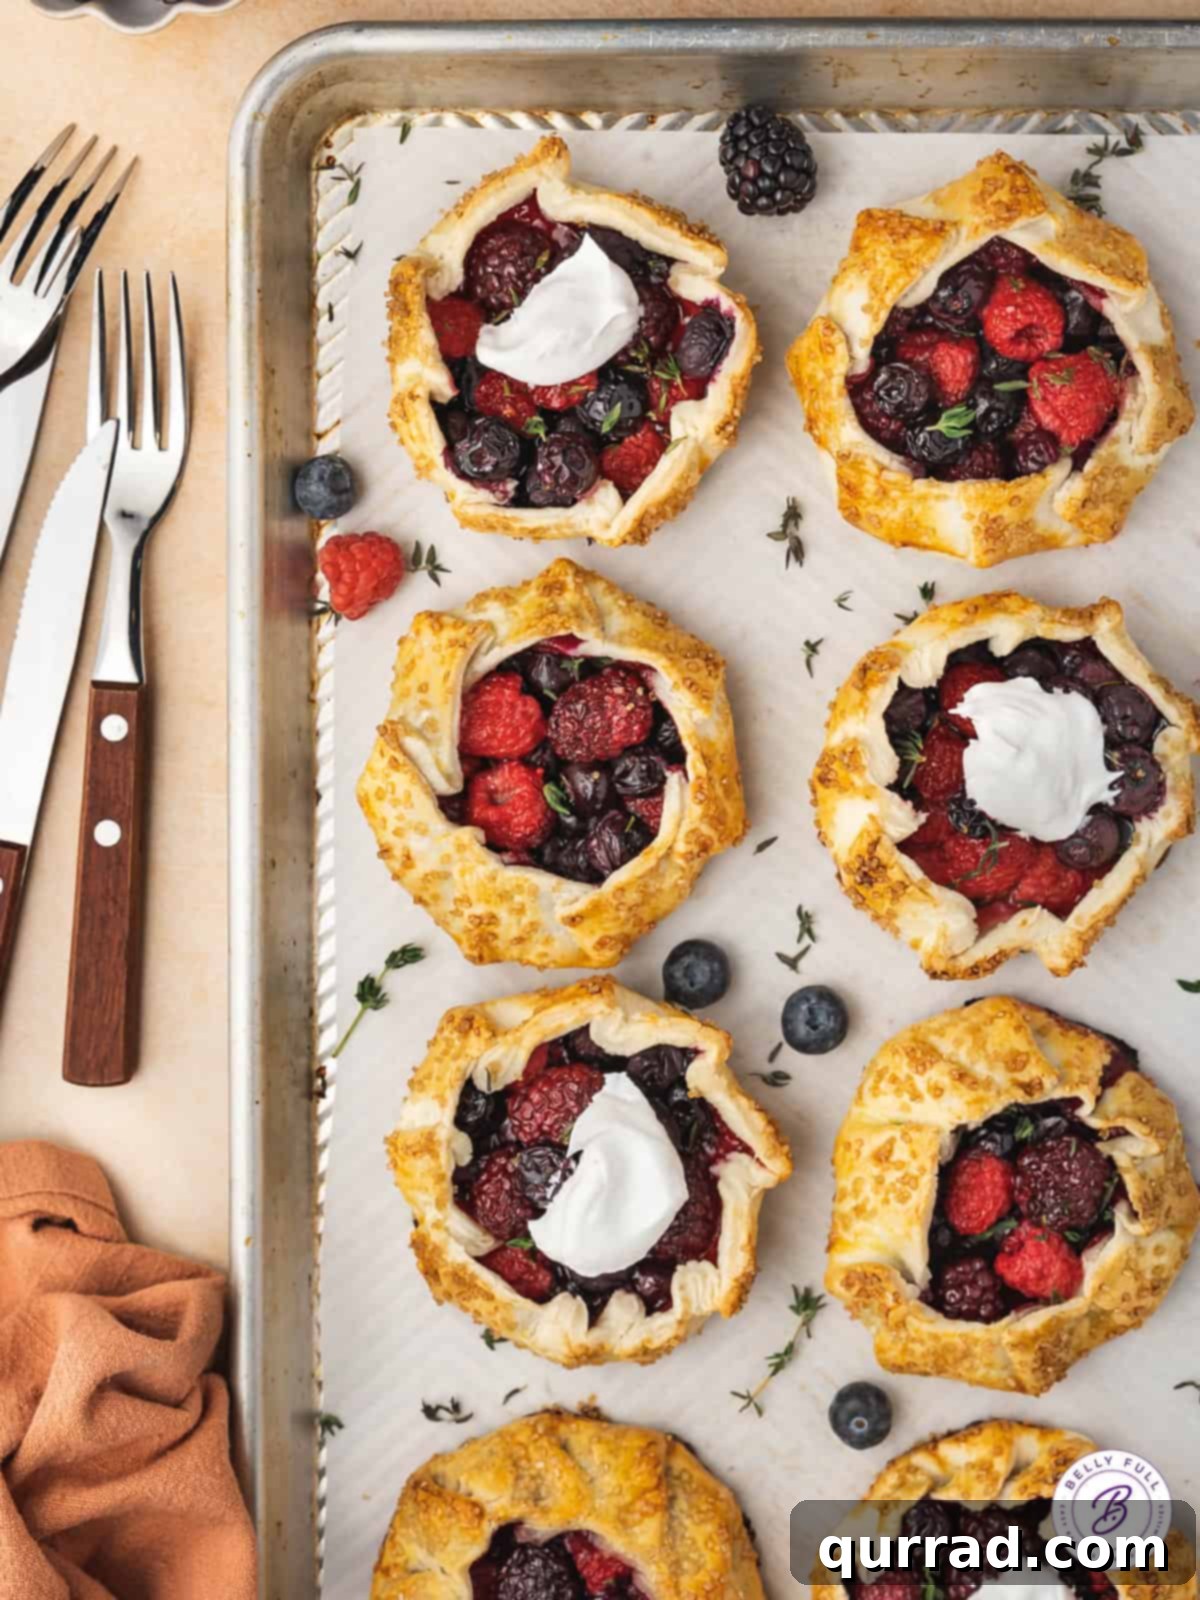
Easy Mini Mixed Berry Galettes: Your Go-To Rustic Dessert
Prepare to fall in love with these delightful Mini Mixed Berry Galettes! Crafted with a vibrant medley of fresh or frozen berries nestled within a simple refrigerated pie crust, these individual treats offer the charm of a classic French pastry without any of the fuss. Their beautiful, rustic appearance, coupled with their irresistible flavor, makes them an elegant yet incredibly easy dessert that’s guaranteed to impress your guests, whether served at a casual brunch, a sophisticated luncheon, or as a sweet ending to an evening meal.
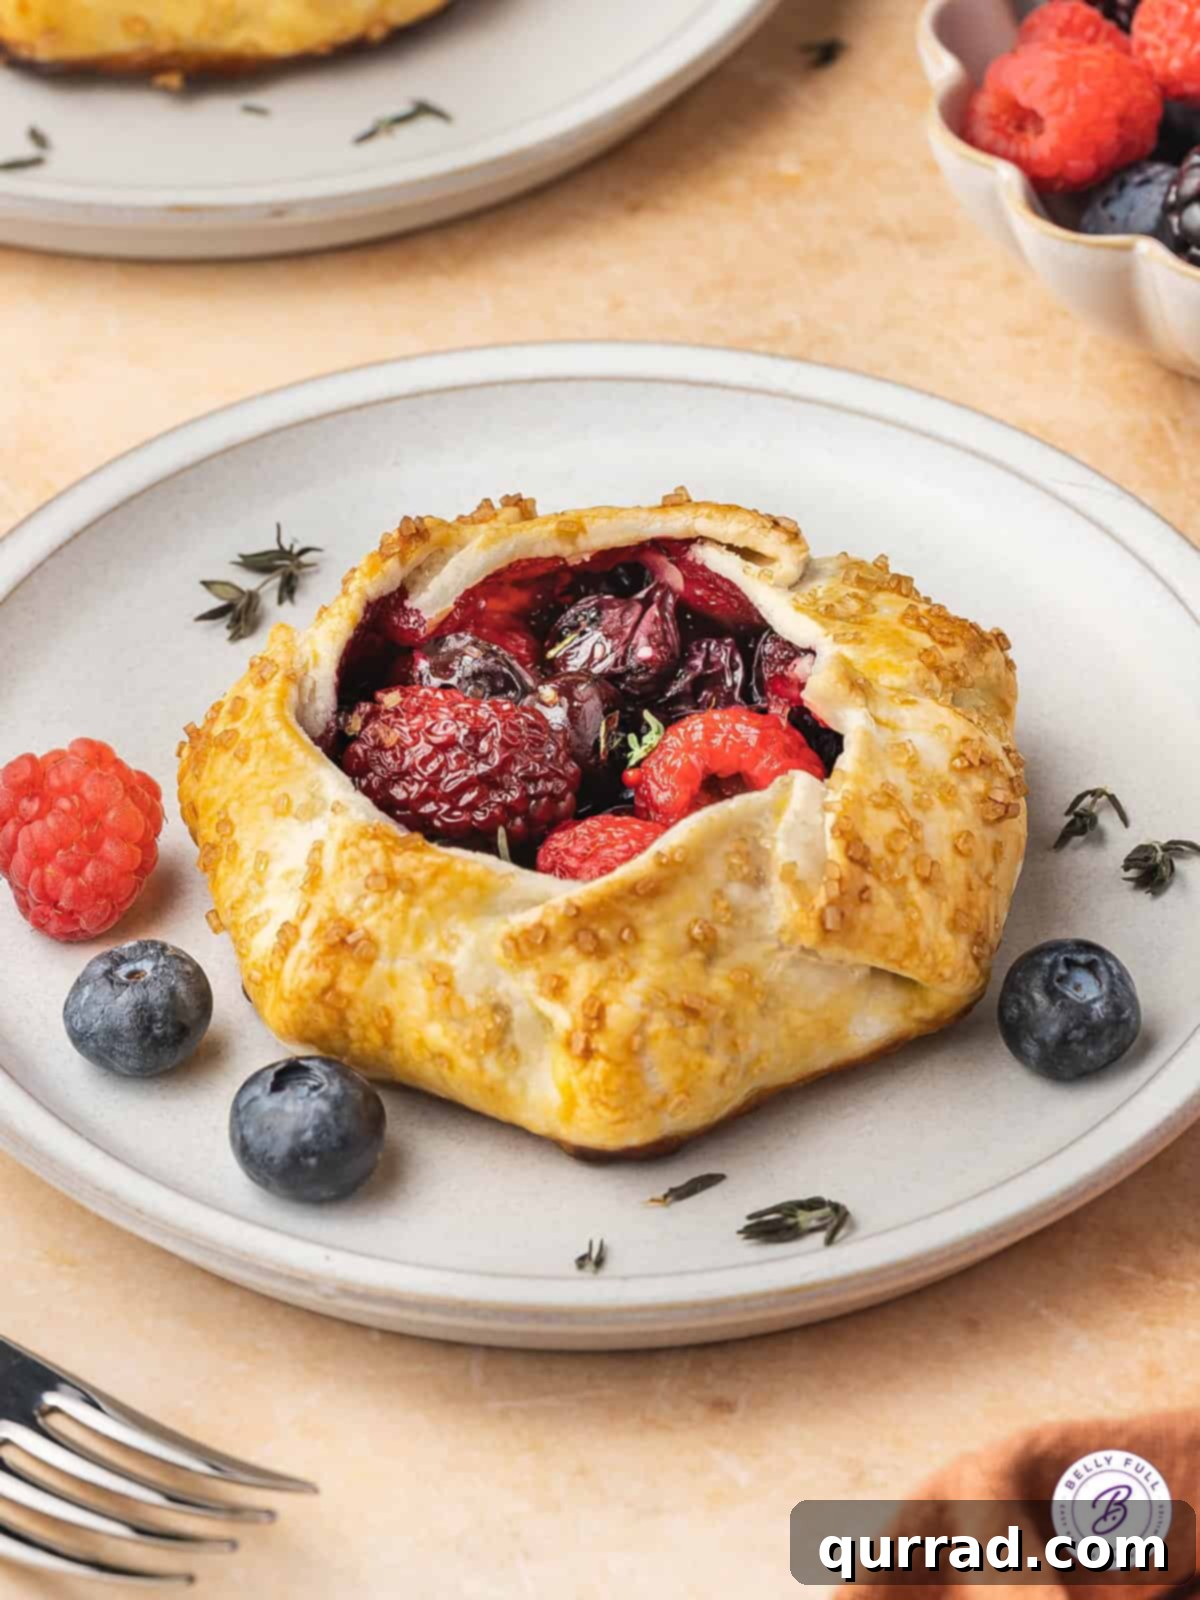
What Exactly is a Galette?
If you’re new to the world of galettes, get ready to discover your new favorite dessert! A galette is a term used in French cuisine to describe a flat, round, and often free-form cake or pastry. Think of it as a charming, less-intimidating cousin to the traditional pie. It starts with a simple pastry crust, which is then filled with a variety of sweet or savory ingredients – most commonly, fresh fruit. Unlike a pie, which requires careful crimping and often a top crust, a galette embraces a wonderfully rustic, open-faced style. The edges of the pastry are simply folded over the filling, creating an artfully imperfect, homemade look that everyone adores. This simplicity is part of its immense appeal, making it accessible even for novice bakers.
Why Choose Mixed Berries for Your Galette?
While galettes are incredibly versatile and can be filled with virtually any fruit you desire – from apples to peaches to plums – I’ve found that a mixed berry combination truly shines. The tartness of raspberries and blackberries, combined with the sweetness of strawberries and blueberries, creates a harmonious explosion of flavor that is both refreshing and deeply satisfying. This medley not only tastes incredible but also offers a beautiful spectrum of colors, making your dessert visually stunning. The beauty of this recipe lies in its flexibility; feel free to adapt the berry mix to whatever fresh, seasonal fruits you have on hand or what looks best at your local market.
The Charm of Mini Galettes: Perfect Individual Servings
Opting for mini galettes instead of a large, shared one adds an extra layer of elegance and convenience. Each galette is perfectly portioned for an individual serving, eliminating the need for slicing and ensuring everyone gets their own beautiful, personal dessert. This makes them ideal for dinner parties, where presentation matters, or for special brunches where guests can easily pick up their own sweet treat. Imagine rounding out an elegant dinner, perhaps featuring a succulent steak or delicate scallops, with these impressive yet surprisingly easy-to-make mini galettes. They provide a sophisticated finish without demanding hours in the kitchen, allowing you more time to enjoy your guests and the occasion.
Essential Tips for Perfect Mini Berry Galettes
Achieving a perfectly baked, delicious mini berry galette is simpler than you might think. Here are some invaluable tips to guide you through the process, ensuring your pastries are a resounding success every time:
- Embrace Berry Versatility: While our recipe calls for a specific mix of sliced strawberries, blueberries, blackberries, and raspberries, don’t hesitate to get creative. Use any combination of berries you love or have readily available. Both fresh and frozen berries work wonderfully. If using frozen berries, ensure they are thoroughly thawed and completely drained of all excess liquid before mixing with other ingredients. This crucial step prevents a soggy crust.
- Crust Selection and Handling: For ultimate convenience, refrigerated, pre-rolled pie crusts (like Pillsbury) are a fantastic shortcut that yields excellent results. However, if you prefer a truly homemade touch, feel free to use your favorite pie crust recipe. Regardless of your choice, handle the pie crusts with care. They can be delicate, especially when transferring the cut circles to the baking sheet. If the dough tears, simply pinch the edges back together firmly. Any unsealed holes could allow the delicious berry filling to seep out during baking, leading to a mess and a less-than-perfect galette.
- The Magic of Cornstarch: Cornstarch is a key ingredient in our berry filling. Its purpose is twofold: it acts as a thickening agent, preventing the fruit juices from making the crust soggy, and it helps the filling set beautifully, allowing for easy slicing and serving without a spill. Don’t skip this ingredient!
- Strain for Success: After mixing your berry filling and letting it sit, fruit juices will naturally accumulate. When spooning the fruit mixture onto the pie crust circles, always use a slotted spoon. This allows any excess liquid to drain away, further safeguarding your galette against a soggy bottom.
- Prepare Filling in Advance: To streamline your baking process, the berry filling can be prepared up to a day ahead. Simply mix all the filling ingredients and store them in an airtight container in the refrigerator. Before assembling your galettes, remember to strain out any accumulated berry juices again. This proactive step is vital for maintaining the integrity and crispness of your pastry crust.
Mini Mixed Berry Galettes
15 mins
30 mins
45 mins
8 mini galettes

Pin Recipe
Print Recipe
Made with a delectable combination of fresh or frozen berries and a convenient refrigerated pie crust, these Mini Mixed Berry Galettes are an elegant yet surprisingly easy dessert that will surely delight your guests for any occasion.
Ingredients
FOR THE FILLING
- 4 cups mixed berries (1 cup each of sliced strawberries, blueberries, blackberries, and raspberries)
- 1/3 cup granulated sugar
- 2 tablespoons cornstarch
- 3 tablespoons lemon juice
- 1 teaspoon fresh thyme, snipped
FOR THE CRUST
- 2 refrigerated rolled pie crusts (such as Pillsbury)
- 1 large egg, beaten (for egg wash)
- 1 tablespoon turbinado sugar
FOR SERVING
- Whipped cream or a scoop of vanilla ice cream
Instructions
- Preheat Oven & Prep Baking Sheets: Preheat your oven to 400°F (200°C). Line two large baking sheets with parchment paper to prevent sticking and set them aside.
- Prepare the Berry Filling: In a large mixing bowl, combine the 4 cups of mixed berries, 1/3 cup granulated sugar, 2 tablespoons cornstarch, 3 tablespoons lemon juice, and 1 teaspoon of snipped fresh thyme. Gently toss all ingredients together until the berries are well coated. Let the mixture sit for about 10 minutes to allow the flavors to meld and some juices to release.
- Cut Pie Crust Circles: Unroll one refrigerated pie crust onto a clean, lightly floured surface. Using a medium-sized, 6-inch wide-mouth bowl or a round cookie cutter as a guide, carefully cut out circles from the dough. Gather the scraps, gently re-roll them, and cut out additional circles. Repeat this process with the second pie crust until you have approximately 8 circles in total.
- Fill and Form Galettes: Carefully transfer the pie crust circles to the prepared baking sheets, ensuring they are evenly spaced. Using a slotted spoon, fill the center of each circle with approximately 1/2 cup of the berry mixture, making sure to leave an inch border around the edge of the crust. The slotted spoon helps to drain off any excess berry juice, which is vital for a crisp crust.
- Fold and Finish: Gently fold the edges of the pie crust upwards and over the berry filling, creating natural, creased folds. Press the folds together lightly to secure the fruit. In a small bowl, beat one large egg to create an egg wash. Brush the exposed pie crust edges with the egg wash, then sprinkle generously with turbinado sugar for a beautiful golden finish and added texture.
- Bake to Golden Perfection: Place the baking sheets in the preheated oven and bake for 25 to 30 minutes, or until the pie crust turns a deep golden brown and the fruit filling is visibly bubbly and tender.
- Serve Warm: Allow the mini berry galettes to cool slightly on the baking sheets before carefully transferring them. Serve them warm with a generous dollop of freshly whipped cream or a scoop of your favorite vanilla ice cream for an ultimate indulgence.
Nutrition Information (Estimated)
Calories: 289kcal | Carbohydrates: 42g | Protein: 4g | Fat: 12g | Saturated Fat: 4g | Polyunsaturated Fat: 2g | Monounsaturated Fat: 5g | Trans Fat: 0.003g | Cholesterol: 20mg | Sodium: 183mg | Potassium: 99mg | Fiber: 3g | Sugar: 17g | Vitamin A: 78IU | Vitamin C: 5mg | Calcium: 19mg | Iron: 1mg
Nutritional information provided is an automatic calculation and may vary based on specific ingredients used and any modifications to the recipe. If precise nutritional values are crucial, we recommend calculating them independently using your exact product details.
Did you try this recipe? We’d love to hear from you! Please leave a rating and comment below to share your experience.
A Quick Visual Guide: How to Make Mini Mixed Berry Galettes
Sometimes, seeing the process makes all the difference! Here’s a simplified overview of the steps, complementing the detailed instructions in the recipe card above, to help you visualize each stage of creating your perfect mini galettes:
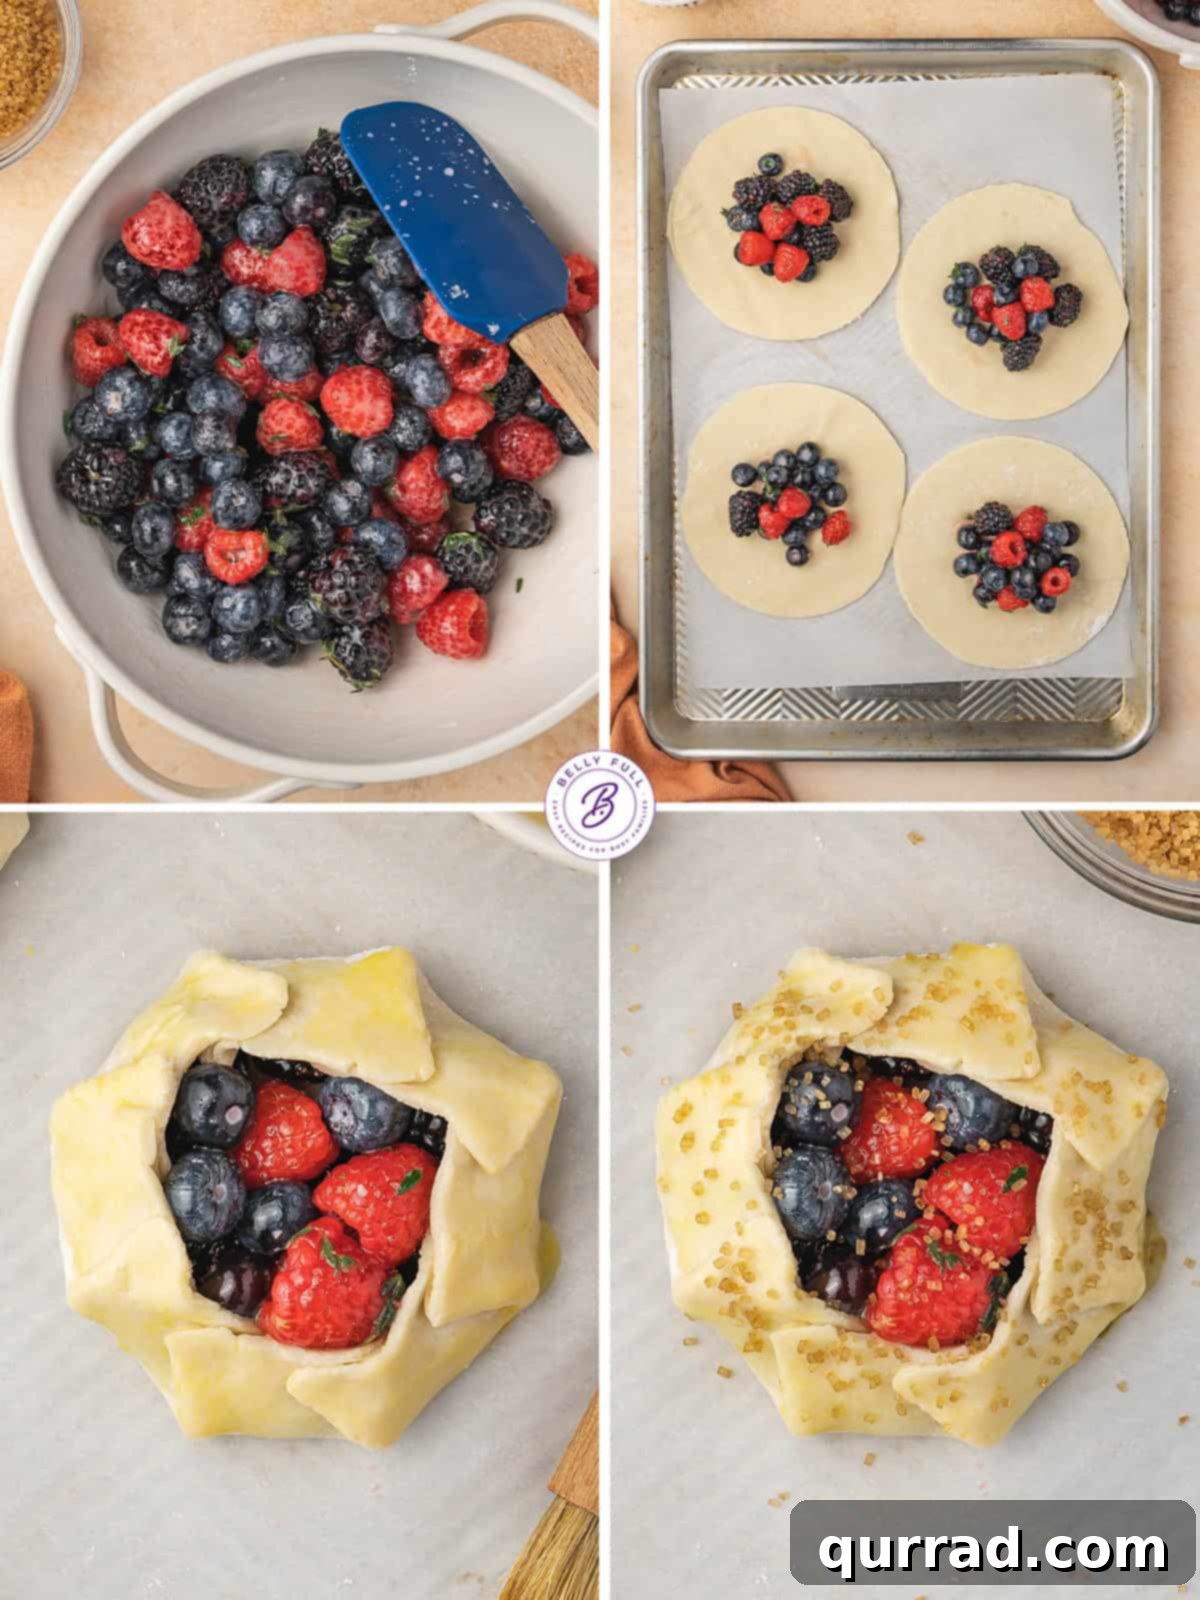
- Prepare the Berry Filling: In a bowl, gently combine 4 cups of your chosen mixed berries (such as sliced strawberries, blueberries, blackberries, and raspberries) with 1/3 cup sugar, 2 tablespoons cornstarch, 3 tablespoons lemon juice, and 1 teaspoon of fresh, snipped thyme. Let it rest for 10 minutes to allow the flavors to meld and juices to release.
- Cut the Pie Crusts: Unroll refrigerated pie crusts onto a floured surface. Use a 6-inch wide-mouth bowl or cookie cutter to cut out individual circles. You should yield about 8 circles from two standard crusts.
- Assemble the Mini Galettes: Carefully transfer the pie crust circles to your prepared baking sheets. Fill each circle with approximately 1/2 cup of the berry mixture, making sure to use a slotted spoon to drain excess juices and leaving an inch border around the edge. Fold the crust edges upwards and gently press them together to create a rustic, sealed border around the fruit. Brush the folded edges with a beaten egg wash and sprinkle with turbinado sugar.
- Bake Until Golden: Bake your assembled mini galettes in a preheated oven at 400°F (200°C) for 25 to 30 minutes. They are ready when the crust is a beautiful golden brown and the berry filling is bubbly and tender. Serve warm and enjoy!
Elevate Your Dessert: What to Serve with Mini Mixed Berry Galettes
While these mini mixed berry galettes are absolutely divine on their own, serving them with a complementary accompaniment can take the dessert experience to the next level. My absolute favorite way to enjoy them is warm, fresh from the oven, adorned with a generous dollop of light and airy homemade whipped cream and a delicate sprig of fresh thyme for an aromatic touch. The cool, creamy whipped cream perfectly balances the warm, sweet-tart berries.
If you’re not a fan of whipped cream, a scoop of premium vanilla bean ice cream is an equally fantastic choice. The melting ice cream mingling with the warm fruit is an indulgence not to be missed!
For the best flavor and texture, I highly recommend serving your mini galettes warm. If you have leftovers and store them in the refrigerator, a quick reheat in the microwave for a few seconds will bring them back to their optimal warmth and tender crust, making them taste freshly baked again.
Keeping Them Fresh: Storage & Freezing Tips
These mini mixed berry galettes are so delicious, you might not have any leftovers! But just in case you do, or if you’re planning ahead, here’s how to properly store them to maintain their delightful taste and texture:
- Refrigerator Storage: Allow any leftover mini galettes to cool completely to room temperature. Once cooled, transfer them to an airtight container and store them in the refrigerator. They will remain fresh and delicious for up to 4 days.
- Reheating for Best Enjoyment: To enjoy your refrigerated galettes again, simply warm them in the microwave for approximately 20-30 seconds, or until heated through. For a crisper crust, you can also gently reheat them in a toaster oven at a low temperature for a few minutes.
- Freezing for Future Indulgence: Yes, these mixed berry galettes freeze exceptionally well! This makes them perfect for meal prepping desserts or having a quick treat on hand.
- Cool Completely: Ensure the baked galettes are entirely cool before freezing. Warm galettes will create condensation, leading to soggy crusts when thawed.
- Wrap Tightly: Individually wrap each cooled galette tightly in plastic wrap, ensuring no air can get in.
- Add Another Layer: For extra protection against freezer burn, wrap the plastic-wrapped galettes again in aluminum foil.
- Freeze: Place the double-wrapped galettes in a freezer-safe bag or container. They can be frozen for up to 3 months.
- Thawing and Reheating: When you’re ready to enjoy, thaw the frozen galettes overnight in the refrigerator. Once thawed, reheat them in the microwave for 20-30 seconds, or in a preheated oven at 350°F (175°C) for about 5-10 minutes, until warmed through and the crust is crisp again.
More Irresistible Berry Desserts to Try
If you’ve fallen in love with these Mini Mixed Berry Galettes and can’t get enough of fruity delights, you’re in luck! Berries are incredibly versatile and form the base for countless delicious desserts. Here are a few more berry-centric recipes from our kitchen that we think you’ll adore:
- Mixed Berry Fruit Fool: A light, creamy, and wonderfully simple dessert highlighting fresh berries.
- Lemon Blueberry Scones: Perfect for breakfast or an afternoon tea, bursting with tangy lemon and sweet blueberries.
- Blackberry Cobbler: A comforting, warm dessert with juicy blackberries topped with a sweet biscuit crust.
- Berries and Cream Mini Fruit Tarts: Elegant, bite-sized tarts featuring a rich cream filling and fresh berries.
- Blueberry Puff Pastry Tarts: Quick, easy, and impressive tarts made with convenient puff pastry and sweet blueberries.
We truly hope you’ve enjoyed this delightful and easy recipe for Mini Mixed Berry Galettes. Your feedback means the world to us, so please don’t hesitate to leave a review below and share your baking success! For more delicious recipes and cooking inspiration, remember to follow Belly Full on your favorite social media platforms:
TikTok,
Facebook,
Instagram,
Pinterest, and
YouTube!