
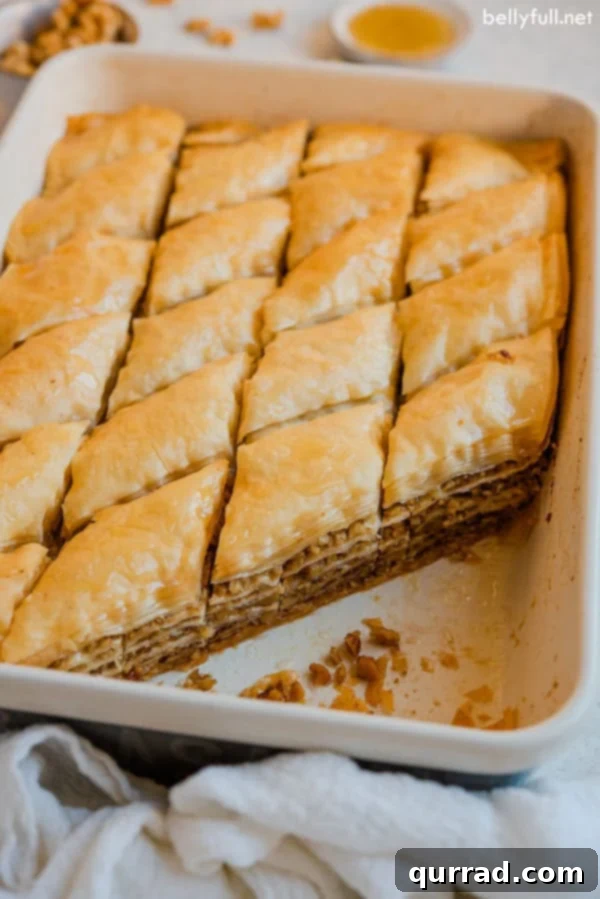
Authentic Baklava Recipe: A Guide to the Ultimate Sweet Treat
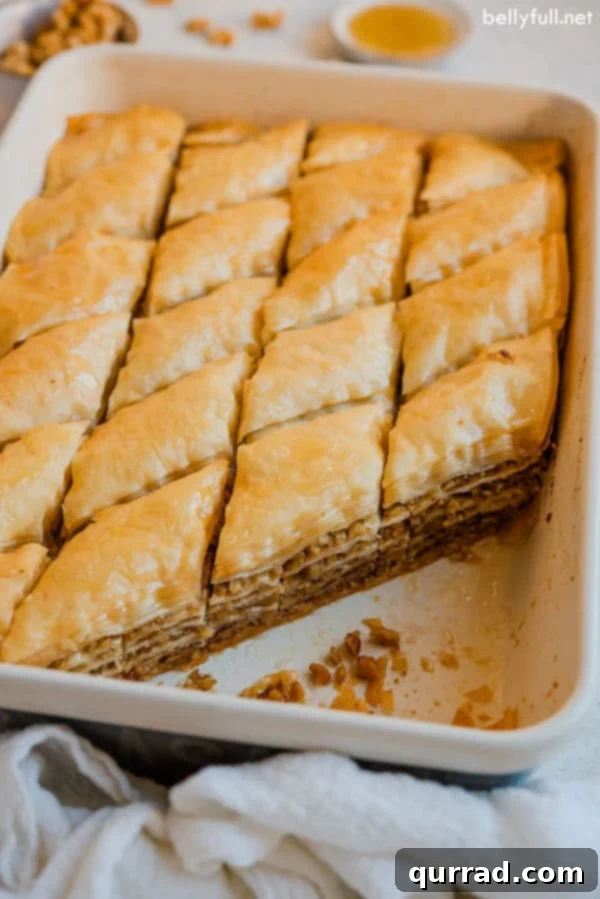
There’s a special kind of magic that happens when you bring a tray of homemade Baklava to any gathering. It’s more than just a dessert; it’s a centerpiece, a conversation starter, and a true showstopper that captivates everyone with its delicate layers and rich aroma. Just a few weeks ago, at a housewarming party, my eyes immediately landed on a beautiful tray of Baklava on the counter. It wasn’t the new furniture or the stunning decor that first caught my attention, but that familiar, irresistible golden pastry.
It had been years since I last savored Baklava, and that single glimpse instantly brought back cherished memories and reminded me just how much I absolutely adore this timeless sweet. If you’ve never had the pleasure, prepare to embark on a culinary journey that will delight your senses and leave an unforgettable impression.
What is Baklava? Unraveling the Layers of a Culinary Legend
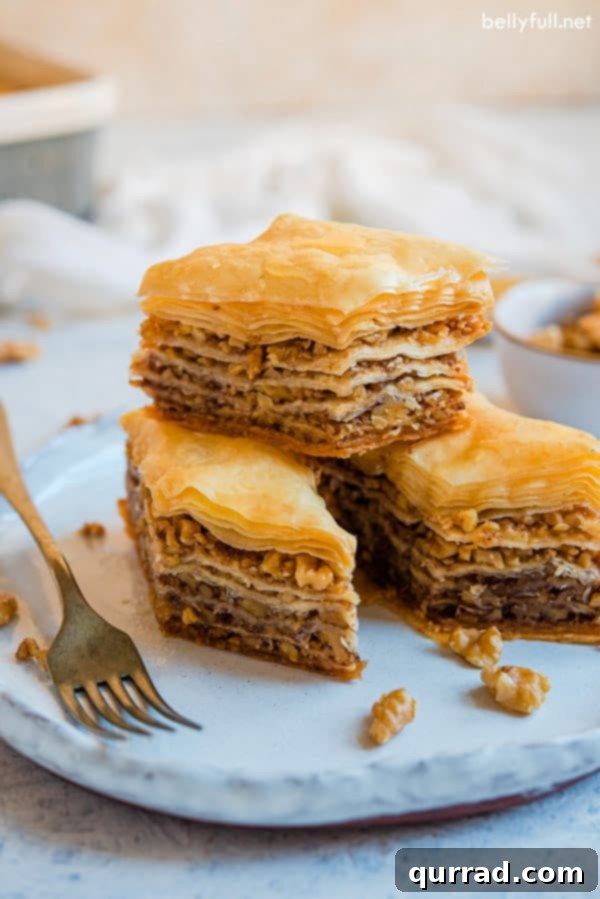
Baklava is an iconic, rich, and intensely sweet pastry dessert that has charmed palates across the globe for centuries. At its heart, Baklava is a masterpiece of culinary architecture, crafted from countless wafer-thin layers of phyllo (also spelled fillo) dough. Each delicate sheet is meticulously brushed with melted butter, then stacked to create a foundation for a luscious, spiced chopped nut filling. The entire pastry is then baked to a glorious golden crisp and, while still warm, drenched in a fragrant, sweet honey syrup, allowing every layer to absorb its sticky goodness.
While its exact origins are debated, Baklava is deeply ingrained in the culinary traditions of numerous cultures. Various ethnic groups, including the Greeks, Turks, and people across the Middle East, proudly claim Baklava as their own, each preparing it with unique regional touches and subtle variations in spices, nuts, and syrup flavors. This rich history and widespread appeal make Baklava not just a dessert, but a cultural emblem of hospitality and celebration.
Essential Baklava Ingredients: Crafting Perfection from Scratch
Creating authentic Baklava requires a selection of high-quality ingredients, each playing a crucial role in achieving that perfect balance of crispy texture, aromatic spice, and sweet indulgence. Here’s what you’ll need:
- Phyllo (Fillo) Dough: The backbone of Baklava, this paper-thin pastry dough is essential for its characteristic crispness. You’ll typically need one 16-ounce package, which usually contains two rolls totaling about 40 sheets. Phyllo can be found in the freezer section of most grocery stores.
- Walnuts: The classic choice for Baklava filling, providing a rich, earthy flavor and satisfying crunch. For the best texture, they should be coarsely ground, not pulverized into a fine powder.
- Ground Cinnamon and Cardamom: These spices infuse the nut filling with warmth and an exotic aroma, elevating the overall flavor profile. Cardamom, while optional for some, adds an authentic Middle Eastern touch.
- Unsalted Melted Butter: Generous amounts of butter are critical for coating each phyllo layer, contributing to the pastry’s golden color, flakiness, and rich taste. Unsalted butter allows you to control the overall saltiness of the dish.
- Granulated Sugar: A primary component of the sweet syrup that binds and moistens the Baklava.
- Honey: The star of the syrup, honey provides a distinctive floral sweetness and glossy finish. High-quality honey will make a noticeable difference in the final flavor.
- Water and Lemon Juice: Water helps create the syrup, while lemon juice adds a touch of brightness, prevents crystallization, and balances the intense sweetness.
- A Strip of Orange Peel: Used to infuse the syrup with a subtle citrus fragrance, adding another layer of complexity to the flavor.
A Note on Phyllo Dough: The 16-ounce package is ideal. Occasionally, you might find packages with fewer, larger sheets (e.g., 18 sheets in one roll). In such cases, you can carefully cut them in half lengthwise to increase your sheet count, though it might result in slightly smaller pieces. Baklava is surprisingly forgiving when it comes to the exact number of layers, so don’t fret too much if your package differs slightly. The key is careful handling and generous buttering!
Mastering the Art of Baklava: Step-by-Step Guide
While making Baklava might seem intricate, it’s a wonderfully meditative process that yields incredibly rewarding results. Follow these steps carefully, and you’ll create a dessert that tastes like it came straight from a Mediterranean bakery.
1. Prepare the Phyllo Dough
- Thawing is Key: Begin by thawing your phyllo dough completely. This is crucial for preventing tears and ensuring workability. The best method is to transfer the frozen package to the refrigerator overnight (at least 8-10 hours).
- Room Temperature Acclimation: Approximately one hour before you plan to assemble your Baklava, remove the unopened phyllo package from the refrigerator and let it sit on your kitchen counter. This brings it to room temperature, making the sheets more pliable and less prone to cracking.
2. Craft the Aromatic Honey Syrup
Making the syrup first is essential, as it needs ample time to cool completely while the Baklava bakes. Pouring cold syrup over hot Baklava is the secret to maximum absorption and a perfectly crisp texture.
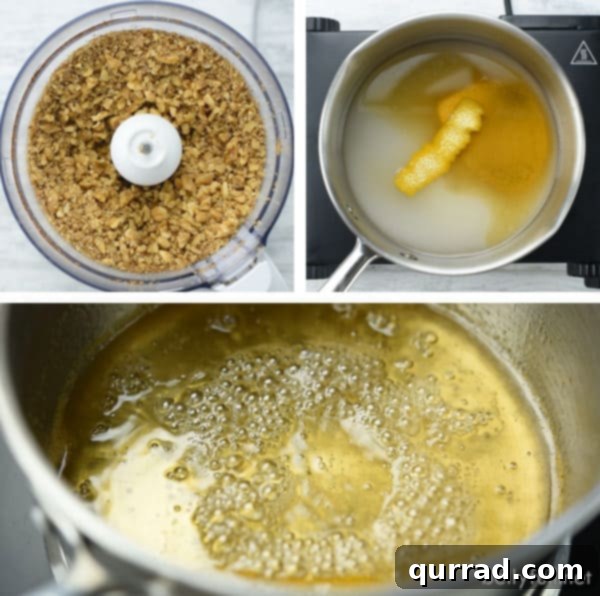
- In a medium saucepan, combine the granulated sugar, water, honey, lemon juice, and the strip of orange peel.
- Place the saucepan over medium-high heat and bring the mixture to a rolling boil, stirring occasionally until all the sugar has fully dissolved.
- Once boiling, reduce the heat to medium-low and allow the syrup to gently simmer for another 4 minutes without stirring. This helps the flavors meld and the syrup thicken slightly.
- Remove the saucepan from the heat and set it aside to cool completely at room temperature. Once cool, discard the orange peel.
3. Prepare the Spiced Nut Filling
The nutty, spiced filling is the heart of Baklava’s flavor. Getting the right consistency for the nuts is important – you want texture, not powder.
- Place the walnuts, ground cinnamon, and ground cardamom into the bowl of a food processor.
- Pulse the mixture 10-12 times, or until the nuts are coarsely ground. Be careful not to over-process them into a fine powder or nut butter; you want small, distinct pieces for texture. Set this fragrant mixture aside.
4. Assemble the Baklava Layers
This is where patience and attention to detail pay off. Keep your work area organized and your phyllo covered.
- Preheat your oven to 325 degrees F (160 degrees C). This lower temperature ensures the Baklava bakes through without burning, resulting in beautifully golden, crispy layers.
- Prepare your workspace: Unroll the thawed phyllo dough and gently lay the sheets flat on a clean, dry work surface. Immediately trim the sheets to perfectly fit the dimensions of your 9×13-inch baking dish. This makes layering much easier and creates clean edges.
- Crucial Phyllo Tip: As soon as you unroll and trim the phyllo, immediately cover the entire stack with a slightly damp (but not wet!) clean kitchen towel. This is absolutely critical to prevent the delicate sheets from drying out and becoming brittle, which makes them impossible to work with. As you take one sheet from the stack, quickly recover the remaining sheets.
- Butter the Dish: Generously baste the bottom and sides of your 9×13-inch baking dish with some of your melted unsalted butter. This prevents sticking and contributes to the golden crust.
- Build the Base: Place the first sheet of phyllo dough into the buttered baking dish. Gently brush the entire surface of this sheet with melted butter. Repeat this process with 9 more sheets, buttering each one thoroughly. This creates a sturdy and delicious 10-layer base.
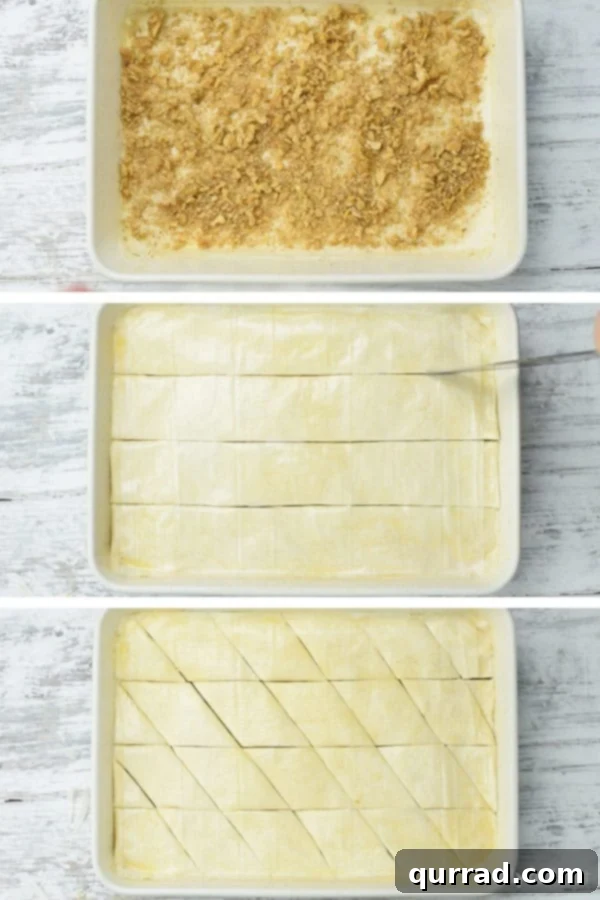
- First Nut Layer: Evenly sprinkle approximately one-fifth of your chopped walnut mixture (roughly 3/4 cup) over the top of the 10th buttered phyllo sheet.
- Middle Layers: Cover the nuts with 5 sheets of phyllo, brushing each individual sheet with melted butter as you layer them. Top these 5 sheets with another 3/4 cup of the walnut mixture. Repeat this layering pattern (5 phyllo sheets, buttered, then 3/4 cup walnuts) three more times. You will have used a total of 4 nut layers at this point.
- Top Layers: Finish building your Baklava with the final 10 sheets of phyllo dough. Just like the base, brush melted butter generously between each of these layers. Ensure the very top sheet is also thoroughly brushed with butter. This final butter layer will help achieve a beautiful golden-brown crust.
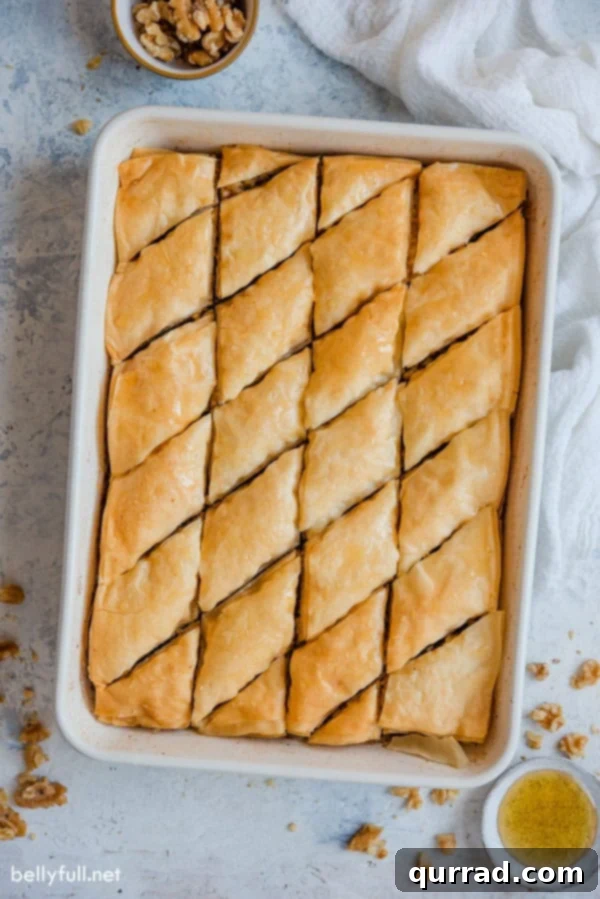
- Pre-Cutting for Perfection: Before baking, use a very sharp knife to carefully slice the unbaked Baklava. First, make 4 long, even strips lengthwise. Then, slice diagonally across these strips to create traditional diamond-shaped pieces. This pre-cutting allows the syrup to penetrate all the layers more effectively after baking.
Order of Assembly Recap:
- 10 phyllo sheets, each brushed with melted butter, followed by 3/4 cup walnut mixture.
- 5 phyllo sheets, each brushed with melted butter, followed by 3/4 cup walnut mixture.
- 5 phyllo sheets, each brushed with melted butter, followed by 3/4 cup walnut mixture.
- 5 phyllo sheets, each brushed with melted butter, followed by 3/4 cup walnut mixture.
- 5 phyllo sheets, each brushed with melted butter, followed by 3/4 cup walnut mixture.
- 10 phyllo sheets, each brushed with melted butter. Ensure the very top sheet is also buttered generously.
5. Bake to Golden Perfection
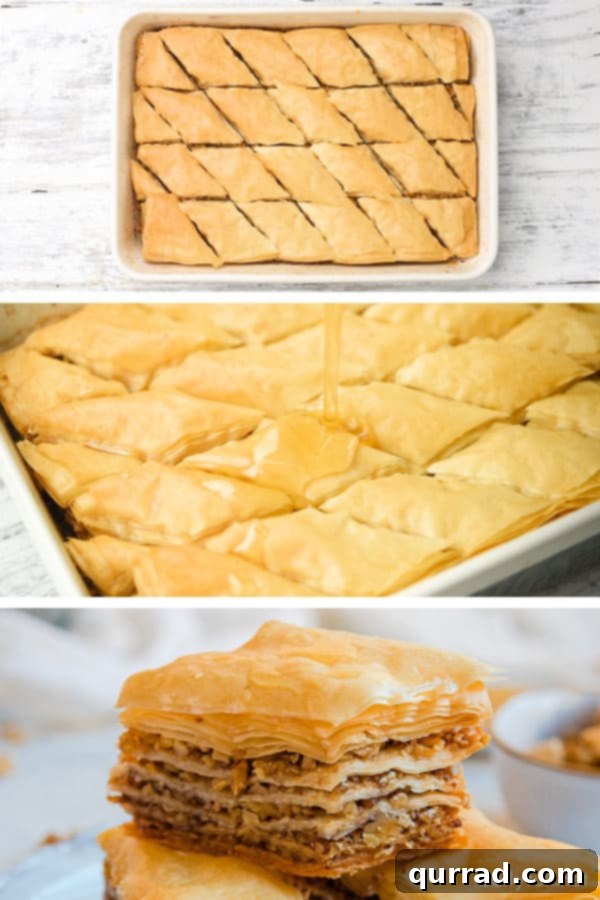
- Place the baking dish in your preheated 325°F (160°C) oven. Bake for approximately 1 hour and 15 minutes, or until the top of the Baklava is a deep, rich golden brown and appears beautifully crisp.
6. The Grand Finale: Syrupy Drizzle and Cooling
This final step is crucial for transforming the crisp pastry into the succulent, syrupy Baklava you know and love.
- Immediate Syrup Application: As soon as you remove the hot Baklava from the oven, immediately and evenly drizzle all of the completely cooled honey syrup (remember to discard the orange peel first) over the entire surface of the hot pastry. Listen for that satisfying sizzle! Ensure every diamond-shaped piece gets thoroughly coated.
- Reinforce Cuts: Using your sharp knife, gently run it through the pre-cut lines again. This ensures that as the Baklava soaks up the syrup and settles, each piece remains easily separable later.
- The Waiting Game (Patience is a Virtue!): This is arguably the most important step! Let the Baklava cool completely at room temperature for at least 6 hours – ideally, overnight. Do NOT cover it during this cooling period; covering it too soon will trap moisture and make the pastry soggy. This extended cooling time allows the baked pastry layers to fully absorb all that glorious syrup, setting the texture and cementing the flavors. The longer it rests, the better it becomes.
Expert Baklava Recipe Tips for Success
Creating perfect Baklava is an art, but these tips will help you achieve outstanding results every time:
- Syrup First, Always: Always prepare your honey syrup before starting the Baklava assembly. It absolutely must be completely cool when it meets the hot pastry for proper absorption and crispness.
- No Skimping on Butter or Syrup: Resist the urge to go light on the butter between phyllo layers or the final syrup drizzle. Butter is what makes the phyllo flaky and golden, preventing it from drying out and crumbling. The generous syrup is what brings all the layers together, moistens the nuts, and defines the Baklava’s rich texture.
- Keep Phyllo Covered: This cannot be stressed enough! Phyllo dough dries out incredibly fast. Always keep the unused stack covered with a lightly damp cloth while you are working. Work quickly and efficiently with each sheet.
- Cutting Techniques: When pre-cutting the Baklava, a very sharp, thin knife is your best friend. Sometimes, making small, gentle stabbing motions to initiate the cut, then smoothly running the knife through, can help prevent tearing delicate layers. Don’t be afraid to sharpen your knife before you begin!
- The Magic of Resting: While Baklava is delicious after its initial 6-hour rest, it truly reaches its peak flavor and texture when allowed to sit overnight. This extended period allows the layers to fully soak up the syrup, resulting in a more cohesive, flavorful, and perfectly moist (yet still crisp!) pastry.
- Achieving Even Browning: If you notice one side of your Baklava browning faster in the oven, rotate the baking dish halfway through the baking time for a more even golden finish.
Baklava Recipe Variations: Customizing Your Sweet Creation
Baklava’s beauty lies in its adaptability. While the classic walnut version is undeniably delicious, you can easily customize this recipe to suit your preferences or explore different regional flavors:
- Nut Choices: Traditionally, Baklava is made with walnuts, pistachios, or almonds, depending on the region. Feel free to experiment with any of these or create your own blend! A pistachio-based Baklava, for instance, offers a vibrant green hue and a distinct, delicate flavor.
- Syrup Infusions: While lemon and orange peel are common, you can add other aromatics to your syrup. A splash of rose water or orange blossom water (added after the syrup has cooled, as heat diminishes their fragrance) can lend a beautiful, authentic Middle Eastern floral note. You can also omit citrus peels entirely for a simpler honey flavor.
- Spice Profile: Beyond cinnamon and cardamom, some recipes include a pinch of ground cloves or even a tiny amount of mastic for a unique, resinous flavor, especially in Greek variations.
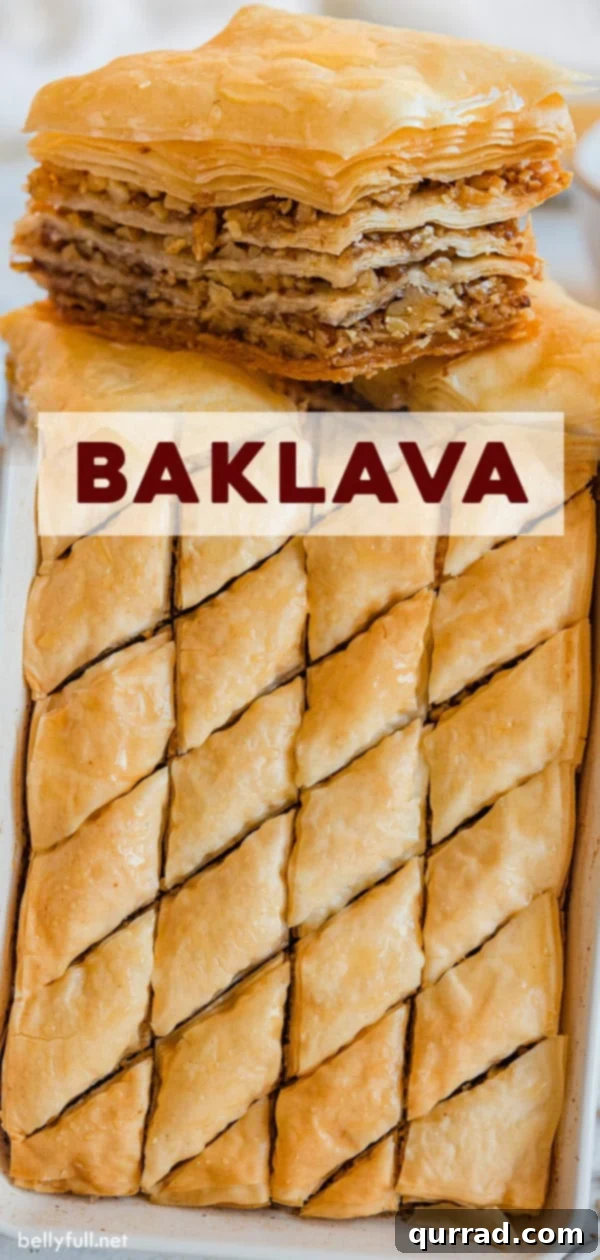
- Cutting Patterns: While diamond shapes are classic and visually appealing, Baklava can also be cut into neat squares or even small triangles. The cutting pattern doesn’t affect the taste but can change the presentation.
Storing Baklava: Enjoying the Sweetness Longer
One of the many wonderful qualities of Baklava, aside from its incredible taste, is its excellent shelf life and ability to be made in advance. This makes it an ideal dessert for any occasion, whether it’s a holiday feast, a baby shower, a game day party with a crowd, or simply a delightful treat for your family to snack on throughout the week.
Does Baklava need to be refrigerated? No, not immediately. Freshly made Baklava can be stored at room temperature for up to one week, loosely covered with a clean tea towel to allow air circulation and prevent sogginess. After a week, or if you live in a very warm climate, it’s best to move it to the refrigerator.
How long does Baklava last? When stored properly in an airtight container in the refrigerator, Baklava can maintain its quality for up to three weeks.
Can you freeze Baklava? Absolutely! Baklava freezes beautifully. Place cooled, cut pieces in a single layer in a freezer-safe, airtight container, separating layers with parchment paper if stacking. It can be stored in the freezer for up to three months. Thaw at room temperature before serving.
While some might describe the process of making Baklava as tedious due to the layering, I find it quite relaxing. It’s an opportunity to slow down, put on some favorite music, and enjoy the meditative rhythm of creating something truly special by hand. Give yourself the gift of time, and you’ll discover the joy in every layer.
Other Delicious Desserts Great for a Crowd
- Mini Pecan Pies: All the rich, buttery flavors of a traditional pecan pie, perfectly portioned in delightful mini form.
- Dessert Charcuterie Board: An incredibly easy, fun, and impressive way to serve a variety of sweets, perfect for any gathering.
- Caramel Apple Pie Fudge: A heavenly fusion where the comforting flavors of caramel apples meet the spiced warmth of apple pie in an irresistible fudge.
- Mini Lemon Tarts: Delicate phyllo shells filled with a bright, tangy lemon custard, crowned with whipped cream and toasted coconut for a refreshing bite.
Watch the Video Tutorial for Baklava
For a visual guide to each step, from preparing the phyllo to drizzling the syrup, be sure to watch our comprehensive video tutorial.
I sincerely hope you fall in love with this exquisite and surprisingly achievable Baklava recipe. It’s a labor of love that is absolutely worth every moment. Don’t forget to share your experience and thoughts in the comments below! For more delightful recipes and culinary inspiration, follow us on Facebook, Instagram, Pinterest, and YouTube!
Baklava Recipe Card
This Baklava recipe is a true showstopper dessert, cherished by all at gatherings. It features countless layers of buttery phyllo dough, elegantly stacked between a rich cinnamon-walnut filling, and finished with a fragrant honey glaze. Baked to golden perfection, it’s irresistibly crispy and utterly amazing!
Recipe Overview
- Prep Time: 30 minutes
- Cook Time: 1 hour 15 minutes
- Rest Time: 6 hours (ideally overnight)
- Total Time: Approximately 7 hours 45 minutes (including rest)
- Servings: 30 pieces
Ingredients
For the Syrup
- 1 cup granulated sugar
- 3/4 cup water
- 1/2 cup honey
- 2 tablespoons lemon juice
- 1 strip orange peel
For the Baklava Pastry and Filling
- 16 ounce package phyllo (fillo) dough (approx. 40 sheets), thawed according to package instructions
- 1 pound walnuts, finely chopped (about 4 cups)
- 1 teaspoon ground cinnamon
- 1/8 teaspoon ground cardamom
- 1 1/4 cups unsalted butter, melted
Instructions
For the Pastry
- Thaw phyllo dough completely by placing it in the refrigerator overnight. Then, let the unopened package sit on the counter for 1 hour prior to making your Baklava to bring it to room temperature.
For the Syrup Mixture
- Combine the sugar, water, honey, lemon juice, and orange peel in a medium saucepan. Bring to a boil over medium-high heat, stirring until the sugar dissolves.
- Reduce heat to medium-low and continue to boil for 4 minutes more without stirring. Remove from heat and set aside to cool completely. Discard the orange peel before using.
For the Nut Mixture
- Place the walnuts, cinnamon, and cardamom in a food processor. Pulse 10-12 times until the nuts are coarsely ground, but not into a fine powder.
Assemble the Baklava
- Unroll the phyllo dough and lay the sheets flat on your work surface. Trim the sheets to the size of a 9×13-inch baking dish. Immediately cover them with a damp towel and keep them covered while assembling the Baklava. As you take a phyllo sheet from the stack, immediately cover the stack to prevent drying out.
- Preheat oven to 325 degrees F (160 degrees C).
- Baste the bottom and sides of your baking dish with some of the melted butter.
- Lay one sheet of phyllo in your baking dish. Brush with butter. Repeat this process with 10 sheets, brushing every single sheet with butter.
- Sprinkle approximately 1/5 of the chopped walnuts (about 3/4 cup) evenly on top.
- Cover with 5 sheets of phyllo, brushing every sheet with butter. Top with 3/4 cup walnuts. Repeat this 3 more times, alternating 5 buttered phyllo sheets with 3/4 cup walnuts.
- Finish with the final 10 sheets of phyllo, brushing with butter between each layer. Also, brush the very top sheet of phyllo dough generously with butter.
- Using a sharp knife, carefully slice the Baklava into 4 long, even strips lengthwise, then slice diagonally to create traditional diamond-shaped pieces.
- Bake in the preheated oven for 1 hour and 15 minutes, or until the Baklava is golden brown and crispy.
- Remove from oven and immediately drizzle all of the cooled honey syrup over the hot Baklava, making sure everything gets coated evenly.
- Using a sharp knife, gently run it through the cut Baklava again to ensure each piece can easily be removed later.
- Let the Baklava cool completely at room temperature for at least 6 hours (ideally overnight) without being covered. This prevents sogginess and allows the baked pastry to fully soak up all of the syrup, resulting in the best texture and flavor.
Notes
- Recommended Order of Assembly (Total 50 Phyllo Sheets):
- 10 phyllo sheets, each brushed with butter, then 3/4 cup walnut mixture.
- 5 phyllo sheets, each brushed with butter, then 3/4 cup walnut mixture.
- 5 phyllo sheets, each brushed with butter, then 3/4 cup walnut mixture.
- 5 phyllo sheets, each brushed with butter, then 3/4 cup walnut mixture.
- 5 phyllo sheets, each brushed with butter, then 3/4 cup walnut mixture.
- 10 phyllo sheets, each brushed with butter (including the final top sheet).
- Storage: Finished Baklava can be stored for 1 week at room temperature, loosely covered with a clean tea towel. For longer storage, keep it in the refrigerator in a tightly sealed container for up to 3 weeks, or in the freezer for up to 3 months.
- For more helpful tips and delicious variations, please refer to the full article above and watch the video tutorial!
Nutrition Information (per serving, approximate)
Calories: 255kcal | Carbohydrates: 21g | Protein: 3g | Fat: 18g | Saturated Fat: 6g | Cholesterol: 20mg | Sodium: 75mg | Potassium: 83mg | Fiber: 1g | Sugar: 12g | Vitamin A: 239IU | Vitamin C: 1mg | Calcium: 20mg | Iron: 1mg
Nutritional information provided is an automatic calculation and can vary based on the exact products you use and any changes you make to the recipe. If these numbers are very important to you, we recommend calculating them yourself using your specific ingredients.
Original recipe inspiration from Fifteen Spatulas with thoughtful modifications for enhanced flavor and ease.