
Mastering the Art of Mini Pavlovas: An Effortlessly Elegant Dessert
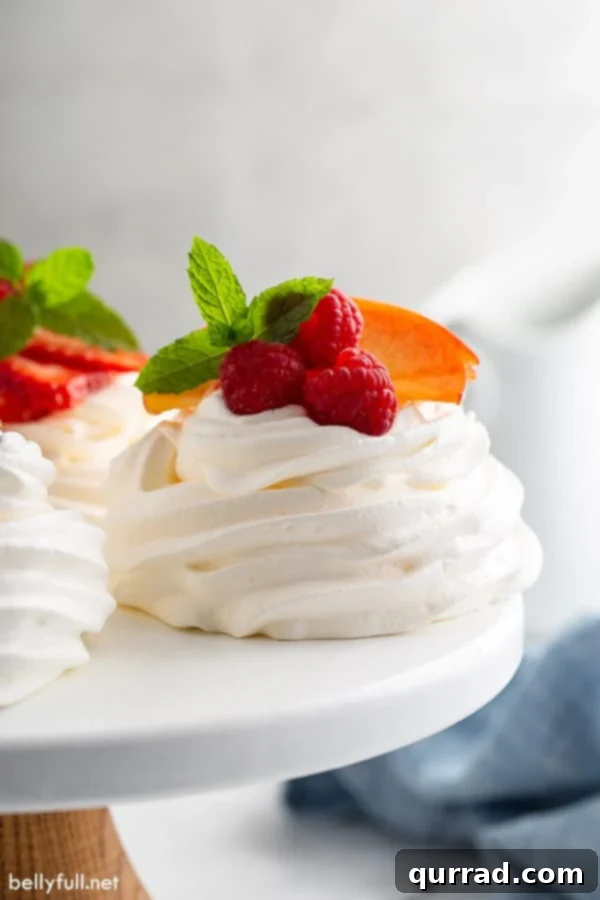
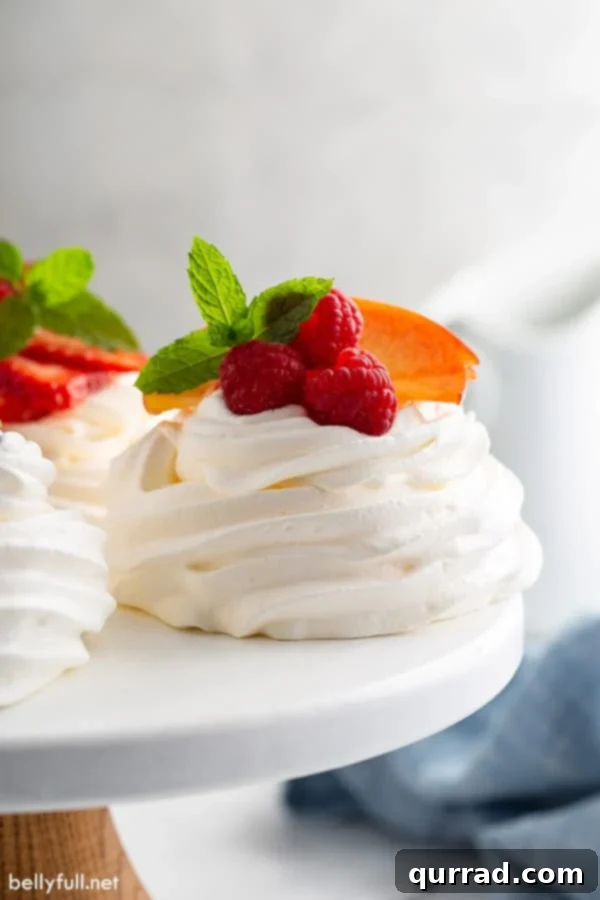
Embark on a delightful culinary journey with our ultimate guide to crafting the most exquisite mini Pavlovas. This ethereal dessert, often perceived as complex, is surprisingly simple to create, promising a show-stopping finish with minimal fuss. Imagine a delicate, crispy shell giving way to a dreamy, marshmallow-soft interior, generously crowned with freshly whipped cream and a vibrant medley of seasonal fruits. These individual Pavlovas are not just desserts; they are edible works of art, perfect for any occasion – from casual summer gatherings and elegant brunches to festive holiday celebrations and sophisticated after-dinner treats. Prepare to impress your guests and delight your taste buds with this beautifully balanced symphony of textures and flavors.
Our favorite way to serve these miniature masterpieces is layered with silky Homemade Whipped Cream, a zesty dollop of Lemon Curd or a sweet swirl of Peach Freezer Jam, all adorned with an abundant assortment of juicy, fresh berries. The combination of sweet, tart, and creamy elements elevates the Pavlova experience, making each bite an unforgettable indulgence.
What Exactly is Pavlova? Unveiling this Elegant Meringue Dessert
The name “Pavlova” itself evokes a sense of grandeur and culinary sophistication, often leading home cooks to believe it’s beyond their reach. Yet, this couldn’t be further from the truth! Pavlova is, at its heart, a baked meringue dessert. It features a wonderfully chewy-crisp exterior that shatters gently with each spoonful, revealing a surprisingly soft, melt-in-your-mouth, marshmallow-like interior. This unique textural contrast is what sets Pavlova apart and makes it such a beloved treat.
This exquisite dessert is famously named after the renowned Russian ballerina, Anna Pavlova, commemorating her tours of Australia and New Zealand in the 1920s. Interestingly, despite its Russian namesake, the dessert’s origin is hotly debated between Australia and New Zealand, with both countries claiming to have created it in her honor. Regardless of its precise birthplace, the Pavlova has become a cherished staple in both nations’ culinary traditions and a globally recognized symbol of delicate dessert artistry.
Why Choose Mini Pavlovas? The Charm of Individual Servings
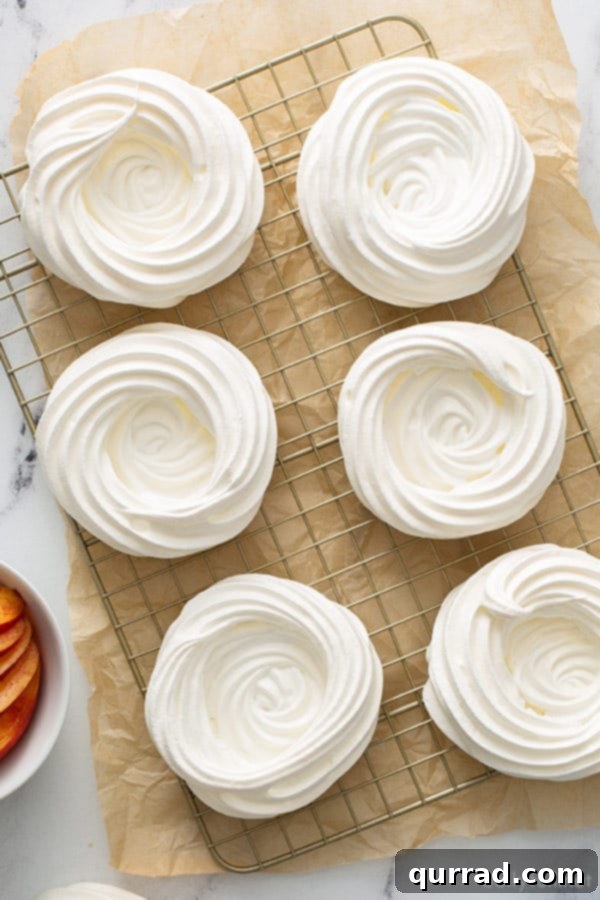
While a grand, show-stopping Pavlova cake certainly has its place, opting for mini Pavlovas offers numerous advantages, making them an ideal choice for any gathering. Individual portions are incredibly elegant and visually appealing, adding a touch of sophistication to your dessert table. They eliminate the need for cutting and serving a large, delicate cake, resulting in less mess and easier handling for both hosts and guests. Each person receives their own perfectly sculpted meringue nest, ready to be filled with toppings. This not only makes portion control effortless but also allows for creative customization, letting guests choose their favorite fruits and fillings if you set up a Pavlova bar. Plus, they look absolutely charming on a serving tray, making them perfect for parties, tea times, or simply a delightful personal indulgence.
Essential Ingredients for Your Perfect Pavlova Recipe
The beauty of a classic Pavlova lies in its simplicity, requiring only a handful of basic ingredients. However, achieving that signature crisp exterior and soft, cloud-like interior demands precision. This isn’t a recipe where you can freely experiment; following the exact measurements and techniques is key to success. The good news is, you likely already have these five pantry staples on hand!
- Egg Whites: The Foundation of Meringue
Egg whites are the fundamental building block of Pavlova, transforming from clear liquid into a voluminous, stable foam when beaten. This process incorporates air, giving the dessert its light, cloud-like texture. For optimal volume and stability, ensure your egg whites are at room temperature, allowing their proteins to relax and incorporate air more efficiently. Absolutely no trace of egg yolk, water, or grease should come into contact with the whites, as any fat can prevent them from whipping up properly. - Granulated Sugar: The Sweet Stabilizer
Beyond its role as a sweetener, sugar is critically important for stabilizing the egg whites in Pavlova. As sugar is gradually beaten into the egg whites, it dissolves, forming a glossy, stable meringue. This sugar structure prevents the egg whites from collapsing, ensuring the meringue holds its shape during baking and as it cools. It’s what contributes to that wonderful crispy, airy texture on the outside and the dense, sweet chewiness within. - Cornstarch: The Secret to a Marshmallow Center
Cornstarch is the magic ingredient that gives Pavlova its distinctive, marshmallow-like center. When combined with the meringue, cornstarch helps to create a softer, more yielding interior by inhibiting excessive protein coagulation during baking. This results in that delightful contrast between the crunchy shell and the soft, pillowy core, defining the true Pavlova experience. - Lemon Juice: The Acid for Added Volume
The acidity from lemon juice plays a crucial role in stabilizing the egg whites. Similar to sugar, acid helps the egg whites hold onto air more effectively, contributing to the meringue’s overall volume and preventing deflation. The acid denatures the egg white proteins, allowing them to form stronger, more stable bonds when whipped. As an alternative, you can also use a 1/2 teaspoon of cream of tartar or 1 teaspoon of white vinegar, which perform the same function. - Vanilla Extract: A Hint of Sweet Aroma
While purely for flavor, vanilla extract should not be omitted. Just a small amount adds a warm, inviting aroma and a subtle depth of flavor that complements the sweetness of the meringue and the freshness of the fruit, making a significant difference to the overall taste profile.
Expert Tips for Pavlova Perfection: Achieving Flawless Meringue Nests
Crafting the perfect Pavlova is less about innate skill and more about adhering to a few key techniques. These expert tips will guide you to consistently achieve beautiful, delicious meringue nests:
- Bring Eggs to Room Temperature: Room temperature egg whites whip up with greater volume and stability than cold ones. If your eggs are straight from the fridge, simply place them in a bowl of warm (not hot) water for about 15 minutes to take off the chill. Remember, egg yolks separate more easily from whites when cold, so separate them while chilled, then let the whites warm up.
- Ensure Absolute Cleanliness: Any trace of egg yolk, water, or grease in your mixing bowl or on your beaters can prevent the egg whites from whipping into stiff peaks. Even a tiny speck of fat can deflate your meringue. Use clean, dry equipment for the best results.
- Whip to Stiff, Glossy Peaks: Beat the egg whites until they form stiff, upright peaks that hold their shape. The meringue should be smooth and glossy. A good test is to turn the bowl upside down; if the meringue doesn’t budge, it’s ready. However, be careful not to over-beat, as this can make the meringue dry and brittle, causing it to deflate once other ingredients are added.
- Add Sugar Gradually: Incorporate the granulated sugar slowly, one tablespoon at a time, allowing each addition to fully dissolve before adding the next. This gradual process ensures the sugar properly stabilizes the egg whites and creates a smooth, stable meringue, preventing it from collapsing.
- Create an Indent for Toppings: After piping your meringue nests onto the parchment paper, don’t forget to gently indent the center with the back of a spoon. This creates a perfect little well for your luscious whipped cream and fresh fruit toppings.
- Preheat Oven Thoroughly and Bake Promptly: Always ensure your oven is fully preheated to the correct temperature before introducing the Pavlovas. Once piped, bake the meringues immediately. Waiting too long can cause them to start melting or form an undesirable layer of brown sugar at the bottom during baking.
- Use Parchment Paper for Easy Release: Line your baking sheet with parchment paper for effortless removal of the delicate Pavlovas. Avoid using butter, nonstick spray, wax paper, or aluminum foil, as these can stick or cause the meringue to brown unevenly.
- Cool Slowly in the Oven: After baking, turn off the oven and leave the Pavlovas inside with the door closed until they are completely cooled, typically 3-4 hours. This slow cooling process prevents a sudden temperature shock that can lead to browning and cracking. While not always perfect, this method significantly reduces the chances of major imperfections.
Can I Make Pavlovas Ahead of Time? Planning Your Dessert Perfection
One of the many benefits of Pavlova is its make-ahead potential, allowing you to prepare components in advance and assemble just before serving. You can bake the meringue nests up to 3 days ahead of time. Store them in an airtight container at room temperature in a low-humidity environment. Humidity is the enemy of crisp meringue, so choose a dry spot! Once assembled with whipped cream and fruit, the meringue will begin to soften over time. For the best texture and freshness, Pavlovas should be enjoyed within 3-4 hours of assembly. This makes them an excellent choice for entertaining, as the bulk of the work can be done well in advance.
Creative Topping and Serving Ideas for Your Mini Pavlovas
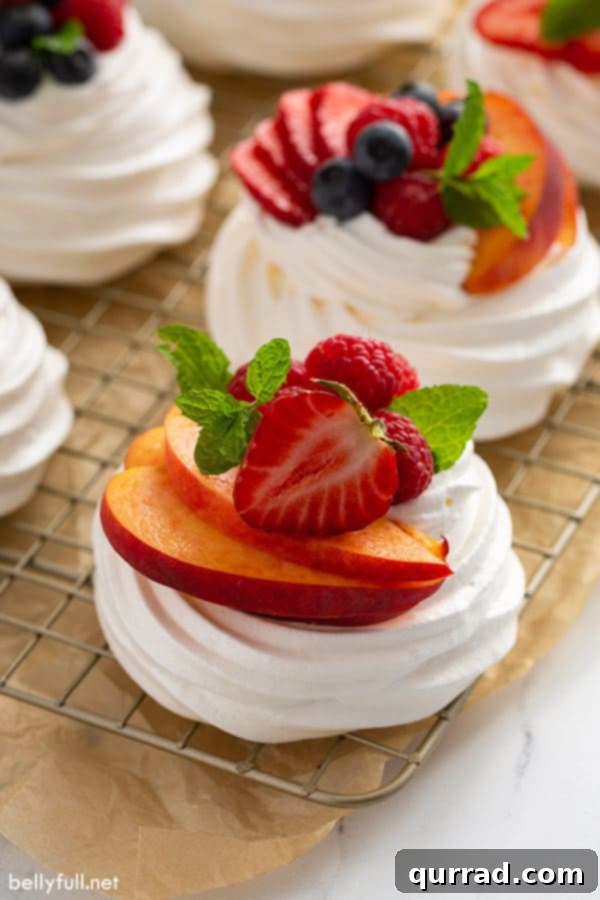
The versatility of Pavlova truly shines when it comes to toppings. While classic combinations are always a hit, don’t shy away from experimenting with different flavors and textures to personalize your dessert. My absolute favorites include the luscious richness of Homemade Whipped Cream, the vibrant tang of Lemon Curd or the sweet warmth of Peach Freezer Jam, all generously topped with a colorful assortment of fresh berries like raspberries, blueberries, and sliced strawberries.
Beyond these delightful classics, consider exploring other options:
- Tropical Fruits: Sliced kiwi, mango, passion fruit, or pineapple add an exotic flair and beautiful color.
- Chocolate Delights: A drizzle of chocolate sauce, chocolate shavings, or even a sprinkle of cocoa powder can create a richer profile.
- Citrus Zest: A touch of orange or lime zest can brighten the flavors.
- Nuts: Toasted slivered almonds or pistachios add a pleasant crunch and nutty flavor.
- Fruit Purees: Raspberry coulis or a simple berry compote can enhance the fruitiness.
- Flavored Whipped Cream: Infuse your whipped cream with a hint of almond extract, coconut, or a touch of liqueur for an extra special touch.
Whether served as elegant mini Pavlovas or a single large cake, this dessert is guaranteed to impress. The individual mini versions offer convenience and a charming presentation that’s hard to resist.
{Mini} Pavlova Dessert Recipe
Prep Time: 15 mins
Cook Time: 1 hr 15 mins
Cool Down Time: 3 hrs
Total Time: 4 hrs 30 mins
Servings: 15 mini pavlovas
Pavlova is an easy dessert with a crisp exterior and soft marshmallow-y inside. Filled with whipped cream and fresh fruit, it’s elegant and beautiful!
Ingredients
For Pavlova
- 6 large egg whites, room temperature
- 1 1/2 cups granulated sugar
- 1/2 tablespoon lemon juice
- 1/2 tablespoon vanilla extract
- 2 teaspoons corn starch
For Whipped Cream
- 1 1/2 cups (very cold) heavy whipping cream
- 2 tablespoons powdered sugar
For Topping
- 4-5 cups fresh fruit, such as blueberries, raspberries, sliced strawberries, sliced peaches, kiwi, etc.
- 15 small mint leaves, for garnish (optional)
Instructions
- Preheat your oven to 200 degrees F. Line a large baking sheet with parchment paper.
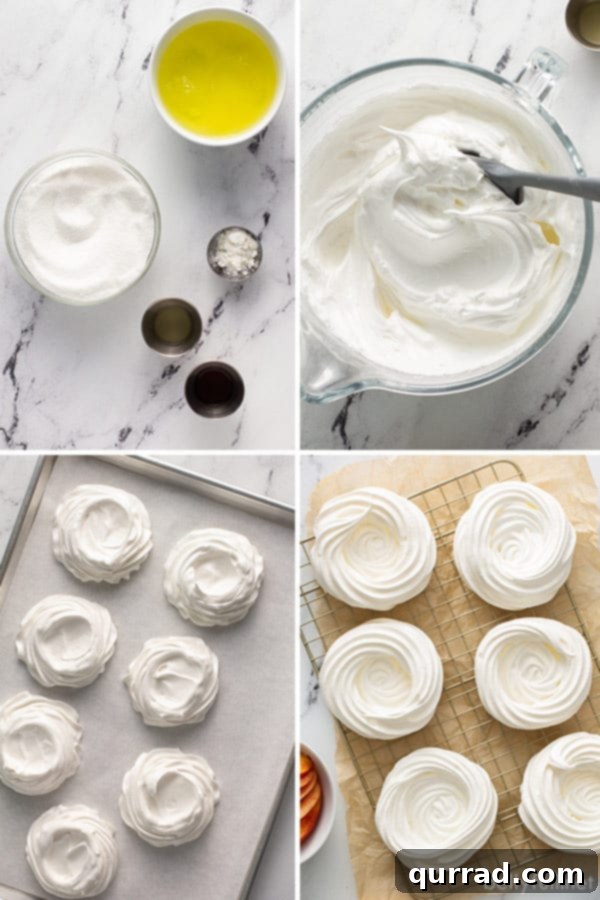
- Using a stand mixer or handheld electric mixer, beat the egg whites on high speed for about 1 minute until soft peaks form. With the mixer still on, gradually add in the sugar, 1 tablespoon at a time, and beat 10 minutes on high speed, or until stiff peaks form. It will be smooth and glossy.
- Using a spatula, quickly fold in the lemon juice and vanilla extract, then fold in the corn starch and gently mix until well blended.
- Pipe meringue into 3 to 3 1/2-inch wide nests onto the parchment paper using a 1M Star tip. Indent the center with a spoon to allow room for toppings.
- Bake for 1 hour and 15 minutes, then turn the oven off and without opening the door, let meringue sit in the oven until completely cooled, about 3-4 hours. (The outsides will be dry and crisp to the tap and a very pale cream-colored, and insides will still be marshmallow soft.)
- Transfer the pavlova with the parchment paper onto the counter for assembly.
- To make the whipping cream: beat cold whipping cream with 2 tablespoons powdered sugar in a cold bowl for 2 – 2 1/2 minutes or until whipped and spreadable.
- Once pavlova are completely cool, pipe some of the whipped cream in the indentation and top with a little fresh fruit.
- Serve and enjoy within 3 hours.
Notes
For perfect pavlovas, please refer to the recipe tips mentioned in the article.
Nutrition
Calories: 210kcal | Carbohydrates: 32g | Protein: 2g | Fat: 9g | Saturated Fat: 5g | Cholesterol: 33mg | Sodium: 35mg | Potassium: 101mg | Fiber: 1g | Sugar: 28g | Vitamin A: 583IU | Vitamin C: 2mg | Calcium: 22mg | Iron: 1mg
Nutritional information given is an automatic calculation and can vary based on the exact products you use and any changes you make to the recipe. If these numbers are very important to you, I would recommend calculating them yourself.
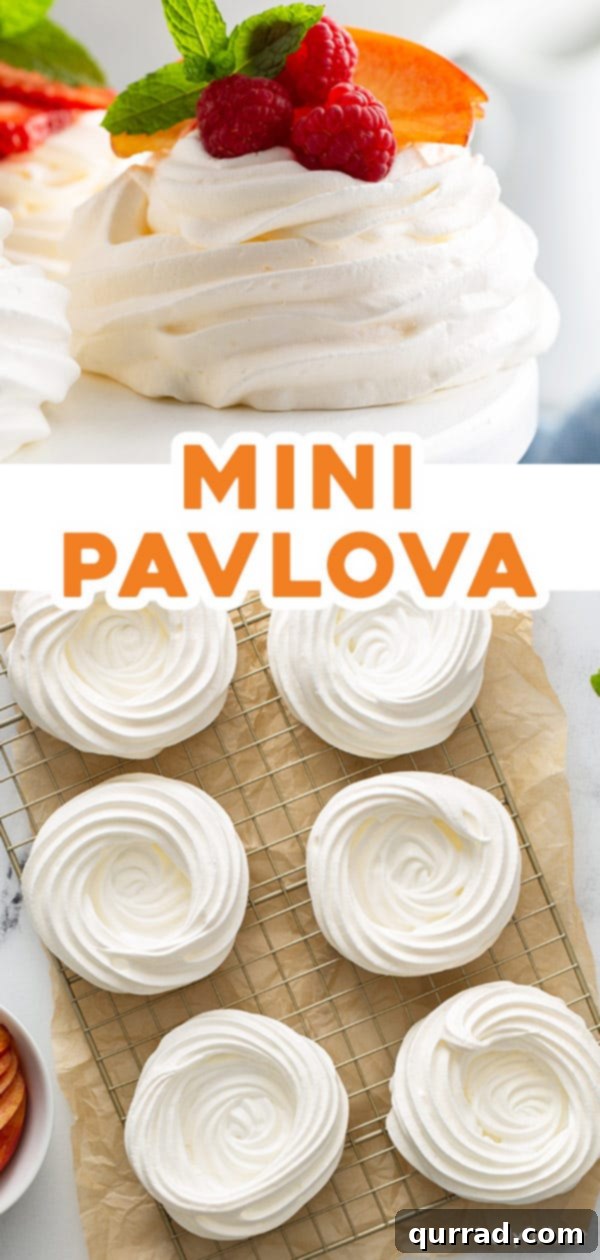
We hope you adore this delicious and surprisingly easy Pavlova recipe! It’s a dessert that truly delivers on both taste and visual appeal, proving that elegance doesn’t have to mean complication. Enjoy creating these delightful treats for your next gathering or simply for a moment of personal indulgence.