
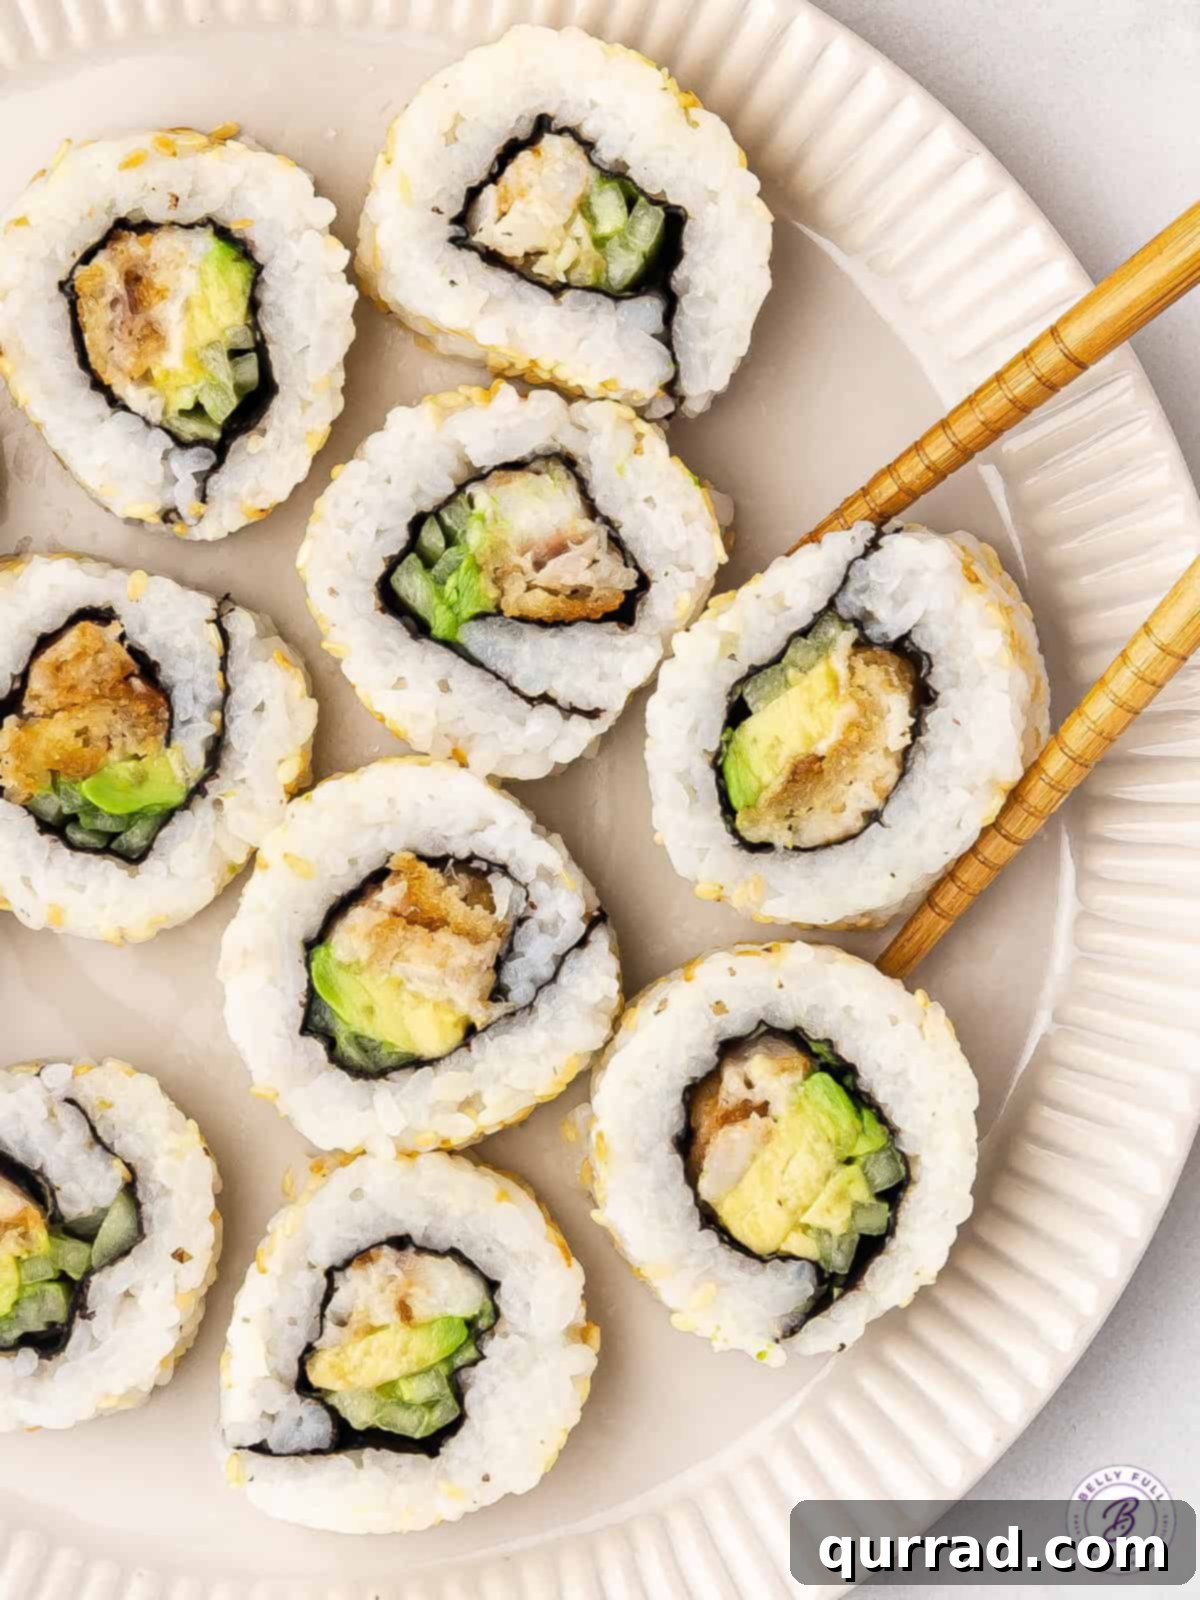
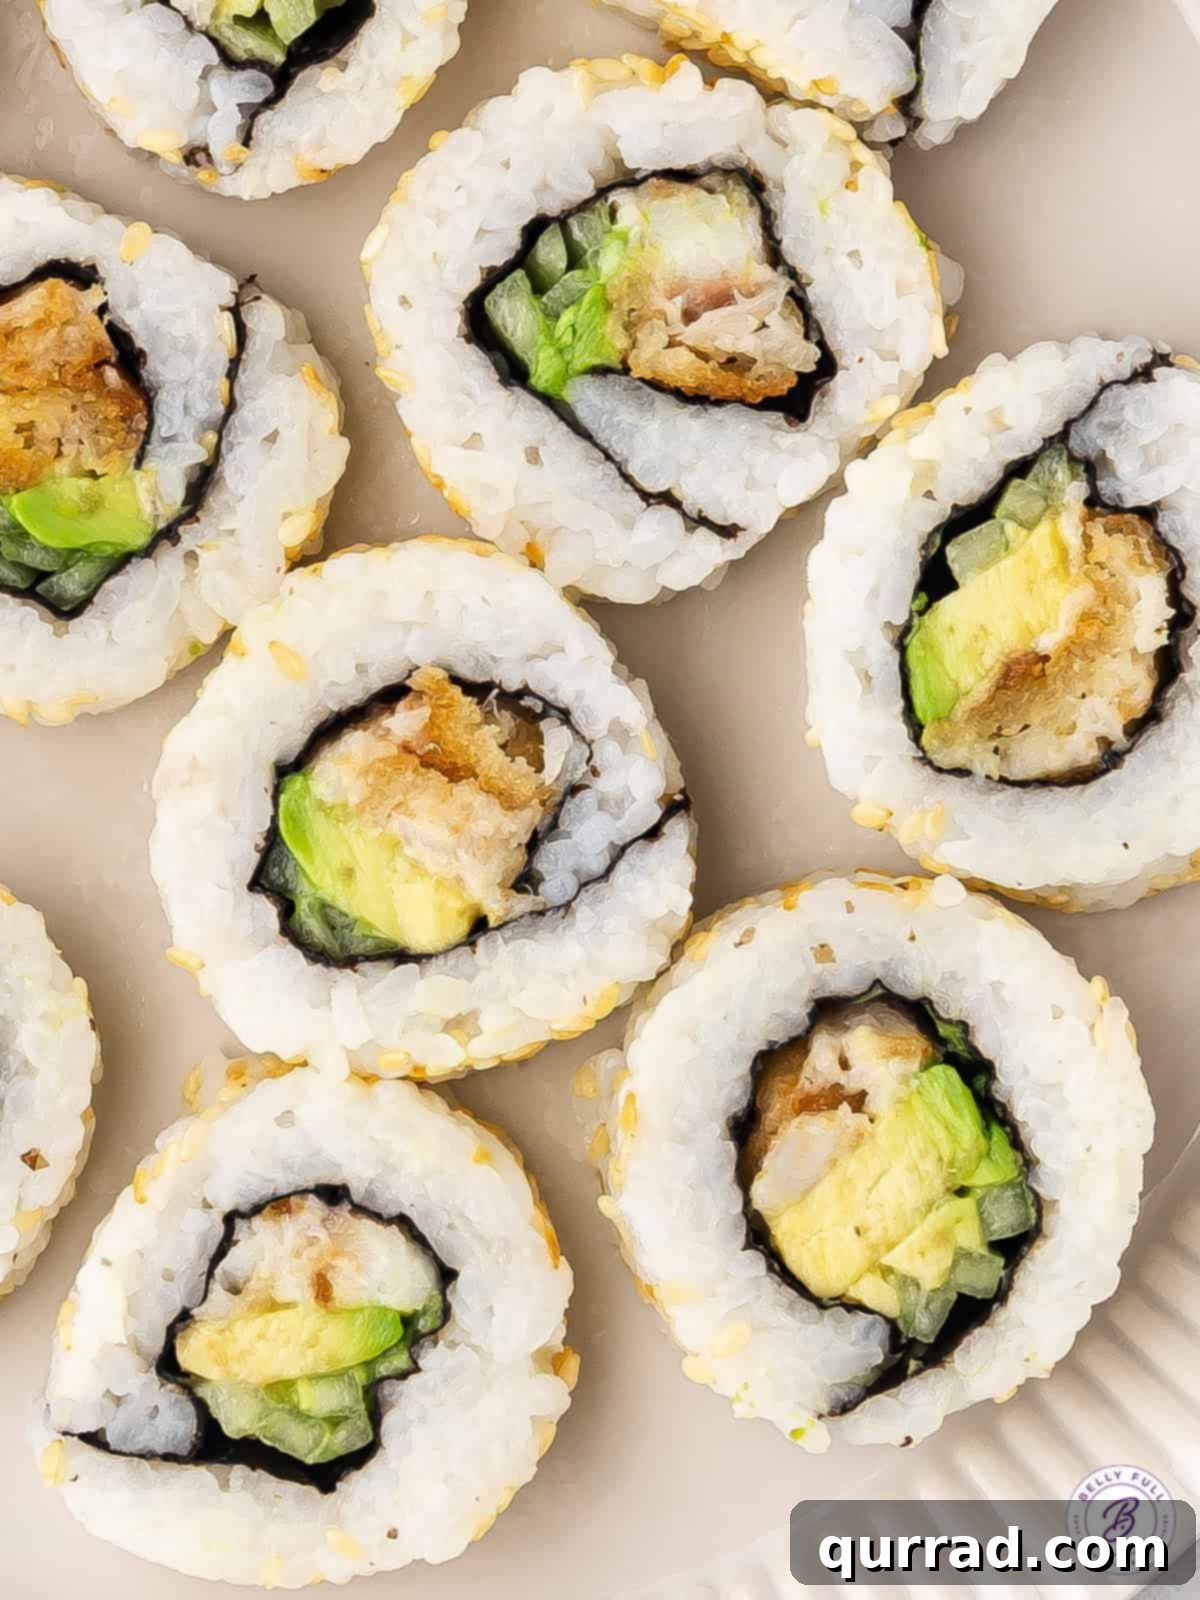
Unlock the secret to irresistible homemade sushi with these innovative Fish Stick Sushi Rolls! Crafted with crispy breaded fish sticks, creamy avocado, and refreshing cucumber, these rolls deliver a delightful crunch reminiscent of your favorite crunch rolls. They offer a quick, easy, and incredibly affordable alternative for enjoying delicious sushi right from your own kitchen. Perfect for a fun family meal or a casual gathering, this recipe transforms humble fish sticks into an exciting culinary adventure.
Craving more imaginative ways to utilize frozen fish sticks? Dive into our family’s beloved fish stick tacos for another easy and satisfying meal idea!
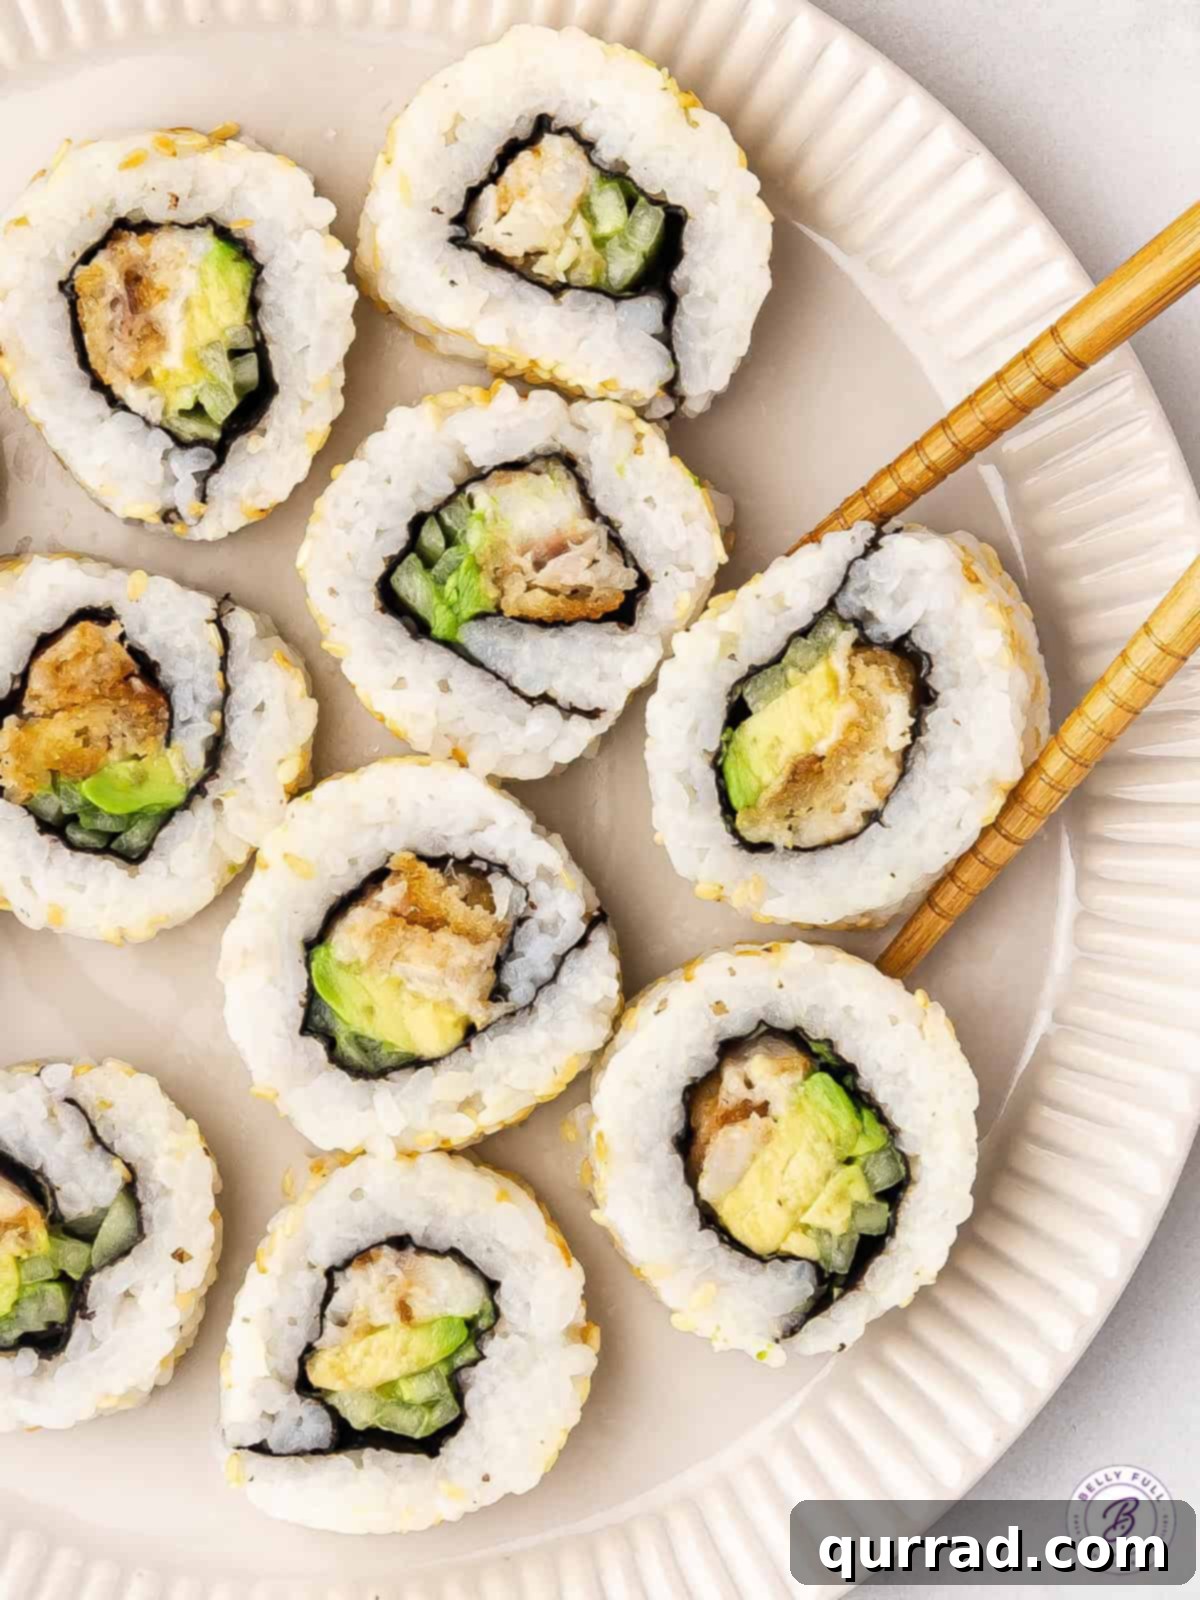
Discover the Joy of Easy Homemade Sushi Rolls
Our family shares a profound love for sushi. It’s a passion that started early, with even our youngest children, who typically resisted salads, enthusiastically embracing raw fish and sushi. However, the costs associated with dining out at sushi restaurants or purchasing premium ingredients like fresh tuna and salmon can quickly add up, even for small portions. This is where our clever culinary hack comes in: crafting incredibly satisfying sushi rolls using humble fish sticks!
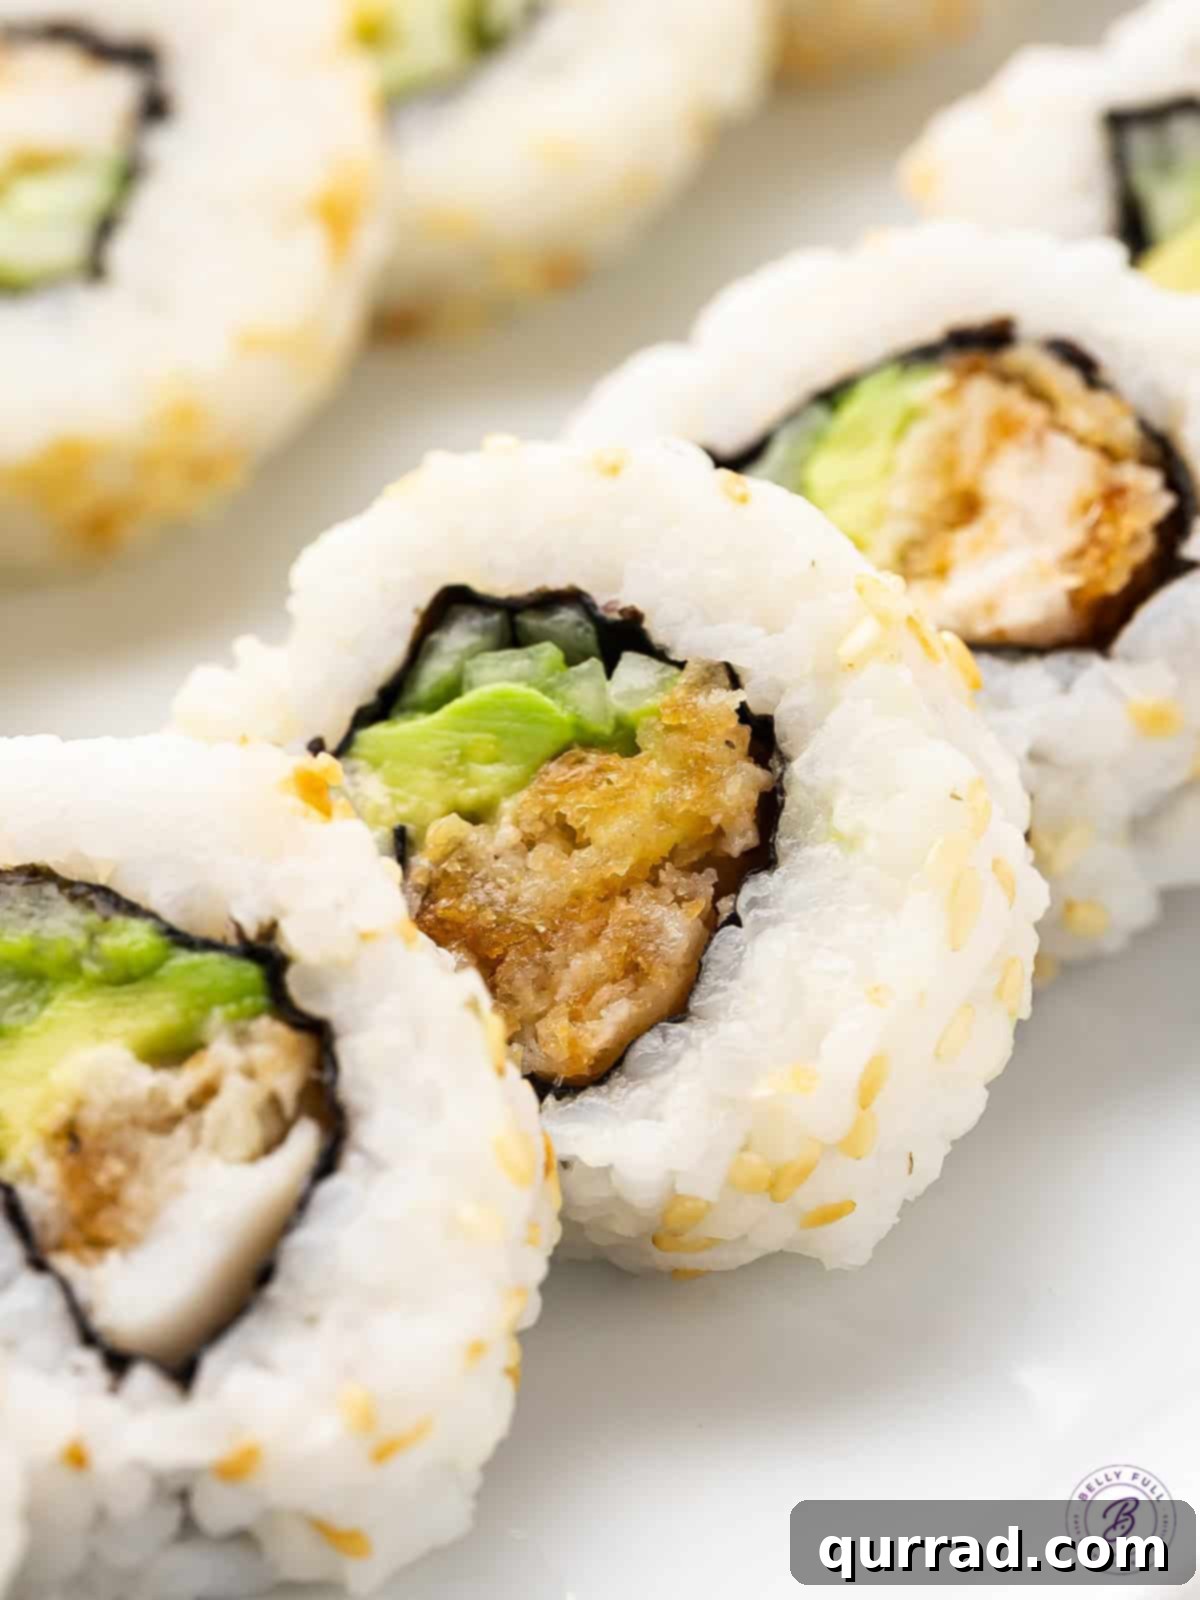
The concept of fish stick sushi might initially raise an eyebrow, but we urge you to trust us – they are an absolute revelation. Not only do they provide a significantly more budget-friendly approach to enjoying sushi at home, but their core ingredient, crispy breaded fish sticks, also imparts an amazing crunch that perfectly mimics the popular tempura or “crunch” rolls found in your favorite sushi establishments. It’s a delightful blend of familiar comfort and exotic flavors, making homemade sushi more accessible than ever before.
Why You’ll Fall in Love with These Fish Finger Sushi Rolls
These fish stick sushi rolls aren’t just a quirky novelty; they offer a host of compelling reasons to become a staple in your home cooking repertoire. From their affordability to their adaptable nature, they truly redefine easy homemade sushi.
- Economical & Effortless: One of the primary advantages of these fish stick sushi rolls is their cost-effectiveness and simplicity. Traditional sushi ingredients, such as high-grade raw tuna or salmon, can be quite expensive and require careful handling. Fish sticks, on the other hand, are readily available, inexpensive, and incredibly easy to prepare, making sushi night an achievable reality for any budget and skill level.
- Addictive Crunchy Texture: If you’re a fan of the satisfying crispness found in tempura rolls or other “crunch” sushi varieties, you’re in for a treat. The breaded coating of the fish sticks, especially when prepared correctly, provides a fantastic textural contrast to the soft rice and fresh vegetables. For an unparalleled crunch that elevates these rolls, we highly recommend cooking your fish sticks in an air fryer. This method delivers an extra layer of crispiness that truly makes these rolls special.
- Effortless Customization: The beauty of this recipe lies in its inherent flexibility. While fish sticks are the star, you can easily adapt the protein to suit different tastes or dietary preferences. Imitation crab sticks offer a classic sushi flavor, or you can explore other cooked options. Furthermore, the accompanying fillings like avocado and cucumber are just a starting point. Feel free to experiment with various vegetables, sauces, and other additions to create your unique signature roll.
- Kid-Friendly & Fun: Introducing children to new flavors can sometimes be a challenge, but these fish stick sushi rolls are a game-changer. Fish sticks are a familiar and comforting food for many kids, making them more likely to try this exciting new format. Involving them in the rolling process can also make mealtime a fun, interactive activity, fostering a love for cooking and diverse foods.
Essential Ingredients for Your Sushi Adventure
Creating these delightful sushi rolls requires fewer than 10 core ingredients, many of which you might already have in your pantry. Simplicity and taste go hand-in-hand with this recipe.
- Sushi Rice: This is the foundation of any great sushi roll. Sushi rice is a short-grain variety known for its slightly higher starch content and wonderfully sticky texture when cooked. This stickiness is crucial for binding your rolls together.
- Water: Essential for cooking your sushi rice to perfection, ensuring it’s tender yet firm enough to hold its shape.
- Seasoned Rice Vinegar: A critical component for flavoring sushi rice. It provides the signature sweet and tangy notes that balance the other ingredients. (Refer to our note below for making your own!)
- Nori: These thin, dried sheets of seaweed act as the wrapper for your sushi, holding all the delicious fillings securely in place. They impart a subtle umami flavor.
- Toasted Sesame Seeds: Adds a delicate nutty flavor and an appealing visual texture to the exterior of your sushi rolls.
- Kewpie Japanese Mayo: A beloved condiment in Japanese cuisine, Kewpie mayonnaise offers a richer, creamier, and slightly sweeter flavor profile compared to regular mayonnaise, making it a classic sushi ingredient that truly enhances the taste.
- Breaded Fish Sticks: The star of the show! We typically use Gorton’s brand, but any high-quality breaded fish sticks will work beautifully. Choose a brand that cooks up nice and crispy.
- Avocado: Ripe and thinly sliced, avocado adds a buttery, creamy texture and mild flavor that complements the other ingredients perfectly.
- Cucumbers: For a refreshing crunch and vibrant freshness, we recommend Persian cucumbers. Their smaller size and thinner skin make them ideal for slicing into julienne strips for sushi.
- For Serving: Elevate your sushi experience with a selection of classic condiments. Consider soy sauce for dipping, a touch of potent wasabi for a kick, a sliver of pickled ginger to cleanse the palate, or a drizzle of spicy Sriracha-mayo for an extra layer of flavor.
Craft Your Own Seasoned Rice Vinegar
If you don’t have seasoned rice vinegar on hand or prefer to make your own from scratch, it’s incredibly simple! Seasoned rice vinegar typically contains sugar and salt to balance the acidity. To prepare your own, combine 1/4 cup unseasoned rice vinegar, 1 & 1/2 tablespoons of sugar, and 3/4 teaspoon of salt. Gently heat this mixture in the microwave for a short period, just until the sugar completely dissolves. Once dissolved, remove it from the microwave and allow it to cool completely before incorporating it into your rice. This homemade version is just as effective and delicious.
Mastering the Art of Making Fish Stick Sushi Rolls
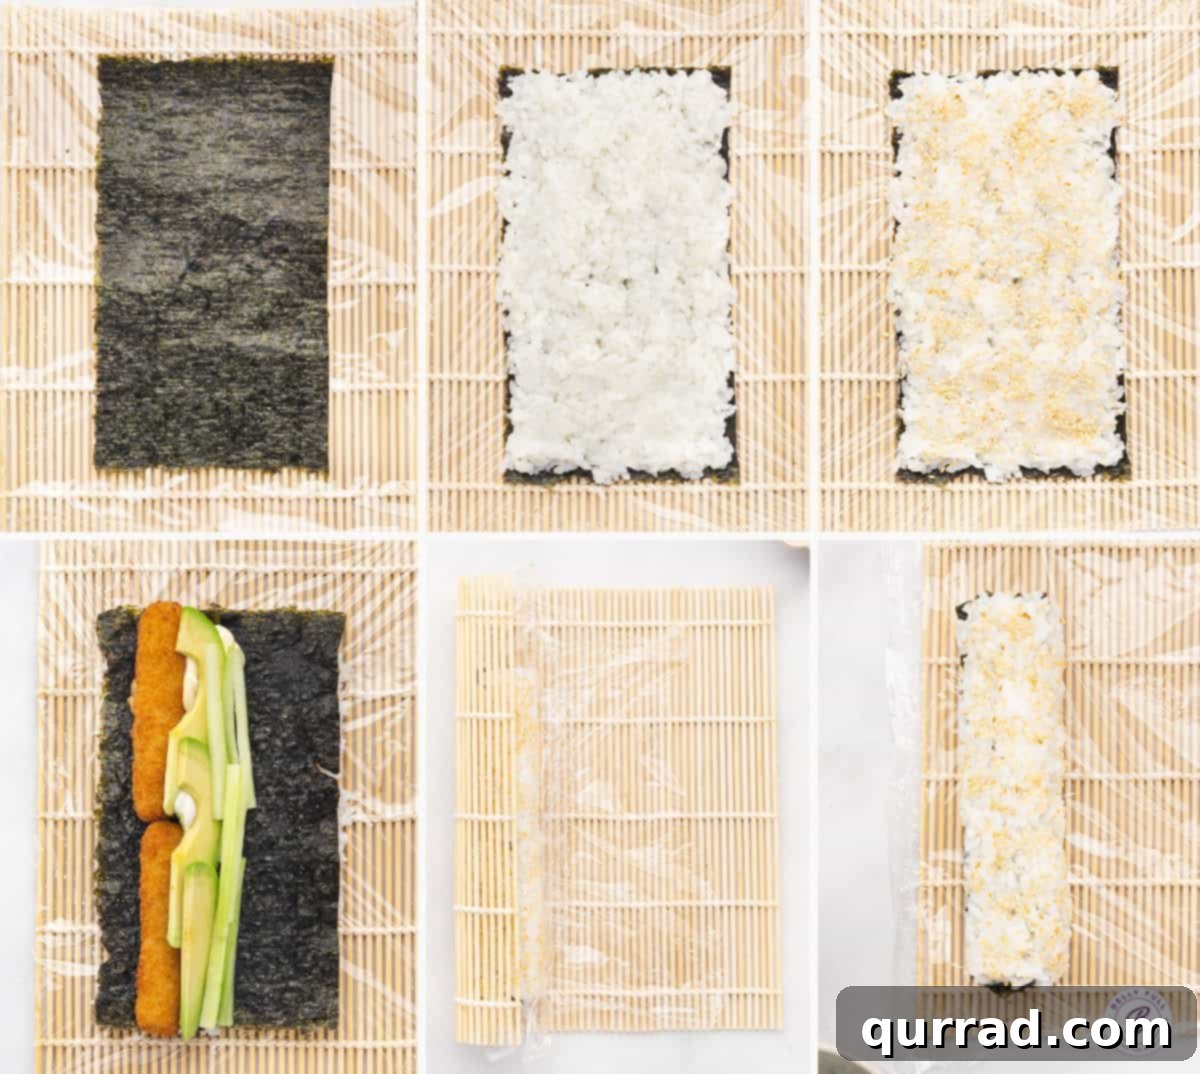
Making these delicious fish stick sushi rolls is a straightforward process that’s much simpler than you might imagine. Follow these detailed steps, using the provided images as a helpful visual guide, to achieve perfect rolls every time.
(For precise quantities and a printable recipe card, please scroll down to the bottom of the page.)
- Prepare the Sushi Rice: Begin by thoroughly rinsing your sushi rice under cold running water until the water runs completely clear. This step is crucial for removing excess starch and achieving the ideal texture. Transfer the rinsed rice and the appropriate amount of water to a saucepan. Bring it to a boil over medium-high heat, then immediately reduce the heat to low, cover the saucepan tightly, and allow it to simmer until the rice is tender and all the water has been fully absorbed.
- Season the Rice: Once cooked, transfer the warm rice to a large, greased baking sheet or a wide baking dish. Evenly drizzle the cooled seasoned rice vinegar over the entire surface of the rice. Using a rice paddle or a large spoon, employ a gentle slicing motion to combine the vinegar with the rice. Avoid stirring or mashing, as this can break the grains. While mixing, gently fan the rice with a piece of cardboard or a hand fan to help it cool and dry slightly, preventing it from becoming overly sticky. Set the seasoned rice aside to cool to room temperature.
- Cook the Fish Sticks: Prepare your breaded fish sticks according to the package instructions. For maximum crispiness – which is key to these sushi rolls – we highly recommend air frying them. This method not only yields an extra-crispy exterior but is also often faster than oven baking.
- Assemble Your Rolls: Take a nori sheet and cut it in half along its shorter end. Lay a bamboo sushi rolling mat flat and cover it with a sheet of plastic wrap. Place one half of the nori sheet on top of the plastic-lined mat. With wet hands (this prevents the rice from sticking to your fingers), evenly spread about 1/2 cup of the cooled sushi rice over the nori, covering most of the surface. Sprinkle a generous amount of toasted sesame seeds over the rice for added flavor and visual appeal.
- Layer the Fillings: Carefully flip the nori sheet over so the rice side is now facing down on the plastic wrap. Drizzle a small amount of Kewpie mayonnaise in a line across the middle of the nori. Arrange two cooked fish sticks horizontally along the center of the sheet. Layer with delicate slices of ripe avocado and crisp julienned cucumbers, placing them alongside the fish sticks. (Refer to the images in the article for a clearer visual guide on proper placement.)
- Roll the Sushi: This is where the magic happens! Gently lift the bottom edge of the bamboo mat, slowly moving the nori sheet over the fillings. Begin to roll upwards, keeping the roll very tight and applying gentle, even pressure as you go. The goal is to create a compact, cylindrical roll that encapsulates all the ingredients. Continue rolling until the entire sheet comes away from the plastic wrap, leaving you with a perfectly formed sushi log.
- Slice and Serve: For clean and precise cuts, use a very sharp knife. Dip the knife in water between each slice to prevent the rice from sticking. Make long, single-stroke slices to cut the roll into 6-8 uniform pieces. Avoid sawing back and forth, as this can tear the nori and distort the roll’s shape.
- Enjoy Your Creation: Arrange your freshly sliced fish stick sushi rolls on a platter. Serve them immediately with your preferred condiments, such as soy sauce, a dab of wasabi, refreshing pickled ginger, or a drizzle of spicy Sriracha-mayo. Get ready to impress your family and friends with this homemade delight!
Expert Tips for Crafting Flawless Sushi Rolls
While making sushi might seem a bit intimidating at first glance, these expert tips and tricks will transform the process into a smooth and enjoyable experience, even for beginners. With a little practice, you’ll be rolling like a pro!
- Handle the Rice with Care: When incorporating the seasoned rice vinegar into your cooked sushi rice, remember to use a gentle slicing or cutting motion with your rice paddle or spoon. The aim is to separate the grains and evenly distribute the seasoning without mashing or crushing the delicate rice. This preserves its texture and stickiness, which is crucial for well-formed rolls.
- Keep Your Hands Moist: Sushi rice is inherently sticky, and it loves to cling to anything it touches, especially dry hands. To prevent this frustration when pressing the rice onto the nori sheet, always keep a small bowl of water nearby. Dip your hands into the water frequently to keep them damp, creating a non-stick surface that makes spreading the rice significantly easier.
- Always Use Freshly Prepared Sushi Rice: For the best texture and flavor, it is highly recommended to prepare your sushi rice fresh just before assembling your rolls. Cooked rice tends to become hard and dry when refrigerated, losing its essential sticky and pliable qualities. If, for any reason, you absolutely must prepare it ahead of time, ensure it’s tightly covered with plastic wrap in an airtight container and stored in the fridge. Before use, microwave it briefly to bring it back to room temperature (not hot!), adding a tiny touch of water if needed to loosen it up.
- Roll with Gentle Firmness: The key to a well-structured sushi roll is applying consistent, gentle pressure as you roll. You want the roll to be firm enough to hold its shape without falling apart, but not so tight that the nori tears or the fillings burst out the sides. Use your bamboo mat to guide and compress the roll evenly, ensuring a snug fit for all ingredients.
- Master the Single-Stroke Slice: Achieving clean, appealing sushi pieces is all about the cut. Always use a very sharp knife to slice your rolls. The secret is to make each cut in one smooth, continuous motion, rather than a back-and-forth sawing action. Sawing will tear the nori and create ragged edges. For even cleaner slices, dip your knife in water between each cut to prevent rice from sticking to the blade.
- Prepare Your Workspace: Before you begin rolling, gather all your ingredients and tools. Have your cooked fish sticks, sliced avocado and cucumber, seasoned sushi rice, nori sheets, bamboo mat (lined with plastic wrap), and a bowl of water ready. A well-organized workspace makes the assembly process much more efficient and enjoyable.
Creative Filling and Flavor Combinations
While our crispy breaded fish sticks are an incredibly easy and delicious base, the world of sushi fillings is vast and full of possibilities! Don’t hesitate to get creative and customize your rolls to suit your taste or what you have on hand.
- Imitation Crab: A classic and widely loved sushi filling, offering a subtly sweet, delicate flavor and flaky texture.
- Shrimp Tempura: For an extra layer of crunch and rich flavor, swap out fish sticks for homemade or store-bought shrimp tempura.
- Cooked Shrimp: Simple boiled or pan-seared shrimp can offer a tender, sweet contrast to your rolls.
- Cream Cheese: Adds a rich, creamy element, perfect for pairing with smoked salmon or imitation crab for a “Philadelphia roll” inspired twist.
- Carrot: Thinly julienned carrots provide a delightful crunch and a hint of earthy sweetness.
- Salmon or Tuna: For a more traditional sushi experience, consider using sushi-grade raw salmon or tuna, ensuring proper handling and sourcing.
- **Other Vegetable Options:** Think thinly sliced bell peppers, blanched asparagus, or even pickled radish for an added tang.
- **Sauce Swaps:** Beyond Kewpie mayo, consider a drizzle of eel sauce (unagi sauce), a dash of spicy aioli, or even a sweet chili sauce inside your rolls for another layer of flavor.
Proper Storage and Enjoying Leftovers
Fish stick sushi rolls, like most sushi, are undoubtedly at their peak flavor and texture when enjoyed immediately after preparation. The crispy fish sticks, fresh vegetables, and perfectly seasoned rice are best savored right away.
However, if you find yourself with leftovers, you can certainly store them. Wrap the rolls tightly in plastic wrap to minimize air exposure and refrigerate them for 1-2 days. It’s important to note that the crispy fish sticks will inevitably lose their irresistible crunch once refrigerated. You’ll need to enjoy the fish cold, as reheating them is not recommended and would further compromise the texture. While they won’t have the same crunch as fresh, they can still be a tasty, convenient snack or light meal.
Explore More Delightful Sushi Creations
If you’ve enjoyed making these fish stick sushi rolls, you’re ready to dive deeper into the world of homemade sushi and sushi-inspired dishes. Here are a few more recipes to ignite your culinary imagination:
- Cucumber Sushi Boats
- Sushi Bake
- California Roll Sushi Bowls
- Slacker Sushi Bowls
We genuinely hope you adore this delicious and incredibly easy recipe. Don’t forget to leave a review below and share your thoughts! Additionally, stay connected with Belly Full for more mouthwatering recipes by following us on TikTok, Facebook,Instagram,Pinterest, and YouTube!
Fish Stick Sushi Rolls
Pin
Ingredients
- 1 & 1/2 cups uncooked short-grained Calrose “sushi” rice
- water
- 1/4 cup seasoned rice vinegar
- 2 nori seaweed sheets
- 1 tablespoon toasted sesame seeds
- 2 tablespoons Kewpie Japanese mayonnaise
- 8 breaded fish sticks, (I use Gorton’s brand)
- 1 medium ripe avocado, , sliced
- 2 small Persian cucumbers, , ends trimmed, sliced julienned
- For serving: , soy sauce, wasabi, garlic, pickled ginger, Sriracha-mayo
Instructions
-
Rinse your rice under cold running water until the water runs clear. Combine the rinsed rice and water in a saucepan and cook according to the package directions, until tender and all water is absorbed.
Transfer the cooked rice to a greased rimmed baking sheet or baking dish. Drizzle the seasoned rice vinegar evenly over the top. Gently combine using a slicing motion with a rice paddle or spoon, being careful not to stir or mash. Fan the rice while mixing to help it cool and dry slightly. Set aside to cool to room temperature.
-
Cook the fish sticks according to package directions. For optimal crispiness, air frying is recommended, but baking is also a suitable option.
-
Cut each nori seaweed sheet in half along its shorter end.
-
Line a bamboo sushi rolling mat with plastic wrap. Place one half of a nori sheet on top. With damp hands (to prevent sticking), evenly spread about 1/2 cup of the cooked and cooled sushi rice over the nori.
-
Sprinkle approximately one teaspoon of toasted sesame seeds over the rice.
-
Carefully flip the nori and rice sheet over so the rice side is facing down on the plastic wrap. Drizzle a small amount of Kewpie Japanese mayonnaise horizontally along the middle. Place 2 cooked fish sticks horizontally along the center of the seaweed. Layer with avocado slices and julienned cucumbers alongside the fish sticks. (Refer to the images in the article for visual guidance.)
-
Using the bamboo mat, roll the sushi tightly, applying gentle, even pressure. Once rolled, remove the plastic wrap before slicing. (TIP: Use a very sharp knife and make one clean stroke per slice. Dip the knife in water between cuts to prevent rice from sticking. Do not use a sawing motion, which can tear the roll.)
-
Serve your freshly made fish stick sushi rolls immediately with soy sauce, wasabi, pickled ginger, and a drizzle of Sriracha-mayo, if desired.
Notes
Nutrition
Nutritional information given is an automatic calculation and can vary based on the exact products you use and any changes you make to the recipe. If these numbers are very important to you, I would recommend calculating them yourself.