
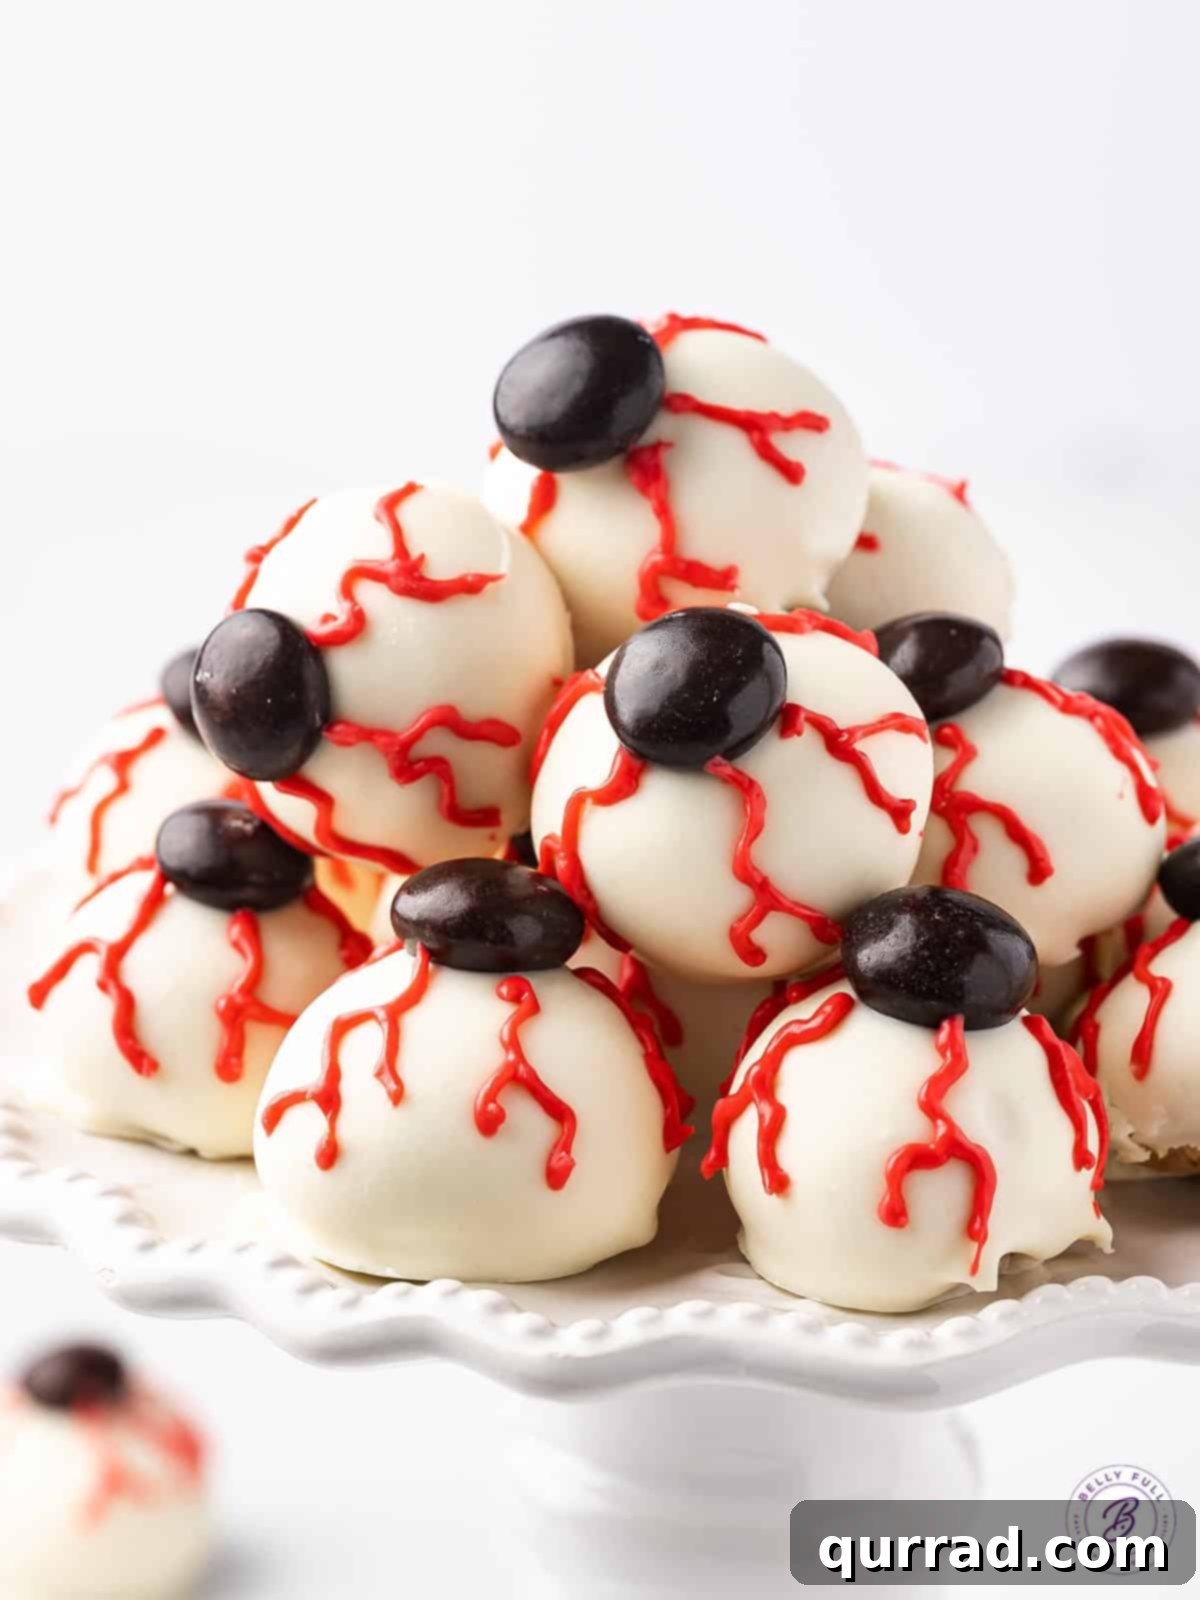
Get ready to cast a delicious spell this Halloween with these incredibly fun and spooky Halloween Bloodshot Eyeballs Candy! These whimsical treats are guaranteed to be the life of your Halloween party, with their eerie gaze drawing in every guest. But don’t let their creepy appearance fool you; beneath that chilling exterior lies a sweet, creamy, and utterly irresistible peanut butter ball generously coated in decadent chocolate. Best of all, they’re a breeze to make, requiring no baking whatsoever, making them the perfect project for busy Halloween hosts and enthusiastic home bakers alike. Prepare for them to be devoured in a flash!
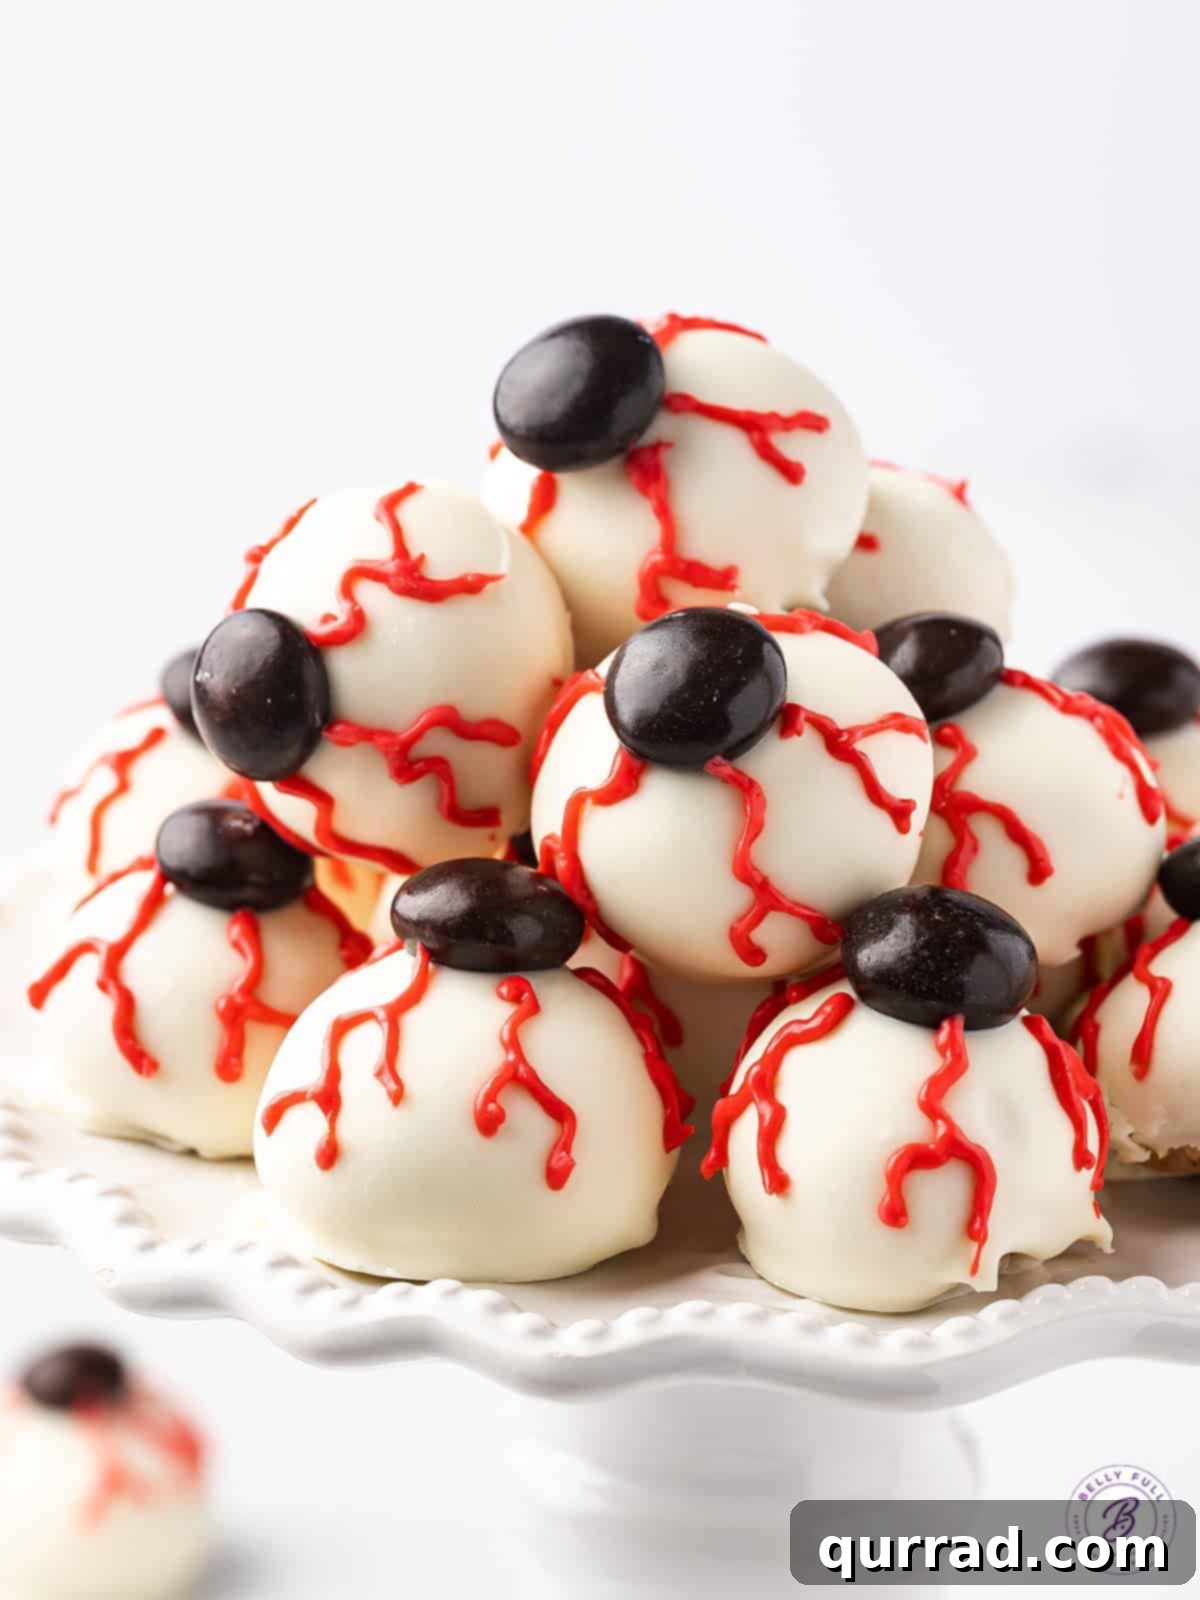
No-Bake Halloween Bloodshot Eyeballs: The Ultimate Spooky Sweet
If you’re a fan of classic peanut butter balls, you’re in for a real treat with this fantastically creepy Halloween variation. These Bloodshot Eyeballs take everything you love about the original—the smooth, rich peanut butter flavor, the satisfying chocolate coating—and add a ghoulishly delightful twist. The beauty of this recipe lies in its simplicity and the fact that it’s completely no-bake. That means no oven time, no complicated steps, and minimal cleanup, leaving you more time to enjoy the Halloween festivities.
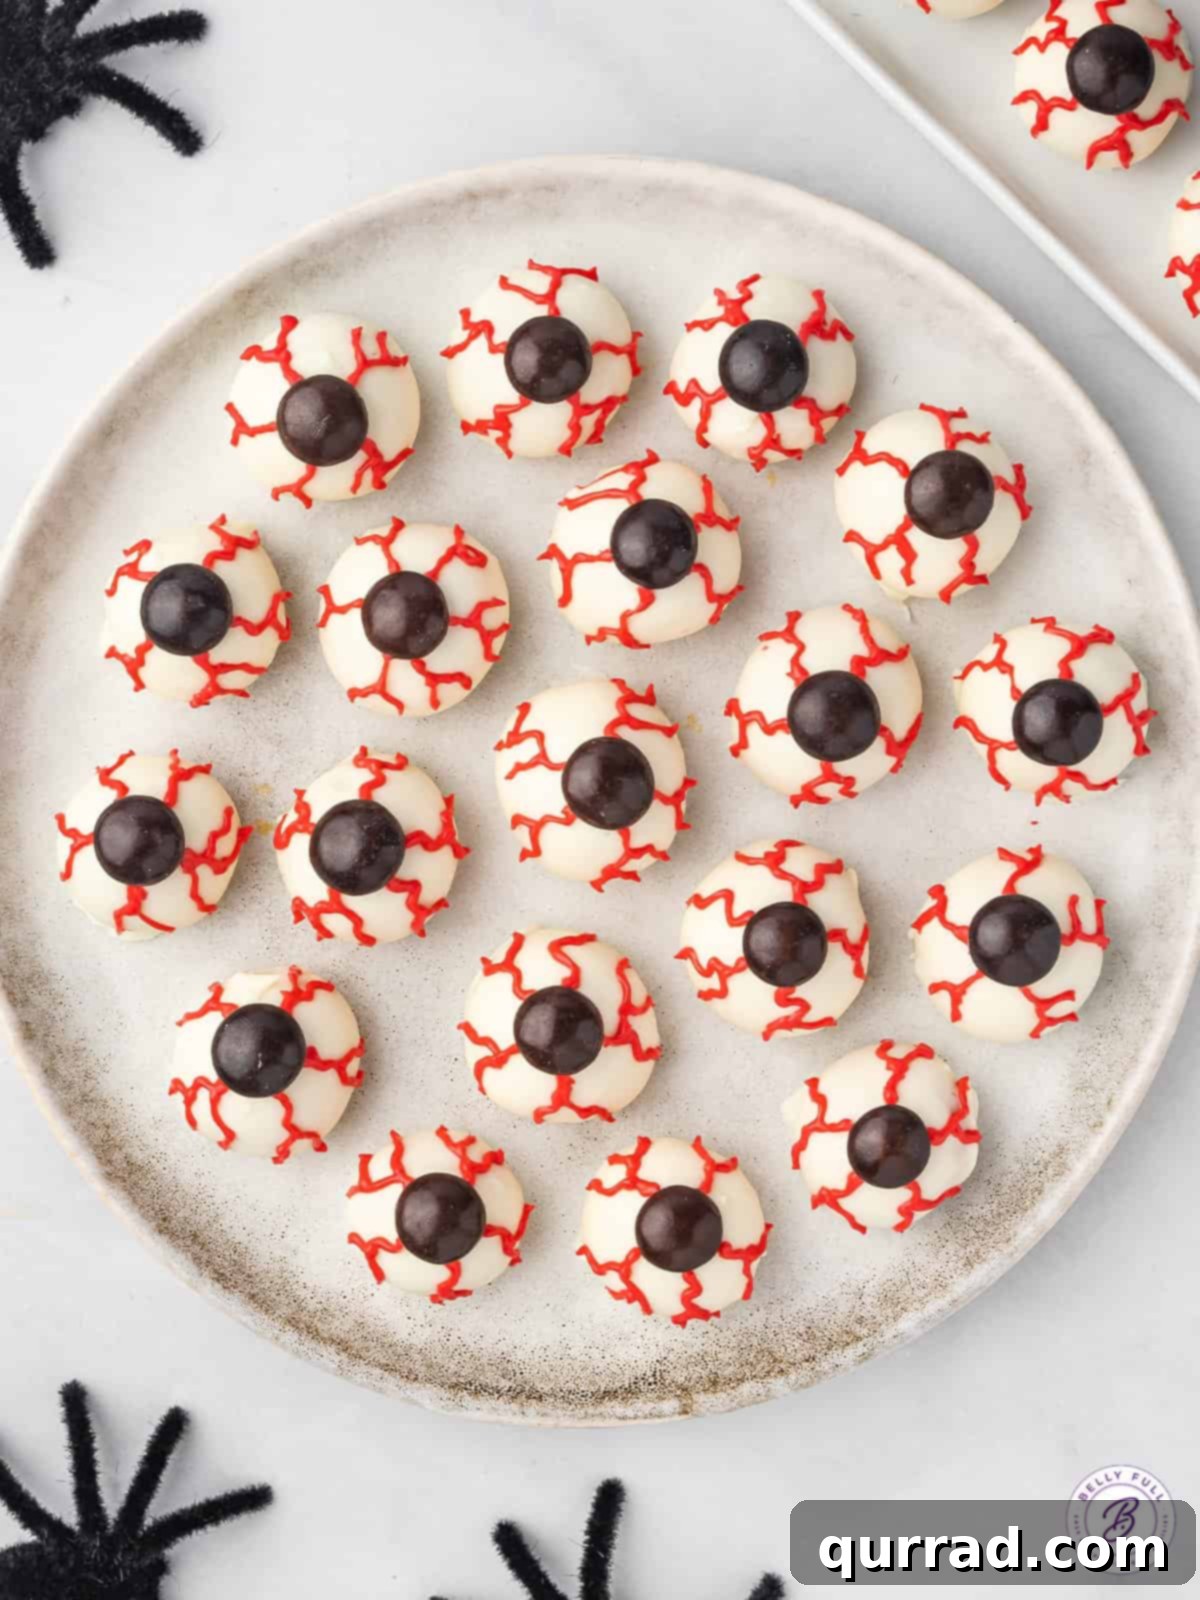
Crafting these spooky delights begins with blending creamy peanut butter with softened butter and powdered sugar, resulting in a perfectly smooth, sweet, and pliable filling. Each peanut butter ball is then dipped into a luscious melted white chocolate coating, creating the canvas for our eerie artwork. The final touch involves adding a brown candy for the pupil and artfully piping red food gel to create the bloodshot effect. The result? A treat that’s just creepy enough to be a festive holiday highlight, yet utterly harmless and appealing to even the most easily frightened guests. They’re so good, they’ll disappear faster than a ghost on Halloween night!
This recipe isn’t just easy; it’s an ideal way to get kids involved in the kitchen during the holiday season. The rolling, dipping, and decorating steps are simple and fun, making it a memorable activity for the whole family. Plus, the quick setting time means less waiting and more enjoying your spooky creations.
Essential Ingredients for Spooky Sweet Success
This delightful Halloween peanut butter balls recipe requires just a handful of staple pantry ingredients, along with a few festive additions for decoration. Here’s a detailed look at what you’ll need to create these captivating candy eyeballs:
- Creamy Peanut Butter: The star of our show! It’s crucial to use commercial creamy peanut butter (like Jif or Skippy) for this recipe. Natural peanut butter, while delicious, has a different consistency due to oil separation and can make your mixture too oily or crumbly, preventing the balls from holding their shape properly.
- Powdered Sugar: Also known as confectioners’ sugar, this ingredient sweetens the peanut butter filling and, most importantly, provides that silky-smooth texture we’re aiming for. Granulated sugar will result in a gritty filling, so stick to powdered for the best results.
- Unsalted Butter: Softened to room temperature, the butter blends effortlessly with the peanut butter and sugar, contributing to the creamy, rich consistency of the filling. Using unsalted butter allows you to control the overall saltiness of your candy.
- Vanilla Extract: A touch of pure vanilla extract elevates the flavor profile, adding warmth and depth that complements the peanut butter and chocolate beautifully.
- Salt: Just a pinch of salt is all you need to perfectly balance the sweetness of the sugar and chocolate, enhancing all the other flavors without making the treats taste salty.
- White Candy Melts: For the iconic “eyeball” base, white candy melts are highly recommended. Brands like Wilton candy melts, Ghirardelli melting wafers, or CandiQuik almond bark work wonderfully. These products are specifically designed for melting smoothly and setting quickly, providing a firm, non-sticky coating that holds up well at room temperature. Avoid regular white chocolate chips, which can be temperamental to melt and may require adding a touch of coconut oil to achieve a dippable consistency (see tips below for more detail).
- M&Ms (Brown): These small chocolate candies serve as the perfect pupils for our bloodshot eyeballs, adding a contrasting color and a satisfying little crunch.
- Red Food Gel: To create the eerie “bloodshot” effect, red food gel is ideal. Gel colors are highly concentrated, allowing you to achieve vibrant red lines without altering the consistency of your melted chocolate too much. A little goes a long way!
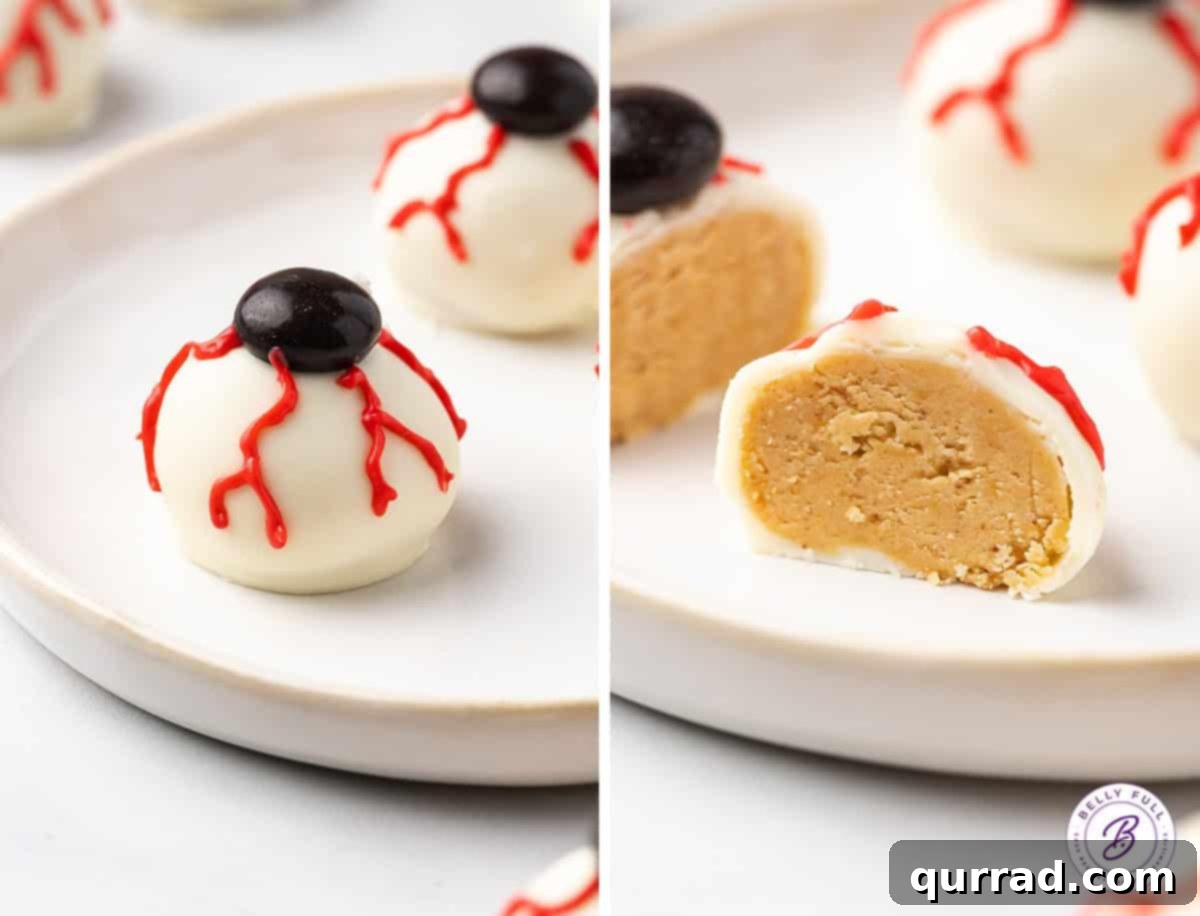
Expert Tips for Perfect Bloodshot Eyeballs
Achieving perfectly smooth, firm, and spooky bloodshot eyeballs is easy with a few key tips and tricks:
- Choosing Your Coating: Candy Melts vs. Regular Chocolate: As mentioned, I highly recommend using Wilton candy melts, Ghirardelli melting wafers, or CandiQuik almond bark. These products are formulated to melt into a smooth, even consistency ideal for dipping, and they set quickly and firmly. This means your candy eyeballs can be left out at room temperature without becoming soft or sticky, which is a huge advantage for party planning. If you opt to use regular white chocolate chips, you’ll likely need to add a small amount of coconut oil (about 1-2 teaspoons per cup of chocolate chips) to thin it out and ensure a smooth, dippable texture. Without the oil, regular chocolate chips can be too thick or seize when melted, making dipping a challenge.
- Maintaining the Peanut Butter Balls’ Firmness: The key to a clean, even chocolate coating is starting with firm, cold peanut butter balls. After shaping, freezing them for at least 30 minutes is crucial. As you work, if the peanut butter balls begin to soften too much, don’t hesitate to pop them back into the freezer for a few minutes. It’s often easier to work in batches, taking only a few balls out of the freezer at a time to dip, while keeping the rest chilled. This prevents them from losing their shape and makes dipping much more manageable.
- Melting Your Candy Melts Properly: Whether you use a microwave or a double boiler, melt your candy melts slowly and stir frequently. In the microwave, heat in 30-second intervals, stirring well after each, until smooth. Overheating can cause the melts to seize or become lumpy. For a double boiler, ensure the water in the bottom pot never touches the bottom of the bowl holding the melts, and use gentle heat.
- Achieving the Bloodshot Look: For the red “blood vessels,” use a small, resealable plastic bag with a tiny corner snipped off, or a very fine piping tip. This allows for precise, delicate lines. Start with just a couple of drops of red food gel in your remaining melted white chocolate, as gel colors are potent. Add more gradually until you achieve your desired shade of red. Experiment with wavy, irregular lines to mimic realistic veins for that truly bloodshot appearance.
- Patience During Setting: Allow each layer to set completely before moving on to the next. The initial freeze after shaping the peanut butter balls, the quick chill after dipping and adding the M&Ms, and the final freeze after piping the red veins are all important for a polished final product.
Serving Suggestions for a Spooktacular Party
These Bloodshot Eyeballs Candy are not just a treat for the taste buds but also a fantastic centerpiece for your Halloween spread. Thanks to their durable candy coating, they can happily sit out on your countertop for several hours, freeing up precious refrigerator space for other party essentials. Just be sure to keep them away from direct sunlight, excessive heat, or humidity, which could cause the coating to melt or become sticky.
To create an unforgettable Halloween party experience, consider pairing these creepy confections with a selection of other festive treats. Imagine a table laden with our decadent Halloween Poke Cake, its vibrant layers offering a sweet contrast. Add a touch of whimsical spookiness with our delicate Ghost Meringue Cookies, their ethereal presence floating alongside the watchful eyes. For a savory and fun snack, whip up a batch of our addictively crunchy Monster Munch, a perfect counterpoint to the sweetness. And to wash it all down, a bubbling, fizzy glass of our vibrant Witches Brew Punch will complete your chillingly delightful culinary tableau. Your guests will be enchanted by both the visual feast and the delicious array of flavors!
Proper Storage for Lasting Freshness
Knowing how to store your Halloween Bloodshot Eyeballs Candy properly will ensure they remain fresh and delicious for days, or even months, after you make them. Here’s a detailed guide:
- Countertop Storage: Thanks to the stable candy melt coating, these treats can be stored, covered loosely (to prevent condensation), at room temperature for up to 3-4 days. It’s essential to keep them in a cool, dry place, away from direct sunlight, heat sources, or any moisture and humidity, which can cause the chocolate to bloom or melt. An airtight container isn’t strictly necessary for short-term countertop storage but can help keep them fresh.
- Refrigerator Storage: For extended freshness, transfer your bloodshot eyeballs to an airtight container and store them in the refrigerator. When properly stored in the fridge, they should remain delicious for 5-7 days. If you’re planning to serve them, allow them to come to room temperature for about 10-15 minutes before serving for the best texture and flavor.
- Freezer Storage: These peanut butter balls freeze exceptionally well, making them an excellent make-ahead treat. Once the chocolate coating has hardened completely (you can give them a final chill in the freezer for about 15 minutes to ensure this), transfer them to a freezer-safe, airtight container or a heavy-duty freezer bag. Layer them with parchment paper between layers to prevent sticking. They can be frozen for up to 3 months. To enjoy, simply thaw them in the refrigerator overnight, or at room temperature for a couple of hours.
Halloween Bloodshot Eyes Candy
35 mins
40 mins
1 hr 15 mins
24 eyeballs
Ingredients
-
1/2 cup creamy peanut butter
(or almond butter if preferred) - 3 tablespoons unsalted butter, softened
- 1 cup powdered sugar
- 1 teaspoon vanilla extract
- pinch of salt
- 10 ounces white candy melts
- 24 brown M&Ms
- red food gel
Instructions
- Line a baking sheet with parchment paper. This will prevent sticking and make cleanup easy.
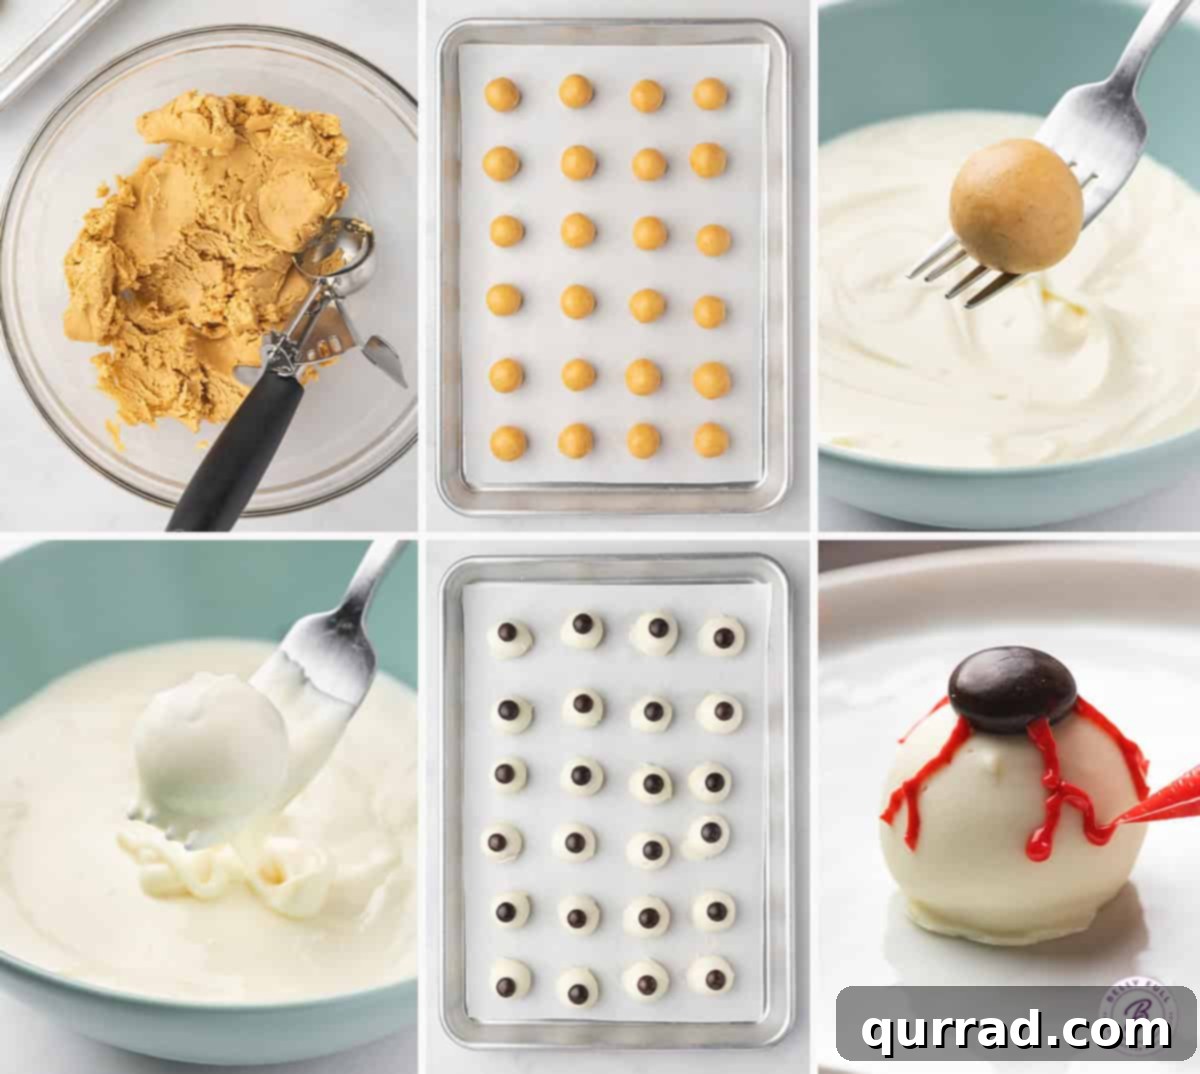
- In a large mixing bowl, using an electric mixer (or stand mixer with paddle attachment), cream together the peanut butter, softened unsalted butter, powdered sugar, vanilla extract, and pinch of salt until thoroughly combined and smooth. The mixture should be cohesive and hold its shape when pressed between two fingers without crumbling.
- Using a 1-inch sized cookie scoop or by hand, shape the mixture into uniform balls. The dough will be somewhat sticky, so a scoop helps maintain consistency. Place the shaped balls on your prepared baking sheet and transfer them to the freezer for a minimum of 30 minutes, or until they are firm enough to handle for dipping.
- While the peanut butter balls are chilling, melt the white candy melts according to package directions. This is typically done in the microwave in short intervals (30 seconds), stirring well between each, or using a double boiler, until the melts are completely smooth and free of lumps.
- Remove the firm peanut butter balls from the freezer. Dip each ball into the melted white chocolate, ensuring it’s fully coated. Gently tap off any excess chocolate. Place the coated ball back onto the parchment-lined baking sheet. Immediately press one brown M&M onto the top center of each eyeball to create the pupil before the chocolate sets. Return the baking sheet to the freezer for another 5 minutes, or until the chocolate coating is firm.
- Take the remaining melted white chocolate (if any) and add a few drops of red food gel. Mix thoroughly, adding more gel gradually until you achieve your desired shade of blood-red. Transfer this colored chocolate to a small, resealable plastic bag. Snip off a tiny corner of the bag to create a fine opening. Carefully pipe wavy, irregular lines downward from the M&Ms, mimicking blood vessels, to create the “bloodshot” effect.
- Place the decorated eyeballs back into the freezer for a final 5 minutes to ensure the red details set completely. Once firm, they are ready to serve and enjoy!
Nutrition
Calories:
96kcal
|
Carbohydrates:
10g
|
Protein:
1g
|
Fat:
6g
|
Saturated Fat:
3g
|
Polyunsaturated Fat:
1g
|
Monounsaturated Fat:
2g
|
Trans Fat:
0.1g
|
Cholesterol:
4mg
|
Sodium:
29mg
|
Potassium:
31mg
|
Fiber:
0.3g
|
Sugar:
9g
|
Vitamin A:
46IU
|
Vitamin C:
0.01mg
|
Calcium:
4mg
|
Iron:
0.1mg
Nutritional information is an estimate and can vary based on the exact products used and any modifications made to the recipe. For precise values, it’s recommended to calculate them independently.
I hope you thoroughly enjoy creating and sharing this delicious and incredibly simple recipe. It’s a fantastic way to add some homemade charm and spooky fun to your Halloween celebrations. Don’t forget to follow Belly Full on TikTok, Facebook, Instagram, Pinterest, and YouTube for more delightful recipes and inspiration!