
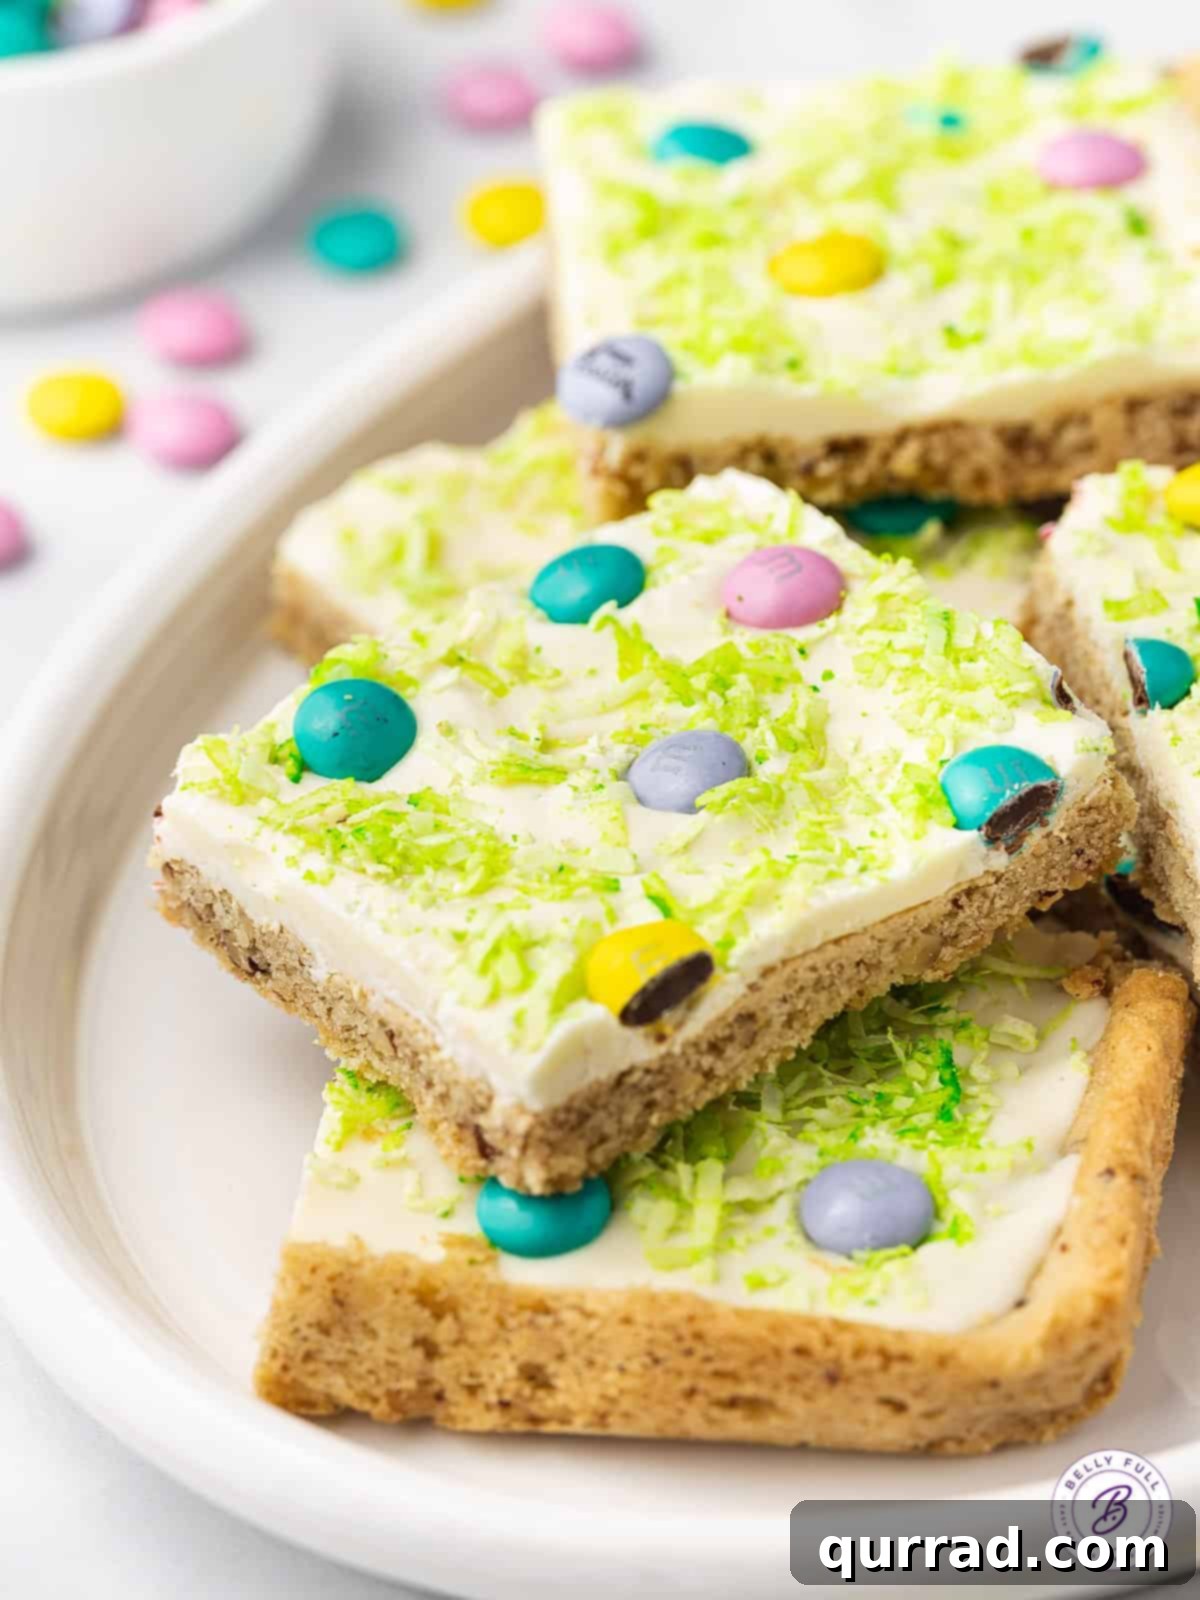
Welcome to the enchanting world of Easter baking, where delightful treats capture the essence of spring and joyous celebrations. Imagine a dessert so simple yet utterly charming, requiring just a handful of ingredients, and perfect for sharing. These Easter Sugar Cookie Bars are exactly that: an effortless and festive indulgence that will brighten any holiday table or springtime gathering. Forget the fuss of traditional cut-out cookies; these bars deliver all the beloved flavor and tender texture in a fraction of the time, making them a go-to recipe for busy bakers and dessert enthusiasts alike.
Sugar cookies hold a special place in our hearts for their versatility and classic appeal. Whether you prefer the simplicity of our easy sugar cookies, the intricate charm of cut-out sugar cookies, or the rich indulgence of chocolate sugar cookies, there’s a sugar cookie for every occasion. These Easter Sugar Cookie Bars combine the best of both worlds: the comforting taste of a classic sugar cookie base with a festive, eye-catching presentation that perfectly suits the Easter holiday and the vibrant spirit of spring.
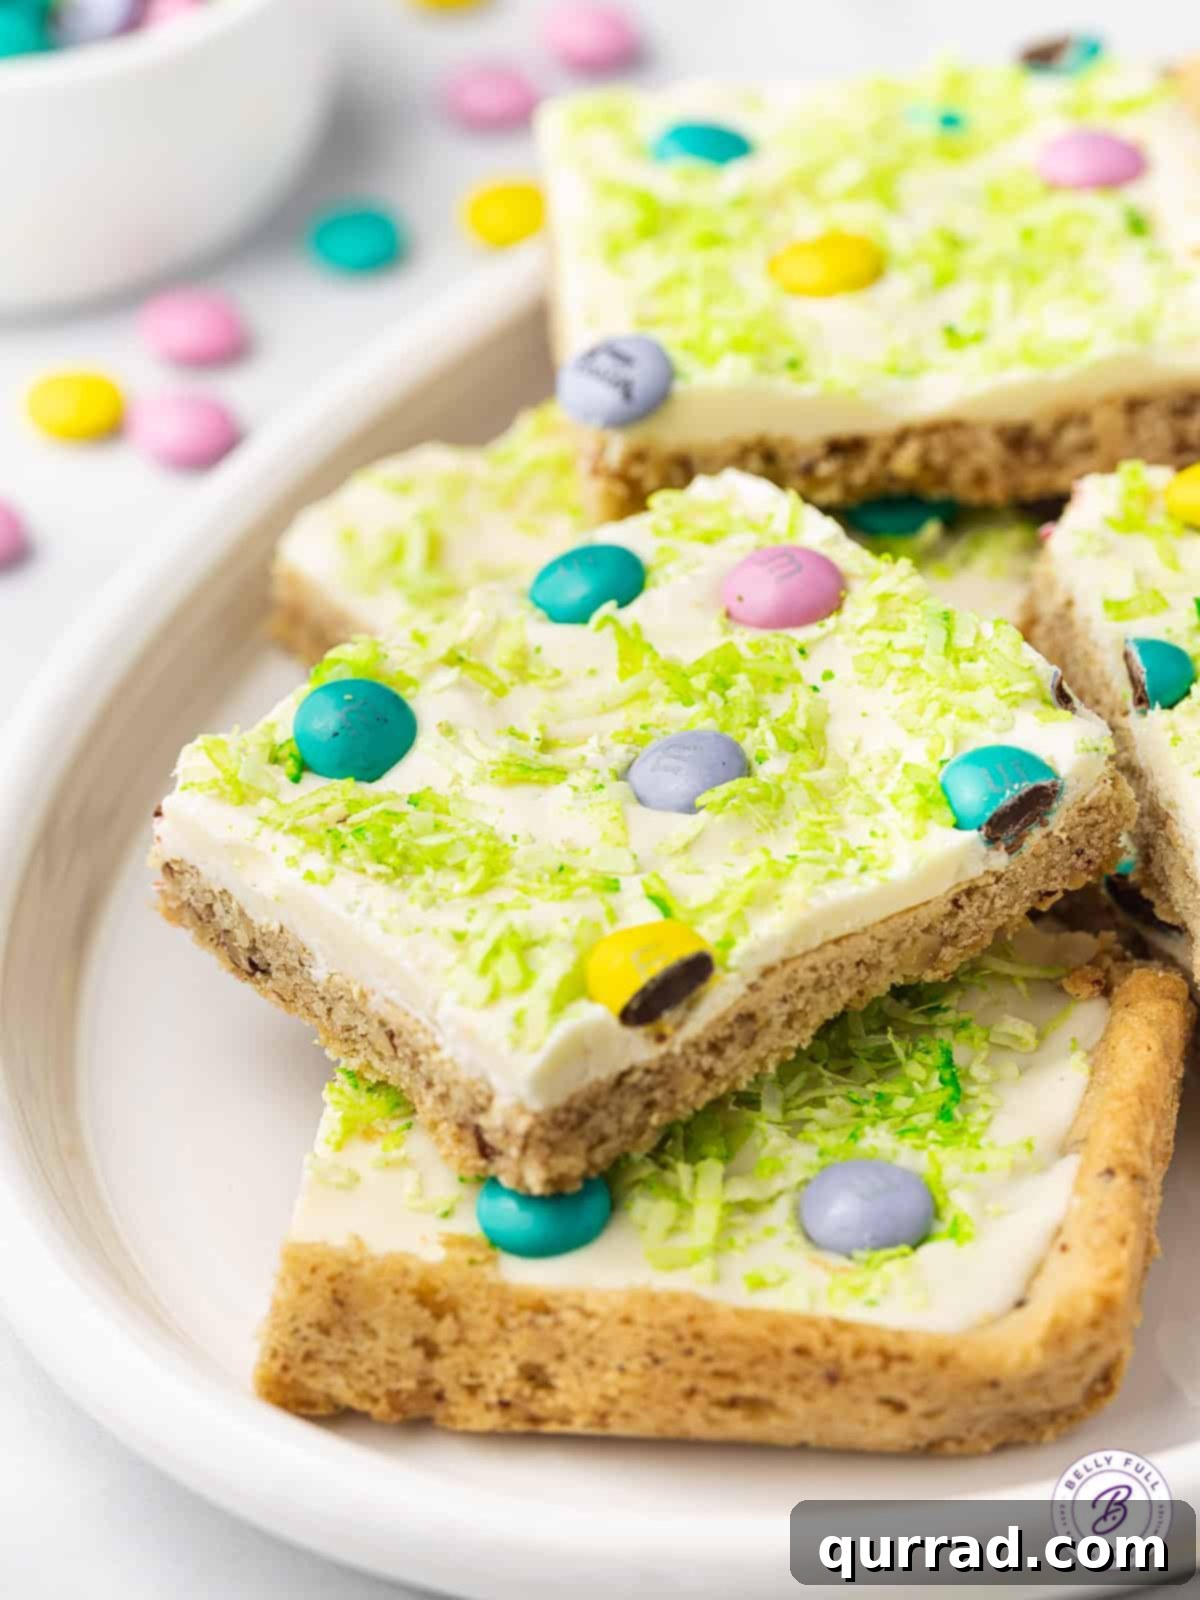
Effortless Easter Sugar Cookie Bars: A Springtime Delight
Spring is a time for renewal, fresh beginnings, and delightful pastel colors. What better way to celebrate than with a dessert that embodies all these vibrant qualities? Our Easy Easter Sugar Cookie Bar recipe is designed for maximum flavor and visual appeal with minimal effort. Inspired by the festive candies and sweet treats that fill store aisles this time of year, these cookie bars are a seasonal spin on our popular Praline Crunch Bars, maintaining the same incredible ease and deliciousness.
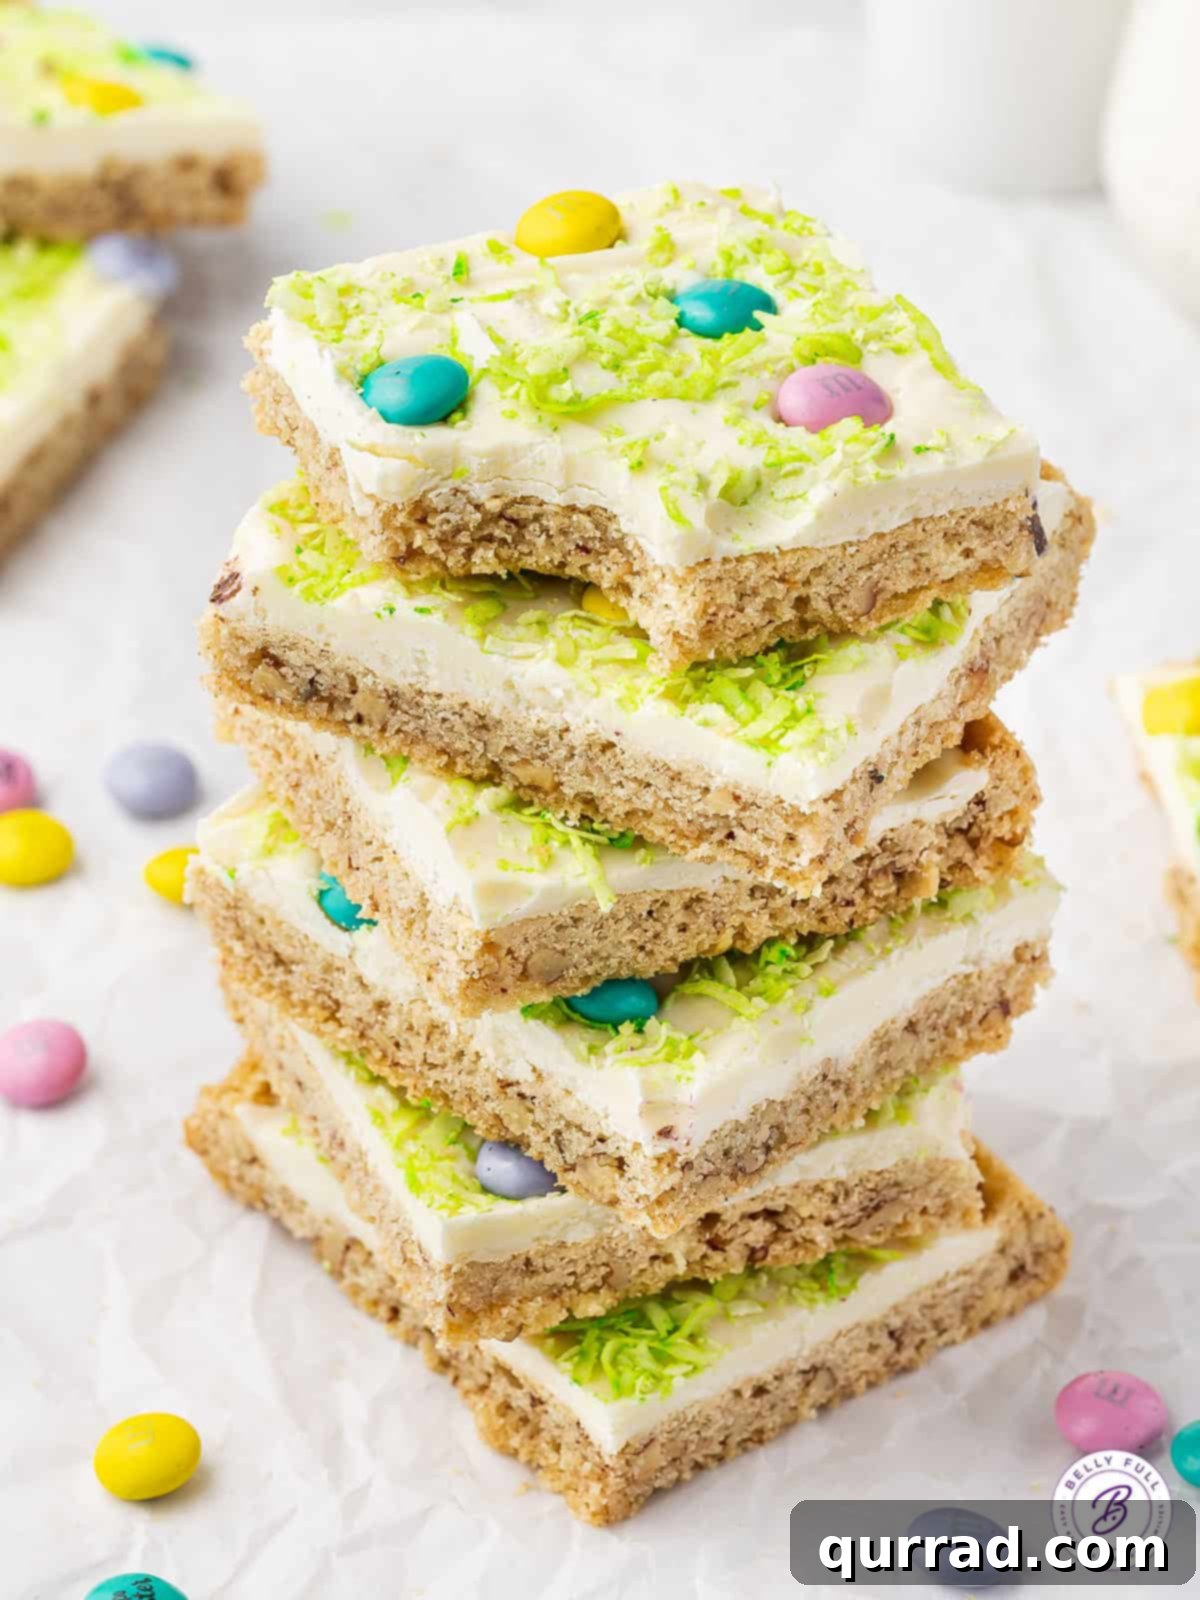
Each bar starts with a tender, buttery sugar cookie base, baked to golden perfection. This soft foundation is then generously topped with a smooth, sweet layer of melted white chocolate, creating a delightful contrast in texture and flavor. To truly capture the essence of Easter and spring, we add a playful touch of “grass” made from sweetened shredded coconut, dyed a vibrant green. Finally, a colorful scattering of pastel M&Ms completes the festive tableau, making these bars as much a feast for the eyes as they are for the palate. They are wonderfully soft, incredibly tender, and bursting with deliciousness – an absolute must-have for any Easter Sunday brunch, springtime picnic, or casual gathering.
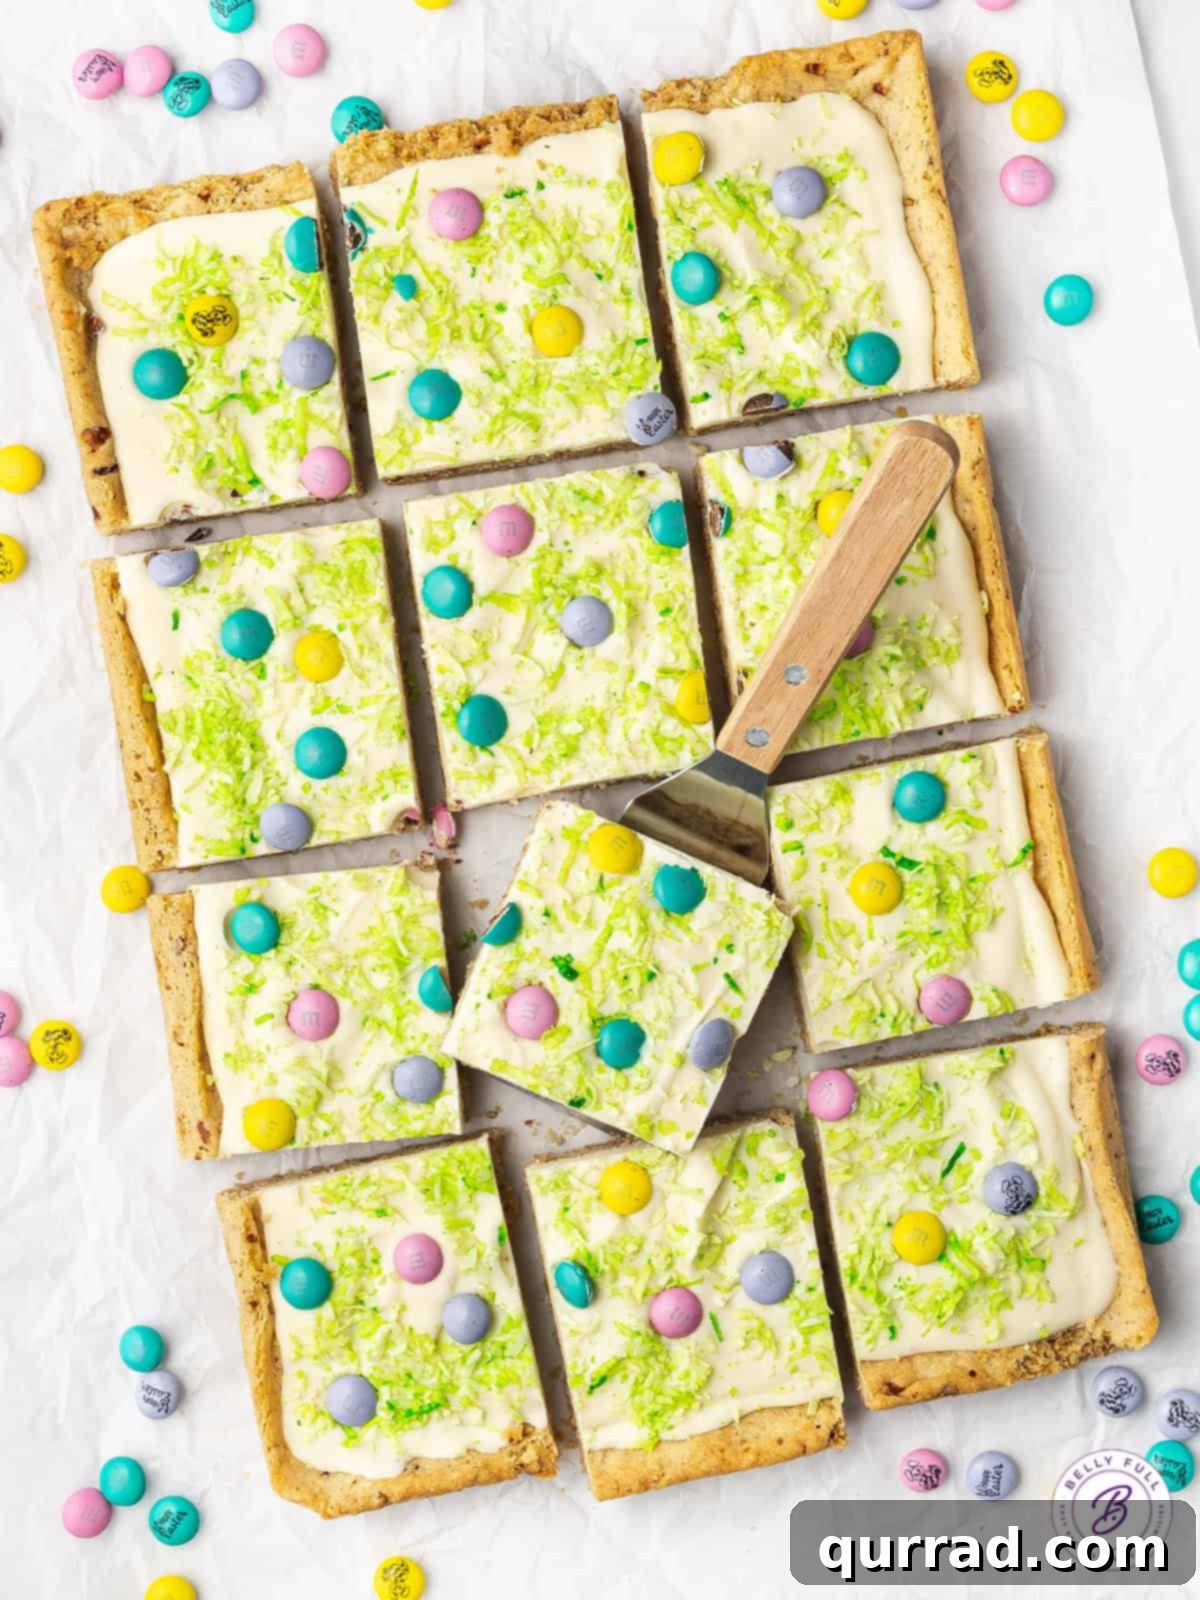
Essential Ingredients for Your Festive Cookie Bars
One of the best features of this recipe is its simplicity. You only need six core ingredients to create these incredibly delicious and festive dessert bars, making it a perfect choice for last-minute baking or when you want to minimize your grocery list. Each ingredient plays a crucial role in delivering the perfect balance of flavor, texture, and visual appeal. Below, we’ll delve into each component, offering tips and potential substitutions to ensure your cookie bars turn out perfectly every time.
- Sugar Cookie Dough: For ultimate convenience, we recommend using an 18-ounce roll of store-bought refrigerated sugar cookie dough. This simple shortcut dramatically cuts down on preparation time, allowing you to focus on the fun decorating. Ensure the dough is at room temperature before mixing, as this makes it much easier to knead and spread evenly. If you prefer the homemade touch, feel free to use your favorite sugar cookie dough recipe from scratch. The key is a soft, pliable dough that bakes up tender.
- Finely Chopped Pecans: These provide a wonderful nutty flavor and a subtle, delightful crunch that complements the sweet cookie and chocolate layers. The pecans are finely chopped and kneaded into the dough, ensuring even distribution in every bite. If you have nut allergies, or simply don’t care for nuts, these can be easily omitted without compromising the overall deliciousness of the bars. You could also try other finely chopped nuts like walnuts or almonds if pecans aren’t your favorite.
- White Chocolate Candy Melts: For the smooth, creamy topping that sets beautifully, we highly recommend white chocolate candy melts, Ghirardelli melting wafers, or almond bark. These products are specifically formulated to melt smoothly and harden firmly at room temperature, making them ideal for coating. Unlike regular white chocolate chips, they don’t typically require additional oil for melting, ensuring a perfect consistency.
- Sweetened Shredded Coconut: This ingredient is transformed into the whimsical “grass” for your Easter scene. We prefer sweetened shredded coconut for its sticky texture and extra touch of sweetness, which perfectly suits a dessert. However, if you prefer less sweetness or a different texture, unsweetened shredded coconut can be used. Just be aware that it might have a slightly drier consistency.
- Green Food Dye: A few drops of green food coloring are essential to transform the coconut flakes into vibrant, realistic-looking Easter grass. Gel food coloring typically provides a more intense color with less liquid, which is ideal for coloring coconut without making it soggy. Adjust the amount to achieve your desired shade of green, from a light spring pastel to a deeper grass hue.
- Pastel M&Ms: These small, colorful candies are the crowning glory of your Easter Sugar Cookie Bars, adding a burst of color and a satisfying candy crunch. Look for packages of pastel-colored M&Ms, which are readily available during the spring season. If M&Ms aren’t available or you’re looking for an alternative, other pastel-colored candies, Easter sprinkles, or even mini chocolate eggs can be used to create a similar festive effect.
Candy Melts vs. White Chocolate Chips: Understanding the Difference
When it comes to creating a smooth, set chocolate topping for your bars, the choice of white chocolate can make a big difference. We strongly recommend using candy melts, melting wafers, or almond bark over regular white chocolate chips. The reason lies in their composition: candy melts contain stabilizers and specific fats that allow them to melt into a perfectly smooth, fluid consistency and then set firmly at room temperature. This means your cookie bars can sit out at room temperature without the topping becoming soft or messy. Regular white chocolate chips, on the other hand, contain cocoa butter that can cause them to seize or become grainy when melted, and they tend to remain softer at room temperature. If you absolutely must use white chocolate chips, you’ll need to melt them very carefully with a small amount of coconut oil (typically 1 teaspoon per cup of chips) to achieve a smooth, workable consistency.
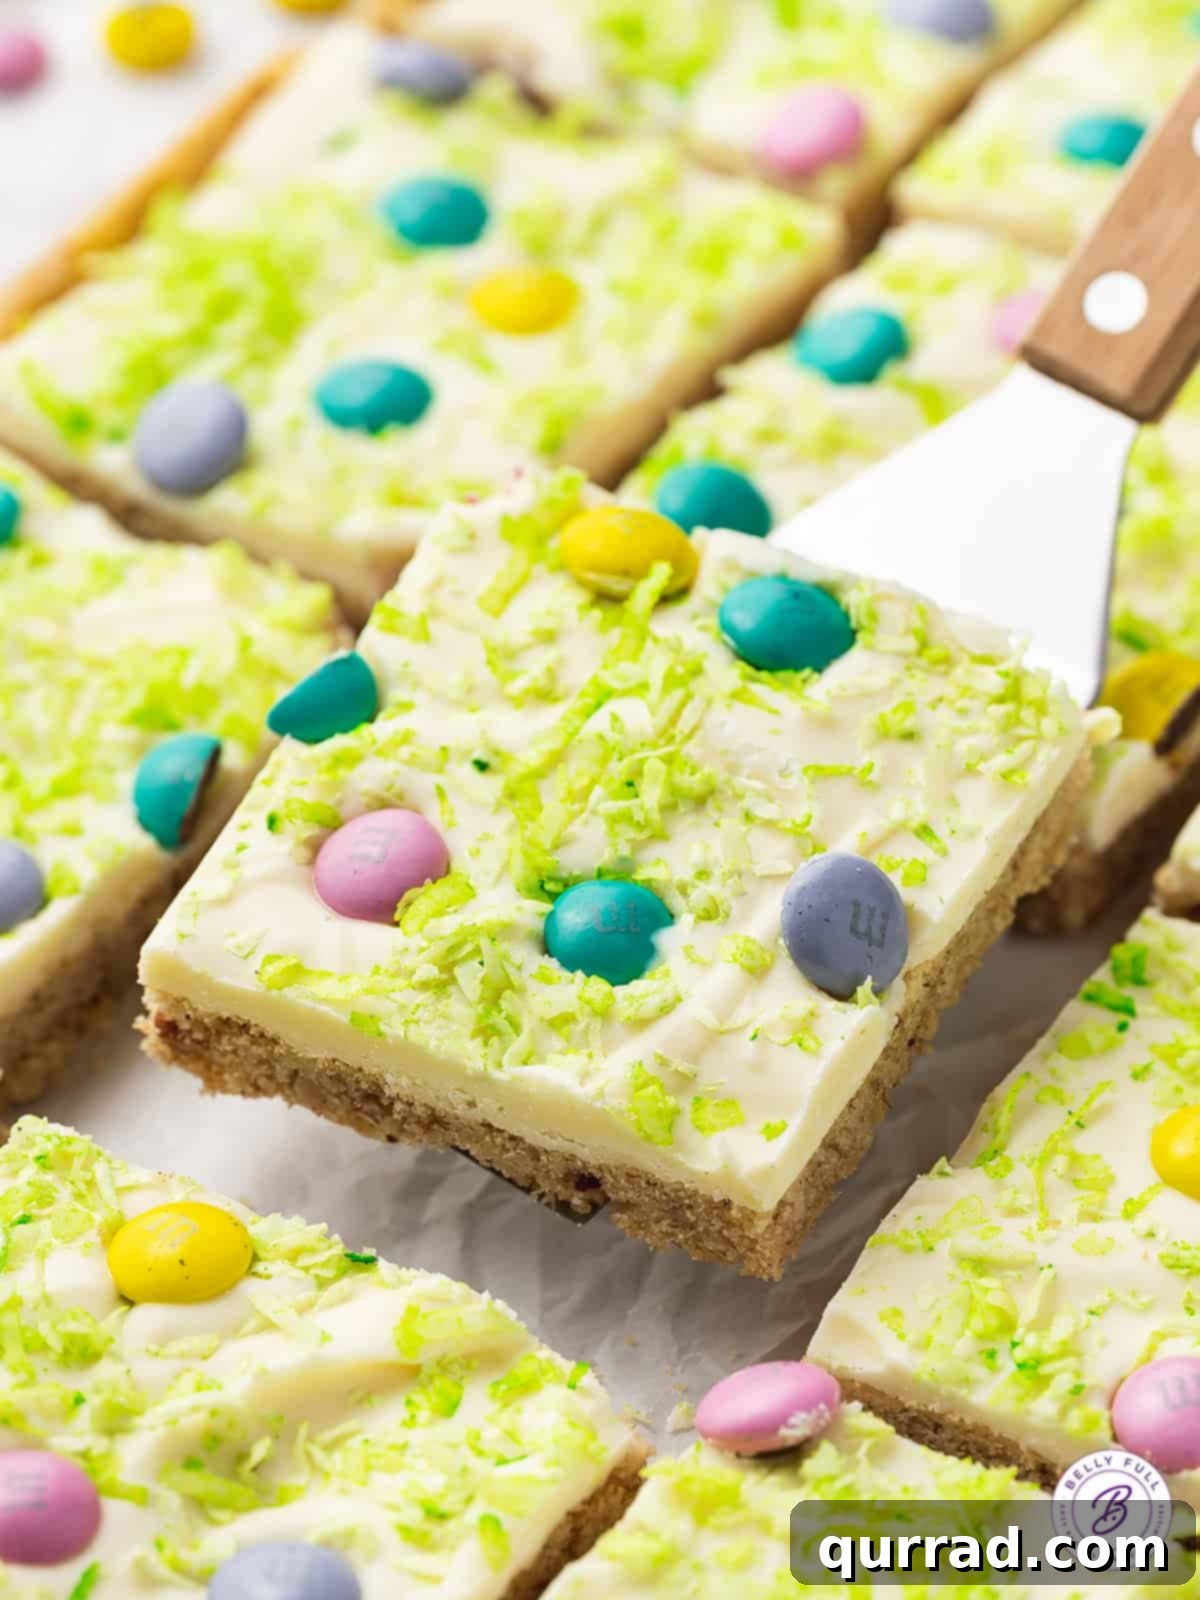
Crafting Your Easter Sugar Cookie Bars: A Step-by-Step Guide
This Easter dessert recipe is not only delicious but also incredibly simple to prepare, making it a perfect project for bakers of all skill levels. The process involves just a few straightforward steps, ensuring you can whip up a batch of these festive bars without any stress. Follow these detailed instructions to create a batch of beautifully decorated, soft, and chewy cookie bars that will be the star of your Easter celebration.
- Prepare Your Baking Pan: Begin by preheating your oven to 350°F (175°C). This ensures your oven is at the correct temperature for even baking. Next, line a 9×13-inch baking dish with parchment paper. It’s a good idea to leave a slight overhang on the two longer sides of the pan. This overhang acts as a convenient “handle” later, allowing you to easily lift the entire slab of baked cookie from the pan for clean cutting. Lightly grease the pan before lining to help the parchment paper adhere better.
- Prepare and Press the Dough: Take your room temperature sugar cookie dough and place it in a large resealable plastic bag. Add the finely chopped pecans to the bag. Knead the bag gently until the pecans are thoroughly and evenly incorporated throughout the cookie dough. This ensures every bite has a subtle nutty crunch. Once combined, press the dough evenly into the bottom of your prepared 9×13-inch baking pan. Make sure it forms an even layer from edge to edge to ensure consistent baking.
- Bake to Golden Perfection: Place the pan in your preheated oven and bake for approximately 12 to 15 minutes, or until the edges are lightly golden brown and the center appears set. Be careful not to overbake, as this can result in a dry, crumbly bar instead of a soft, tender one. The key to a chewy sugar cookie bar is to remove it from the oven when it’s just set. Once baked, remove the pan from the oven and allow the cookie base to cool completely on a wire rack. This is crucial before adding the chocolate topping.
- Create the Edible “Grass”: While your cookie base is cooling, prepare your festive green coconut “grass.” Place the sweetened shredded coconut in a small bowl or a clean resealable plastic bag. Add a couple of dots of green food coloring – start with a small amount, as you can always add more to deepen the color. Gently knead or mix the coconut until all the flakes are evenly coated and transformed into a vibrant green, resembling fresh spring grass. Set this aside.
- Melt the White Chocolate: Now it’s time to prepare the luscious white chocolate topping. Follow the package directions for your chosen candy melts, melting wafers, or almond bark. Typically, this involves melting them in a microwave-safe bowl in 30-second intervals, stirring well after each, until the chocolate is completely melted and smooth. Be careful not to overheat the chocolate, as this can cause it to seize or burn.
- Assemble Your Festive Bars: Once the baked cookie base is completely cool, pour the melted white chocolate evenly over the top. Use an offset spatula or the back of a spoon to spread the chocolate smoothly to all edges. Immediately, while the chocolate is still wet, lightly sprinkle the green-dyed coconut flakes over the entire surface. This creates your “grass” layer. Follow this by sprinkling the pastel M&Ms, making sure to gently press them into the melted chocolate so they adhere and don’t fall off once the chocolate sets.
- Allow to Set: For the chocolate to fully harden, you have two options. You can allow the assembled bars to stand at room temperature for a couple of hours, or you can speed up the process by chilling them in the refrigerator for about 15-30 minutes. The refrigerator method is ideal if you’re short on time, but ensure the chocolate is fully set before proceeding to the next step.
- Cut and Serve: Once the chocolate topping is completely set and firm, use the parchment paper overhangs to carefully lift the entire cookie slab out of the baking pan and transfer it to a cutting board. Using a sharp knife, cut the slab into individual bars. For cleaner cuts, you can lightly warm your knife under hot water and wipe it dry between cuts. Arrange the beautifully decorated Easter Sugar Cookie Bars on a serving platter and enjoy your festive, homemade treat!
TIP: Soften the Cookie Dough for Easier Handling
A crucial tip for effortless dough preparation is to allow your refrigerated sugar cookie dough to sit out at room temperature while you preheat the oven. This softening period makes the dough much more pliable and easier to knead with the chopped pecans, ensuring they are evenly distributed without excessive effort. Attempting to knead cold, stiff dough can be challenging and may not yield as uniform a result.
Proper Storage for Lasting Freshness
Once you’ve baked and decorated your beautiful Easter Sugar Cookie Bars, knowing how to store them properly is key to maintaining their freshness and delicious taste. These bars are delightful for several days, making them perfect for preparing in advance for your holiday celebrations. Here are the best ways to store them, ensuring every bite is as good as the first:
- Storing at Room Temperature: These sugar cookie bars are quite stable and can be stored at room temperature for up to 2 days. To keep them fresh and prevent them from drying out, place them in an airtight container. It’s important to keep the container away from direct sunlight, sources of heat (like ovens or stovetops), and areas with high moisture or humidity, as these factors can cause the chocolate topping to soften or melt.
- Storing in the Refrigerator: For extended freshness, these bars can be kept in the refrigerator for up to 4 days. Again, ensure they are stored in an airtight container to protect them from absorbing odors from other foods and to prevent them from drying out. When you’re ready to serve them, it’s best to let them come closer to room temperature for about 15-30 minutes. This allows the cookie base to soften slightly and the flavors to fully develop, enhancing the eating experience.
- Freezing for Longer Storage: If you’ve made a large batch or want to enjoy these festive treats later, Easter Sugar Cookie Bars freeze beautifully. To freeze, arrange the cut bars in a single layer on a baking sheet and flash freeze for about an hour, until firm. This prevents them from sticking together. Then, wrap each bar individually in plastic wrap, and then again in aluminum foil. Transfer the double-wrapped bars to a freezer-safe Ziploc bag or container. They can be frozen for up to 1 month. To thaw, simply transfer them from the freezer to the refrigerator overnight. Once thawed, bring them closer to room temperature before serving for the best texture and flavor.
Tips for Sugar Cookie Bar Success
- Don’t Overbake: For soft and chewy bars, pull them from the oven when the edges are just barely golden and the center is set but still looks slightly soft. They will continue to cook slightly from residual heat once removed.
- Cool Completely: Resist the urge to top your bars before they are fully cooled. Applying melted chocolate to a warm base will cause it to melt and create a messy result. Patience is key here!
- Even Spreading: When pressing the dough into the pan, aim for an even thickness throughout. This ensures uniform baking and a consistent texture in every bar.
- Clean Cuts: For neat, professional-looking bars, use a large, sharp knife. For even cleaner cuts through the chocolate, you can run the knife under hot water and wipe it dry before each cut.
- Get Creative with Toppings: While pastel M&Ms are classic, feel free to experiment! Mini Cadbury eggs, spring-themed sprinkles, or even small edible sugar flowers could add a unique touch.
Why These Easter Sugar Cookie Bars Are a Must-Make
These Easter Sugar Cookie Bars are more than just a dessert; they’re a celebration in edible form. Their ease of preparation makes them accessible to even novice bakers, while their vibrant appearance and delicious taste will impress everyone. They are perfect for:
- Easter Gatherings: A delightful centerpiece for your Easter brunch or dinner, bringing a pop of color and sweetness.
- Springtime Parties: Ideal for picnics, potlucks, or any occasion celebrating the arrival of warmer weather and blossoming flowers.
- Bake Sales: Their eye-catching design and universally loved flavor make them a popular item at school or charity bake sales.
- Gifts: Package a few bars in a pretty box with a ribbon for a thoughtful homemade gift that friends, family, or neighbors will adore.
- Kids’ Activities: Involve children in the decorating process! Sprinkling the coconut grass and M&Ms is a fun, hands-on activity that encourages creativity and makes them feel part of the baking magic.
In conclusion, these Easter Sugar Cookie Bars offer a delightful blend of simplicity, festive charm, and irresistible flavor. They require minimal ingredients and effort, yet they yield a stunning and delicious dessert that’s perfect for celebrating Easter and the beautiful spring season. We encourage you to try this recipe and experience the joy of creating a memorable treat that will bring smiles to everyone’s faces.
More Festive Easter Desserts to Explore:
- Easter Mini Funfetti Cupcakes: Tiny cupcakes bursting with color and fun, perfect for little hands and big smiles.
- Classic Italian Cookies: A traditional favorite, these tender cookies are versatile for any holiday.
- Hummingbird Cake: A moist and flavorful cake featuring pineapple, banana, and pecans, often enjoyed during spring.
- Broken Glass Jello: A visually stunning and refreshingly jiggly dessert that’s always a hit with kids.
- Bright Lemon Trifle: Layers of cake, custard, and tangy lemon make for an elegant and light dessert.
- Candy Coated Strawberry Carrots: Adorable and creative, these strawberry “carrots” are a clever Easter treat.
- Authentic Baklava: For those who appreciate rich, syrupy, and nutty delights, baklava is a showstopper.
Easter Sugar Cookie Bars
10 mins
15 mins
25 mins
20 bars
Ingredients
- 18 ounce roll refrigerated sugar cookie dough, room temperature
- 1/2 cup finely chopped pecans
- 12 ounce package vanilla candy melts
- 1/2 cup sweetened shredded coconut
- green food dye
- 1/2 cup pastel colored M&Ms
Instructions
-
Preheat oven to 350°F. Line a 9×13 baking dish with parchment paper, with a slight overhang on the 2 longer sides.
-
Place cookie dough and the pecans in a large resealable plastic bag and knead to combine so the pecans are evenly distributed throughout the dough. Press dough evenly over the bottom of the prepared pan.
-
Bake for 12 to 15 minutes or until golden brown, then set aside to cool completely.
-
In the meantime, place coconut in a small bowl or bag along with a couple dots of green food coloring. Gently knead to combine and coat all the coconut until it’s green (like grass.) Set aside.
-
Melt candy melts according to package directions until melted and smooth.
-
Pour the melted chocolate over the top of the cooled baked cookie dough and spread evenly. Lightly sprinkle with the green dyed coconut flakes, followed by the M&Ms (making sure the M&Ms touch the chocolate, so they’ll stick and not fall off.)
-
Allow chocolate to set at room temperature (or chill in the refrigerator for about 15 minutes to speed up the process.)
-
Remove from pan onto a cutting board and cut into bars.
Nutrition
Calories: 205kcal |
Carbohydrates: 25g |
Protein: 2g |
Fat: 11g |
Saturated Fat: 5g |
Polyunsaturated Fat: 1g |
Monounsaturated Fat: 4g |
Trans Fat: 0.01g |
Cholesterol: 4mg |
Sodium: 91mg |
Potassium: 56mg |
Fiber: 1g |
Sugar: 18g |
Vitamin A: 23IU |
Vitamin C: 0.1mg |
Calcium: 10mg |
Iron: 1mg
Nutritional information given is an automatic calculation and can vary based on the exact products you use and any changes you make to the recipe. If these numbers are very important to you, I would recommend calculating them yourself.
Did you make this? Leave a rating below!
I hope you love this delicious and easy recipe – be sure to give it a review below! Also don’t forget to follow Belly Full on TikTok, Facebook, Instagram, Pinterest, and YouTube!