
Prepare to enchant your taste buds with this utterly delightful Lemon Tart, a perfect fusion of classic sweetness and vibrant tang. Imagine your favorite lemon bars, reimagined into an elegant, show-stopping pie, nestled in a rich, buttery shortbread crust. This dessert isn’t just beautiful; it’s surprisingly simple to master, making it a truly versatile treat. Whether you’re planning a sophisticated holiday feast or a relaxed weekend gathering, this homemade lemon tart is fancy enough to impress, yet approachable enough for any occasion.
For those who love lemon desserts in a smaller, more individualized form, don’t forget to explore our tempting Mini Lemon Tarts!

Attention, all lemon enthusiasts! This Lemon Tart recipe is designed with you in mind. Drawing inspiration from the beloved French “tarte au citron,” it boasts a delightful crumbly crust and a truly luscious lemon curd filling. Each bite delivers that perfect balance of sweet and tart, creating a rich, wonderfully vibrant flavor profile that is both refreshing and deeply satisfying.
Making a superb lemon tart from scratch might sound daunting, but it’s an incredibly rewarding process that yields spectacular results. The secret lies in combining a few simple ingredients and following clear steps to create a dessert that tastes like it came from a high-end patisserie. This recipe has been refined to ensure success for home bakers of all skill levels, allowing you to create a culinary masterpiece with confidence.
Crafting the Perfect Lemon Tart: The Recipe Unveiled
Every exceptional lemon tart is built upon two foundational elements:
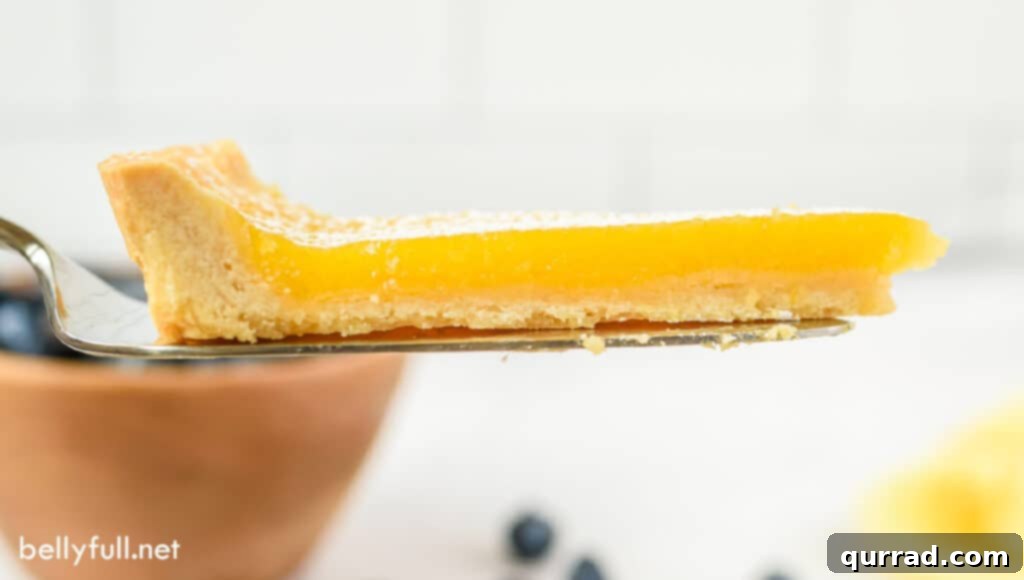
- The Shortbread Crust: This isn’t just any crust; it’s a rich, buttery shortbread that provides the ideal counterpoint to the vibrant lemon filling. It’s incredibly easy to make, requiring you to simply combine flour, powdered sugar, salt, softened unsalted butter, and vanilla extract in a bowl – or, for ultimate convenience, in a food processor. Once the dough comes together, it’s pressed evenly into the tart pan, covering both the bottom and sides, then pre-baked to achieve that wonderfully crisp and golden base before the filling is added. This pre-baking step is crucial for preventing a soggy bottom and ensuring a perfectly textured crust.
- The Luscious Lemon Curd Filling: This velvety filling is a close cousin to our popular easy lemon curd recipe, but with a subtle twist: slightly less butter and the thoughtful addition of heavy cream. This adjustment results in a curd that is incredibly smooth, rich, and firm enough to hold its shape beautifully once chilled, while still delivering that intense burst of fresh lemon flavor. It’s surprisingly quick and straightforward to prepare, coming together with just a few minutes of whisking and gentle cooking on the stovetop.
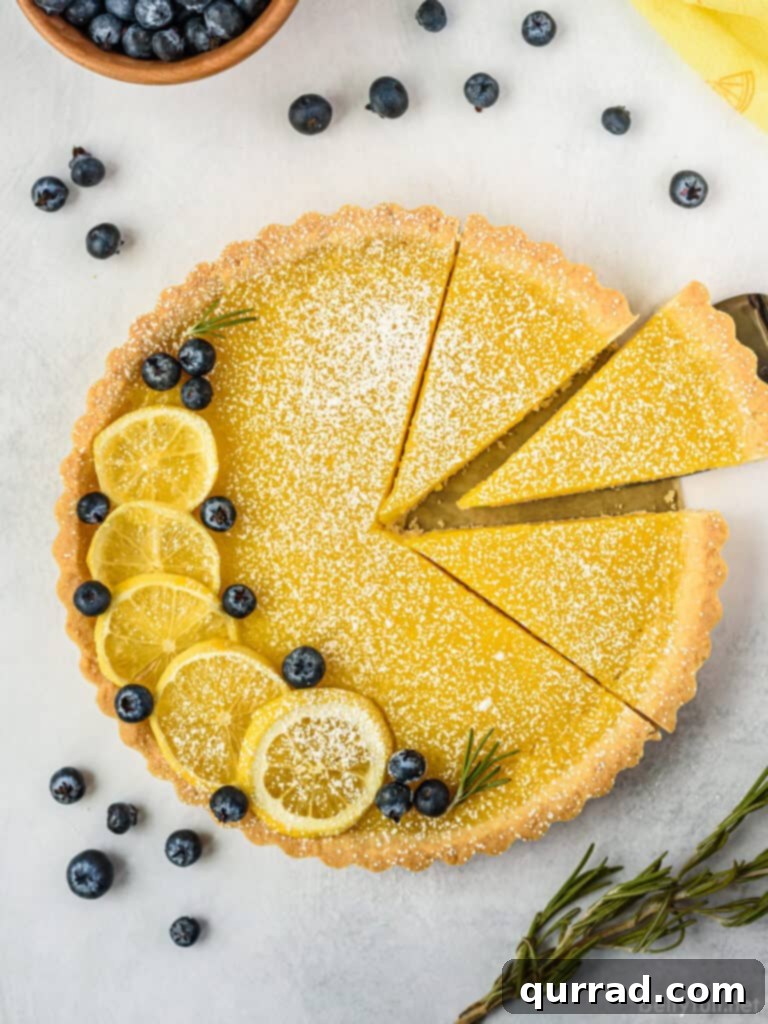
Essential Equipment: Choosing Your Tart Pan
For the most professional-looking results, this lemon tart recipe is ideally prepared in a 9-inch tart pan. A classic tart pan is distinguished by its straight, often fluted, sides and its typical metal construction. Many also feature a removable bottom, which is a fantastic design element. This allows you to effortlessly lift the tart out of the pan once it’s cooled and set, preserving those beautiful, crimped edges without any risk of damaging your meticulously crafted dessert.
What if you don’t have a tart pan? While a tart pan is highly recommended for its aesthetic and functional advantages, don’t let its absence deter you! This recipe is adaptable. Any 9-inch pie tin or pie plate will work just fine. You’ll still achieve a delicious tart, though the edges might not have the distinctive fluted pattern. Alternatively, for a more rustic, square presentation, you could even use an 8×8-inch baking dish. Just be aware that when using a standard pie plate or baking dish, removing the tart might be a bit trickier, so ensure thorough greasing or lining is employed.
Expert Tips for a Flawless Lemon Curd Tart
Achieving a perfect lemon tart is within reach with these helpful tips and tricks:
- Prepare the Pan Properly: Ensuring your tart comes out cleanly from the pan is paramount. Generously greasing the tart pan or lining it with parchment paper will make a significant difference. A clever trick is to trace the bottom of your tart pan onto parchment paper, cut out the circle, and place it in the bottom of the pan. Then, spray the inside edges of the pan with cooking spray. This dual approach provides maximum non-stick security.
- Tailor the Sweetness to Your Liking: The amount of sugar in the lemon curd filling can be adjusted to suit your personal preference. Our recipe calls for 3/4 cup of granulated sugar, which strikes a wonderful balance, leaving a pleasant tartness without being overly sour. However, if you prefer a sweeter dessert, feel free to add a bit more sugar, up to 1 full cup. Taste as you go to find your perfect sweet-to-tart ratio.
- Employ a Fine-Mesh Sieve for Silky Curd: For a lemon curd filling that is incredibly creamy and free of any unwanted eggy bits, don’t skip the straining step. Once the curd has thickened on the stovetop, push it through a fine-mesh sieve. This simple action removes any cooked egg particles or lemon zest remnants, ensuring a perfectly smooth and luxurious texture that elevates the entire tart.
- Harness the Power of a Food Processor for the Crust: While the shortbread dough for the crust can certainly be mixed in a regular mixing bowl with a bit of elbow grease, a food processor makes the task significantly easier and quicker. It combines the ingredients uniformly and efficiently, resulting in a cohesive dough in mere seconds. If you have one, this is definitely the way to go for the crust!
- Avoid Over-Baking the Tart: Over-baking is a common pitfall that can lead to the lemon curd cracking on the surface. To prevent this, remove the tart from the oven when the top of the filling still looks smooth and the very center still exhibits a slight jiggle. Don’t worry, it will continue to set as it cools and chills in the refrigerator. Even if a crack does appear, rest assured, the tart will still taste absolutely fantastic! A simple dusting of powdered sugar before serving can beautifully hide any minor imperfections.
- Crucial Chilling Time: This step is non-negotiable for a perfectly set lemon tart. You must chill the lemon curd tart for several hours – ideally at least 3-4 hours, or even overnight – before you plan to serve it. Insufficient chilling will result in a runny filling that won’t hold its shape when sliced. After adequate chilling, the lemon curd will firm up beautifully, making for clean, effortless slices and a truly enjoyable texture.
Storing Your Delicious Lemon Tart
Proper storage is key to maintaining the freshness and safety of your lemon tart:
Do lemon curd tarts require refrigeration? Absolutely, yes. Due to the presence of eggs in the luscious filling, it is essential to keep the tart refrigerated. Ensure it is covered tightly with plastic wrap or stored in an airtight container to prevent it from absorbing other odors from the fridge and to maintain its fresh taste. When stored correctly, your lemon tart will remain wonderfully fresh and delicious for up to 3 days.
Can you freeze a lemon tart? Yes, lemon tarts freeze exceptionally well, offering a convenient make-ahead option. To freeze, first ensure the tart is completely cooled. Then, wrap it tightly in several layers of plastic wrap, followed by a layer of aluminum foil to prevent freezer burn. Transfer the well-wrapped tart to a freezer-safe plastic bag or container. It can be stored in the freezer for up to 1 month. When you’re ready to enjoy it, thaw the frozen tart overnight in the refrigerator. While the texture remains excellent, the crust might soften slightly after freezing and thawing.
Elevate Your Tart: Decorating Ideas
This lemon tart is magnificent on its own, its natural beauty shining through. However, if you wish to elevate its presentation and add an extra touch of gourmet flair, there are numerous delightful options for garnishing. Each adds a visual appeal and can complement the tart’s flavors beautifully:
- Homemade Whipped Cream: A dollop of light and airy homemade whipped cream provides a creamy contrast to the tartness of the lemon.
- Raspberry Sauce: A drizzle of vibrant raspberry sauce introduces a lovely fruity tartness and a pop of color.
- Meringue: A classic pairing, a toasted meringue topping adds a cloud-like texture and a sweet, toasted flavor.
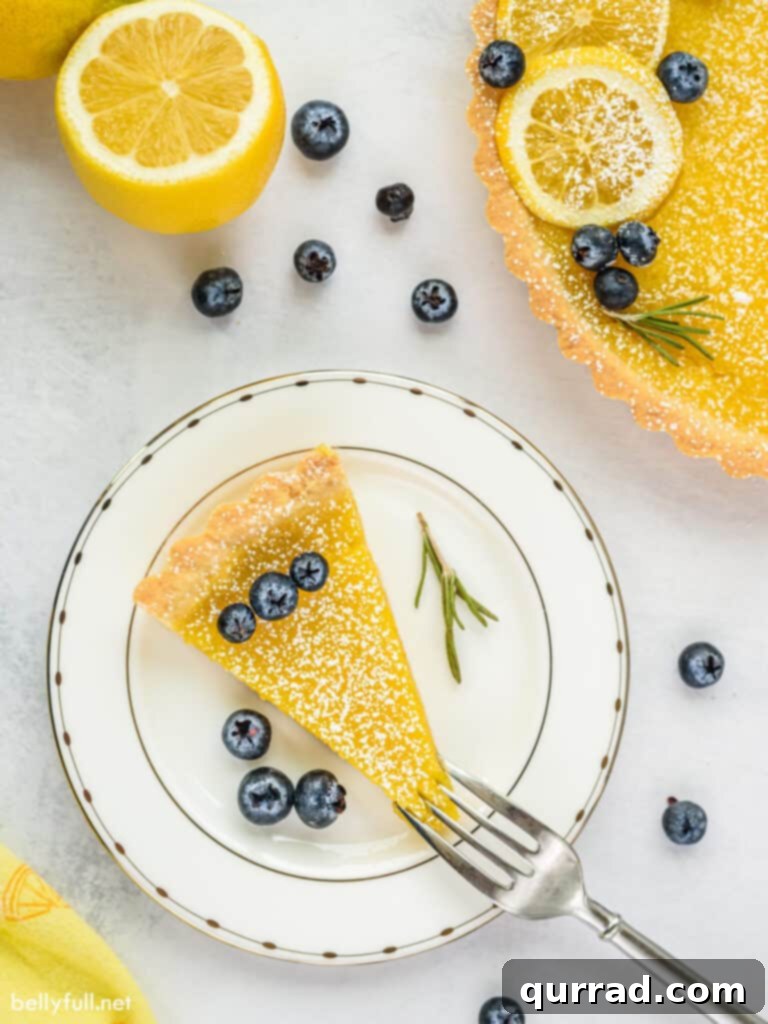
- Powdered Sugar: A simple dusting of powdered sugar creates an elegant, frosted look, especially effective for masking any minor cracks.
- Candied Lemon Slices: Delicate candied lemon slices offer a beautiful, translucent garnish and an extra burst of concentrated lemon flavor.
- Fresh Berries: A scattering of fresh berries like blueberries, raspberries, or sliced strawberries adds freshness, color, and a juicy sweetness.
Consider arranging these garnishes artfully on individual slices or adorning the entire tart for a truly stunning centerpiece. A sprig of fresh mint can also add a touch of green and aromatic freshness.
Explore More Lemon Desserts
If you’re a true lemon aficionado, your culinary adventure doesn’t have to end with this incredible tart. There’s a whole world of zesty, bright lemon desserts waiting to be discovered. Expand your repertoire with these other fantastic lemon-infused treats:
- Lemon Crinkle Cookies: Soft, chewy cookies bursting with lemon flavor and coated in powdered sugar.
- Lemon Trifle: Layers of fluffy cake, creamy lemon curd, and whipped cream for an impressive dessert.
- Mini Lemon Tarts: All the joy of a lemon tart in adorable, bite-sized portions, perfect for parties.
- Lemon Blueberry Scones: A delightful breakfast or brunch treat combining tangy lemon with sweet blueberries.
We sincerely hope you cherish this delicious and wonderfully simple recipe. Your feedback is invaluable, so please consider leaving a review below to share your experience! And don’t forget to connect with Belly Full on Facebook, Instagram, Pinterest, and YouTube for more inspiring recipes and culinary adventures!
Lemon Tart
45 mins
15 mins
3 hrs
4 hrs
10

Ingredients
For the Shortbread Crust
- 1 cup all-purpose flour, spooned and leveled
- 1/4 cup powdered sugar
- 1/2 teaspoon salt
- 7 tablespoons unsalted butter, softened
- 1 teaspoon vanilla extract
For the Lemon Curd Filling
- 2 large eggs
- 2 large egg yolks
- 3/4 cup granulated sugar
- 1/4 teaspoon salt
- 1/2 cup lemon juice
- 1 tablespoon lemon zest
- 1 tablespoon unsalted butter
- 1 tablespoon heavy whipping cream
Instructions
-
Preheat your oven to 350 degrees F (175 degrees C). Prepare a 9-inch tart pan by generously greasing it or lining the bottom with a circle of parchment paper for easy removal.
-
To make the crust: In a medium mixing bowl, whisk together the all-purpose flour, powdered sugar, and salt until well combined. Add the softened unsalted butter and vanilla extract. Mix thoroughly until the ingredients come together and form a cohesive ball of dough. This process is significantly easier and quicker if done in a food processor.
-
Press the prepared shortbread dough evenly into the bottom of the tart pan and all the way up the sides. Ensure the crust is uniform in thickness. Prick the bottom of the crust several times with a fork to prevent it from puffing up during baking. Bake for approximately 15 minutes, or until the edges just begin to turn a light golden brown. Remove from the oven and set aside to cool slightly while you prepare the filling.
-
To make the filling: In a medium saucepan, whisk together the large eggs, egg yolks, granulated sugar, and salt until smooth. Stir in the fresh lemon juice and lemon zest. Place the saucepan over medium heat and cook, stirring constantly with a whisk, for about 10-12 minutes, or until the mixture thickens considerably and reaches a pudding-like consistency. Constant stirring is crucial to prevent the eggs from scrambling.
-
Once thickened, remove the saucepan from the heat. Stir in the tablespoon of unsalted butter and the heavy whipping cream until fully incorporated and the butter has melted completely, creating a smooth and glossy curd.
-
For an ultra-smooth filling, strain the warm lemon curd through a fine-mesh strainer directly into the pre-baked shortbread crust. This removes any potential cooked egg bits or large pieces of zest, ensuring a silky texture.
-
Carefully transfer the tart back to the oven. Bake for an additional 15 to 18 minutes, or until the filling is set but still slightly jiggly in the very center. It will firm up further as it cools.
-
Allow the tart to cool completely on a wire rack for at least one hour at room temperature. After cooling, transfer the tart to the refrigerator and chill for a minimum of 3 hours, or preferably overnight, to allow the lemon curd to fully set.
-
Before serving, if desired, lightly sprinkle a dusting of powdered sugar over the top of the tart for an elegant finish.
Nutrition
Calories:
230kcal
|
Carbohydrates:
29g
|
Protein:
3g
|
Fat:
12g
|
Saturated Fat:
7g
|
Trans Fat:
1g
|
Cholesterol:
100mg
|
Sodium:
271mg
|
Potassium:
49mg
|
Fiber:
1g
|
Sugar:
18g
|
Vitamin A:
406IU
|
Vitamin C:
6mg
|
Calcium:
17mg
|
Iron:
1mg
Nutritional information provided is an automatic calculation and can vary based on the exact products you use and any changes you make to the recipe. If these numbers are very important to you, we recommend calculating them yourself.
Did you make this recipe? We’d love to hear from you! Leave a rating below and share your experience!