
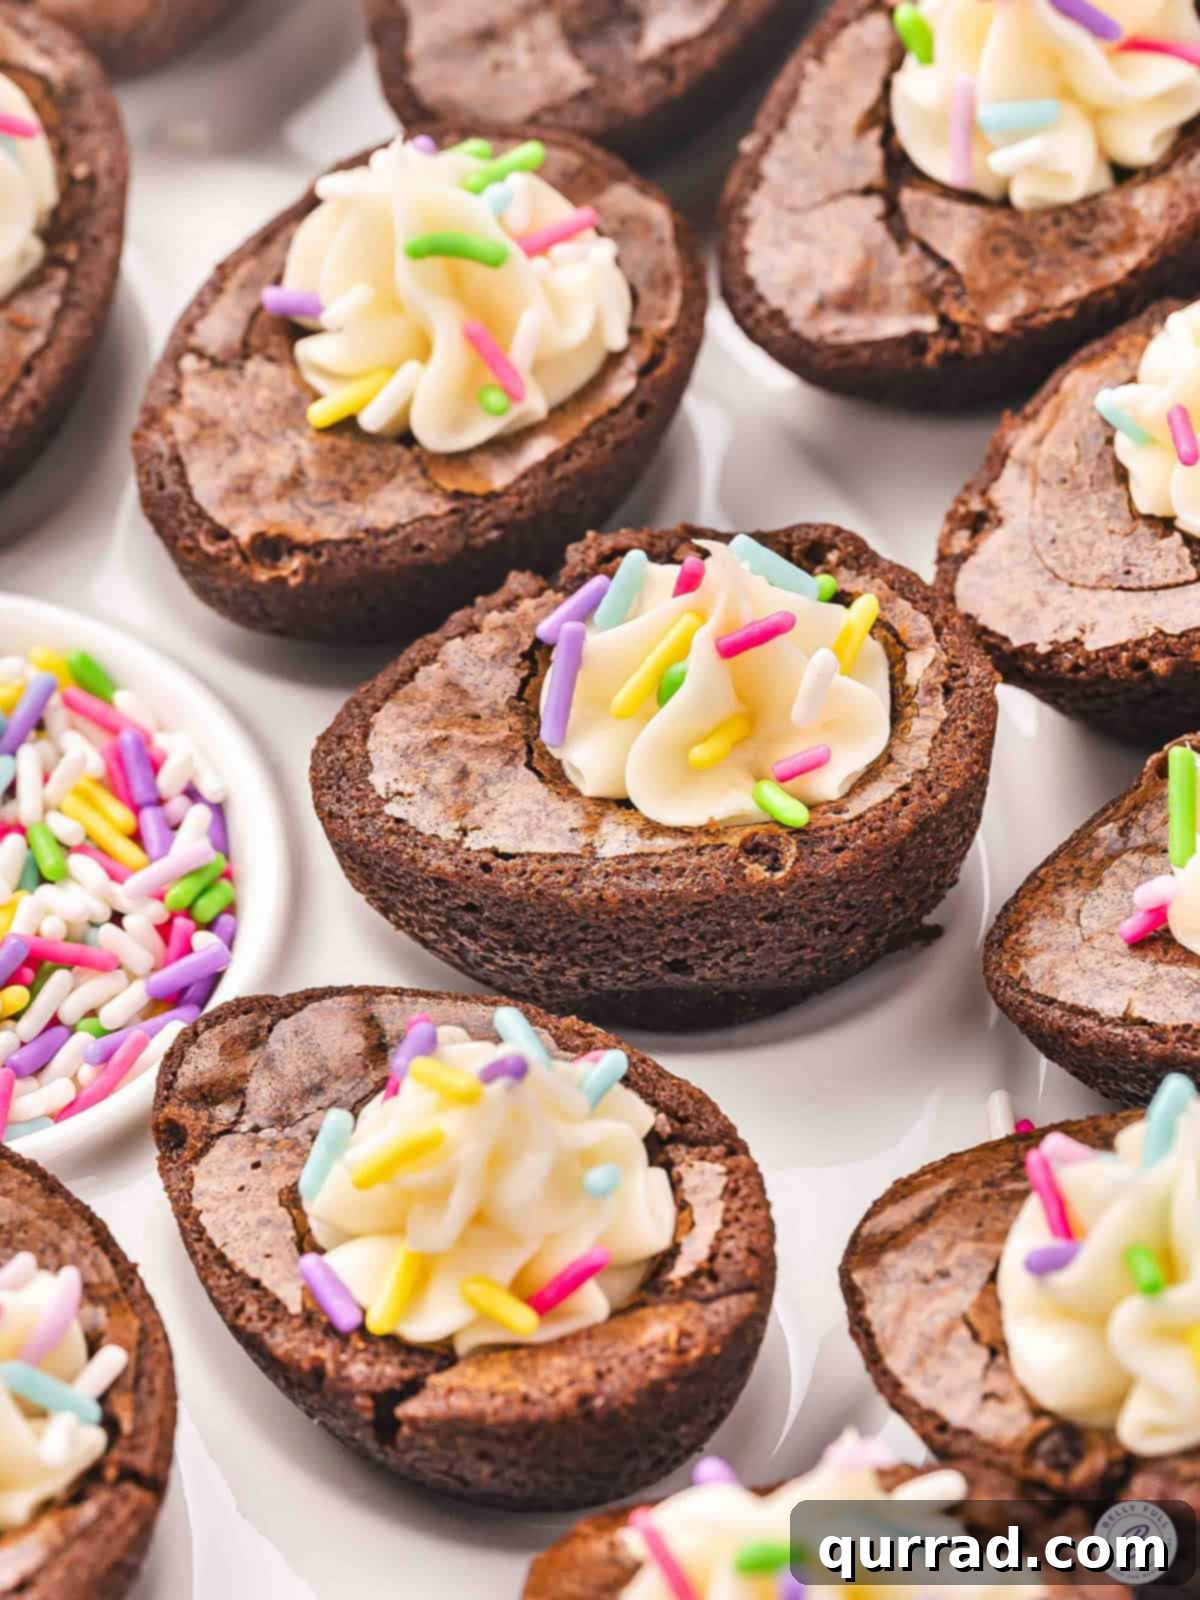
Easy & Adorable Deviled Brownies: A Sweet Dessert Twist
Prepare to delight your guests with a whimsical and delicious dessert that’s as charming as it is easy to make: Deviled Brownies! These incredibly cute treats ingeniously mimic the appearance of classic savory deviled eggs, but with a delightful sweet twist that’s perfect for any occasion. Whether you’re planning an Easter brunch, a springtime luncheon, a baby shower, or simply looking for a fun and unique dessert, these brownie deviled eggs are guaranteed to be a conversation starter and a crowd-pleaser. Made with just a few simple, budget-friendly ingredients, they offer ample opportunity for customization, from the color of your sprinkles to the hue of your frosting. Get ready to impress with this clever confectionery creation!
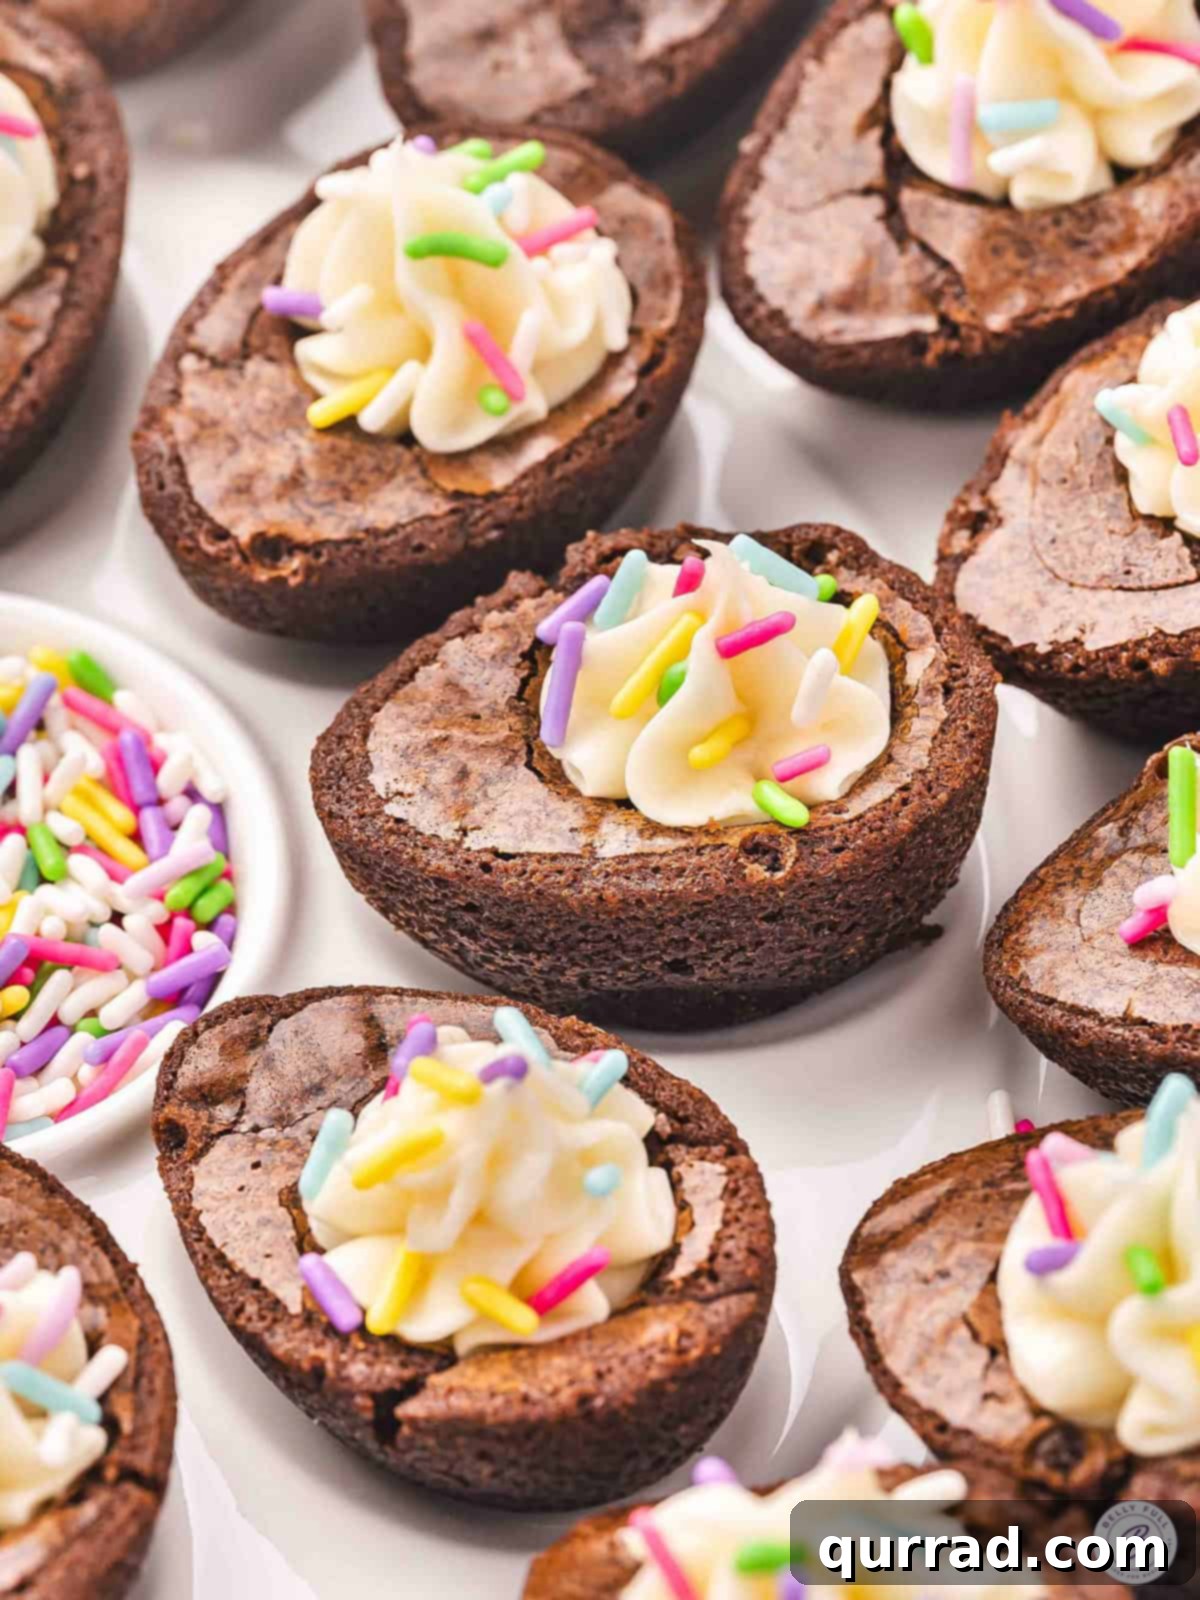
If you’re searching for a dessert that combines fun, festivity, and fantastic flavor with incredible ease of preparation, look no further than these charming Deviled Brownies. They’re an ingenious sweet adaptation of the universally loved deviled egg, swapping out the savory egg white for a rich brownie base and the creamy yolk for a swirl of delicious frosting, all topped with colorful sprinkles instead of paprika. Not only are they quick to whip up, making them perfect for last-minute gatherings, but they can also be prepared ahead of time, allowing you to enjoy your event without stress. Watch as everyone raves about their cleverness and irresistible taste! The true beauty of this recipe lies in its versatility; simply by changing the sprinkle colors, you can tailor these brownies to fit any holiday theme, baby shower, birthday party, or just a delightful everyday treat.
Why You’ll Love These Deviled Brownies
- Uniquely Charming: They’re an instant hit and conversation starter, guaranteed to bring smiles and compliments at any gathering.
- Effortlessly Easy: Utilizing a brownie mix and simple frosting ingredients, this recipe minimizes effort without compromising on taste or presentation.
- Highly Customizable: Adapt the sprinkle colors for different holidays or events, or even tint the frosting for an extra pop of color.
- Perfect for Any Occasion: From Easter and spring parties to baby showers and everyday dessert cravings, these brownies fit right in.
- Make-Ahead Friendly: Prepare them in advance, store them, and frost just before serving for ultimate convenience.
- Budget-Friendly Ingredients: A handful of common pantry staples means you don’t need to break the bank for this impressive treat.
What Exactly Are Deviled Brownies?
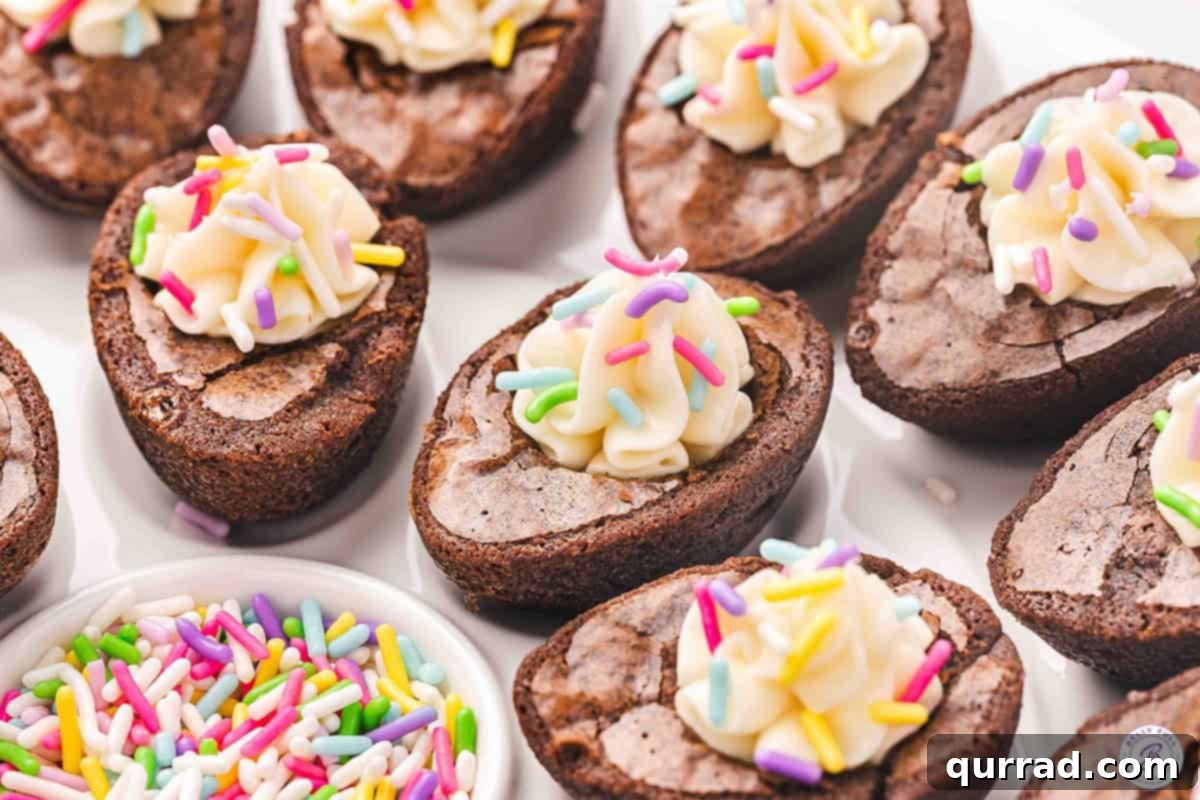
Deviled Brownies are an imaginative dessert creation designed to mimic the beloved appearance of traditional deviled eggs. Instead of hard-boiled egg whites, they feature a rich, fudgy brownie base shaped like an egg, often created using silicone molds. The “yolk” is replaced by a creamy, piped swirl of frosting, typically a sweet cream cheese frosting or vanilla buttercream. To complete the illusion, colorful sprinkles are dusted over the frosting, mirroring the paprika that traditionally garnishes savory deviled eggs. This delightful concept transforms a savory appetizer into a sweet indulgence, offering a playful and unexpected treat that’s both visually striking and incredibly tasty. They’re a testament to culinary creativity, proving that sometimes the most fun desserts are those that playfully trick the eye before pleasing the palate.
Ingredients You’ll Need for Deviled Brownies
Crafting these adorable deviled brownies requires a few straightforward ingredients, easily found at any grocery store. The beauty of this recipe lies in its simplicity and the option to use pre-made mixes or homemade components, depending on your preference and time constraints. Here’s what you’ll need to gather:
For the Fudgy Brownie Base (Yields 24 pieces)
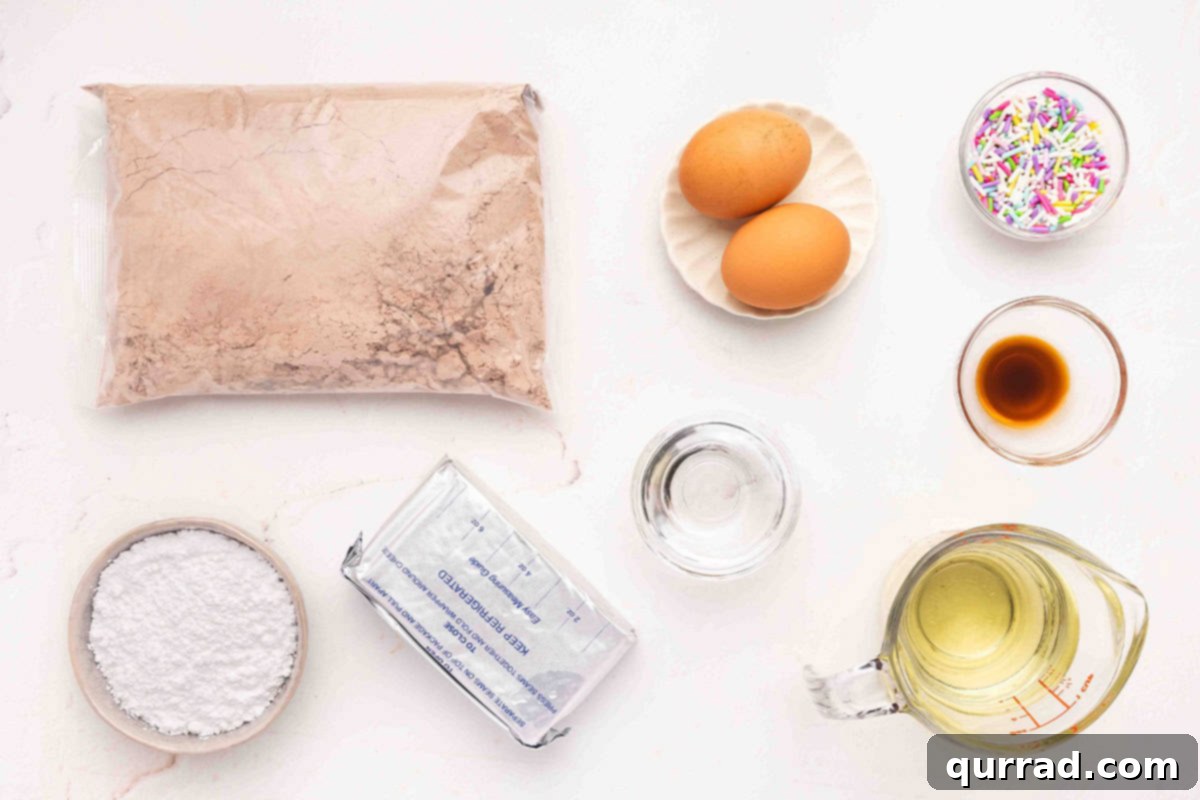
- 1 (18.3 ounce) box fudgy brownie mix: Opt for a good quality box mix for convenience. Ensure it specifies “fudgy” for the best texture.
- 2 large eggs: As typically required by most brownie mixes.
- ⅔ cup vegetable oil: Or other neutral oil as instructed on your brownie mix box.
- 3 tablespoons water: Again, follow the specific liquid requirements of your chosen brownie mix.
- Alternatively, you can use your favorite homemade fudgy brownie recipe.
For the Creamy Frosting “Yolks”
- 8 ounces cream cheese: Softened to room temperature for smooth mixing.
- ½ cup powdered sugar: Also known as confectioners’ sugar, for sweetness and smooth consistency.
- 1 teaspoon vanilla extract: Pure vanilla extract provides the best flavor.
- For an even quicker option, a can of store-bought vanilla frosting or homemade vanilla buttercream can be used.
For Garnish
- 1-2 teaspoons festive sprinkles: Choose colors and shapes that match your occasion. These will serve as your “paprika.”
Essential Equipment for Perfect Deviled Brownies
While the ingredients are simple, having the right tools can make the process even smoother and ensure your deviled brownies look just like the real thing. Here’s a list of recommended equipment:
- Silicone Egg Molds: You’ll need about 3 molds with 8 cavities each to make 24 deviled brownies. These are crucial for achieving the perfect egg shape and easy release.
- Mixing Bowls: One for the brownie batter and another for the frosting.
- Handheld Mixer or Stand Mixer: Essential for achieving a smooth, creamy frosting.
- Nonstick Cooking Spray: For lightly greasing the silicone molds to prevent sticking.
- Cookie Scoop (optional but recommended): Helps in neatly portioning brownie batter into the egg molds.
- Tablespoon Measure: Used to create the indentation in the warm brownies for the frosting.
- Piping Bag: For neatly piping the frosting.
- 1M Star Piping Tip: This specific tip creates the classic swirled appearance of a deviled egg yolk.
- Cooling Rack: For allowing the brownies to cool completely after baking.
- Deviled Egg Tray (optional but highly recommended): For an authentic presentation, displaying your finished deviled brownies on a tray designed for deviled eggs adds an extra layer of charm.
How to Make Deviled Brownies: A Detailed Step-by-Step Guide
Creating these delightful Deviled Brownies is a straightforward process, broken down into manageable steps. Follow these instructions closely for a batch of perfectly themed sweet treats that will impress everyone.
1. Prepare Your Molds
Begin by preparing your silicone egg molds. Lightly spray three 8-slot egg-shaped silicone molds with a nonstick cooking spray. This crucial step ensures your brownies will release cleanly and maintain their perfect egg shape once cooled. Place the molds on a baking sheet for easier handling and transfer to and from the oven.
2. Mix the Brownie Batter
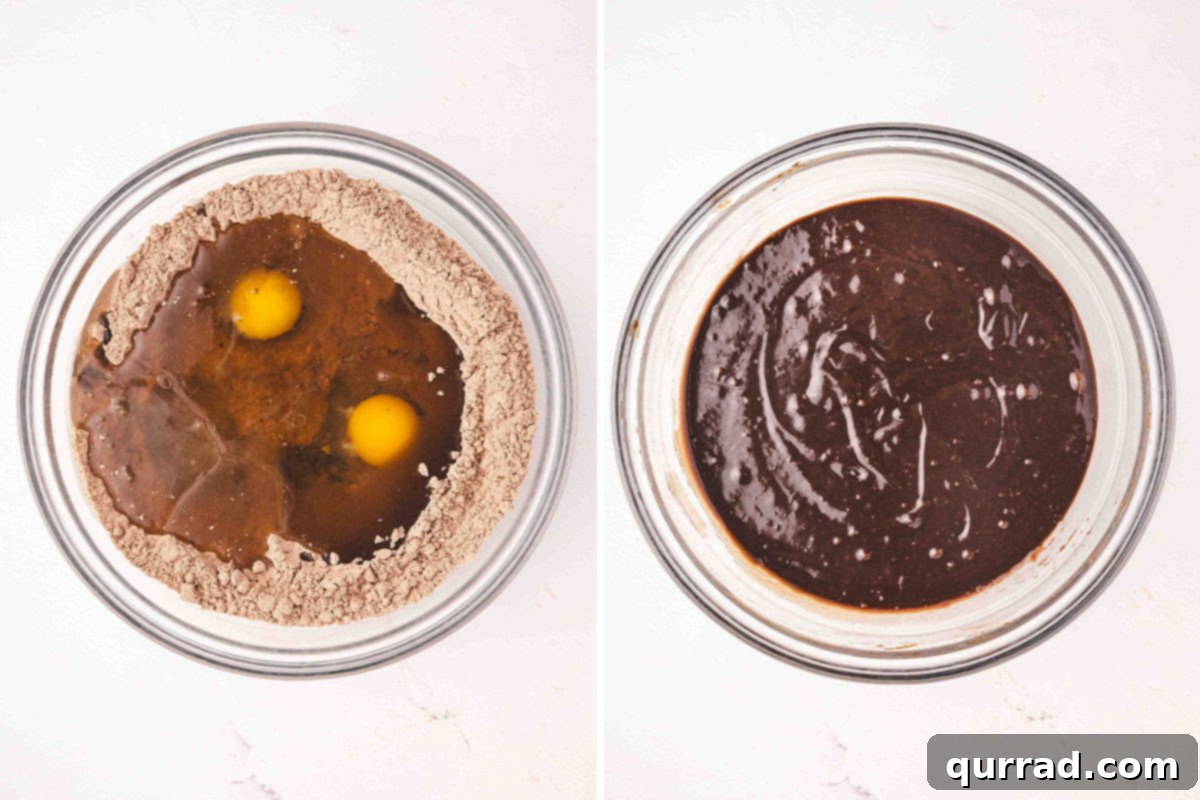
Preheat your oven to the temperature specified on your brownie mix box (typically around 350°F / 175°C). In a large mixing bowl, prepare the brownie batter according to the package directions, using the eggs, vegetable oil, and water. Whisk or mix the ingredients until they are just combined and smooth. Be careful not to overmix, as this can lead to tougher brownies. The batter should be thick and glossy.
3. Fill and Bake
Carefully spoon the prepared brownie batter into each egg-shaped cavity of your silicone molds. Aim to fill each cavity approximately ¾ full. Using a cookie scoop can help achieve even portions and minimize mess. Avoid overfilling, as the brownies will rise slightly during baking. Once filled, gently tap the molds on the counter a few times to release any air bubbles and ensure an even surface.
Bake the brownies in your preheated oven according to the duration specified on the brownie box directions, but start checking a few minutes early. Silicone molds can sometimes bake a little faster than traditional pans. For instance, my batch took about 22 minutes at 350°F (175°C), but oven temperatures can vary. To check for doneness, insert a toothpick into the center of a brownie; it should come out with a few moist crumbs attached, but no wet batter.
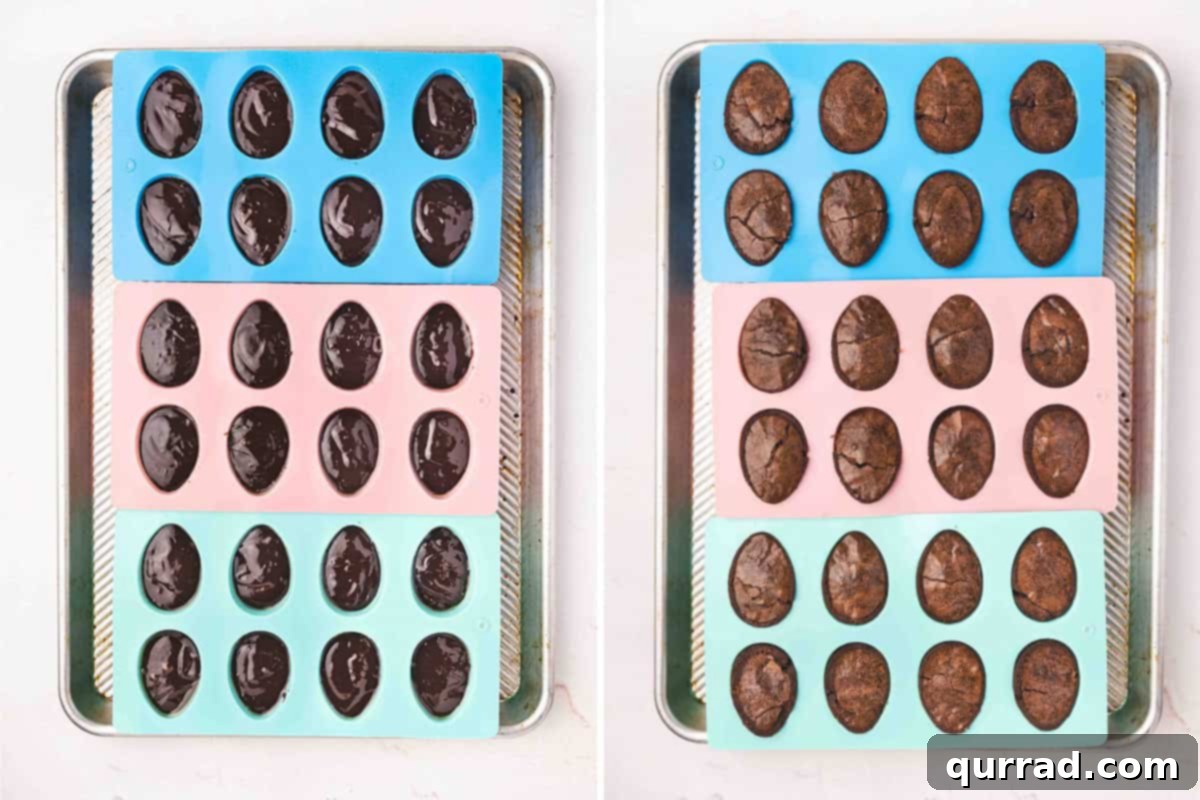
4. Create the “Yolk” Indentations
As soon as the baked brownies are removed from the oven, while they are still warm and soft, gently create a small cavity in the center of each brownie. Use the back of a tablespoon measure for this task. Press down immediately and gently, taking care not to push all the way through the brownie. The warmth of the brownies will allow them to reshape easily without cracking. Once the indentations are made, set the brownies aside in their molds or carefully transfer them to a cooling rack to cool completely. This step is critical; ensure they are fully cooled before proceeding to frosting, or your frosting will melt.
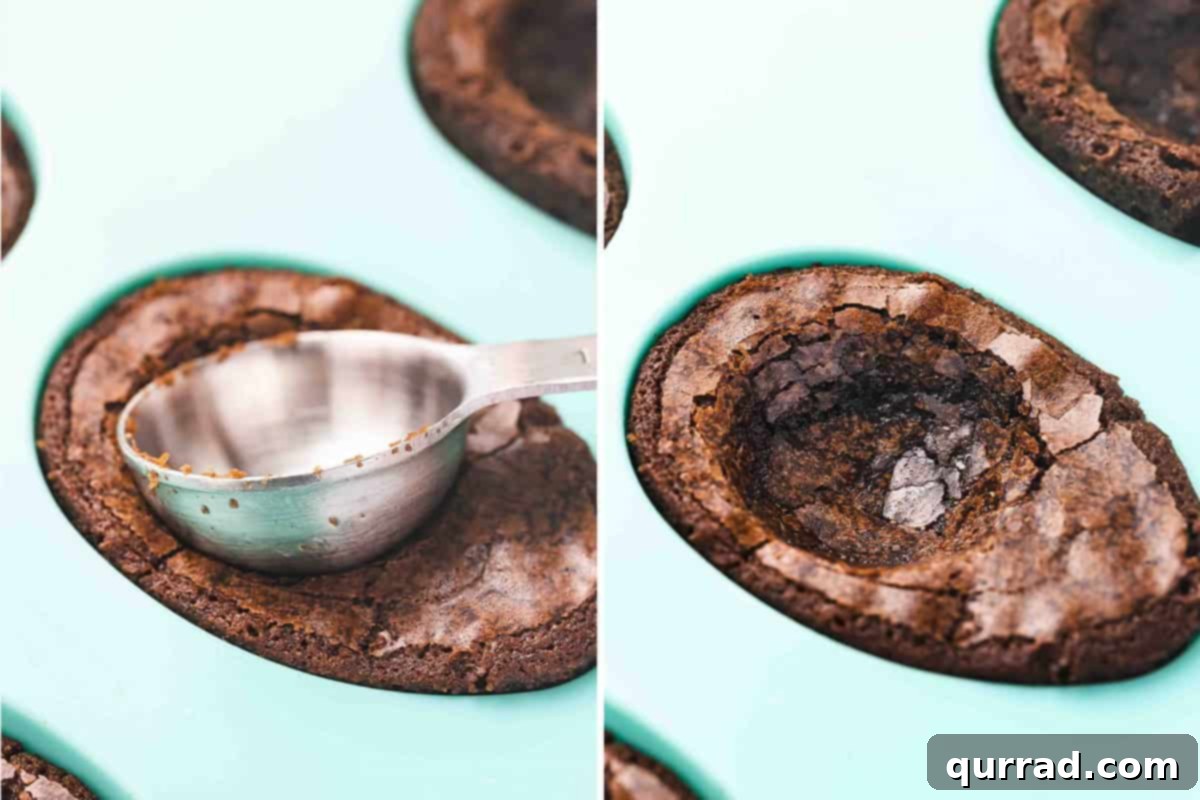
5. Prepare the Cream Cheese Frosting
While the brownies are cooling, prepare your creamy frosting. In a mixing bowl, using a handheld mixer (or stand mixer with paddle attachment), beat together the 8 ounces of softened cream cheese, ½ cup of powdered sugar, and 1 teaspoon of vanilla extract. Beat until the mixture is completely smooth, light, and creamy, with no lumps of cream cheese remaining. Scrape down the sides of the bowl as needed to ensure everything is well incorporated. This frosting will serve as the rich and delicious “yolk” of your deviled brownies.
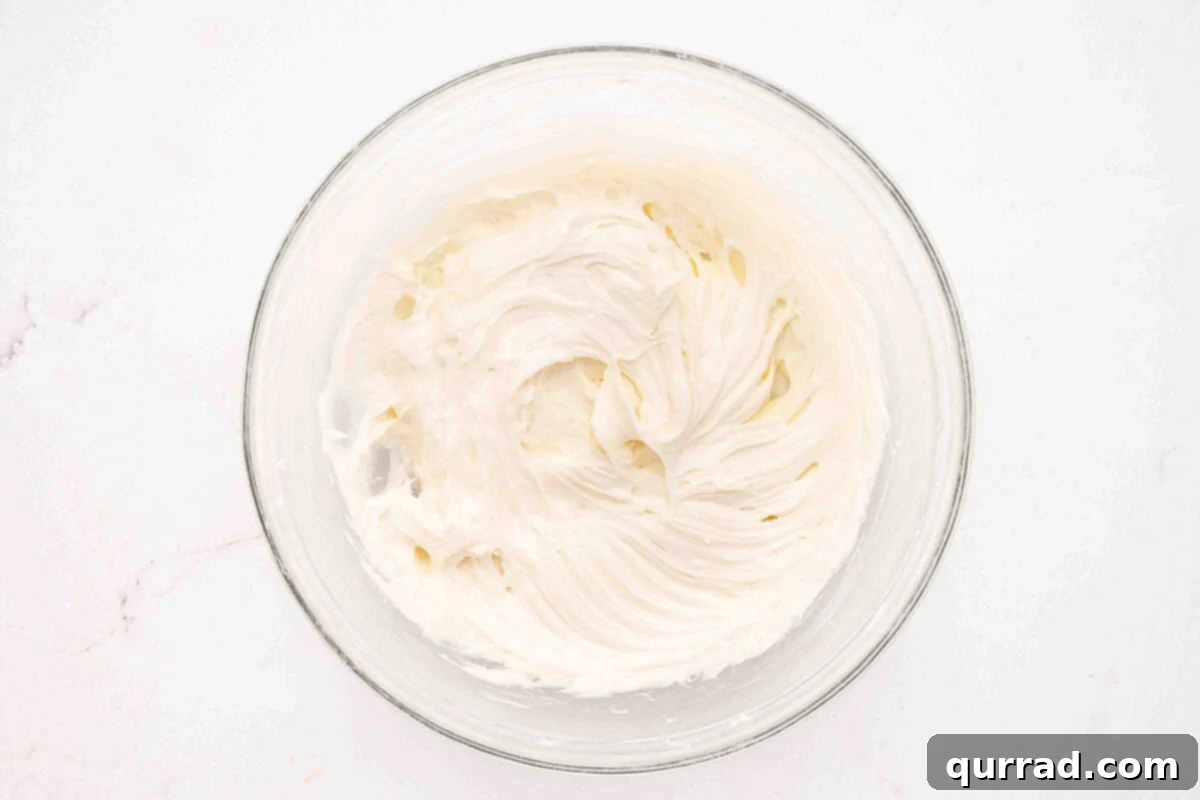
6. Pipe the Frosting Swirls
Once the brownies are completely cool, transfer your prepared frosting to a piping bag fitted with a 1M star tip. This tip is ideal for creating the classic, swirled appearance reminiscent of deviled egg yolks. Carefully pipe a tall, elegant swirl of frosting into each brownie cavity. If your frosting feels too soft to hold its shape, you can chill it in the refrigerator for about 30 minutes to firm it up slightly. However, avoid chilling it for too long, as it can become too stiff and difficult to pipe smoothly. Aim for a generous swirl that stands proudly above the brownie base.
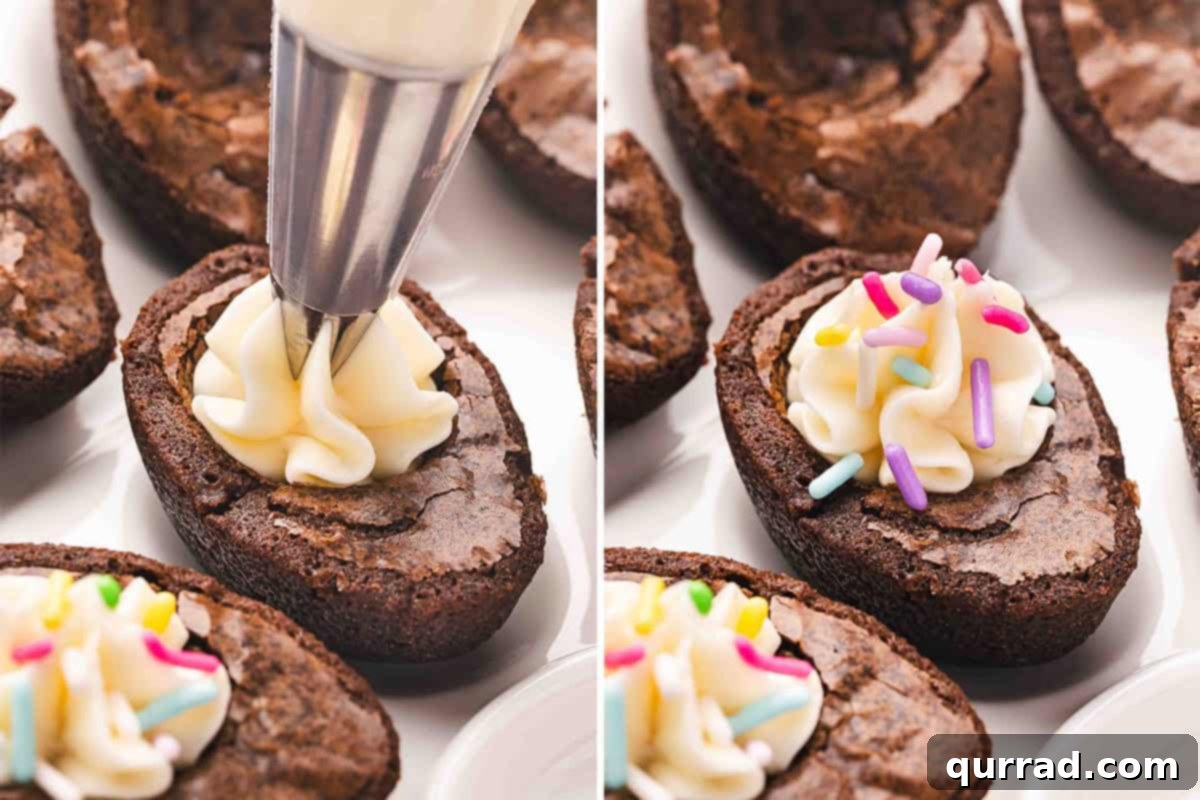
7. Garnish and Serve
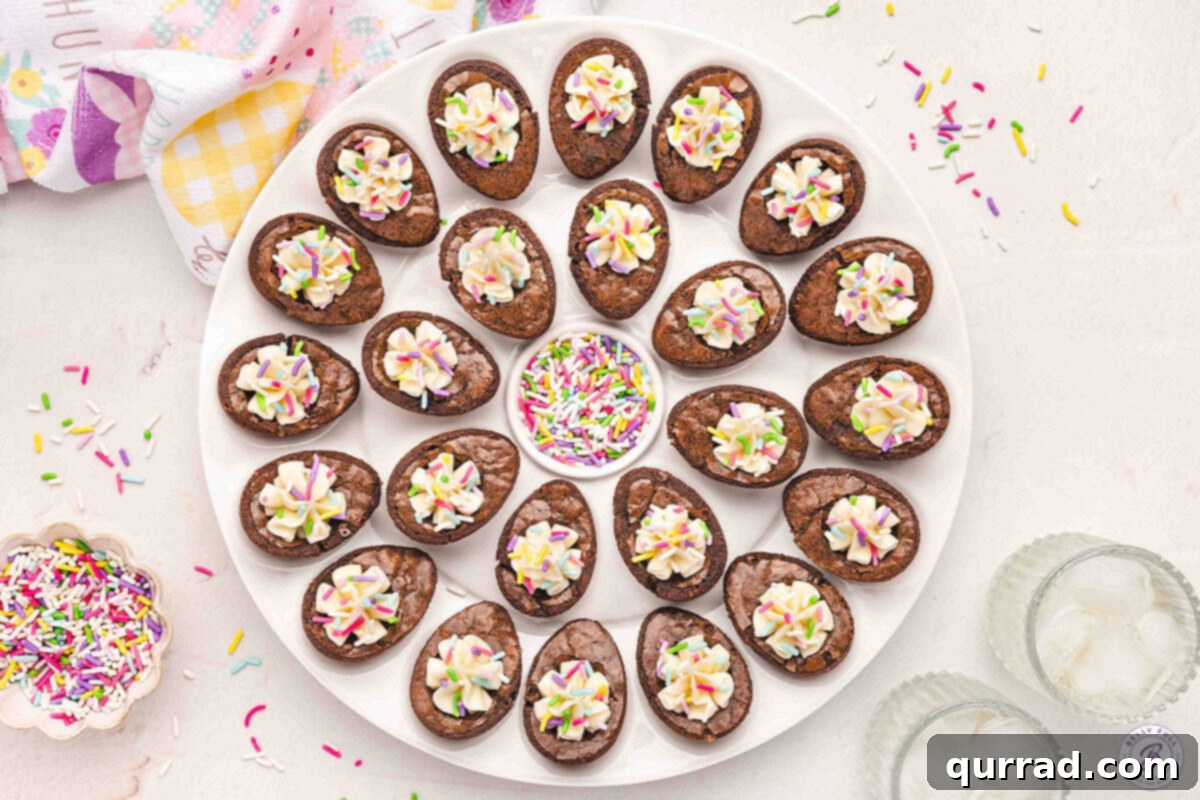
To finish your charming Deviled Brownies, generously sprinkle 1-2 teaspoons of festive sprinkles over the piped frosting. These sprinkles beautifully mimic the paprika traditionally dusted over deviled eggs, completing the illusion and adding a touch of celebratory color. For the ultimate presentation and an authentic deviled egg experience, arrange the assembled brownies on a white deviled egg tray. Serve these adorable treats to your guests, enjoy their reactions, and listen to all the compliments on your creative dessert!
Expert Tips & Creative Variations for Your Deviled Brownies
To ensure your Deviled Brownies are an absolute success and to inspire your creativity, here are some expert tips and exciting variations you can try:
Choosing the Right Brownie Base
- Fudgy vs. Cakey Brownies: For the ideal “egg” shape and a dense, satisfying bite, always opt for fudgy brownies over cake-like ones. Their denser texture holds the shape much better and provides a wonderful contrast to the creamy frosting. If using a box mix, select one specifically labeled “fudgy.”
- Homemade Alternative: While a box mix offers convenience, feel free to use your favorite homemade fudgy brownie recipe. Just ensure it bakes up dense enough to hold its form when scooped or molded.
Mastering Your Frosting
- Cream Cheese vs. Buttercream: Our recipe features a delightful cream cheese frosting for its tangy balance to the sweet brownie. However, a classic vanilla buttercream also works beautifully. You can even use a good quality store-bought vanilla frosting in a pinch.
- Dye the Frosting: To enhance the “yolk” illusion, tint your frosting a pale yellow with a drop of food gel. For themed parties, experiment with pink, blue, green, or purple frosting using food gel dyes. Just remember that too much dye can alter the frosting’s consistency.
- Frosting Consistency: If your cream cheese frosting seems too soft to pipe distinct swirls, chill it in the refrigerator for about 20-30 minutes. Be cautious not to over-chill, as it will become too stiff and difficult to pipe smoothly. If it gets too stiff, let it sit at room temperature for a few minutes or beat it briefly with a mixer to soften slightly.
The Art of Indenting
- Timing is Key: Always indent the brownies while they are still warm, immediately after removing them from the oven. This ensures the brownie is pliable enough to create a clean cavity without cracking.
- Tool Choice: The back of a tablespoon measure works perfectly for creating the indentation. You can also use a small cookie scoop or even your thumb, ensuring a gentle but firm press.
Piping for Perfection
- Piping Tip: A 1M star piping tip is recommended for that classic deviled egg swirl. However, any open star tip will give a similar, decorative effect. Practice on a plate first if you’re new to piping!
- Cool Brownies are a Must: Patience is a virtue here. Ensure your brownie bases are completely cool before piping the frosting. Piping onto warm brownies will result in a melted, runny mess.
Customizing with Sprinkles
- “Paprika” Alternatives: While festive sprinkles mimic paprika beautifully, consider other garnishes. For a chocolatey touch, use finely grated chocolate. For a more “savory” look with a sweet taste, a tiny pinch of red edible glitter or a dusting of cocoa powder could work.
- Occasion-Specific Colors: Green and purple for Easter, pastel pink or blue for baby showers, school colors for graduations, or a mix of vibrant hues for birthdays – sprinkles are your easiest customization tool.
Alternative Molds and Shapes
- No Egg Molds? No Problem!: If you don’t have silicone egg molds, you can bake a batch of brownies in a standard 9×13 inch pan. Once cooled, use an oval or round cookie cutter to cut out “egg” shapes. You can still create an indentation in these cutouts. This method might yield a slightly different brownie thickness but works just as well.
Serving Suggestions: Elevate Your Deviled Brownie Presentation
While these Deviled Brownies are adorable on their own, the way you serve them can truly enhance the experience and complete the charming illusion. Here are some ideas:
- The Classic Deviled Egg Tray: This is the ultimate presentation hack! Placing your Deviled Brownies on a traditional white deviled egg tray instantly makes them look like their savory counterparts, adding an element of surprise and delight.
- Temperature Matters: For the best biting texture, chill the brownies briefly after frosting to firm up the “yolk.” However, let them sit at room temperature for about 10-15 minutes before serving. This allows the brownie base to soften slightly and the frosting to become perfectly creamy.
- Pair with Other Springtime Delights: These brownies are fantastic as part of a larger dessert spread. Consider serving them alongside a gorgeous lemon trifle for a burst of citrus, or delightful carrot cake cookies to complement the spring theme.
- Balance with Savory Bites: If serving at a party, balance the sweetness with some savory, fun appetizers. Super cute stuffed mini bell pepper carrots offer a colorful and healthy counterpoint that also plays into the whimsical theme.
- Buffet Table Centerpiece: Arrange them attractively on a tiered dessert stand or a large platter for a stunning centerpiece that invites guests to admire and indulge.
Make-Ahead & Storage Guide
One of the many advantages of these Deviled Brownies is their make-ahead potential, which can significantly ease your party preparations. Knowing how to store them properly ensures they remain fresh and delicious.
Preparing in Advance
- Bake Brownies Ahead: You can bake the brownie bases up to 1-2 days in advance. Once completely cooled, store the unfrosted brownies in an airtight container at room temperature. This allows you to tackle the baking part without the pressure of frosting on the same day.
- Frosting Prep: The cream cheese frosting can also be made a day in advance. Store it in an airtight container in the refrigerator. Before piping, let it come to room temperature for about 30 minutes, then beat it briefly with a mixer to restore its creamy consistency.
- Assembly Time: For the best appearance, it’s always recommended to assemble and frost the deviled brownies on the day you plan to serve them. This keeps the frosting fresh and vibrant.
Storing Leftovers
- Refrigeration: Once assembled, any leftover frosted deviled brownies should be stored in an airtight container in the refrigerator. They will keep well for up to 3 days. The cream cheese frosting requires refrigeration to maintain food safety and consistency.
- Serving Temperature for Leftovers: For optimal texture and flavor, bring refrigerated deviled brownies to room temperature for about 15-20 minutes before serving. This softens the brownie and makes the frosting creamy again.
Freezing for Future Enjoyment
- Unfrosted Brownies: You can freeze the unfrosted brownie bases for longer storage. Once completely cooled, wrap each brownie tightly in plastic wrap, then place them in a freezer-safe bag or airtight container. They will keep in the freezer for up to 2 months.
- Thawing: When you’re ready to enjoy them, thaw the frozen brownies overnight in the refrigerator, or at room temperature for a few hours. Ensure they are completely thawed before proceeding with the frosting step. We do not recommend freezing the brownies once they have been frosted, as the frosting’s texture may suffer upon thawing.
Frequently Asked Questions About Deviled Brownies
Q: Can I use a different type of frosting for these Deviled Brownies?
Absolutely! While cream cheese frosting offers a wonderful tangy balance, you can certainly use vanilla buttercream or even a store-bought can of vanilla frosting for convenience. For a chocolate lover’s dream, a chocolate ganache or chocolate buttercream could also be used, though it might detract from the “deviled egg” visual if not contrasting enough.
Q: How can I make these Deviled Brownies gluten-free or vegan?
To make them gluten-free, simply use a certified gluten-free brownie mix and ensure all other ingredients (like sprinkles) are also gluten-free. For a vegan version, use a vegan brownie mix (many exist!), replace eggs with flax eggs or a commercial egg replacer, use plant-based oil, and prepare a vegan cream cheese frosting using vegan cream cheese and powdered sugar.
Q: What if I don’t have egg-shaped silicone molds?
No problem! You can bake your brownie batter in a standard 8×8 or 9×13 inch baking pan. Once the brownies have cooled completely, use an oval or round cookie cutter to cut out individual brownie shapes. You can then gently scoop out a small indentation in the center of each cut-out brownie using a small spoon or the back of a measuring spoon before piping the frosting.
Q: How long do Deviled Brownies last, and how should I store them?
Once assembled with cream cheese frosting, Deviled Brownies should be stored in an airtight container in the refrigerator. They will remain fresh and delicious for up to 3 days. Before serving, it’s best to let them sit at room temperature for about 15-20 minutes to allow the brownie to soften and the frosting to reach an ideal creamy consistency.
More Delightful Easter & Spring Treats to Try
- Easter Chocolate Bark
- Chocolate Strawberry Carrots
- Bird’s Nest Cookies
- Easter Peanut Butter Eggs
- Broken Glass Jello
We hope you thoroughly enjoy creating and sharing this fun and delicious Deviled Brownies recipe! We’d love to hear how they turn out – be sure to leave a review below and share your creations. Happy baking!