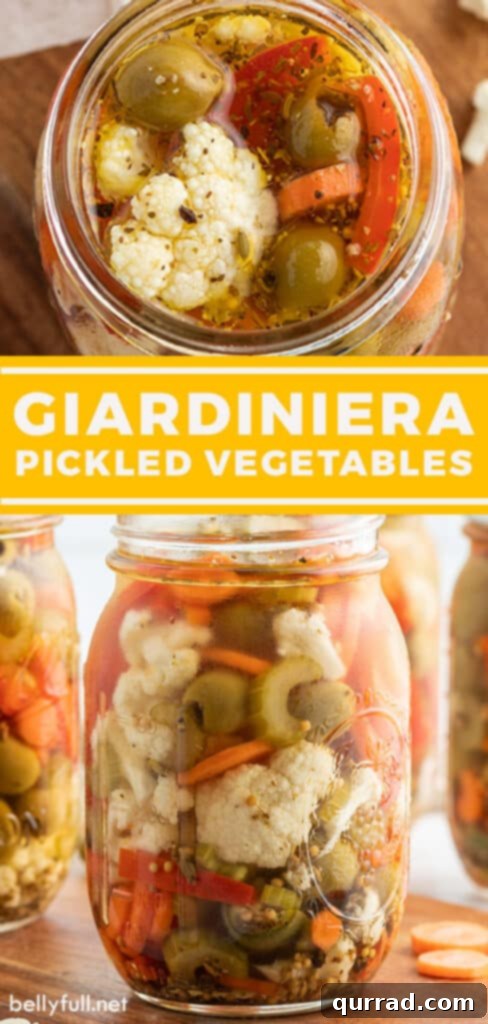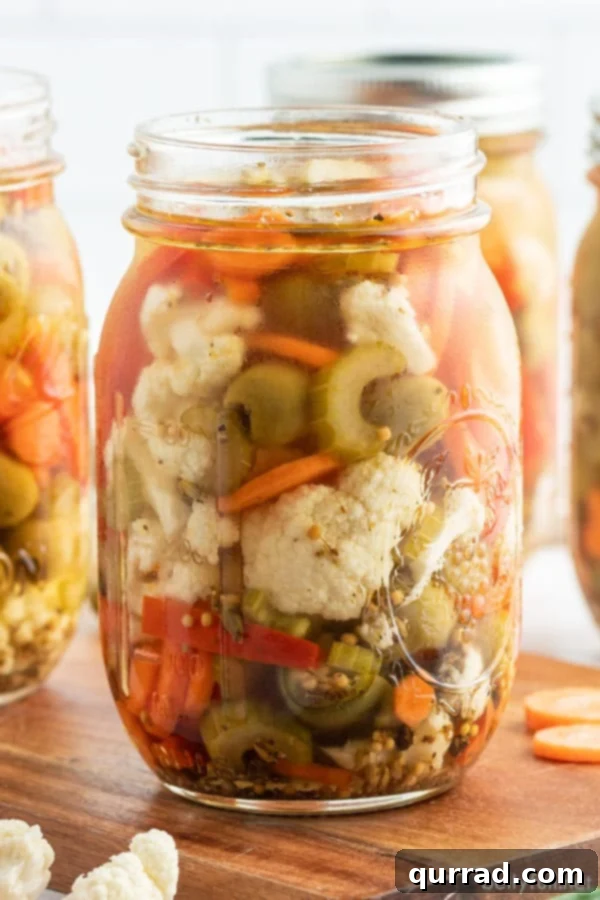
Unlock a world of vibrant flavor with homemade Giardiniera! This zesty, crunchy, and aromatic Italian pickled vegetable mix is incredibly easy to prepare and profoundly superior to any store-bought version. Bursting with fresh, tangy notes and a hint of spice, Giardiniera has the power to transform ordinary meals into extraordinary culinary experiences. From livening up sandwiches and salads to complementing pasta dishes, enriching an antipasto snack board, or even serving as a delicious side, its versatility knows no bounds. Once you try this colorful and utterly delicious condiment, it will quickly become a beloved staple in your refrigerator.
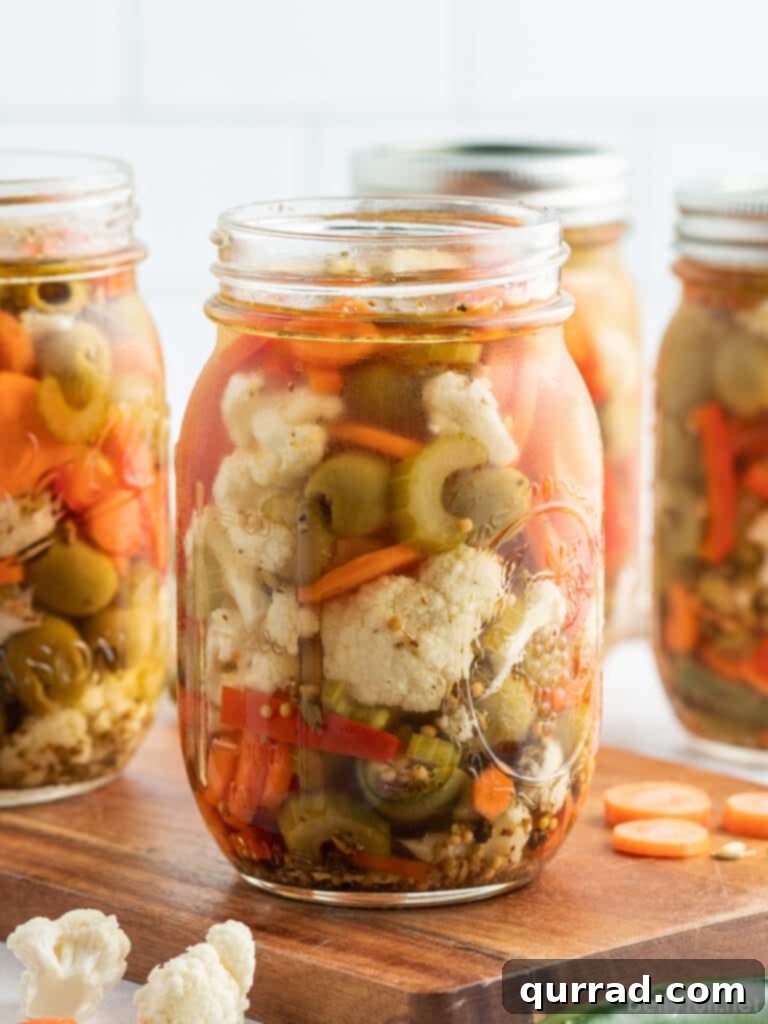
For many years, Giardiniera might have been just another jar in the grocery store aisle, often overlooked next to the familiar olives, pickles, capers, and roasted red peppers. Perhaps, like many, you dismissed it as a simple medley of vegetables swimming in vinegar. That was my experience until a fateful Muffuletta Sandwich changed everything. The sheer depth of flavor and irresistible crunch introduced by Giardiniera on that sandwich instantly converted me into a devotee. While I used to buy it in bulk, this past year, I discovered the incredible satisfaction and ease of making it myself. The difference is truly remarkable, offering a freshness and customizable appeal that store-bought options simply cannot match.
The beauty of crafting your own Giardiniera lies in its simplicity. Chances are, you already have most of the pantry staples required for the brine. All that’s left is to select your favorite fresh vegetables, and you’re well on your way to creating a condiment that is not only healthier but also far more flavorful and vibrant than anything you’d find on a supermarket shelf. This homemade version promises a crisp texture and a bright, balanced taste that will elevate countless dishes in your kitchen.
What Exactly is Giardiniera?
Giardiniera (pronounced gaar-deen-ee-uh) is a traditional Italian relish comprised of various pickled vegetables steeped in a seasoned vinegar or oil marinade. This beloved condiment is renowned for its tangy, crunchy, and often spicy profile, making it a fantastic addition to a wide array of culinary creations. Historically, it’s a perfect companion to cured meats, a lively component of salads, and, most famously, an integral ingredient in the iconic Muffuletta sandwich. Its complex flavor and appealing texture instantly brighten any Italian antipasto charcuterie board, adding an exciting dimension of taste.
While the essence of Giardiniera remains consistent, there are two distinct versions that have evolved over time: the traditional Italian style and the American, often referred to as “Chicago-style.”
- Classic Italian Giardiniera: This version typically features larger cuts of vegetables such as cauliflower florets, carrot rounds, celery sticks, and bell peppers, sometimes including gherkins. It marinates in a rich blend of olive oil, red or white wine vinegar, and a medley of aromatic herbs and spices. The traditional Italian preparation is often served as a delightful appetizer, allowing the individual flavors and textures of the larger vegetable pieces to shine.
- Chicago-Style Giardiniera: In contrast, the Chicago-style interpretation is quite similar but distinguishes itself with the inclusion of hot peppers and a marinade that contains significantly less vinegar, often relying more on oil and sometimes water. The vegetables are typically cut into smaller pieces, with a pronounced emphasis on the peppers, transforming it into more of a spicy relish. This version is a quintessential condiment in Chicago, particularly popular on Italian beef sandwiches.
Our recipe expertly bridges these two worlds, offering the best characteristics of both. It presents larger, satisfying cuts of vegetables, delivering the zesty kick of a vinegar-based brine, while also incorporating a delightful spiciness from Serrano peppers. This harmonious blend ensures a Giardiniera that is both substantial and exhilarating, perfect for any palate.
Unleashing the Versatility of Giardiniera
Giardiniera is a truly versatile condiment that can elevate a surprisingly wide range of dishes, adding a burst of flavor and a satisfying crunch. Don’t limit its use to just a few meals; experiment and discover new ways to incorporate this delightful pickled mix into your daily cooking. Here are just a few ideas to inspire you:
- Sandwiches and Burgers: Beyond the classic Muffuletta, Giardiniera makes an exceptional topping for hot dogs, juicy burgers, and deli sandwiches. Its tangy bite cuts through the richness of meats and cheeses.
- Pizza Topping: Sprinkle chopped Giardiniera over your favorite pizza for an unexpected and delicious twist. The briny vegetables complement both meat and vegetarian pizzas beautifully.
- Breakfast Boost: Add a spoonful to your morning omelette or scrambled eggs for a vibrant start to your day.
- Pasta Perfection: Mix Giardiniera into a cold pasta salad for an instant flavor upgrade, or even stir a finely chopped version into warm pasta dishes for a zesty kick.
- Antipasto & Charcuterie Boards: It’s an essential component of any authentic Italian antipasto or charcuterie board, offering a bright, pickled counterpoint to cheeses, cured meats, and crackers.
- Stews and Chili: Finely chop and stir into stews, chilis, or even casseroles for an added layer of complexity and tang.
- Grain Bowls: Top your healthy grain bowls with Giardiniera for a burst of texture and flavor.
Whether you prefer the vegetables in larger, robust pieces or finely chopped into a relish-like consistency, Giardiniera is incredibly adaptable to suit your culinary needs and preferences. The key is to enjoy its vibrant flavors wherever a touch of zesty goodness is desired.
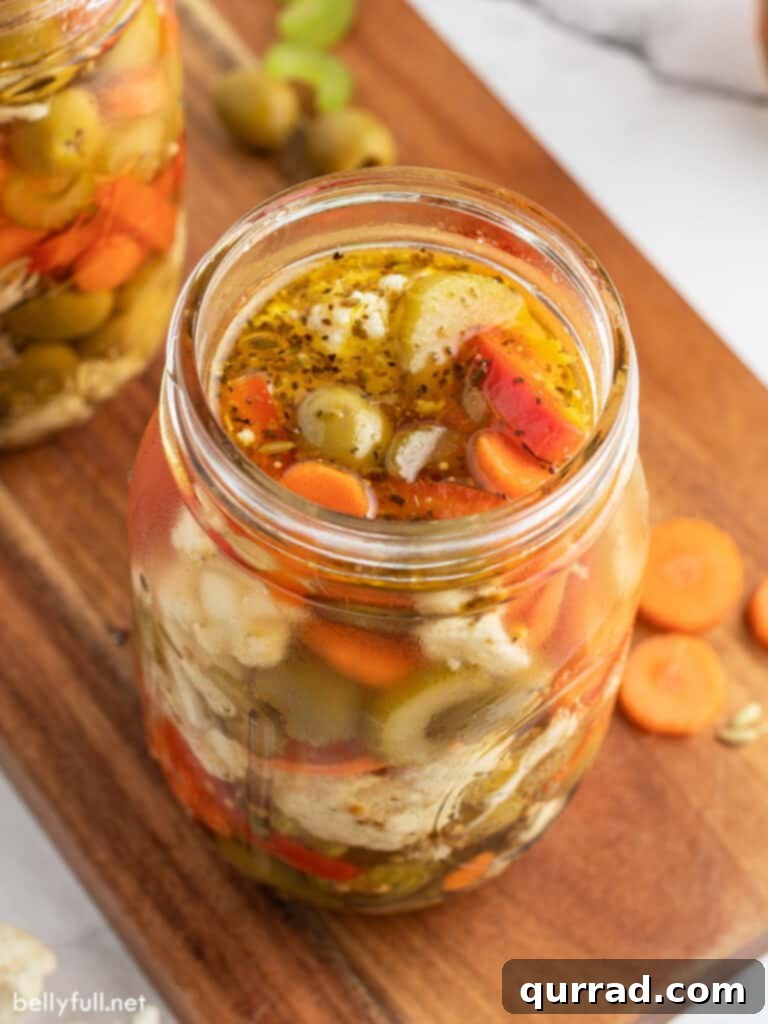
Giardiniera Recipe Insights: Tips for Perfection
Crafting the perfect batch of homemade Giardiniera is simpler than you might think, especially with a few key considerations. This recipe offers a fantastic balance of flavors, but don’s hesitate to customize it to your liking. Here are some essential recipe notes and tips to ensure your Giardiniera turns out perfectly every time:
- Choosing Your Vegetables: The traditional Giardiniera typically includes a colorful mix of cauliflower, carrots, celery, and bell peppers. However, the beauty of homemade is customization! Feel free to experiment with other additions like gherkins, pearl onions, green beans, olives, or even sliced radishes for an extra peppery bite. Ensure all vegetables are fresh and cut into uniform, bite-sized pieces for even pickling.
- Vinegar vs. Oil Brine: As discussed, Chicago-style Giardiniera often leans heavily on an oil-based marinade, sometimes with minimal vinegar or water. For this recipe, we opt for a robust vinegary brine. Not only does this impart a brighter, zestier flavor profile that many prefer, but vinegar also acts as a natural preservative, extending the shelf life of your Giardiniera in the refrigerator. If you desire an oilier version, you can adjust the vinegar-to-oil ratio, but be mindful of the storage duration.
- Selecting Your Peppers: The heat level of your Giardiniera is entirely in your hands! Our recipe calls for Serrano peppers, which offer a pleasant medium heat. For a milder experience, consider using jalapeños or simply increase the amount of bell peppers. If you’re a fan of fiery flavors, sport peppers or even habanero peppers will deliver a serious kick. For a completely heat-free version, stick to various colors of bell peppers. Always wear gloves when handling hot peppers to avoid skin irritation.
- Addressing Saltiness: Pickling inherently involves salt, but sometimes, after the initial brining period, you might find the vegetables a bit too salty for your taste. If, after 36 hours, your Giardiniera seems overly salty, there’s an easy fix: carefully pour off about one-third of the brine from the top of the jar and replace it with fresh water. Gently shake the jar to redistribute, then return it to the fridge. This subtle adjustment can help balance the flavor without compromising preservation.
- Olive Oil Solidification: It’s common for olive oil in Giardiniera to solidify when stored in the refrigerator, especially extra virgin olive oil. This is a natural reaction to cold temperatures and is perfectly normal, not a sign of spoilage. To liquefy the oil before serving, simply take the jar out of the fridge and let it sit on the counter at room temperature for at least 20 minutes. For a quicker fix, you can gently run the sealed jar under warm water. The oil will return to its liquid state, and your Giardiniera will be ready to enjoy.
Simplified Guide: How to Make Giardiniera at Home
Making homemade Giardiniera is a straightforward process that yields incredibly rewarding results. Follow these easy steps to create your own flavorful pickled vegetables. (A more detailed printable recipe is typically available in a recipe card section.)
- Prepare Your Produce: Begin by washing and chopping all your chosen vegetables into uniform, bite-sized pieces. Aim for consistency to ensure even pickling.
- Set Up Jars: Gather four pint-sized canning jars and ensure they are clean and sterilized.
- Layer the Aromatics: Into each of the four prepared jars, evenly distribute the following: 1 tablespoon of olive oil, 1/2 garlic clove (sliced in half), 1/2 Serrano pepper (sliced in half), 1 bay leaf, 1/2 teaspoon dried oregano, 1/4 teaspoon celery seeds, 1/4 teaspoon fennel seeds, 1/4 teaspoon yellow mustard seeds, 1/8 teaspoon coriander seeds, and a small pinch of black peppercorns.
- Fill with Vegetables: Divide the chopped cauliflower, sliced carrots, celery, red bell pepper, and pitted green olives evenly among the four jars. Pack them in snugly, filling the jars almost to the top, leaving a small headspace.
- Prepare the Brine: In a medium saucepan, combine 3 cups of water, 3 cups of white wine vinegar, 2 tablespoons of salt, and 2 tablespoons of granulated sugar. Place the saucepan over high heat and bring the mixture to a rolling boil, stirring well to ensure the salt and sugar dissolve completely.
- Pour the Brine: Carefully and slowly pour the hot, boiling brine over the vegetables in each jar, ensuring the vegetables are fully submerged. Fill the jars almost to the brim, leaving about a 1/2 inch of headspace.
- Cool and Refrigerate: Allow the jars of pickled vegetables to cool completely at room temperature. Once cooled, secure the lids tightly. Give each jar a gentle shake to mix the contents, then transfer them to the refrigerator.
- Brine for Flavor: For optimal flavor development, refrigerate your Giardiniera for at least 36 to 48 hours before serving. This allows the vegetables to fully absorb the delicious brine and spices.
- Adjust Saltiness (Optional): If after 36 hours you find the Giardiniera too salty, you can pour off about one-third of the brine and refill with fresh water before returning to the fridge.
- Enjoy! Once properly brined, your homemade Giardiniera is ready to be used as desired.
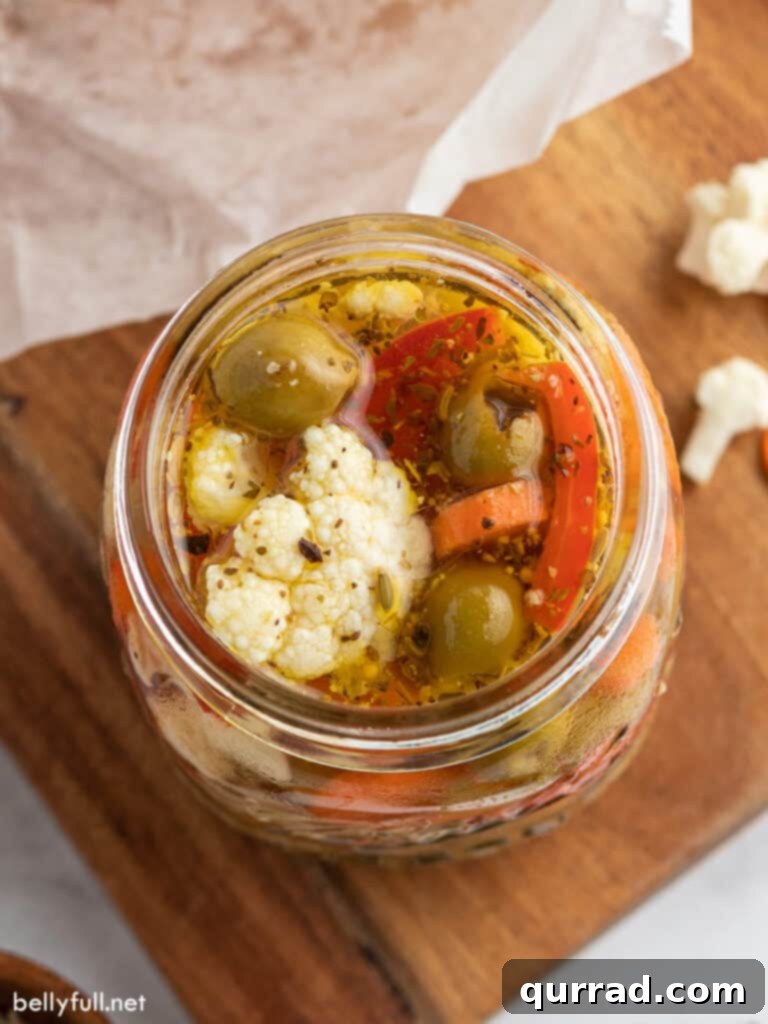
Proper Storage and Preservation for Your Homemade Giardiniera
Ensuring your homemade Giardiniera is stored correctly is crucial for maintaining its fresh taste and prolonging its shelf life. The preservation method largely depends on your brine and whether you choose to formally can it.
How Long Does Giardiniera Last?
- Refrigerator Storage (Vinegary Brine): This specific Giardiniera recipe, thanks to its vinegar-rich brine, will keep beautifully in a sealed jar in the refrigerator for up to 3 weeks. The vinegar acts as a natural preservative, inhibiting bacterial growth and keeping your pickled vegetables delicious.
- Refrigerator Storage (Oil-Only Brine): If you opt for a Giardiniera recipe that uses only oil (common in some Chicago-style versions) with minimal to no vinegar, its refrigerator shelf life is shorter, typically up to 2 weeks. The absence of vinegar means less acidity, making it more susceptible to spoilage.
- Extending Shelf Life Through Canning: For long-term storage, canning your Giardiniera is the best method. This process creates a vacuum seal that allows the pickled vegetables to remain shelf-stable for many months. To properly can Giardiniera, you’ll need to follow a few additional steps:
- Blanching: Before adding the fresh produce to the jars, blanch all the vegetables in salty boiling water for a few minutes. This pre-cooks them slightly and helps with preservation.
- Hot Packing: Pack the blanched vegetables and hot brine into sterilized canning jars.
- Water Bath Canning: Process the filled, sealed jars in a boiling water bath for approximately 10 minutes (adjusting for altitude if necessary) to create a proper, airtight seal. After processing, allow the jars to cool completely and check for a secure seal before storing them in a cool, dark pantry.
Always ensure your jars and lids are clean and properly sterilized before use, regardless of the storage method. Enjoying your Giardiniera safely and deliciously is key!
Other Pickled Delights to Explore
If you’ve fallen in love with the vibrant flavors and satisfying crunch of Giardiniera, you’ll surely enjoy these other fantastic pickled recipes:
- Refrigerator Pickled Beets: Sweet, earthy, and brilliantly colored, these beets are a wonderful side dish or salad topping.
- Homemade Bread and Butter Pickles: A classic sweet and tangy pickle, perfect for sandwiches and burgers.
- Quick Pickled Red Onions: Add a beautiful pink hue and a zesty bite to tacos, salads, and more in minutes.
- Easy Pickled Eggs: A protein-packed snack with a delightful tangy flavor, great for meal prep.
Giardiniera {Pickled Vegetables)
20 mins
5 mins
2 days
2 days 25 mins
24
Ingredients
- 3 cups small bite-sized cauliflower florets
- 1 1/2 cups sliced carrots (rounds)
- 1 1/2 cups sliced celery
- 1 1/2 cups sliced red bell pepper (1 1/2 inch long pieces)
- 1 cup pitted green olives, drained
- 4 tablespoons olive oil, divided
- 4 cloves garlic, peeled and sliced in half, divided
- 2 Serrano chile peppers, sliced in half, divided
- 4 bay leaves, divided
- 2 teaspoons dried oregano, divided
- 1 teaspoon celery seeds, divided
- 1 teaspoon fennel seeds, divided
- 1 teaspoon yellow mustard seeds, divided
- 1/2 teaspoon coriander seeds, divided
- 1/4 teaspoon black peppercorns, divided
For the Brine
- 3 cups water
- 3 cups white wine vinegar
- 2 tablespoons salt
- 2 tablespoons granulated sugar
Instructions
-
Prep and chop all the produce into bite-sized pieces. Set out 4 pint jars.
-
To each jar add: 1 tablespoon olive oil, 1/2 garlic clove, 1/2 serrano pepper, 1 bay leaf, 1/2 teaspoon oregano, 1/4 teaspoon celery seeds, 1/4 teaspoon fennel seeds, 1/4 teaspoon mustard seeds, 1/8 teaspoon coriander seeds, and a pinch of black peppercorns.
-
Divide the cauliflower, sliced carrots, celery, red bell pepper, and olives evenly between the four jars. Fill them to the top.
-
Make the Brine: Set a medium saucepan over high heat. Add the water, vinegar, salt, and sugar. Bring to a boil. Stir well, then carefully pour the boiling brine into each jar, ensuring all vegetables are submerged.
-
Allow the pickled vegetables to cool at room temperature. Then cover with a lid, give them a gentle shake, and refrigerate for 36-48 hours before serving.
-
(If you find the pickled vegetables are too salty after 36 hours, you can pour one-third of the brine off the top and fill with water, then place the jar back in the fridge.)
-
Use as desired (see suggestions in the full article above.)
Nutrition
Calories: 52 kcal |
Carbohydrates: 4g |
Protein: 1g |
Fat: 3g |
Saturated Fat: 1g |
Sodium: 688mg |
Potassium: 124mg |
Fiber: 1g |
Sugar: 2g |
Vitamin A: 1688 IU |
Vitamin C: 19mg |
Calcium: 22mg |
Iron: 1mg
Nutritional information given is an automatic calculation and can vary based on the exact products you use and any changes you make to the recipe. If these numbers are very important to you, I would recommend calculating them yourself.