
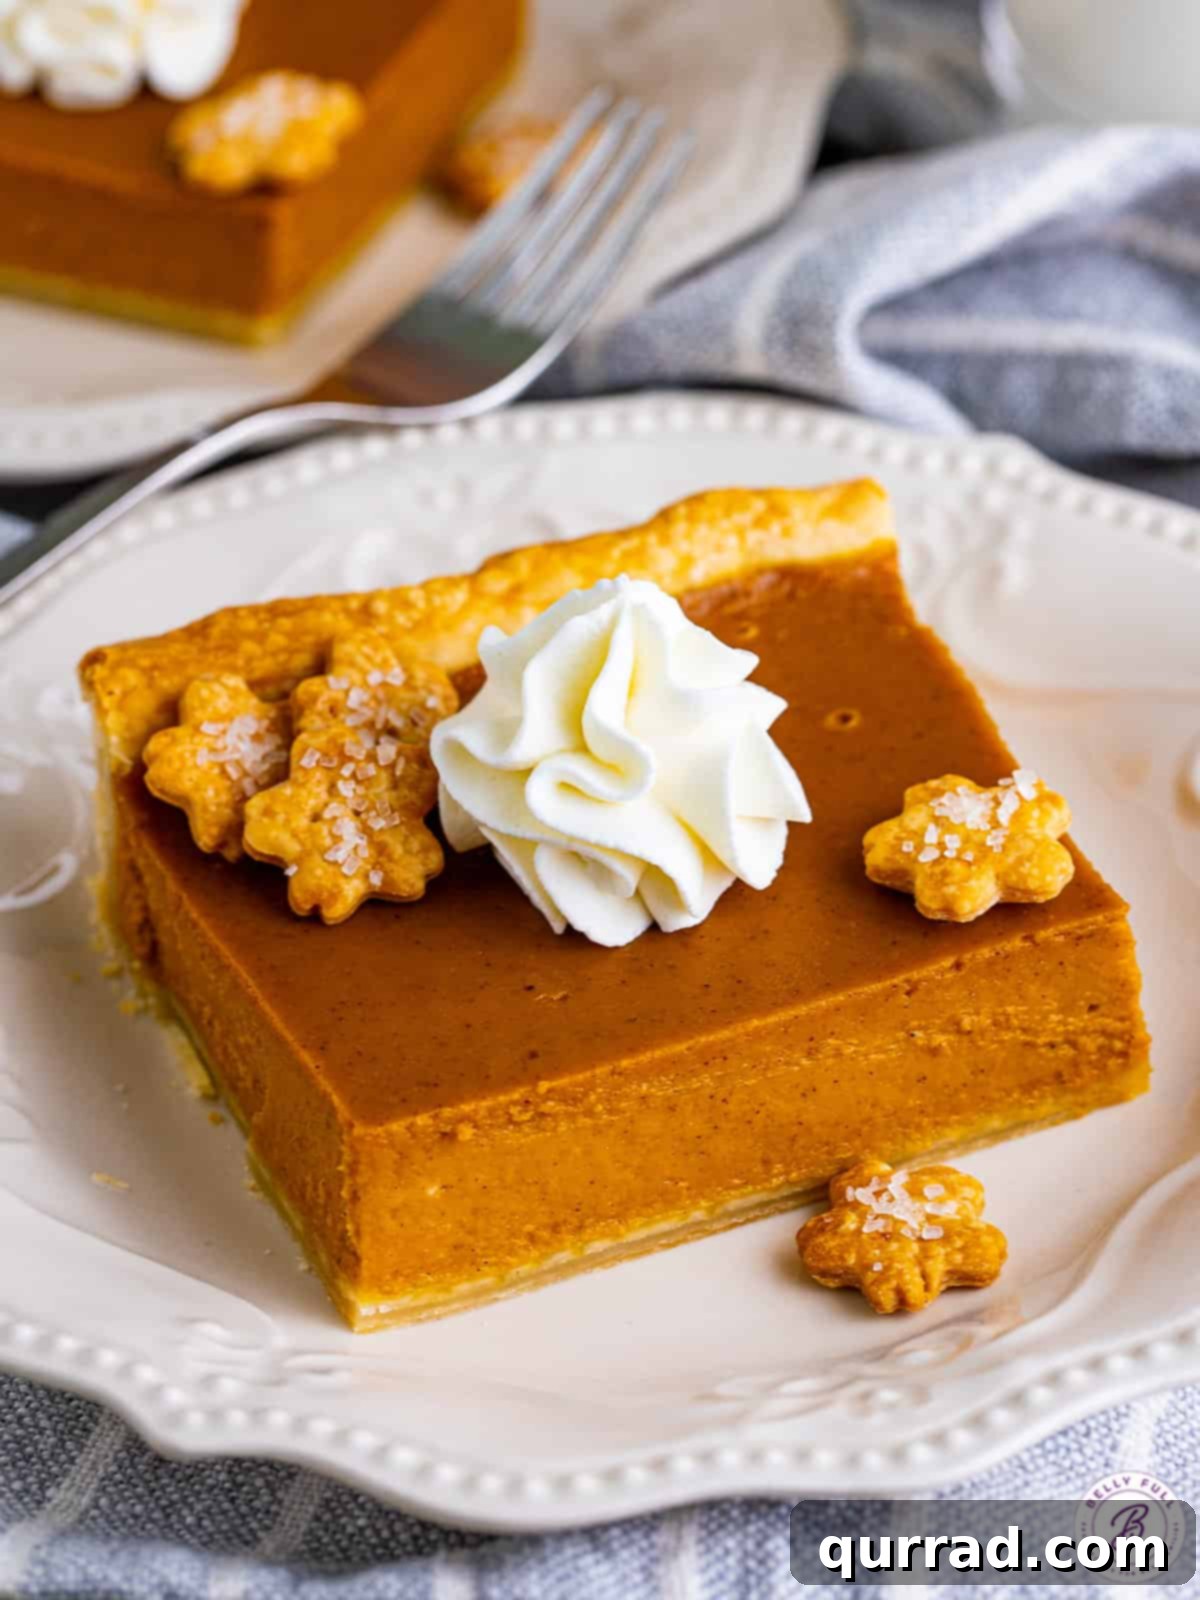
As the leaves turn golden and a crisp chill fills the air, there’s one dessert that captures the very essence of autumn and the spirit of holiday gatherings: pumpkin pie. But not just any pumpkin pie – we’re talking about the incredible **Pumpkin Slab Pie**. This recipe takes everything you love about traditional pumpkin pie and elevates it, making it even easier to prepare, perfectly spiced, and wonderfully simple to serve a crowd. With its irresistibly silky smooth filling encased in a golden, flaky crust, this slab pie is truly a foolproof masterpiece and destined to be your go-to Thanksgiving dessert.
Forget the stress of carving individual pie slices from a delicate round. Our pumpkin slab pie bakes beautifully in a rectangular pan, allowing for neat, square portions that are a breeze to cut and serve. Whether you’re hosting a grand holiday feast or a cozy fall gathering, this recipe ensures everyone gets a generous, delicious slice with minimal fuss. And if you’re looking for delightful bite-sized variations for easy entertaining, don’t miss our charming mini pumpkin pies.
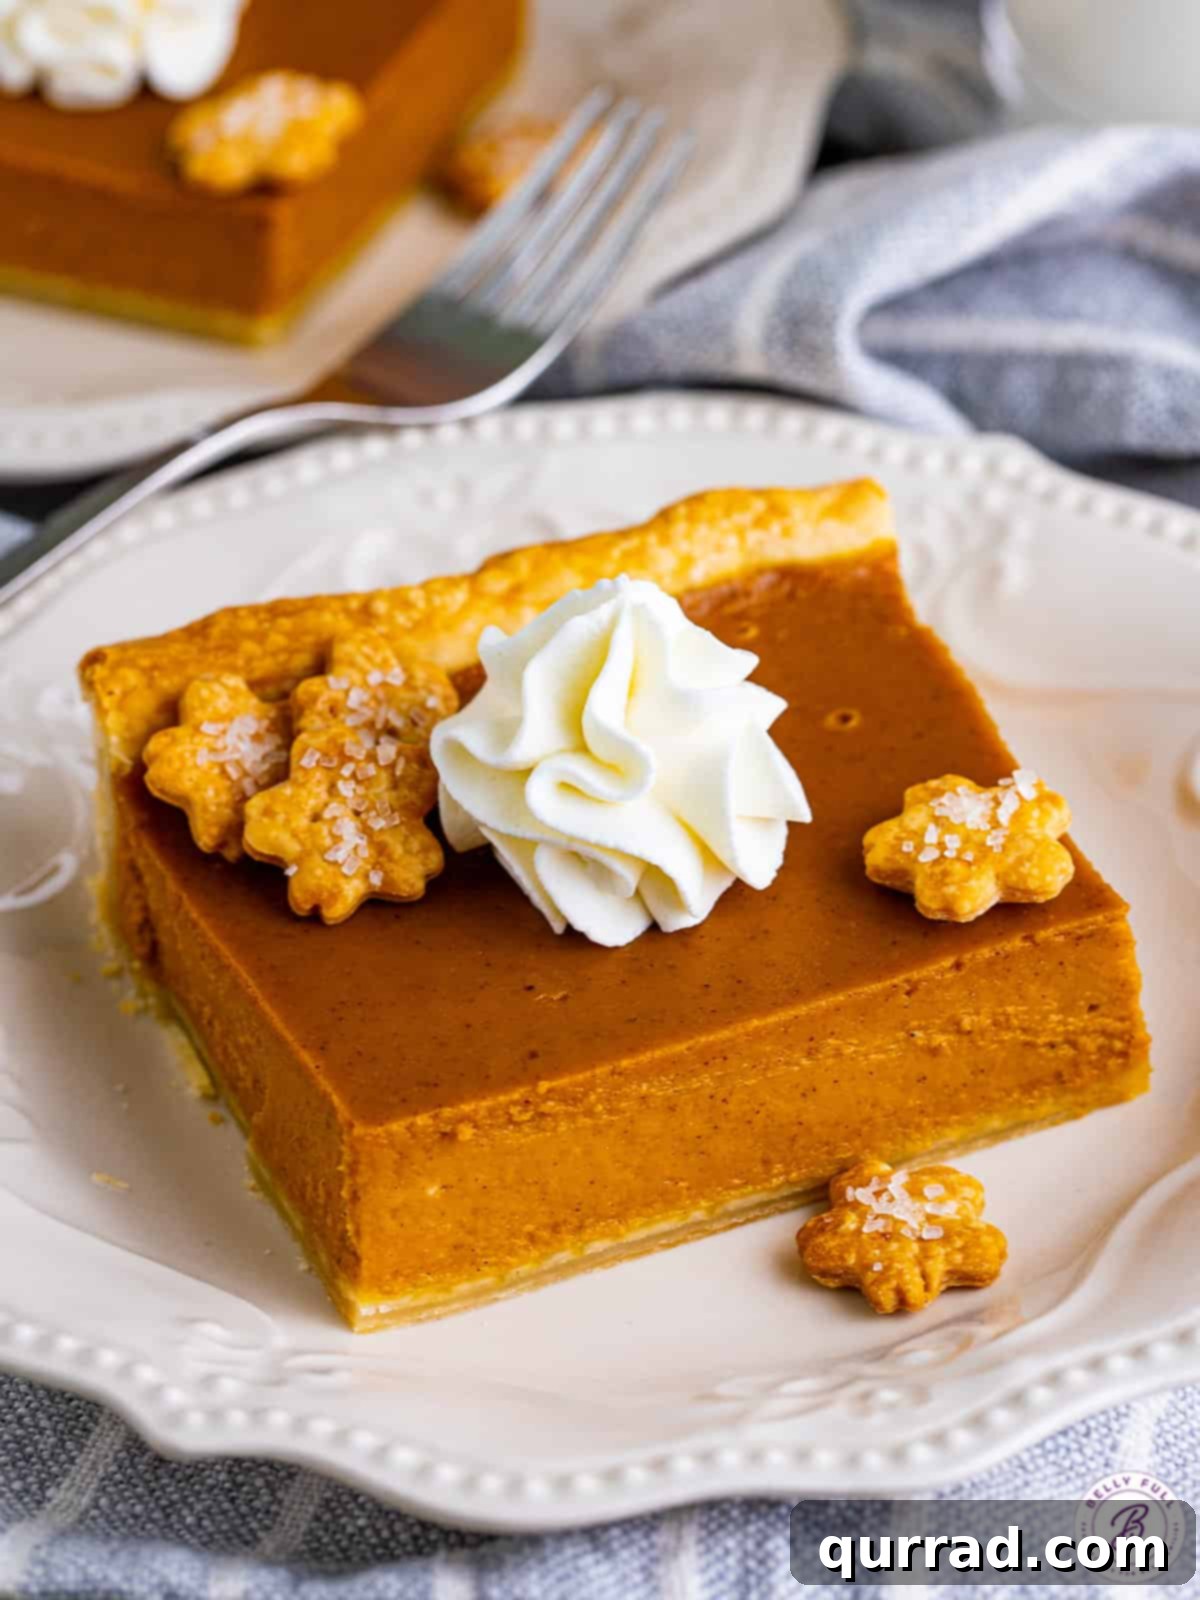
Effortless Elegance: The Ultimate Easy Pumpkin Slab Pie Recipe
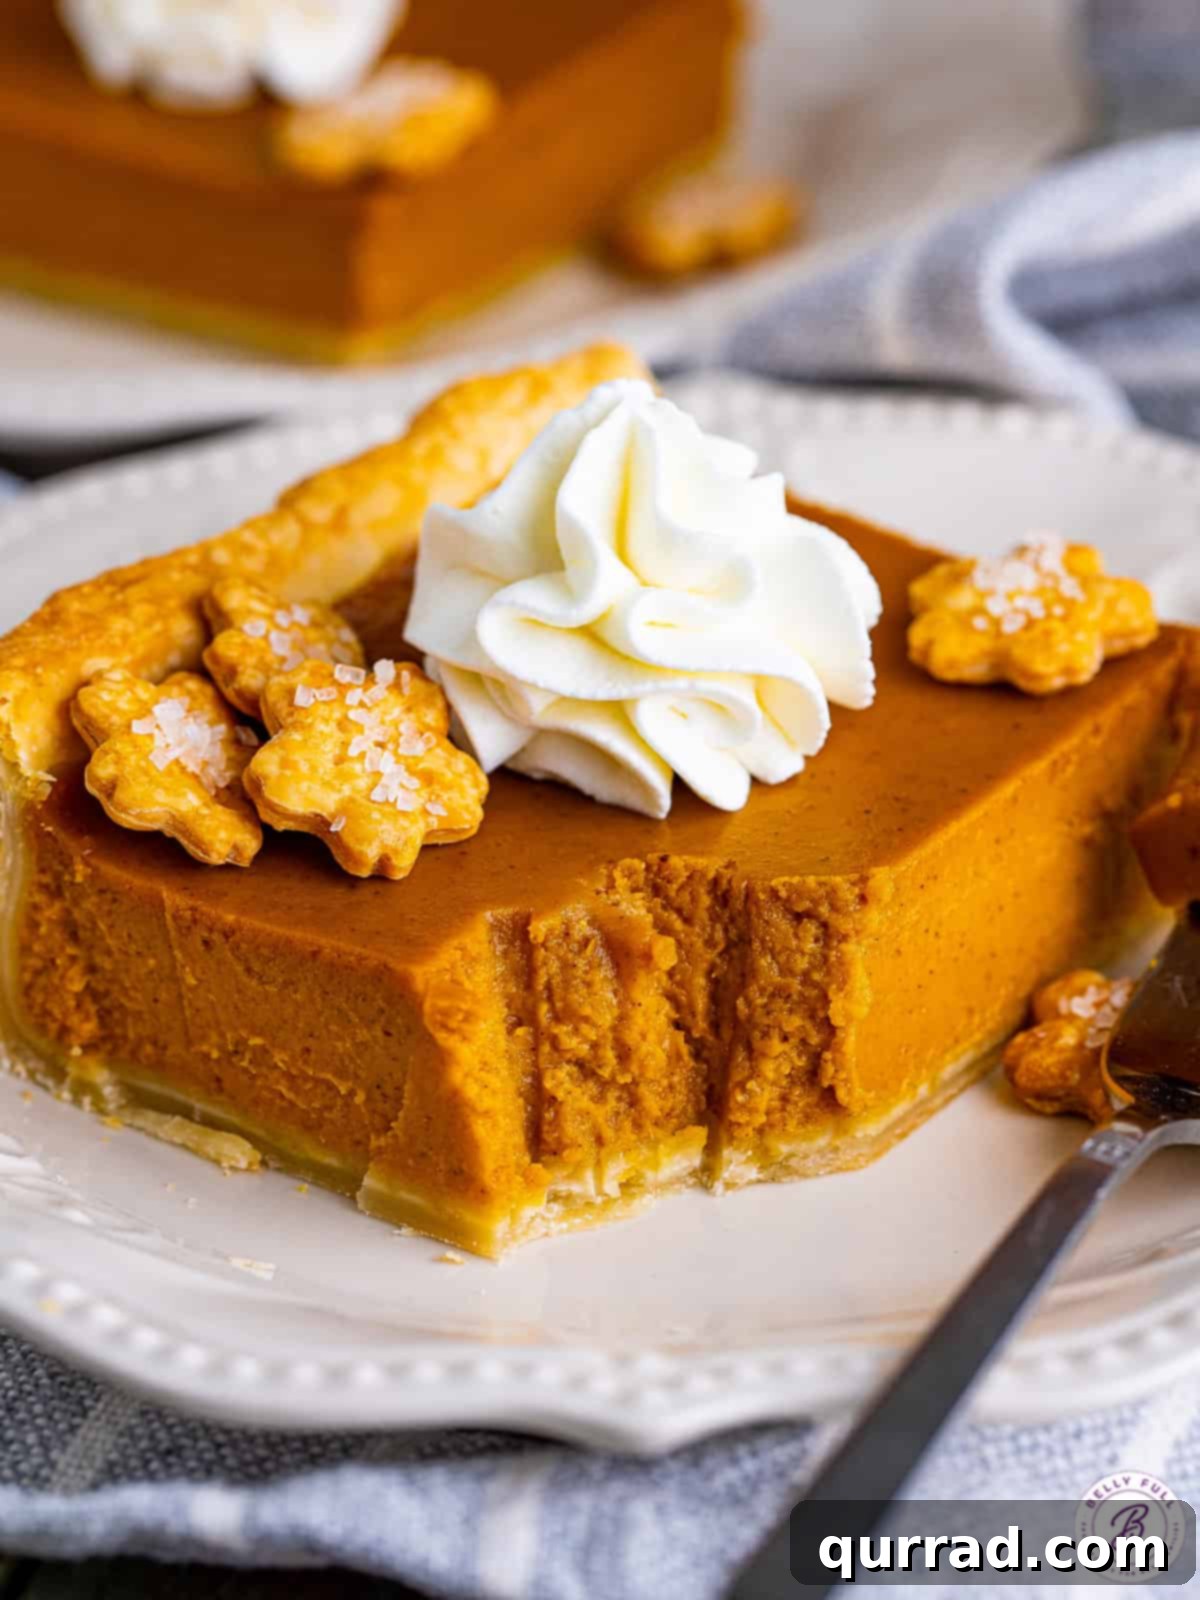
Are you searching for an easy Thanksgiving dessert that consistently delights everyone and comes together without a hitch? Look no further than this fantastic Pumpkin Slab Pie! It delivers all the beloved flavors and comforting warmth you expect from a classic pumpkin dessert, yet in my experience, it’s even simpler to prepare than its traditional round counterpart. The rectangular format is a game-changer, making it incredibly easy to slice into uniform squares, perfect for serving large groups and ensuring every guest enjoys a piece of this autumnal delight.
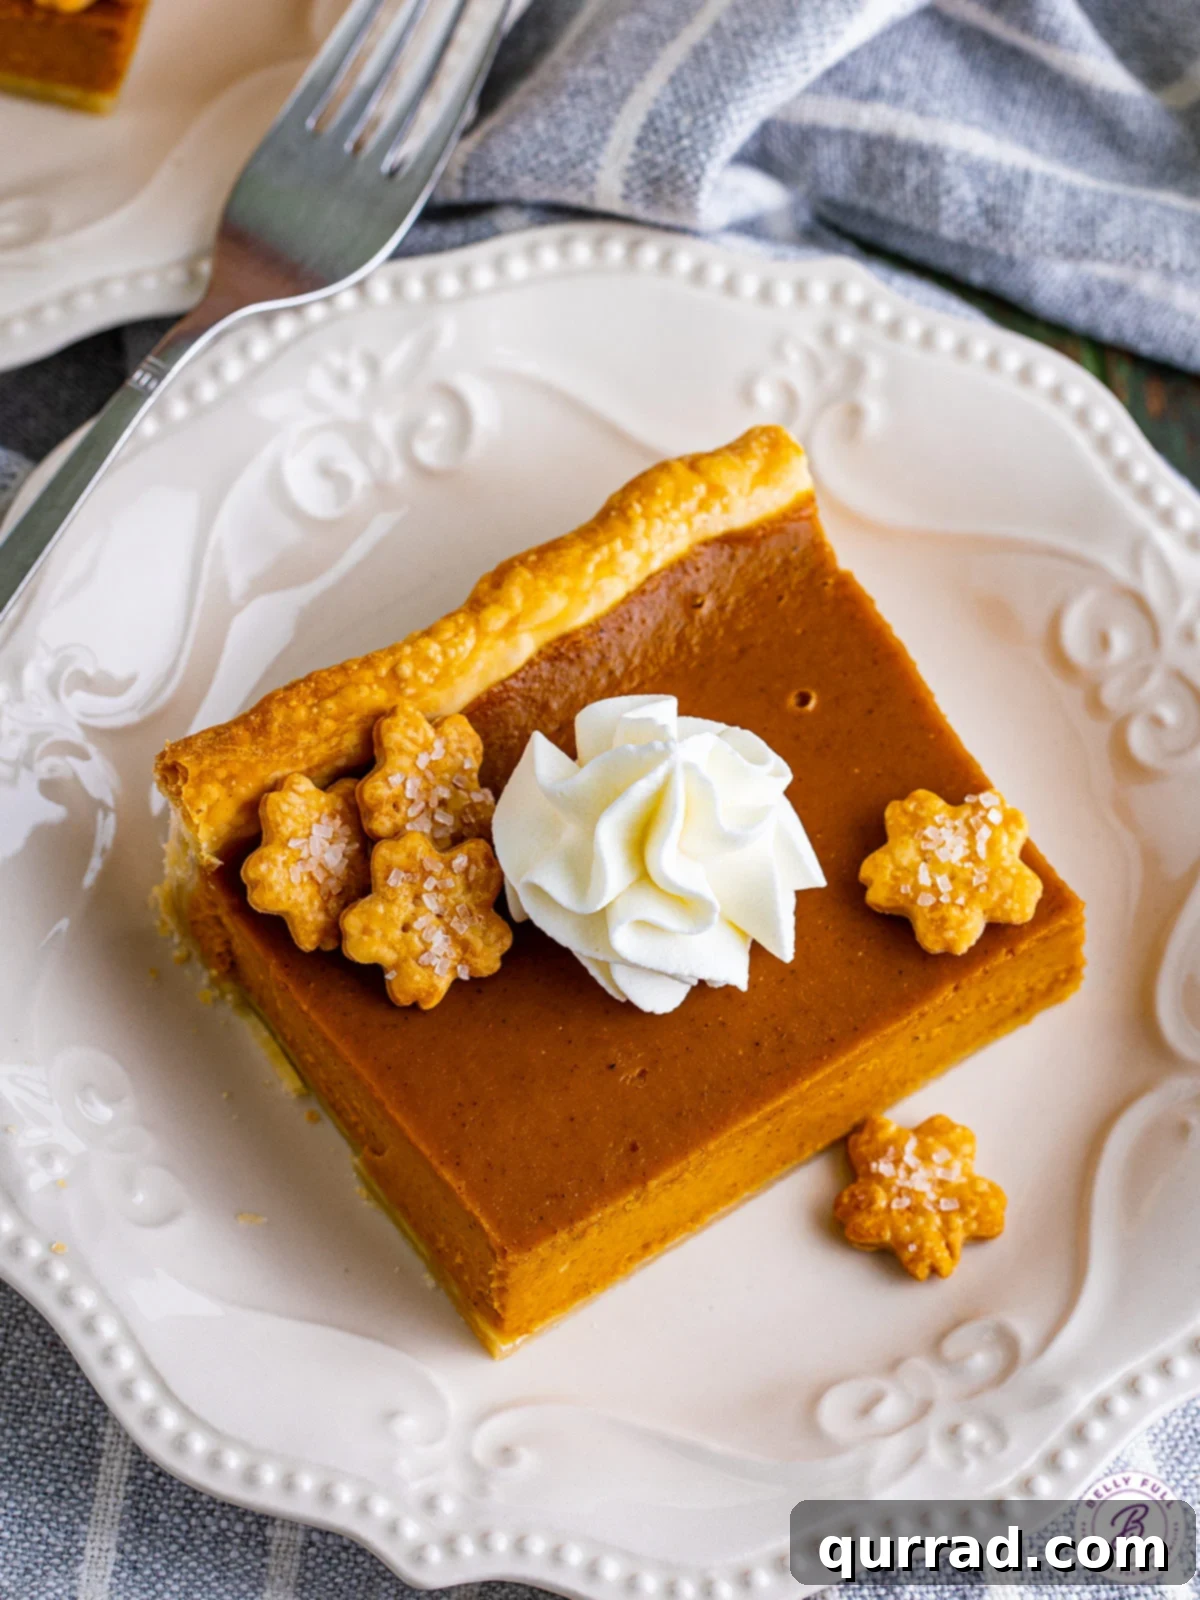
The star of this dessert is undoubtedly its filling: a perfectly spiced, incredibly silky, and smooth pumpkin custard that practically melts in your mouth. You have the flexibility to choose between convenient refrigerated pie crusts for ultimate ease or my tried-and-true homemade pie crust for that extra touch of love. While optional, I sometimes enhance its visual appeal with delicate pie crust decorations (instructions for which you’ll find below). However, even a simple dollop of fresh, piped whipped cream is absolutely perfect, adding a cloud-like finish to this already exquisite dessert.
Why Choose a Pumpkin Slab Pie?
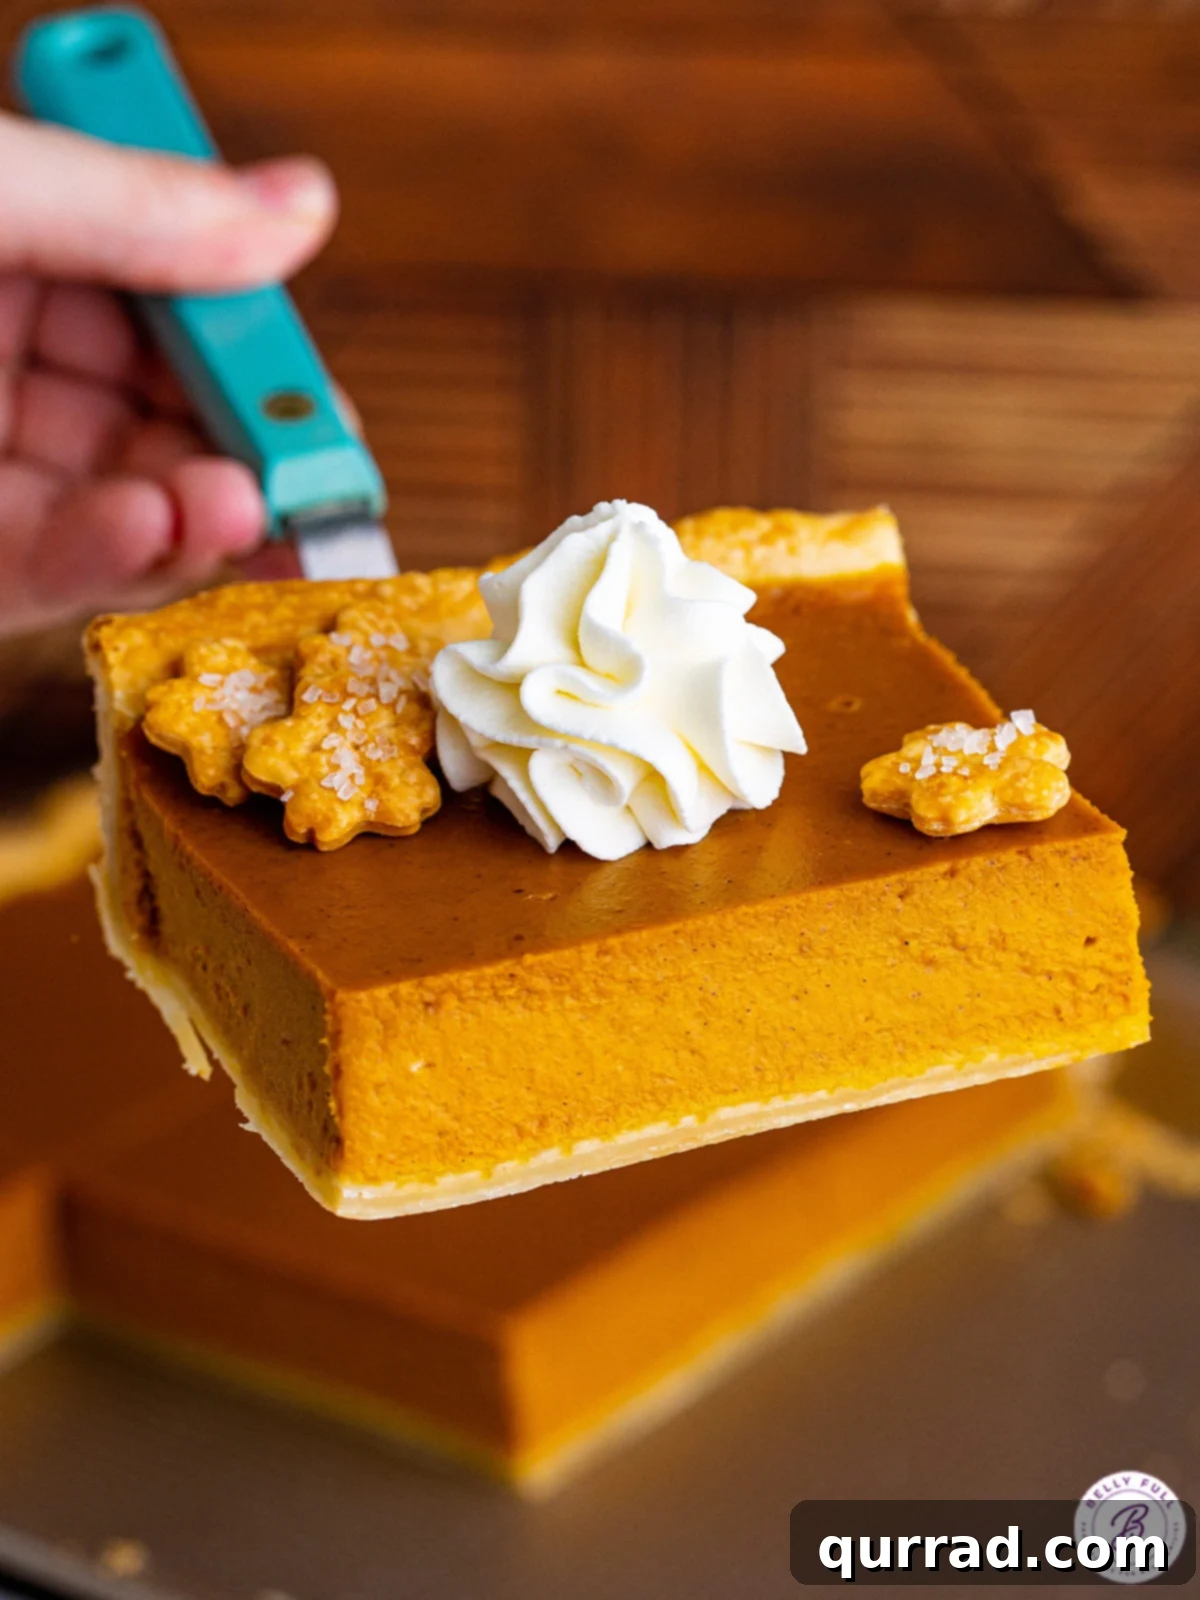
You might be wondering, what makes a slab pie better than a traditional round pie? The answer lies in its practicality and presentation, especially when feeding a crowd. Slab pies are designed for efficiency and ease. Baking in a rectangular jelly roll pan means you can produce a larger volume of dessert at once, significantly reducing baking time compared to multiple standard pies. This is a huge advantage during busy holiday preparations.
Furthermore, the shape of a slab pie eliminates the awkward, uneven slices often encountered with round pies. Instead, you get beautifully uniform squares or rectangles that are easy to cut, serve, and eat. No more struggling with a wobbly piece of pie! This makes it ideal for potlucks, family gatherings, or any event where you want a delicious dessert that’s simple to manage. Plus, the expansive surface area offers a fantastic canvas for creative decorations, turning a simple pie into a festive centerpiece.
Essential Ingredients for Your Perfect Pumpkin Slab Pie
Crafting this delightful pumpkin slab pie requires many of the same core ingredients found in a classic pumpkin pie, but the clever combination and proportions make it surprisingly even simpler to perfect. Each component plays a vital role in achieving that rich flavor and exquisite, smooth texture. Here’s a detailed look at what you’ll need:
- Pie Crusts: You’ll need three (3) pie crusts for this recipe. For utmost convenience, opt for refrigerated rolled pie crusts, which save significant time and effort. Alternatively, if you enjoy baking from scratch, my easy homemade pie crust recipe yields a wonderfully flaky base.
- Pure Pumpkin Puree: This is the heart of your pie. It is absolutely crucial to use *pure pumpkin puree* and not canned pumpkin pie filling. Pumpkin pie filling comes pre-spiced and pre-sweetened, which will throw off the delicate balance of flavors in this recipe. Look for cans labeled “100% Pure Pumpkin.”
- Dark Brown Sugar: Dark brown sugar is preferred here as it imparts a deeper, richer molasses undertone that beautifully complements the pumpkin and spices. If dark brown sugar isn’t available, light brown sugar can be used as a substitute, though the flavor will be slightly milder.
- Heavy Cream: Essential for a truly rich and creamy filling, heavy cream contributes to the luxurious mouthfeel and decadent texture of the slab pie.
- Evaporated Milk: This ingredient adds another layer of creaminess and helps achieve that signature smooth, custardy consistency without thinning the filling too much. For substitutions, half-and-half or whole milk can be used, though evaporated milk provides a slightly richer result due to its concentrated nature.
- Eggs: Eggs are critical for giving the pumpkin filling its structure and helping it set properly as it bakes. They act as a binder, ensuring your pie slices hold their shape beautifully.
- Vanilla Extract: A touch of pure vanilla extract enhances all the other flavors, adding a subtle warmth and depth that rounds out the overall taste profile of the pie.
- Cornstarch: This acts as a thickening agent, ensuring the filling sets up perfectly and prevents it from being watery or overly loose. It contributes to the silky smooth texture that makes this slab pie so delightful.
- Pumpkin Pie Spice: The quintessential spice blend for any pumpkin dessert. I highly recommend making homemade pumpkin pie spice for the freshest, most vibrant combination of flavors. If you don’t have a pre-made blend, individual ground spices like allspice, ginger, clove, and cinnamon would also be excellent additions, providing that classic autumnal aroma and taste.
- Sea Salt: Just a pinch of fine sea salt is added to heighten and balance all the other flavors in the pie, preventing it from being overly sweet and bringing out the best in the pumpkin and spices.
Elevate Your Slab Pie: Delightful Topping Ideas
While this pumpkin slab pie is utterly delicious on its own, adding a topping can take it from simply wonderful to truly extraordinary. Whether you prefer something classic or a little creative, there are plenty of options to customize your dessert. Here are some of our favorite pumpkin pie topping ideas to inspire you:
- Pie Crust Decoration: For an extra festive and elegant touch, consider adding decorative pie crust shapes on top. These are surprisingly easy to make and add visual appeal (see directions below).
- Caramel Sauce: A drizzle of rich, homemade caramel sauce creates a luxurious complement to the sweet and spicy pumpkin filling.
- Vanilla Sauce: A smooth, creamy vanilla sauce offers a delicate contrast and adds a sophisticated flavor profile.
- Whipped Cream: A generous dollop of freshly whipped cream is a classic and always welcome topping, adding a light and airy texture. You can even add a touch of maple syrup or cinnamon to the cream for extra flavor.
- Vanilla Ice Cream: Serving a warm (or room temperature) slice of pumpkin pie with a scoop of cold vanilla bean ice cream is a heavenly combination, offering a delightful interplay of temperatures and textures.
- Candied Pecans or Walnuts: For a crunchy texture and nutty flavor, sprinkle some candied nuts over the top of your pie.
- Dusting of Cinnamon or Nutmeg: A simple dusting of ground cinnamon or freshly grated nutmeg adds a warm aroma and a touch of spice.
Crafting Your Masterpiece: How to Make Pumpkin Slab Pie
Making this easy pumpkin pie recipe is a straightforward process, broken down into just a few simple steps. Prepare to impress your guests with minimal effort!
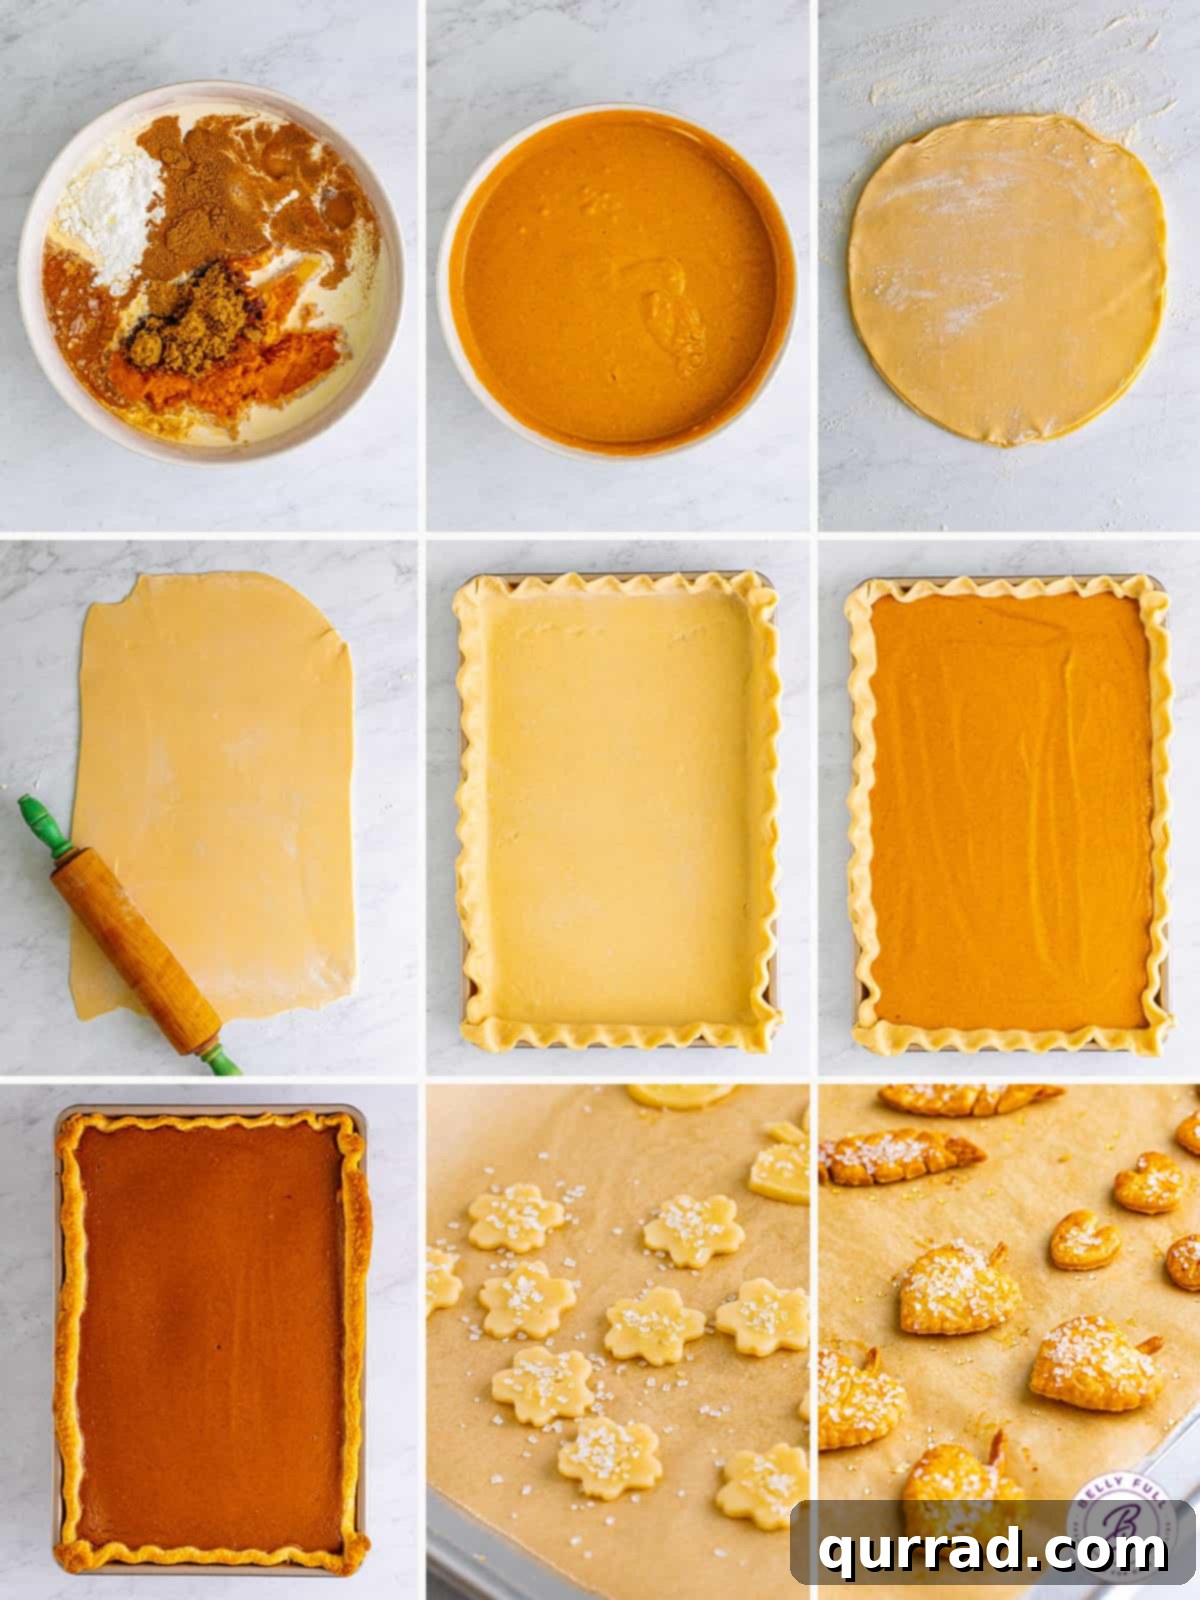
- Preheat and Prepare the Crusts: Begin by preheating your oven to 400°F (200°C). Lightly flour a clean work surface. Carefully unroll and stack all three (3) refrigerated pie crusts one on top of the other. Using a rolling pin, gently roll them together into a large 12×18-inch rectangle. This ensures a single, cohesive crust for your slab pie.
- Form the Crust: Carefully transfer the rolled pie crust into a 10x15x1-inch jelly roll pan. Gently press and form the crust to fit the contours of the pan, extending up the sides. Trim off any significant excess crust hanging over the edges, then crimp the edges decoratively to create a beautiful finish and prevent shrinkage during baking. Set the prepared crust aside.
- Whip Up the Silky Filling: In a large mixing bowl, combine the pure pumpkin puree, dark brown sugar, heavy cream, evaporated milk, large eggs, vanilla extract, cornstarch, pumpkin pie spice, and fine sea salt. Whisk all the ingredients together vigorously until the mixture is completely smooth and well combined, with no lumps. The goal is a truly silky consistency.
- Fill and Bake to Perfection: Carefully pour the prepared pumpkin filling into your crust-lined jelly roll pan. Gently smooth out the top with a spatula to ensure an even layer. Transfer the pan to the preheated oven and bake for 28 to 32 minutes, or until the top is golden brown, the crust is golden, and a toothpick inserted into the center of the pie comes out clean. This indicates the filling is fully set.
- Cool and Enjoy: Once baked, remove the pumpkin slab pie from the oven and allow it to cool completely on a wire rack. This cooling process is crucial for the filling to set fully and achieve its perfect texture. Serve the pie at room temperature or chilled, adorned with the optional crust decoration or any other toppings you desire, such as a generous dollop of whipped cream.
Adding a Touch of Elegance: How to Make Pie Crust Decorations
One of my favorite ways to present this easy pumpkin dessert and make it appear even fancier than it is, is by adding simple pie crust decorations. It’s an incredibly easy technique that instantly elevates the look of any pie and adds a lovely personal touch.
- Prepare the Crust: Unroll one additional refrigerated pie crust onto a lightly floured, clean work surface.
- Cut Out Shapes: Using small fall-themed cookie cutters (think leaves, pumpkins, acorns) or even freehand with a sharp knife, cut out various decorative shapes from the pie crust. Get creative with your designs!
- Bake the Decorations: Arrange the cut-out shapes onto a baking sheet lined with parchment paper. In a small bowl, whisk one large egg with a splash of water to create an egg wash. Lightly brush the tops of your pie crust decorations with this egg wash using a pastry brush. For a sparkling finish, sprinkle them with decorator’s sugar.
- Bake and Cool: Bake the decorations in a preheated oven (usually around 375°F/190°C) for 8 to 10 minutes, or until they turn a beautiful golden brown and are crisp. Keep a close eye on them, as they can brown quickly due to their thinness.
- Serve with Style: Allow the pie crust decorations to cool completely on the baking sheet before gently transferring them. Once cooled, arrange them artfully on top of your finished pumpkin slab pie or other desserts just before serving.
Tips for Slab Pie Success: Achieving Perfection Every Time
Creating the best pumpkin slab pie is easy, especially with a few helpful tips to guide you. These insights will ensure your pie comes out perfectly baked, wonderfully textured, and utterly delicious every single time.
- Choosing the Right Pan: A standard 10x15x1-inch jelly roll pan is ideal for this recipe. This specific size ensures the correct crust-to-filling ratio and allows for even baking. If you don’t have one, a baking sheet with at least a 1-inch rim can work, though the precise dimensions might slightly alter the baking time or pie thickness.
- Knowing When Your Pie is Done: You’ll know your pumpkin slab pie is perfectly baked when both the top of the filling and the crust achieve a beautiful golden brown color. A common test is to insert a toothpick or a thin knife into the center of the pie; it should come out clean, indicating the filling is fully set and cooked through. The center might have a slight jiggle, but it shouldn’t be liquid.
- The Beauty of Making Ahead: One of the most fantastic advantages of this slab pie recipe is how well it holds up when made in advance. It’s absolutely delicious served chilled, making it the perfect candidate for preparing a day or two before your holiday gathering. This allows the flavors to meld beautifully and frees up valuable time on the day of your event – one less thing to stress about on a busy holiday morning!
- Preventing a Soggy Crust: To ensure your bottom crust remains flaky and never soggy, make sure your oven is adequately preheated. You can also lightly brush the bottom crust with a thin layer of egg white before adding the filling, which creates a barrier against moisture.
- Room Temperature Ingredients: For the smoothest, most homogenous filling, ensure your eggs and dairy ingredients (heavy cream, evaporated milk) are at room temperature. This helps them incorporate more easily and bake more evenly, contributing to that desirable silky texture.
- Cooling is Key: Resist the urge to slice into your warm pie immediately. Allowing the pie to cool completely on a wire rack is crucial. This gives the filling ample time to set and firm up, ensuring clean, perfect slices. Rushing this step can lead to a messy, unset pie.
Serving and Storing Your Delicious Pumpkin Slab Pie
Once your delectable Pumpkin Slab Pie has cooled, it’s ready to be enjoyed! Here’s how to best serve and store any leftovers to maintain its fresh, comforting flavor.
- Serving Suggestions: We personally adore this easy pumpkin pie served cold. After it has cooled to room temperature on a wire rack, I recommend transferring it to the refrigerator for at least 4 hours to chill thoroughly before slicing and serving. This chilling period allows the filling to firm up completely, resulting in perfectly set, clean slices. However, whether served at room temperature or chilled, it will be perfectly delicious and ready to delight your guests. It’s absolutely perfect when served with a generous dollop of fresh homemade whipped cream on top, perhaps with a sprinkle of cinnamon or a drizzle of caramel for an extra touch.
- Storing Leftovers: Any leftover pumpkin slab pie can be kept in the refrigerator for up to 3 days. To maintain its freshness and prevent it from drying out or absorbing other refrigerator odors, ensure the pie is tightly covered with plastic wrap. If you only have a few pieces remaining, it’s best to transfer them to an airtight container before refrigerating.
- Freezing for Future Enjoyment: This pumpkin pie also freezes beautifully, allowing you to prepare it well in advance or save extra portions for later. To freeze, allow the baked pie to cool and set completely at room temperature. Once fully cooled, wrap the entire pie (or individual slices) tightly first in plastic wrap, then again in aluminum foil. This double layer of protection helps prevent freezer burn. It can be stored in the freezer for up to 3 months. When you’re ready to enjoy it, thaw the pie on the kitchen counter for a few hours, or ideally, thaw it overnight in the refrigerator for the best texture.
Frequently Asked Questions About Pumpkin Slab Pie
Here are some common questions about making and enjoying pumpkin slab pie:
Q: Can I use fresh pumpkin instead of canned pumpkin puree?
A: Yes, you can! If using fresh pumpkin, ensure it’s cooked and pureed until completely smooth, and that any excess moisture has been drained. The consistency should be similar to canned pumpkin puree. You’ll need about 30 ounces (around 3.75 cups) of fresh pumpkin puree for this recipe.
Q: My pie filling cracked on top. What happened?
A: Cracking often occurs if the pie is overbaked or cools too quickly. Overbaking causes the custard to dry out and contract. Ensure you bake only until a toothpick inserted in the center comes out clean and the edges are set. Also, try to let the pie cool gradually at room temperature on a wire rack, away from drafts.
Q: Can I prepare the pie crust ahead of time?
A: Absolutely! If you’re using homemade pie crust, you can prepare the dough up to 2-3 days in advance and store it in the refrigerator, tightly wrapped. You can also roll out and form the crust in the jelly roll pan, then cover it and refrigerate for up to 24 hours before filling and baking.
Q: What if I don’t have a jelly roll pan?
A: While a 10x15x1-inch jelly roll pan is ideal, you can adapt. A large baking sheet with at least a 1-inch rim will work, though your pie might be slightly thinner or thicker depending on the pan size. You might need to adjust baking time accordingly. Always ensure the pan can contain the liquid filling without spilling.
Q: How can I tell if pumpkin puree is 100% pure and not pie filling?
A: Always check the label! Cans of pure pumpkin will list “100% Pure Pumpkin” or “Pumpkin” as the sole ingredient. Pumpkin pie filling will list additional ingredients like sugar and spices.
Q: Can I reduce the amount of sugar in the recipe?
A: You can slightly reduce the sugar, but be mindful that sugar plays a role in the pie’s texture and overall flavor balance. Reducing it too much might affect the filling’s consistency and sweetness. Start by reducing by 1/4 cup if you prefer a less sweet pie.
Discover More Delicious Pumpkin Desserts:
If you’re as enamored with pumpkin as we are, you’ll love exploring these other delightful pumpkin-inspired treats that are perfect for fall and beyond:
- Pumpkin Scones
- Butterscotch Pumpkin Cookies
- Mini Pumpkin Pies
- Pumpkin Dump Cake
- Pumpkin Fluff
We sincerely hope you cherish this incredibly delicious and easy pumpkin slab pie recipe. It’s truly a labor of love that brings warmth and joy to any occasion, especially during the festive holiday season. Don’t forget to connect with us on your favorite social platforms for more fantastic recipes and culinary inspiration!
Pumpkin Slab Pie Recipe
Prep Time: 15 mins
Cook Time: 32 mins
Total Time: 47 mins
Servings: 15 servings
This Pumpkin Slab Pie is totally foolproof, perfectly spiced, with a silky smooth filling, and easy to slice and serve. It’s truly the best pumpkin pie and a super easy Thanksgiving dessert!
Ingredients
For the Pie
- 3 refrigerated rolled pie crusts
- 30 ounces pure pumpkin puree (not pie filling)
- 1 ¾ cups dark brown sugar
- 1 ½ cups heavy cream
- 1 cup evaporated milk
- 4 large eggs
- 1 tablespoon vanilla extract
- 2 tablespoons cornstarch
- 2 teaspoons pumpkin pie spice
- 1 teaspoon fine sea salt
Optional Pie Crust Decoration:
- 1 refrigerated rolled pie crust
- 1 large egg
- Splash of water
- Decorator’s sugar
Instructions
- Preheat your oven to 400°F (200°C).
- Lightly flour a clean work surface. Unroll and stack 3 pie crusts on top of each other. Roll them out together into a 12×18-inch rectangle.
- Carefully place the rolled pie crust into a 10x15x1-inch jelly roll pan, forming it to the pan. Trim off any excess crust and crimp the edges decoratively. Set aside.
- In a large bowl, whisk together the pumpkin puree, dark brown sugar, heavy cream, evaporated milk, eggs, vanilla extract, cornstarch, pumpkin pie spice, and salt until the mixture is completely smooth. Pour this silky filling into the prepared pie crust and gently smooth the top.
- Bake for 28-32 minutes, or until the top of the filling is golden brown, the crust is golden, and a toothpick inserted into the center of the pie comes out clean.
- Remove the pie from the oven and let it cool completely on a wire rack. This is crucial for the filling to set properly.
- For optional crust decoration (while the pie is baking): Unroll an additional pie crust onto a lightly floured surface. Use cookie cutters to cut out fall-themed shapes (e.g., leaves, pumpkins).
- Place these shapes onto a parchment paper-lined baking sheet. Beat the remaining large egg with a splash of water to make an egg wash. Lightly brush the crust decorations with the egg wash and sprinkle with decorator’s sugar.
- Bake these decorations for 8-10 minutes, or until golden brown. Let them cool completely.
- Once the pumpkin slab pie has cooled to room temperature (or chilled, if preferred), slice it into squares. Serve with the optional pie crust decorations as garnish and a dollop of fresh whipped cream. Enjoy your delicious, perfectly spiced pumpkin slab pie!
Nutrition Facts
Calories: 459kcal
Carbohydrates: 56g
Protein: 7g
Fat: 23g
Saturated Fat: 11g
Polyunsaturated Fat: 2g
Monounsaturated Fat: 9g
Trans Fat: 0.01g
Cholesterol: 94mg
Sodium: 399mg
Potassium: 295mg
Fiber: 3g
Sugar: 29g
Vitamin A: 9306IU
Vitamin C: 3mg
Calcium: 116mg
Iron: 3mg
Nutritional information is an automatic calculation and may vary based on specific products used and any modifications to the recipe. For precise values, it’s recommended to calculate them independently.