
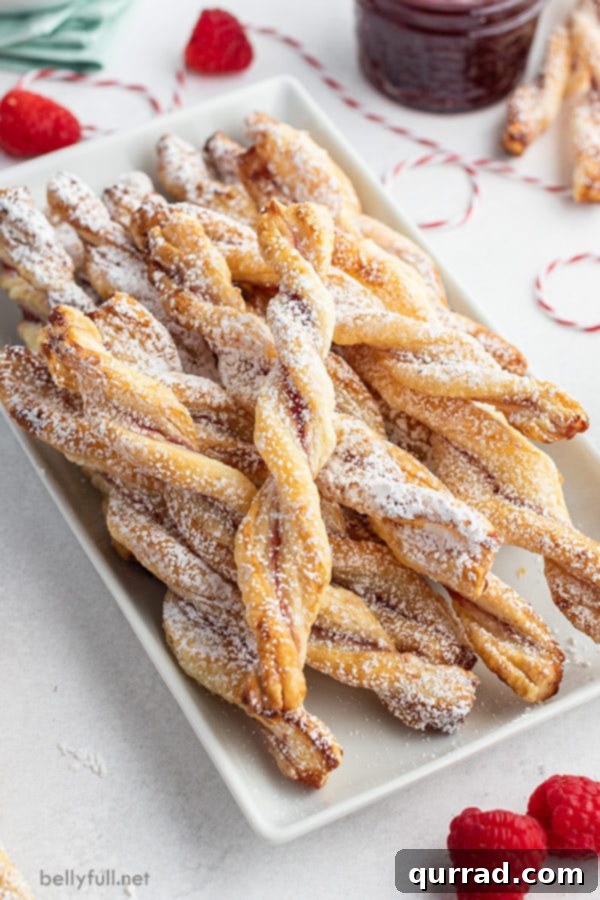
Irresistible 2-Ingredient Jam Puff Pastry Twists: Your Ultimate Guide to Easy Baking
Craving a delightful, flaky treat that requires minimal effort yet impresses every time? Look no further than these incredible Jam Puff Pastry Twists! With just two simple, accessible ingredients – store-bought puff pastry and your favorite fruit jam – you can effortlessly create an elegant, mouth-watering snack perfect for any occasion. Whether it’s a cozy breakfast, a sophisticated brunch spread, a delightful addition to an afternoon tea, or a charming companion to your morning coffee, these golden, spiral delights are guaranteed to be a hit. Forget complicated recipes and lengthy baking sessions; these twists are all about maximum flavor and visual appeal with minimum fuss, making them a true culinary hero for busy bakers.
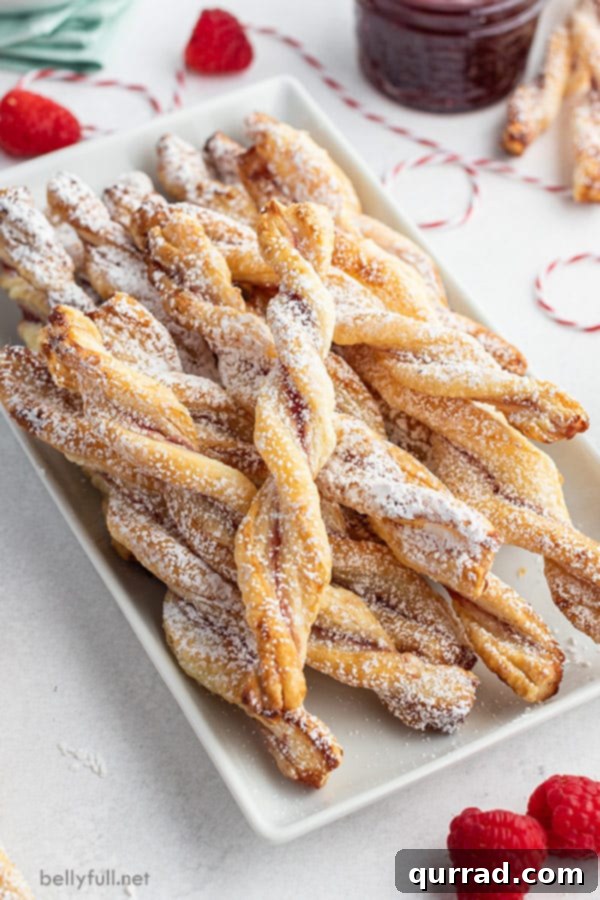
Why These Jam Puff Pastry Twists Are a Must-Try for Every Home Baker
These beautiful pastry twists may look like they came straight from a gourmet bakery, but their underlying simplicity is their most charming secret. They offer a perfect harmony of crispy, buttery layers that practically melt in your mouth, contrasted beautifully with a sweet, fruity, and slightly tangy filling. Their ease of preparation makes them an absolute dream for entertaining guests or simply indulging in a homemade treat without the stress. They are ideal for:
- Effortless Elegance: Requiring only two main ingredients and straightforward steps, these twists deliver an impressive presentation with minimal culinary skill.
- Remarkably Quick: From the moment your puff pastry thaws to the first bite, you can have warm, freshly baked pastries on your table in under 30 minutes, not including chilling time.
- Incredibly Versatile: Easily adaptable with various jam flavors, chocolate spreads, or even savory fillings, allowing for endless customization to suit any palate or occasion.
- Visually Appealing: Their unique twisted shape and golden-brown hue, often enhanced with a dusting of powdered sugar, make them a fantastic centerpiece or a charming addition to any dessert spread.
- Universally Loved: A delightful snack that appeals to everyone, from children enjoying a sweet treat to adults savoring a sophisticated bite with their morning brew.
- Perfect for Any Event: Whether you’re hosting a baby shower, bridal brunch, Sunday morning gathering, a festive holiday celebration, or simply enjoying a quiet moment, these twists fit right in.
Imagine the delightful aroma filling your kitchen as these golden spirals bake to perfection, promising a delectable experience. They evoke the charm of artisanal breadsticks or delicate Danish pastries, but without any of the extensive and often intimidating prep work. Let’s delve into how you can create these show-stopping, flaky treats with absolute ease and confidence.
Crafting Your Perfect Jam Puff Pastry Twists: A Comprehensive Guide
The true magic of these jam-filled pastry twists lies in their profound simplicity. You’ll be genuinely amazed at how such minimal effort and basic ingredients can yield such impressive and utterly delicious results. This section will walk you through everything you need to know, from selecting your ingredients to the final dusting of powdered sugar, ensuring your twists are nothing short of spectacular.
Essential Ingredients for Flaky Perfection:
- Puff Pastry: You’ll need one sheet of frozen puff pastry, typically around 8.65 ounces, which often constitutes half of a standard package. For the best flavor and a richer, more authentic flakiness, consider opting for all-butter puff pastry if it’s available in your local grocery store. Otherwise, any quality brand of frozen puff pastry will work beautifully. Crucially, ensure it’s thawed correctly according to the package instructions before you begin your preparation.
- Seedless Jam of Your Choice: Approximately 1/4 cup. While seedless varieties like raspberry, strawberry, or apricot are highly recommended for a smoother, mess-free experience, feel free to experiment with any fruit preserve you adore. Consider cherry, blueberry, or even a mixed berry blend for delightful variations.
- All-Purpose Flour: A small, modest amount is needed for lightly dusting your work surface and rolling pin. This simple step is vital for preventing the delicate puff pastry from sticking, ensuring a smooth rolling and cutting process.
- Powdered Sugar: (Optional, but enthusiastically recommended) This is your secret weapon for a professional, elegant finish. A generous dusting not only adds an extra touch of delicate sweetness but also gives your twists that irresistible bakery-fresh appeal.
Key Equipment You’ll Need:
- Rolling pin
- Sharp knife or a pizza cutter (for clean, precise strips)
- Small pastry brush (for even jam spreading)
- Baking sheet(s)
- Parchment paper (essential for non-stick baking and easy cleanup)
- Measuring cups and spoons
- Microwave-safe bowl (for warming jam)
- Wire rack (for cooling)
Step-by-Step Instructions to Create Your Twists:
- Prepare the Puff Pastry: First, remove your frozen puff pastry from the freezer and allow it to thaw completely according to the specific instructions provided on its packaging. This typically takes about 30 to 40 minutes at room temperature. The pastry should be pliable and easy to unfold, yet still cool to the touch.
- Line Your Baking Sheets: While the pastry thaws, prepare your baking surface. Line a large baking sheet (or two, if you have them, to ensure proper spacing) with parchment paper. This critical step prevents your twists from sticking and makes cleanup incredibly simple. Set the lined sheet aside.
- Roll Out the Pastry: Lightly dust a clean, dry work surface and your rolling pin with a fine sprinkle of all-purpose flour. Carefully unfold one sheet of the thawed puff pastry. Gently roll it out into a uniform 12×16-inch rectangle. While perfect precision isn’t strictly necessary, strive for an even thickness across the entire sheet. Once rolled, use your knife or pizza cutter to cut this large rectangle crosswise into two equal 8×12-inch rectangles.
- Warm and Spread the Jam: In a small, microwave-safe bowl, warm your chosen jam for approximately 15 seconds. This brief heating loosens its consistency, making it much easier to spread smoothly and evenly across the pastry. Using a pastry brush, coat one of the 8×12-inch puff pastry rectangles with the warmed jam. Be sure to leave a small, clean border (about 1/4 inch) around the edges of the pastry.
- Assemble and Seal the Layers: Carefully place the second, uncoated pastry piece directly on top of the jam-coated rectangle. Gently align the edges as best you can. Then, very lightly use your rolling pin to roll over the stacked pastry. This action helps to gently seal the two layers together and distribute the jam evenly. Exercise caution here; too much pressure will force the jam out the sides, leading to a sticky mess.
- Slice and Form the Twists: With a sharp knife or a pizza cutter, slice the combined pastry layers into approximately 24 individual strips, each about 1/2-inch wide. Pick up each strip, firmly pinch the ends together to create a secure seal, and then carefully twist the strip several times, forming an elegant spiral shape. The tighter and more secure the initial pinch, the less likely your twists are to unravel during the baking process.
- Chill for Optimal Flakiness: Arrange the twisted pastry strips on your prepared baking sheet(s), ensuring you leave ample space—about 1.5 inches—between each one to allow for proper expansion during baking. Transfer the entire baking sheet to the refrigerator and chill for at least 20 minutes. This crucial chilling step helps the puff pastry butter solidify, which in turn helps the twists maintain their beautiful shape and achieve maximum flakiness when exposed to the hot oven.
- Preheat Your Oven: While your twists are chilling in the refrigerator, preheat your oven to 400°F (200°C). This ensures the oven is at the correct temperature for immediate baking.
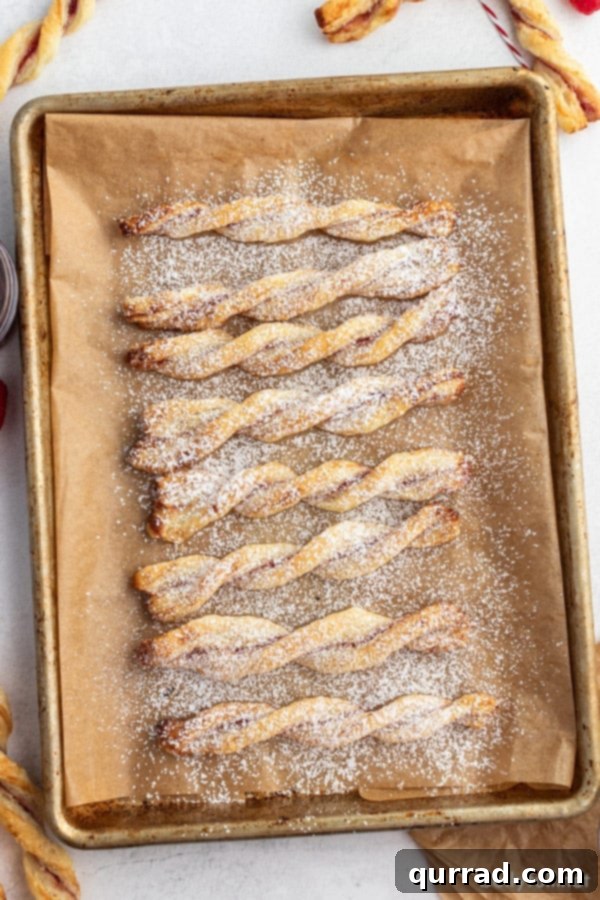
- Bake to Golden Perfection: Once the oven is preheated and the twists are chilled, place the baking sheet in the oven. Bake for 10-12 minutes, or until the twists are beautifully golden brown, visibly puffed up, and delightfully crisp. Keep a close eye on them towards the end of the baking time, as oven temperatures can vary.
- Cool and Finish: Carefully remove the baked twists from the oven. Let them cool on the baking sheet for a few minutes to set slightly before gently transferring them to a wire rack to cool completely. Once they’ve cooled down, generously dust them with powdered sugar for that irresistible, professional finish and an extra whisper of sweetness.
Recipe Notes & Expert Tips for Puff Pastry Success
Achieving bakery-quality pastry twists is far easier than you might imagine, especially with a few insider tips. Keep these pointers in mind to ensure your treats are nothing short of perfect and consistently delicious:
- Smart Jam Selection: While seedless jam is often recommended for a clean, smooth eating experience, never hesitate to experiment with your personal favorite fruit flavors. Strawberry, raspberry, apricot, or even a vibrant mixed berry blend all work wonderfully. The key is to choose a jam you genuinely enjoy!
- Enhance Sweetness and Aroma: For an even richer, sweeter, and more aromatic treat, consider sprinkling a tiny bit of brown sugar along with a delicate pinch of ground cinnamon over the jam layer before you place the second pastry sheet on top. This subtle addition truly adds a magnificent depth of flavor.
- The Golden Rule for Jam: Less is More: It’s tempting to apply a thick layer of jam, but resist the urge to overfill. Applying too much jam will inevitably cause it to ooze out excessively during baking, resulting in a sticky, caramelized mess on your baking sheet and potentially soggy pastry. A thin, even coating is truly ideal for both flavor and texture.
- Beyond Traditional Jam Fillings: Unleash your creativity! While jam is fantastic, you can easily replace it with other delectable spreads. Think melted chocolate, creamy and rich Nutella, a thin layer of sweetened cream cheese, or even a tangy lemon curd for a citrusy twist.
- Secure the Twist – Don’t Skip This Step: When forming your twists, it is absolutely crucial to firmly pinch the ends of each pastry strip together before you begin twisting. This vital step acts as a seal, effectively preventing the twists from unraveling in the hot oven and ensuring they retain their beautiful, elegant spiral shape.
- Handle Pastry Minimally: Puff pastry is delicate. The key to its signature flakiness is layers of butter that melt and create steam. Overworking the pastry or handling it too much can warm the butter, making it tough rather than flaky. Work quickly and with a light touch.
- Temperature is Key: Always ensure your puff pastry is cold when it goes into the oven. The stark contrast between cold pastry and a hot oven is what creates those desirable, airy, and flaky layers.
Storage & Make-Ahead Strategies for Jam Puff Pastry Twists
These delightful twists are truly at their absolute best when enjoyed fresh from the oven, ideally within an hour or two of baking. At this point, the flaky layers are perfectly crisp, and the jam filling is wonderfully warm and inviting.
Serving and Short-Term Storage:
- For the ultimate indulgence, serve these twists warm from the oven. The butter in the pastry will be perfectly melted, creating an unparalleled texture.
- If you find yourself with leftovers, or if you’re preparing them for an event later in the same day, allow them to cool completely to room temperature. Once cooled, store them in an airtight container. They will remain fresh and delicious for up to 2-3 days, though they may gradually lose some of their initial crispiness.
- To regain some crispness for stored twists, you can briefly reheat them in a toaster oven or a regular oven at a low temperature (around 300°F / 150°C) for a few minutes.
Make-Ahead & Freezing Instructions for Ultimate Convenience:
These Jam Puff Pastry Twists are exceptionally well-suited for meal prepping or preparing in advance for larger gatherings or busy mornings. The ability to freeze them unbaked means you can bake them fresh on demand, enjoying that fresh-from-the-bakery taste whenever you desire.
- To Prep and Freeze Unbaked Twists: Follow the recipe instructions precisely up to step 7 (slicing and twisting the pastry strips). Once twisted, arrange the unbaked twists on a parchment-lined baking sheet, ensuring they are spaced adequately and not touching each other. Place the entire baking sheet directly into the freezer and freeze until the twists are completely firm and solid. This usually takes approximately 3-4 hours, depending on your freezer’s temperature.
- Storing Frozen Twists: Once the twists are thoroughly frozen and solid, you can transfer them from the baking sheet into a freezer-safe zip-top bag or an airtight freezer container. This helps save space in your freezer. For optimal quality, they can be stored in the freezer for up to 2 months. Don’t forget to label the bag or container with the date.
- Baking from Frozen: When you’re ready to enjoy fresh pastry twists, simply remove the desired number of frozen twists from the freezer. There is absolutely no need to thaw them beforehand! Arrange the frozen twists on a parchment-lined baking sheet, ensuring they are spaced out appropriately. Place them into a preheated 400°F (200°C) oven and bake for approximately 15-20 minutes, or until they are beautifully golden brown and delightfully puffed up. Be aware that baking time might be slightly longer than for freshly prepared twists.
Presenting Your Elegant Pastry Twists: A Touch of Sophistication
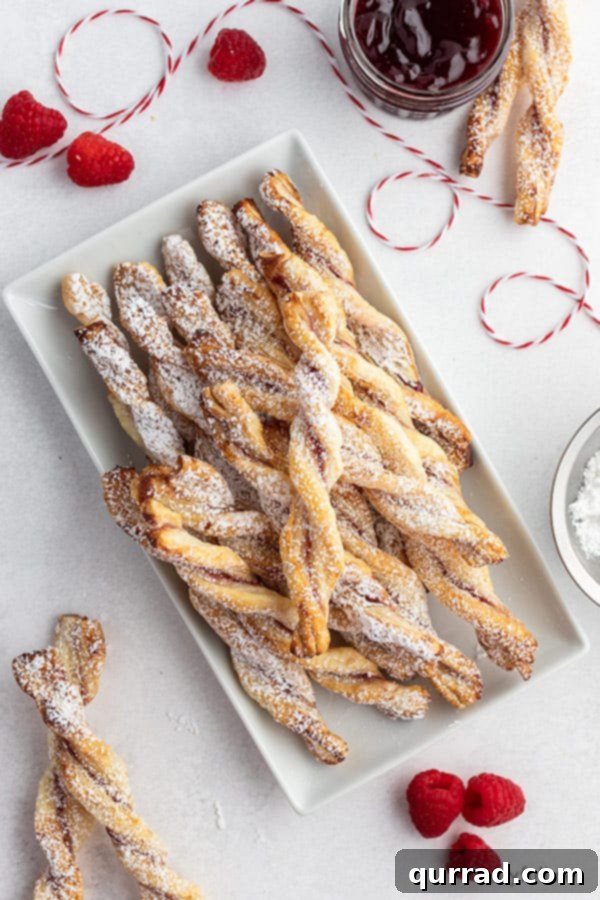
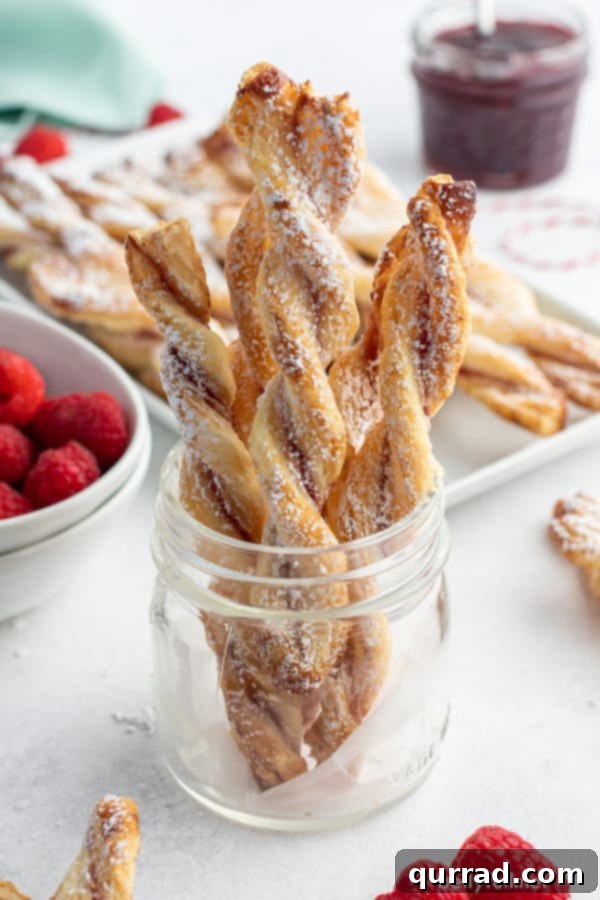
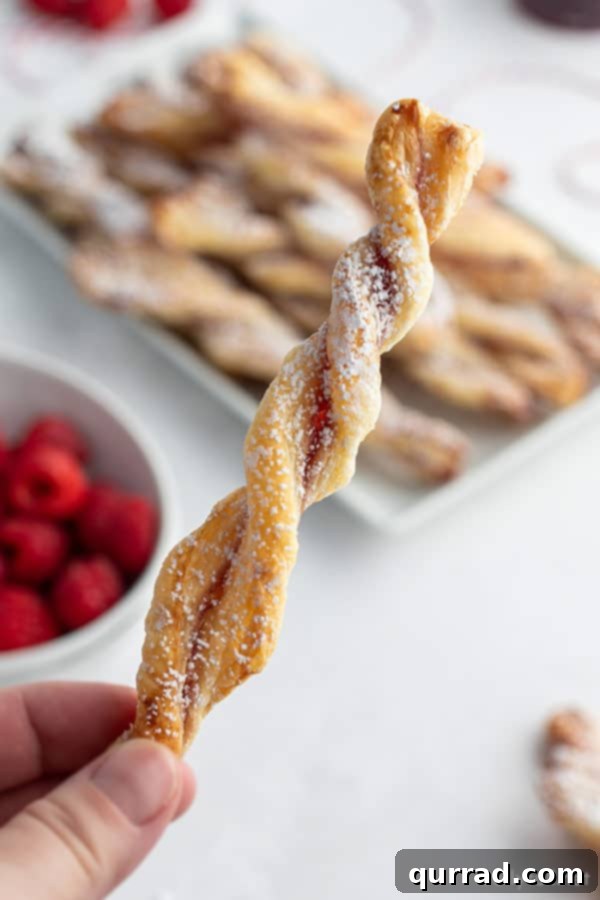
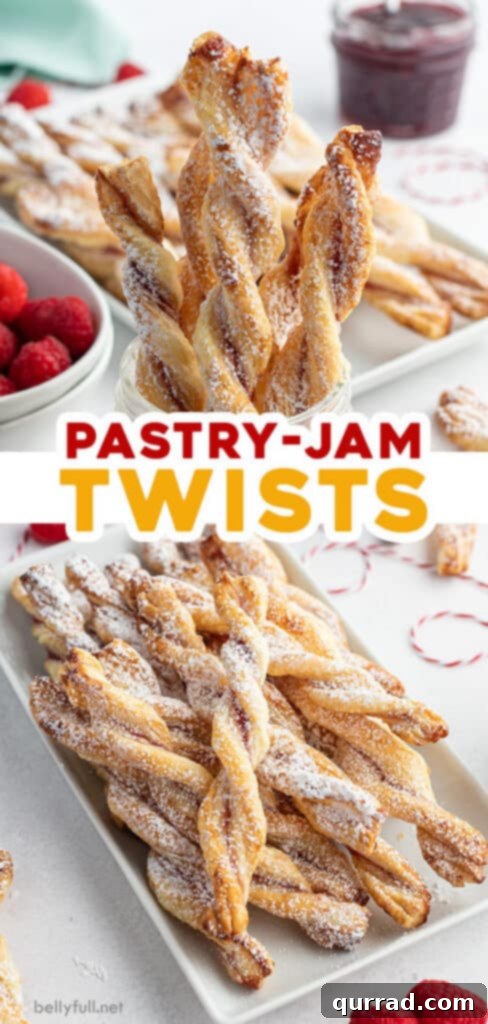
Once baked to a crispy, flaky, and utterly delicious perfection, these jam twists are not just a treat for the taste buds but also a feast for the eyes. Their elongated, gracefully spiraled shape makes them inherently elegant and visually appealing. For a truly impressive and effortless presentation, consider standing them upright in a pretty glass jar, a stylish tall mug, or arranging them artfully fanned out on a beautiful serving platter. They will instantly elevate the look of any buffet table, fooling everyone into believing you spent hours laboring over them in the kitchen! The delicate dusting of powdered sugar is that final, essential touch that adds both visual charm and a subtle sweetness, making them truly irresistible.
Beyond Twists: Creative Uses for Versatile Puff Pastry
Puff pastry is undoubtedly a true kitchen MVP, a culinary canvas that can be transformed into countless delicious creations. Once you’ve mastered these delightful jam twists, you’ll undoubtedly want to explore its seemingly endless possibilities. Its remarkable versatility makes it the perfect base for both sweet and savory applications, proving its worth in any kitchen. Here are a few more inspiring ideas to spark your next puff pastry adventure:
- Blueberry Puff Pastry Tart: A simple yet stunning dessert featuring juicy, fresh blueberries baked atop a foundation of flaky, buttery pastry. Perfect for a quick summer treat.
- Tomato and Basil Tarts: A savory delight that serves beautifully as an appetizer or a light lunch. This recipe combines ripe, flavorful tomatoes and aromatic fresh basil with a creamy, cheesy base, all encased in crisp puff pastry.
- Gourmet Cheese Straws: For a savory snack, cut puff pastry into thin strips, brush with egg wash, sprinkle generously with finely grated Parmesan cheese, a pinch of black pepper, and perhaps a dash of cayenne for a kick. Twist them and bake until golden and crunchy.
- Classic Apple Turnovers: Fill squares of puff pastry with a spiced apple mixture (apples, cinnamon, nutmeg, a touch of sugar), fold them into neat triangles, crimp the edges to seal, and bake until golden. A timeless, comforting dessert.
- Mini Quiches or Tartlets: Use small rounds of puff pastry to line mini muffin tins. Fill these pastry cups with a savory egg custard mixture, along with your favorite fillings like chopped ham, cheese, spinach, or mushrooms, for quick and elegant individual quiches or savory tartlets.
- Chocolate Croissants (Pain au Chocolat): Place a piece of chocolate on a strip of puff pastry, roll it up, and bake for a simplified version of this French bakery classic.
Frequently Asked Questions About Jam Puff Pastry Twists
- Can I use homemade puff pastry for this recipe?
- Absolutely! If you’re an ambitious baker with a tried-and-true homemade puff pastry recipe, using it will undoubtedly make these twists even more exceptionally special and deeply flavorful. However, the true beauty and widespread appeal of this particular recipe lie in the incredible convenience and accessibility of high-quality, store-bought frozen puff pastry.
- What other filling ideas can I explore besides traditional jam?
- The culinary possibilities for fillings are wonderfully vast! Beyond the suggested melted chocolate or luscious Nutella, consider spreading a vibrant lemon curd for a zesty kick, a thin layer of softened cream cheese sweetened with a touch of sugar, or even a classic cinnamon-sugar mixture for a comforting twist. For savory options, pesto, finely grated sharp cheddar cheese, olive tapenade, or even a sun-dried tomato spread would be delightful.
- My pastry twists are unraveling during baking. What might be the issue?
- This common issue usually stems from two main factors: either the ends of the pastry strips weren’t pinched firmly enough together before twisting, or the pastry wasn’t adequately chilled before it went into the hot oven. Ensure you press the ends together very tightly to create a secure seal, and never skip the crucial 20-minute chilling step, as it helps the butter in the pastry solidify and hold its shape.
- What’s the secret to ensuring my puff pastry is consistently flaky and airy?
- The absolute key to achieving that desirable, signature flakiness is maintaining a cold temperature for your puff pastry throughout the preparation process. Work quickly to prevent the butter from warming up too much, handle the pastry minimally, and always, always chill it thoroughly before placing it into a preheated, hot oven. The dramatic contrast between the cold pastry and the intense heat of the oven is what creates those wonderful, separate, and airy layers.
- Can I use fresh or frozen berries directly as a filling instead of jam?
- While fresh or thawed berries can be a delicious addition to many desserts, using them directly as a filling for these twists is generally not recommended. Berries tend to release a significant amount of moisture during baking, which can unfortunately lead to a soggy pastry, undermining the desired flaky texture. If you’re set on using fresh fruit, it’s best to first cook the berries down into a thick compote or sauce, similar in consistency to jam, to reduce their moisture content.
Jam Puff Pastry Twists
★★★★★ (5 out of 5 stars based on 9 ratings)
These Jam Puff Pastry Twists are a super simple 2-ingredient treat that are so easy to make and fun to eat. Great for breakfast, brunch, with a cup of coffee or tea.
Prep Time: 15 minutes
Cook Time: 12 minutes
Total Time: 27 minutes
Servings: 20 twists
Ingredients
- 8.65 ounces puff pastry (1 sheet, or 1/2 package puff pastry), thawed
- 1/4 cup seedless jam of your choice
- Flour, for dusting work surface
- Powdered sugar, for finishing (recommended)
Instructions
- Allow puff pastry to thaw according to package instructions until pliable.
- Line a cookie sheet with parchment paper; set aside.
- Lightly dust your work surface and a rolling pin with flour. Carefully roll out the puff pastry to a 12×16-inch rectangle. Cut it crosswise into two equal 8×12-inch rectangles.
- Warm the jam in the microwave for about 15 seconds to loosen its consistency. Using a pastry brush, evenly coat one piece of the pastry with the warmed jam, leaving a small border.
- Place the uncoated pastry piece on top of the jam-covered one, aligning the edges. Gently roll them together with the rolling pin to seal (do not press too hard, or the jam will squish out!).
- Slice the combined pastry into 24 strips, each approximately 1/2-inch wide. Pinch the ends of each strip tightly to seal, then twist the strip several times to form a spiral.
- Transfer the twisted pastries to the lined baking sheet(s), ensuring they are spaced 1 1/2-inches apart. Chill the tray in the refrigerator for 20 minutes.
- While the twists are chilling, preheat your oven to 400°F (200°C).
- Bake the chilled twists for 10-12 minutes, or until they are beautifully golden brown and puffed.
- Let the twists cool slightly on the baking sheet, then transfer to a wire rack to cool completely. Once cooled, generously sprinkle with powdered sugar before serving.
Nutrition (Approximate per serving)
Calories: 79kcal | Carbohydrates: 8g | Protein: 1g | Fat: 5g | Saturated Fat: 1g | Sodium: 32mg | Potassium: 11mg | Fiber: 1g | Sugar: 2g | Vitamin C: 1mg | Calcium: 2mg | Iron: 1mg
Nutritional information provided is an automatic calculation and can vary based on the exact products you use and any modifications you make to the recipe. If precise nutritional values are crucial to you, it is recommended to calculate them yourself using your specific ingredients.
We sincerely hope you love making and sharing these delightful Jam Puff Pastry Twists as much as we do! If you try this incredibly easy and delicious recipe, please consider leaving a review below to let us know how it turned out. Your feedback is invaluable!
For more culinary inspiration, easy recipes, and delightful cooking tips, make sure to stay connected with us. You can find more of our delicious creations by following us on Facebook, Instagram, Pinterest, and YouTube!