
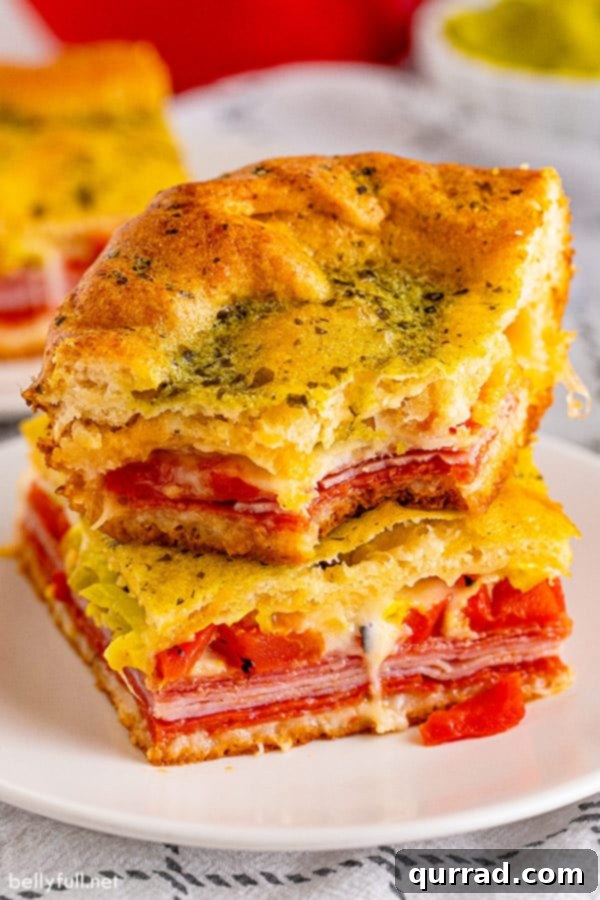
Imagine all the savory, cheesy goodness of a classic Italian sub, but baked to golden perfection and wrapped in a flaky crescent roll crust. These incredible Antipasto Squares are exactly that – a delightful, effortless dish that serves as a fantastic lunch, a simple dinner, or the ultimate party appetizer. If you love the flavors of Italy layered with convenience, you’re about to find your new favorite recipe.
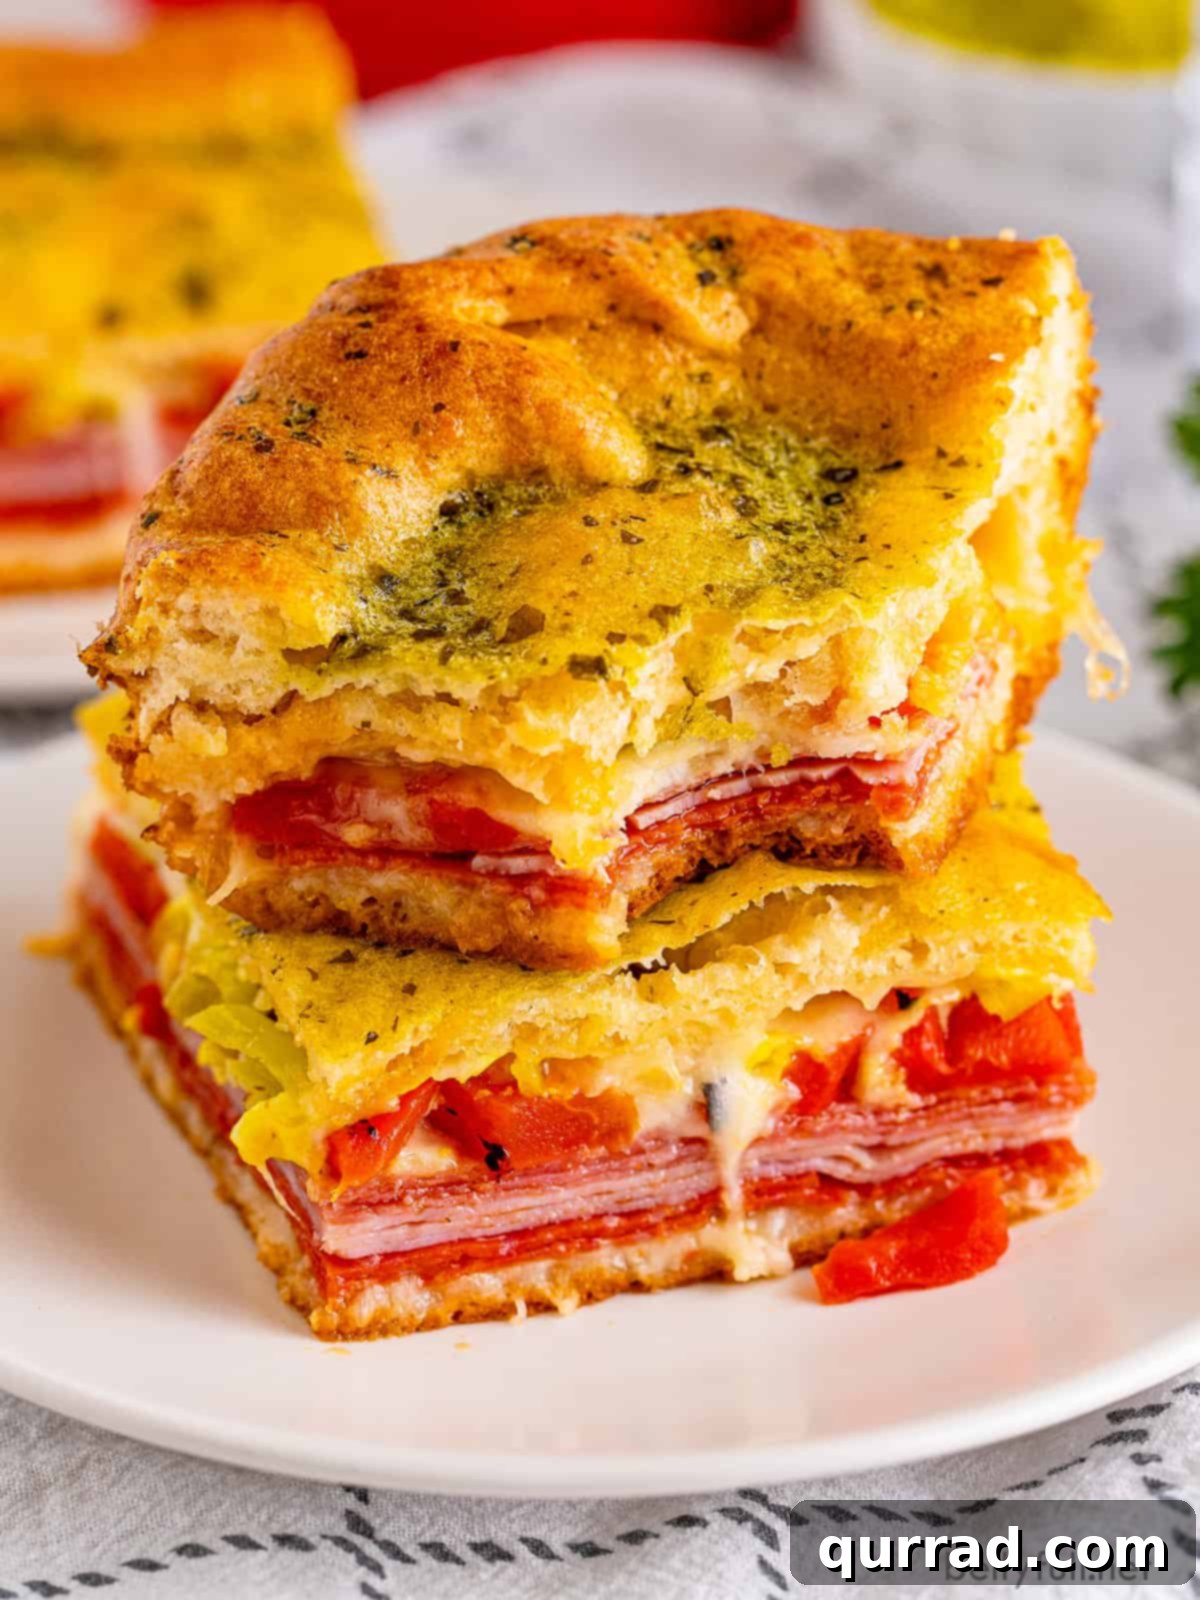
What Are Antipasto Squares? Your New Favorite Baked Italian Sub!
Antipasto Squares are essentially a deconstructed, baked version of a beloved Italian deli sub, transformed into a convenient and shareable square. The magic begins with two sheets of flaky crescent dough, sandwiching a generous filling of premium provolone cheese, savory pepperoni, thinly sliced ham, and rich Genoa salami. This robust combination creates a warm, gooey, and utterly irresistible center that’s encased in a golden, buttery crust.
What makes these “Pillsbury Antipasto Squares” so special is their versatility and ease. They’re a fantastic solution for a quick and satisfying lunch, a no-fuss weeknight dinner, or a highly sought-after addition to any gathering. Whether you’re hosting a game day party, a casual get-together with friends, or simply need an impressive appetizer that practically makes itself, these squares are guaranteed to be a hit. The delightful blend of salty meats, tangy peppers, and melty cheese makes every bite a flavor explosion that will have everyone reaching for more.
Why You’ll Love This Easy Antipasto Squares Recipe
There’s a reason Antipasto Squares have become a staple in many households, and once you try them, you’ll understand why:
- Effortlessly Easy: Using pre-made crescent roll dough sheets drastically cuts down on prep time, making this a beginner-friendly recipe that delivers impressive results. You’ll spend more time enjoying and less time cooking!
- Crowd-Pleaser: The combination of classic Italian deli flavors is universally loved. These squares disappear quickly at parties, potlucks, and family gatherings.
- Versatile for Any Occasion: Perfect for game day, holiday parties, a simple family lunch, or even a casual dinner alongside a fresh salad.
- Flavor-Packed: Each bite offers a harmonious blend of salty cured meats, melty provolone cheese, and a hint of tang from roasted peppers and pepperoncini, all wrapped in a rich, flaky crust.
- Make-Ahead Friendly: You can assemble these squares in advance, saving you precious time when entertaining or preparing for a busy week.
- Delicious Hot or At Room Temperature: Unlike many baked dishes, Antipasto Squares maintain their deliciousness even after cooling, making them ideal for buffets and grab-and-go serving.
Essential Ingredients for Perfect Antipasto Squares
Creating these delightful baked Italian sub squares requires just a handful of straightforward ingredients. Focus on quality, and you’ll be rewarded with maximum flavor!
- Crescent Roll Dough Sheets: This is your secret weapon for an incredibly easy and flaky crust. Opt for the dough sheets rather than the perforated crescent rolls, as they provide a seamless base and top, saving you the trouble of pinching seams together. If you can only find regular rolls, simply press the perforations together firmly to create a solid sheet.
- Provolone Cheese: Sliced provolone offers a wonderfully mild, yet distinctly Italian, flavor that melts beautifully. For the best gooey texture, ask for it freshly sliced from the deli counter. You can also use a combination of mild and sharp provolone for added depth.
- Italian Deli Meats:
- Pepperoni: Adds a spicy, savory kick and turns crispy when baked.
- Ham: A classic deli choice, contributing a smoky, slightly sweet balance.
- Genoa Salami: Offers a rich, robust, and slightly garlicky flavor that’s essential for an authentic Italian sub experience.
We recommend using equal amounts of these three for a balanced flavor profile, but feel free to adjust to your personal preference.
- Jarred Roasted Bell Peppers: Sweet and slightly smoky, these add a burst of color and a delightful tang that cuts through the richness of the meats and cheese. Make sure to drain and thinly slice them to prevent excess moisture.
- Jarred Pepperoncini: These mild, slightly spicy peppers introduce a zesty, briny element that brightens the entire dish and truly elevates the “antipasto” experience. Again, ensure they are well-drained and sliced.
- Large Egg: Beaten and combined with pesto and Parmesan, it creates a luscious egg wash for the top crust, ensuring a beautiful golden-brown finish and adding an extra layer of savory flavor.
- Pesto Sauce: Whether store-bought or homemade, pesto infuses the top crust with aromatic basil, garlic, pine nuts, and Parmesan, making every bite incredibly flavorful.
- Freshly Grated Parmesan Cheese: Skip the pre-grated varieties for this. Freshly grated Parmesan melts better and offers a superior, nutty, salty flavor that will truly enhance the crust.
Customization & Variations: Make Your Antipasto Squares Uniquely Yours
One of the best aspects of these Antipasto Squares is their adaptability. Feel free to get creative and customize them to suit your taste preferences or whatever ingredients you have on hand.
- Pesto Alternatives for the Top Crust: If pesto isn’t your preference or you’re simply out, don’t fret! You can still achieve a delicious crust. Brush the top lightly with a simple egg wash (beaten egg with a splash of water), or use a good quality olive oil. For an extra touch of texture and flavor, sprinkle with sesame seeds, dried Italian herbs, or a dash of garlic powder before baking.
- Switch Up the Cheeses and Meats: The internal layers are completely flexible!
- Cheese: Experiment with different Italian cheeses like mozzarella (for extra gooeyness), Swiss for a nuttier flavor, or even a blend of Monterey Jack and provolone.
- Meats: Explore other deli favorites such as smoked turkey, capicola, or even thinly sliced roast beef for a different twist. Make sure the meats are thinly sliced to allow for even baking and easy slicing of the squares.
- Embrace Puff Pastry for a Lighter Crust: For a more delicate, incredibly flaky, and thinner crust, consider using puff pastry sheets instead of crescent dough. Keep in mind that puff pastry might bake slightly faster, so adjust your baking time and keep a close eye on it to prevent over-browning.
- Add More Veggies: Boost the nutritional value and flavor by incorporating other drained and finely diced vegetables. Consider artichoke hearts, sun-dried tomatoes (packed in oil, well-drained), sautéed spinach (squeeze out all excess water!), or black olives.
- A Touch of Spice: For those who love heat, add a thin layer of red pepper flakes with the meats, or use spicy salami and pepperoni. A drizzle of hot honey over the finished squares can also provide a sweet and spicy kick.
How to Make Easy Crescent Antipasto Squares: A Step-by-Step Guide
These Italian sub-inspired squares are remarkably simple to prepare and assemble, requiring minimal hands-on time before baking to golden perfection. Follow these easy steps:
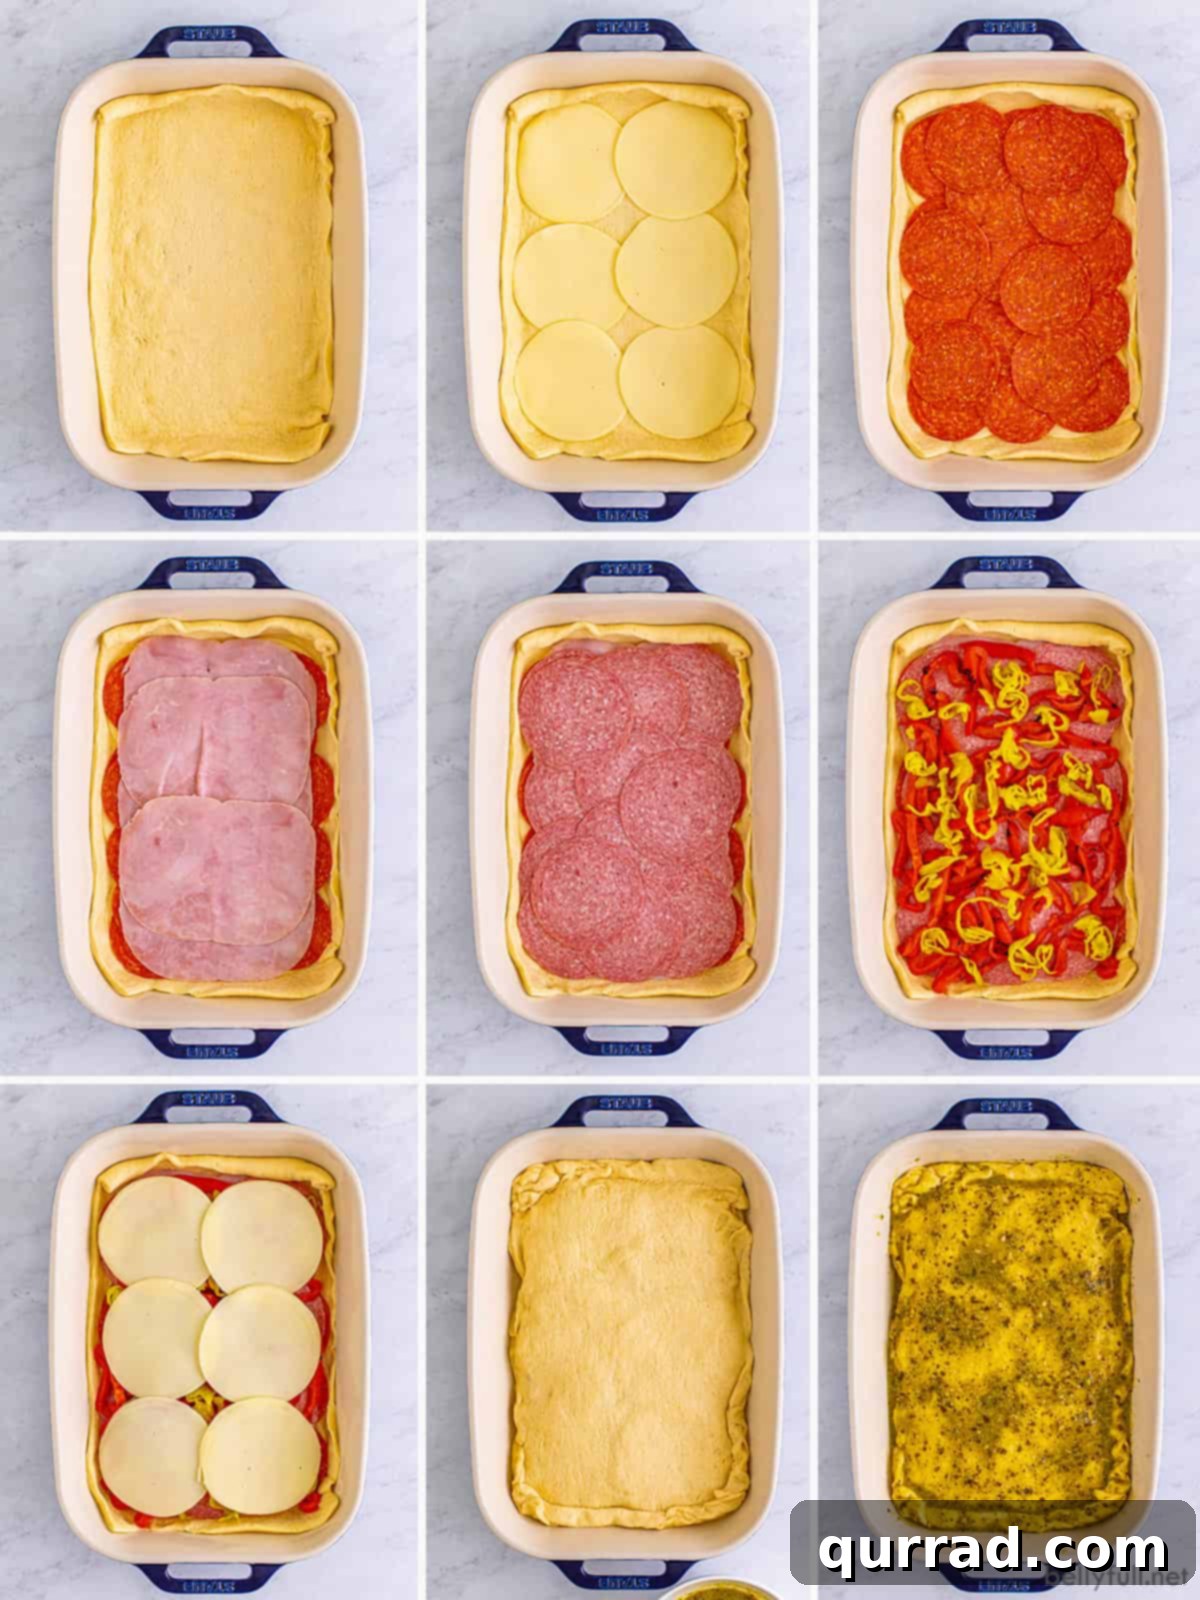
- Step 1: Preheat & Prep the Dish. Begin by preheating your oven to 350°F (175°C). Lightly grease a 9×13-inch baking dish with cooking spray to prevent sticking.
- Step 2: Lay the First Dough Layer. Unroll one can of crescent roll dough sheets. Carefully press the dough into the bottom of the prepared baking dish, ensuring it extends up the sides by about one inch. This creates a sturdy base and helps contain the delicious filling.
- Step 3: Layer the Savory Filling. Evenly distribute half of your sliced provolone cheese over the bottom dough layer. Next, arrange the pepperoni, followed by the ham, and then the Genoa salami, creating distinct, flavorful layers. Scatter the drained and thinly sliced roasted bell peppers and pepperoncini over the meats. Finally, top with the remaining provolone cheese.
- Step 4: Seal with the Second Dough Layer. Gently unroll the second can of crescent dough sheets and carefully place it on top of the layered ingredients. Do your best to pinch and seal all the edges of the top and bottom dough together, creating a well-sealed package that will hold in all the delicious flavors as it bakes.
- Step 5: Prepare the Flavorful Topping. In a small bowl, whisk together the large egg, pesto sauce, and freshly grated Parmesan cheese until well combined. This mixture will form a rich, savory crust.
- Step 6: Brush & Bake. Generously brush the pesto-egg-Parmesan mixture all over the top surface of the dough. Cover the baking pan loosely with nonstick foil (or spray one side of regular foil with cooking spray and place it spray-side down onto the dish). Bake for 30 minutes.
- Step 7: Uncover & Finish Baking. After 30 minutes, remove the foil. Continue to bake for an additional 15 to 20 minutes, or until the top crust is beautifully golden brown and the filling is bubbly and heated through.
- Step 8: Cool & Serve. Once baked, resist the urge to cut immediately! Allow the Antipasto Squares to cool in the pan for 15-20 minutes. This crucial resting time allows the cheese and meats to set, ensuring cleaner, more defined squares when you slice them. Cut into desired square sizes and serve warm or at room temperature.
Expert Tips for Flawless Antipasto Squares Every Time
Achieving perfect Antipasto Squares is simple with a few key considerations in mind:
- Finding Crescent Dough Sheets: These are usually located in the refrigerated section of your grocery store, right next to the regular crescent rolls. If you can’t find the “sheets,” simply purchase two cans of regular perforated crescent rolls and firmly press the seams together to form a solid sheet. This works just as well!
- The Importance of Cooling Time: This step cannot be emphasized enough. Once the squares come out of the oven, they are incredibly hot, and the cheese is very soft. Letting them cool for 15-20 minutes allows the filling to firm up slightly. This prevents the layers from sliding apart and ensures neat, clean cuts when you slice them, making them much easier to serve.
- Managing Sodium Levels: With an abundance of cured meats and cheeses, Antipasto Squares are inherently salty. If you’re mindful of sodium intake, consider opting for reduced-sodium deli meats and cheeses. You can also rinse certain meats (like pepperoni) briefly under cold water to remove some surface salt before layering.
- Preventing a Soggy Bottom: While a slight sogginess at the bottom of the dough can be hard to completely avoid due to liquids from meats and veggies, you can minimize it. Ensure all jarred ingredients (roasted peppers, pepperoncini) are thoroughly drained and patted dry before layering. You might also consider pricking the bottom dough layer with a fork a few times before adding the filling, though this is optional.
- Even Baking: For an evenly golden crust, ensure your oven is preheated to the correct temperature. If your oven has hot spots, you might rotate the baking dish halfway through the uncovered baking time. Covering the dish for the initial bake helps the interior cook through without the crust burning.
- Don’t Overstuff: While it’s tempting to pile on the fillings, avoid overstuffing the squares. Too much filling can make it difficult to seal the dough and may lead to a messier result, potentially increasing moisture and sogginess.
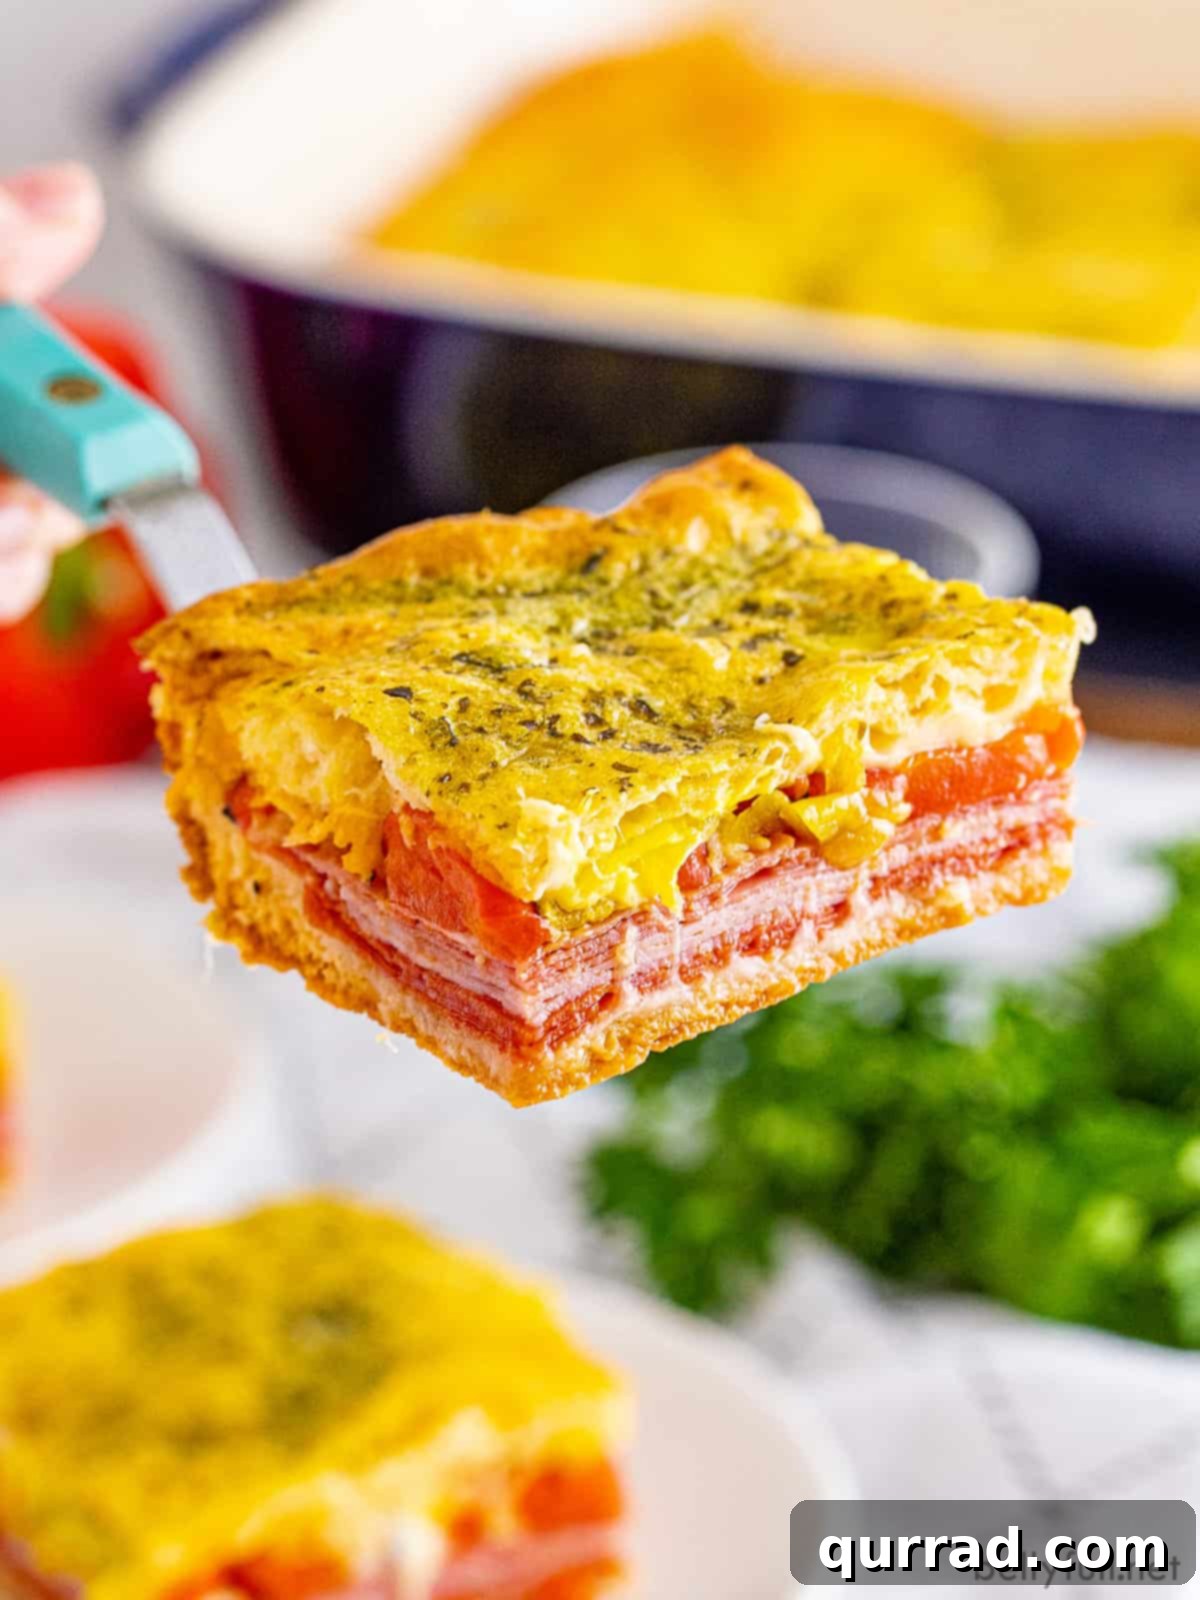
Serving Suggestions: Beyond Just an Appetizer
While Crescent Antipasto Squares are a star appetizer, their hearty and satisfying nature means they can easily transition into a main course. Here are some ideas for serving:
- Perfect Party Appetizer: Cut into smaller, bite-sized squares for effortless grab-and-go party food. They are especially popular during game day gatherings, holiday parties, or any casual get-together. The best part? They hold up well at room temperature and are perfectly fine to sit out for a few hours on a buffet table, making them ideal for entertaining.
- Quick & Easy Lunch: Serve a larger square or two alongside a light simple side salad with a vinaigrette dressing. The fresh greens provide a lovely contrast to the rich, savory flavors of the squares.
- Satisfying Dinner Option: Transform these squares into a complete meal by pairing them with heartier side dishes. Consider a creamy pea salad, a classic macaroni salad, or a warm bowl of tomato soup. The combination of flavors creates a comforting and filling meal.
- Breakfast or Brunch Idea: While traditionally savory, a smaller square can even make for an interesting addition to a brunch spread, especially if you’re looking for something hearty and non-sweet.
Storing & Reheating Your Antipasto Squares
Antipasto Squares are fantastic for making ahead and excellent as leftovers. Here’s how to handle them:
- Make Ahead: To simplify party prep or weekday meals, you can assemble the antipasto appetizer squares up to 24 hours in advance. Follow all assembly steps, but do not bake. Instead, wrap the unbaked dish tightly in plastic wrap and refrigerate. When ready to bake, allow the dish to sit at room temperature for at least 30 minutes before baking as directed. This helps the dough come to temperature and bake evenly.
- How to Store Leftovers: Once baked and completely cooled, store leftover Antipasto Squares in an airtight container or tightly wrapped in foil. They will keep fresh in the refrigerator for up to 3 days.
- How to Reheat: For the best results, we highly recommend reheating Antipasto Squares in the oven rather than the microwave. The oven helps the crescent dough crisp up again, preventing it from becoming soggy. Place the squares on a baking sheet and reheat at 300°F (150°C) for about 10-15 minutes, or until warmed through and the crust is crisp.
- Can I Freeze These? Absolutely! Baked Antipasto Squares freeze wonderfully. Allow them to cool completely, then wrap individual squares or smaller portions tightly in freezer-safe foil, then transfer to a freezer-safe bag or container. They will keep frozen for up to 3 months. To reheat from frozen, unwrap and place on a baking sheet, then bake at 350°F (175°C) for 20-30 minutes, or until heated through and golden.
More Italian-Inspired Recipes to Enjoy
If you love the flavors of these Antipasto Squares, be sure to explore more Italian-inspired dishes that are perfect for entertaining or everyday enjoyment:
- Antipasto Charcuterie Board: A beautiful spread of cured meats, cheeses, olives, and pickled vegetables – perfect for grazing.
- Caprese Skewers: Fresh mozzarella, cherry tomatoes, and basil, drizzled with balsamic glaze, a light and refreshing appetizer.
- Mini Tortellini Kabobs: Skewers featuring cooked tortellini, cherry tomatoes, and mozzarella balls, often served with pesto.
- Giardiniera (Pickled Vegetables): A tangy, crunchy mix of pickled vegetables that adds a wonderful acidic bite to any meal.
- Olive Tapenade: A savory spread made from finely chopped olives, capers, and olive oil, excellent with crusty bread.
We hope you adore this delicious and incredibly easy recipe! It’s a true testament to how simple ingredients can come together to create something truly extraordinary. Don’t forget to connect with Belly Full on TikTok, Facebook, Instagram, Pinterest, and YouTube for more culinary inspiration.
Antipasto Squares
Prep Time: 10 mins | Cook Time: 45 mins | Total Time: 55 mins
Servings: 15 servings

With all of the elements of a baked Italian sub layered with crescent roll dough, these Antipasto Squares make a delicious, easy lunch or fun party appetizer.
Ingredients
- 2 cans crescent roll dough sheets
- 8 ounces sliced provolone cheese
- 1/4 pound sliced deli pepperoni
- 1/4 pound sliced deli ham
- 1/4 pound sliced deli Genoa salami
- 12 ounces jarred roasted bell peppers, (drained and thinly sliced)
- 1/2 cup jarred pepperoncini, (drained and sliced)
- 1 large egg
- 1 tablespoon pesto sauce
- 1 tablespoon freshly grated parmesan cheese
Instructions
- Preheat the oven to 350°F (175°C). Spray a 9×13 baking dish with cooking spray.
- Unroll one of the cans of crescent dough and press it into the bottom of the baking dish, making sure the dough goes up the sides of the pan about 1-inch high.
- Layer half of the cheese on the bottom. Top with the pepperoni, then ham, then salami. Add the sliced red bell peppers and pepperoncini. Finally, add the remaining provolone cheese on top.
- Unroll the second crescent dough and place it on top, trying your best to pinch all the edges of the dough together to make a sealed package.
- In a small bowl, whisk together the egg, pesto, and parmesan cheese. Brush this mixture all over the top of the dough.
- Cover the pan with nonstick foil (or spray a piece of foil with cooking spray), and place it spray side down on top of the dish.
- Bake for 30 minutes. Uncover and bake an additional 15-20 minutes until deep golden brown.
- Let cool for 15-20 minutes, cut, and serve.
Notes
Once you cut the squares, any liquid from the meats and veggies will seep out. There is no avoiding this and the bottom of the dough may become slightly soggy. But, they still hold together great and they’re just as delicious at room temperature as they are fresh out of the oven.
Nutrition
Calories: 260kcal | Carbohydrates: 14g | Protein: 11g | Fat: 19g | Saturated Fat: 8g | Polyunsaturated Fat: 3g | Monounsaturated Fat: 5g | Trans Fat: 1g | Cholesterol: 42mg | Sodium: 1093mg | Potassium: 141mg | Fiber: 1g | Sugar: 3g | Vitamin A: 306IU | Vitamin C: 14mg | Calcium: 135mg | Iron: 1mg
Nutritional information given is an automatic calculation and can vary based on the exact products you use and any changes you make to the recipe. If these numbers are very important to you, we recommend calculating them yourself.