
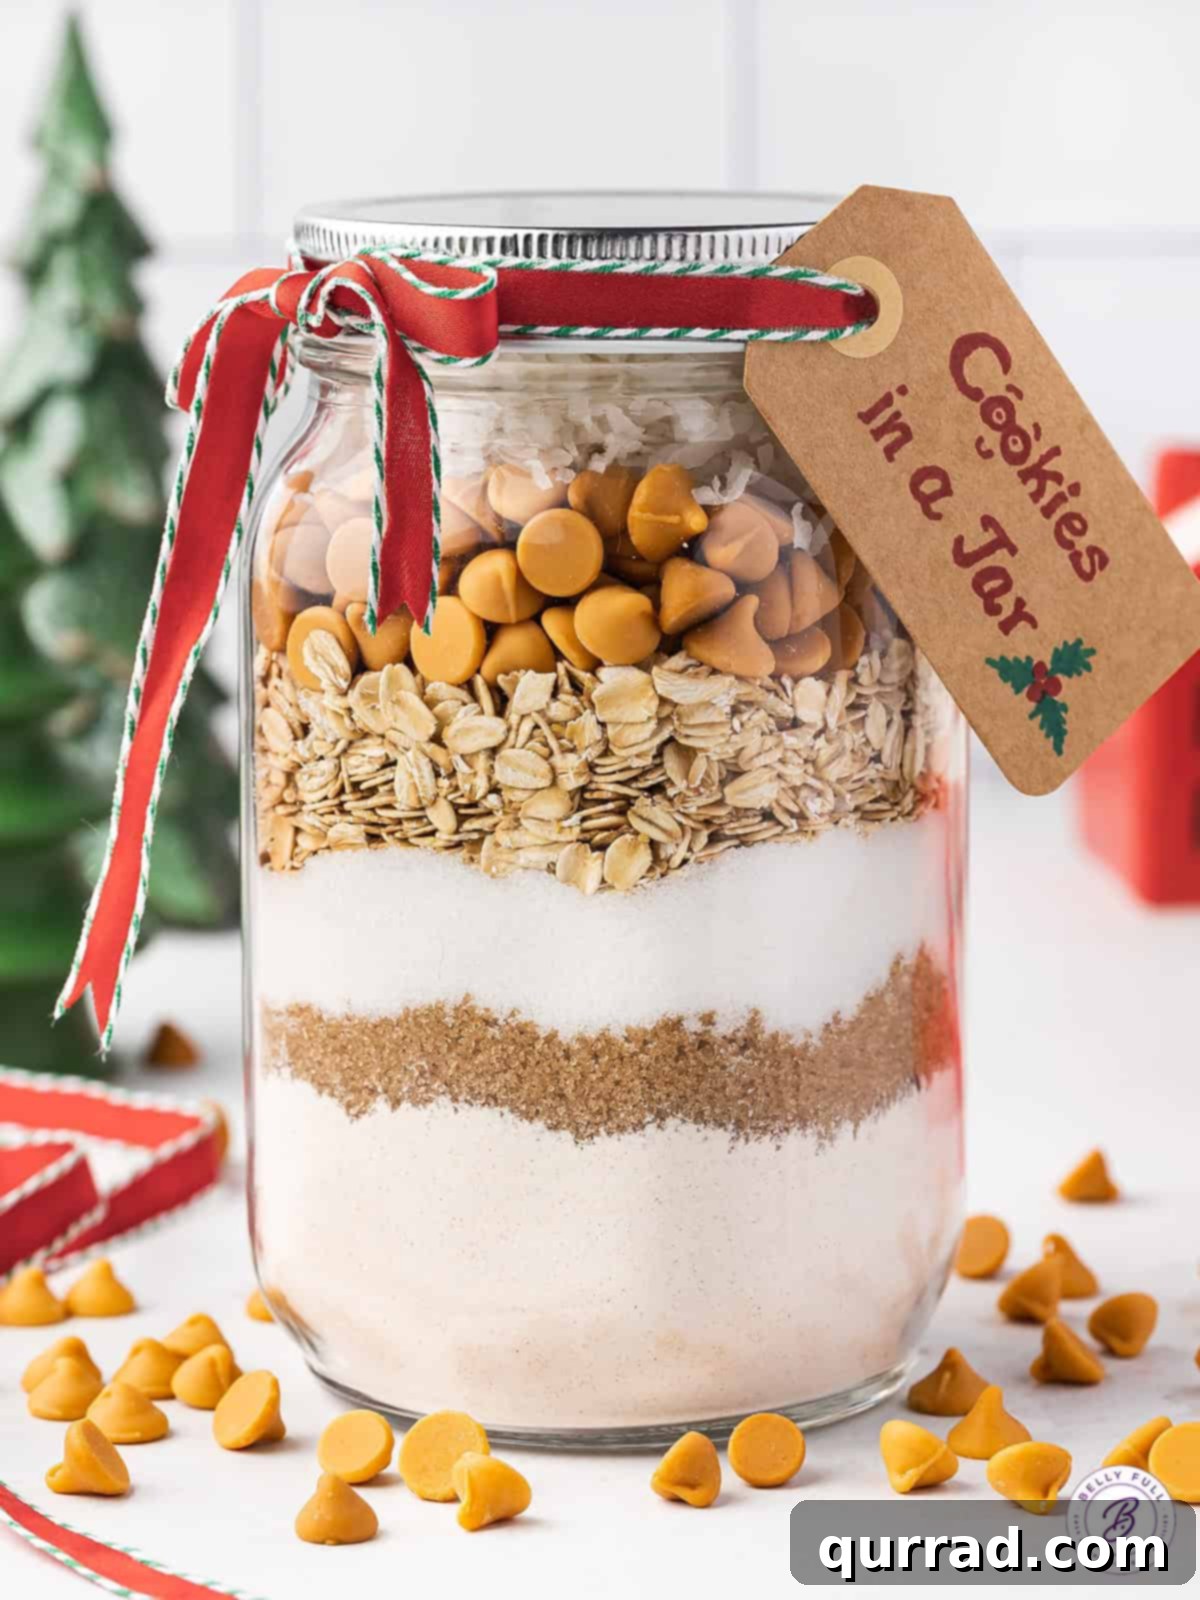
The Ultimate Guide to Gifting Homemade Cookie Mix in a Jar: A Thoughtful & Delicious Present
There’s something uniquely heartwarming about receiving a homemade gift. The effort, the care, and the personal touch that goes into creating something from scratch for someone special truly elevates it beyond a store-bought item. And let’s be honest, who doesn’t adore a freshly baked cookie? This Cookie Mix in a Jar recipe embodies all these wonderful qualities, making it the perfect present for any occasion. It’s not just a gift; it’s an experience waiting to happen. Designed to keep for several months, this mix promises soft, chewy cookies every time, and its ingredients can be effortlessly adapted to suit any taste or dietary preference. Prepare to delight your friends and family with this charming and utterly delicious homemade treat!
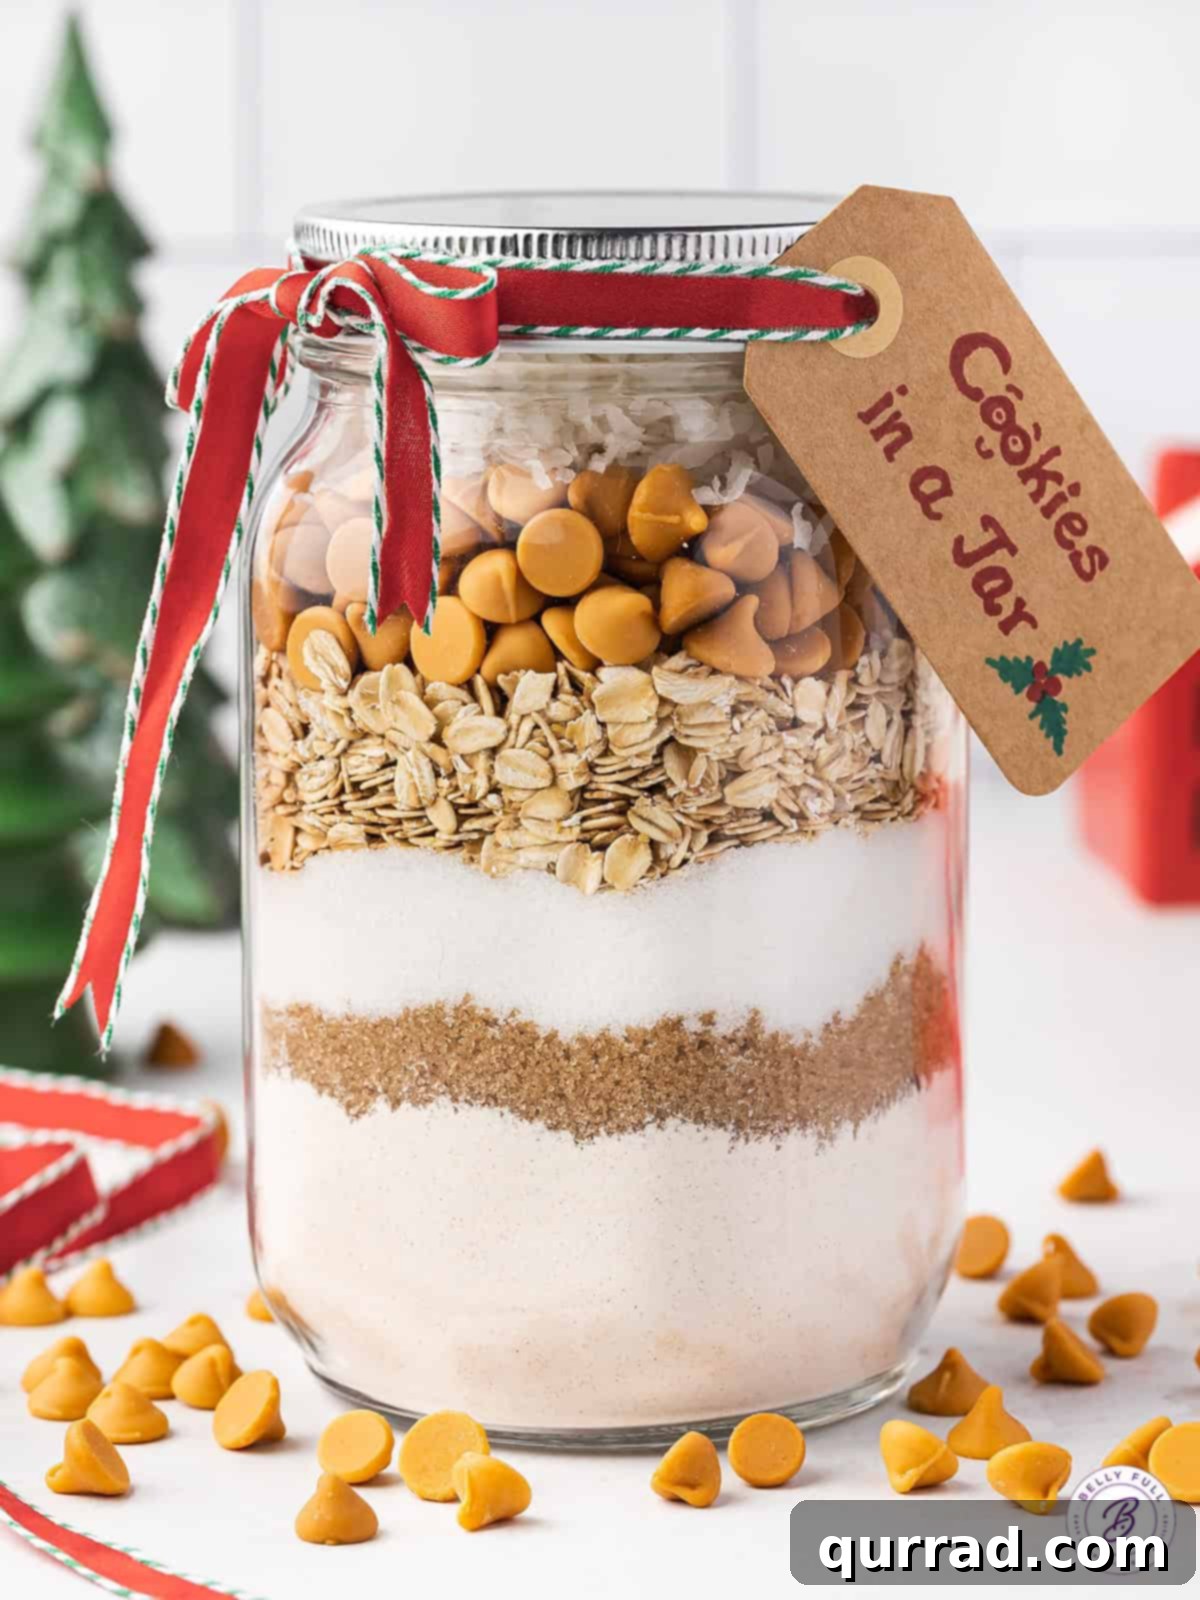
Why a Cookie Mix in a Jar Makes the Perfect Gift
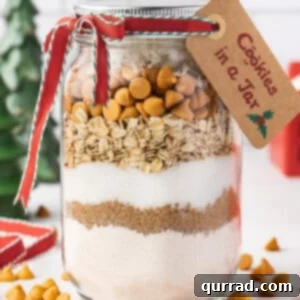
I am absolutely enamored with this cookie mix in a jar, and I believe you will be too. The meticulously layered ingredients create a stunning visual display that is almost too pretty to disturb. When tied with a festive ribbon and a neatly written instruction tag, it transforms into an incredibly thoughtful and appealing gift. Imagine the joy of presenting this to a new homeowner, a beloved teacher, a gracious hostess, or during the holiday season. It’s a gift that speaks volumes about your consideration and personal touch. Beyond its aesthetic appeal, the resulting cookies are nothing short of perfection: wonderfully soft and delightfully chewy, just as any top-tier cookie should be.
Our featured mixture is for classic butterscotch oatmeal cookies, a beloved flavor profile that evokes comfort and nostalgia. However, the beauty of this DIY cookie mix lies in its incredible versatility. If butterscotch isn’t your preferred flavor, or if you simply wish to offer a different option, you can easily swap them out. Consider classic dark, milk, or white chocolate chips, or get creative with cinnamon, peanut butter, or even mint chips. The possibilities are endless! Furthermore, the coconut flakes can be replaced with finely chopped nuts like walnuts, pecans, or almonds, offering an extra layer of texture and flavor. Even the spices can be adjusted—a touch more cinnamon for a warmer profile, or a hint of ginger for a festive twist. The key is to maintain the overall dry to wet ingredient ratios, ensuring that your customized cookies turn out perfectly every time. This adaptability truly makes it a gift for anyone and everyone on your list!
For an extra special presentation, consider pairing this delightful cookie mix with other edible gifts. Imagine a curated basket featuring our cookie mix alongside elegant candied pecans and rich, homemade caramels. Such a thoughtful and delicious ensemble is sure to leave a lasting impression, showcasing your generosity and culinary flair.
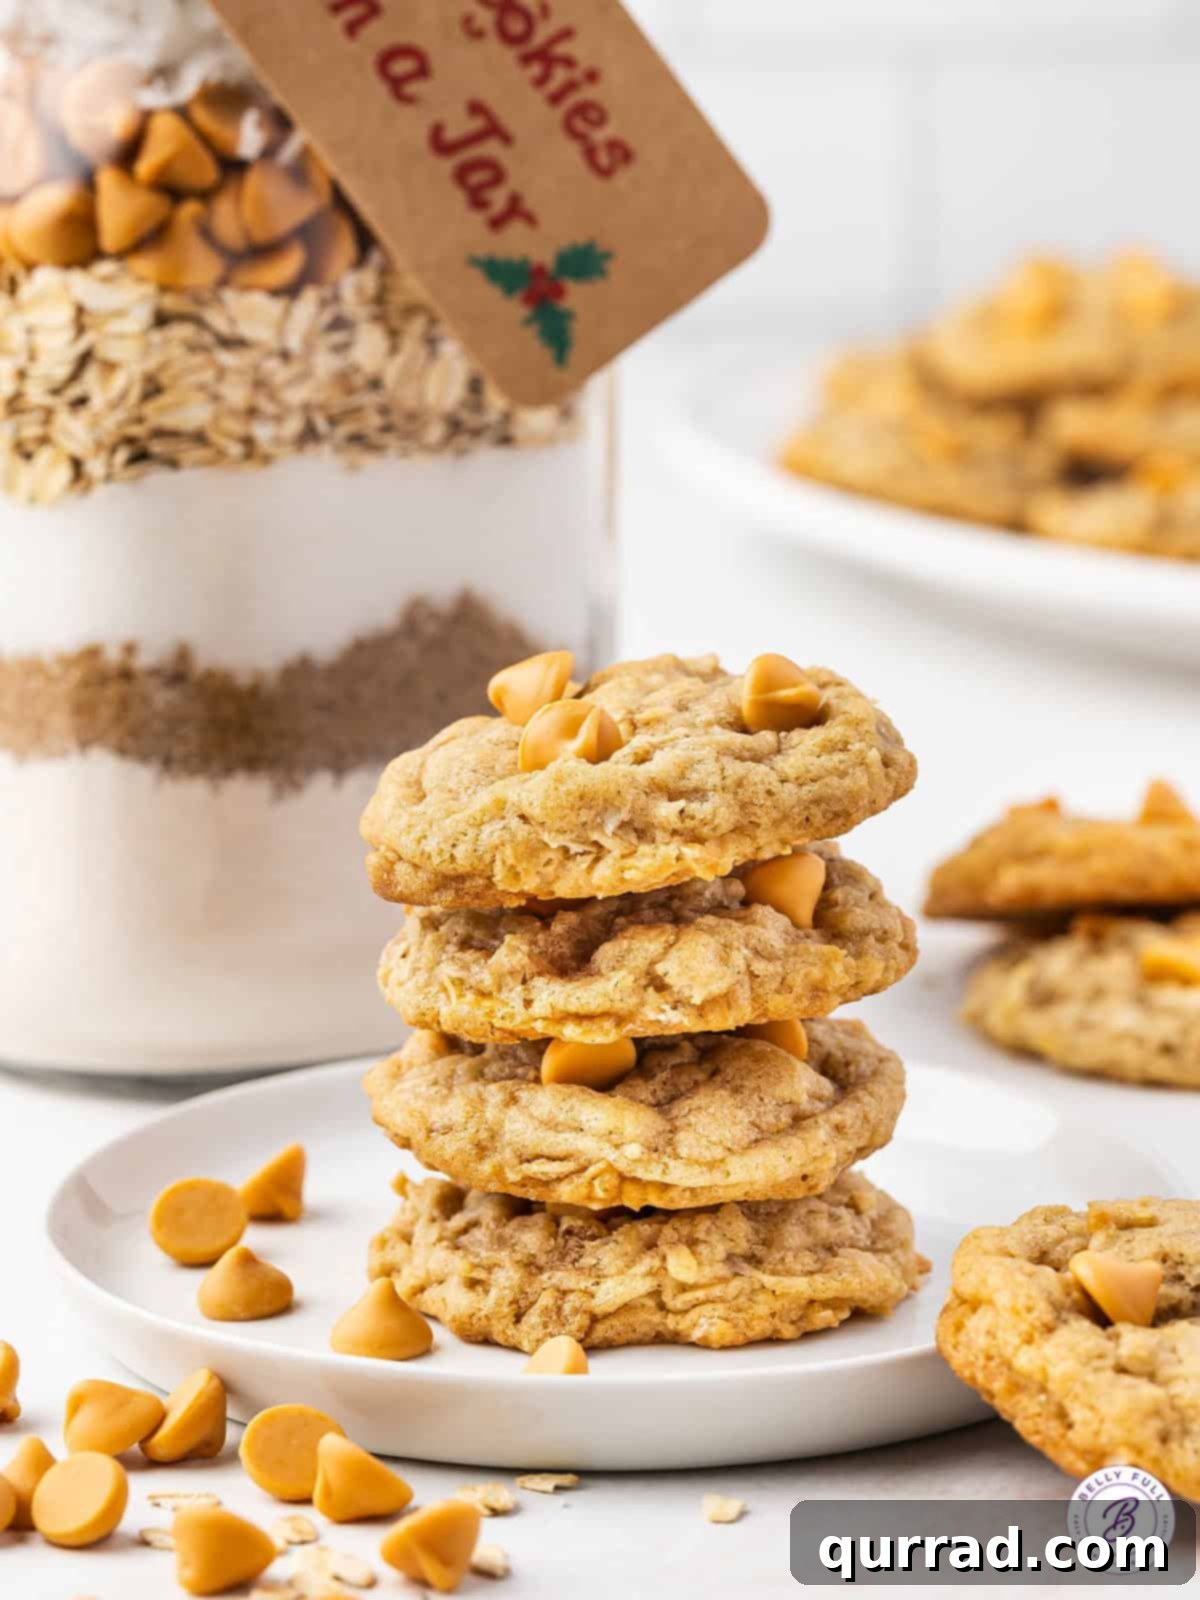
Essential Ingredients for Your Homemade Cookie Mix
Creating this cookie mix requires a selection of basic pantry staples that are readily available. These ingredients form the foundation of both the dry mix you’ll layer in the jar and the final scrumptious cookies. Please note that the exact measurements for each component are provided in the detailed recipe card below, ensuring you have everything you need to create a perfect batch.
- All-Purpose Flour: This is the backbone of our cookie mix. Always ensure you spoon and level your flour for precise measurement. This technique prevents over-packing the flour, which can lead to dense, dry cookies.
- Baking Soda: A crucial leavening agent, baking soda reacts with acidic ingredients (like brown sugar) to produce carbon dioxide, giving the cookies a slight lift and contributing to that desirable soft and chewy texture.
- Coarse Salt: Just a small amount of salt plays a significant role. It not only enhances and balances the sweetness of the sugars but also brightens the overall flavor profile of the cookies.
- Warm Spices (Cinnamon & Nutmeg): These aromatic spices are what give our butterscotch oatmeal cookies their signature warmth and comforting aroma. Cinnamon provides a sweet, woody note, while nutmeg adds a subtly spicy, almost creamy undertone. Feel free to adjust the amounts or even add a pinch of allspice or ground ginger for a more complex flavor.
- Sugars (Granulated & Brown Sugar): The combination of both white granulated sugar and brown sugar is essential for achieving the perfect balance of sweetness and texture. Granulated sugar contributes to crisp edges, while brown sugar, with its molasses content, adds moisture, depth of flavor, and promotes a softer, chewier interior.
- Old-Fashioned Rolled Oats: These provide a wonderful hearty texture and nutty flavor to the cookies. It’s important to use old-fashioned rolled oats, not quick-cooking or steel-cut varieties, as their different processing will drastically alter the cookie’s texture.
- Butterscotch Chips: The star of our mix-ins, butterscotch chips deliver a rich, buttery, and caramel-like flavor. As mentioned, these are highly customizable. Consider dark chocolate chips for a richer cookie, milk chocolate for classic comfort, white chocolate for a creamy sweetness, or even peanut butter chips for a nutty twist. The key is to keep the volume of mix-ins consistent.
- Coconut Flakes: Sweetened coconut flakes add a lovely tropical note and a delightful chewiness. If you prefer a less sweet option, unsweetened coconut flakes work just as well. For those who aren’t fans of coconut, finely chopped nuts (like pecans, walnuts, or almonds) or even dried cranberries or raisins make excellent substitutes, adding different textures and flavors.
- Additional Wet Ingredients (to be added by the recipient): To transform this delightful dry mix into warm, baked cookies, the recipient will need to add a few fresh wet ingredients. These include room temperature unsalted butter (for richness and structure), a large egg (for binding and moisture), and vanilla extract (to enhance all the sweet flavors). Remember, these perishable items DO NOT go into the jar! They will be listed on the gift tag instructions.
Choosing the Right Jar Size and Layering Tips
The dry cookie mix, as specified in this recipe, is designed to perfectly fill a standard 1-quart (approximately 4-cup or 32-ounce) container. While any airtight container will work to store the mix, I highly recommend using a clear glass jar, such as a mason jar or a classic glass canning jar. The transparent nature of glass allows the beautiful, distinct layers of dry ingredients to shine through, creating a truly appealing visual presentation that enhances the gift’s charm.
When assembling your cookie mix in a jar, the layering technique is key to its aesthetic appeal. Carefully adding each ingredient in sequence creates striking bands of color and texture. For the best visual effect and to prevent the layers from mixing during transport, here are a few tips:
- Compact Each Layer: After adding each ingredient, gently tap the bottom of the jar on your countertop a few times. This helps to settle and compact the layer, creating a more defined line between ingredients and making space for subsequent layers. You can also use the back of a spoon to lightly press down on each layer.
- Use a Funnel (Optional but Recommended): A wide-mouth funnel can be incredibly helpful, especially when adding the flour and sugars, to ensure the ingredients go cleanly into the jar without scattering or mixing the layers.
- Order Matters: Follow the order specified in the recipe card for the best visual outcome, usually starting with the densest ingredients or those that form a good base.
- Fill to the Top: Aim to fill the jar almost completely to the brim. A full jar not only looks generous but also minimizes air pockets, which can help keep the ingredients fresh and prevent shifting during transport.
While layering is visually delightful, you also have the option to pre-mix all the dry ingredients together and then transfer the consolidated mix into the container. This approach is quicker and still yields delicious cookies, though it foregoes the charming layered look. However you choose to present it, the gift of homemade cookies will always be appreciated!
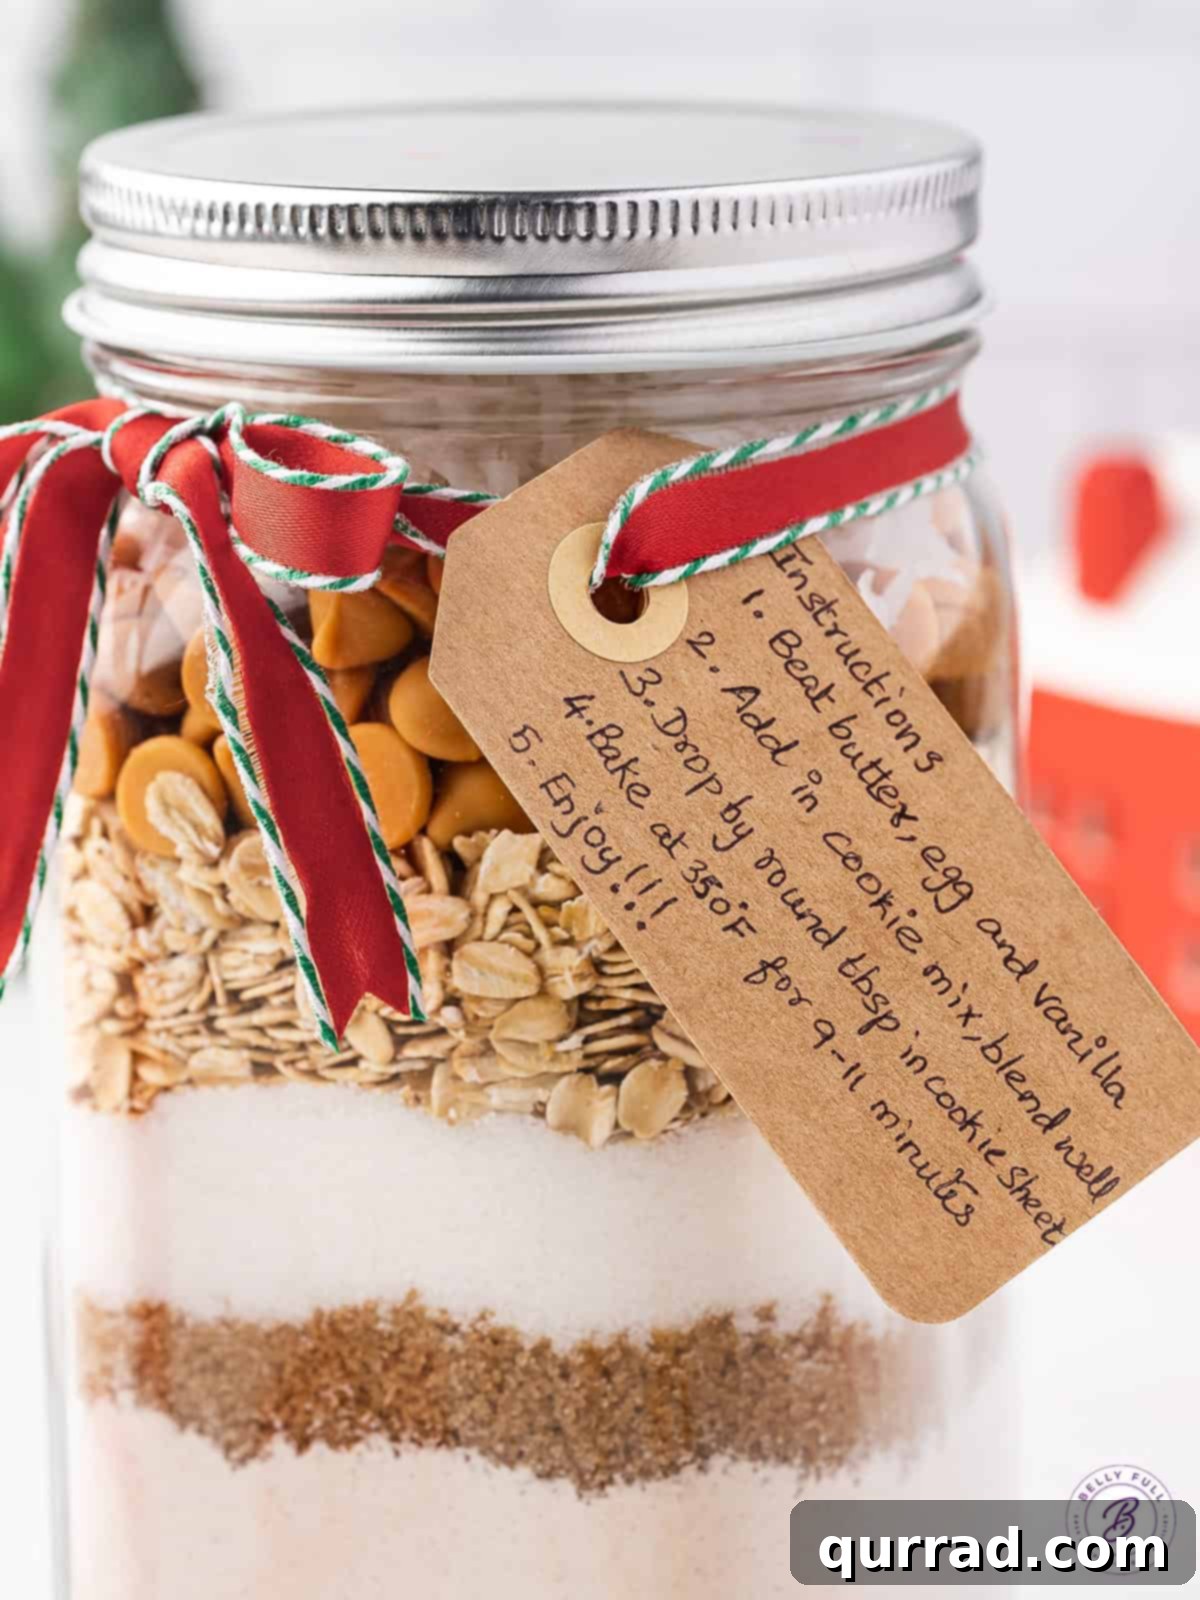
How to Gift Your Cookie Mix in a Jar
Gifting this cookie mix in a jar is a simple yet elegant process that involves two main steps, ensuring the recipient has everything they need to bake a fresh batch of cookies. The complete and detailed instructions are thoughtfully provided in the printable recipe card below.
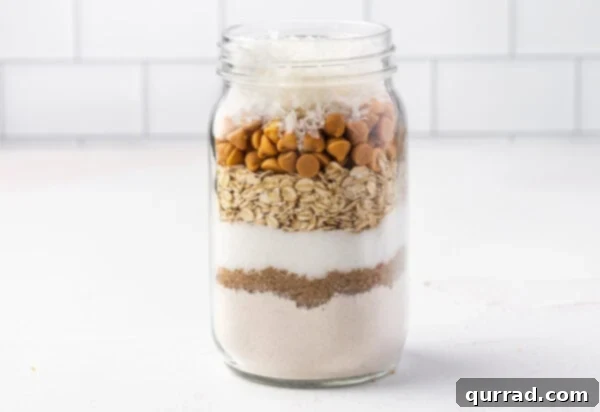
- Fill the Jar with Dry Ingredients: This is where the magic begins! As previously discussed, I strongly recommend using a clear glass jar and meticulously layering the dry ingredients. Starting with the flour mixture, then adding the brown sugar, granulated sugar, rolled oats, butterscotch chips, and finally the coconut flakes, creates a visually stunning effect. Each distinct layer adds to the anticipation and beauty of the gift. Once all ingredients are carefully placed, secure the lid tightly to seal in freshness and prevent any jostling during delivery.
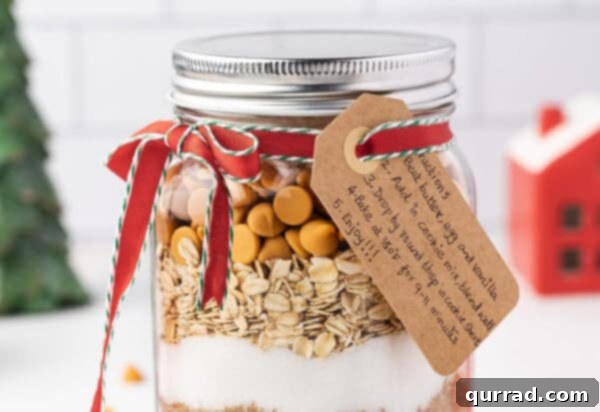
- Include Comprehensive Directions: The second, and arguably most important, part of gifting this mix is providing clear and concise instructions for baking. The recipient needs to know what additional wet ingredients to add and the steps to follow to transform the mix into delicious cookies. I love to craft a small, decorative note card, which I then attach to the jar with a pretty ribbon, as seen in the photos. On this card, you should list the following:
- Additional Wet Ingredients: Clearly state the exact amounts of softened butter, egg, and vanilla extract they will need.
- Baking Instructions: Provide step-by-step guidance, including creaming the butter, egg, and vanilla, then mixing in the dry ingredients, dropping the dough onto a baking sheet, and specifying the oven temperature and baking time (e.g., 350°F for 9-11 minutes).
- Yield Information: Inform them about how many cookies the mix typically yields (e.g., “Makes about 3 dozen cookies”).
- Storage Information: Briefly include tips for storing the baked cookies to keep them fresh.
- Personal Touch: Add a warm message, perhaps “Enjoy these homemade delights!” or “Wishing you sweet moments!”
Alternatively, you could print out the instructions on a piece of decorative paper and roll it up or fold it neatly inside the gift bag or box alongside the jar. The goal is to make the baking process as straightforward and enjoyable as possible for the recipient, ensuring they experience the full joy of your thoughtful gift.
Proper Storage for Your Cookie Mix and Baked Treats
Ensuring the longevity and freshness of your cookie mix and any baked cookies is crucial. Proper storage techniques will help maintain their delicious quality for extended periods.
- Dry Cookie Mix: Whether you choose to layer the dry ingredients for visual appeal or mix them all together before placing them in the jar, the dry cookie mix will remain fresh for up to 3 months. To achieve this, it must be stored in a tightly sealed jar or any other airtight container in a cool, dry place. Avoid areas with significant temperature fluctuations or direct sunlight, which can degrade the quality of the ingredients over time.
- Baked Cookies on Countertop: Once the cookies are baked, they will stay wonderfully soft and fresh at room temperature for up to 4 days. The key to maintaining their quality is to store them in an airtight container. This prevents them from drying out and keeps them away from light and moisture, which can accelerate staling. A cookie jar with a good seal or a plastic container with a tight-fitting lid works perfectly.
- Baked Cookies in Fridge: If you wish to extend the freshness of your baked cookies beyond a few days, they can be stored in an airtight container in the refrigerator for up to two weeks. Chilling the cookies can sometimes alter their texture slightly, making them a bit firmer. You can enjoy them chilled for a refreshing treat, or allow them to come to room temperature for a few minutes before serving to regain some of their original softness.
- Baked Cookies in Freezer: For longer-term storage, freezing is an excellent option. Once your cookies have completely cooled, transfer them to an airtight, freezer-safe Ziploc bag or a rigid freezer container. Ensure as much air as possible is removed from bags to prevent freezer burn. They can be frozen for up to 3 months without compromising much on flavor or texture. When you’re ready to enjoy them, simply thaw them on the counter at room temperature for an hour or two. They’ll taste almost as good as freshly baked!
We truly hope you adore this delightful and simple recipe for Cookie Mix in a Jar! Your feedback is invaluable, so please consider leaving a review below. Stay connected for more delicious recipes and kitchen inspiration!
Cookie Mix in a Jar
Prep Time: 15 mins
Total Time: 15 mins (for mix assembly)
Servings: 1 jar for gifting (makes approximately 36 cookies when baked)
Rate This Recipe | Pin Recipe | Print Recipe
This Cookie Mix in a Jar makes a great gift! It keeps for several months, produces soft chewy cookies, and the mix-ins can be swapped to suit your needs.
Ingredients
Dry Cookie Mix
- 1 cup all-purpose flour, spooned and leveled
- ¾ teaspoon baking soda
- ¼ teaspoon coarse salt
- 1 teaspoon cinnamon
- ⅛ teaspoon nutmeg
- ½ cup brown sugar, packed
- ½ cup granulated sugar
- 1 cup old-fashioned rolled oats (do not use instant or steel cut)
- 1 cup butterscotch chips (or your preferred chocolate chips)
- ½ cup coconut flakes (sweetened or unsweetened, or chopped nuts)
Additional Wet Ingredients (to be added by recipient)
- ½ cup unsalted butter, softened
- 1 large egg
- ¾ teaspoon vanilla extract
Instructions
To Make the Dry Mix for Gifting
-
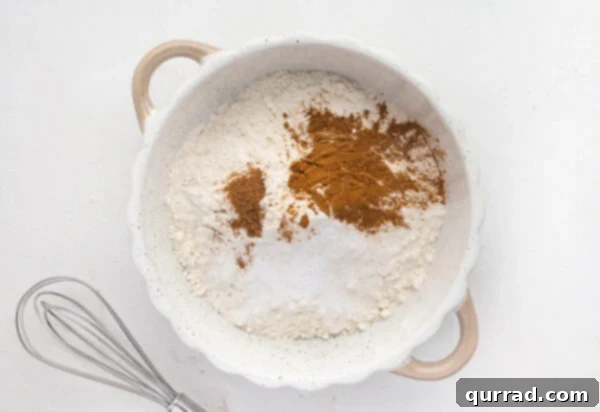
In a medium bowl, whisk together the flour, baking soda, salt, cinnamon, and nutmeg until well combined.

-
In a 1-quart glass jar, carefully layer the dry ingredients in the following order, gently tapping the jar after each addition to compact the layer: first the flour mixture, followed by the brown sugar, then the granulated sugar, the rolled oats, the butterscotch chips, and finally the coconut flakes.
-
Place the lid securely on the jar, ensuring it is sealed tightly. Fasten a decorative ribbon around the jar, attaching a gift tag with baking directions and a list of the additional wet ingredients needed by the recipient. (Refer to the “How to Gift This Cookie Mix” section above for detailed tag content).
To Make the Cookies (Recipient’s Instructions)
-
Preheat your oven to 350°F (175°C). Line a baking sheet with parchment paper.
-
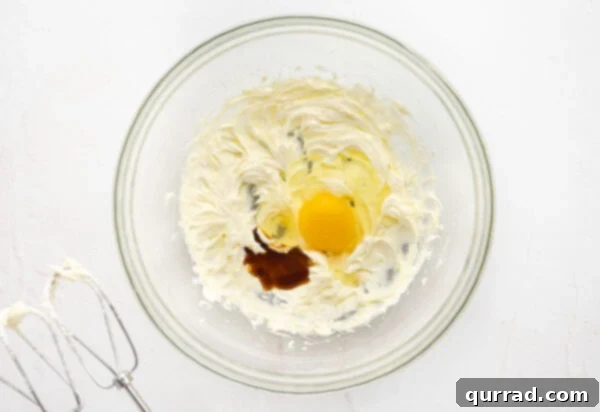
In a large bowl, using an electric mixer, beat the softened butter until it’s light and fluffy. Add the egg and vanilla extract, blending until just combined.
-
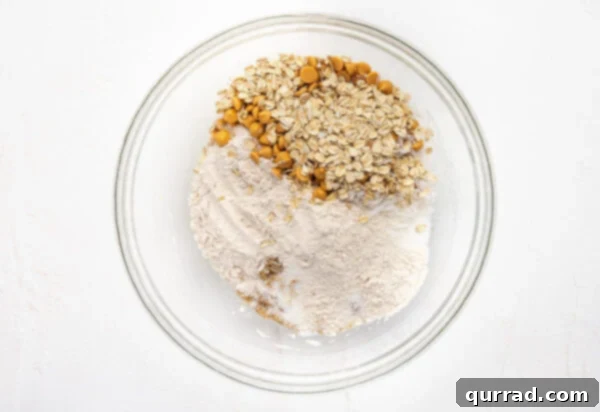
Pour the entire contents of the dry cookie mix from the jar into the wet ingredients. Mix on low speed until just combined, being careful not to overmix.
-
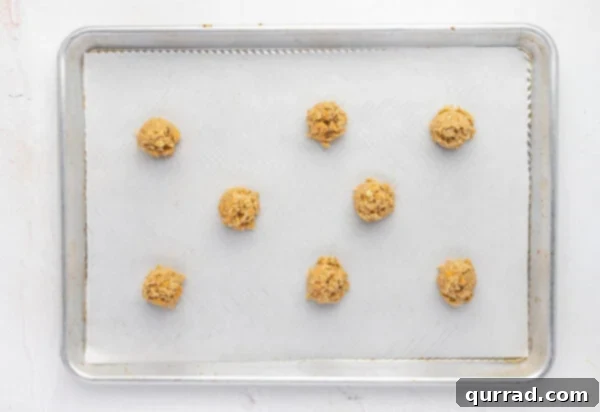
Drop rounded tablespoons of cookie dough about 2 inches apart onto the prepared baking sheet.
-
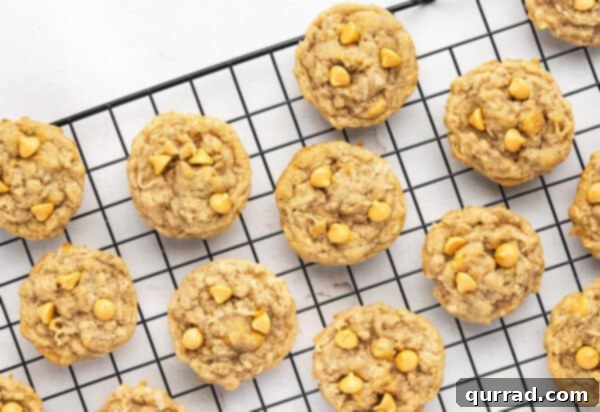
Bake for 9-11 minutes, or until the edges are golden brown and the centers are just set. Let the cookies cool on the baking sheet for 2 minutes before transferring them to a wire rack to cool completely.
Recipe Notes
This cookie mix is wonderfully adaptable! If butterscotch oatmeal cookies aren’t quite what you or the recipient desires, feel free to swap the butterscotch chips for another type of chip, such as dark chocolate, milk chocolate, white chocolate, or even peanut butter chips. For a different texture, the rolled oats can be partially replaced with finely crushed pretzels. And if coconut isn’t a favorite, finely chopped nuts (like pecans or walnuts) are an excellent substitute. The key to successful customization is maintaining the overall volume of mix-ins and dry ingredients. As long as the primary ratios remain consistent, your cookies will turn out great. For detailed storage guidelines for both the mix and the baked cookies, please refer to the “Proper Storage” section within the article.
Nutrition
Serving: 1 cookie
- Calories: 92 kcal
- Carbohydrates: 14g
- Fat: 3g
- Saturated Fat: 2g
- Cholesterol: 13mg
- Sodium: 64mg
- Potassium: 22mg
- Sugar: 10g
- Vitamin A: 90 IU
- Calcium: 6mg
- Iron: 0.3mg
Frequently Asked Questions About Cookie Mix in a Jar
- Can I make this mix gluten-free?
- Yes, you can substitute the all-purpose flour with a 1:1 gluten-free baking flour blend. Ensure your oats are certified gluten-free as well, as oats can sometimes be cross-contaminated during processing. The remaining ingredients are typically gluten-free, but always check labels.
- How far in advance can I prepare the mix for gifting?
- The dry cookie mix will stay fresh for up to 3 months when stored in a sealed, airtight jar in a cool, dry place. This makes it perfect for preparing well in advance of the holiday season or any special occasion.
- What are some other creative mix-in ideas?
- Beyond the suggestions above, consider dried cranberries, chopped dried apricots, mini marshmallows (add these when baking, not in the jar mix!), toffee bits, or even a combination of different chocolate chips. Just maintain the total volume of 1.5 cups for the mix-ins.
- Do I need to include a specific type of jar?
- While a 1-quart glass jar is ideal for its visual appeal and the perfect fit for the ingredients, any clean, airtight container of the same volume will work. Just ensure it seals well to keep the ingredients fresh.
- Can I double or triple the recipe?
- Absolutely! This recipe scales up beautifully. Simply multiply all the dry ingredients by your desired factor. You will need a larger container or multiple 1-quart jars. Remember to adjust the quantities for the wet ingredients on your instruction tag accordingly.
More Delicious Holiday Cookie Recipes to Explore:
- Reindeer Ritz Cracker Cookies
- Christmas Italian Cookies
- Peanut Butter Blossoms
- Hot Cocoa Cookies
- Classic Cut Out Sugar Cookies