
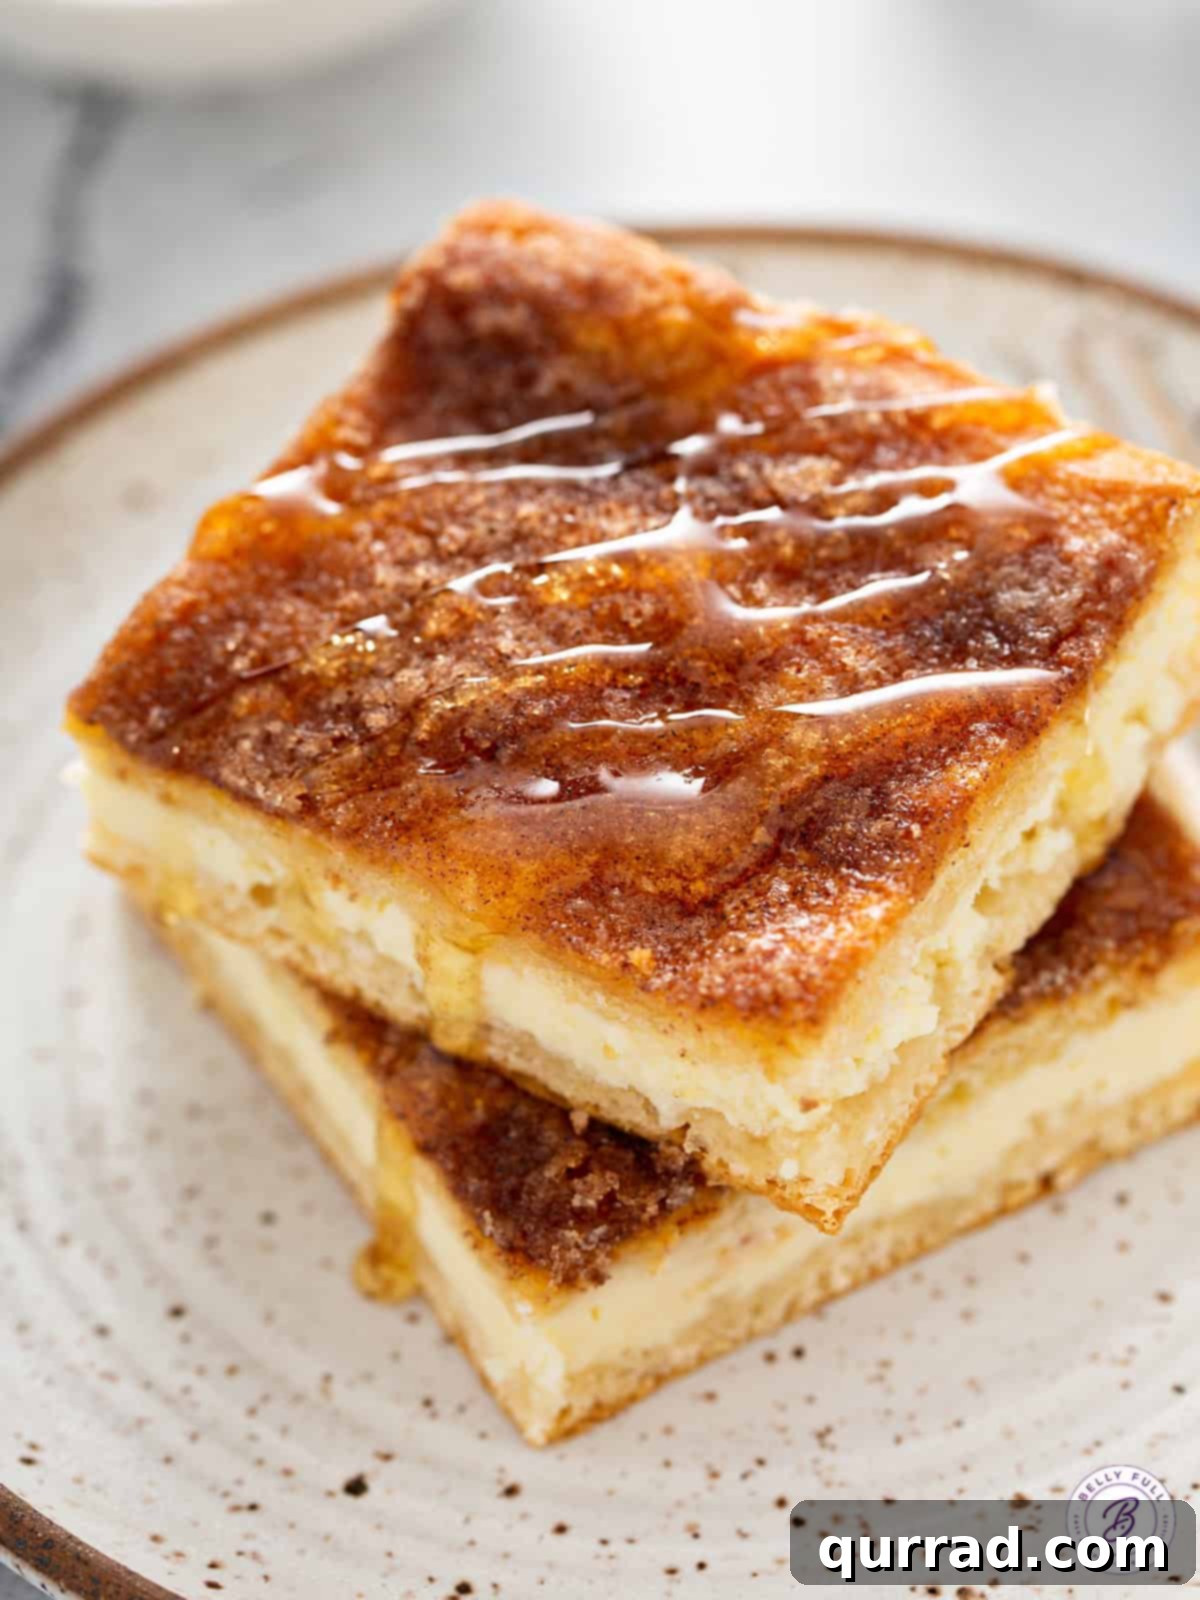
Indulge in a truly unique dessert experience with this incredible Sopapilla Cheesecake recipe. Imagine the warm, sweet crunch of a sopapilla, the comforting cinnamon-sugar embrace of a churro, and the rich, creamy texture of a classic cheesecake—all harmoniously combined into one heavenly treat! This easy-to-make dessert is not only a showstopper but also incredibly simple to prepare, making it the perfect choice for potlucks, family gatherings, or simply satisfying your sweet cravings. Prepare for a dessert that will have everyone asking for the recipe!
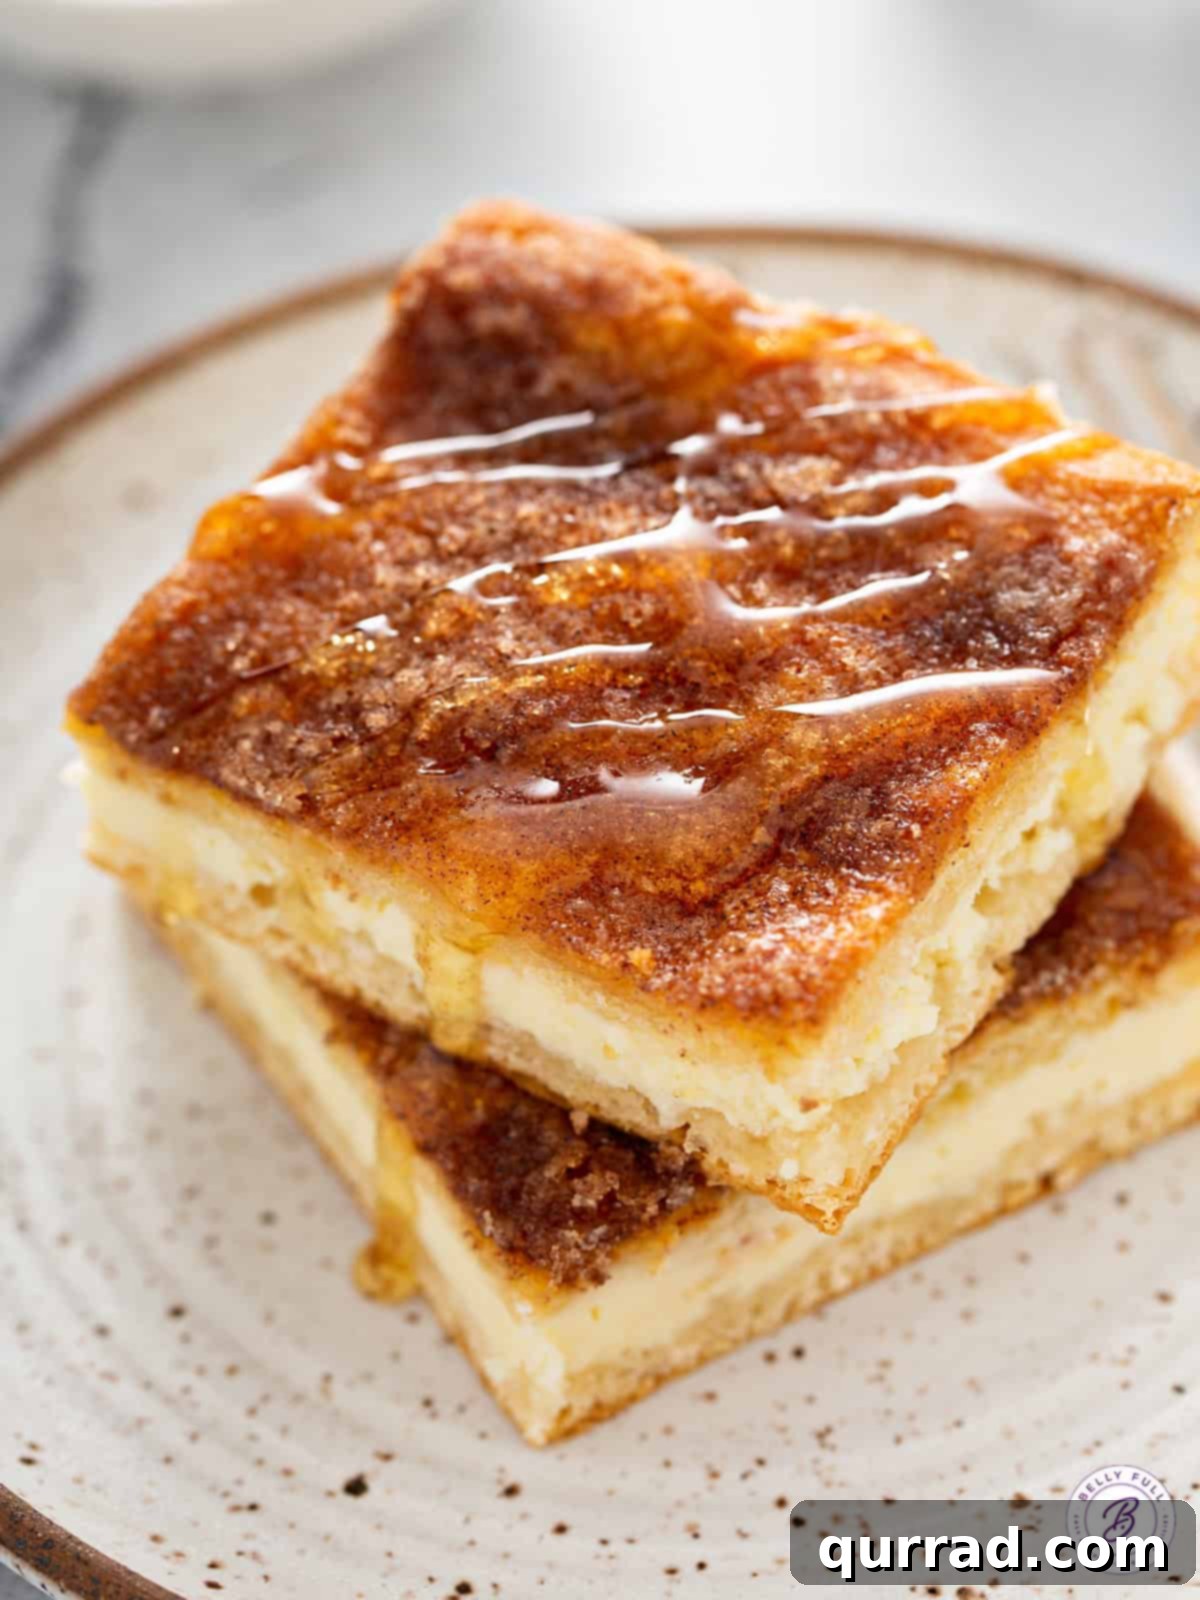
Easy Sopapilla Cheesecake: A Mexican-Inspired Dessert Delight
There are some desserts that leave a lasting impression, and this Sopapilla Cheesecake is definitely one of them. I first encountered this magical creation at a baby shower, where a friend served it (though her crust was homemade). The very first bite was an absolute revelation – a perfect symphony of textures and flavors that immediately sent me to dessert heaven. I promptly begged for the recipe, and it has since become a staple in my kitchen, especially when I need a fuss-free yet impressive dessert for gatherings that transports beautifully.
What makes this Mexican cheesecake so irresistibly good? It’s the delightful contrast. The luscious, sweet, and creamy cheesecake filling is perfectly sandwiched between two layers of crisp, flaky dough. This dough transforms into a golden, buttery crust during baking, generously coated with a delightful cinnamon-sugar blend. A final drizzle of warm honey elevates the experience, soaking into the golden crust and adding an extra layer of sweetness and sticky perfection. It’s truly reminiscent of a giant, decadent churro, but with the added richness of cheesecake – a combination that’s simply divine and incredibly easy to achieve with this recipe.
What Exactly is a Sopapilla?
To truly appreciate Sopapilla Cheesecake, it helps to understand its namesake. Sopapillas (pronounced soh-pah-PEE-uhs) are a beloved fried pastry with roots in Spanish cuisine, specifically in New Mexico and other parts of the American Southwest, as well as several Latin American countries. The word “sopaipa” in Spanish translates roughly to “bread soaked in oil,” which perfectly describes this delicious treat. Unlike a French beignet, sopapillas typically do not contain yeast, giving them a lighter, flakier texture that puffs up beautifully when fried. They share some similarities with Indian fry bread, but with their own distinct characteristics.
Traditionally, sopapillas can be served in a couple of ways. The most common and popular rendition is sweet, often dusted with powdered sugar, drizzled generously with honey, or served with cinnamon sugar. These sweet versions are a delightful end to any meal or a comforting snack. However, sopapillas also have a savory side; in some regions, they are stuffed with savory fillings like seasoned beef, beans, or cheese, much like a tamale or empanada, making them a hearty and satisfying meal on their own. This Sopapilla Cheesecake cleverly borrows the sweet, flaky, cinnamon-sugar-honey profile of the dessert sopapilla, melding it with the creamy indulgence of cheesecake for an unforgettable fusion.
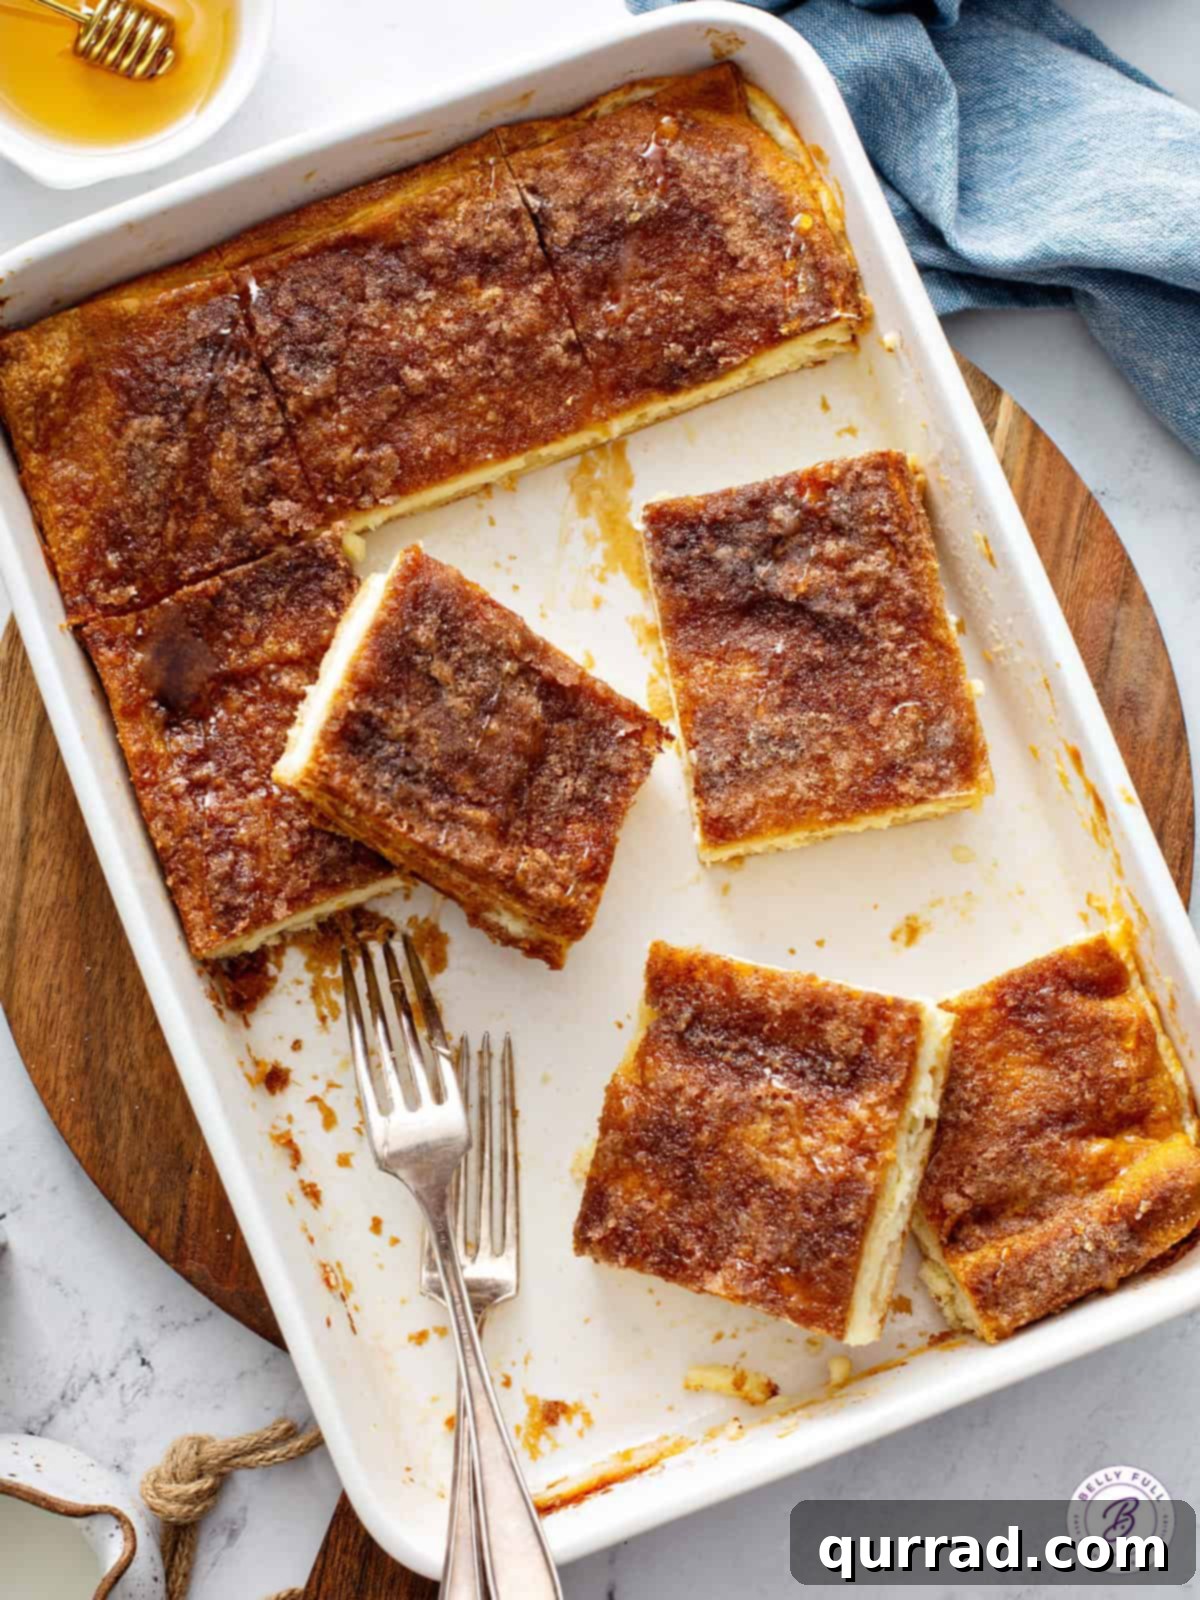
Essential Ingredients for Your Sopapilla Cheesecake
One of the best aspects of this Mexican cheesecake recipe is its reliance on readily available, simple pantry ingredients. You won’t need any fancy equipment or obscure items to create this masterpiece. Here’s a breakdown of the key components:
- Refrigerated Crescent Roll Sheets: This is the secret weapon for an incredibly easy crust! If your local grocery store offers the seamless crescent roll dough sheets, grab those, as they’re the most convenient. If you can only find the perforated crescent rolls, no worries at all – simply unroll them and pinch the seams together firmly to create a solid sheet for both the bottom and top layers.
- Cream Cheese: The heart of any cheesecake! Opt for full-fat cream cheese for the richest, creamiest filling. It’s crucial to bring it to room temperature before mixing. This ensures it blends smoothly with the other ingredients, preventing lumps and creating that silky-smooth texture we all love in cheesecake.
- Granulated Sugar: This provides the essential sweetness for both the creamy cheesecake filling and the delightful cinnamon-sugar topping that defines the sopapilla element. The sugar content is carefully balanced to ensure a perfectly sweet, but not overly cloying, dessert.
- Egg: A single large egg acts as a binder and provides structure to the cream cheese filling. It helps the cheesecake set beautifully during baking, giving it that classic smooth, sliceable consistency.
- Vanilla Extract: A splash of good quality vanilla extract enhances all the other flavors, adding warmth and depth to the sweet cream cheese filling. Don’t underestimate its power to elevate the overall taste profile.
- Unsalted Butter: Melted unsalted butter is brushed generously over the top crescent roll layer before baking. This step is vital for two reasons: it helps the cinnamon-sugar adhere perfectly, creating a beautiful, evenly coated crust, and it ensures the top bakes to a gorgeous golden brown, yielding that desirable crisp and flaky texture.
- Ground Cinnamon: The star of the “sopapilla” component! Mixed with sugar and sprinkled abundantly over the buttered top crust, the cinnamon infuses the dessert with its signature warm, aromatic spice, mimicking the classic flavor of fried sopapillas and churros.
- Honey: While listed as an optional topping, I strongly recommend against skipping it! A generous drizzle of honey over the warm, freshly baked cheesecake bars allows it to seep into the cinnamon-sugar crust, adding an incredible layer of sweet moisture and intensifying the Mexican-inspired flavor. It truly takes this dessert from delicious to absolutely unforgettable.
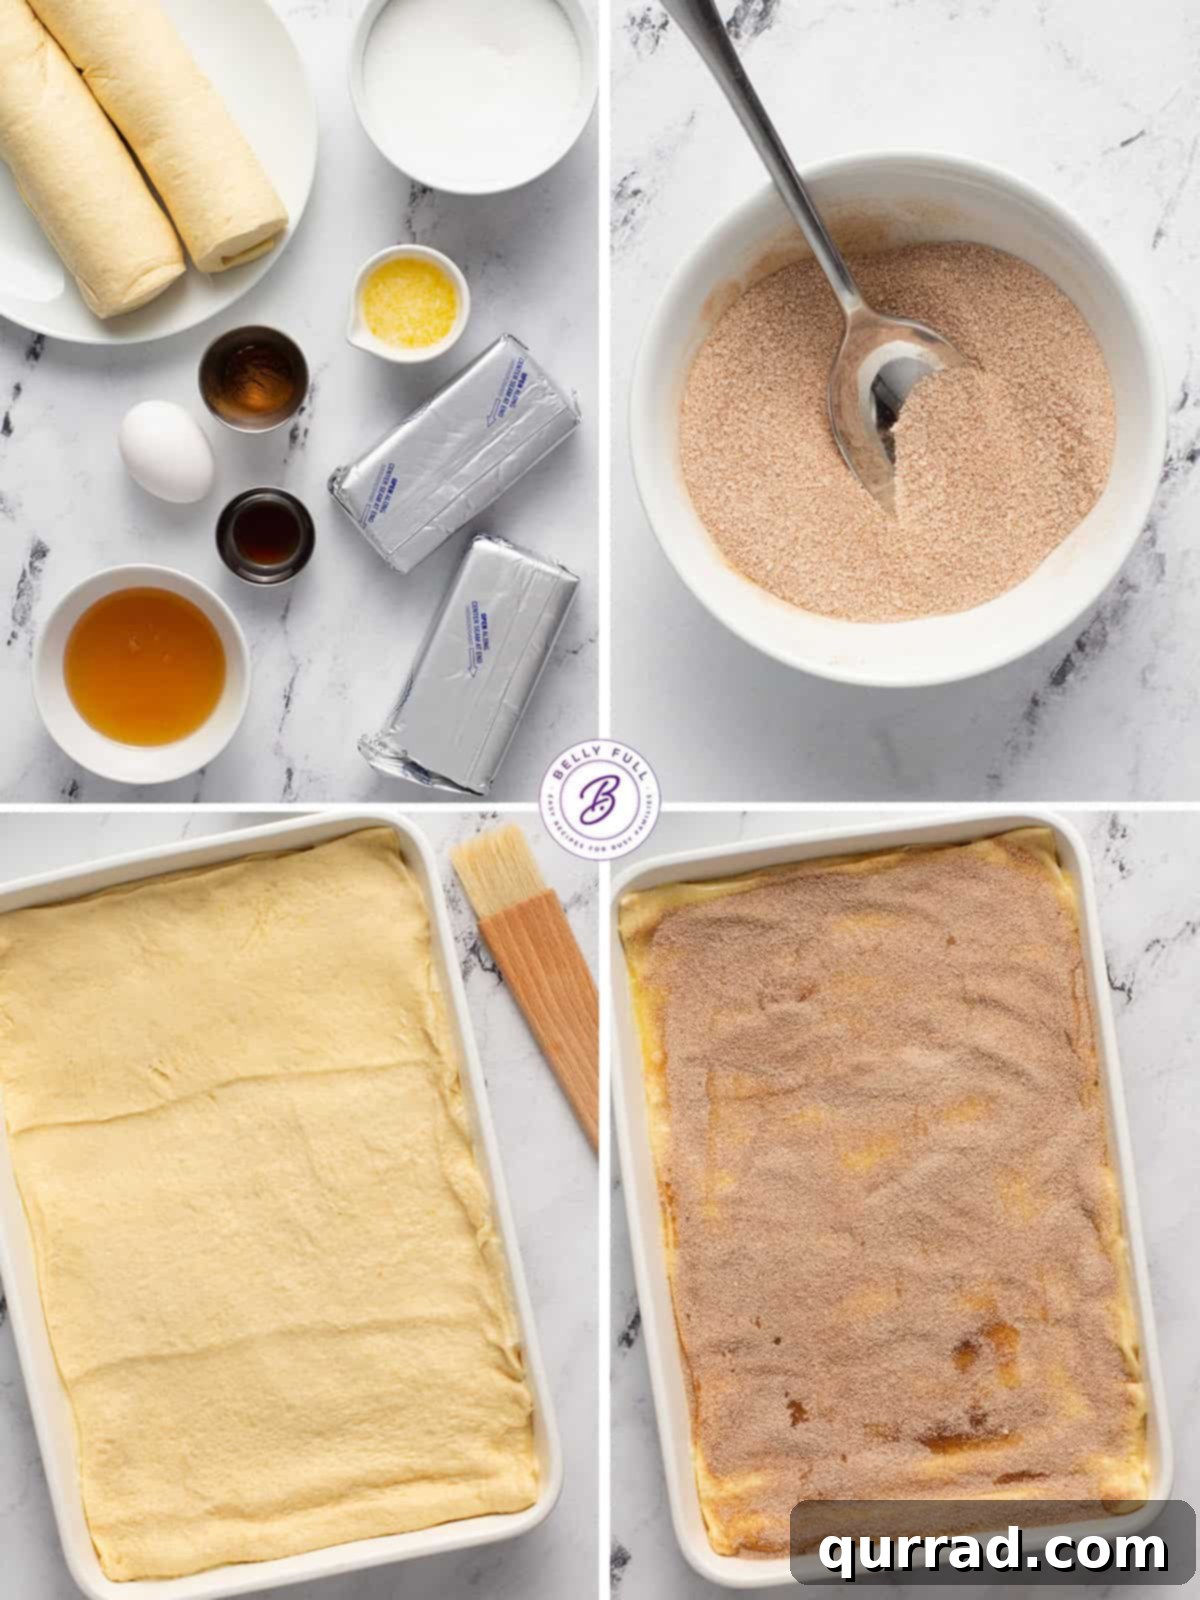
How to Prepare Your Easy Sopapilla Cheesecake: Step-by-Step Guide
Despite its impressive appearance and incredible flavor, making this Sopapilla Cheesecake is surprisingly straightforward. Even novice bakers will find this recipe a breeze to follow. Let’s walk through the simple steps to create this delightful dessert:
- Prepare Your Baking Dish and Oven: Begin by preheating your oven to 350°F (175°C). Then, lightly grease a 9×13-inch baking dish with nonstick cooking spray. This ensures your cheesecake bars won’t stick and will release easily once cooled.
- Craft the Cinnamon-Sugar Blend: In a small bowl, combine ¼ cup of the granulated sugar with the ground cinnamon. Stir well until the cinnamon is evenly distributed. This fragrant mixture will be sprinkled on top later, so set it aside.
- Whip Up the Cream Cheese Filling: In a large mixing bowl, using an electric mixer, beat the softened cream cheese until it’s wonderfully smooth and creamy. Make sure to scrape down the sides of the bowl occasionally to ensure everything is fully incorporated. Next, add the remaining 1 cup of granulated sugar, the large egg, and the vanilla extract. Continue to beat on medium speed until the mixture is light, fluffy, and well combined. This is the luscious heart of your cheesecake!
- Lay the Foundation (Bottom Crust): Unroll one of the refrigerated crescent roll dough sheets. Carefully press it into the bottom of your prepared 9×13-inch baking dish, ensuring it covers the entire base. If you’re using the perforated crescent rolls, take a moment to firmly pinch all the seams together to create a solid, continuous bottom crust.
- Spread the Creamy Filling: With a spatula or the back of a spoon, gently and evenly spread the prepared cream cheese mixture over the crescent roll bottom crust. Try to get it as level as possible for even baking.
- Top it Off (Upper Crust): Carefully unroll the second crescent roll dough sheet and place it directly over the cream cheese filling. Again, if using perforated dough, pinch the seams together to seal it completely.
- Butter and Cinnamon-Sugar Shower: Melt the unsalted butter. Using a pastry brush, generously brush the entire surface of the top crescent roll crust with the melted butter. This not only adds flavor but also helps create that beautiful golden-brown finish. Immediately after brushing with butter, evenly sprinkle the reserved cinnamon-sugar mixture all over the top crust, ensuring it’s completely covered for that classic sopapilla charm.
- Bake to Golden Perfection: Place the baking dish into your preheated oven. Bake for approximately 30-35 minutes, or until the crescent dough has puffed up, turned a rich golden brown, and the cheesecake filling appears set when gently jiggled.
- The Honey Finale & Cooling: Once baked, remove the cheesecake from the oven. While it’s still warm, generously drizzle the ¼ cup of honey evenly over the entire top. Let the bars cool in the pan for at least 1 hour at room temperature. For the cleanest slices and best texture, I highly recommend chilling it in the refrigerator overnight. Before serving, you can bring it back to room temperature or briefly rewarm slices in the microwave (5-10 seconds at 50% power) if you prefer it warm. Slice into 12 bars and enjoy!
Expert Tips and Flavorful Variations for Your Sopapilla Cheesecake
While this Sopapilla Cheesecake recipe is straightforward, a few tips can ensure absolute perfection, and some variations can add exciting twists to this already beloved dessert:
- Serving Temperature is Your Choice: This dessert is delightful whether served warm or cold. After baking, allow it to cool for at least one hour in the pan before attempting to slice. I often chill it overnight in the refrigerator, as this makes slicing into neat, uniform bars much easier. However, if you prefer a softer, fluffier texture, bring the chilled bars back to room temperature before serving, or even warm individual slices slightly in the microwave for a few seconds.
- Easily Halve the Recipe: If you’re cooking for a smaller crowd or simply want a less generous batch, this recipe scales down perfectly. Simply halve all the ingredients and bake in an 8×8-inch square baking pan. Adjust the baking time slightly if needed, keeping an eye on it until golden and set.
- Add a Fruit Layer for Extra Flavor: For a delightful fruity variation, consider adding a thin layer of your favorite fruit pie filling on top of the cream cheese layer, just before you place the top crescent roll crust. Cherry pie filling, apple pie filling, or a vibrant raspberry sauce would all be fantastic choices, adding a burst of tangy sweetness that complements the rich cheesecake beautifully.
- Don’t Skip the Honey Drizzle: Seriously, this is a game-changer! The combination of the warm cinnamon-sugar crust and the sticky, sweet honey is what gives this dessert its authentic “sopapilla” magic and elevates its flavor profile to another level. If possible, do not omit the honey – it truly adds that special “wow” factor.
- Homemade Crust Option: For those who love baking from scratch, you can absolutely make your own pie crust or even a simple puff pastry for the top and bottom layers instead of crescent rolls. Just ensure the crust is thin enough to bake properly and provide a good contrast to the creamy filling.
- Spice It Up: If you enjoy a bit of a kick, a tiny pinch of cayenne pepper added to the cinnamon-sugar mixture can create an intriguing sweet-and-spicy note, typical of some New Mexican flavors.
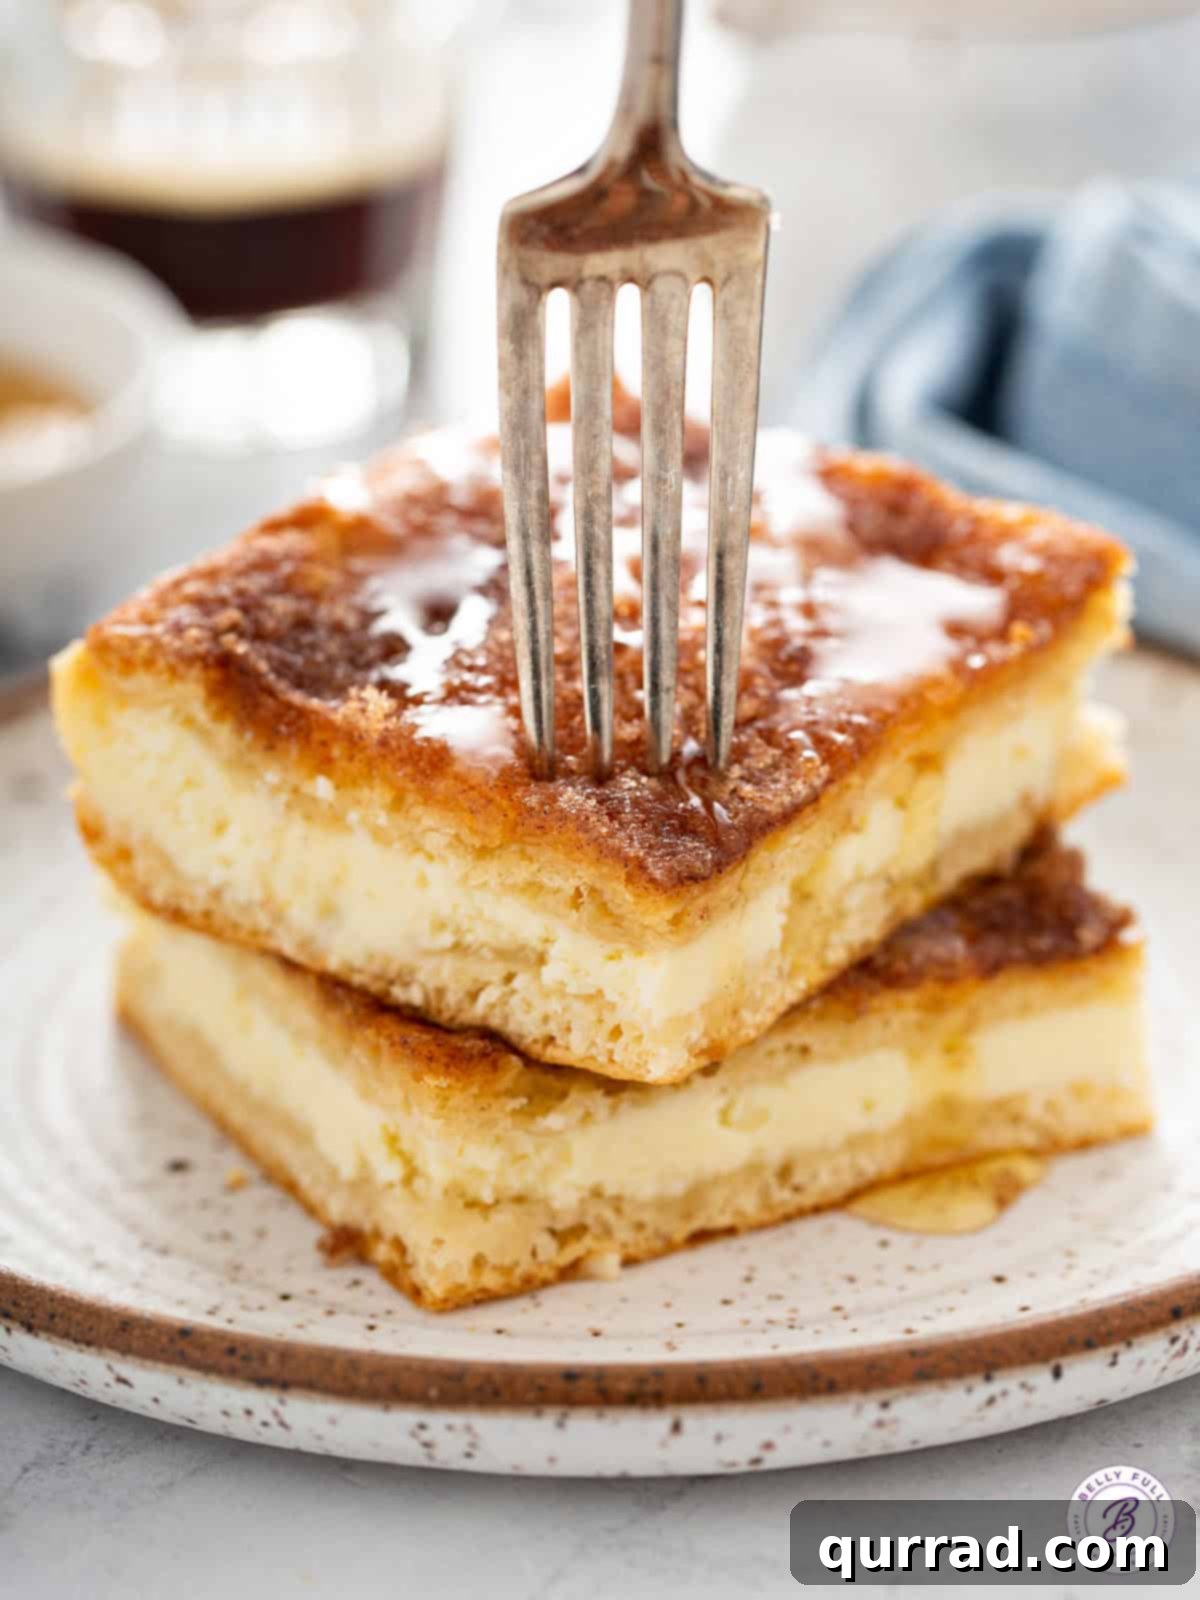
Serving Suggestions
This Sopapilla Cheesecake is already a wonderfully sweet and complete dessert on its own. The honey and cinnamon-sugar crust provide all the “wow factor” you could ask for, making additional toppings largely unnecessary. However, if you’re feeling extra indulgent and want to take it up yet another notch (and who would judge you for that?!), there are a few optional toppings that can make this treat even more decadent:
- Chocolate Sauce: A drizzle of rich homemade chocolate sauce or a good quality store-bought version can create a lovely contrast with the cinnamon and cream cheese.
- Caramel Sauce: For an extra layer of sweetness and sticky goodness, a warm caramel sauce pairs beautifully with the flavors of this cheesecake.
- Ice Cream: Serve a warm slice with a scoop of vanilla bean ice cream for a truly luxurious experience. The melting ice cream against the warm, crisp crust is simply heavenly.
Proper Storage for Your Sopapilla Cheesecake
To keep your Sopapilla Cheesecake delicious and fresh, proper storage is key:
- Refrigeration: While you can enjoy this dessert warm, once it has cooled, it absolutely needs to be stored in the refrigerator due to the cream cheese filling. Cover any leftovers tightly with plastic wrap or aluminum foil, or store them in an airtight container. It will remain fresh and delightful for up to 3 days. Be aware that the longer it chills, the top crust may lose some of its initial crispness, but it will still be incredibly tasty.
- Freezing: Sopapilla Cheesecake bars freeze wonderfully! Once the bars have cooled completely, slice them into individual portions. Place them in a single layer on a baking sheet and freeze for about an hour until firm. Then, transfer the frozen bars to a freezer-safe plastic bag or an airtight container, separating layers with parchment paper to prevent sticking. They can be frozen for up to 2 months. To serve, simply remove the desired number of bars from the freezer and defrost them in the refrigerator for a few hours or overnight.
- Rewarming: If you prefer your chilled bars warm, place an individual slice on a microwave-safe plate and microwave at 50% power for 5-10 seconds. This will gently warm it without making it soggy.
Frequently Asked Questions (FAQs)
Here are answers to some common questions about making Sopapilla Cheesecake:
- Can I use puff pastry instead of crescent rolls? Yes, you can! Puff pastry would create an even flakier crust, similar to traditional sopapillas. Ensure you thaw it according to package directions and gently press it into your baking dish for both the bottom and top layers. You might need to adjust baking time slightly, so keep an eye on the crust for golden perfection.
- Is Sopapilla Cheesecake an authentic Mexican dessert? While inspired by the flavors of traditional Mexican and New Mexican sopapillas, Sopapilla Cheesecake is a fusion dessert, not a traditional Mexican dish. It combines elements of both cultures to create something uniquely delicious.
- Can I make this dessert gluten-free? It’s possible, but it requires a few substitutions. You would need to find gluten-free crescent roll dough sheets (which can be challenging) or use a homemade gluten-free pie crust. Ensure all other ingredients are naturally gluten-free.
- What if my cream cheese isn’t at room temperature? If your cream cheese is cold, it will be very difficult to beat smooth and will likely result in a lumpy filling. To quickly bring it to room temperature, unwrap the blocks of cream cheese and microwave them on low power (e.g., 30% power) for 15-30 seconds, checking and flipping halfway, until softened but not melted.
- How do I prevent the topping from burning? The cinnamon-sugar topping and crescent rolls can brown quickly. If you notice the top browning too fast before the cheesecake is set, you can loosely tent the baking dish with aluminum foil for the remaining baking time.
- Can I make this ahead for a party? Absolutely! This dessert is an excellent make-ahead option. You can prepare it the day before and chill it overnight. In fact, chilling it overnight makes it much easier to slice neatly for serving. Simply bring it to room temperature before your guests arrive, or offer it chilled.
More Mexican-Inspired Desserts To Try:
- Churros
- Flan
- Carlota de Limon
- Tres Leches Cake
Sopapilla Cheesecake
Prep Time: 10 mins
Cook Time: 30 mins
Cool Time: 1 hr
Total Time: 1 hr 40 mins
Servings: 12 bars
This Sopapilla Cheesecake recipe features sweetened cream cheese between layers of a cinnamon-sugar crust for the perfect combination of New-Mexican sopapillas, churros, and cheesecake in one!
Ingredients
- 1 & 1/4 cups granulated sugar, divided
- 1 teaspoon ground cinnamon
- (2) 8 ounce packages cream cheese, softened
- 1 large egg
- 1 teaspoon vanilla extract
- (2) 8 ounce tubes refrigerated crescent roll sheets (if you can’t find the seamless dough sheets, use the perforated crescent rolls and pinch seams together)
- 3 tablespoons unsalted butter, melted
- 1/4 cup honey
Instructions
- Preheat an oven to 350 degrees F (175°C). Coat a 9×13-inch baking dish with nonstick cooking spray.
- In a small bowl, stir together 1/4 of the sugar with the cinnamon. Set aside.
- In a large bowl with an electric mixer, beat the cream cheese until smooth, scraping down the sides of the bowl if necessary. Add in the remaining 1 cup of the sugar, the egg, and vanilla; beat to combine until fluffy. Set aside.
- Unroll the tubes of crescent roll dough sheets; gently press one of them into the bottom of the prepared baking dish. (If using perforated crescent roll dough, pinch the seams together to seal completely.)
- Using a spatula, evenly spread the cream cheese mixture on top of the dough, then cover with the other roll of crescent dough.
- Brush the top all over with the melted butter, then sprinkle the cinnamon-sugar mixture all over to cover.
- Bake in the preheated oven for about 30-35 minutes or until the crescent dough has puffed and turned golden brown, and bars appear set when gently shaken.
- Remove from oven and drizzle evenly with the honey.
- Cool for at least 1 hour in the pan. For easier slicing, it is recommended to chill it overnight and then bring to room temperature (or rewarm) before cutting into 12 bars. Enjoy warm or cold.
Notes
For additional helpful tips, recipe variations, and detailed storage instructions, please refer to the full article above.
Nutrition
Calories: 343kcal | Carbohydrates: 45g | Protein: 5g | Fat: 17g | Saturated Fat: 9g | Cholesterol: 43mg | Sodium: 481mg | Potassium: 103mg | Fiber: 1g | Sugar: 33g | Vitamin A: 319IU | Calcium: 61mg | Iron: 1mg
Nutritional information given is an automatic calculation and can vary based on the exact products you use and any changes you make to the recipe. If these numbers are very important to you, I would recommend calculating them yourself.
I hope you love this delicious and easy Sopapilla Cheesecake recipe – be sure to give it a try and share your experience below! For more culinary inspiration, don’t forget to follow Belly Full on TikTok, Facebook, Instagram, Pinterest, and YouTube!