
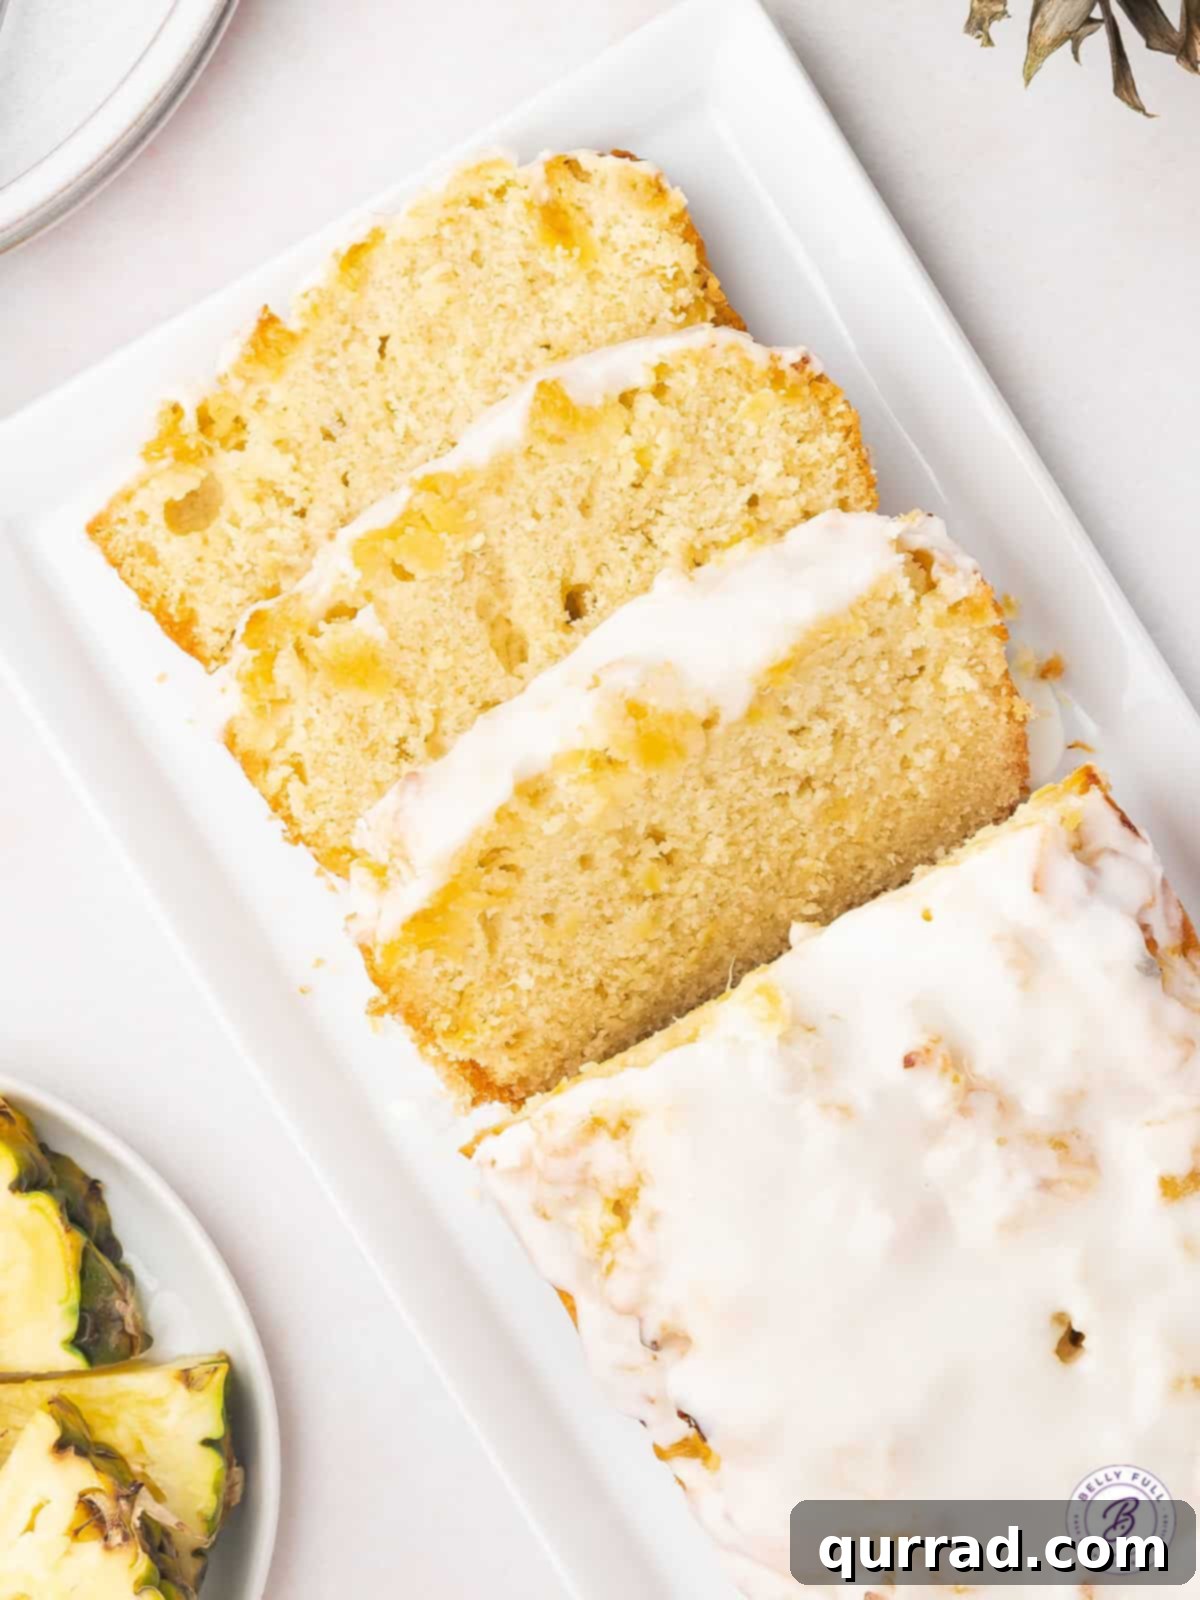
Delight in the vibrant flavors of the tropics with this incredibly easy and exceptionally moist Pineapple Bread recipe. Infused with the refreshing zest of pineapple juice and generous helpings of crushed pineapple, every bite offers a burst of sweet and tangy goodness that will transport you to an island paradise. Crowned with an irresistible, silky-smooth icing, this loaf cake is so delightfully simple to prepare and addictively delicious, you’ll find yourself baking it on repeat. Whether you’re a seasoned baker or just starting out, this recipe promises a perfect, moist crumb and an unforgettable taste experience.
Rave Reviews for This Recipe!
“This pineapple bread is absolutely fantastic! My family devoured it and immediately asked for another loaf. It’s definitely a new favorite in our home.” – Cecil
Quick & Easy Pineapple Bread Recipe: Your Tropical Escape
Searching for a truly exceptional quick bread that stands out from the rest? Look no further than this Quick & Easy Pineapple Bread. This loaf cake is a masterful blend of rich density and delightful moisture, achieving a perfect texture that’s neither too heavy nor too crumbly. Its flavor profile strikes a harmonious balance between sweetness and the natural tartness of fresh pineapple, making it incredibly versatile. It’s truly one of those special treats that can effortlessly transition from a delightful breakfast pastry, served alongside your morning coffee, to an elegant dessert, perfectly complementing an evening meal or a light afternoon tea.
This recipe is a dream come true for pineapple enthusiasts! We’ve taken extra steps to ensure an explosion of pineapple flavor in every single bite. The batter itself is enriched with tangy pineapple juice, which also features prominently in the sweet, delicate glaze that adorns the finished loaf. But we don’t stop there – the cake boasts not one, but two generous layers of crushed pineapple, strategically placed to ensure a juicy, fruity burst throughout the entire bread. This double-layering technique guarantees that you’ll experience that authentic tropical essence from the very first slice to the last.
If you’re as passionate about simple yet sensational baked goods as we are, you’ll be thrilled to discover more of our beloved quick bread recipes. Expand your baking repertoire with our incredibly popular Cranberry Orange Bread, a festive and zesty delight. Don’t miss our comforting Apple Bread, perfect for cozy autumn days, and of course, the perennial favorite, our best-ever Banana Bread. Each recipe is designed for ease and maximum flavor, ensuring baking success every time!
Pineapple Bread Recipe
Prep Time: 15 mins
Cook Time: 1 hr
Total Time: 1 hr 15 mins
Servings: 8 slices
This easy Pineapple Bread Recipe, featuring both pineapple juice and crushed pineapple, is delightfully moist and bursting with tropical flavor in every bite, topped with an irresistible icing!
Step-by-step photos can be seen below the recipe card.
Ingredients
FOR THE CAKE
- ½ cup unsalted butter, softened
- 1 cup granulated sugar
- 2 large eggs
- ½ cup half and half
- ¼ cup pineapple juice
- 1½ tsp vanilla extract
- 1¾ cups all-purpose flour, spooned and leveled
- 1¼ tsp baking powder
- ½ tsp salt
- 1 cup crushed pineapple, well drained of all liquid (save the syrup for the glaze!)
FOR THE GLAZE
- 1 cup powdered sugar
- 1 tbsp whole milk
- 1 tbsp pineapple juice (from the reserved syrup, or a fresh splash)
Instructions
- Preheat your oven to 350°F (175°C). Prepare a 9×5-inch loaf pan by lining it with parchment paper, allowing a slight overhang on the two longer sides. This parchment “sling” will make it much easier to remove the baked loaf.
- In a large mixing bowl, using a handheld electric mixer, cream together the softened unsalted butter and granulated sugar until the mixture is light, fluffy, and pale in color. This creaming process incorporates air, which is crucial for a tender crumb.
- To the butter and sugar mixture, add the eggs one at a time, beating well after each addition. Then, incorporate the half and half, pineapple juice, and vanilla extract. Mix until just combined.
- In a separate bowl, whisk together the all-purpose flour, baking powder, and salt. Gradually add the dry ingredients to the wet ingredients, mixing on low speed until just combined. Be careful not to overmix, as this can lead to a tough bread.
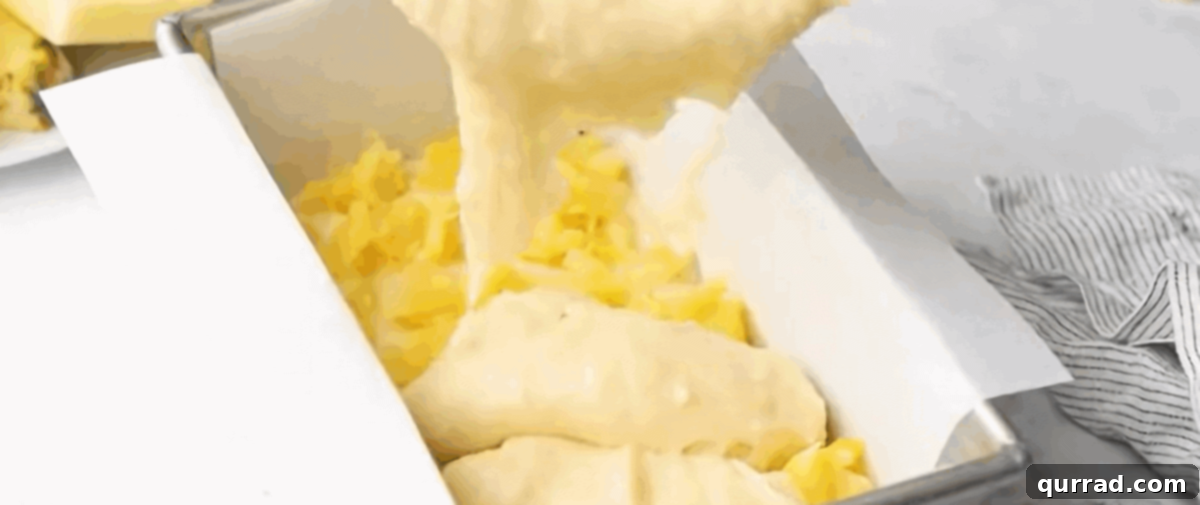
- Pour half of the prepared batter into your lined loaf pan. Gently tap the pan on your counter a few times to help the batter spread evenly and release any large air bubbles. Evenly scatter half of the well-drained crushed pineapple over the top of the batter layer.
- Carefully repeat the layering process: pour the remaining batter over the pineapple layer, spread it gently, and then scatter the rest of the crushed pineapple over the top.
- Bake for 55 to 60 minutes, or until a wooden skewer or toothpick inserted into the center of the loaf comes out clean. Keep a close eye on your bread during the last 20 minutes of baking; if the top appears to be browning too quickly, loosely tent it with aluminum foil to prevent over-browning.
- Allow the pineapple bread to cool in the pan for at least one hour. This allows the loaf to firm up before handling. After an hour, use the parchment paper overhang to carefully lift the loaf out of the pan and transfer it to a wire rack to cool completely. Cooling completely is important before glazing to prevent the glaze from melting.
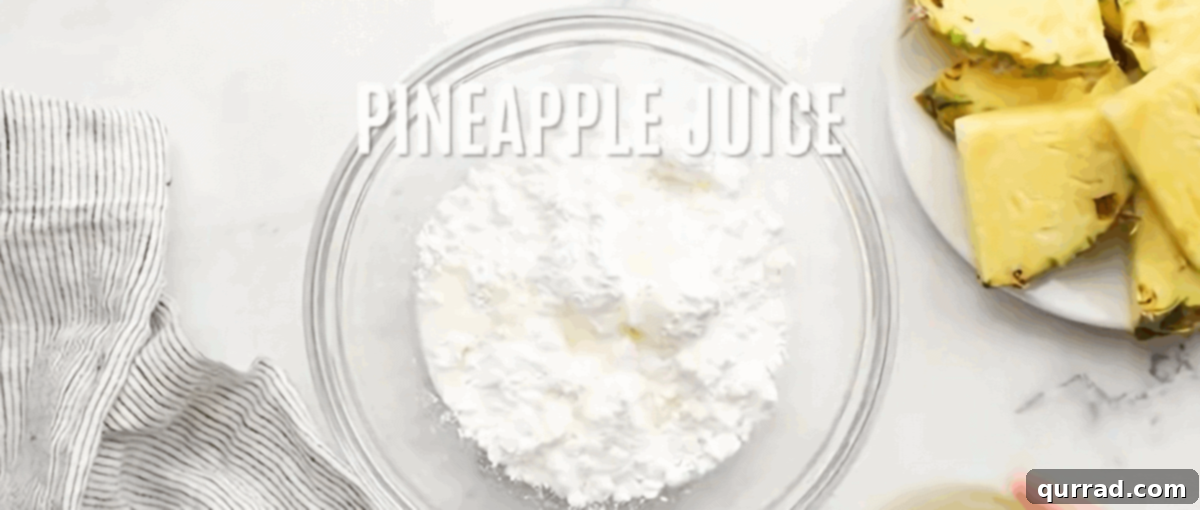
- While the cake cools, prepare the luscious glaze. In a small bowl, whisk together the powdered sugar, whole milk, and pineapple juice until smooth and free of lumps. Adjust consistency as needed: add a tiny bit more milk for a thinner glaze, or a bit more powdered sugar for a thicker one.
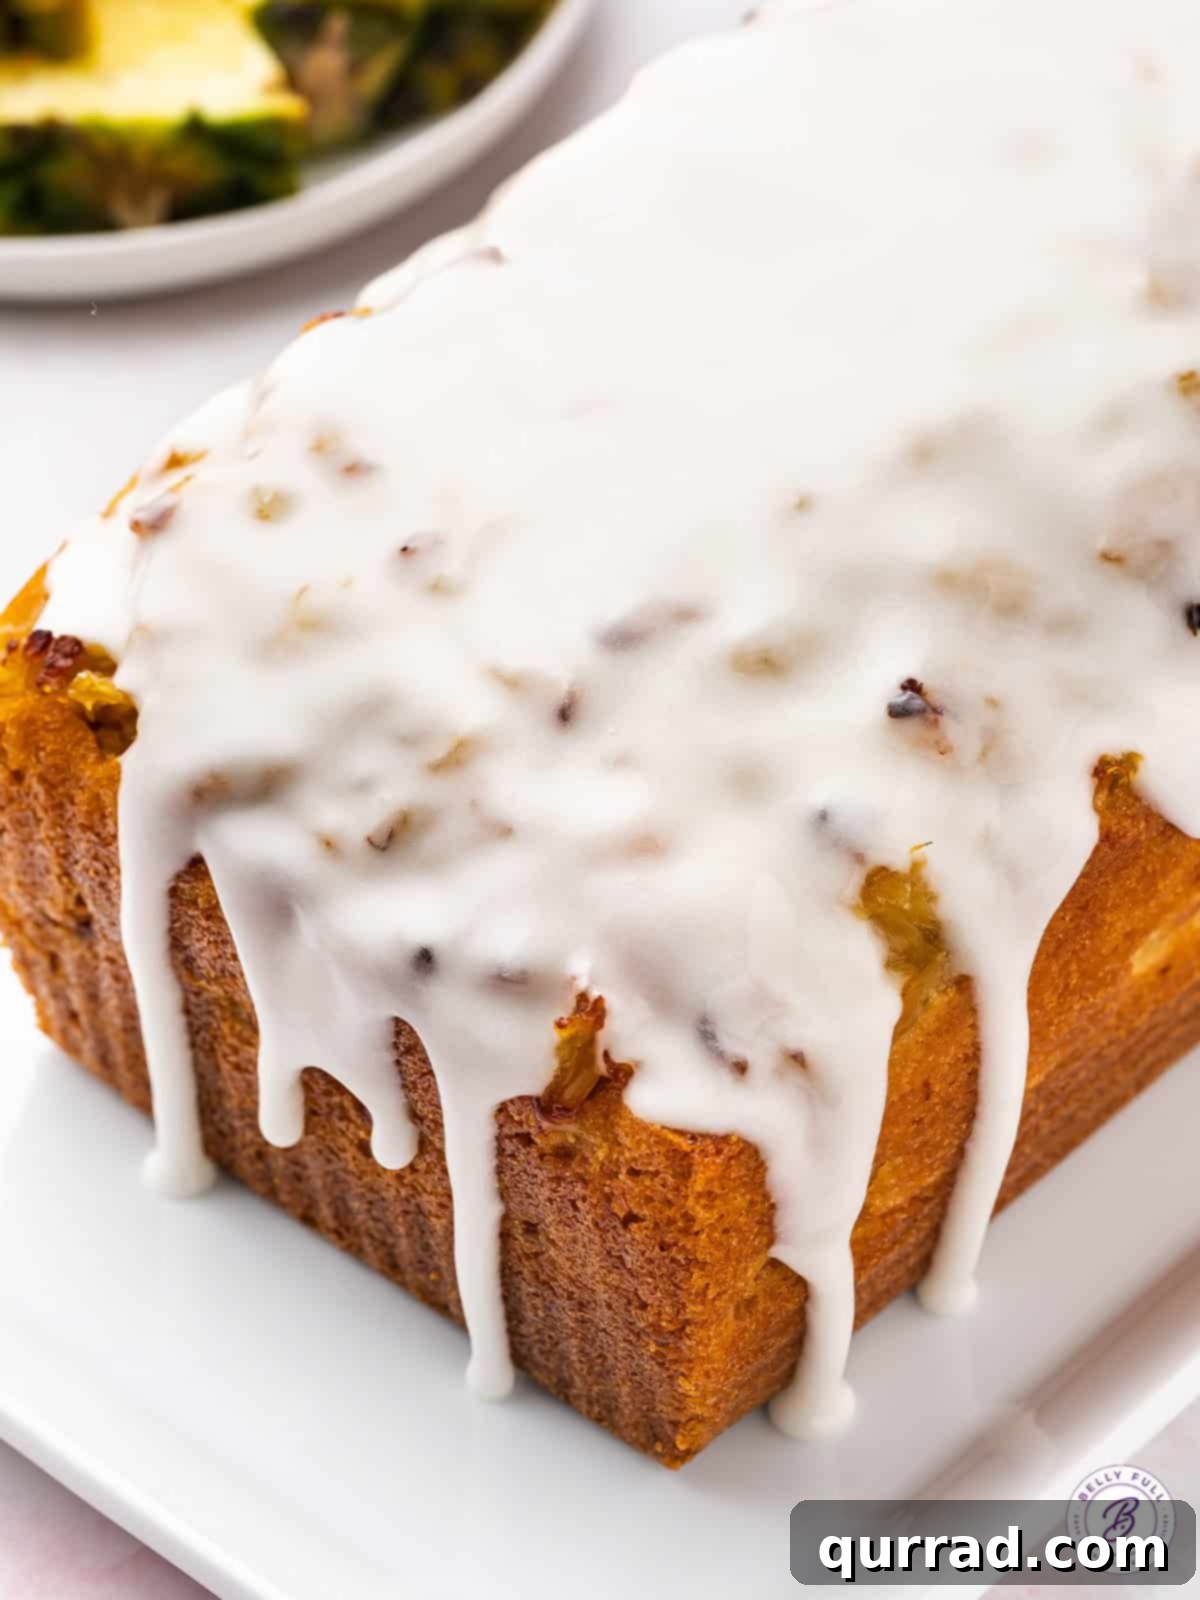
- Once the pineapple bread is completely cool, generously pour the prepared glaze over the top, allowing it to drip down the sides for a beautiful finish. Let the glaze set for a few minutes before slicing and serving.
Notes for the Perfect Pineapple Bread
- Half-and-half explained: If you’re having trouble locating half-and-half in your dairy aisle, don’t fret! It’s simply a blend of equal parts whole milk and heavy cream. You can easily make your own substitute at home for the same rich results.
- Amp up the tropical vibe with coconut: For an even more intense tropical flavor, consider gently folding in about ½ cup of toasted shredded coconut (sweetened or unsweetened) along with the crushed pineapple. The subtle nuttiness and chewiness of the coconut perfectly complement the sweet tang of the pineapple.
- Draining the pineapple: Ensuring your crushed pineapple is thoroughly drained is crucial. Excess liquid can make your bread dense and soggy. Press it well against a fine-mesh sieve or squeeze it in a cheesecloth.
- Room temperature ingredients: For the best texture, make sure your butter and eggs are at room temperature. This helps them cream together more smoothly, creating an emulsified batter that traps air for a lighter crumb.
Nutrition Information (per serving)
Calories: 420kcal | Carbohydrates: 68g | Protein: 5g | Fat: 15g | Saturated Fat: 9g | Polyunsaturated Fat: 1g | Monounsaturated Fat: 4g | Trans Fat: 0.5g | Cholesterol: 83mg | Sodium: 177mg | Potassium: 186mg | Fiber: 1g | Sugar: 46g | Vitamin A: 494IU | Vitamin C: 4mg | Calcium: 67mg | Iron: 2mg
Nutritional information is an estimate based on standard ingredients and can vary. If precise dietary values are critical, we recommend calculating them based on the specific products you use.
How To Make Pineapple Bread: A Visual Step-by-Step Guide
Baking this Pineapple Bread is a joyful experience, and we’ve broken it down into simple, easy-to-follow steps, complete with visual aids, to ensure your success in the kitchen.
Step 1: Prep Your Workspace
Begin by preheating your oven to 350°F (175°C). This ensures your oven is at the correct temperature when your batter is ready. Next, prepare your 9×5-inch loaf pan by lining it with parchment paper. Leave a generous overhang on the two longer sides of the pan; this thoughtful step creates a convenient “sling” that will allow you to easily lift the entire baked loaf out of the pan once it’s cooled.
Step 2: Craft the Irresistible Batter
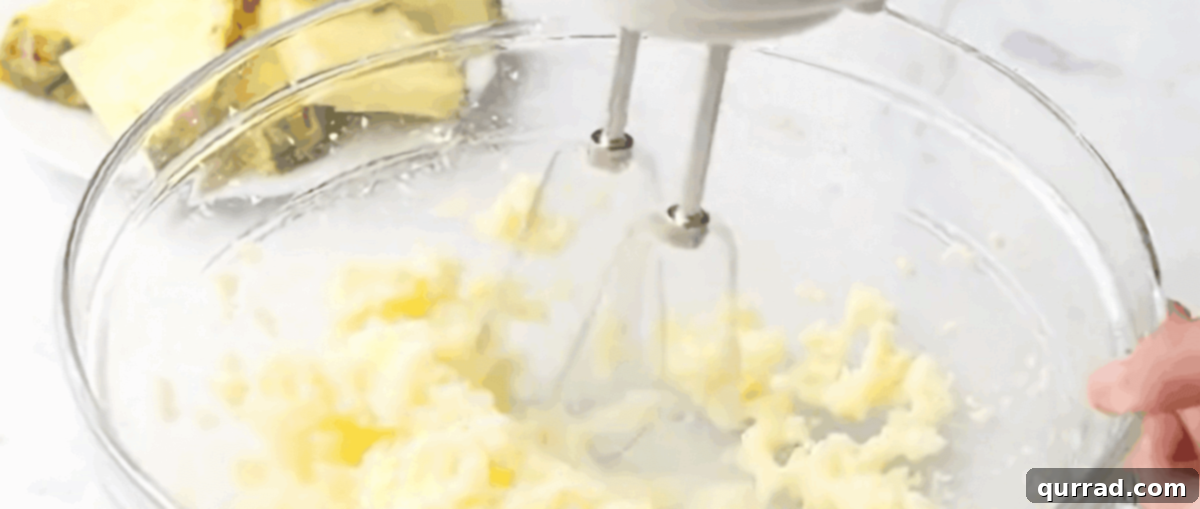
In a spacious mixing bowl, use a handheld electric mixer to cream together ½ cup of softened unsalted butter and 1 cup of granulated sugar. Beat these ingredients for several minutes until the mixture transforms into a light, airy, and fluffy consistency. This crucial step incorporates air, which contributes significantly to the bread’s tender texture. Once creamed, add 2 large eggs, followed by ½ cup of half and half, ¼ cup of pineapple juice, and 1½ tsp of vanilla extract. Mix everything until it’s just combined, taking care not to overmix. Finally, gently beat in 1¾ cups of all-purpose flour (spooned and leveled for accuracy), 1¼ tsp of baking powder, and ½ tsp of salt until a cohesive batter forms. Again, mix only until the dry ingredients disappear to prevent gluten development, which can result in a tough loaf.
Step 3: Assemble with Layers of Tropical Goodness
Now for the exciting part – assembling your loaf! Pour exactly half of your prepared batter evenly into the parchment-lined loaf pan. Gently tap the pan on your counter a few times; this helps the batter settle and spread smoothly, ensuring an even bake. Next, generously scatter half of your well-ddrained crushed pineapple over this first layer of batter. The key here is to distribute it evenly for consistent flavor. Once that’s done, repeat the process with the remaining batter and pineapple, creating a delightful two-layered effect that guarantees pineapple in every single bite!

Step 4: Bake to Golden Perfection & Cool with Patience
Carefully place your assembled loaf pan into the preheated oven. Bake for approximately 55 to 60 minutes. Baking times can vary slightly depending on your oven, so keep an eye on it. The best way to test for doneness is to insert a wooden skewer or toothpick into the center of the loaf; if it comes out clean, your bread is perfectly baked. A helpful tip: if you notice the top browning too rapidly during the last 20 minutes of baking, simply loosely tent the loaf with aluminum foil to prevent it from getting too dark while the interior finishes cooking. Once baked, let the bread cool in its pan for at least one hour. This cooling period is vital, allowing the structure to set and preventing it from falling apart when removed. After an hour, use the parchment overhang to carefully lift the loaf out and transfer it to a wire rack to cool completely. Patience is a virtue here, as a completely cool loaf ensures the glaze adheres beautifully.
Step 5: Drizzle on the Dazzling Glaze
With your beautiful pineapple bread patiently cooling, it’s time to prepare the finishing touch – the decadent glaze! In a small bowl, whisk together 1 cup of powdered sugar (also known as confectioners’ sugar), 1 tablespoon of whole milk, and 1 tablespoon of pineapple juice. Whisk until the mixture is completely smooth and lusciously thick, yet still pourable. If you prefer a thinner glaze, add a tiny splash more milk; for a thicker consistency, add a touch more powdered sugar. Once your bread is thoroughly cooled (this is critical!), generously pour the glaze over the top, letting it cascade down the sides for an elegant presentation.
Step 6: Slice, Serve, and Savor!
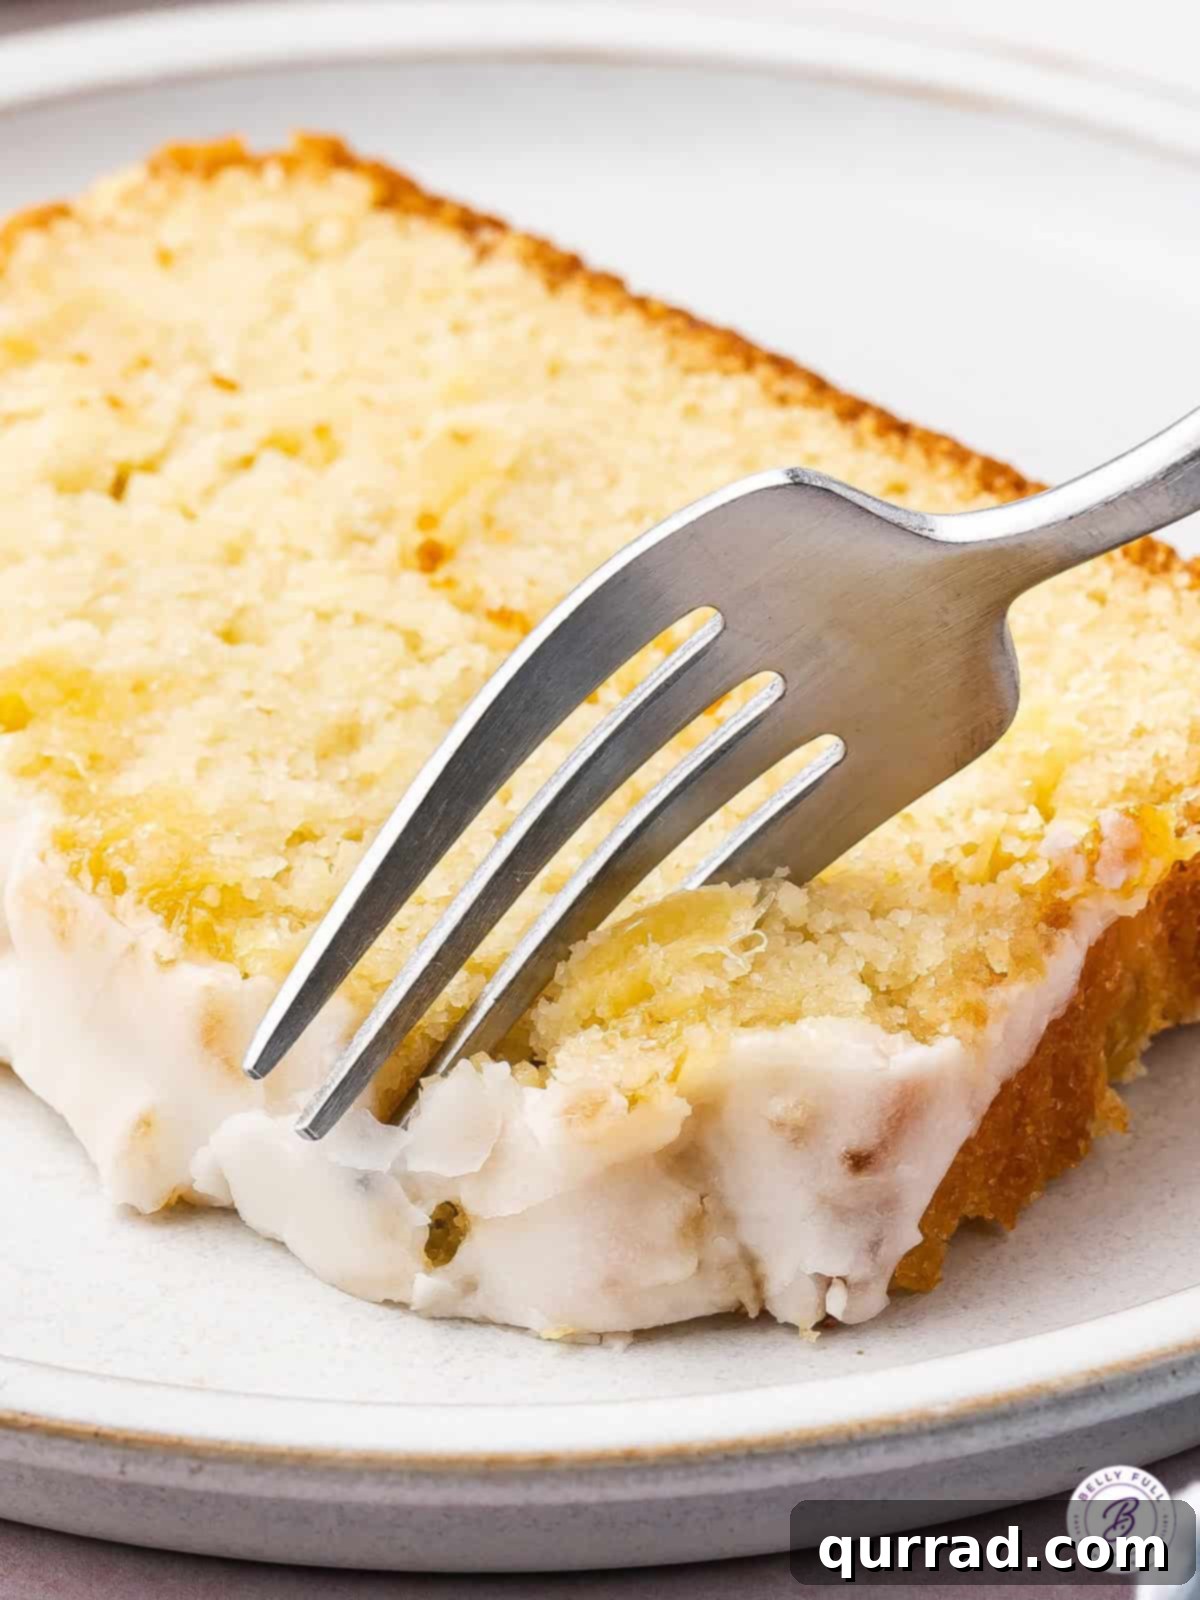
Allow the glaze a few minutes to set and firm up slightly – this enhances its delightful texture and prevents it from being too sticky. Once the glaze is perfectly set, grab a sharp, serrated knife and slice your magnificent pineapple bread into thick, inviting pieces. Arrange them on a platter and prepare for compliments! This bread is truly best enjoyed fresh, but its wonderful flavors also develop beautifully over time. Each slice promises a moist, tropical delight that’s perfect for any occasion.
Essential Tips for the Best Pineapple Bread
Achieving the perfect pineapple bread is all about a few key techniques and considerations. Here are some pro tips to ensure your loaf turns out beautifully every time:
- Don’t Overmix the Batter: Once you add the dry ingredients to the wet, mix only until the flour streaks disappear. Overmixing develops gluten, which can lead to a tough and chewy bread instead of a tender, moist one.
- Accurate Flour Measurement: Always spoon your flour into the measuring cup and then level it off with a straight edge (like the back of a knife). Scooping directly from the bag can compact the flour, resulting in too much flour and a dry, dense loaf.
- The Power of Room Temperature Ingredients: Ensuring your butter and eggs are at room temperature is crucial for emulsification. Room temperature butter creams better with sugar, incorporating more air, which creates a lighter, fluffier batter. Similarly, room temperature eggs integrate more smoothly into the mixture.
- Patience with Cooling: Resist the temptation to glaze or cut into your bread while it’s still hot. Quick breads continue to set as they cool, and cutting too early can cause them to collapse or become gummy. Cooling completely also ensures the glaze adheres properly without melting into a sticky mess.
- Adjusting Glaze Consistency: The perfect glaze should be thick enough to cling to the bread but thin enough to drizzle. If your glaze is too thick, add more milk or pineapple juice a teaspoon at a time. If it’s too thin, whisk in a tablespoon of powdered sugar until the desired consistency is reached.
How to Store Your Delicious Pineapple Bread
Proper storage is key to keeping your homemade Pineapple Bread fresh and flavorful. Whether you plan to enjoy it over a few days or save some for later, here’s how to store it effectively:
- Room Temperature Storage: For immediate enjoyment, store leftover pineapple bread at room temperature for up to 2 days. To maintain its delightful moisture and prevent it from drying out, wrap the entire loaf or individual slices tightly in aluminum foil, or place them in an airtight container. This method works best for glazed bread, as refrigeration can sometimes make the glaze tacky.
- Refrigeration for Extended Freshness: If you want to extend the shelf life of your pineapple bread beyond a couple of days, wrapping it securely in foil and storing it in the fridge will keep it fresh for up to a week. The cooler temperature helps to inhibit mold growth and preserve its quality.
- Freezing for Long-Term Enjoyment: This bread freezes beautifully, making it an excellent option for meal prepping or saving for unexpected guests. For optimal results, we highly recommend freezing the loaf *before* applying the glaze. The glaze can become watery or separate upon thawing. Wrap individual slices or the entire cooled loaf tightly in plastic wrap, then add another layer of aluminum foil for extra protection against freezer burn. This double-wrapped method will keep your pineapple bread fresh in the freezer for up to 3 months.
- Thawing Instructions: When you’re ready to enjoy your frozen pineapple bread, simply transfer it from the freezer to your kitchen counter and allow it to thaw at room temperature for several hours. If desired, you can then prepare a fresh batch of glaze to drizzle over the thawed loaf for that perfect finish.
What to Serve With Pineapple Bread
The versatility of pineapple bread makes it a wonderful addition to various meals and occasions. While it’s delightful on its own, pairing it with other dishes can elevate the dining experience. Here are some fantastic serving suggestions:
- For a Weekend Brunch Extravaganza: Pineapple bread is the perfect centerpiece for a leisurely weekend brunch. Imagine serving warm slices alongside a hearty hash brown egg casserole, the savory notes beautifully complementing the bread’s sweetness. Add some crispy, easy air fryer bacon for a balanced plate. And, of course, no elegant brunch is truly complete without a refreshing and bubbly strawberry mimosa to toast to a wonderful meal.
- Afternoon Tea Delight: Cut into delicate slices, this pineapple bread makes a charming addition to an afternoon tea spread. Serve it with simple clotted cream or a dollop of whipped cream and a side of fresh berries for a truly indulgent treat.
- A Sweet Breakfast Treat: Enjoy a slice with your morning coffee or tea. It’s a satisfying and flavorful way to start your day, offering a quick burst of tropical energy.
- Simple Dessert: While perfect for breakfast, this bread is also a fantastic light dessert. Serve it slightly warm with a scoop of vanilla bean ice cream or a drizzle of caramel sauce for an elevated experience.
- A Taste of the Tropics: Enhance the tropical theme by serving it alongside fresh fruit salad featuring mango, kiwi, and passion fruit.
Frequently Asked Questions (FAQ)
Here are some common questions about making and enjoying pineapple bread:
Q: Can I use fresh pineapple instead of crushed canned pineapple?
A: While fresh pineapple offers incredible flavor, it has a higher water content than canned crushed pineapple. If using fresh, ensure it’s very finely diced and well-drained. You might also want to lightly press out excess moisture. Canned crushed pineapple is generally recommended for its consistency and convenience in this recipe.
Q: What if my bread is too dense?
A: A common reason for dense quick bread is overmixing the batter. Once you add the dry ingredients, mix only until they are just incorporated. Overmixing develops gluten, which leads to a tough and dense texture. Also, ensure your leavening agents (baking powder) are fresh and active.
Q: Can I make this pineapple bread gluten-free?
A: You can often substitute all-purpose flour with a 1:1 gluten-free baking flour blend (ensure it contains xanthan gum) for quick bread recipes. Results may vary slightly in texture, but it’s generally a good starting point for adaptation.
Q: How can I tell if the pineapple bread is fully baked?
A: The most reliable method is to insert a wooden skewer or toothpick into the very center of the loaf. If it comes out clean with no wet batter attached, the bread is done. If it comes out with wet crumbs, bake for a few more minutes and test again.
Q: Can I add nuts to this recipe?
A: Absolutely! Toasted pecans or walnuts would be a fantastic addition, adding a delightful crunch and nutty flavor that complements the pineapple beautifully. Fold in about ½ cup of chopped nuts with the crushed pineapple.
More Irresistible Pineapple Recipes To Try
If you’ve fallen in love with the tropical charm of this Pineapple Bread, you’re in for a treat! Pineapple is an incredibly versatile ingredient that shines in both sweet and savory dishes. Explore these other fantastic pineapple-infused recipes from our collection:
- Pineapple Rum Sauce: A decadent, boozy sauce perfect for drizzling over desserts or savory dishes.
- Crockpot Pineapple Bananas Foster: A slow-cooked tropical dessert that’s incredibly easy and comforting.
- Pineapple Pretzel Fluff: A unique and delightful dessert salad with a sweet and salty crunch.
- 3 Ingredient Pineapple Cake: The ultimate easy dessert for when you need something quick and delicious.
There’s nothing quite like the bright, tangy sweetness of pineapple to bring a touch of sunshine to your kitchen. This Easy Pineapple Bread recipe is more than just a quick loaf; it’s a moist, flavorful, and incredibly versatile bake that promises to become a cherished favorite. Whether enjoyed for a special brunch, a comforting breakfast, or a simple dessert, its tropical charm and irresistible icing will have everyone asking for more. Don’t hesitate to whisk up a batch today and let the delicious aroma fill your home!