
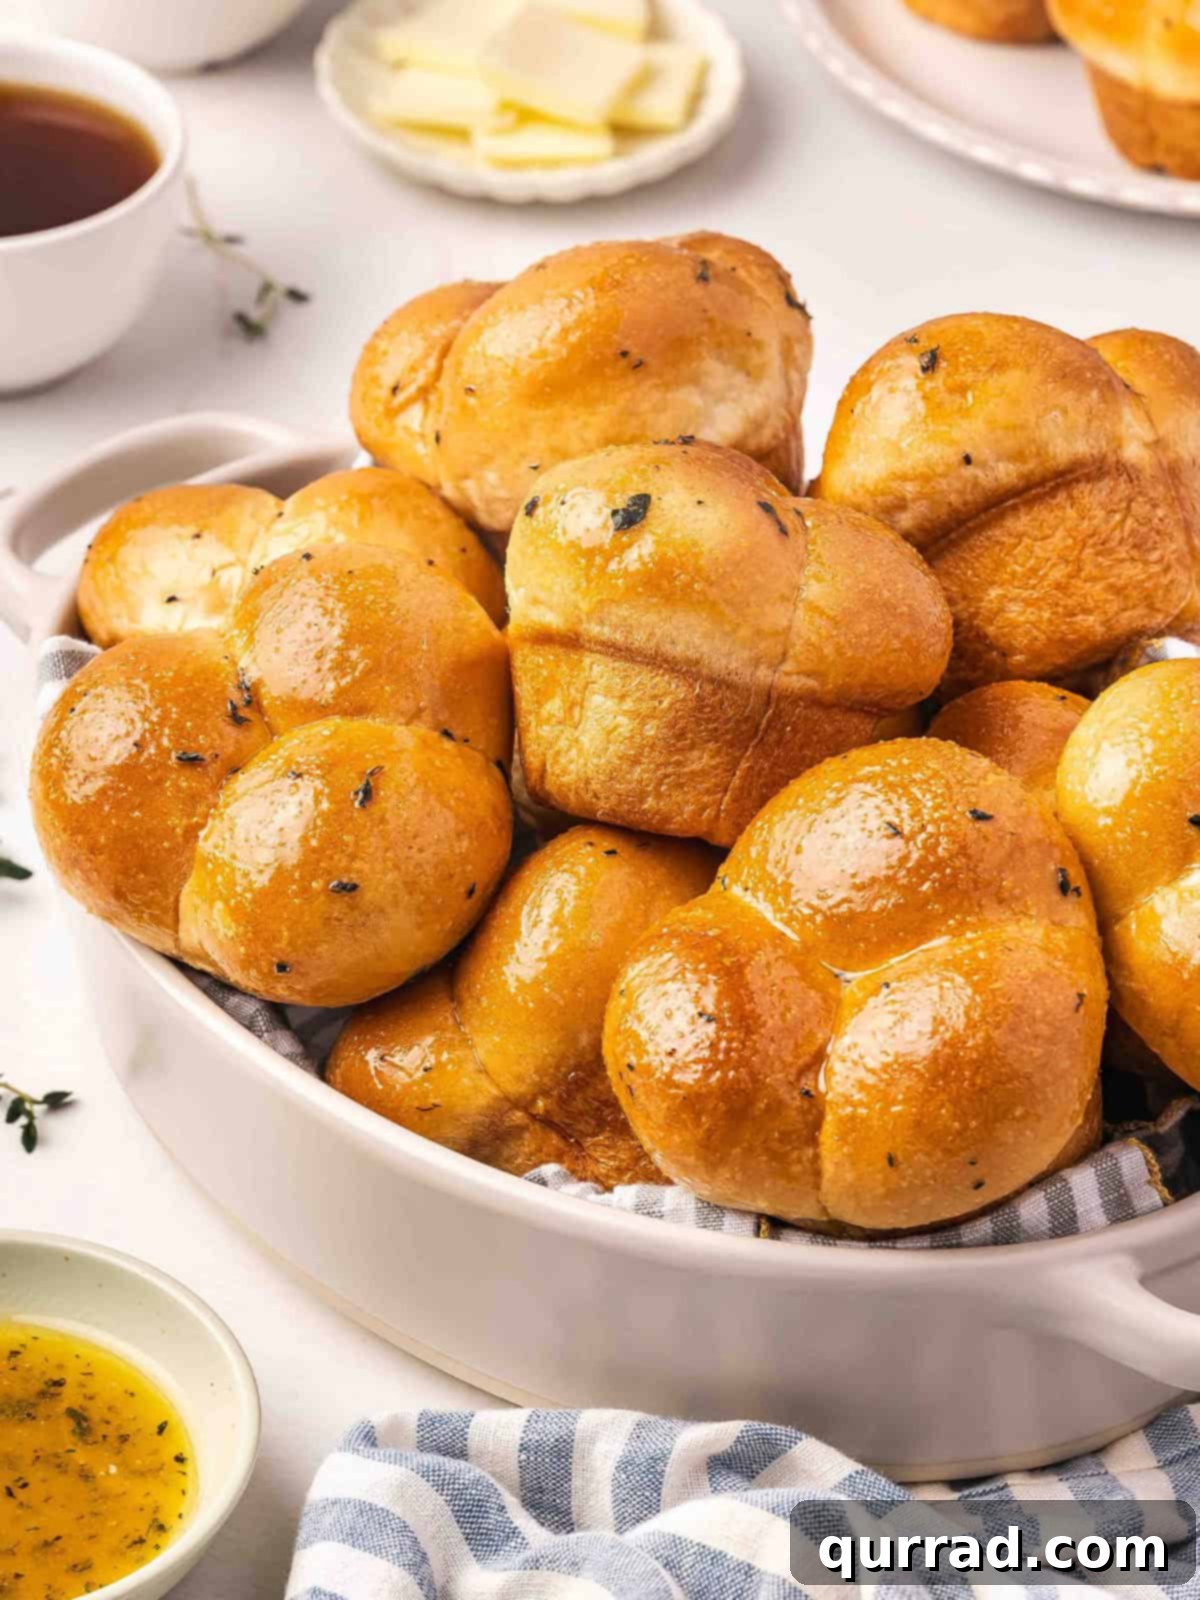
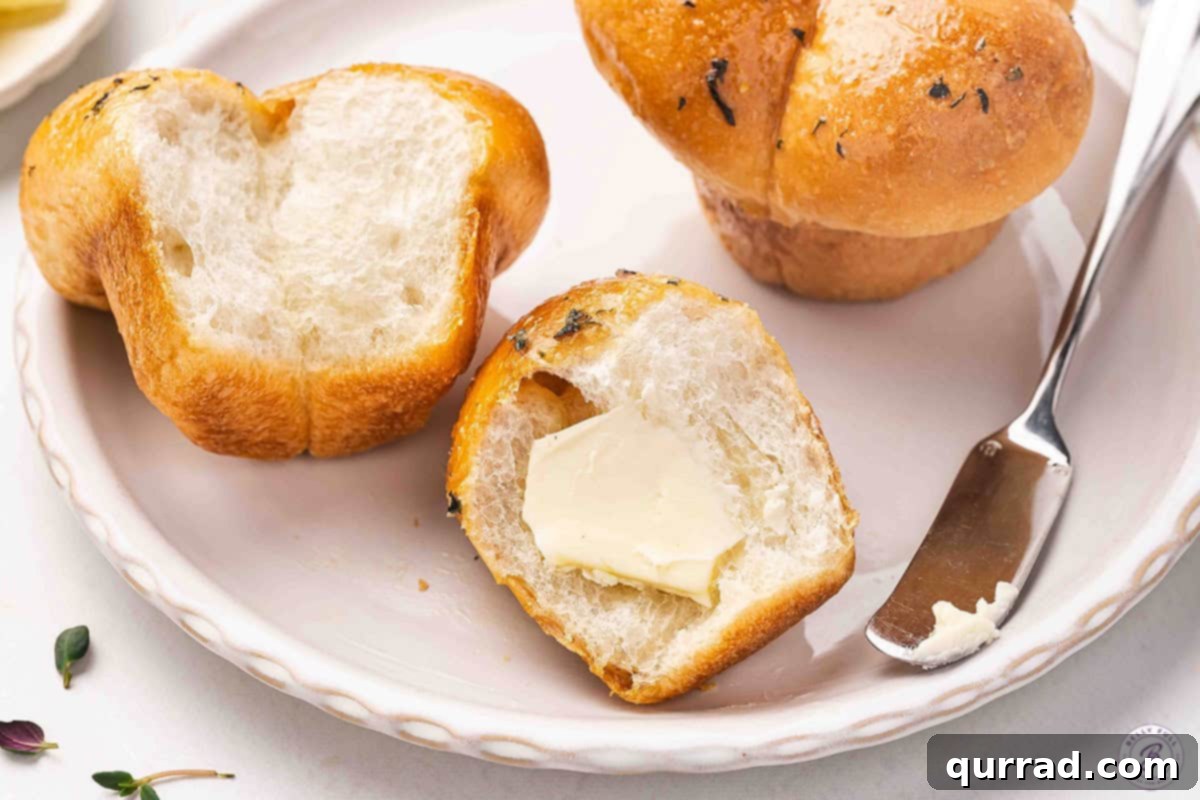
Craving warm, fluffy dinner rolls that taste like they took hours to make, but only require a fraction of the effort? Look no further! These Easy Shortcut Cloverleaf Rolls are an absolute game-changer, delivering soft, buttery perfection that will have everyone reaching for seconds before the main course even hits the table. What makes them truly special is the ingenious shortcut: we start with readily available frozen Rhodes dough balls, transforming them into irresistibly tender, pull-apart rolls that genuinely taste homemade. Perfect for weeknight meals, holiday gatherings, or even a fun St. Patrick’s Day treat thanks to their charming clover shape, these rolls are destined to become a staple in your kitchen. Get ready to impress with minimal fuss and maximum flavor!
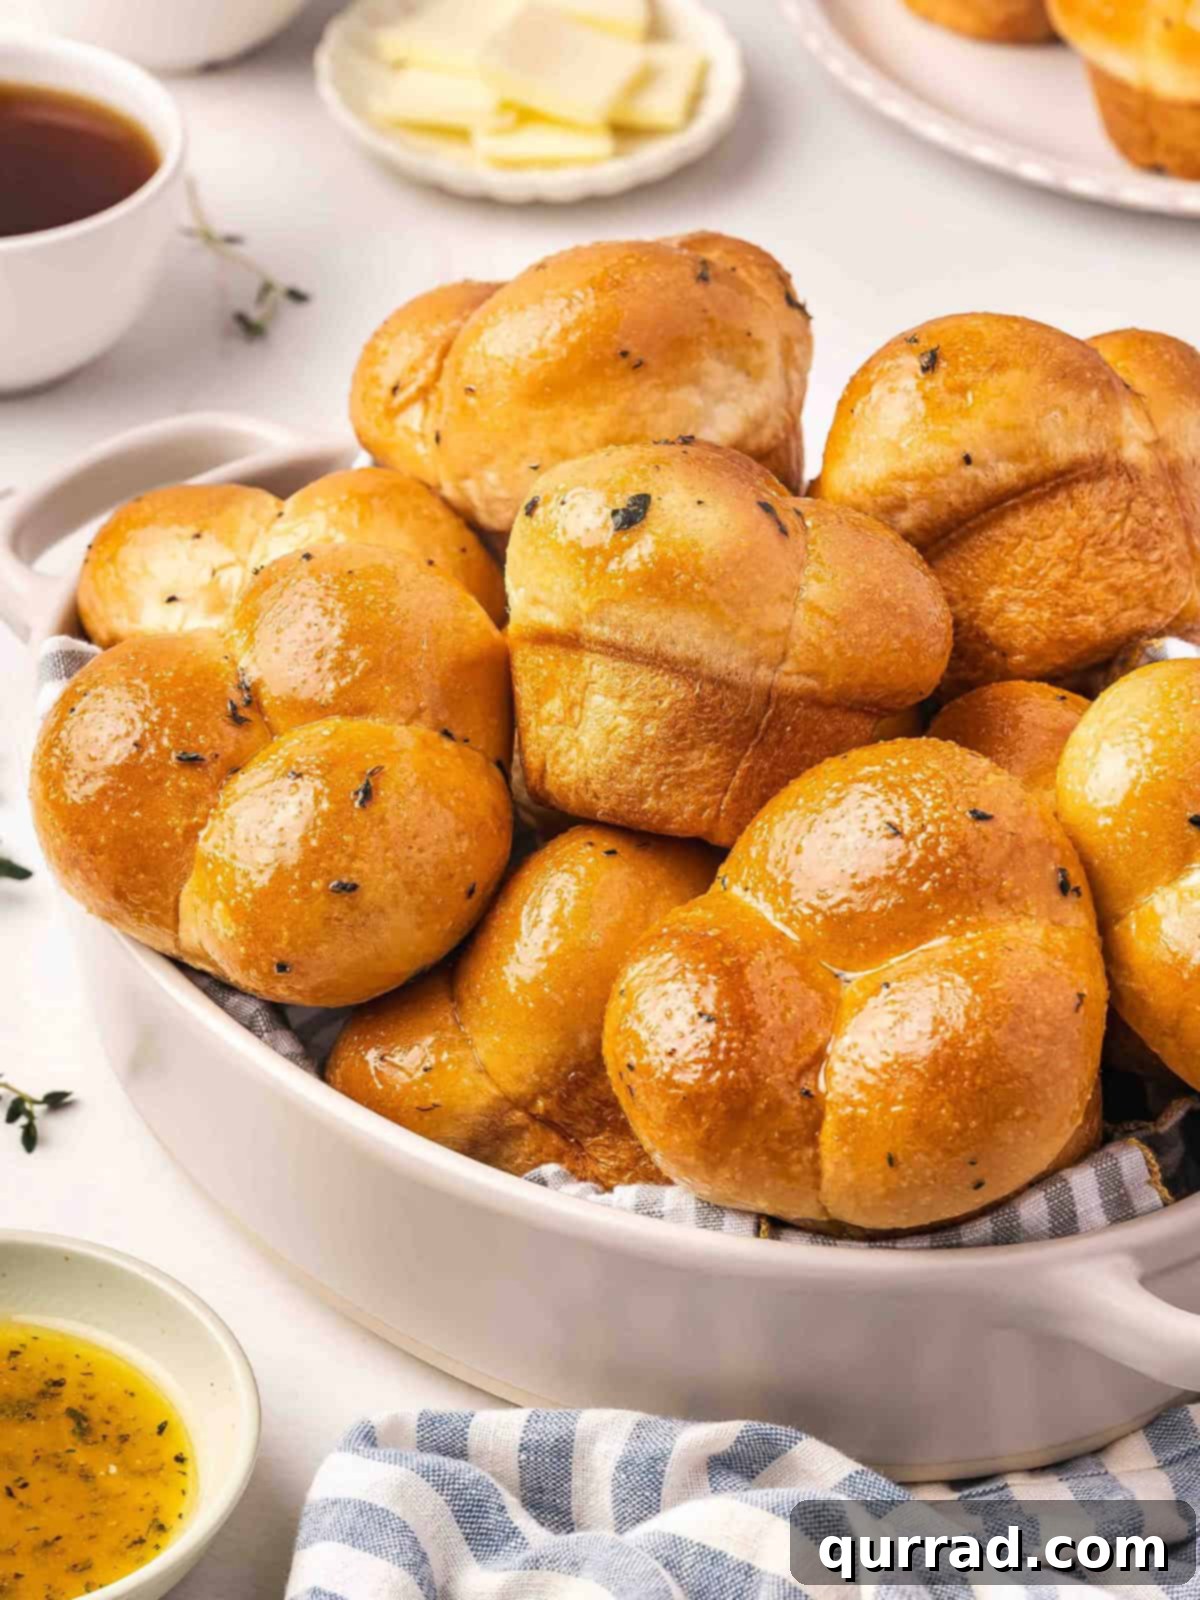
There’s something uniquely comforting and deeply satisfying about a warm, soft dinner roll. While I adore the process of making dinner rolls from scratch when I have ample time, I’m also a huge proponent of smart shortcuts that bring that delightful homemade warmth and flavor to the table without all the heavy lifting. This particular cloverleaf roll recipe, featuring convenient frozen Rhodes Dinner Rolls, is my ultimate secret weapon for achieving that balance. Each roll is a masterpiece of buttery, pull-apart goodness, lovingly brushed with a simple yet exquisite butter-honey glaze infused with fragrant fresh thyme and a whisper of savory garlic. The actual hands-on preparation time is incredibly minimal, yet the inviting aroma that fills your kitchen as they bake is absolutely divine and promises pure comfort. You’ll find yourself making batch after batch of these glorious golden treasures, as the ease and deliciousness are simply unparalleled.
Why You’ll Love These Easy Cloverleaf Rolls
- Effortless Elegance: Achieve a sophisticated, beautifully “homemade” look with significantly less effort, all thanks to the clever use of frozen dough as a shortcut. These rolls truly punch above their weight in presentation.
- Incredibly Soft & Buttery: Each delicate bite of these cloverleaf rolls melts in your mouth, offering a luxurious tenderness that is further enhanced by the rich, glistening butter-honey glaze. They are the epitome of comfort food.
- Perfect Pull-Apart Texture: The unique cloverleaf design isn’t just charming; it’s functional! It ensures that every segment of the roll is a delightful, individual serving, making them easy to share and enjoy without needing a knife.
- Versatile for Any Occasion: From casual weeknight dinners with a hearty stew to elegant holiday feasts like Thanksgiving or Christmas, these rolls seamlessly fit into any menu. Their classic appeal is universally loved.
- Customizable Flavor Profile: While the honey, thyme, and garlic glaze is a winning combination, feel free to adjust the herb and garlic notes to suit your personal preference. A touch of rosemary or a sprinkle of poppy seeds can also be delightful.
- Kid-Friendly Fun: The distinctive clover shape makes these rolls a particular hit with children, adding a playful and festive touch to any meal, especially around holidays like St. Patrick’s Day.
Helpful Tips & Variations for Perfect Cloverleaf Rolls
- Adjusting the Recipe Yield: The instructions are designed to yield 12 perfectly formed cloverleaf rolls, utilizing 18 frozen Rhodes dough balls. Each original frozen roll is strategically cut in half, resulting in 36 smaller dough portions, with three of these smaller pieces nested into each muffin cup. Should your gathering require a different quantity, whether more or fewer than 12 rolls, simply adjust the initial amount of frozen dough accordingly. A useful ratio to remember is that each finished cloverleaf roll artistically comes from 1½ original frozen Rhodes rolls.
- Experiment with Fresh Herbs: While fresh thyme bestows a wonderfully aromatic and slightly peppery touch to the glaze, don’t hesitate to explore other fresh herbs to personalize your rolls. Fresh rosemary, with its earthy and piney notes, offers a fantastic alternative or can be combined with thyme for a more complex flavor. For the most vibrant and fragrant outcome, fresh herbs are always highly recommended. However, if dried herbs are your only option, remember their potency: use approximately ⅓ teaspoon of dried herbs for every 1 teaspoon of fresh specified in the recipe.
- Don’t Skimp on Cooking Spray: This step is paramount for a fuss-free baking experience. Ensure you generously coat not only the entire 12-slot muffin pan, paying close attention to the bottom and all sides of each individual cup, but also the plastic wrap that will cover the rolls during their rise. If the plastic wrap isn’t sufficiently greased, it has a tendency to stick firmly to the beautifully risen dough when you attempt to remove it. This can lead to the dough deflating, resulting in flat, less airy rolls after baking.
- Achieving Optimal Dough Rise: The secret to light, fluffy, and airy rolls lies in allowing the dough to rise to its optimal point. You want the dough to visibly double in size and gently puff up just above the brim of your muffin slots, but avoid over-rising, which can sometimes lead to a coarser texture. Dough tends to rise much more rapidly in a warmer environment, so the total rise time can fluctuate significantly—anywhere from a quick 30 minutes to a more extended 90 minutes. It’s best to observe the dough’s volume rather than strictly adhering to a timer.
- Strategic Baking Position: For consistently even cooking and that coveted golden-brown crust, always position your muffin pan on the middle rack of your oven. Baking the rolls too high can cause their tops to brown excessively or even burn before the centers are thoroughly cooked. Conversely, placing them too low might result in less browning on the top surfaces, leading to a paler appearance.
- Prevent Overbrowning with Foil: If, towards the latter part of the baking cycle (typically the last 5-10 minutes), you notice the tops of your cloverleaf rolls beginning to brown too rapidly, you can easily remedy this. Simply and loosely tent the muffin pan with a piece of aluminum foil. This clever trick creates a shield, protecting the tops from direct heat while allowing the rolls to continue baking through to perfection without becoming overly dark or crispy.
★
★
★
★
Easy Shortcut Cloverleaf Rolls Recipe
20 mins
15 mins
3 hrs
3 hrs 35 mins
12 rolls

Pin Recipe
Print Recipe
These Easy Shortcut Cloverleaf Rolls are the perfect solution for achieving a homemade taste with minimal effort, by expertly utilizing frozen Rhodes dinner rolls. The result is a batch of delightfully buttery, tender, and irresistibly pull-apart rolls, beautifully enhanced by a savory-sweet glaze of honey, fresh thyme, and aromatic garlic.
For visual learners, detailed step-by-step photos and additional helpful tips can be found directly below this recipe card.
Equipment
- Large Casserole Dish or Baking Sheet
- Plastic Wrap
- Standard 12-slot Muffin Pan
Ingredients
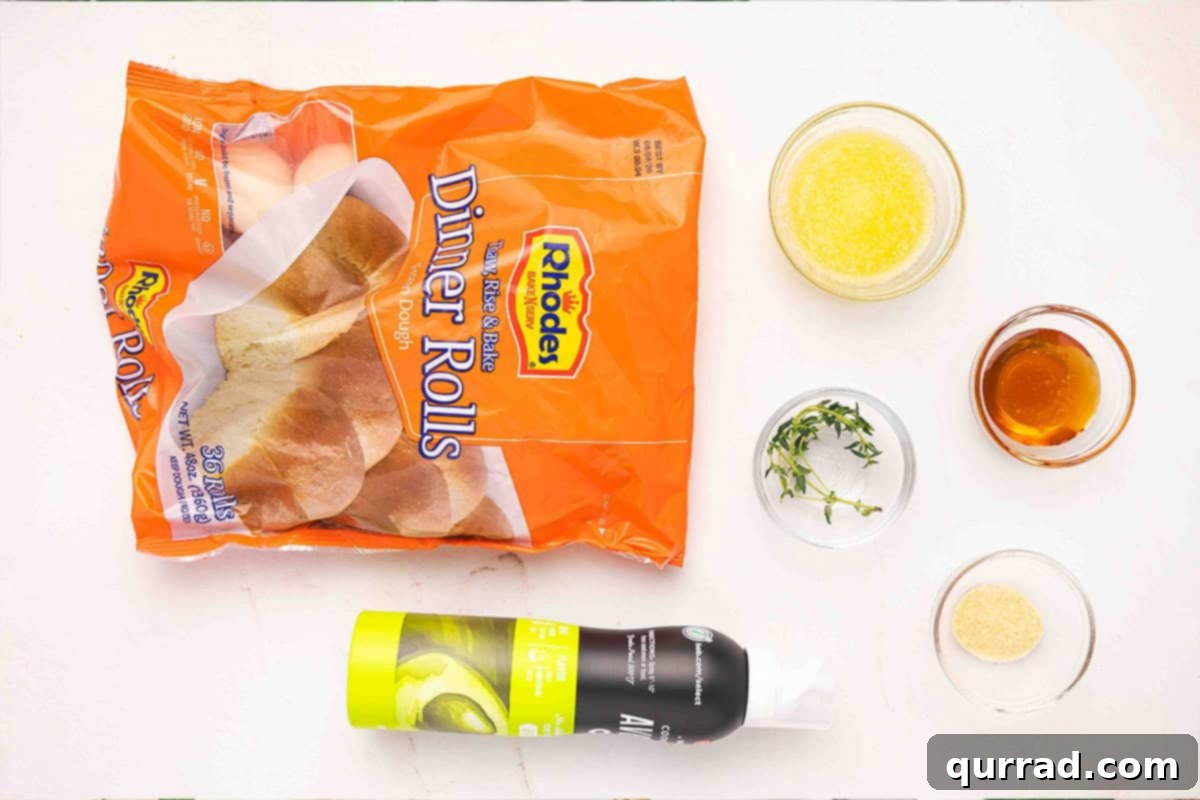
- 18 frozen unbaked Rhodes dinner rolls
- Nonstick cooking spray
- 3 tbsp regular salted butter, melted
- 1½ tbsp honey
- 1 tsp very finely chopped fresh thyme
- ½ tsp garlic powder
Instructions
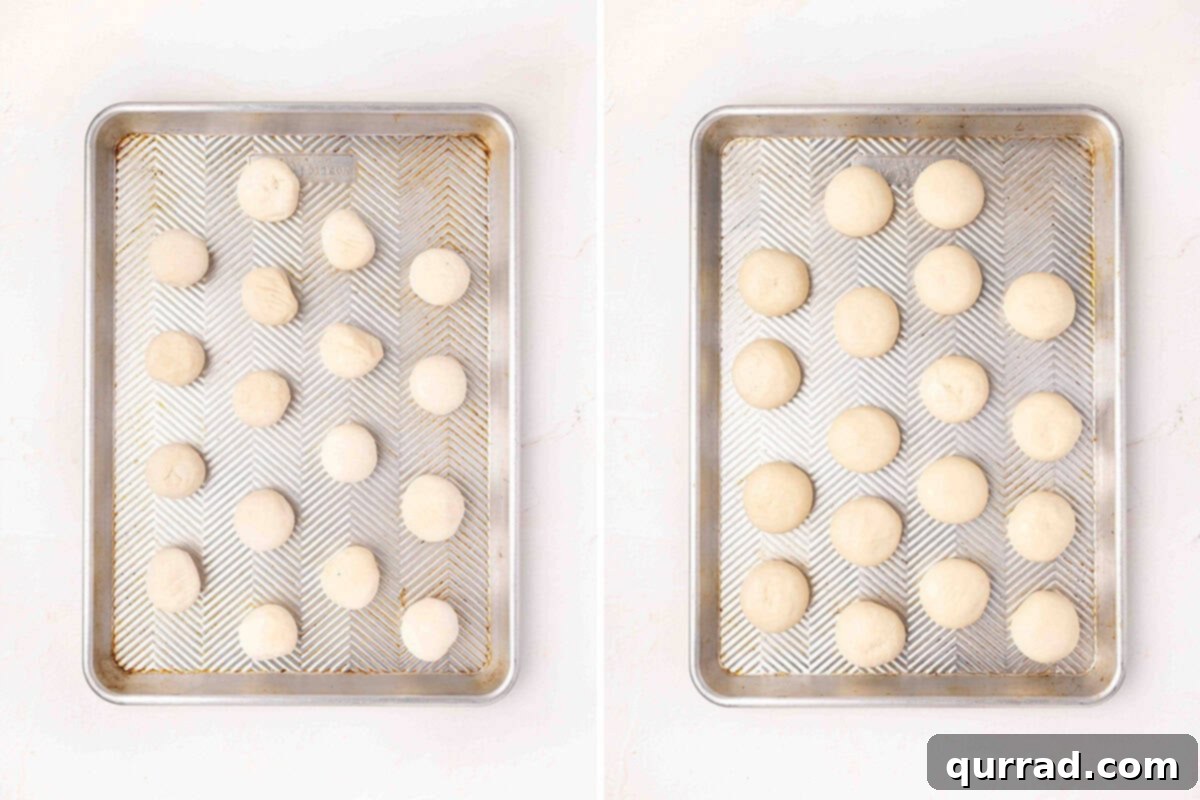
- Thaw the Dough: Arrange the 18 frozen unbaked Rhodes dinner rolls in a single layer within a large casserole dish or on a spacious baking sheet, ensuring there’s ample space between each roll for expansion. Loosely cover the dish with plastic wrap. Allow the rolls to thaw at room temperature until they become soft and pliable enough to cut through easily, yet still maintain a cool temperature. This thawing process typically takes approximately 2 hours, though the exact time can vary depending on the ambient temperature of your kitchen.
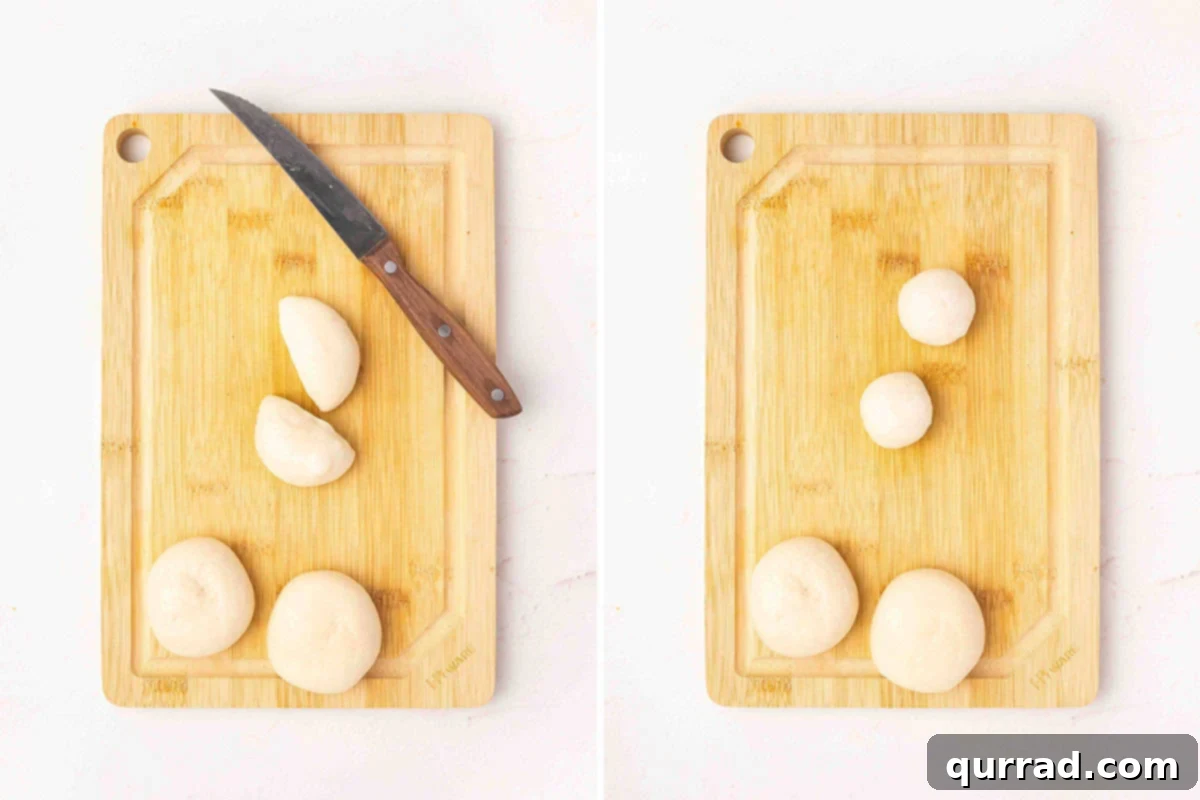
- Prepare the Dough Balls: Once the rolls are perfectly thawed, take each individual dough ball and carefully cut it in half using a sharp knife or a clean bench scraper. After cutting, gently re-roll each half into a smooth, small ball. As you shape them, subtly tuck or pinch any excess dough towards the bottom of the ball to create a neat, even finish. From your initial 18 frozen rolls, you should now have a total of 36 perfectly formed small dough balls.
- Prepare Muffin Pan: Generously spray a standard 12-slot muffin pan with nonstick cooking spray. Be thorough, ensuring that the bottom and all sides of each individual muffin slot are well coated to prevent any sticking during baking. This critical step ensures easy removal of your finished rolls.
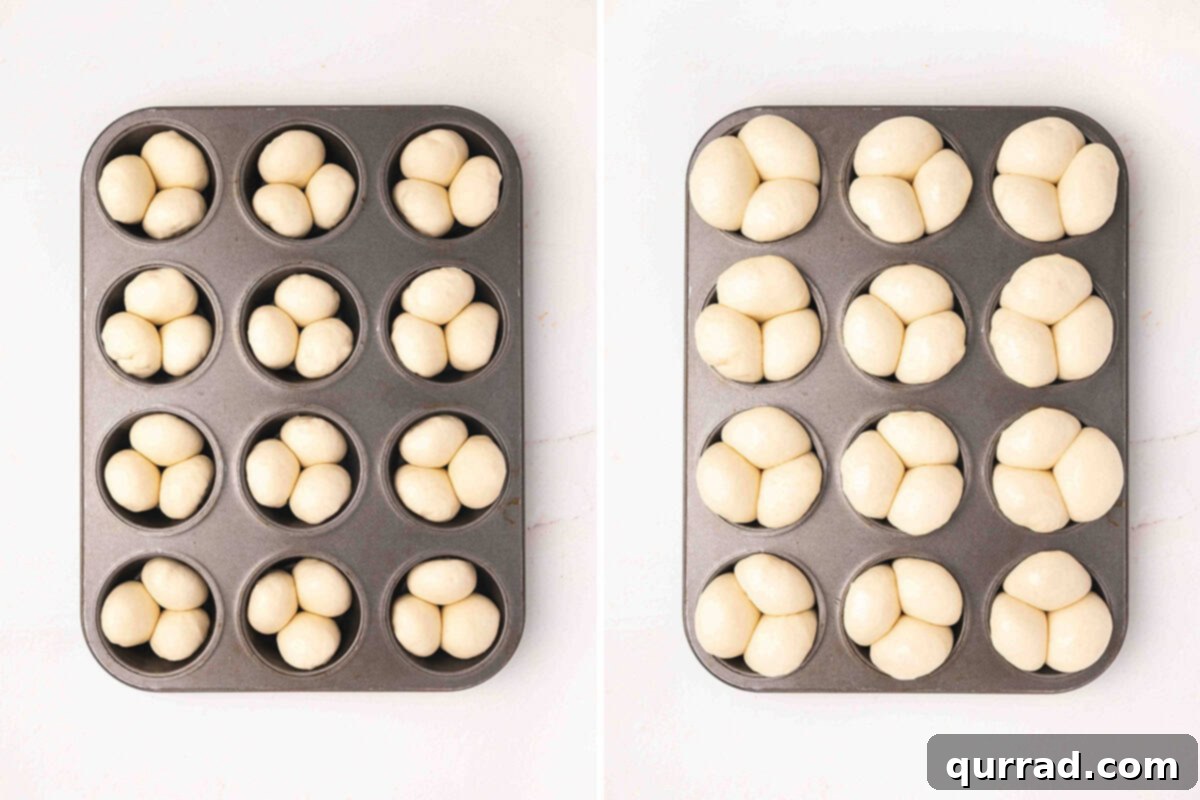
- Arrange Dough in Pan: Place three of the small, newly formed dough balls into each of the generously greased muffin slots. Arrange them closely together within each cup; as they rise and bake, they will expand and beautifully merge to form the characteristic cloverleaf pattern.
- Cover and Rise (First Phase): Take a large piece of plastic wrap and generously coat one side with nonstick cooking spray. Carefully place this sprayed plastic wrap over the filled muffin pan, with the greased side facing down so it directly touches the dough balls. This creates a humid environment conducive to rising and, importantly, prevents the dough from adhering to the wrap as it expands.
- Let Dough Rise (Second Phase): Allow the dough to rise in a warm, draft-free spot until it has visibly doubled in size and expanded just over the top edge of the muffin slots. The duration of this rise is highly dependent on your kitchen’s ambient temperature and can range from a quick 30 minutes to a more extended 90 minutes. Monitor the dough’s volume closely rather than relying solely on a timer.
- Preheat Oven: Towards the final stage of the dough’s rising time, preheat your oven to 350°F (175°C). Ensuring the oven is at the correct temperature before the rolls go in is crucial for even baking and a beautiful crust.
- Remove Plastic Wrap: Once the rolls have fully risen and are beautifully puffed, very carefully and gently remove the plastic wrap from the muffin pan. Perform this step slowly to avoid inadvertently deflating the delicate risen dough.
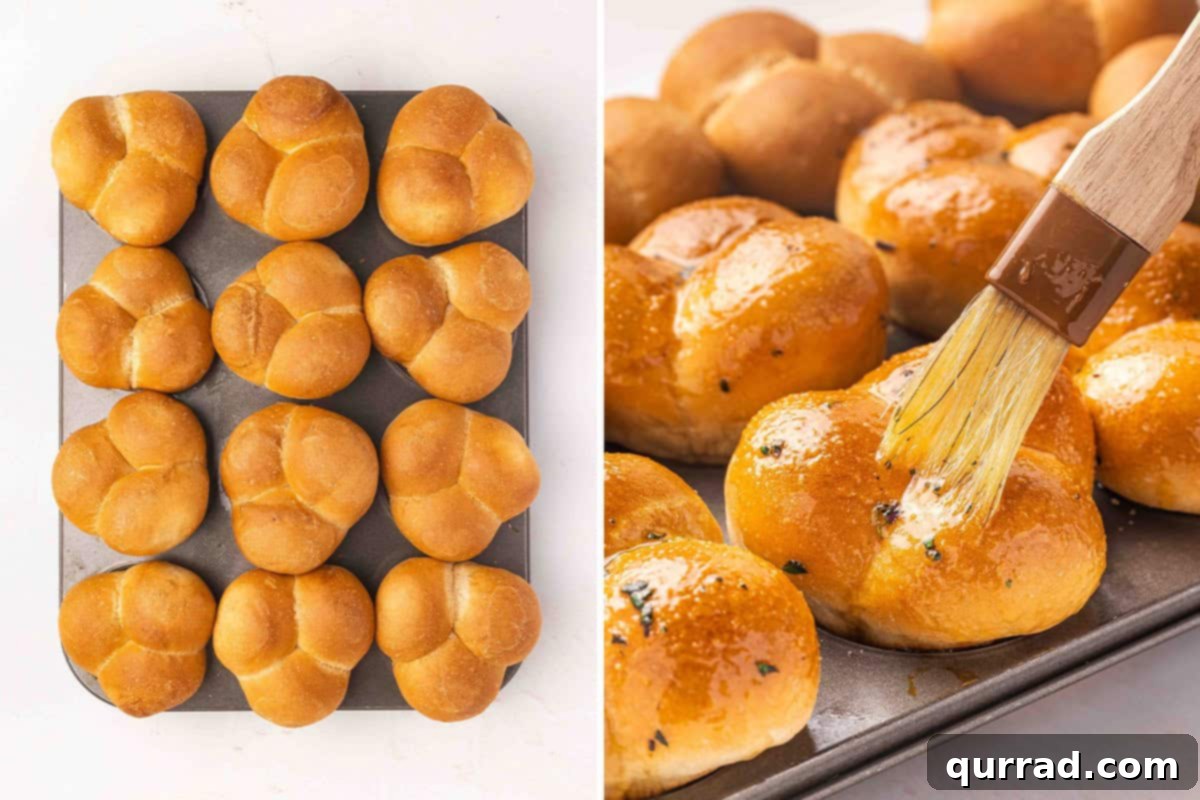
- Bake Rolls: Place the muffin pan onto the middle or center rack of your preheated oven. Bake the cloverleaf rolls for approximately 15 to 18 minutes, or until they are beautifully puffed up, achieve a consistent golden-brown hue on top, and are thoroughly cooked through.
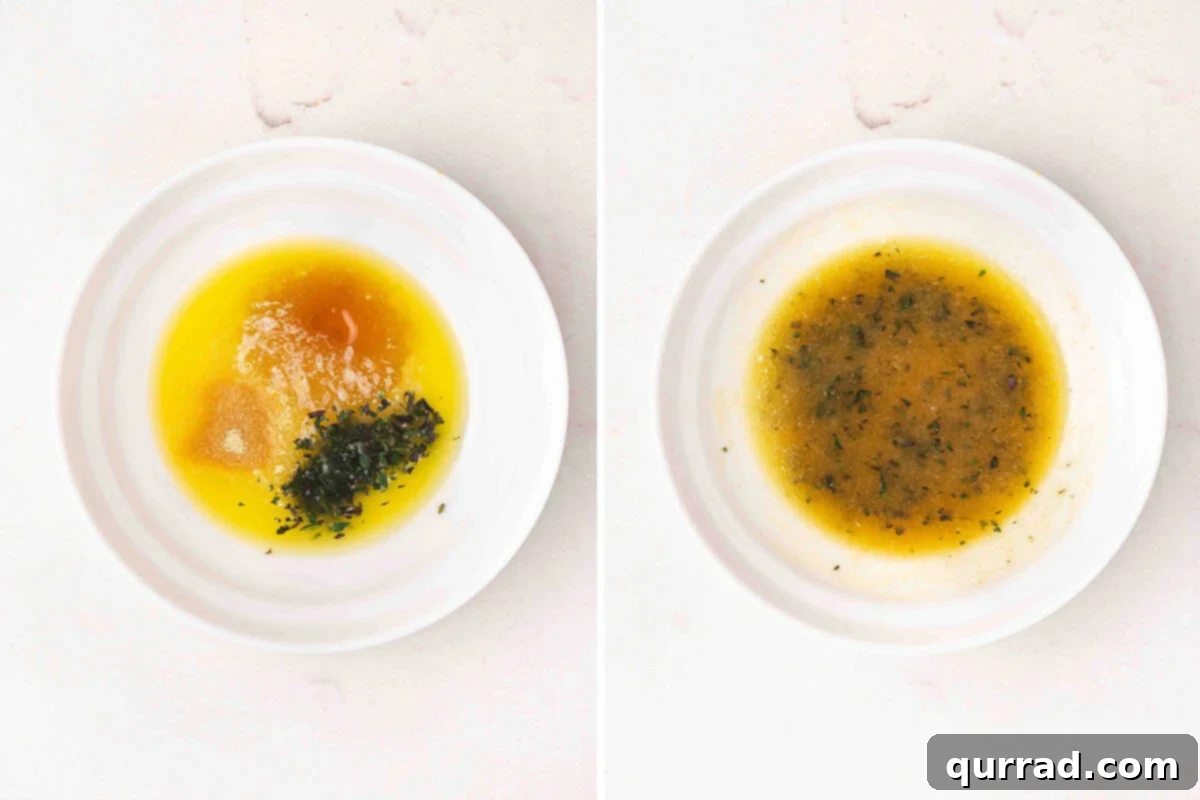
- Prepare Glaze: While the rolls are baking, combine the 3 tablespoons of rich, melted salted butter, 1½ tablespoons of golden honey, 1 teaspoon of very finely chopped fresh thyme, and ½ teaspoon of aromatic garlic powder in a small bowl. Whisk all these ingredients together vigorously until they are well combined and form a smooth, fragrant glaze.
- Glaze and Serve: As soon as you remove the hot, baked cloverleaf rolls from the oven, immediately and gently brush the prepared butter-honey-thyme-garlic glaze generously over their warm, golden tops. Allow the rolls to cool slightly in the muffin pan for just a few minutes before carefully transferring them to a wire rack. Serve warm and savor every soft, fragrant, and utterly delightful bite!
Recipe Video
A video tutorial for making these delicious Cloverleaf Rolls will be embedded here soon!
Notes
- Rhodes Rolls Recommendation: For optimal results and to achieve the intended fluffy, soft texture and authentic flavor, it is highly recommended to specifically use RHODES brand dinner rolls for this recipe. Through extensive testing, it has been observed that other frozen dough brands, such as Texas Roadhouse rolls, do not consistently yield the same delightful outcome. Rhodes frozen rolls are widely accessible and can typically be found in the freezer aisle of most major grocery stores, including popular chains like Walmart, Albertsons, Safeway, Food4Less, and occasionally even Target, making them a convenient and reliable choice for this shortcut recipe.
Nutrition Facts
Per 1 roll serving (approximate):
- Calories: 210kcal
- Carbohydrates: 32g
- Protein: 6g
- Fat: 7g
- Saturated Fat: 3g
- Polyunsaturated Fat: 1g
- Monounsaturated Fat: 3g
- Trans Fat: 0.1g
- Cholesterol: 8mg
- Sodium: 361mg
- Potassium: 79mg
- Fiber: 2g
- Sugar: 3g
- Vitamin A: 95IU
- Vitamin C: 0.3mg
- Calcium: 115mg
- Iron: 2mg
Nutritional information provided is an automatic calculation based on standard ingredient data and should be considered an estimate. Actual values can vary significantly depending on the exact brands and products used in your preparation, as well as any modifications made to the recipe. If precise nutritional data is critical for your dietary needs, we strongly recommend calculating it independently using the specific ingredients you intend to use.
Did you try this recipe? We’d love to hear your thoughts and see your creations! Leave a rating and comment below to share your experience with these delightful Cloverleaf Rolls.
How to Make Cloverleaf Rolls: A Step-by-Step Visual Guide
For those who benefit most from a visual walkthrough, here’s a detailed breakdown of each essential step in making these fantastic Cloverleaf Rolls, thoughtfully accompanied by helpful images to ensure your baking process is smooth and your rolls turn out perfectly golden and tender every single time.

Serving Suggestions for Cloverleaf Rolls
These versatile cloverleaf rolls are much more than just a simple side dish; they are a delightful and enhancing accompaniment that elevates almost any meal to a new level of comfort and flavor. I firmly believe that soup somehow tastes infinitely better, richer, and more satisfying when paired with a warm, comforting piece of freshly baked bread. These particular rolls are absolutely phenomenal alongside a creamy bowl of easy tomato soup, offering the perfect spongy texture for dunking and soaking up every last drop of that savory goodness. They also shine brightly with heartier, more substantial options like cabbage roll soup, where their individual pull-apart “petals” are ideally shaped for scooping up all the rich ingredients at the bottom of your bowl. For a truly special and robust dinner, serving them with a hearty Irish beef stew is a culinary no-brainer – because absolutely none of that rich, flavorful gravy should ever go to waste! And when indulging in saucy main courses such as eggplant parmesan, lasagna, or any classic pasta dish, these buttery rolls become practically indispensable. They are perfectly designed for swiping up every delicious morsel of marinara and gooey, melted cheese, ensuring you enjoy every last bit. Don’t limit them strictly to dinner, either; they make a fantastic addition to a sophisticated brunch spread or even as a warm, welcoming appetizer.
How to Store Cloverleaf Rolls
- Countertop Storage: To ensure your baked Rhodes cloverleaf rolls retain their optimal freshness and delightful softness, allow them to cool completely on a wire cooling rack after baking. Once they have reached room temperature, transfer them to an airtight container or a reliable zip-top bag. Stored this way on your kitchen countertop, they will remain wonderfully delicious and tender for approximately 2 to 3 days. For the best quality, always ensure the container or bag is truly airtight to prevent them from drying out and losing their appealing texture.
- Freezer Storage: These versatile rolls freeze exceptionally well, making them an excellent candidate for meal prepping or for having a convenient, warm bread option on standby whenever a craving strikes. After the rolls have cooled entirely to room temperature, arrange them in a single layer in a freezer-safe bag or an airtight container, taking care not to squish or compress them. They can be safely frozen for up to 30 days without any noticeable compromise to their quality, flavor, or texture. This method is particularly ideal for grabbing just a few rolls at a time as needed.
- Rewarming Instructions:
- From Countertop (Leftovers): To rewarm any leftover rolls that have been stored at room temperature, simply wrap them loosely in aluminum foil. Place the foil-wrapped rolls in a preheated oven at 350°F (175°C) for approximately 5 to 7 minutes, or until they are thoroughly heated through and have regained their soft, inviting texture.
- From Frozen: If you are reheating rolls that were previously baked and then frozen, the process is similar but requires a slightly longer heating time. Keep them wrapped in aluminum foil to prevent drying out. Reheat them in a 350°F (175°C) oven for a duration of typically 13 to 15 minutes, or until they are completely warmed through to the center. The foil helps to steam them slightly, ensuring they come out moist and tender.
More Easy Rolls and Biscuit Recipes to Try
If you’ve fallen in love with the simplicity and undeniable deliciousness of these shortcut cloverleaf rolls, you’re in for a treat! We encourage you to explore some of our other fantastic and equally easy-to-make bread recipes that are sure to become new favorites in your culinary repertoire:
- Classic Popovers – These light, airy, and dramatically puffed pastries are utterly delightful and surprisingly simple to make, perfect for a fancy brunch or a comforting side.
- Cheddar Bay Biscuits – Indulge in these savory, cheesy, and incredibly addictive biscuits, reminiscent of your favorite restaurant version, and perfect with seafood or chili.
- Parker House Rolls – Discover the timeless appeal of these exceptionally soft, tender, and subtly sweet rolls, a classic choice that’s perfect for any special occasion or holiday gathering.
- Garlic Knots – Infuse your meal with flavor with these wonderfully garlicky and chewy knots, an absolutely fantastic accompaniment to any Italian dish or pasta night.
- Cheese Zombies – A fun, gooey, and irresistible cheesy bread treat that is perfect for kids and adults alike, ideal for a quick snack or a casual meal.
I genuinely hope you adore this easy and incredibly delicious Cloverleaf Rolls recipe as much as I do! Your feedback is invaluable to us, so please don’t hesitate to give it a review below and share your thoughts and experiences with our community. To stay beautifully updated with all our latest recipes, culinary tips, and exciting food adventures, remember to follow Belly Full on TikTok, Instagram, Facebook, Pinterest, and YouTube!