
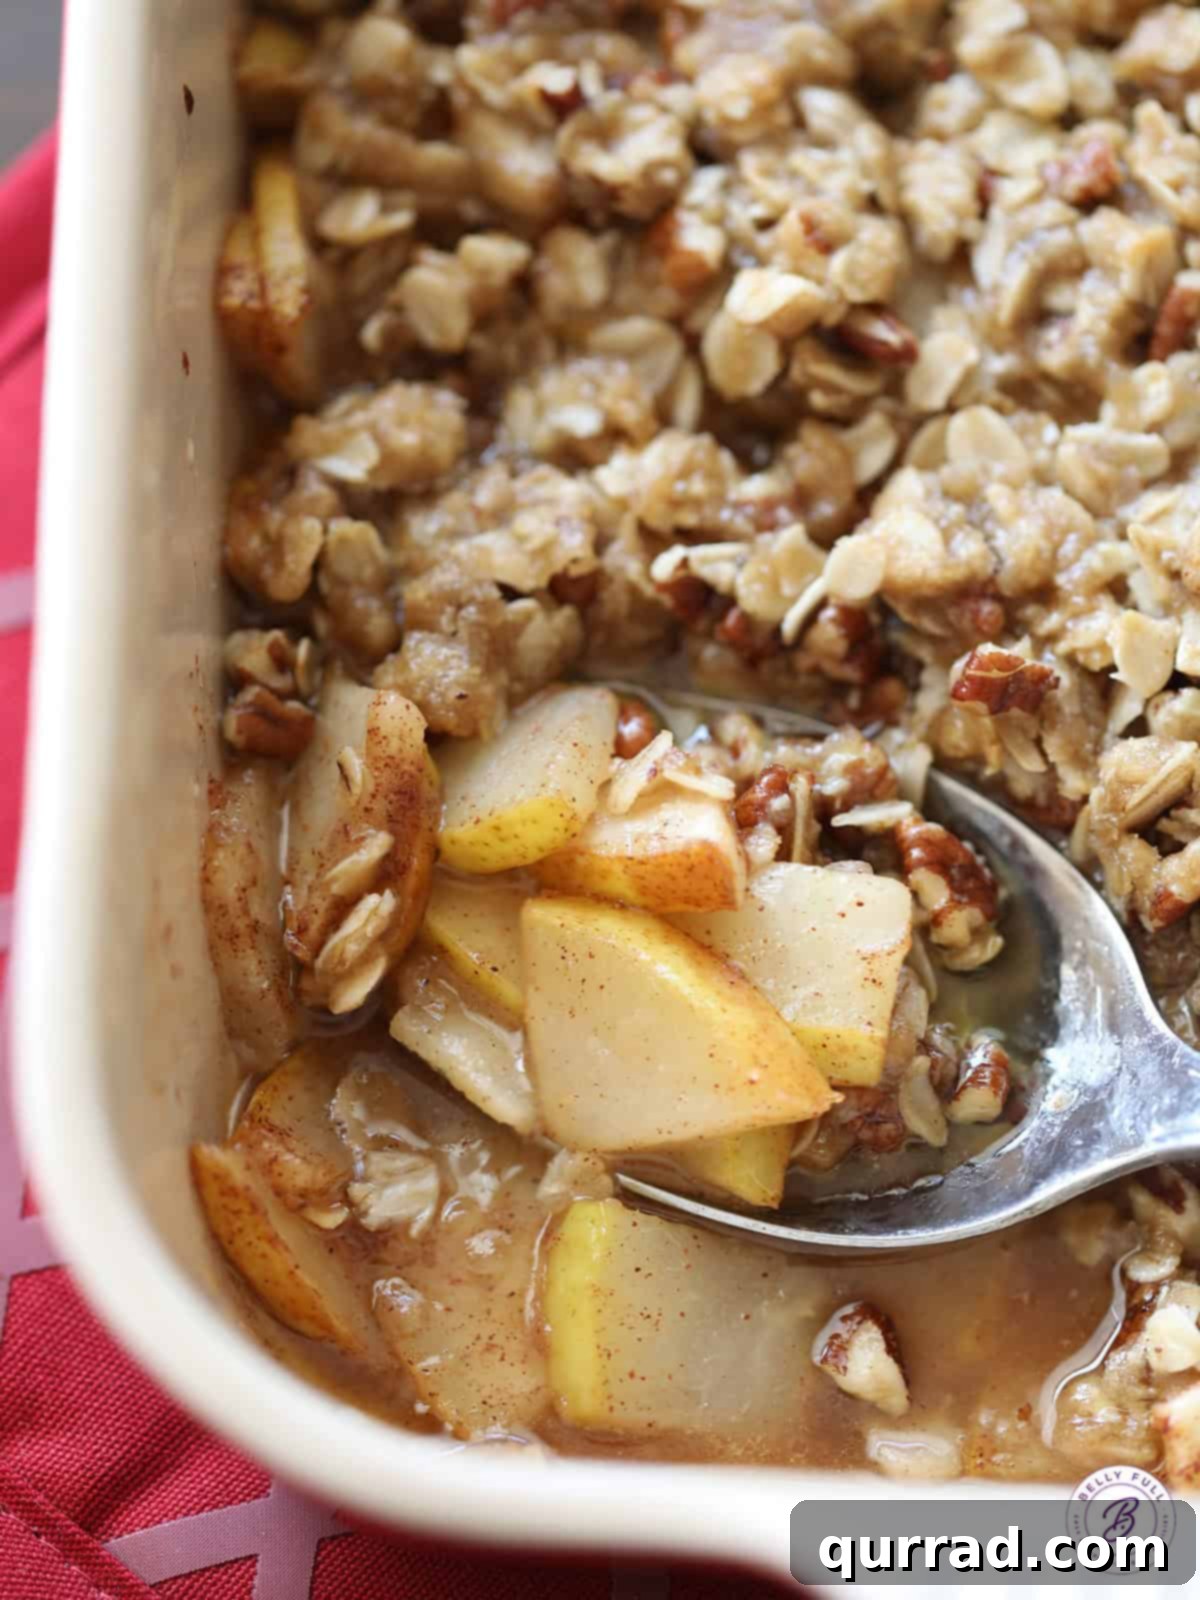
Indulge in the comforting warmth of a classic dessert with this utterly irresistible Easy Pear Crisp. Featuring succulent, juicy pears nestled in a delicate cinnamon-sugar sauce, all crowned with a sweet, buttery, and delightfully crunchy pecan-oat topping, this recipe is a true crowd-pleaser. Whether you’re celebrating the harvest season or simply craving a homemade treat, this crisp can be made year-round using either fresh, seasonal pears or convenient canned pears. It’s the perfect balance of ease and elegance, promising a satisfyingly sweet finish to any meal.
5-STAR REVIEW
“So easy and delicious! We had pears from a neighbor that were unripe and hard. I used them in this recipe and they were perfect. No changes to the recipe; perfect as is!” – Jam
Easy Pear Crisp: A Must-Try Dessert Recipe
As autumn gracefully ushers in cooler temperatures and vibrant foliage, our kitchens often become hubs for comforting, seasonal baking. While apples, cranberries, and roasted squash frequently take center stage during the fall, it’s essential not to overlook the humble yet magnificent pear. This often-forgotten fruit truly shines in a dessert like this Easy Pear Crisp. Its subtle sweetness and tender texture create an exquisite base for a warm, spiced crumble that will undoubtedly become a staple in your recipe repertoire.
A “crisp” is a beloved baked fruit dessert, characterized by its crumbly, streusel-like topping. This delightful topping typically consists of a harmonious blend of butter, flour, old-fashioned oats, brown sugar, and warm spices like cinnamon. Often, chopped nuts such as pecans, almonds, or walnuts are added to enhance the texture and flavor, providing that satisfying crunch that gives the crisp its name.
This particular recipe comes from the highly acclaimed Weeknight Dessert Cookbook, a fantastic resource shared by my good friend Mary from Barefeet In The Kitchen. The cookbook is a treasure trove of 80 irresistible and wonderfully hassle-free desserts, each requiring only about 10 minutes of prep time. It’s an absolute godsend for anyone with an insatiable sweet tooth but a limited amount of time—like me!
The original recipe was designed for individual servings, baked in four separate ramekins. However, a helpful footnote suggested converting it into a single 8×8 inch baking dish, a modification I gladly adopted to make it even simpler. Whether you prefer charming individual portions or a generous family-style dish, the result is consistently simple, satisfying, and utterly delicious.
★
★
★
★
Easy Pear Crisp
10
20
30
5
Pin
Juicy pears in a cinnamon-sugar sauce are tucked under a sweet and crunchy pecan-oat topping for this quick and easy Pear Crisp dessert. Fresh or canned pears can be used for a convenient year-round treat!
Step-by-step photos can be seen below the recipe card.
Ingredients
For the Filling
- 3 ripe pears, sliced thin into bite-sized pieces; apples or peaches also work
- 3 tbsp brown sugar
- 1 tbsp lemon juice
- 1 tbsp cornstarch
- 1 tsp vanilla extract
- ½ tsp ground cinnamon, or use apple pie spice
- ¼ tsp kosher salt
For the Topping
- ½ cup old-fashioned oats
- ¼ cup all-purpose flour, use gluten-free if needed
- ½ cup brown sugar
- ¼ cup chopped pecans, almonds or walnuts also work, or omit for a nut-free crisp
- ⅓ cup unsalted butter, melted, use non-dairy for a vegan crisp
For Serving
- vanilla ice cream, for serving, optional
Instructions
-
Preheat oven to 375°F (190°C). Lightly coat an 8-inch square baking dish with cooking spray to prevent sticking.
-
In a large mixing bowl, combine all the filling ingredients: sliced ripe pears, brown sugar, lemon juice, cornstarch, vanilla extract, cinnamon, and kosher salt. Toss gently until the pears are evenly coated. Pour the pear mixture into the prepared baking dish, spreading it into an even layer.
-
In a separate medium bowl, stir together all the topping ingredients: old-fashioned oats, all-purpose flour, brown sugar, chopped pecans, and melted unsalted butter. Mix until the ingredients are well combined and form a crumbly mixture.
-
Evenly sprinkle the oat and pecan topping over the prepared pear filling in the baking dish.
-
Place the baking dish in the preheated oven and bake for 20-25 minutes, or until the pears are tender when pierced with a fork and the crisp topping is golden brown and bubbly.
-
Allow the pear crisp to cool slightly before serving. It’s delicious served warm or at room temperature, especially when accompanied by a scoop of creamy vanilla ice cream.
Video
Watch the video below to see how easy it is to make this delicious Pear Crisp!
Recipe Notes for the Perfect Pear Crisp
- My go-to pear varieties for this crisp are Green Anjou, Bartlett, and Bosc. However, feel free to use any pear you enjoy eating raw—they all work wonderfully. The key is to select pears that are ripe but still firm, not too soft, to ensure they don’t turn mushy after baking.
- When fresh pears are out of season, canned pears make an excellent substitute. If using canned pears, make sure to drain them well. You might also want to adjust the baking time slightly, as canned pears are softer and will cook faster than fresh ones.
Nutrition Information (per serving)
Calories: 381kcal | Carbohydrates: 58g | Protein: 3g | Fat: 17g | Saturated Fat: 8g | Cholesterol: 33mg | Sodium: 128mg | Potassium: 214mg | Fiber: 5g | Sugar: 39g | Vitamin A: 405IU | Vitamin C: 6mg | Calcium: 46mg | Iron: 1mg
Nutritional information provided is an automatic calculation and may vary based on the exact brands and ingredients you use, as well as any modifications made to the recipe. If precise nutritional data is critical for your dietary needs, we recommend calculating it independently using your specific ingredients.
Did you make this? Leave a rating below!
How to Make Pear Crisp: Step-by-Step Visual Guide
Crafting this delightful pear crisp is incredibly straightforward. Follow these simple steps, accompanied by visual cues, to achieve a perfectly baked dessert every time.
Step 1: Preheat Oven and Prepare Baking Dish
Begin by preheating your oven to 375°F (190°C). Generously coat an 8-inch square baking dish with cooking spray to ensure your crisp doesn’t stick and for easy serving.
Step 2: Prepare the Pear Filling
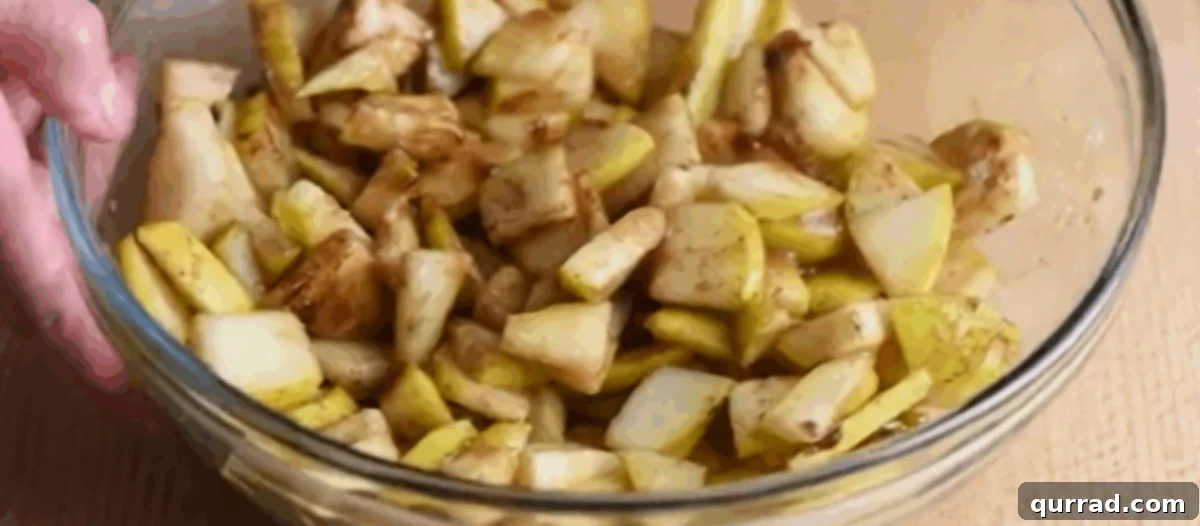
In a spacious mixing bowl, combine your thinly sliced ripe pears with brown sugar, a splash of lemon juice, cornstarch (to help thicken the sauce), fragrant vanilla extract, warming cinnamon, and a pinch of kosher salt. Toss all these ingredients together until the pear slices are thoroughly coated and glistening. Then, transfer this aromatic pear mixture into your prepared baking dish, spreading it out evenly.
Step 3: Create the Crunchy Topping
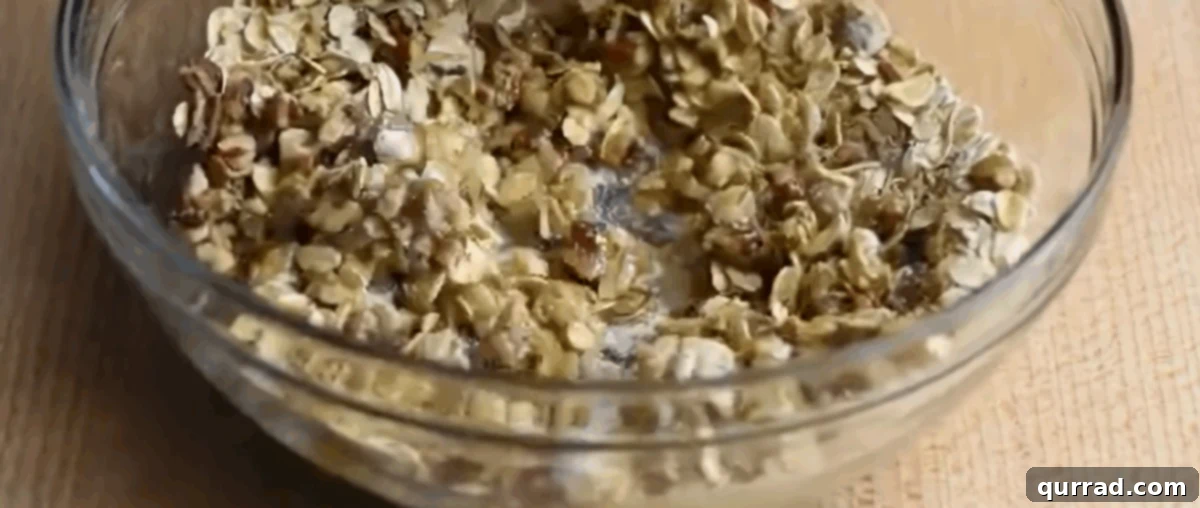
In a separate, medium-sized bowl, combine the ingredients for your crisp’s signature topping. Stir together the old-fashioned oats, all-purpose flour, brown sugar, finely chopped pecans (or your preferred nuts), and the melted unsalted butter. Mix these components until they are fully incorporated and resemble a delightfully crumbly texture.
Step 4: Sprinkle and Bake to Golden Perfection
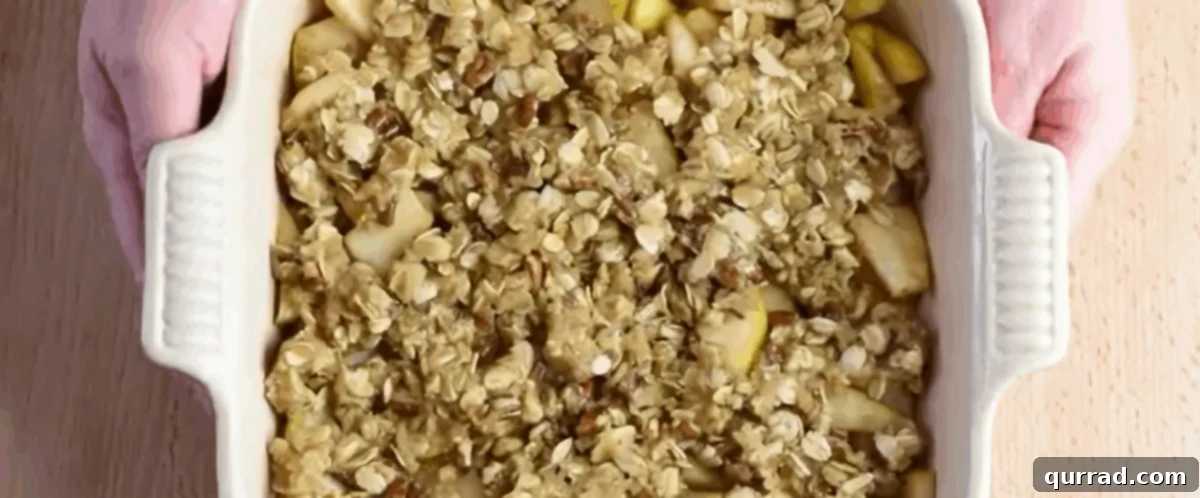
Once your topping is ready, evenly sprinkle it over the pear filling in the baking dish, ensuring a good, uniform layer. Carefully place the dish into your preheated oven. Bake for approximately 20-25 minutes. You’ll know it’s ready when the pears are tender (easily pierced with a fork), the sauce is bubbling enticingly, and the oat topping has achieved a beautiful golden-brown crispness.
Step 5: Serve Warm and Enjoy
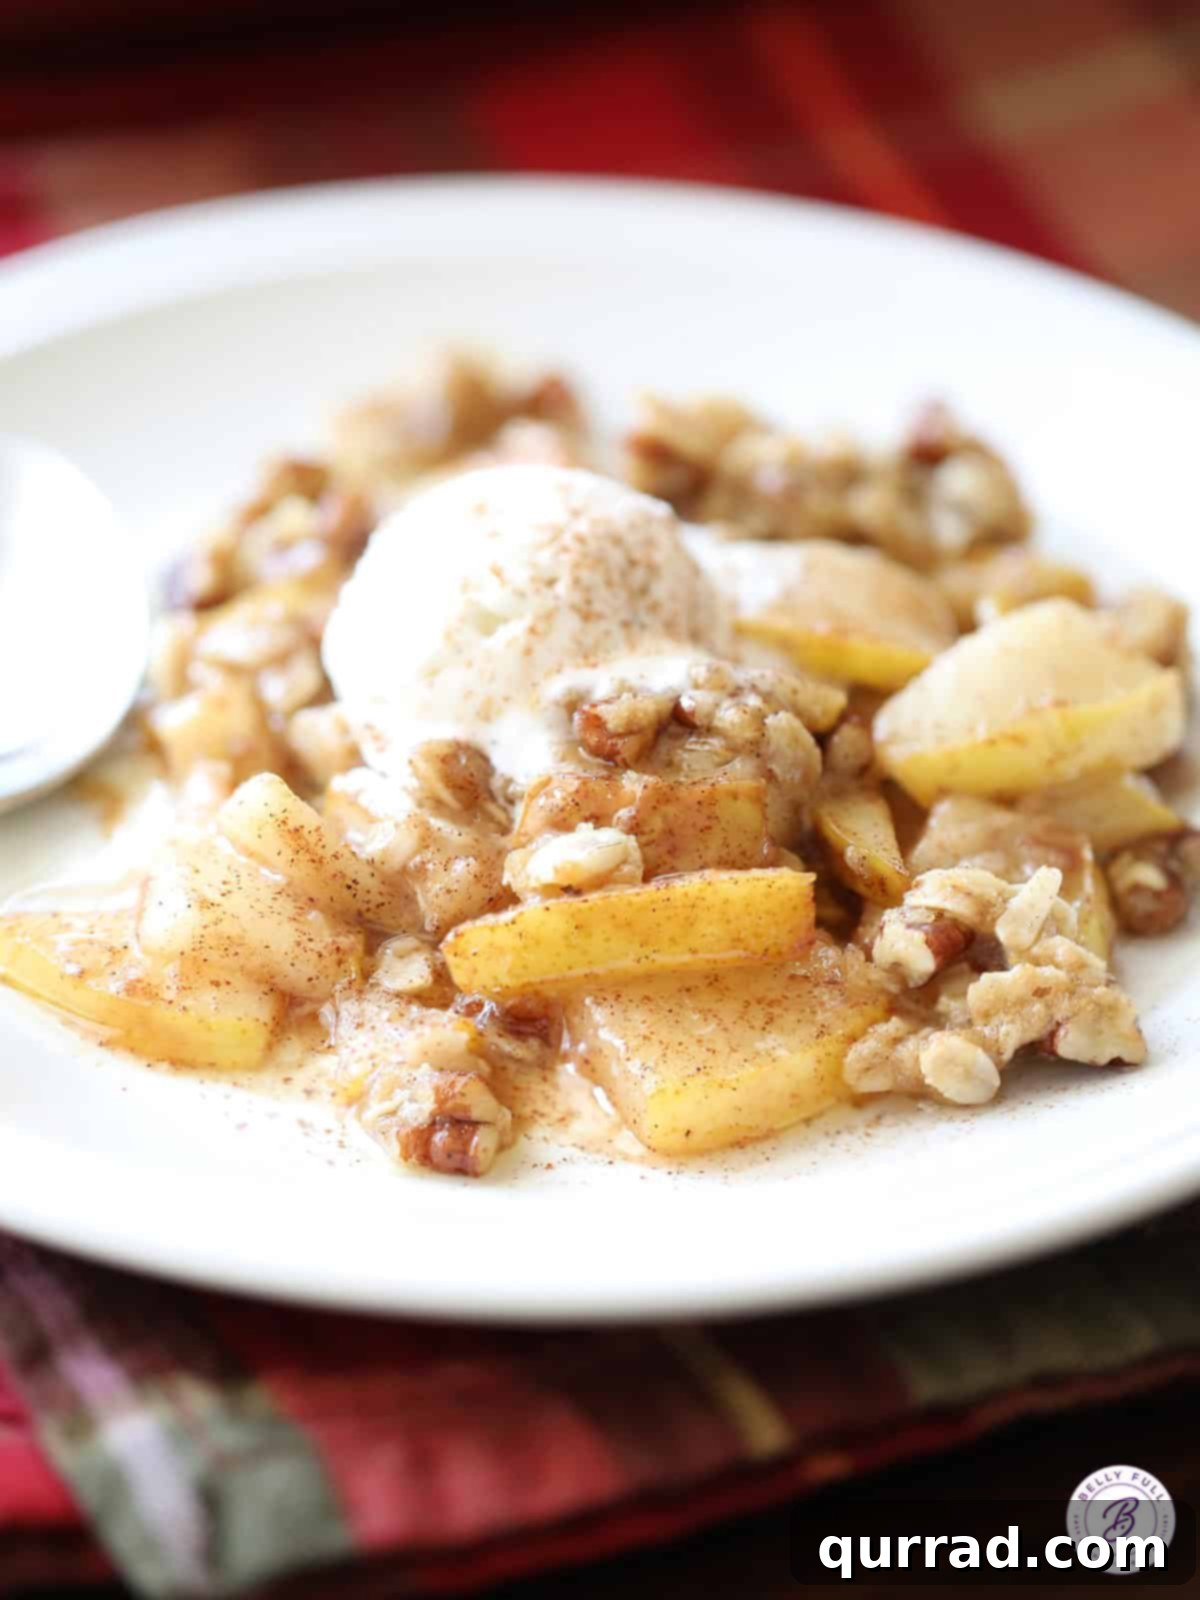
Allow the freshly baked pear crisp to cool for a few minutes after removing it from the oven. This helps the filling set slightly and prevents you from burning your tongue! It’s best served warm, ideally with a generous scoop of vanilla ice cream that slowly melts into the spiced pears and crunchy topping, creating an explosion of flavors and textures.
Storing Your Homemade Pear Crisp
Should you find yourself with the delightful problem of leftover pear crisp (a rare occurrence!), proper storage is key to maintaining its freshness and flavor. Allow any remaining crisp to cool down completely to room temperature. Once cooled, you can either cover the baking dish tightly with plastic wrap or aluminum foil, or transfer individual portions to an airtight container. Store the crisp in the refrigerator for up to 5 days. When you’re ready to enjoy it again, a brief reheat in the microwave in a microwave-safe bowl will warm it through perfectly, bringing back some of that comforting appeal.
Perfect Pairings: What to Serve With Pear Crisp
A warm, bubbling pear crisp is a symphony of flavors and textures on its own, but it can be elevated even further with the right accompaniments. On a chilly autumn day, there’s truly nothing more inviting than a serving of this comforting dessert alongside a steaming hot gingerbread latte or a mug of spiced cider. While vanilla ice cream is a classic and undeniably perfect pairing, don’t hesitate to experiment. A decadent dollop of homemade whipped cream adds a cloud-like lightness, while a rich drizzle of caramel sauce introduces another layer of sweet indulgence. For a touch of tangy brightness, a spoonful of crème fraîche can also be a wonderful addition.
Why You’ll Adore This Easy Pear Crisp Recipe
- Effortless to Make: With minimal prep time and simple steps, this crisp is perfect for both novice bakers and seasoned pros. It’s a truly fuss-free dessert that delivers maximum flavor with minimal effort.
- Seasonal Versatility: While perfect for fall, this recipe’s adaptability means you can enjoy the delicious taste of pear crisp any time of year. Fresh pears when they’re abundant, or canned pears when they’re not, ensure convenience.
- Comfort Food at its Best: There’s something inherently comforting about a warm, fruit-filled dessert with a crunchy topping. It’s the ultimate treat to cozy up with on a cool evening.
- Customizable: Easily adapt this recipe to your preferences. Swap pecans for walnuts or almonds, experiment with different spices, or even combine pears with other fruits like apples or cranberries for unique flavor profiles.
- Crowd-Pleaser: This crisp is guaranteed to be a hit at family gatherings, potlucks, or simply as a special weeknight dessert. Its universally appealing flavors make it a favorite for all ages.
Tips for Making the Best Pear Crisp
- Choose the Right Pears: As mentioned in the notes, ripe but firm pears are crucial. Overripe pears can turn too mushy, while underripe ones won’t soften enough during baking. Green Anjou, Bartlett, and Bosc are excellent choices.
- Don’t Overmix the Topping: Mix the topping ingredients just until combined. Overmixing can develop the gluten in the flour, leading to a tough, less crumbly texture.
- Uniform Slices: Slice your pears into relatively uniform bite-sized pieces. This ensures even cooking and prevents some pieces from being too firm while others are overly soft.
- Lemon Juice is Key: Don’t skip the lemon juice in the filling. It brightens the flavor of the pears and helps prevent them from browning excessively.
- Check for Doneness: The crisp is done when the topping is golden brown and the filling is bubbly. To test pear tenderness, gently poke a pear slice with a fork through the topping.
- Rest Before Serving: While it’s tempting to dig in immediately, allowing the crisp to rest for 10-15 minutes after baking lets the filling set slightly, preventing it from being too runny.
Frequently Asked Questions (FAQs)
Q: Can I use frozen pears for this recipe?
A: Yes, you can! If using frozen pears, thaw them first and drain any excess liquid thoroughly. You might need to add a little extra cornstarch (an additional ½ tablespoon) to the filling to account for the extra moisture they release.
Q: Can I make this pear crisp gluten-free?
A: Absolutely! Simply substitute the all-purpose flour in the topping with a 1:1 gluten-free baking flour blend. Ensure your oats are certified gluten-free if you have a severe allergy or intolerance.
Q: How can I make this recipe vegan?
A: To make a vegan pear crisp, replace the unsalted butter in the topping with a plant-based butter alternative (margarine sticks work well). All other ingredients are typically vegan-friendly.
Q: Can I prepare the pear crisp ahead of time?
A: You can assemble the crisp a few hours in advance. Prepare the filling and topping, layer them in the baking dish, cover, and refrigerate. When ready to bake, add about 5-10 minutes to the baking time since it will be going into the oven cold. You can also prepare the filling and topping separately and store them in the fridge, then assemble and bake just before serving.
Q: How do I get an extra crunchy topping?
A: For an even crunchier topping, ensure your butter is cold and cut into small pieces (instead of melted) before mixing with the other topping ingredients. This creates a more traditional streusel that crisps up beautifully. You can also toast the oats lightly before adding them to the topping mix.
Q: What’s the difference between a crisp and a crumble?
A: The terms are often used interchangeably, but traditionally, a crisp contains oats in its topping, giving it a lighter, more “crisp” texture. A crumble usually has a streusel topping made primarily of flour, sugar, and butter, resulting in a denser, cake-like crumble.
More Easy Dessert Recipes to Love
If you enjoyed this simple and delicious pear crisp, you’ll love exploring these other easy-to-make dessert recipes:
- Blueberry Cobbler: A vibrant, berry-filled classic that’s perfect for summer.
- Easy Sugar Cookies: Simple, buttery cookies that are fun to decorate and always a hit.
- No Bake Cookies: Quick and convenient, these chocolate and peanut butter delights are ready in minutes.
- Pistachio Cake: A moist, flavorful cake with a subtle nutty sweetness.
- Easy Country Apple Dumplings: Individual baked apples wrapped in pastry, simmered in a sweet sauce.