
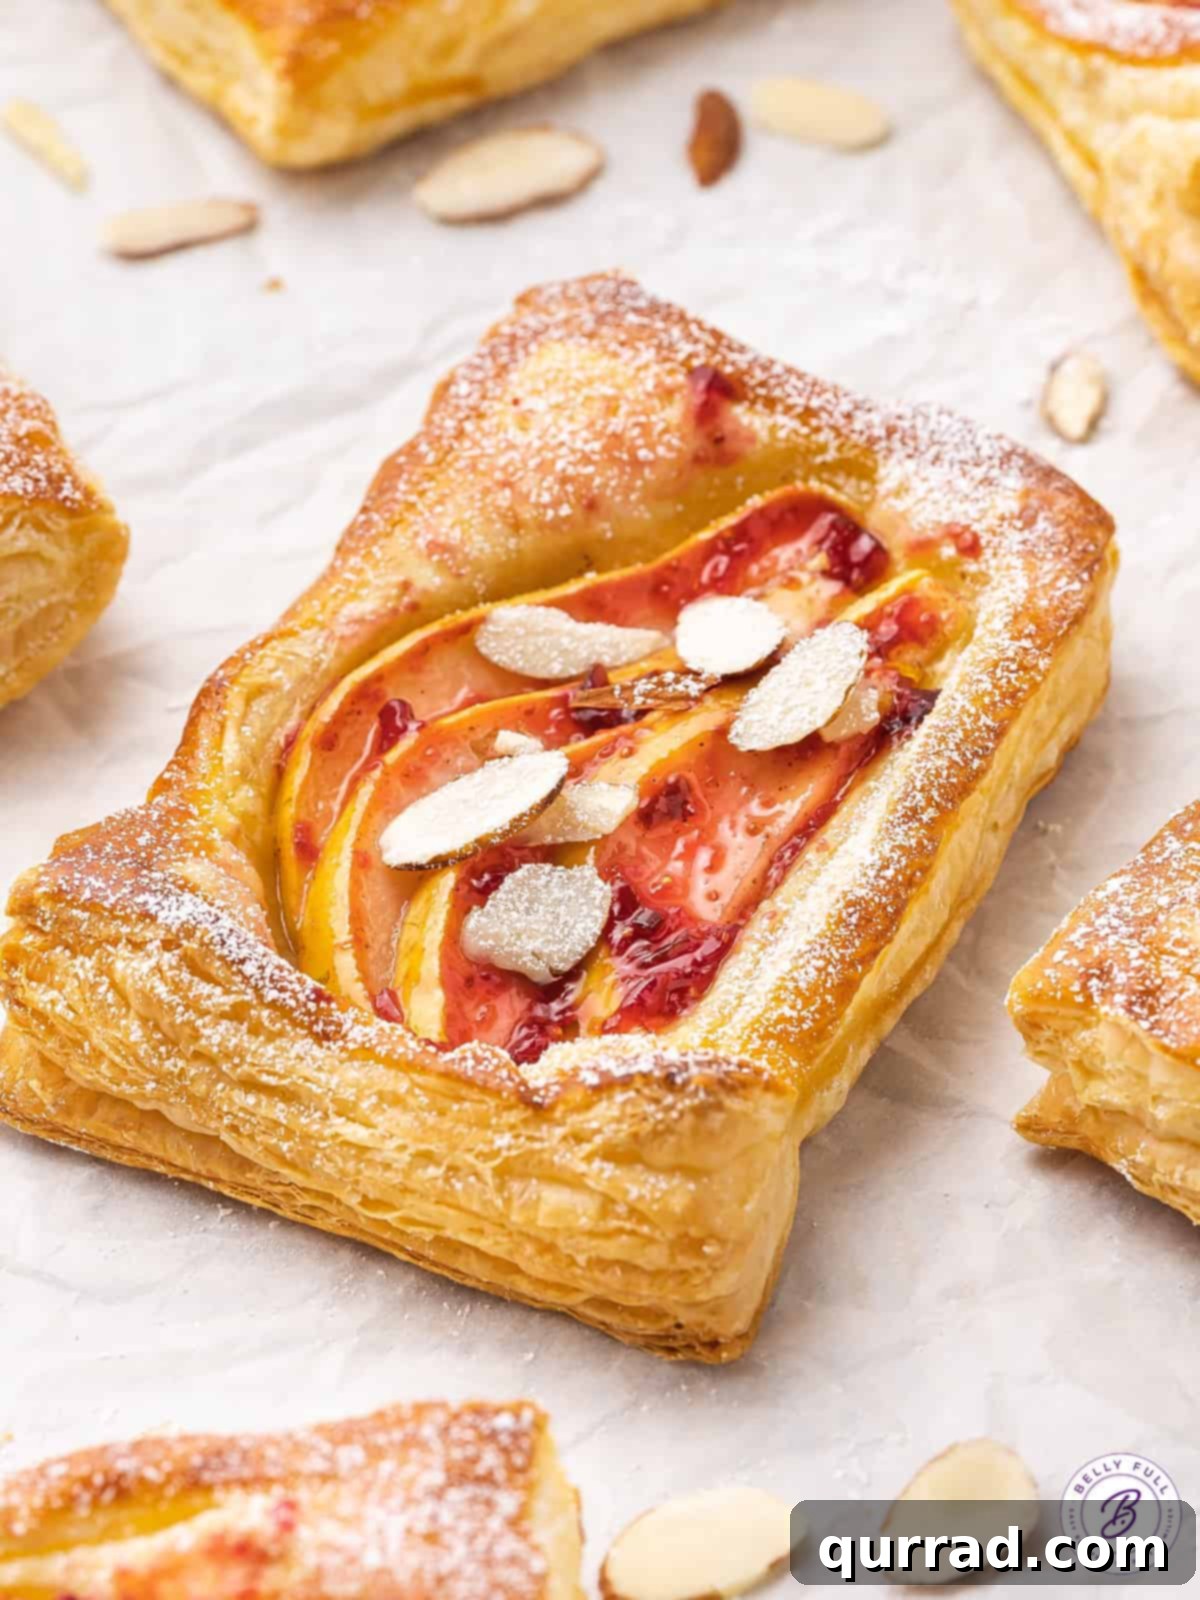
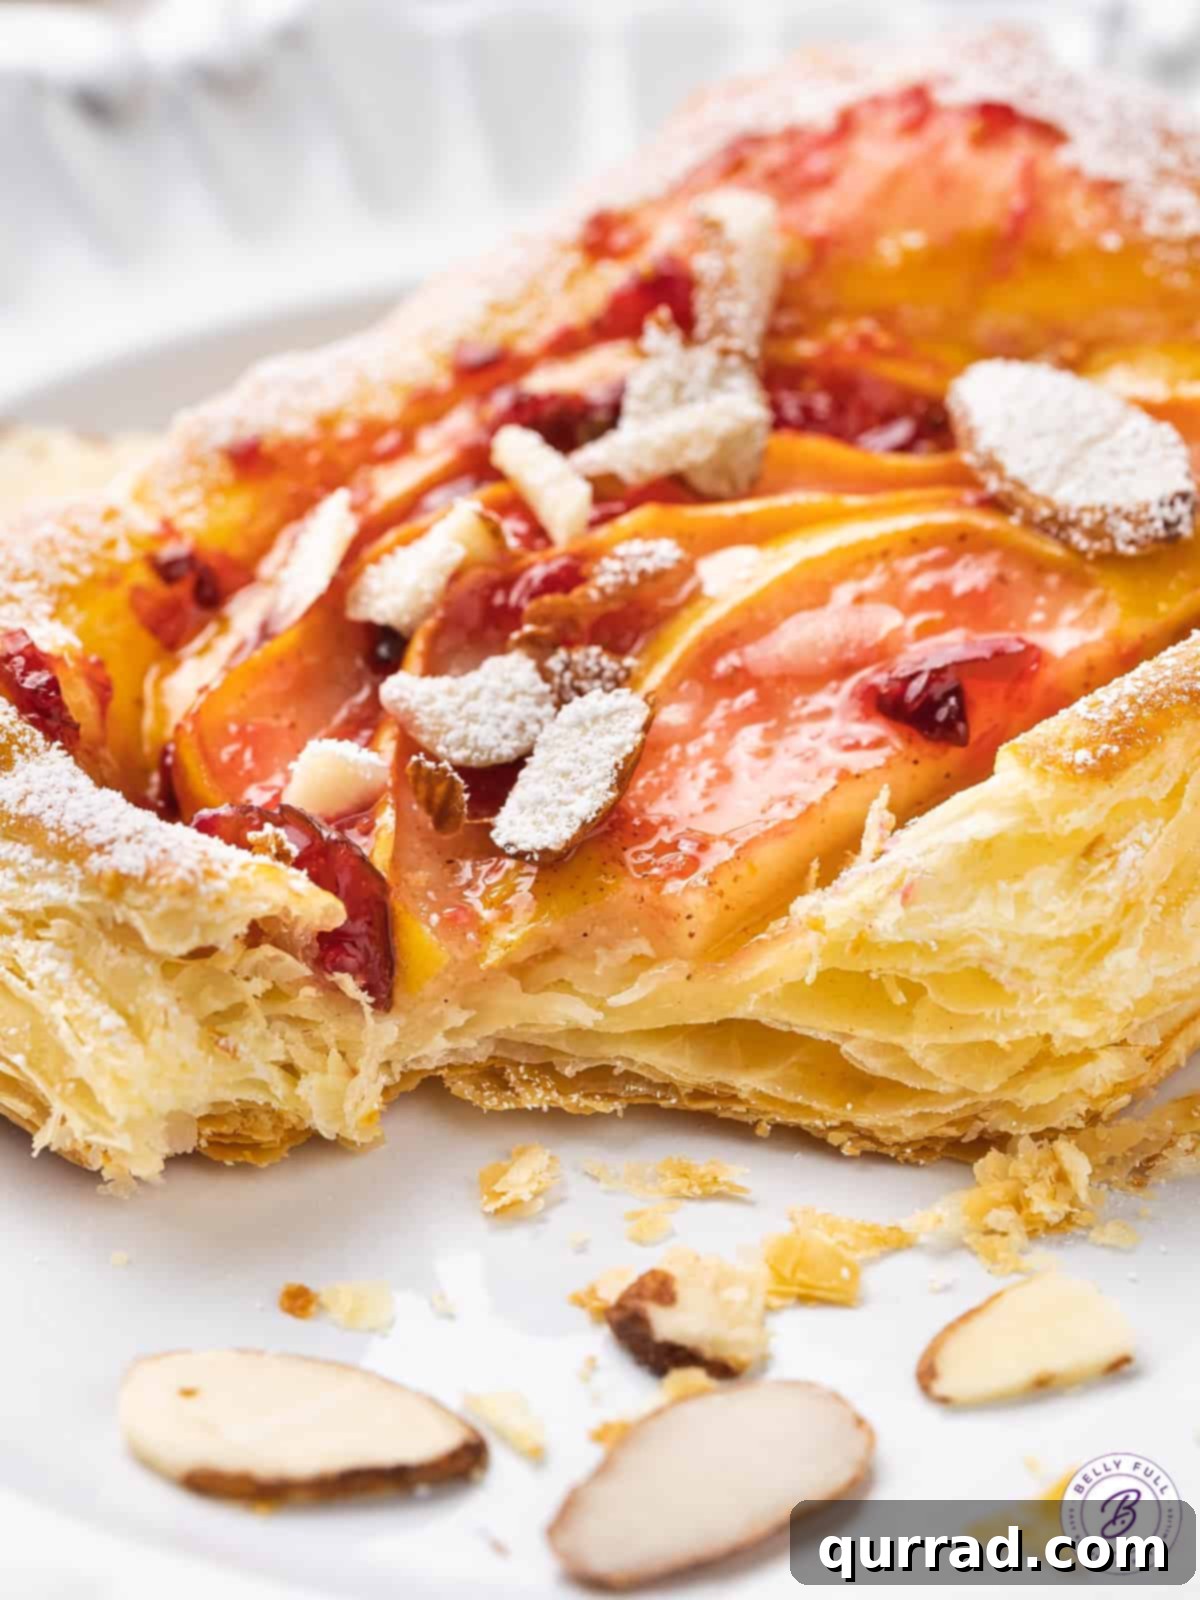
Welcome to the delightful world of Pear Tarts, where impressive elegance meets effortless preparation. Crafted with fresh, tender pears, crisp puff pastry, a luscious sweet jam, and a medley of warm spices, these individual tarts are not just a treat for the palate but also a feast for the eyes. Perfect for a leisurely breakfast, a light yet satisfying dessert, a festive Sunday brunch, or a memorable addition to your holiday spread, they promise to be a beautiful centerpiece on any buffet table, charming friends and family alike.
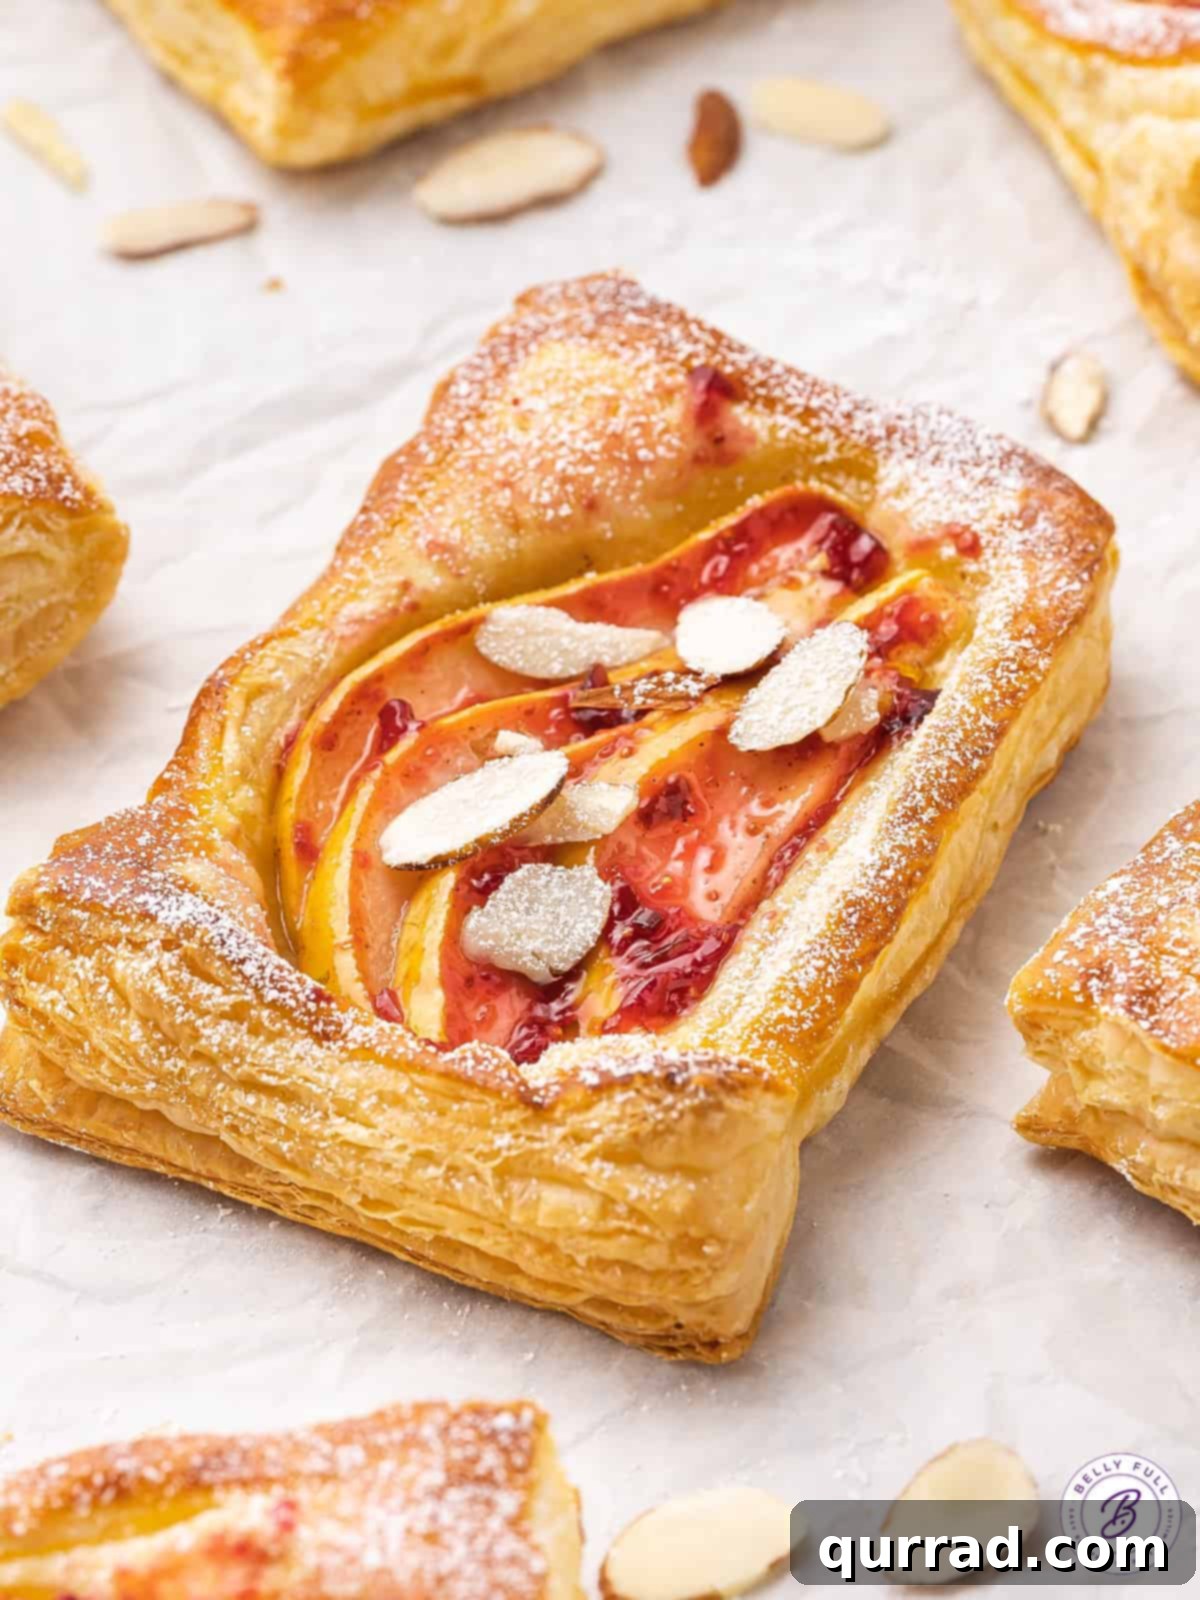
Easy Puff Pastry Pear Tarts: A Culinary Delight Made Simple
There’s a unique charm to a homemade tart, but often, the thought of preparing a crust from scratch can be daunting. This is precisely where our easy Pear Tarts shine. By ingeniously incorporating readily available puff pastry, fresh, seasonal fruit, aromatic spices, and a delicate sweet glaze, all crowned with a sprinkle of nuts, we bypass the complexities of traditional baking. The result? Golden, flaky, light, and utterly wonderful individual tarts that taste as if they required hours of meticulous effort, but are surprisingly quick to assemble.
The beauty of these tarts lies in their simplicity and the luxurious texture that puff pastry provides. Forget about special equipment, chilling dough, or mastering intricate pastry techniques. With store-bought puff pastry, you unlock a world of gourmet possibilities with minimal fuss. Each tart bakes up into a picture-perfect individual serving, making them ideal for any occasion – from a casual morning treat to an elegant dessert, or a standout item for Sunday brunch and holiday entertaining. Their individual nature also makes them incredibly convenient for serving and enjoying.
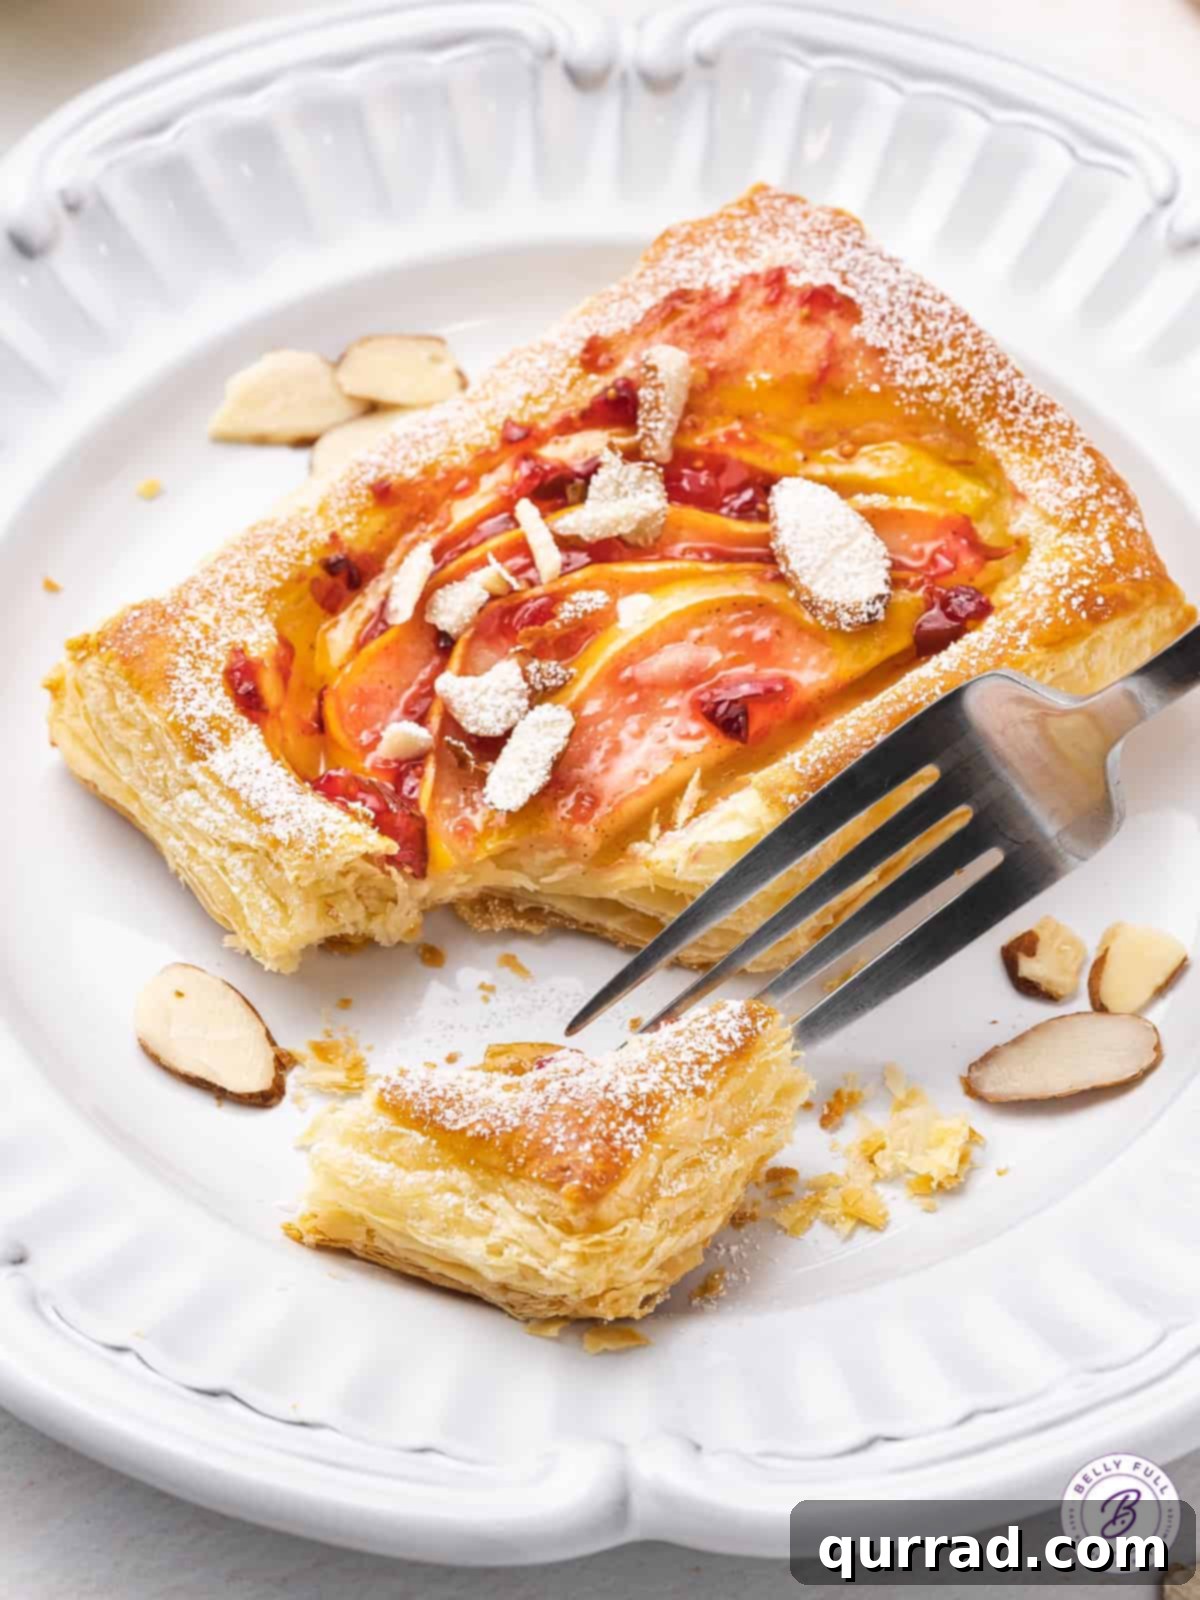
The Magic of Pears in Baking: Selecting the Best Fruit
Pears are a true gift of nature, offering a delicate sweetness and a unique, slightly granular texture that transforms beautifully with heat. For these puff pastry pear tarts, selecting the right pears is key to achieving that perfect balance of flavor and tenderness.
- Pears: You’ll need fresh, ripe pears. Varieties like Bosc or Bartlett are often preferred for their firm flesh and ability to hold their shape when baked, developing a buttery sweetness. However, feel free to experiment with Anjou or Comice for a slightly different flavor profile. The best part? There’s no need to peel them! The skin adds a lovely rustic touch and contributes to the tart’s fiber content. When selecting pears, look for ones that are firm but yield slightly to gentle pressure at the neck. Avoid overly soft or bruised fruit.
- Lemon Juice: A splash of fresh lemon juice is essential. It brightens the flavor of the pears, cuts through their sweetness, and most importantly, prevents the sliced fruit from oxidizing and turning brown, preserving their appealing golden hue.
- Sugars: A thoughtful combination of granulated sugar and brown sugar is used. Granulated sugar provides a clean sweetness, while brown sugar adds a deeper, molasses-like note and helps create a beautiful caramelization on the pears as they bake.
- Cinnamon: This classic warm spice is the perfect companion to pears, enhancing their natural sweetness and infusing the tarts with a comforting aroma that evokes cozy autumn days and holiday cheer.
- Salt: Just a pinch of coarse salt is crucial. It doesn’t make the tarts salty, but rather acts as a flavor enhancer, balancing the sweetness and making all the other ingredients pop.
Essential Ingredients for a Flaky Foundation and Finishing Touches
Beyond the fruit, the success of these pear tarts hinges on a few key components that ensure a perfectly flaky base and a dazzling finish:
- Puff Pastry: This is the hero ingredient that makes these tarts incredibly easy. Always use good quality puff pastry, thawed according to package directions. Brands like Pepperidge Farm are widely available and consistently deliver excellent results. Once baked, it transforms into a delicate, airy, and wonderfully flaky foundation that perfectly complements the soft, spiced pears. Remember, the key is to thaw it just enough to be workable but keep it chilled.
- Egg and Milk (Egg Wash): A simple egg wash, made by whisking an egg with a teaspoon of milk, is brushed over the pastry edges. This is not just for aesthetics; it helps the pastry bake up to a beautiful golden brown and contributes to its irresistible shine and crispness.
- Fig Jam: Fig jam provides a sophisticated, sweet glaze that truly elevates these tarts. Its earthy, fruity notes are a match made in heaven for pears. While our homemade fig jam recipe offers an unparalleled depth of flavor, a good quality store-bought fig jam works perfectly. If fig isn’t your preference, apricot jam is a fantastic alternative that also pairs wonderfully with pears.
- Sliced Almonds: Lightly toasted sliced almonds add a delightful nutty crunch and a subtle, buttery flavor that complements the fruit and pastry. Toasting them briefly beforehand enhances their aroma and crispness. They provide a beautiful textural contrast to the soft pears and flaky pastry.
- Powdered Sugar: An optional but highly recommended dusting of powdered sugar adds a final touch of sweetness and a delicate, elegant visual appeal, reminiscent of freshly fallen snow.
Creative Variations for Your Pear Tarts
While the classic pear tart recipe is undeniably delicious, its versatility allows for exciting customizations. Don’t hesitate to get creative and tailor these tarts to your taste or what you have on hand:
- Explore Different Jams: The choice of jam can significantly alter the flavor profile. If fig jam isn’t to your liking, apricot jam is a superb substitute, offering a bright, slightly tangy sweetness. Raspberry or even a quince paste could also provide intriguing flavor combinations.
- Swap Out the Almonds: The sliced almonds add a lovely crunch, but they can easily be replaced. Consider chopped pecans or walnuts for a different nutty dimension. For those with nut allergies, simply omit them for a equally delicious, nut-free tart. A sprinkle of granola or oats before baking can also add texture.
- Top with Powdered Sugar: A simple dusting of powdered sugar after baking is a classic and elegant finish. It not only adds a delicate sweetness but also enhances the visual appeal, making the tarts look even more professionally prepared.
- Try it with Apples: If pears aren’t in season or you simply prefer apples, this recipe adapts beautifully. Varieties like Pink Lady or Honeycrisp are ideal due to their firm texture and sweet-tart balance, which holds up well to baking. It’s best to avoid Red Delicious, which can become mushy, and Granny Smith, which might be too tart without significant adjustments to sugar. Remember that apples are denser than pears, so slice them very thinly to ensure they cook through properly and become tender.
- Spice it Up: Besides cinnamon, a pinch of nutmeg, cardamom, or even a touch of ginger can add extra warmth and complexity to the pear filling.
- Add a Splash of Liqueur: For an adult twist, a tablespoon of pear liqueur, brandy, or even a spiced rum can be added to the pear mixture before baking. This infuses the fruit with a delightful aromatic depth.
How to Make Pear Tarts with Puff Pastry: A Step-by-Step Guide
Creating these delightful pear tarts with puff pastry is an incredibly straightforward process, broken down into just a few simple steps. You’ll be amazed at how quickly these come together, allowing you more time to enjoy them! For best results, ensure your puff pastry is properly thawed but still cold.
- Prepare Your Workspace and Preheat Oven: Begin by preheating your oven to 400°F (200°C). This high temperature is crucial for achieving that characteristic puff and flakiness in the pastry. Line two large baking sheets with parchment paper; this prevents sticking and makes for easy cleanup.
- Prepare the Pears: In a medium bowl, gently toss your thinly sliced pears with the lemon juice, granulated sugar, brown sugar, cinnamon, and coarse salt. Ensure the pears are evenly coated. The lemon juice prevents browning and adds a bright note, while the sugars and spices begin to work their magic, tenderizing the fruit and building flavor. Set this mixture aside to allow the flavors to meld slightly.
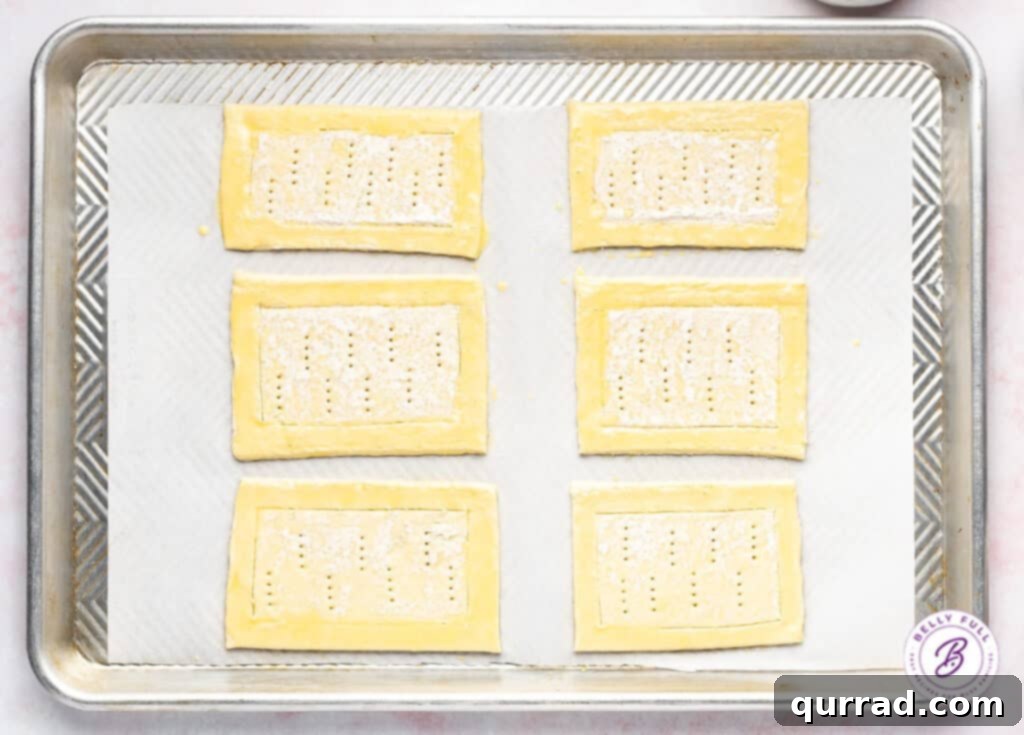
- Prep the Puff Pastry: Carefully unfold both sheets of puff pastry. Most brands come with natural creases; use these as a guide. Cut each sheet in thirds along these vertical creases, giving you six long strips. Then, cut each of those strips in half horizontally, resulting in a total of 12 individual rectangles, each approximately 4 1/4-by-3 inches. Arrange these pastry rectangles on your prepared baking sheets, ensuring they are spaced about 2 to 3 inches apart to allow for expansion.
- Score the Pastry: Using a sharp knife, gently score each pastry rectangle about 1/2-inch from the outer edge, creating a smaller rectangle within the larger one. It’s important not to cut all the way through the pastry; this scoring will create a defined border that puffs up beautifully, forming a natural crust for your tart. Next, using a fork, gently prick the inner rectangle area about 6 times. This step is vital as it prevents the center of the pastry from puffing up excessively, ensuring a stable bed for the pears to sit on and encouraging even cooking.
- Apply Egg Wash: In a small bowl, whisk together the egg and milk until well combined. This is your egg wash. Using a pastry brush, lightly brush the outer scored edges of each pastry shell with the egg wash. This will give them a gorgeous golden sheen and a crisp texture when baked.
- Top with Spiced Pears: Now, arrange the sliced pears on top of the pastry sheets, carefully placing them within the scored border. Slightly overlap the pear slices for an appealing presentation and to ensure a generous amount of fruit in each tart.
- Bake to Golden Perfection: Transfer the baking sheets to the preheated oven. Bake for 15-20 minutes, or until the pears are tender, the puff pastry has puffed up dramatically, and its edges are a beautiful golden brown. Baking times can vary slightly depending on your oven, so keep a close eye on them towards the end.
- Add the Jam and Almonds: Once baked, carefully remove the tarts from the oven. While still warm, gently brush the top of the pears with the slightly warmed fig jam. The warmth of the tarts will help the jam spread smoothly and create a glossy finish. Immediately sprinkle the sliced almonds over the jam, allowing them to adhere.
- Cool and Serve: Allow the tarts to cool completely on the baking sheets or on a wire rack. Cooling is important as it allows the pastry to set and the flavors to fully develop. Once cool, if desired, lightly dust with powdered sugar for that extra touch of elegance. Then, serve and enjoy these impressive yet easy pear tarts!
Expert Tips for Flawless Pear Tarts Every Time
Achieving perfectly flaky and delicious pear tarts is simple when you follow a few key tips:
- Work with Chilled Puff Pastry: The secret to light and airy puff pastry is keeping it cold. Thaw your puff pastry in the refrigerator for 2-3 hours, or on the countertop for about 40 minutes, until it’s pliable but still cold to the touch. If the pastry becomes too warm and sticky while you’re working with it, simply pop it back into the fridge for 10-15 minutes to chill before continuing. Working quickly also helps.
- Achieve Uniform Pear Slices: Consistency in pear thickness ensures even cooking. For fast and uniform pear slices, a mandoline is an excellent tool. If using a knife, aim for slices about 1/8 to 1/4 inch thick.
- Pat Pears Dry: Pears naturally release juices as they bake. To prevent a soggy bottom on your pastry, gently pat the sliced pears dry with a paper towel before tossing them with the sugar and spice mixture. This minimizes excess moisture, ensuring a crisp pastry.
- Don’t Overfill: While tempting to pile on the pears, avoid overfilling the pastry. Too much filling can weigh down the pastry and prevent it from puffing properly. The scored border is your guide for the ideal filling area.
- Monitor Oven Temperature: Every oven is different. Keep a close eye on your tarts as they bake. They might require a minute or two more or less than the suggested time. Look for the pastry to be deeply golden brown and the pears tender.
- Warming the Jam: Slightly warming the fig jam (a few seconds in the microwave or a small saucepan) will make it much easier to brush smoothly over the baked tarts, ensuring an even, glossy coat.
- Use Parchment Paper: Always line your baking sheets with parchment paper. This prevents sticking, ensures even browning on the bottom of the tarts, and makes transferring them off the tray incredibly easy.
Serving Suggestions and Proper Storage
These individual puff pastry pear tarts are wonderfully versatile and can be enjoyed in many ways, but proper serving and storage will ensure you get the most out of them.
Serving Suggestions:
While delicious on their own, these pear tarts can be elevated with a few simple accompaniments:
- Breakfast or Brunch: Serve them simply alongside a cup of coffee or tea for a delightful start to the day.
- Dessert: For a more indulgent treat, pair them with a scoop of vanilla bean ice cream, a dollop of freshly whipped cream, or a drizzle of caramel sauce. A sprinkle of extra cinnamon or a finely chopped herb like mint can also add a fresh touch.
- Afternoon Treat: Enjoy with a glass of sparkling cider or a sweet dessert wine for a sophisticated afternoon snack.
Proper Storage:
These pear tarts are at their absolute best when served within a few hours of baking, especially after the jam has been brushed on. The pastry is at its crispiest and most flaky during this time.
- Refrigeration: Leftover tarts will keep for up to 2 days in an airtight container in the refrigerator. However, be aware that the moisture from the jam and pears will gradually soften the puff pastry over time, so they won’t retain their initial crispness. While still delicious, they may not be as visually appealing or texturally satisfying as fresh.
- Reheating: If you wish to warm them up, a brief reheat in a toaster oven or a conventional oven at around 300°F (150°C) for 5-10 minutes can help to crisp up the pastry slightly, but they won’t fully regain their fresh-baked texture.
- Freezing: It is generally not recommended to freeze these tarts after they have been baked with the pear and jam topping, as the texture of both the pears and the pastry can suffer upon thawing and reheating. If you wish to prep ahead, you could prepare and freeze the plain puff pastry rectangles (before topping) or slice and freeze the spiced pears separately.
Frequently Asked Questions About Pear Tarts
Here are some common questions about making and enjoying puff pastry pear tarts:
- Can I make these tarts ahead of time?
While best served fresh, you can prepare the pear mixture a few hours in advance and keep it refrigerated. You can also cut and score the puff pastry and keep it chilled until just before baking. Assemble and bake just before serving for the crispiest results.
- What kind of puff pastry is best?
For ease and consistent results, store-bought, all-butter puff pastry is highly recommended. Brands like Pepperidge Farm are widely available and perform well. Ensure it is thawed but still cold when working with it.
- Why do I need to score the pastry?
Scoring the pastry creates a border that will puff up, forming a nice crust around the fruit, while pricking the inner rectangle prevents it from puffing excessively, creating a flat bed for the pears. This technique gives the tarts their distinct, elegant appearance.
- Can I use frozen pears?
While fresh pears are ideal, frozen pear slices can be used in a pinch. Make sure to thaw them completely and drain any excess liquid very thoroughly, patting them extremely dry, to prevent a soggy pastry.
- How do I prevent the pastry from getting soggy?
Ensure your pears are well-patted dry. Don’t overfill the tarts, and bake them in a preheated hot oven to allow the pastry to crisp up quickly.
- Can I make one large pear tart instead of individual ones?
Yes, you can! Use a whole sheet of puff pastry. Score a border as directed and arrange the pears. The baking time might need to be adjusted slightly, possibly longer, to ensure even cooking of the larger tart and tenderness of the pears.
More Fruit-Inspired Delights: Explore Our Pear Recipes
If you’ve fallen in love with the sweet versatility of pears, we invite you to explore more delightful recipes that highlight this incredible fruit:
- Pear Salad: A Refreshing Medley
- Easy Pear Crisp: A Comforting Classic
- Pear Tea Sandwiches: A Unique Twist
We hope you thoroughly enjoy this delicious and easy pear tart recipe. It’s a wonderful way to celebrate seasonal fruit and create memorable moments in your kitchen. Happy baking!