
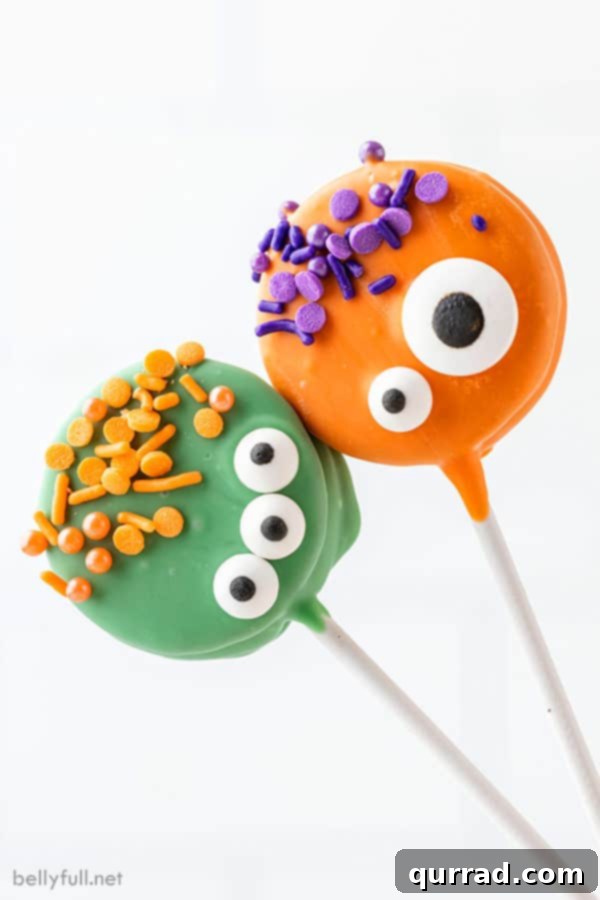
Spooktacularly Simple Halloween Monster Oreo Pops: A Fun No-Bake Treat for All Ages
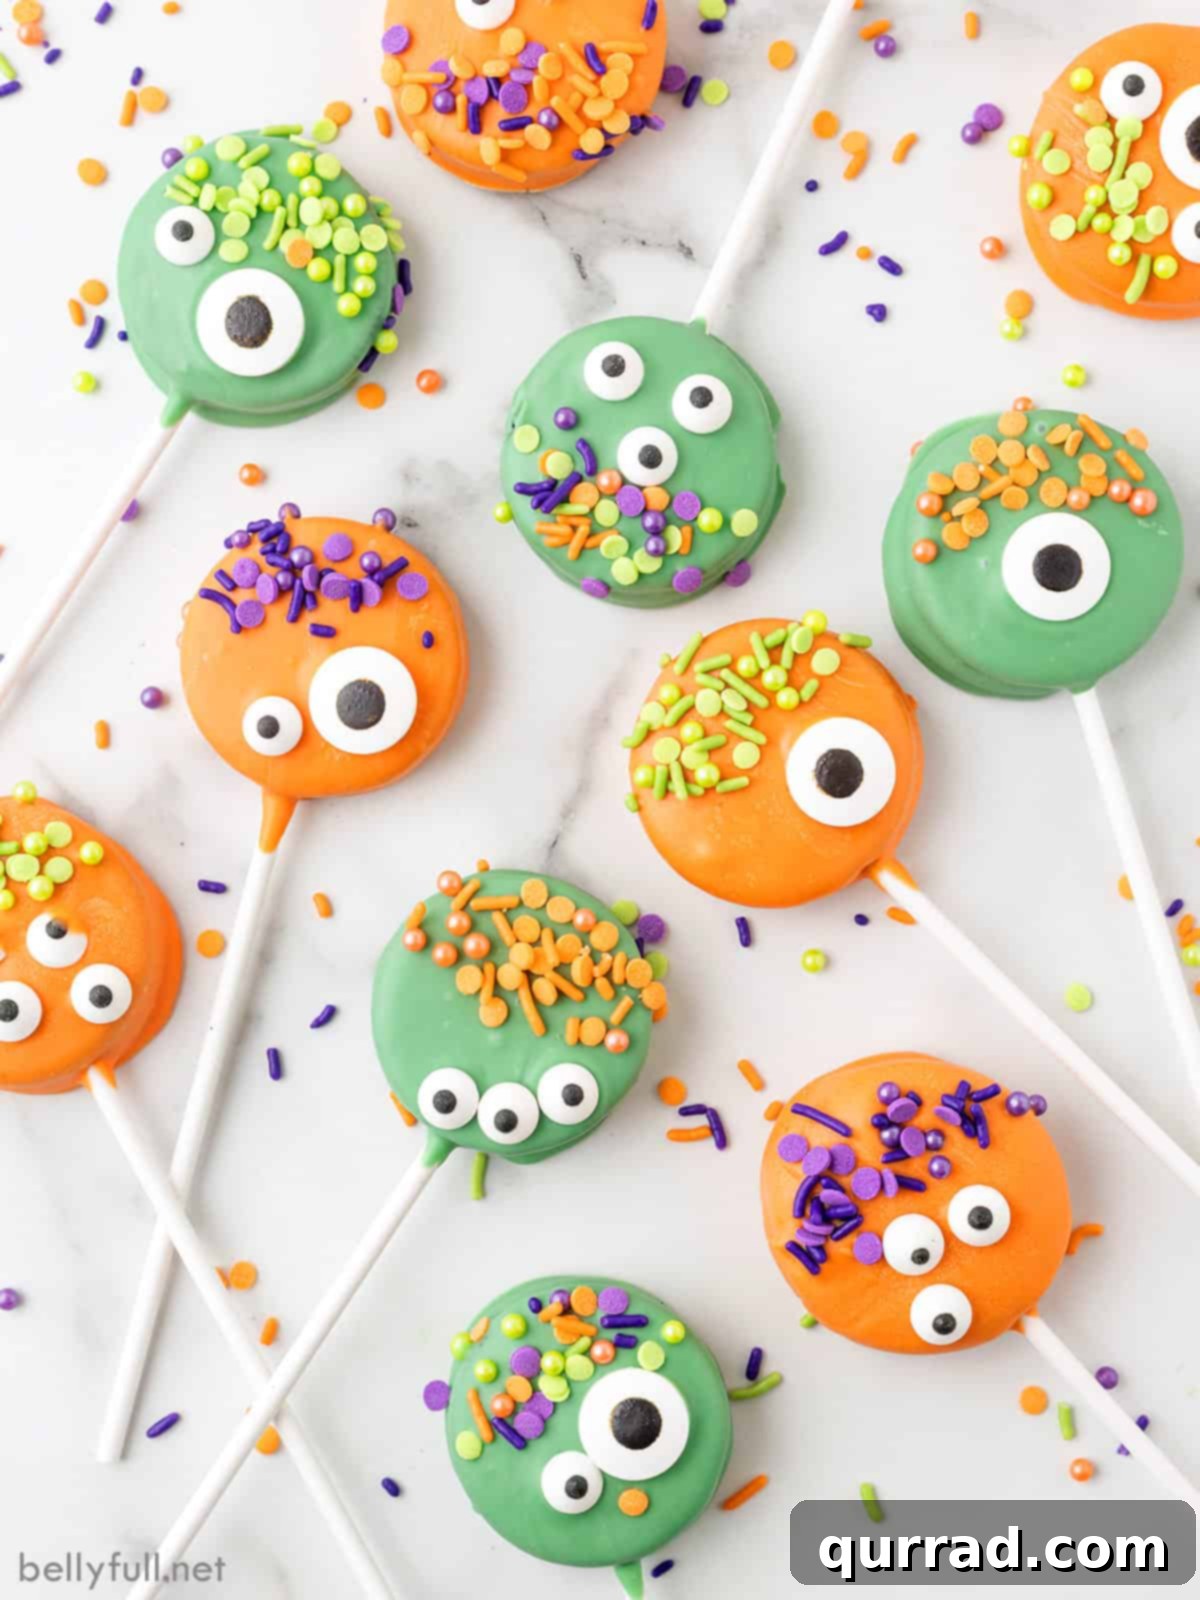
Get ready for a monstrously good time this Halloween with our incredibly easy and utterly adorable Halloween Monster Oreo Pops! These delightful treats are simply classic Oreos dipped in vibrant white chocolate, then brought to life with an assortment of candy eyes and festive sprinkles. They are the ultimate no-bake solution for Halloween parties, thoughtful gift-giving, or just a fun activity with the kids. Guaranteed to be a hit with everyone, from tiny tots to grown-ups!
If you’re searching for more fuss-free, no-bake Halloween treats that are both spooky and sweet, you’ve come to the right place. Be sure to check out our Mummy Oreo Balls and the eerily delightful Bloodshot Eyeballs for even more festive fun!
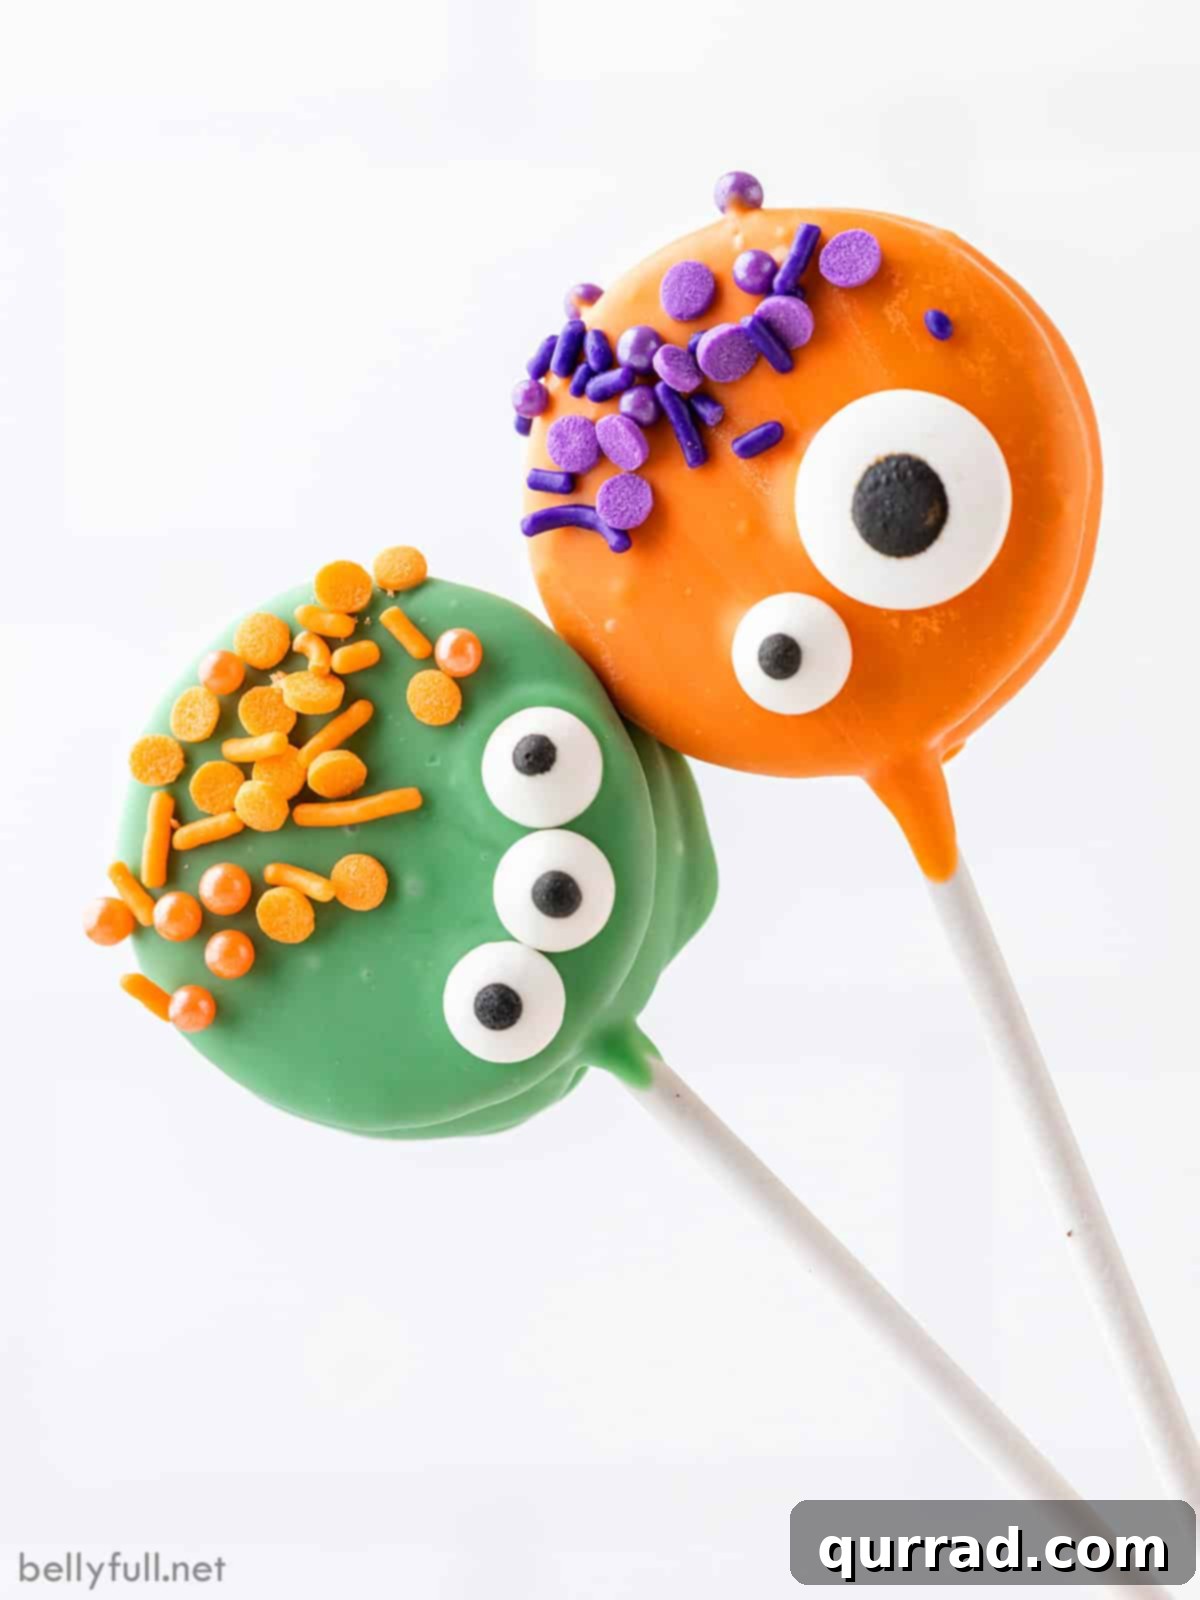
Effortless Elegance: Crafting Delicious Chocolate Covered Oreos for Halloween
The Halloween spirit is officially in full swing! Costumes are chosen, decorations are up, and the candy stash is ready. And, of course, our kitchen has been bustling with tests for the cutest, most delicious new Halloween desserts. Among them, these charming Monster Oreo Pops have emerged as a clear favorite. They’re a testament to how simple ingredients can create something truly special and irresistibly cute – don’t you agree?
These Halloween chocolate-covered Oreos were an undeniable triumph with everyone who tried them. It’s hard to resist the classic combination of a crunchy Oreo enveloped in a smooth, sweet chocolate coating. What makes this recipe even better is its accessibility. If you have little ones eager to lend a hand in the kitchen, this is the perfect project! It requires absolutely no baking, allowing children to safely participate. They can express their creativity by choosing colors, arranging the candy eyes, and sprinkling on festive decorations to design their very own quirky monster faces.
Furthermore, these monster pops are an ideal candidate for classroom Halloween party snacks. Just imagine them individually wrapped in clear cellophane bags, tied with a festive ribbon – they make a delightful and hygienic treat that’s easy to distribute and enjoy. They’re a fantastic alternative to traditional candy, offering a homemade touch that everyone will appreciate.
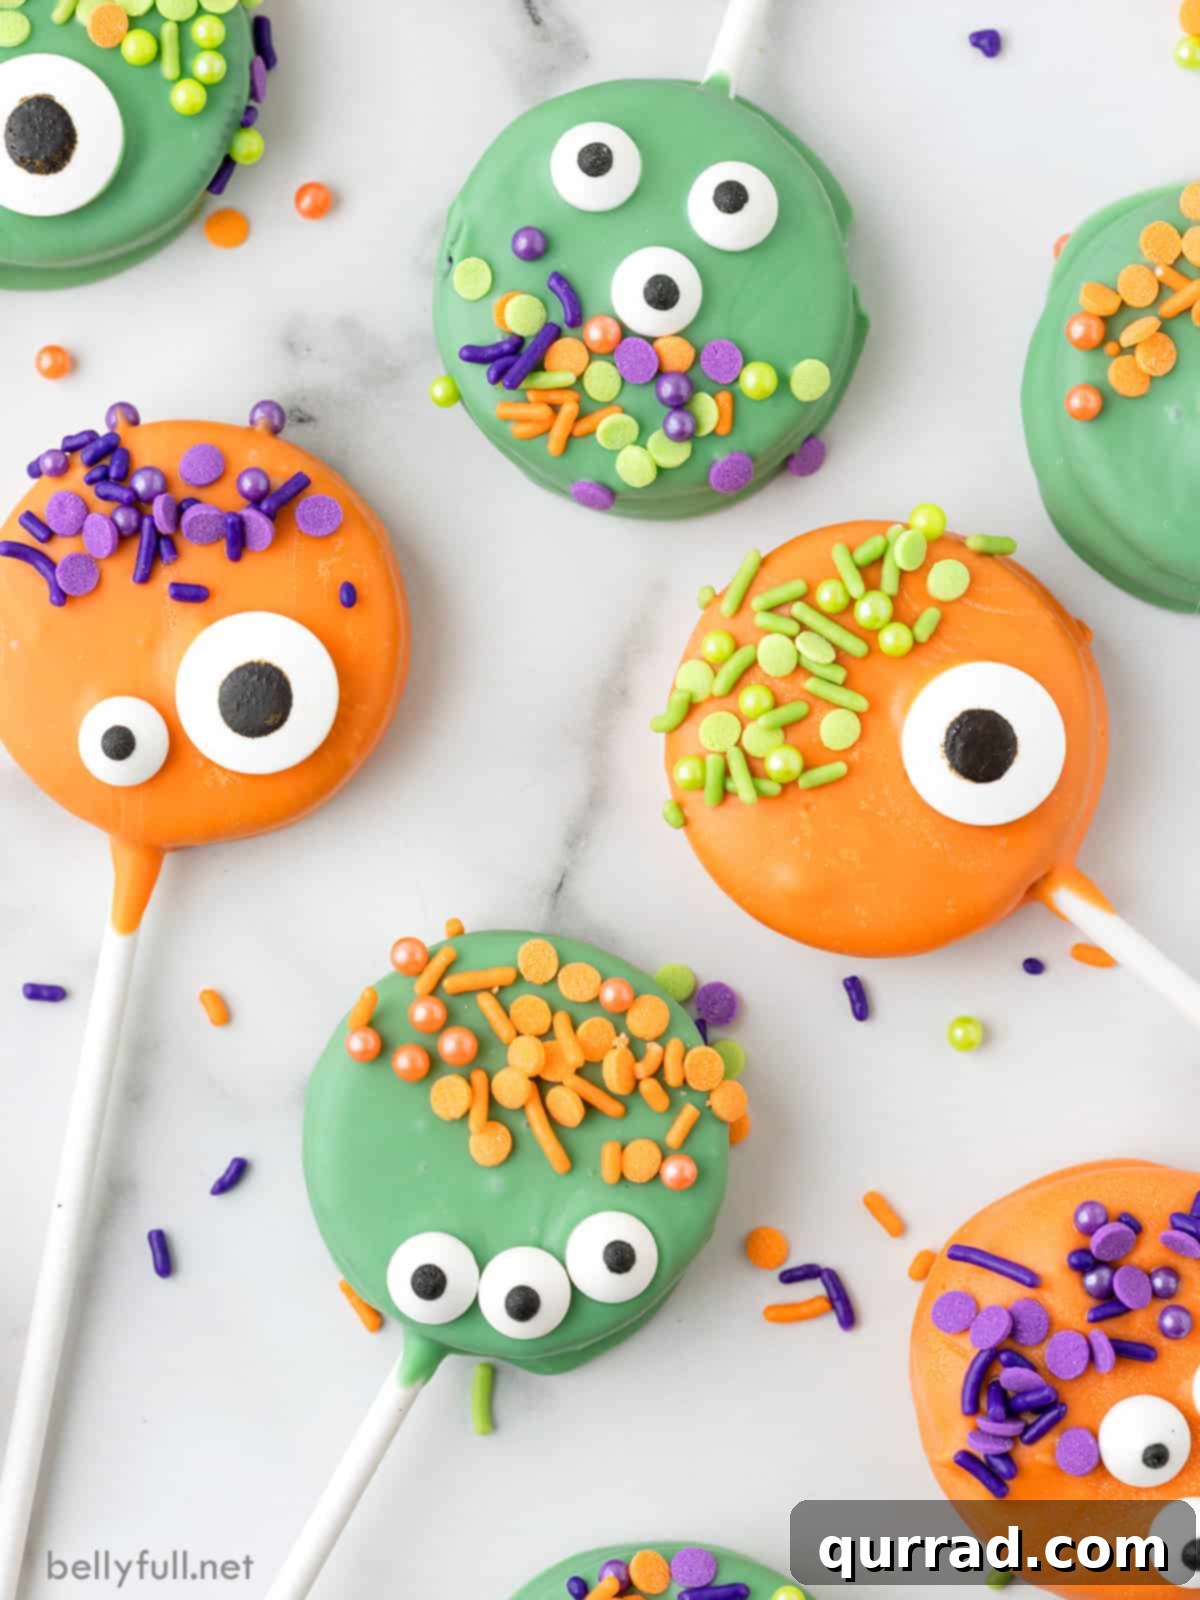
Gather Your Monster-Making Essentials: What You’ll Need
Creating these vibrant white chocolate covered Oreos is surprisingly simple, requiring just a handful of ingredients. Here’s a breakdown of what you’ll need to bring your spooky monsters to life:
- Candy Melts: For these Halloween Monster Oreo Pops, I opted for bright green and orange candy melts to perfectly capture the festive Halloween vibe. However, feel free to let your imagination run wild! You can choose any color to create monsters of your own design – think purple, black, or even a mix of multiple colors for truly unique creatures. Candy melts are fantastic because they melt smoothly and harden beautifully, providing that perfect outer shell for your Oreos.
- Oreos: The classic, traditional Oreo cookie forms the delicious base for these monster pops. Its iconic chocolatey crunch and creamy filling are simply irresistible when paired with a chocolate coating. If you’re looking for a slight variation, blonde (vanilla) Oreos would also work wonderfully and offer a different flavor profile and visual contrast.
- Candy Eyeballs: These are the key to giving your monsters personality! You’ll want a selection of both small and large candy eyeballs. Using various sizes allows for a wider range of silly and spooky monster faces, making each pop unique and engaging. Place them strategically for a wide-eyed stare, a cheeky wink, or a cross-eyed gaze!
- Halloween Sprinkles: Sprinkles are essential for adding extra fun and texture to your monster pops. Not only do they introduce more vibrant colors, but they can also be strategically applied to resemble monster hair, fur, or other quirky textures. Look for Halloween-themed sprinkle mixes with bats, pumpkins, or classic orange, black, and purple jimmies for extra festive flair.
- Lollipop Sticks: While not an ingredient, lollipop sticks are crucial for turning your chocolate-covered Oreos into convenient and fun “pops.” These make them easy to hold, serve, and display.
Crafting Your Creations: How to Make Monster Pops Step-by-Step
If you’ve ever wondered how to create perfect chocolate-dipped Oreos, these easy monster pops offer an excellent starting point. The process is straightforward, fun, and yields impressive results. Follow these simple steps to bring your delightful Halloween treats to life:
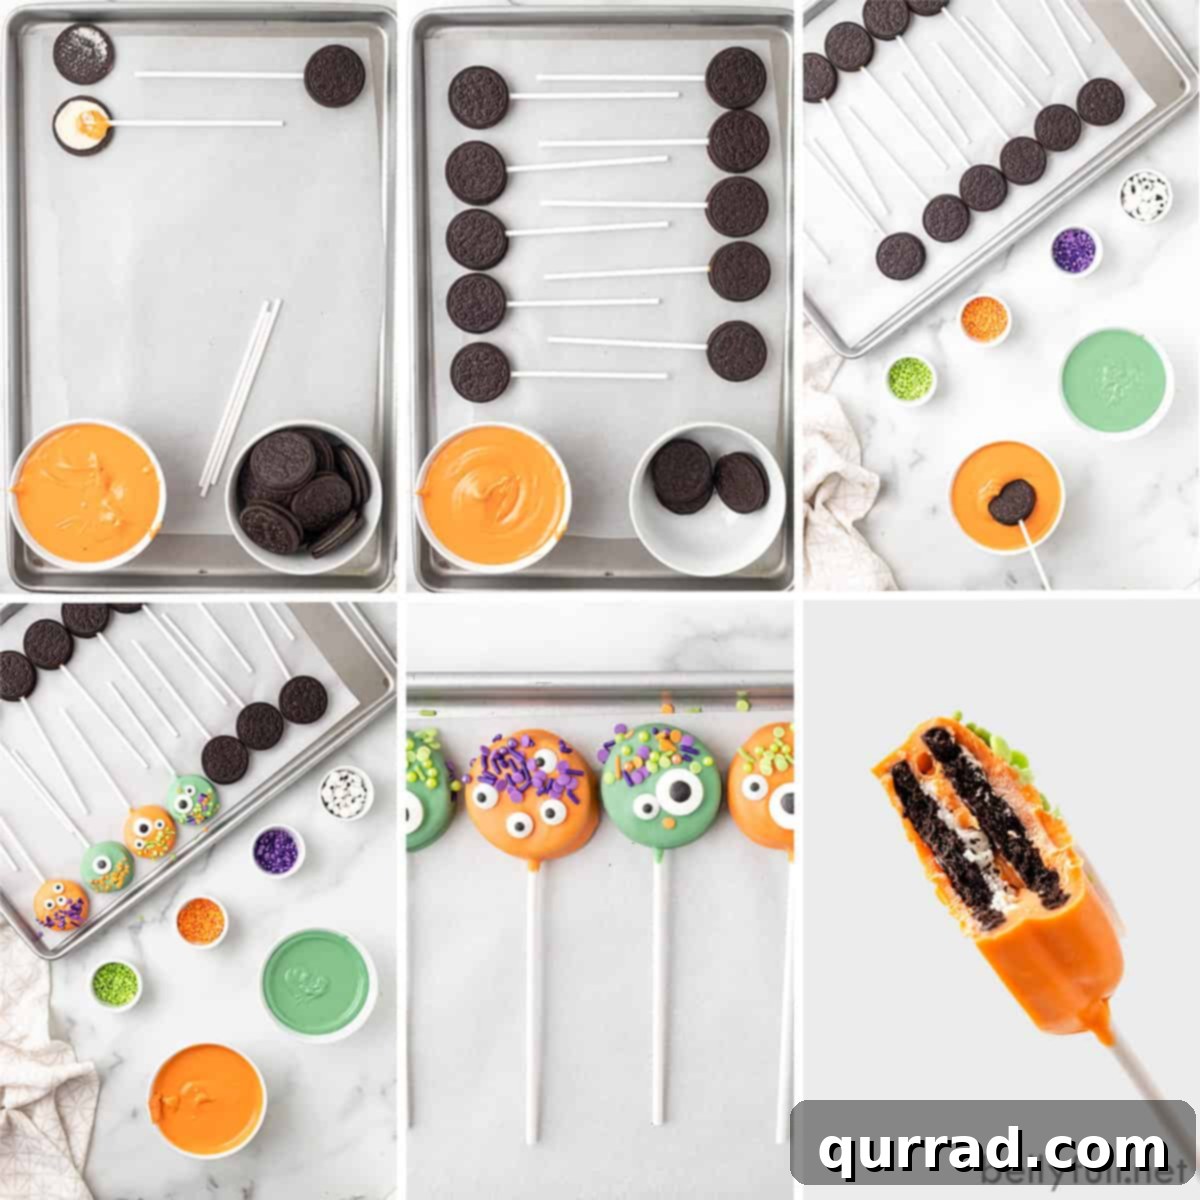
- Prepare Your Workspace: First, line a large sheet pan with parchment paper or a silicone baking mat. This will prevent your monster pops from sticking and make for easy cleanup once they’ve set.
- Melt the First Color: Begin by melting your first color of candy melts (e.g., orange) in a small, microwave-safe bowl according to the package directions. Heat in short intervals, stirring frequently, until the candy melts are completely smooth and free of lumps. A smooth consistency is crucial for an even coating.
- Insert the Lollipop Sticks: Carefully twist open each Oreo cookie, separating the two chocolate wafers while keeping the cream filling intact on one side. Dip one end of a lollipop stick into the melted candy melts, then gently press the chocolate-coated end into the cream filling of one cookie half. Immediately place the other cookie half back on top, gently pressing down to secure the stick. Ensure there’s enough melted chocolate on the stick so it slightly pools around the stick inside the cream, creating a strong bond.
- Pre-Chill to Set Sticks: Place the assembled Oreos with sticks onto your prepared sheet pan. Transfer them to the refrigerator for approximately 10 minutes. This crucial step allows the chocolate holding the stick to firm up, ensuring the cookie remains securely on the stick during the dipping process.
- Melt the Second Color: While the first batch is chilling, melt your second color of candy melts (e.g., green) in another small, microwave-safe bowl, following the same package directions until it’s perfectly smooth and melted.
- Dip and Decorate: Once the sticks are set, retrieve your Oreos from the fridge. Hold an Oreo by its stick and dip it fully into your chosen color of melted chocolate, ensuring it’s completely covered. Gently tap the stick against the edge of the bowl to allow any excess chocolate to drip off, creating a smooth, even coat. Immediately, while the chocolate is still wet, place a few candy eyeballs onto the Oreo. Then, generously sprinkle your Halloween sprinkles over the top part of the Oreo, or wherever you desire to create monster “hair” or texture. Repeat this dipping and decorating process with the remaining cookies, alternating colors as desired.
- Final Chill: Once all your monster pops are dipped and decorated, carefully place them back on the prepared sheet pan. Transfer the pan to the refrigerator for at least 30 minutes, or until the chocolate coating has completely set and hardened. This ensures a firm, delicious treat that’s easy to handle and enjoy.
Expert Tips and Frequently Asked Questions for Perfect Monster Pops
Creating picture-perfect chocolate-dipped Oreos can sometimes pose a few common challenges. Here are some expert tips and answers to frequently asked questions to help ensure your Halloween Monster Pops turn out flawlessly:
My chocolate seems too thick. What should I do?
If your melted candy melts or white chocolate appear too thick for smooth dipping, don’t worry! You can easily thin them out by stirring in a small amount of coconut oil or vegetable shortening. Start with one teaspoon at a time, mixing thoroughly, until you achieve the desired smooth, pourable consistency. Be careful not to add too much, as it can affect setting time and final texture.
What’s the best type of chocolate to use for dipping? Melting wafers or white chocolate chips?
For consistent, smooth results and an easy hardening process, I highly recommend using high-quality candy melts or white melting wafers (like Wilton candy melts or Ghirardelli white melting wafers). These products are specifically designed for dipping and candy making. They melt to a wonderfully smooth consistency and, crucially, harden at room temperature without becoming soft or sticky. If you prefer to use regular white chocolate or white chocolate chips, it’s best to combine them with some coconut oil or shortening. This addition helps the chocolate melt smoother and set more quickly and firmly. A good ratio is approximately 1 tablespoon of coconut oil per 1 cup of chocolate chips.
My Oreo keeps falling off the stick. How can I prevent this?
This is a common issue if the stick isn’t properly secured. The key is to ensure you use enough melted chocolate when inserting the lollipop stick. After dipping the stick end into the chocolate, press it firmly into the Oreo cream. Make sure there is enough melted chocolate on the stick that it creates a small “pool” around the stick as you press the cookie halves back together. This extra chocolate acts as a strong adhesive, firmly bonding the stick to the cookie. Also, remember the 10-minute pre-chill step after inserting the sticks – this allows that initial chocolate to set and create a sturdy foundation.
What kind of fork did you use for dipping the chocolate?
While a regular fork can work, I personally love using specialized dipping forks. These tools are designed with thin, spaced tines that allow excess chocolate to drip off more efficiently. This helps in achieving a thinner, more even coating and prevents the formation of a large “chocolate foot” or puddle around the base of the dipped item, giving your monster pops a cleaner, more professional finish.
Can I make these ahead of time?
Absolutely! These Monster Oreo Pops are an excellent make-ahead treat. Once fully set, they hold up wonderfully. Store them as directed below, and they’ll be ready to impress when it’s time for your Halloween celebration.
Creative Serving & Gifting Ideas for Your Monster Pops
These Halloween Monster Oreo Pops are not only delicious but also incredibly versatile when it comes to presentation and gifting. Here are some ideas to make them stand out:
- Party Display: For an eye-catching party display, consider sticking the lollipop ends into a block of florist foam (the kind used for artificial flowers), which you can then cover with festive Halloween-themed paper or fabric. This creates a fun “monster garden” effect. Alternatively, if you own a cake pop holder, it’s the perfect way to display your creations upright and prevent them from touching.
- Individual Gifting: To give these as thoughtful and adorable gifts, wrap each monster pop individually in clear cellophane bags. Tie the bags securely with bright orange, green, or black ribbons. These individually packaged treats are perfect for classroom Halloween parties, trick-or-treat alternatives, or as small party favors for your guests to take home.
- Dessert Platter: Arrange a colorful assortment of monster pops on a large Halloween-themed dessert platter alongside other treats. Their vibrant colors and playful faces will instantly draw attention.
Storing Your Spooky Treats: Freshness Guaranteed
Proper storage ensures your Halloween Monster Oreo Pops remain fresh and delicious for as long as possible:
- Room Temperature: If your environment is cool and not humid, you can store your chocolate-covered Oreo pops at room temperature for approximately one day. Just be sure to keep them out of direct sunlight and away from heat sources, as this can cause the chocolate to melt or become sticky.
- Refrigeration: For longer storage, or if your home is warm, it’s best to store them in an airtight container in the refrigerator for up to a week. The chill will help the chocolate remain firm and preserve the cookies’ freshness.
- Layering: If you need to stack multiple layers of monster Oreos in your container, place a sheet of parchment paper between each layer. This will prevent the pops from sticking together and protect their delicate decorations.
Explore More Fun Halloween Recipes:
Looking for more spooky inspiration for your Halloween festivities? Don’t miss these other fantastic and fun recipes that are perfect for the season:
- Mummy Hot Dogs
- Hocus Pocus Halloween Cupcakes
- Mummy Oreo Balls
- Ghost Toast
- Witches Brew
We hope you thoroughly enjoy making and devouring these delicious and easy Halloween Monster Oreo Pops! They’re sure to add a touch of playful spookiness to your celebrations. Don’t forget to share your creations and experiences with us!
Monster Oreo Pops
20 minutes
40 minutes
1 hour
16
pops
Ingredients
- 12 ounces orange candy melts
- 12 ounces green candy melts
- 16 Oreos
- 1 package small candy eyes
- 1 package large candy eyes
- 2 ounces Halloween sprinkles
- Lollipop sticks
Instructions
-
Line a sheet pan with parchment paper or a silicone mat.
-
Melt your orange candy melts in a small bowl according to package directions, stirring until it’s all melted and smooth.
-
Gently twist open the Oreos. Dip the end of the lollipop sticks into the chocolate, press them into the Oreo cream and place the top cookies back on the filling. (Make sure there is enough melted chocolate on the stick that it pools up a little bit so the cookie will stick.)
-
Place the assembled cookies onto the prepared sheet pan and transfer into the fridge for 10 minutes to allow the chocolate to set.
-
Melt your green candy melts in a small bowl according to package directions, stirring until it’s all melted and smooth.
-
Dip an Oreo into one of the colored chocolates until it’s fully covered, place a few eyes onto the Oreos and then sprinkle some of the sprinkles onto the top part of the oreo. Repeat this until all the cookies are decorated.
-
Place the cookies into the fridge for 30 minutes to allow the chocolate to set completely.
NOTE: For FAQs, tips, and storage, please refer to the article above.
Nutrition
Calories:
165kcal
|
Carbohydrates:
23g
|
Protein:
1g
|
Fat:
8g
|
Saturated Fat:
6g
|
Polyunsaturated Fat:
1g
|
Monounsaturated Fat:
1g
|
Trans Fat:
1g
|
Sodium:
74mg
|
Potassium:
26mg
|
Fiber:
1g
|
Sugar:
20g
|
Vitamin A:
1IU
|
Calcium:
3mg
|
Iron:
1mg
Nutritional information given is an automatic calculation and can vary based on the exact products you use and any changes you make to the recipe. If these numbers are very important to you, I would recommend calculating them yourself.
Did you make this? Leave a rating below!