
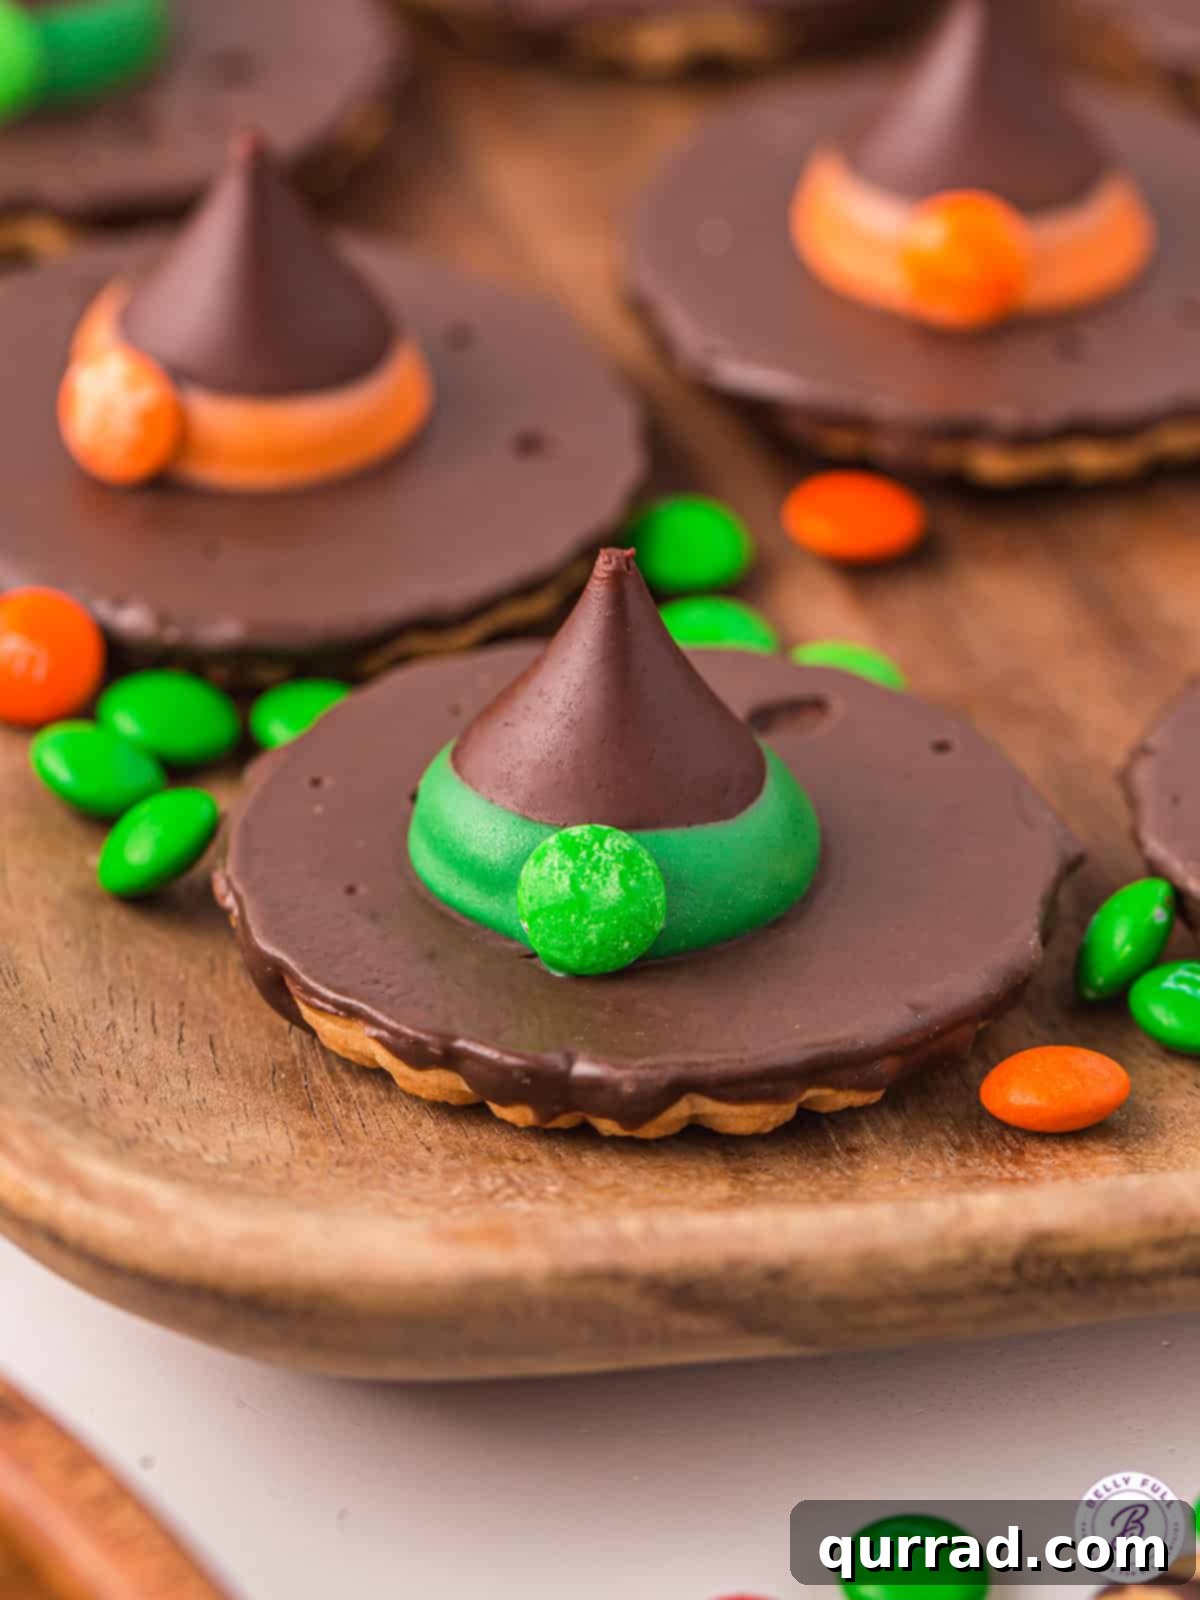
Crafted with just four simple ingredients, these enchanting Witch Hat Cookies are effortlessly quick to assemble, offering a truly adorable and delicious treat. Perfect for any Halloween gathering, from festive parties to school classroom celebrations, these no-bake cookies are guaranteed to be a hit. Their whimsical charm and ease of preparation make them an ideal addition to your spooky season menu.
To complete your Halloween spread, consider pairing these delightful witch cookies with a bubbling Halloween Witches’ Brew for a truly immersive and tasty experience!
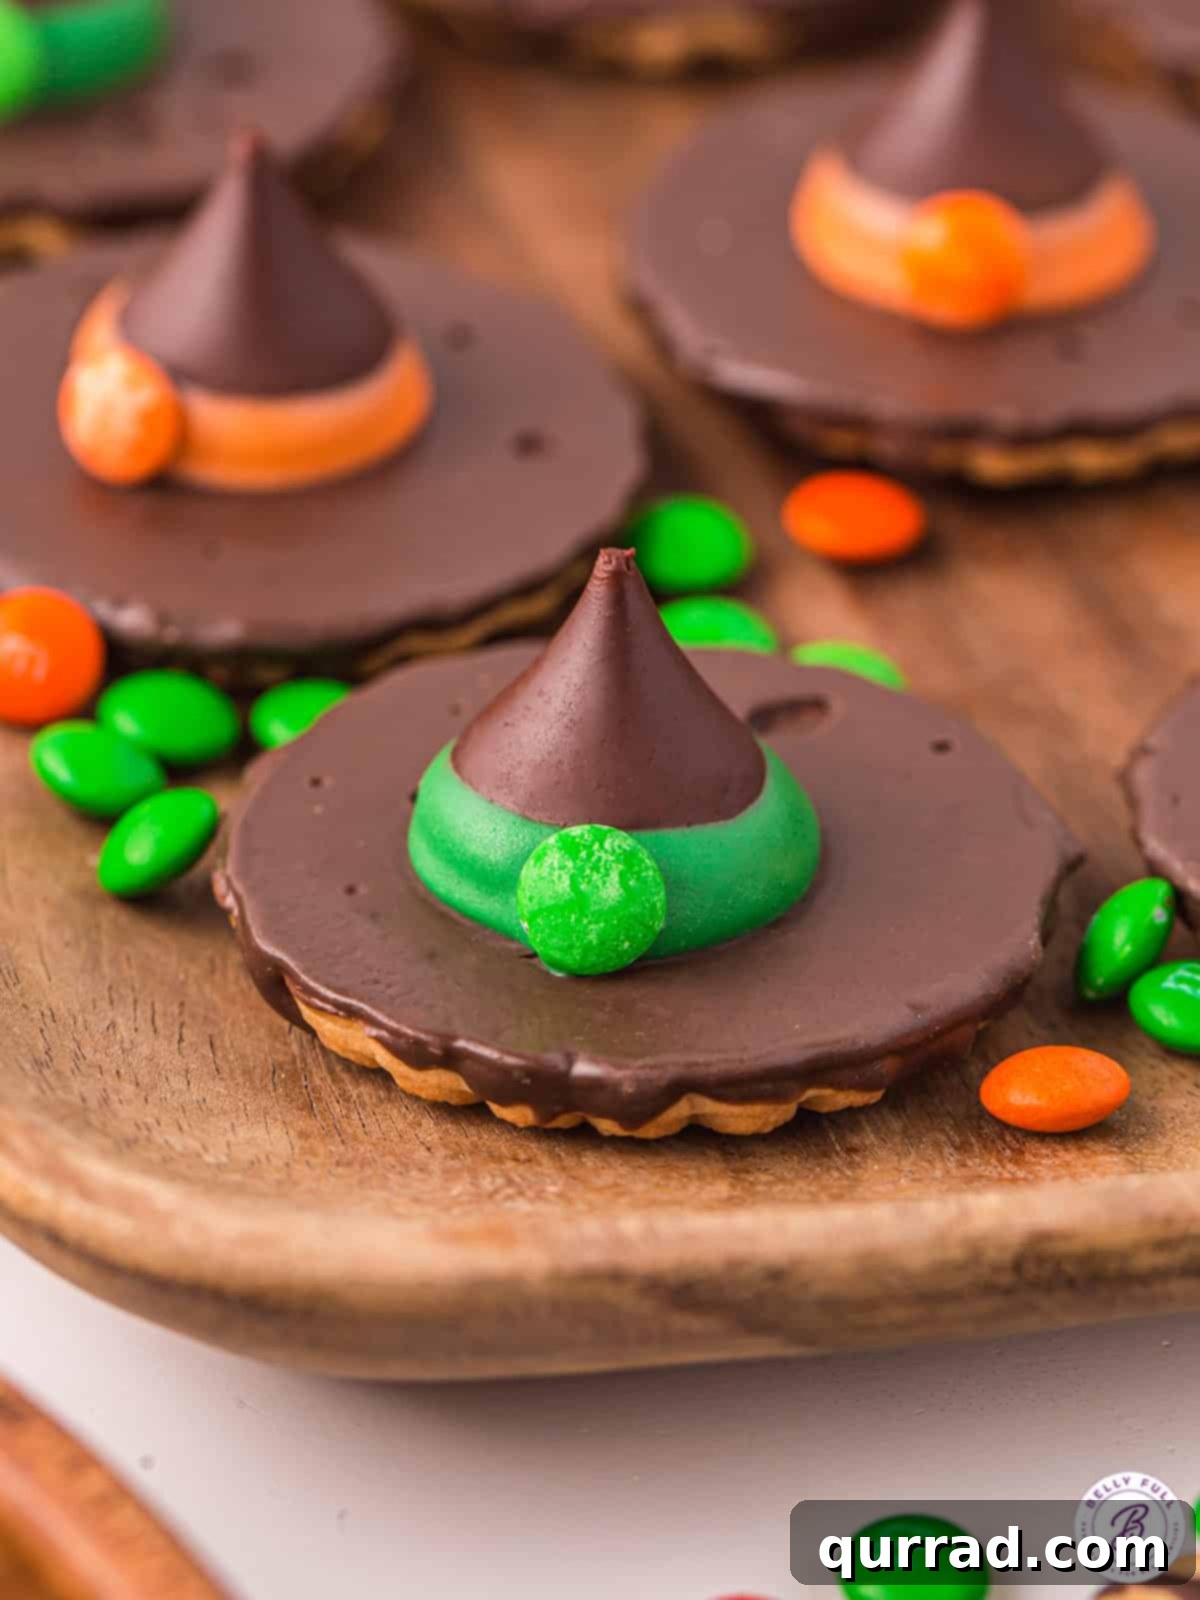
Unleash Your Inner Witch with Easy No-Bake Halloween Cookies
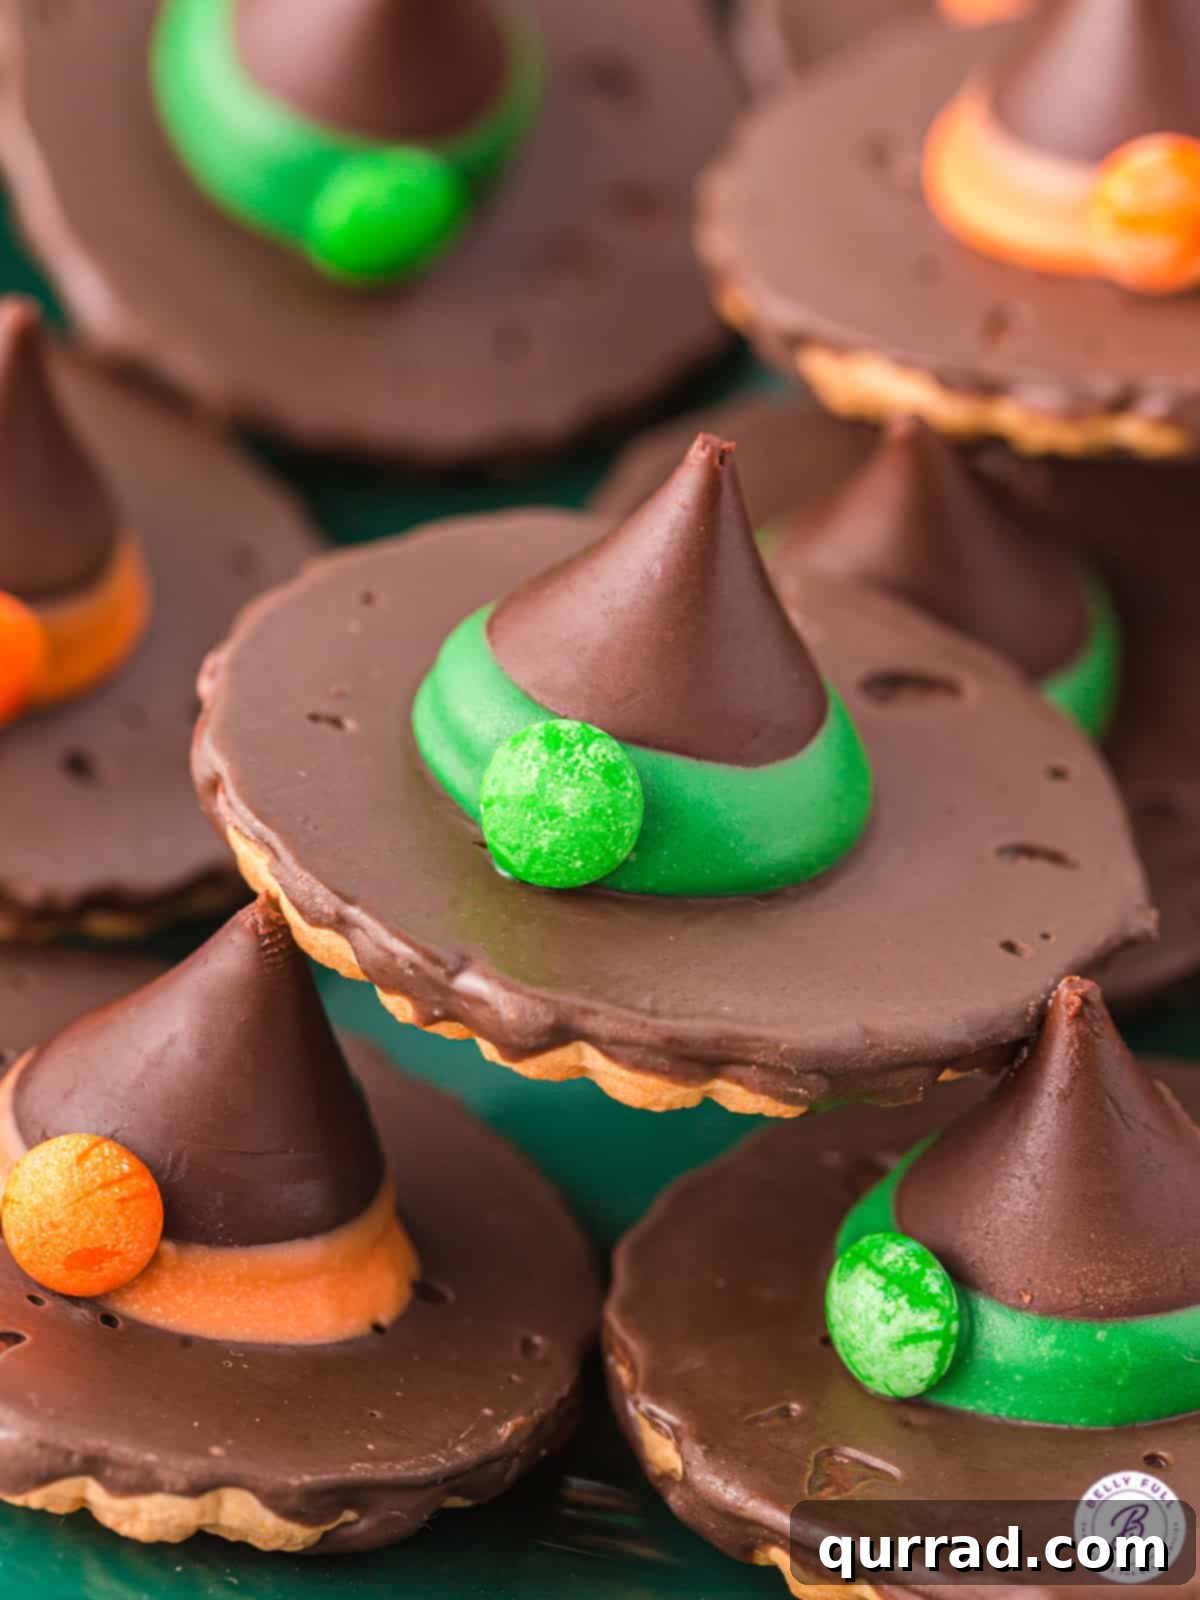
If you’re searching for a treat that perfectly balances fun, ease, and a touch of Halloween magic, look no further than these fantastic Witch Hat Cookies. This inventive no-bake recipe transforms everyday striped cookies into charming witch hats, topped with a classic Hershey’s Kiss and adorned with festive mini M&Ms. The beauty of this recipe lies in its simplicity; it requires no oven time, making it an excellent choice for busy hosts or a delightful activity for families with young children.
The concept is straightforward yet brilliant: a round, flat cookie forms the brim of the hat, a chocolate kiss becomes the pointed top, and a vibrant stripe of melted candy connects them, doubling as the hat band. Mini M&Ms or other small candies then add that final touch of personalization and color, making each cookie uniquely enchanting. These cookies are not only visually appealing but also offer a satisfying blend of textures and flavors that will delight trick-or-treaters and party guests alike.
Why These Witch Hat Cookies Will Be Your New Halloween Favorite
- No-Bake Wonder: Skip the oven and the stress! These cookies require zero baking, making them quick to prepare and perfect for any skill level.
- Kid-Friendly Fun: Little hands can easily participate in the assembly, fostering creativity and a sense of accomplishment without complex steps or hot surfaces.
- Lightning Fast: From start to finish, you can have a batch of these spooky treats ready in under 30 minutes, ideal for last-minute party contributions or sudden sweet cravings.
- Adorably Festive: Their iconic witch hat shape and vibrant colors make them an instant crowd-pleaser and a charming addition to any Halloween dessert table.
- Highly Customizable: With endless possibilities for cookie bases, candy melt colors, and decorative elements, you can tailor each batch to match your unique Halloween theme or personal taste.
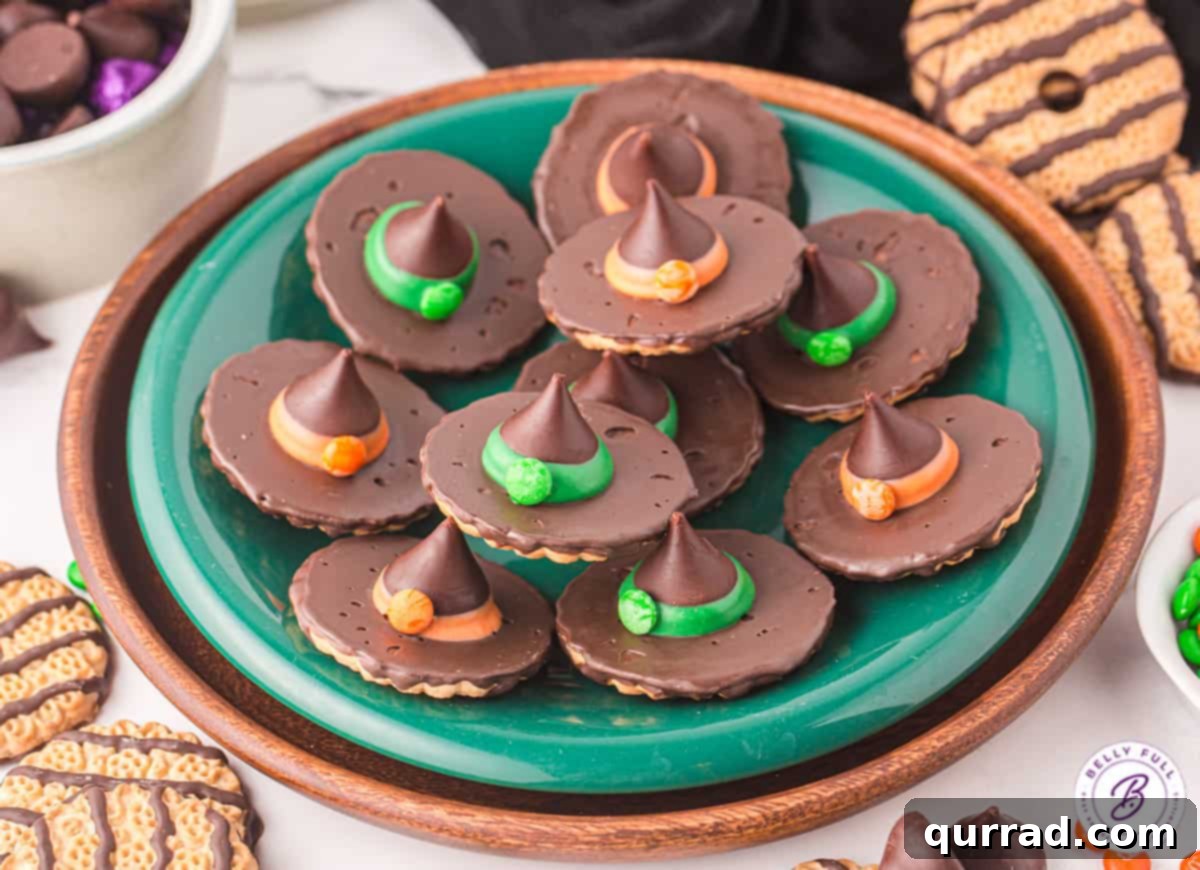
Essential Ingredients for Magical Witch Hats
The magic of these Witch Hat Cookies truly lies in their simplicity, requiring only a handful of readily available ingredients. You’ll be amazed at how quickly these four components transform into a spooky and delightful treat. Below is a detailed look at what you’ll need to create your own edible enchantments:
- Striped Cookies: The foundation of our witch hats! While Keebler Striped Cookies are a popular choice due to their distinct flat, chocolate-covered bottom and vanilla top, almost any round, flat-based cookie can work. The striped variety offers a neat, defined “brim” for the hat, but feel free to experiment with other cookies like shortbread rounds, vanilla wafers, or even chocolate-covered Oreos for different textures and flavors.
- Candy Melts: These are crucial for the vibrant “hat band” and for securing the Hershey’s Kiss. Candy melts come in a rainbow of colors, allowing you to customize your witch hats. Traditional Halloween colors like orange, green, and purple are popular, but don’t shy away from experimenting with other hues to create unique designs. Candy melts harden beautifully at room temperature, providing a stable and attractive finish.
- Dark Chocolate Kisses: The iconic Hershey’s Kiss forms the pointed top of the witch hat. Dark chocolate offers a rich contrast to the sweetness of the cookie and candy melts, but you can easily substitute milk chocolate or even almond-flavored Kisses for a different taste profile. Ensure they are unwrapped and ready for assembly.
- Mini M&Ms: These tiny, colorful candies serve as the decorative buckle on your witch hat band. Orange and green are classic Halloween colors, but a mix of colors can add a playful touch. If mini M&Ms aren’t available or you prefer an alternative, small sprinkles, edible glitter, or even a tiny dot of decorative icing can achieve a similar charming effect.
TIP! Candy Melts vs. White Chocolate Chips
For the best results when making these Witch Hat Cookies, I highly recommend using Wilton candy melts or Ghirardelli White Melting Wafers. These products are specifically designed for candy making, offering a smooth, consistent texture when melted and hardening beautifully at room temperature without becoming soft or sticky. This ensures your witch hat bands maintain their shape and vibrant color.
If you opt to use regular white chocolate chips, it’s advisable to combine them with a small amount of coconut oil. This helps thin the chocolate, creating a smoother consistency for dipping, and aids in faster hardening. A good ratio is about 1 tablespoon of coconut oil per 1 cup of white chocolate chips. Microwave in short bursts, stirring frequently, until smooth and fully melted.
Creative Variations to Personalize Your Treat
One of the most delightful aspects of making Witch Hat Cookies is the freedom to customize them. These variations allow you to tailor each batch to suit your personal preferences, party theme, or simply to spark your creative spirit. Get ready to unleash your imagination and make every witch hat cookie truly unique!
- Alternate Cookie Bases: While striped cookies provide a classic look, don’t hesitate to experiment with different round, flat-based cookies for the hat brim. Consider using fudge-covered Oreos for an extra chocolatey base, plain Oreos for a cookies-and-cream twist, or even Ritz crackers (plain or chocolate-covered) for a surprising sweet and salty combination. Coconut cookies or shortbread also make excellent alternatives, offering different textures and flavors.
- A Spectrum of Colors: The candy melt band offers a fantastic opportunity for color variation. Beyond the traditional orange and green, explore vibrant purple, spooky black, or even a mix of several colors on a single tray. You can match the mini M&Ms to the candy melt color for a cohesive look or mix and match for a playful, mismatched vibe. Imagine a tray filled with an assortment of multi-colored witch hats!
- Elaborate Decorations: Take your witch hats to the next level with additional embellishments. Use various sprinkles—from classic Halloween mixes to glittery sugars—to add sparkle to the hat band. Edible marker pens can be used to draw tiny spiders, cobwebs, or even a delicate buckle onto the candy melt. For more intricate designs, a small piping bag with decorative icing can create delicate patterns or even small, edible bats or stars on the hat. This is an especially fun activity to involve children, letting them personalize their own spooky creations. You can also vary the type of chocolate kisses used, like “Hugs” (white chocolate Kisses) for a lighter hat top, or different flavored Kisses to diversify the taste.
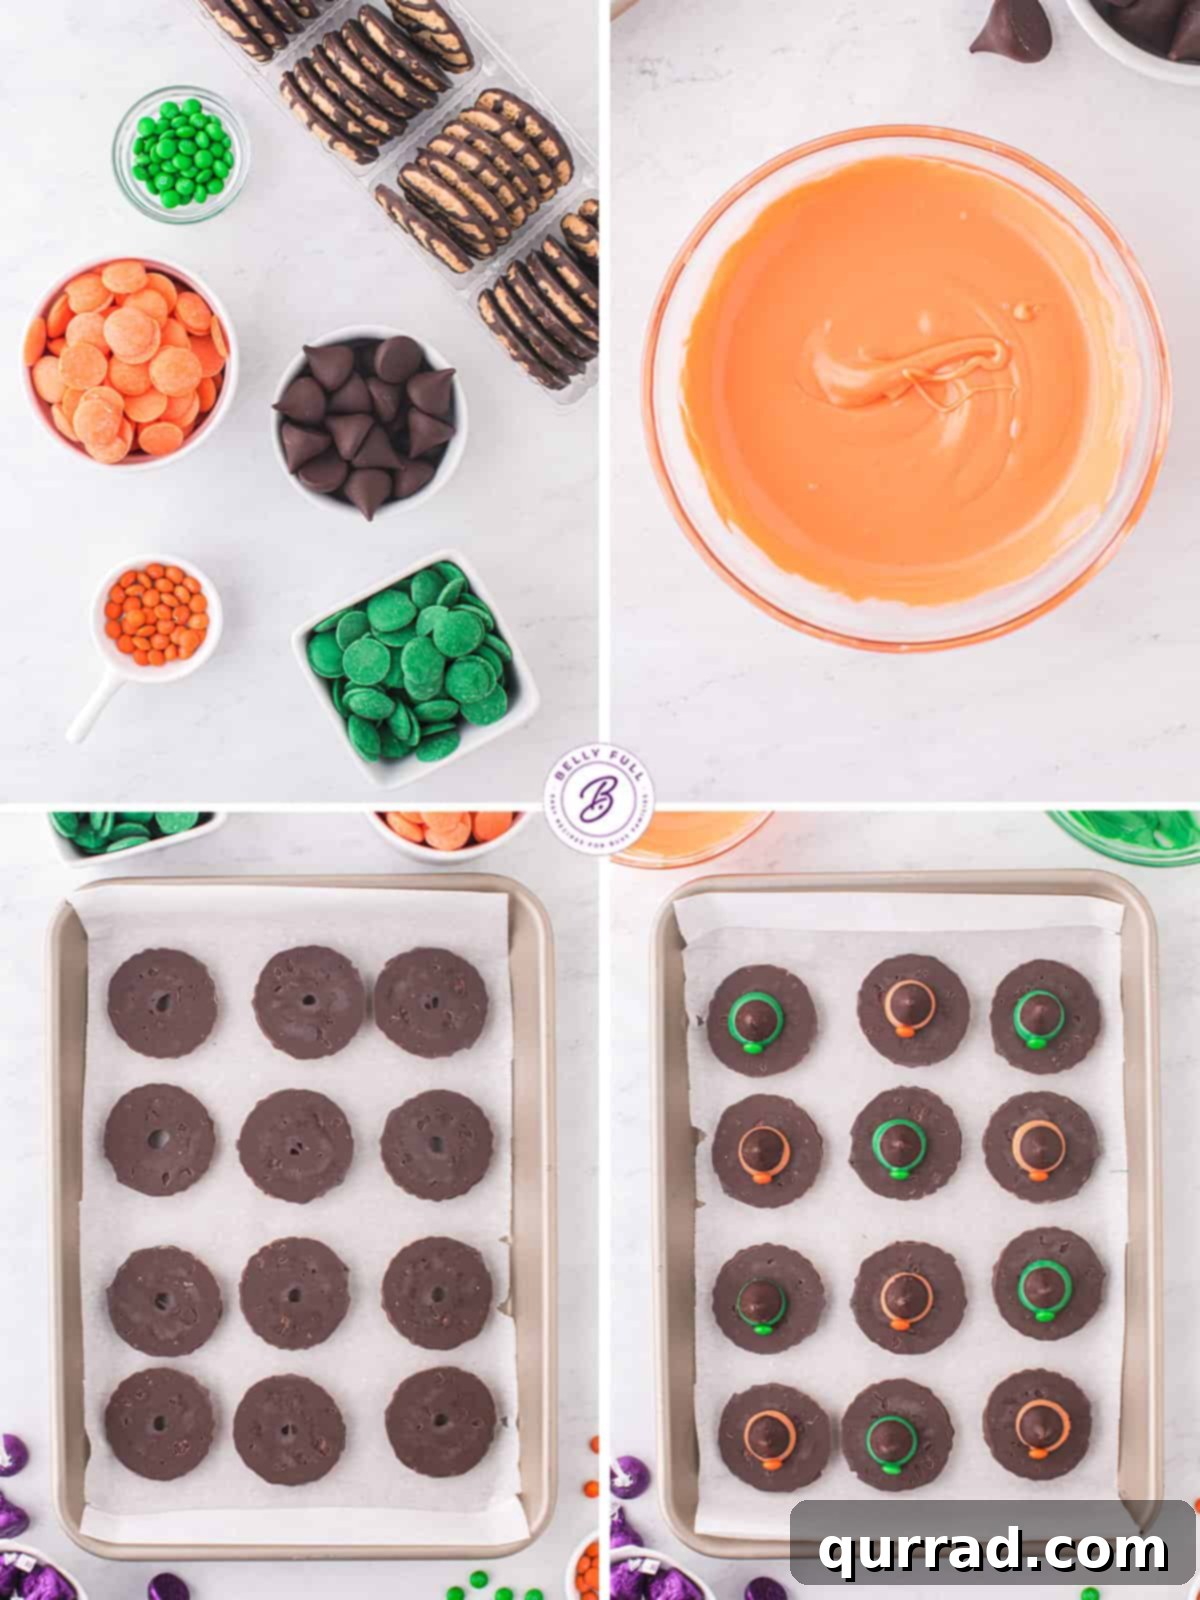
Simple Steps to Craft Your Witch Hat Cookies
Creating these charming Witch Hat Cookies is incredibly straightforward and doesn’t require any baking expertise. Follow these easy steps to bring your edible Halloween creations to life:
- Prepare Your Workspace: Lay out a large sheet of parchment paper or wax paper on a baking sheet or a clean, flat surface. This will prevent the cookies from sticking and make cleanup a breeze. Arrange your striped cookies upside down on the parchment paper, ensuring the solid chocolate bottom is facing upwards. This provides a stable, flat surface for attaching the “hat.”
- Melt the Candy Melts: Pour each color of candy melts into separate shallow, microwave-safe bowls. Follow the package directions carefully for melting. Typically, this involves microwaving in 30-second intervals, stirring thoroughly after each interval, until the melts are smooth and completely melted. Be careful not to overheat, as this can cause the chocolate to seize or become clumpy. Alternatively, you can use a double boiler method for a more controlled melt.
- Attach the “Hat” to the Cookie: Unwrap all your Hershey’s Kisses. Take one chocolate Kiss and dip its flat bottom into the melted candy melts. Ensure it’s coated sufficiently to create a visible “band” around the base of the Kiss, with just a tiny bit of the side edge coated. Allow any excess candy melt to drip off briefly before proceeding to the next step.
- Position the Kiss: Carefully place the dipped Hershey’s Kiss onto the center of a prepared cookie. The melted candy will act as an adhesive, securing the Kiss to the cookie and forming the iconic witch hat shape. Press gently but firmly to ensure good contact.
- Add the M&Ms: While the candy melt band is still wet and pliable, carefully place one mini M&M onto the melted candy, with the “M” side facing down for a cleaner look if desired. This creates the “buckle” of the witch hat. Repeat this process with the remaining cookies, Kisses, and M&Ms. Work relatively quickly so the candy melts don’t set before you can add the M&Ms.
- Allow to Set: Once all your witch hats are assembled and decorated, allow them to set completely. This typically takes about 15 to 30 minutes at room temperature. For quicker setting, you can carefully transfer the baking sheet to the refrigerator for about 10-15 minutes. However, be aware that very cold chocolate can be harder to bite into, so bringing them back to room temperature before serving is often preferred for optimal enjoyment.
Pro Tips for Flawless Witch Hat Cookies
- Temperature Control: Ensure your workspace is not too warm, as this can make the candy melts take longer to set or cause them to become too runny.
- Use Good Quality Melts: Investing in quality candy melts or melting wafers will yield a smoother finish and better setting properties.
- Prevent Overheating: When melting candy melts, heat them slowly and stir frequently to prevent scorching or seizing. A silicone spatula works wonders for thorough mixing.
- Quick Hands: Have all your ingredients prepped and ready before you start melting the candy. This allows for efficient assembly before the melts begin to harden.
- Parchment Paper is Your Friend: It truly simplifies cleanup and ensures your cookies don’t stick to the surface.
Storing Your Spooky Sweets
Once your charming Witch Hat Cookies have fully set, proper storage will ensure they remain fresh and delicious for as long as possible, allowing you to enjoy them throughout the Halloween season or prepare them in advance for a party.
For optimal freshness, store these cookies in an airtight container or a resealable plastic bag at room temperature. Placed away from direct sunlight and heat, they will maintain their quality and delightful crunch for about 2 to 3 weeks. The airtight environment is key to preventing the cookies from becoming soft or stale and protecting the chocolate from any undesirable odors.
While refrigeration or freezing is possible, it’s generally not necessary for short-term storage. If you do choose to refrigerate, the chocolate and cookies will harden significantly. When serving, it’s best to allow them to come back to room temperature for about 15-30 minutes. This brings out the best texture and flavor, making the chocolate softer and the cookies less brittle. Freezing can extend their shelf life even further, up to a couple of months, but similarly requires thawing at room temperature before enjoying.
Explore More Halloween Delights
If you’ve enjoyed making these easy and adorable Witch Hat Cookies, you’ll love these other simple and spooky treats perfect for your Halloween celebrations:
- Halloween Monster Munch
- Hocus Pocus Cupcakes
- Mummy Oreo Balls
- Monster Oreo Pops
- Candy Corn Pretzel Bark
We hope you thoroughly enjoy creating and devouring this delicious and straightforward recipe. Your feedback is valuable, so please consider leaving a review below! Don’t forget to connect with Belly Full on TikTok, Facebook, Instagram, Pinterest, and YouTube for more delightful recipes and culinary inspiration!
Witch Hat Cookies Recipe
Prep Time: 15 mins
Total Time: 15 mins
Servings: 24 cookies
Ingredients
- 1 package (11.5 ounce) striped cookies
- 1/2 cup orange candy melts
- 1/2 cup green candy melts
- 24 dark chocolate Kisses, unwrapped
- 24 orange and green mini M&Ms
Instructions
- Place the cookies upside down on a large, parchment-lined baking sheet so that the solid chocolate bottom is facing up.
- Pour each set of candy melts into a shallow, microwave-safe bowl and melt according to package directions until melted and smooth.
- Dip each chocolate kiss bottom into the candy melts to coat the bottom and just a tiny bit of the side edge.
- Allow any excess to drip off and then place the Kiss on the center of a cookie, creating a witch’s hat.
- Place one mini M&M, M-side down, on the candy melt band and then repeat with the remaining ingredients.
- Allow the witch hats time to set completely, about 15-30 minutes, before serving. (You can transfer to the fridge so they set quicker, but the cold chocolate is not as pleasant to eat.)
Notes
Melting Wafers or Candy Melts vs. White Chocolate Chips: I prefer Wilton candy melts or Ghirardelli White Melting Wafers for candy making because of their smooth consistency, and once dried and hardened, they don’t soften at room temperature. If you want to use regular white chocolate, I recommend combining it with some coconut oil, which will help thicken it up and harden faster. You’ll need about 1 tablespoon coconut oil per 1 cup of chocolate.
Nutrition Facts (per cookie)
Calories: 107kcal | Carbohydrates: 16g | Protein: 1g | Fat: 5g | Saturated Fat: 3g | Polyunsaturated Fat: 1g | Monounsaturated Fat: 1g | Trans Fat: 0.002g | Cholesterol: 2mg | Sodium: 88mg | Potassium: 29mg | Fiber: 1g | Sugar: 11g | Vitamin A: 4IU | Vitamin C: 0.01mg | Calcium: 14mg | Iron: 1mg
Nutritional information provided is an automatic calculation and may vary based on specific product brands and any modifications made to the recipe. For precise values, independent calculation is recommended.