
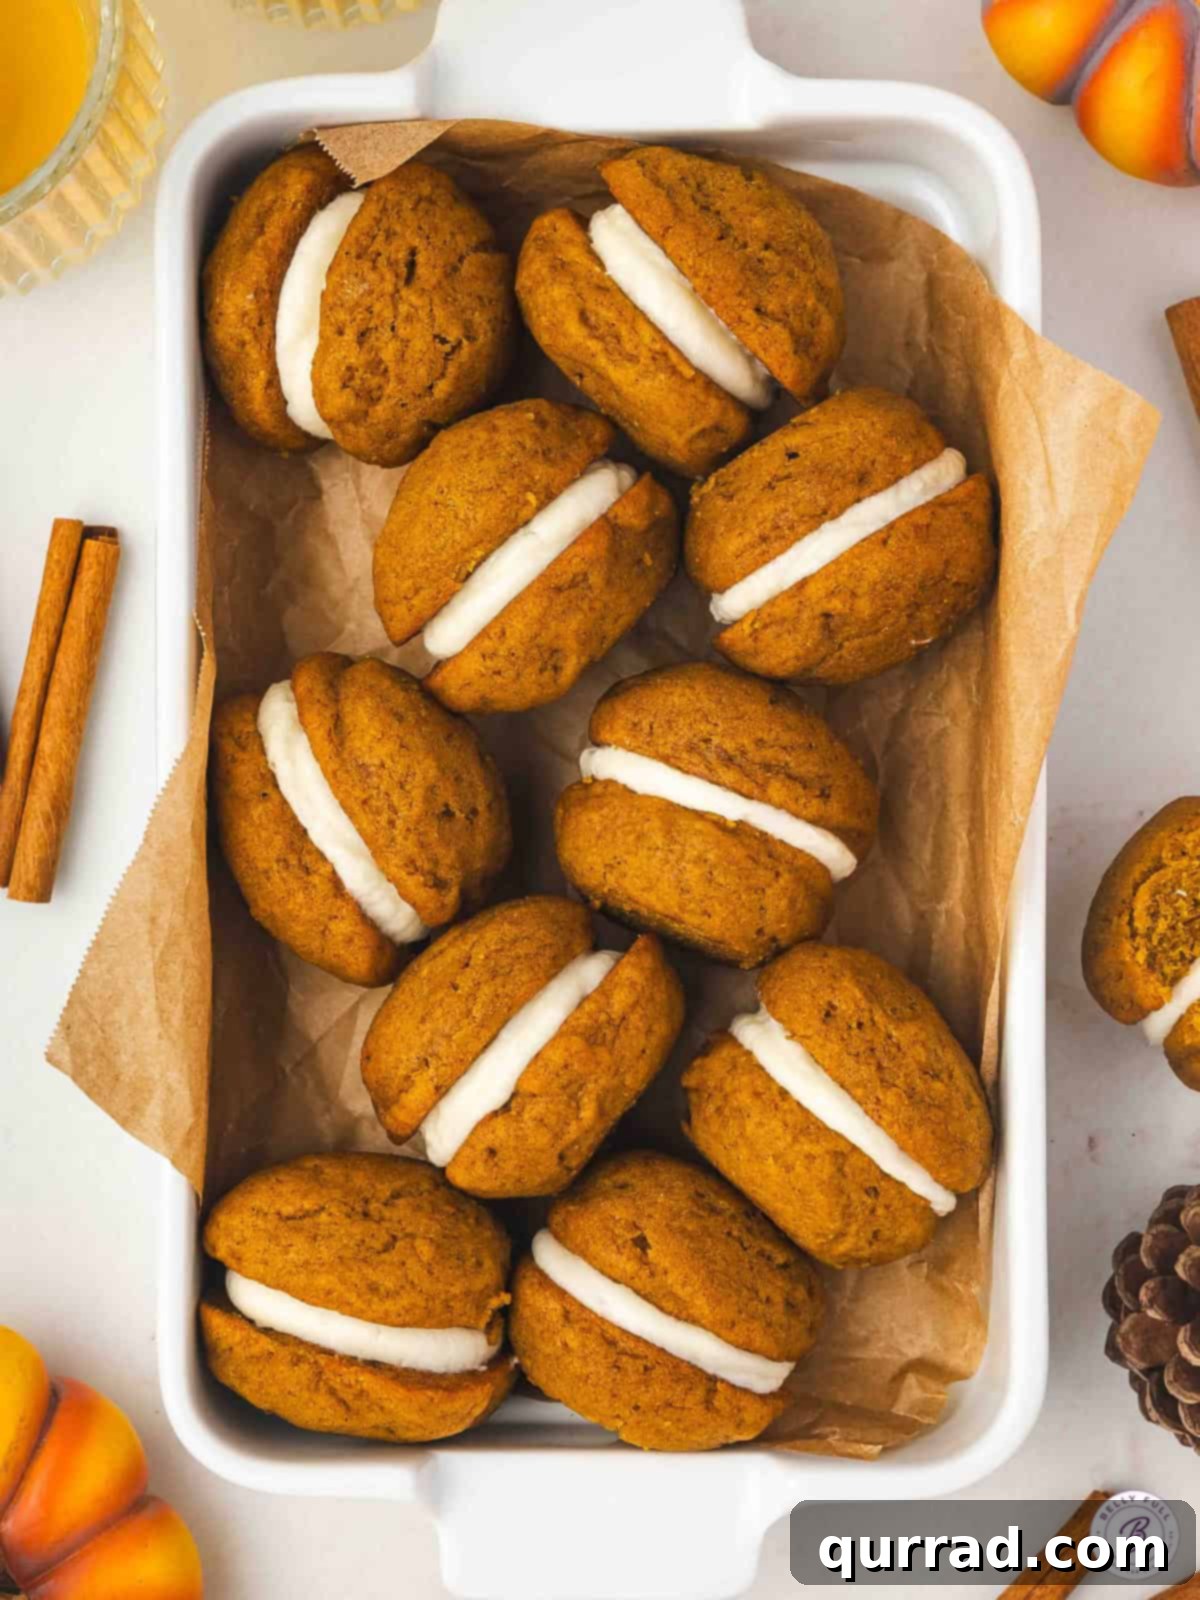
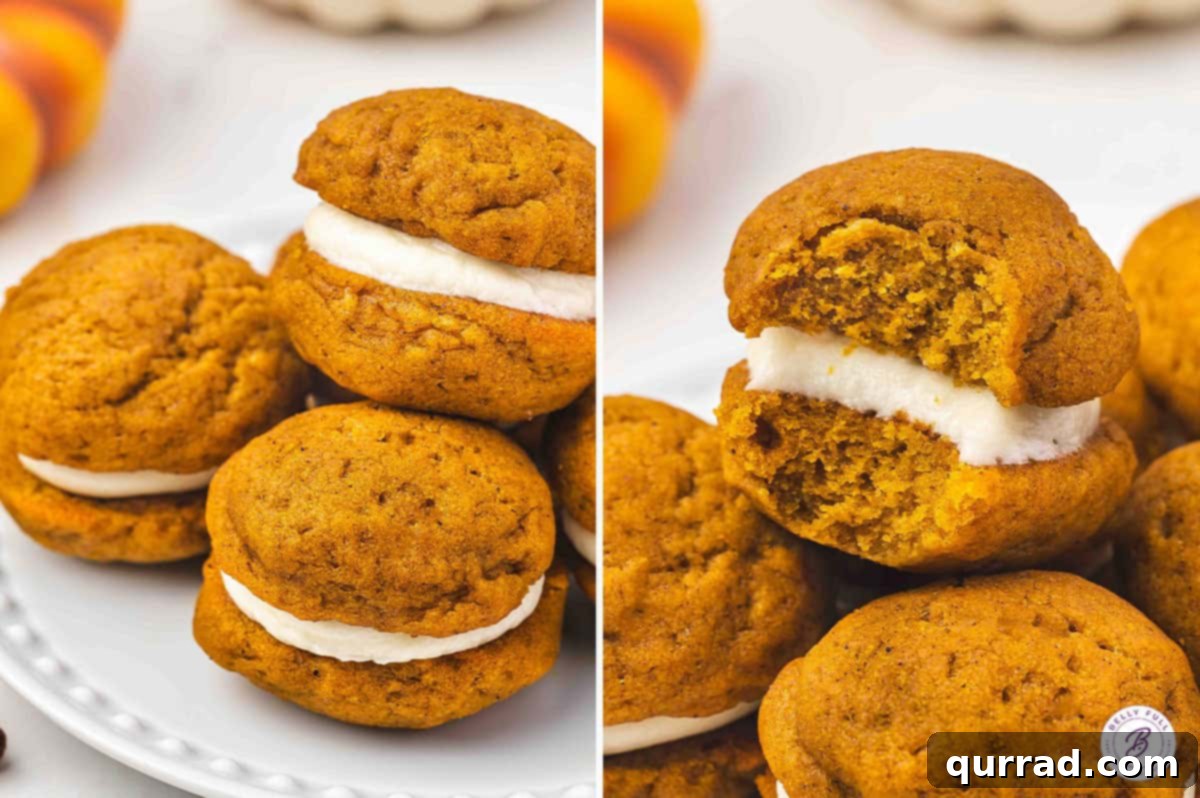
As autumn leaves begin to paint the landscape and a crisp chill fills the air, there’s nothing quite like the comforting aroma of pumpkin spice wafting from the kitchen. Our homemade pumpkin whoopie pies are the quintessential fall dessert, perfectly capturing the spirit of the season in every delightful bite. Imagine two soft, tender, cake-like pumpkin cookies, infused with a symphony of warm spices, generously sandwiching a luscious, creamy, and pipeable cream cheese frosting that holds its shape beautifully. These aren’t just cookies; they are an experience – a nostalgic nod to classic whoopie pies elevated with the irresistible flavors of pumpkin.
For many, whoopie pies evoke childhood memories, a delightful hybrid of cake and cookie that offers the best of both worlds. This particular pumpkin whoopie pie recipe has become a cherished yearly tradition in our home once pumpkin season arrives. My family eagerly anticipates these fluffy, spiced treats, and I, too, am always captivated by a good pumpkin dessert. The ‘cakes’ (or cookie halves) boast a wonderfully soft texture, rich with the natural sweetness of pumpkin puree and the comforting warmth of pumpkin pie spice. They are then paired with a thick, pipeable, and undeniably creamy frosting, creating a harmonious balance of flavors and textures that is simply irresistible.
Beyond their incredible taste, these pumpkin whoopie pies are remarkably practical. They are an excellent make-ahead dessert, freeing up valuable time during busy holiday preparations like Thanksgiving. Plus, they are freezer-friendly, allowing for stress-free baking and enjoyment whenever a pumpkin craving strikes. Easy to transport and fun to share, these delightful handheld desserts are perfect for gatherings, potlucks, or simply enjoying with your afternoon coffee. Get ready to impress your friends and family with this cozy, spiced, and utterly delicious autumn creation!
Expert Baking Tips for Perfect Pumpkin Whoopie Pies
Achieving bakery-quality pumpkin whoopie pies at home is simpler than you might think, especially with a few expert tips to guide you. From perfectly textured cakes to a beautifully piped filling, these insights will help ensure your whoopie pies are a resounding success:
- Precision in Flour Measurement is Key. Baking is a science, and accurately measuring your flour makes a world of difference. Instead of scooping flour directly from the bag with your measuring cup (which compacts it and adds too much), gently spoon the flour into your measuring cup until it overflows. Then, use the flat side of a knife or a straight edge to level off the excess. This technique prevents over-measurement, which can lead to dense, dry whoopie pies rather than the desired soft, tender, and cake-like texture.
- Choose Plain Pumpkin Puree, Not Pie Filling. This distinction is crucial for both flavor and texture. Always opt for 100% pure canned pumpkin puree. Pumpkin pie filling, while convenient, is already sweetened, spiced, and often contains additives, which will significantly alter the balance of flavors in your whoopie pies and affect the consistency of the cake batter. Pure pumpkin puree allows you to control the exact amount of sugar and spice for a perfectly balanced taste.
- Avoid Overmixing the Batter at All Costs. Once you’ve added the dry ingredients to the wet mixture, mix only until they are just combined. Overmixing develops the gluten in the flour too much, leading to tough, rubbery cakes rather than the light, fluffy texture we’re aiming for. A few lumps are perfectly acceptable – resist the urge to keep stirring!
- Chill the Cream Cheese Filling for Optimal Piping. After preparing your decadent cream cheese frosting, give it a little time to firm up in the refrigerator. A short rest, typically 15-20 minutes, will thicken the frosting, making it much easier to pipe smoothly between your whoopie pie halves. This chilling step ensures your frosting holds its shape beautifully and doesn’t ooze out when assembled.
- Uniformity with a Cookie Scoop. For consistently sized whoopie pie halves, use a cookie scoop (about 1 tablespoon in size). This ensures even baking and makes assembly much easier, resulting in a more professional and appealing final product.
- Parchment Paper is Your Best Friend. Always line your baking sheets with parchment paper. This prevents the whoopie pie cakes from sticking, ensures even browning, and makes cleanup a breeze. Silicone baking mats also work wonderfully.
- Room Temperature Ingredients for the Filling. For the smoothest, creamiest cream cheese frosting, make sure your cream cheese and unsalted butter are properly softened to room temperature. This allows them to cream together effortlessly without lumps, resulting in a silky-smooth texture.
Pumpkin Whoopie Pies
Pin
These delightful pumpkin whoopie pies feature soft and fluffy cake-like pumpkin spice cookies, generously filled with a rich and tangy cream cheese frosting. They are the ultimate cozy fall treat, perfect for gracing your Thanksgiving dessert table or enjoying with your favorite coffee or tea break.
Step-by-step photos can be seen below the recipe card for visual guidance.
Ingredients
For the Cakes
- 1 cup pure pumpkin puree
- 1/2 cup vegetable oil
- 1/2 cup packed brown sugar
- 1 large egg, at room temperature
- 1 teaspoon vanilla extract
- 1 & 3/4 cups all-purpose flour, spooned and leveled
- 1 teaspoon baking powder
- 1/2 teaspoon baking soda
- 1/2 teaspoon salt
- 2 teaspoons pumpkin pie spice
Cream Cheese Filling
- 4 ounces cream cheese, softened
- 1/4 cup unsalted butter, softened
- 1 cup powdered sugar
- 1/2 teaspoon vanilla extract
Instructions
- Preheat your oven to 350°F (175°C). Line two large baking sheets with parchment paper for easy release.
- In a large mixing bowl, sift together the all-purpose flour, baking powder, baking soda, salt, and pumpkin pie spice. Whisk gently to ensure all dry ingredients are well combined.
- In a separate large bowl, whisk together the pumpkin puree, vegetable oil, packed brown sugar, room temperature egg, and vanilla extract until the mixture is smooth and thoroughly blended.
- Gradually add the dry ingredients to the wet mixture. Fold gently with a spatula until just combined. Be careful not to overmix; a few small lumps are fine.
- Using a 1-tablespoon cookie scoop or two spoons, drop rounded portions of batter onto the prepared baking sheets, ensuring about 2 inches of space between each mound to allow for spreading.
- Bake for 12–15 minutes, or until the edges are lightly golden and a toothpick inserted into the center of a cake comes out clean. Let the baked cakes cool on the baking sheets for 5 minutes before carefully transferring them to a wire rack to cool completely.
- While the cakes are cooling, prepare the cream cheese filling. In a medium bowl, beat the softened cream cheese and softened unsalted butter with an electric mixer until smooth and creamy. Gradually add the powdered sugar and vanilla extract, continuing to mix until the frosting is thick, fluffy, and well combined. Chill the filling in the refrigerator for 15–20 minutes to help it firm up.
- Once the cakes are completely cool and the filling is chilled, transfer the cream cheese filling to a piping bag (or a sturdy Ziploc bag with a corner snipped off). Pipe a generous dollop of filling onto the flat side of one pumpkin cake. Gently top with another cake, pressing down slightly to create a sandwich. Repeat this process with all remaining cakes.
- For the best structural integrity and flavor, chill the assembled whoopie pies in the refrigerator for at least 30 minutes before serving. This allows the filling to fully set and helps the pies hold their shape.
Video
Notes
- For a slightly less sweet but still delicious filling, consider reducing the powdered sugar to ½ cup. This will result in a tangier cream cheese frosting that still maintains a good, pipeable consistency.
- To ensure an extra firm filling, which is especially helpful in warmer environments or for intricate piping, make sure to chill it for the full 15–20 minutes as instructed. Additionally, incorporating 1–2 tablespoons of cornstarch into the powdered sugar before mixing can significantly enhance the frosting’s stability and ability to hold its shape for piping.
Nutrition
Nutritional information provided is an automatic calculation and may vary based on the specific brands and exact products you use, as well as any modifications made to the recipe. If precise nutritional values are critical, we recommend calculating them independently using your specific ingredients.
How to Make Pumpkin Whoopie Pies: A Visual Step-by-Step Guide
Embark on your pumpkin whoopie pie baking journey with confidence, guided by these detailed, step-by-step instructions accompanied by helpful visuals. Each stage is broken down to ensure a smooth and enjoyable baking experience, leading to perfectly crafted autumnal delights.
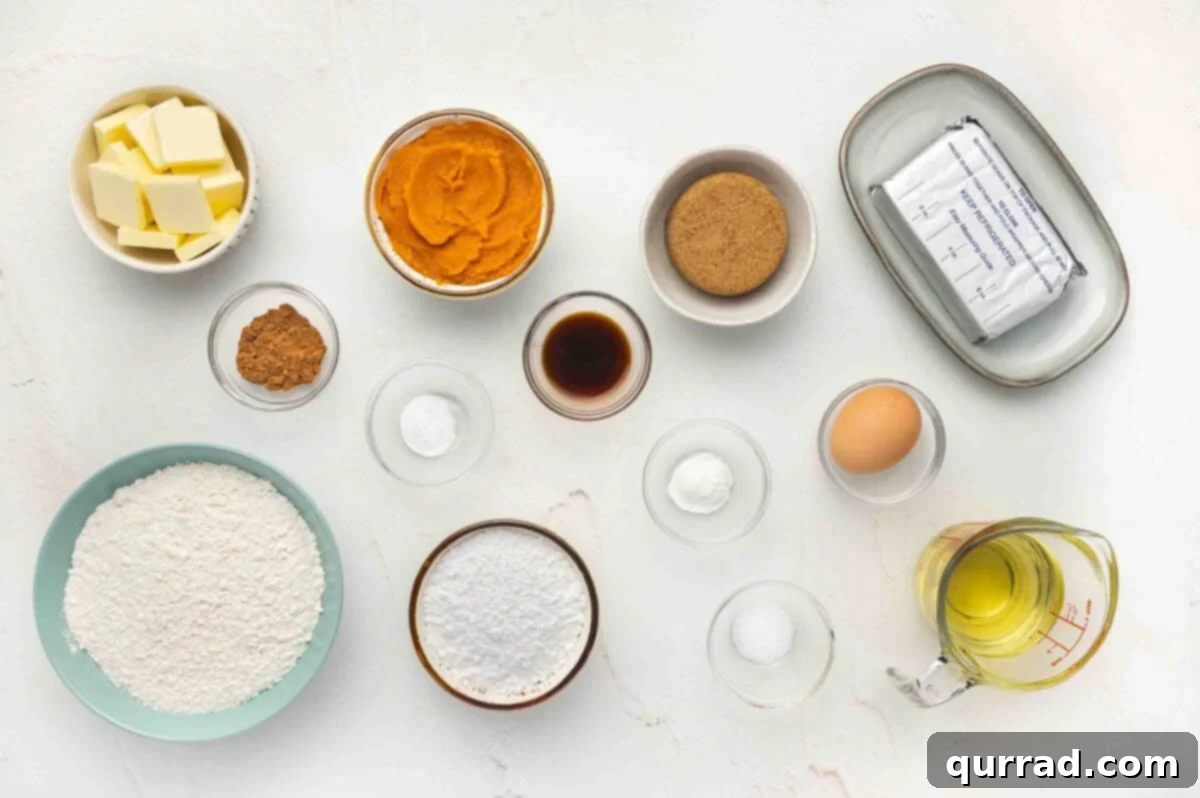
Step 1: Gather Your Ingredients and Prepare Your Workspace. Begin by laying out all the necessary ingredients on your counter. This ensures you have everything at hand when you need it. Preheat your oven to 350°F (175°C), and meticulously line two standard baking sheets with parchment paper. This parchment paper is essential for preventing sticking and allowing your delicate whoopie pie cakes to lift off easily after baking.
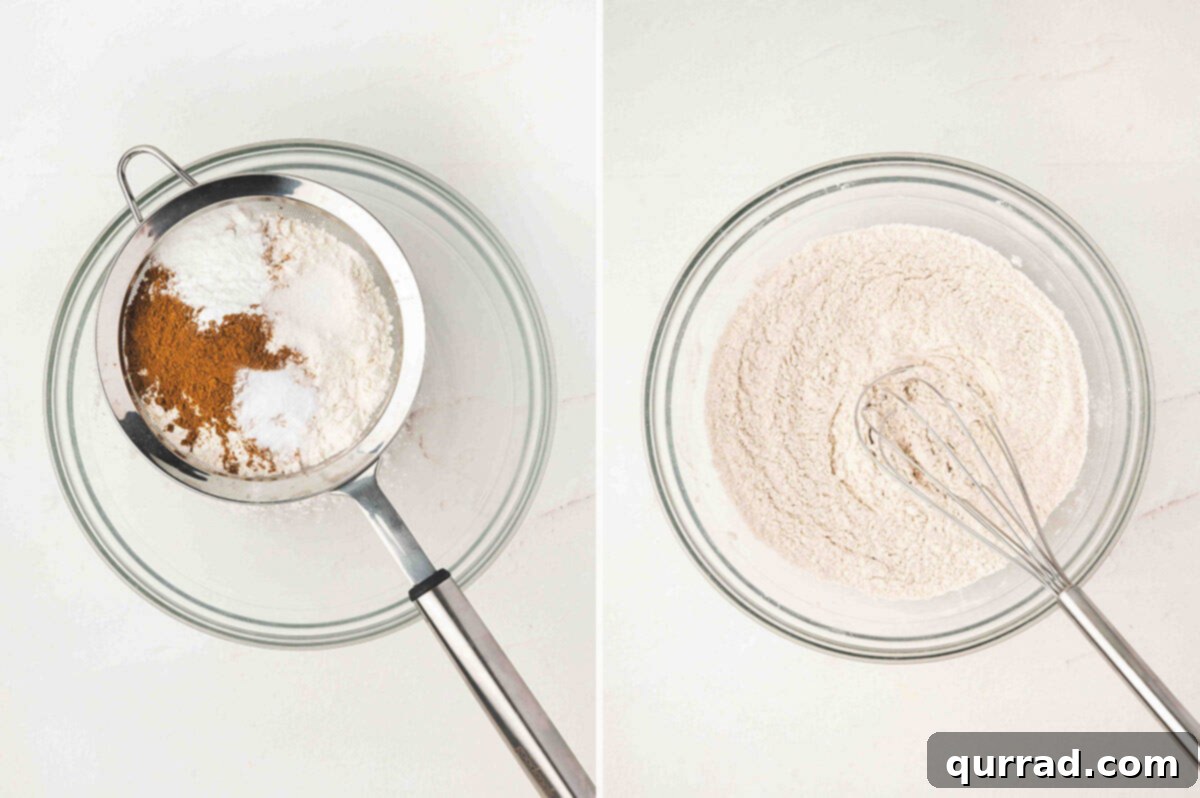
Step 2: Combine the Dry Ingredients for the Cakes. In a spacious mixing bowl, carefully sift together 1¾ cups of all-purpose flour, 1 teaspoon of baking powder, ½ teaspoon of baking soda, ½ teaspoon of salt, and 2 teaspoons of pumpkin pie spice. Sifting is an important step that aerates the flour and removes any lumps, ensuring a light and uniform texture in your finished whoopie pie cakes. Once sifted, give the mixture a quick whisk to ensure all components are evenly distributed.
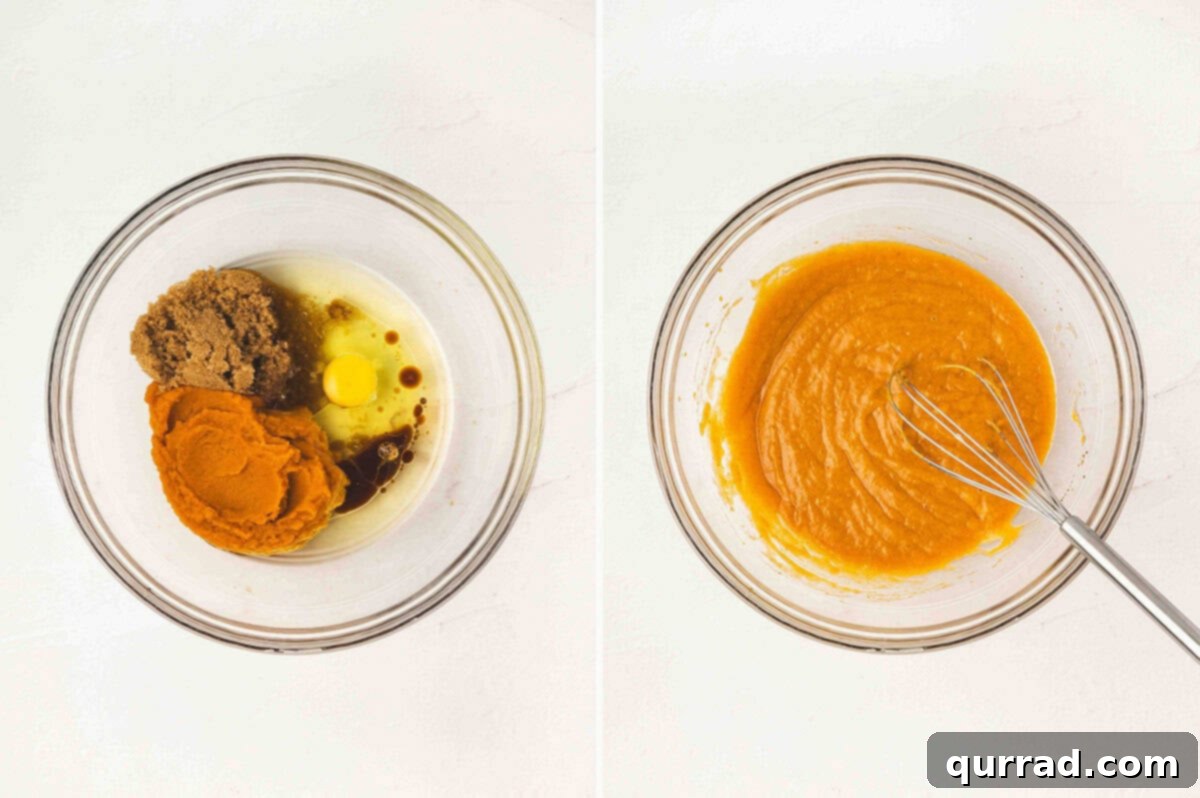
Step 3: Prepare the Wet Ingredients. In a separate, equally large bowl, combine 1 cup of pure pumpkin puree, ½ cup of vegetable oil, ½ cup of packed brown sugar, 1 large egg (at room temperature for better emulsification), and 1 teaspoon of vanilla extract. Whisk these ingredients vigorously until the mixture is completely smooth and evenly colored. The brown sugar will dissolve, and the pumpkin will integrate beautifully, creating a rich, autumnal base for your cakes.
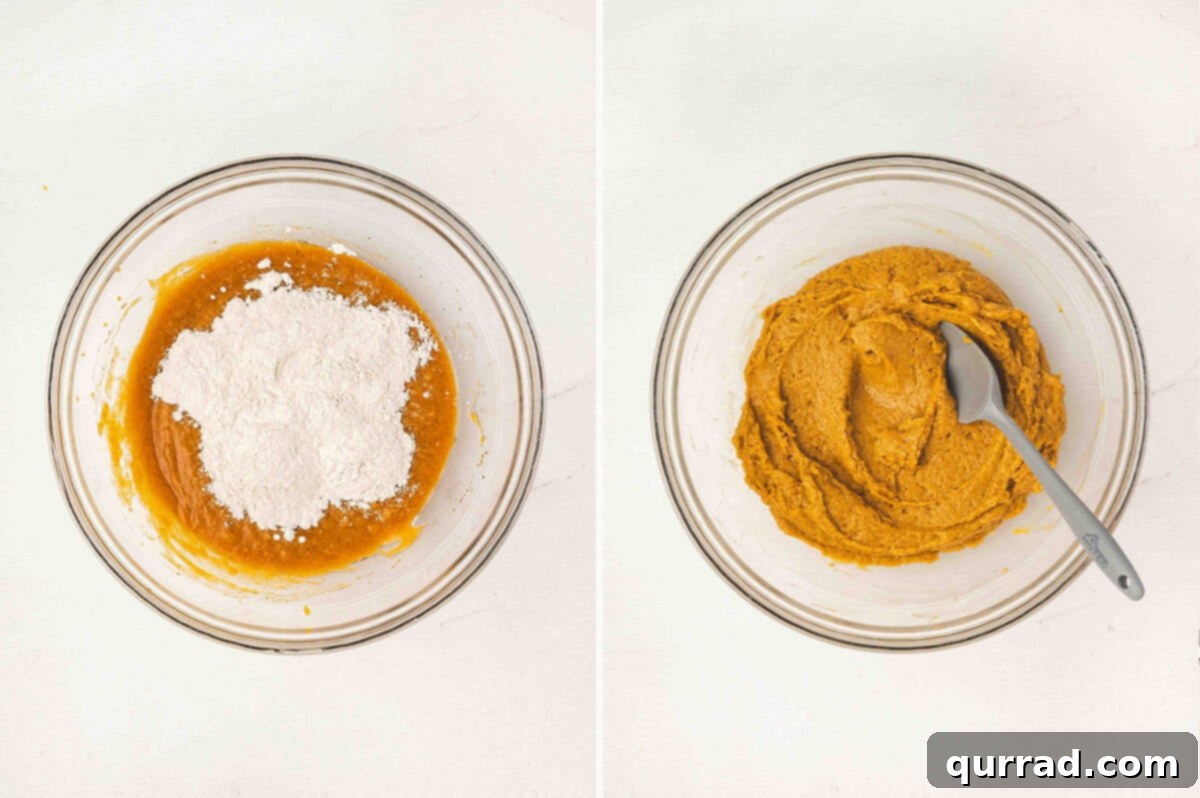
Step 4: Gently Combine Wet and Dry Mixtures. Now, it’s time to unite the flavors. Carefully pour the dry ingredient mixture into the bowl containing the wet pumpkin mixture. Using a spatula, gently fold the ingredients together. The key here is to mix only until the flour streaks have just disappeared and everything is combined. Overmixing will develop the gluten, leading to tough cakes. A few small lumps are perfectly acceptable and often indicate you’ve mixed just enough.
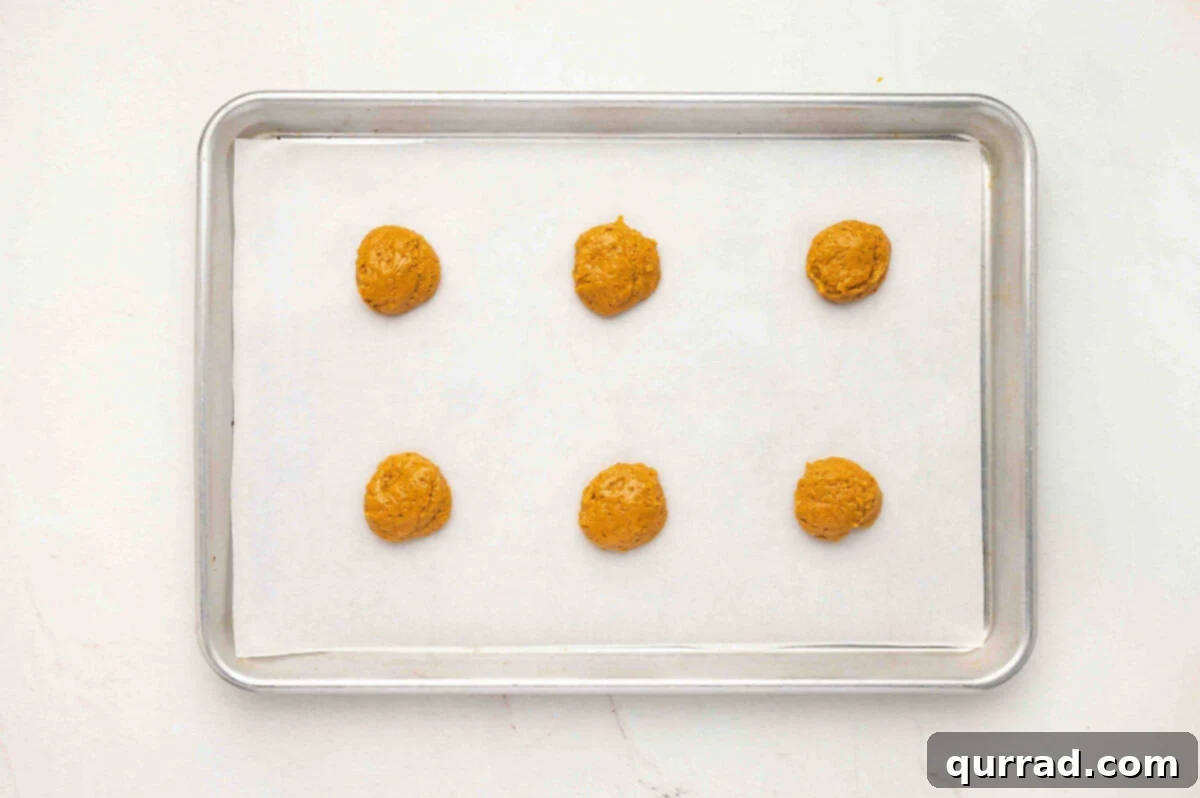
Step 5: Portion the Batter Evenly onto Baking Sheets. Using a 1-tablespoon cookie scoop (or two spoons for careful measurement), drop uniform portions of the pumpkin whoopie pie batter onto your prepared baking sheets. Make sure to leave ample space, approximately 2 inches, between each dollop. This allows the cakes to spread slightly during baking without running into each other, ensuring beautifully rounded and perfectly baked halves.
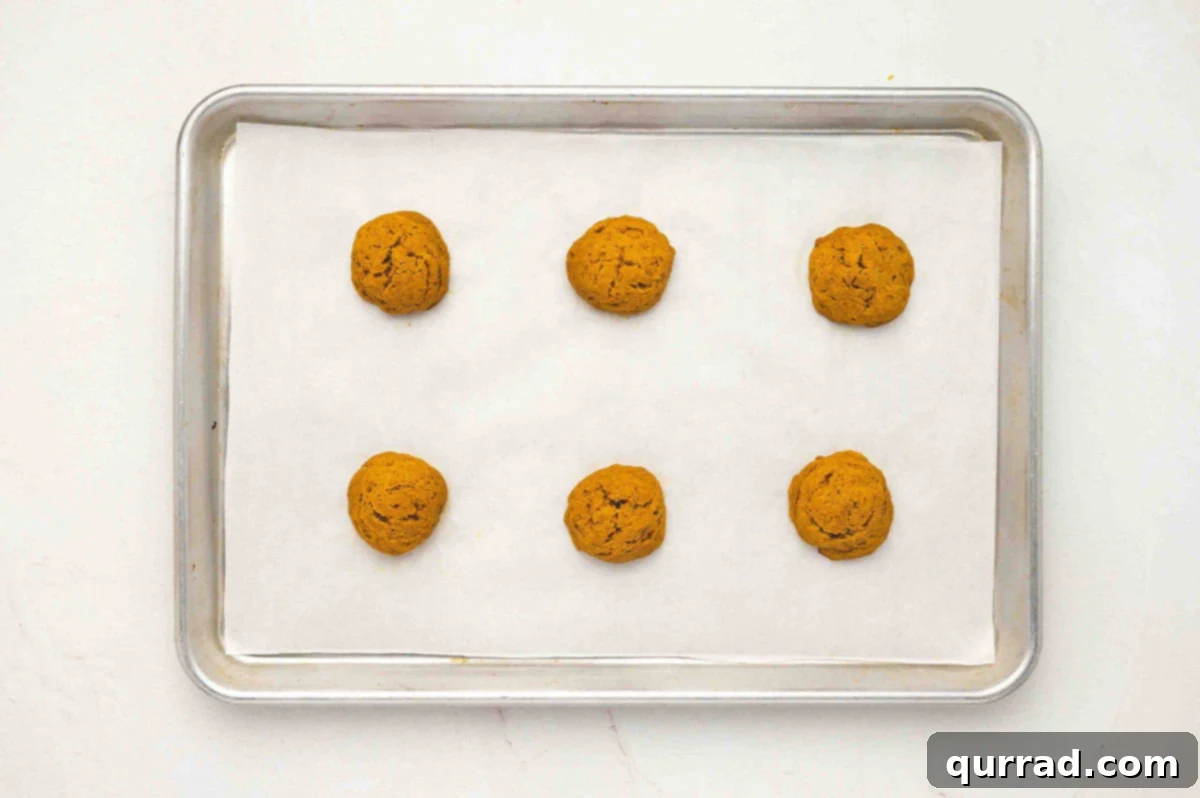
Step 6: Bake the Pumpkin Cakes to Perfection. Slide your prepared baking sheets into the preheated oven and bake for 12–15 minutes. The cakes are done when they are lightly golden around the edges, feel springy to the touch, and a toothpick inserted into the center comes out clean. Once baked, let the cakes cool on the baking sheets for 5 minutes. This brief resting period helps them firm up before you gently transfer them to a wire rack to cool completely. Cooling thoroughly is vital before adding the frosting.
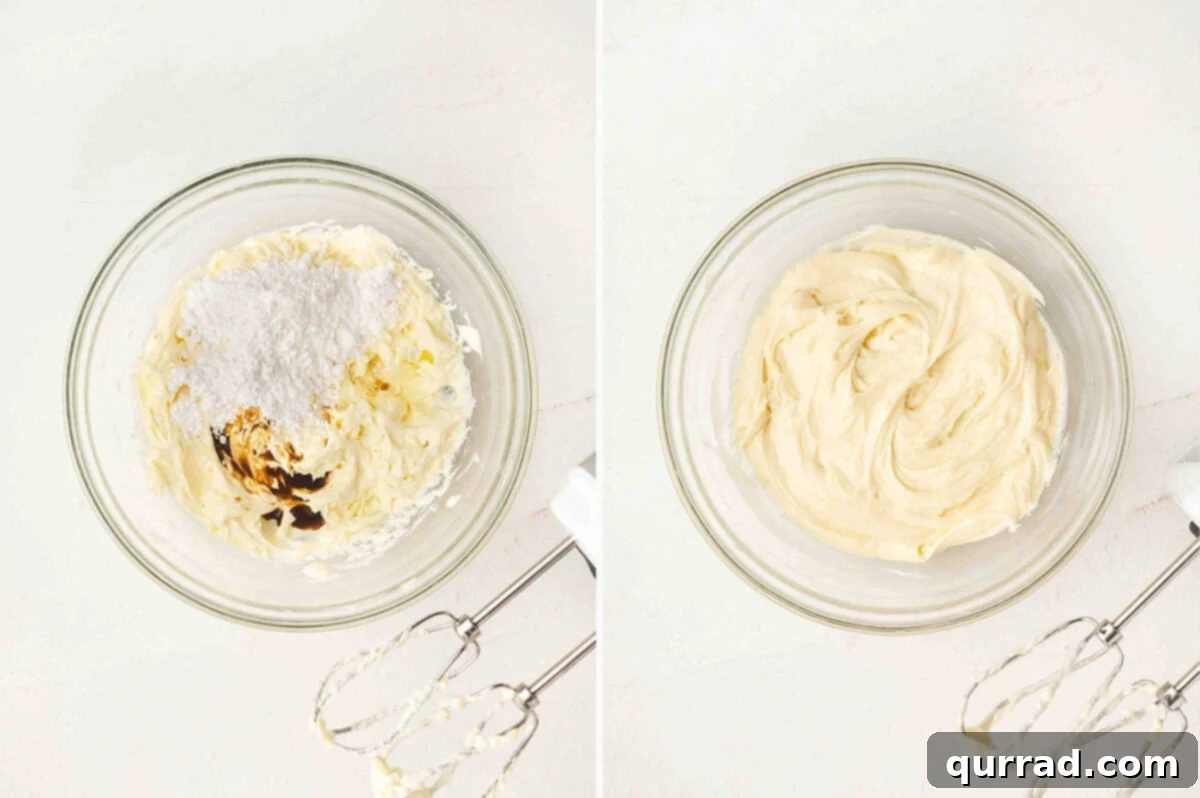
Step 7: Prepare the Rich Cream Cheese Filling. While your pumpkin cakes are cooling, turn your attention to the delightful filling. In a medium mixing bowl, beat together 4 ounces of softened cream cheese and ¼ cup of softened unsalted butter until the mixture is light, fluffy, and completely smooth, with no lumps remaining. Gradually add 1 cup of powdered sugar and ½ teaspoon of vanilla extract, continuing to beat until the frosting is thick, creamy, and spreadable. For best results and easier piping, chill the prepared filling in the refrigerator for 15–20 minutes to allow it to firm up slightly.
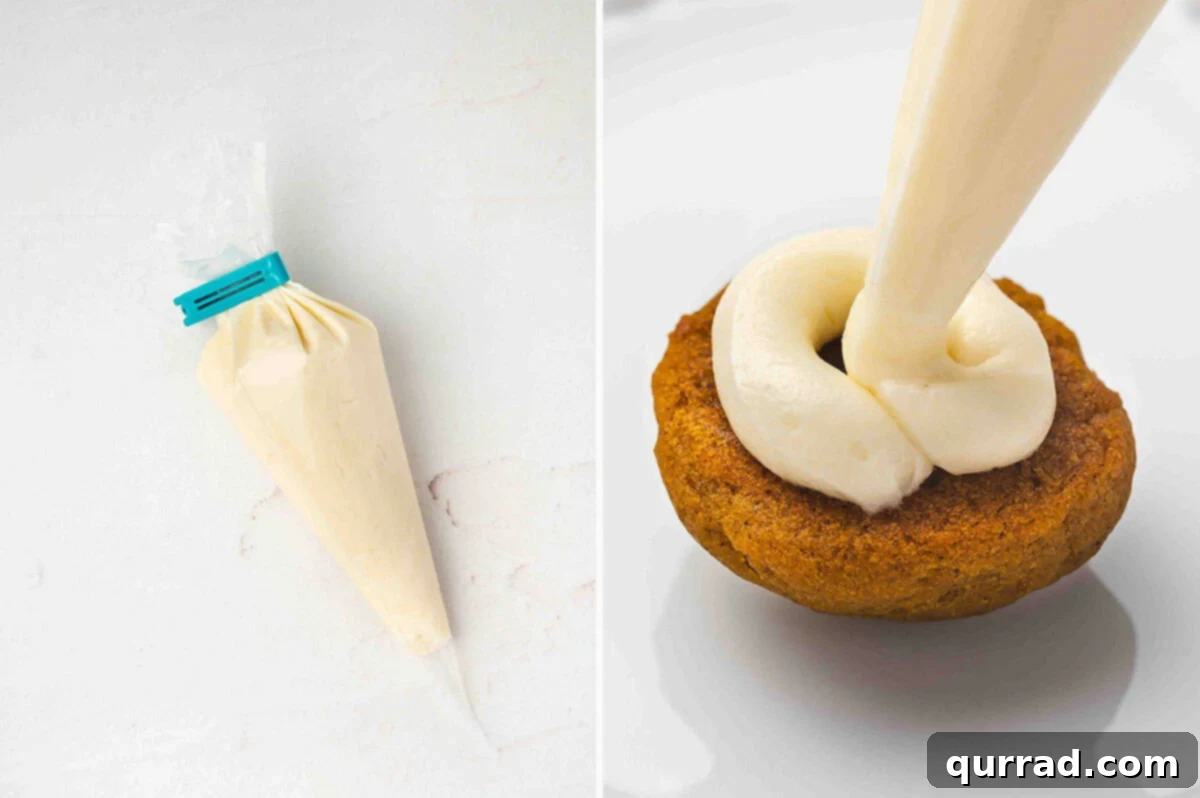
Step 8: Assemble Your Beautiful Pumpkin Whoopie Pies. Once your pumpkin cakes are completely cool and your cream cheese filling has firmed up, it’s time for assembly. Transfer the chilled filling to a piping bag fitted with a round tip (or simply snip off a corner of a sturdy Ziploc bag). Pipe a generous swirl of frosting onto the flat side of one pumpkin cake. Gently place another pumpkin cake on top, flat side down, to form a delightful sandwich. Press lightly to secure the halves, ensuring the frosting is evenly distributed to the edges. Repeat this process with all the remaining cakes and filling.
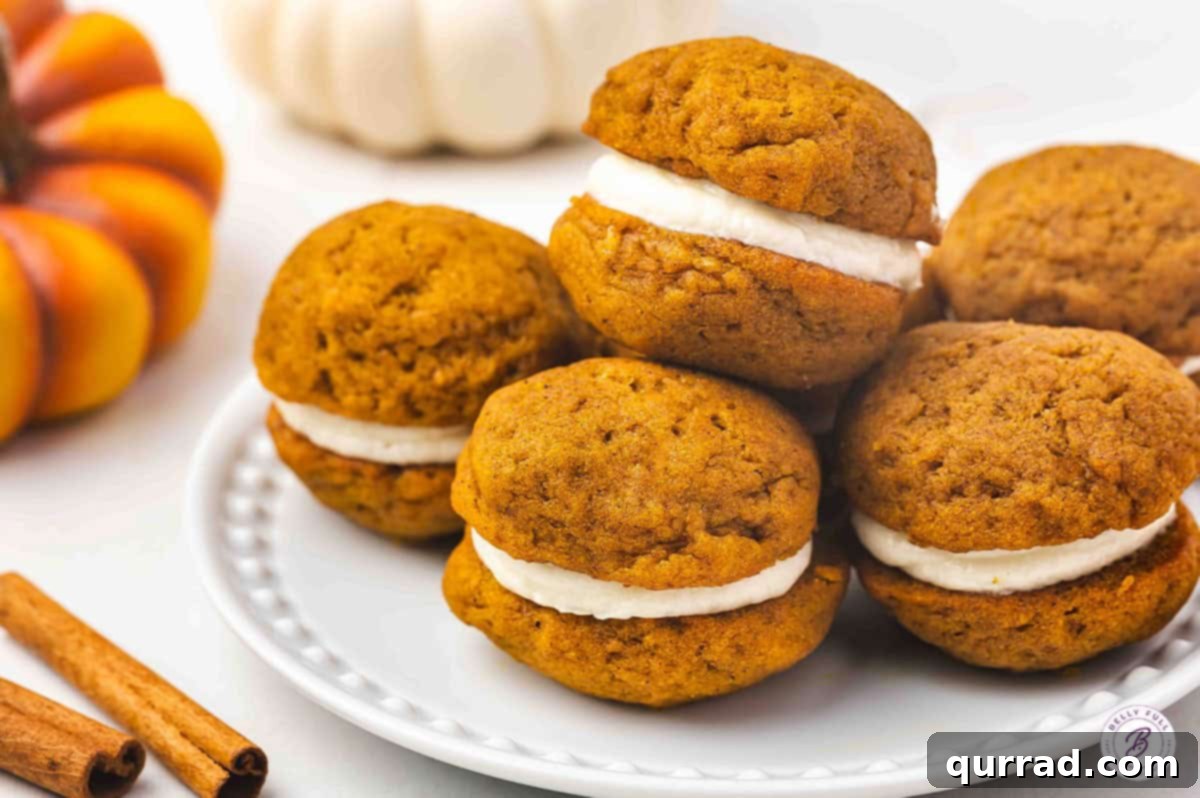
Step 9: Chill and Serve for Optimal Enjoyment. To allow the cream cheese filling to fully set and to help the whoopie pies hold their perfect shape, chill the assembled pies in the refrigerator for at least 30 minutes before serving. This brief chilling period ensures a neat and tidy eating experience, with a perfectly firm and creamy center. Once set, these delightful pumpkin whoopie pies are ready to be savored and shared!
Serving Suggestions for Your Pumpkin Whoopie Pies
These homemade pumpkin whoopie pies are so delicious, they barely need an accompaniment. However, with a little thought, you can elevate the experience and make them truly special for any occasion. I find myself reaching for one of these comforting treats during a cozy night in, perhaps curled up with a good book and a warm beverage. They are also incredibly versatile for entertaining:
- Holiday Dessert Table Star: For Thanksgiving, these whoopie pies are a fantastic addition to the dessert table. Their individual, handheld nature makes them a convenient and less messy alternative to traditional pies, allowing guests to easily grab a sweet treat. They pair wonderfully alongside classic holiday favorites like sweet potato pie, a comforting apple crisp, or even adorable mini chocolate pies, offering a diverse array of flavors and textures.
- Garnishing for Guest-Worthy Presentation: If you’re bringing them to a party or simply want to add a touch of elegance, consider dusting the tops of the assembled whoopie pies with a light coating of powdered sugar. For a festive touch, especially around Halloween or other autumn celebrations, a sprinkle of autumn-themed sprinkles can make them even more appealing.
- Perfect Pairings: Enhance the warm, spiced flavors of the whoopie pies by serving them with a hot cup of coffee, a steaming mug of spiced apple cider, or a comforting chai latte. For an extra indulgent treat, a dollop of whipped cream or a scoop of vanilla bean ice cream can take them to the next level.
- Brunch or Afternoon Tea: These whoopie pies are not just for dessert! Offer them as a sweet option for a fall brunch spread or as part of an afternoon tea selection. Their manageable size makes them ideal for such occasions.
No matter how you choose to serve them, these pumpkin whoopie pies consistently feel special and, without fail, disappear remarkably fast!
How to Store Leftover Pumpkin Whoopie Pies
Proper storage is essential to keep your pumpkin whoopie pies fresh, moist, and delicious for as long as possible. Here’s a detailed guide on how to store any leftovers:
- Countertop Storage (Unfilled Cakes Only): If you’ve baked the pumpkin cakes but haven’t yet filled them, they can be stored at room temperature. Place the completely cooled cake halves in an airtight container. They will remain fresh for up to 2 days on the counter, provided they are kept away from direct sunlight, heat sources, or excessive humidity, which can compromise their texture.
- Refrigerator Storage (Assembled Pies): Once the whoopie pies are assembled with the cream cheese frosting, they must be stored in the refrigerator due to the dairy in the filling. Arrange them in a single layer in an airtight container. If stacking, place a sheet of parchment paper between layers to prevent them from sticking. Stored correctly, the assembled whoopie pies will keep beautifully in the refrigerator for up to 3 days. Before serving, allow them to sit at room temperature for 10–15 minutes. This softens the cake halves and allows the cream cheese frosting to return to its optimal creamy texture and flavor. Discard any pies if the frosting appears to weep or separate, smells off, or if the cakes become noticeably soggy, indicating spoilage.
- Freezer Storage (Long-Term): For extended enjoyment, these pumpkin whoopie pies freeze exceptionally well. You can freeze them either as individual cake halves or as fully assembled pies.
- Freezing Assembled Pies: Arrange the assembled whoopie pies in a single layer on a baking sheet lined with parchment paper. Place the sheet in the freezer until the pies are firm, which typically takes about 1 hour. Once solid, transfer the frozen pies to an airtight freezer-safe container or a heavy-duty freezer bag. Be sure to remove as much air as possible from the bag to prevent freezer burn. They will maintain their quality in the freezer for up to 2 months.
- Freezing Unfilled Cakes: If you prefer to bake ahead and assemble later, freeze the cooled cake halves in a single layer until firm, then transfer them to an airtight container or freezer bag, separated by parchment paper.
When you’re ready to enjoy, thaw the frozen pies (or cakes) overnight in the refrigerator. If you thawed cakes, proceed with making and adding the fresh cream cheese filling. Let the thawed, assembled pies come to room temperature for a short while before serving for the best taste and texture.
More Delicious Pumpkin Treats for the Fall Season
As the days grow shorter and the air turns crisper, these pumpkin whoopie pies are just the beginning of a world of autumnal delights. If you’re eager to explore more ways to savor the flavors of fall, dive into these other irresistible pumpkin recipes that are perfect for any occasion:
- Pumpkin Spice Muffins: Start your day right or enjoy a delightful snack with these fluffy, spice-infused muffins. They’re a perfect grab-and-go option that encapsulates fall.
- Pumpkin Dump Cake: For an incredibly easy yet impressive dessert, this dump cake combines layers of pumpkin, spice, and cake mix for a warm, comforting treat that practically bakes itself.
- Cranberry Pumpkin Muffins: A delightful twist on classic pumpkin muffins, these incorporate the tartness of cranberries and the crunch of pecans, creating a wonderfully balanced flavor profile.
- Mini Pumpkin Cheesecake: Adorable, perfectly portioned, and intensely creamy, these mini cheesecakes offer all the luxurious flavor of a full-sized cheesecake without the fuss.
- Pumpkin Roll: A true showstopper, this elegant dessert features a tender pumpkin cake rolled around a sweet cream cheese filling, making it a holiday favorite.
Whether you’re hosting a holiday gathering, planning a cozy family dinner, or simply looking for a sweet treat to enjoy with a cup of tea, these pumpkin recipes offer something for everyone. Embrace the flavors of autumn and enjoy baking your way through the season!