

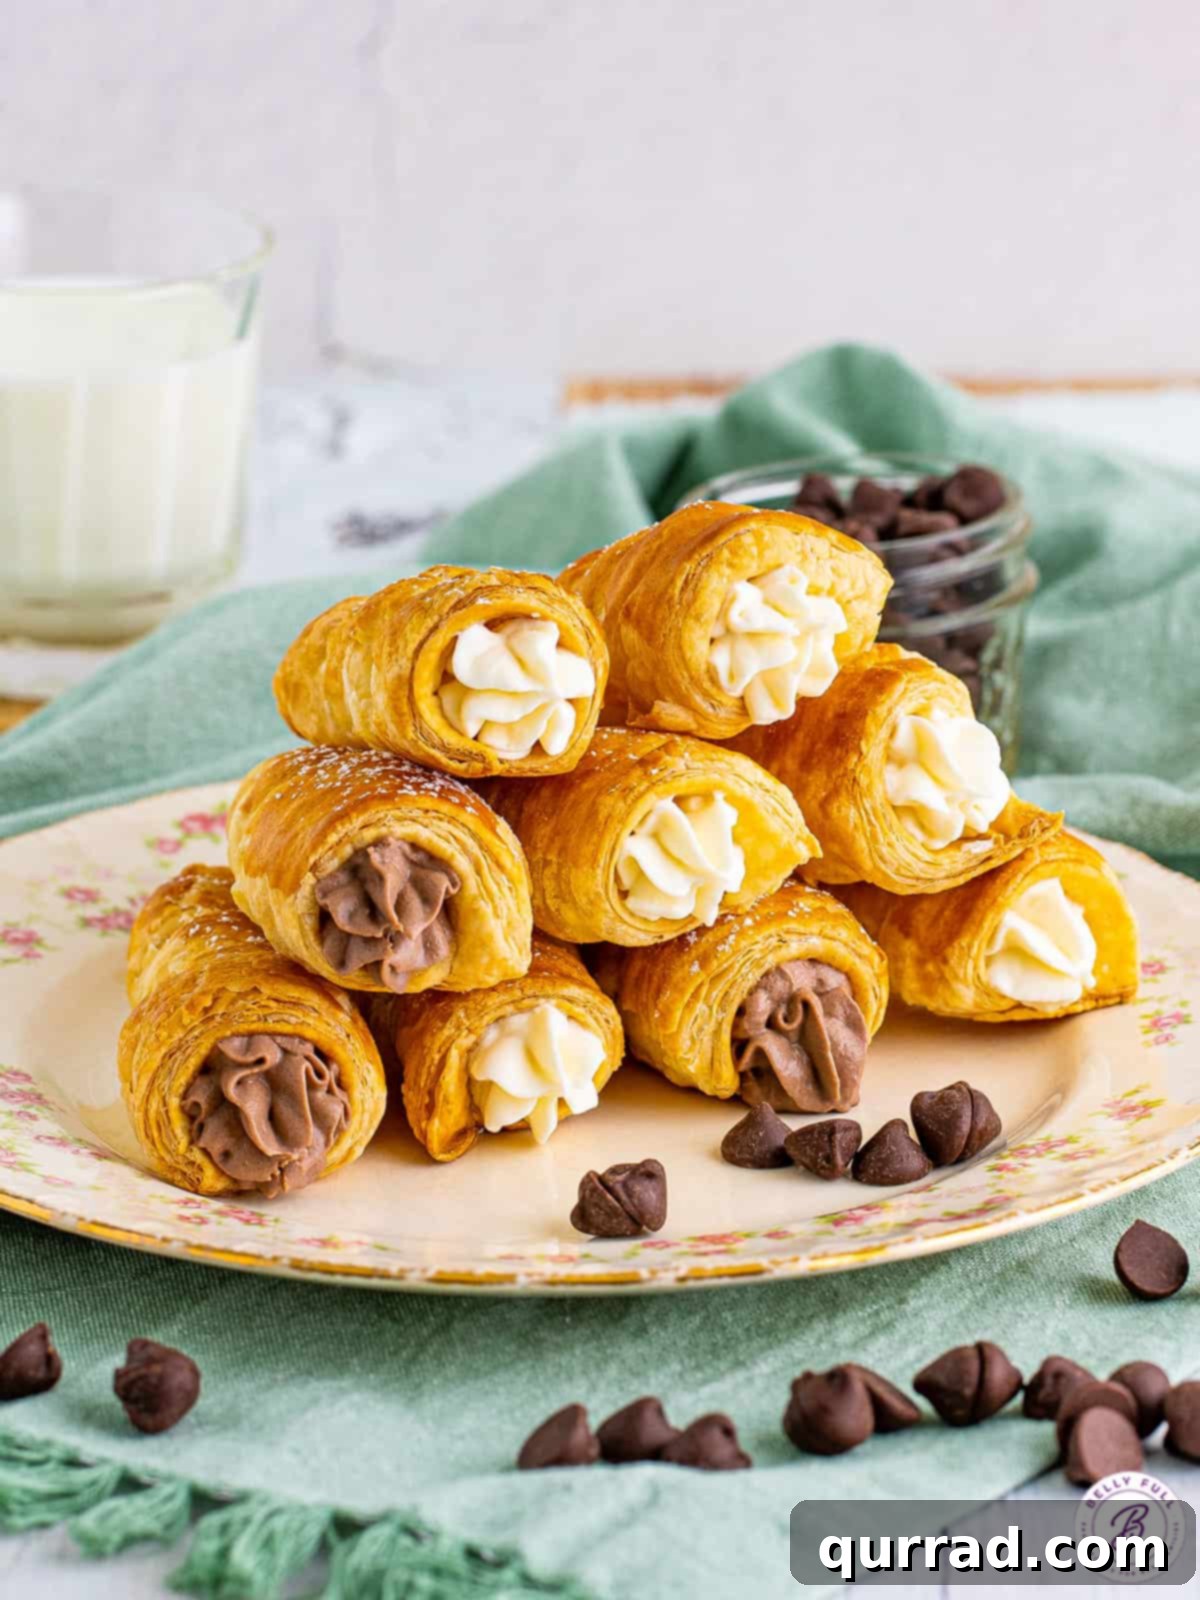
Welcome to the delightful world of Cream Horns! These elegant, flaky, and golden-brown puff pastries are a true masterpiece of simplicity, yet they deliver an experience of pure indulgence. Filled with a luscious, sweetened cream, they are my absolute go-to whenever I need a quick and impressive dessert that tastes like it took hours to prepare. Why choose between classic vanilla or rich chocolate when you can have both? I often prepare a batch with a delightful mix of both fillings, ensuring there’s a favorite for everyone.
5 STAR REVIEW
“I finally found a recipe using a proper filling. Thank you. Great recipe, and easy-to-follow instructions.” – Nicci
Effortless Elegance: The Ultimate Puff Pastry Cream Horn Recipe
Craving a light, airy dessert that strikes the perfect balance between sweet and indulgent? Look no further than these exquisite Cream Horns! Often considered a bakery delicacy, you might be surprised to learn just how simple they are to create right in your own kitchen. With a few readily available ingredients and a set of specialized cream horn molds, you’re on your way to baking a classic pastry that will impress without the stress.
The true heart of this Cream Horn recipe lies in its phenomenal cream cheese whipped cream filling. Unlike overly sweet alternatives, this filling is perfectly balanced, offering a delicate sweetness that allows the crisp, golden puff pastry shell to shine. The combination of the flaky exterior and the impossibly light, creamy interior is simply irresistible. Enjoy them fresh from the oven, or for a delightful chilled treat, pop them in the freezer – freezing instructions are provided below for your convenience. This recipe is designed for both novice bakers and seasoned pros, ensuring a successful and delicious outcome every time.
★
★
★
★
Cream Horns
30
16
46
32
servings

Flaky, golden brown puff pastries filled with a sweetened cream filling, these Cream Horns are a quick and delightful dessert. Choose between vanilla and chocolate filling options or make both!
Step-by-step photos can be seen below the recipe card.
Equipment
-
Cream Horn Molds
Ingredients
-
1
large
egg - splash of water
-
2
sheets puff pastry,
thawed -
8
oz.
cream cheese,
softened -
¾
cup
powdered sugar,
plus more for dusting -
1
tbsp
vanilla extract -
2
cups
heavy cream -
1½
tbsp
unsweetened cocoa powder
Instructions
-
Preheat the oven to 400°F (200°C). Line baking sheets with parchment paper, then set them aside.
-
Lightly spray your cream horn molds with cooking spray, and set those aside as well.
-
In a small bowl, whisk together the large egg and a splash of water to create an egg wash. Set aside.
-
One at a time, carefully unfold the puff pastry sheets. Use a rolling pin to gently flatten them out slightly.
-
Cut each pastry sheet into eight 1-inch (2.5 cm) wide strips. Discard any leftover scraps. Starting at the pointed tip of a cream horn mold, begin wrapping a pastry strip around it, overlapping slightly as you go. Gently press the edges together to seal the pastry. Place the wrapped mold seam-side down onto a prepared baking sheet.
-
Brush the exposed pastry on each mold with the egg wash.
-
Bake for 14-16 minutes, or until the pastries are beautifully puffed and golden brown. Allow them to cool on the baking sheet while still in the molds. You will likely need to bake in batches, so continue wrapping your molds as previous batches bake.
-
Once all the horns are baked, transfer them to a wire rack to cool completely before filling. While they cool, prepare your delectable cream filling.
Make the Filling:
-
Place the softened cream cheese into the bowl of a stand mixer fitted with the whisk attachment. Whip until the cream cheese is perfectly smooth. Gradually add the powdered sugar, a little at a time, until it is fully incorporated, scraping down the sides of the bowl as needed. Stir in the vanilla extract.
-
Slowly stream in the heavy cream until it is just mixed in. Scrape down the sides of the bowl once more, then increase the mixer speed to medium-high and whip until stiff peaks form, usually around 1 minute. At this point, carefully remove half of the cream mixture and place it into a separate bowl – this will be your vanilla filling. To the cream remaining in the stand mixer, add the unsweetened cocoa powder and mix until just combined, creating your chocolate filling.
-
Lightly dust the cooled cream horn shells with additional powdered sugar, if desired, for an extra touch of sweetness and presentation.
-
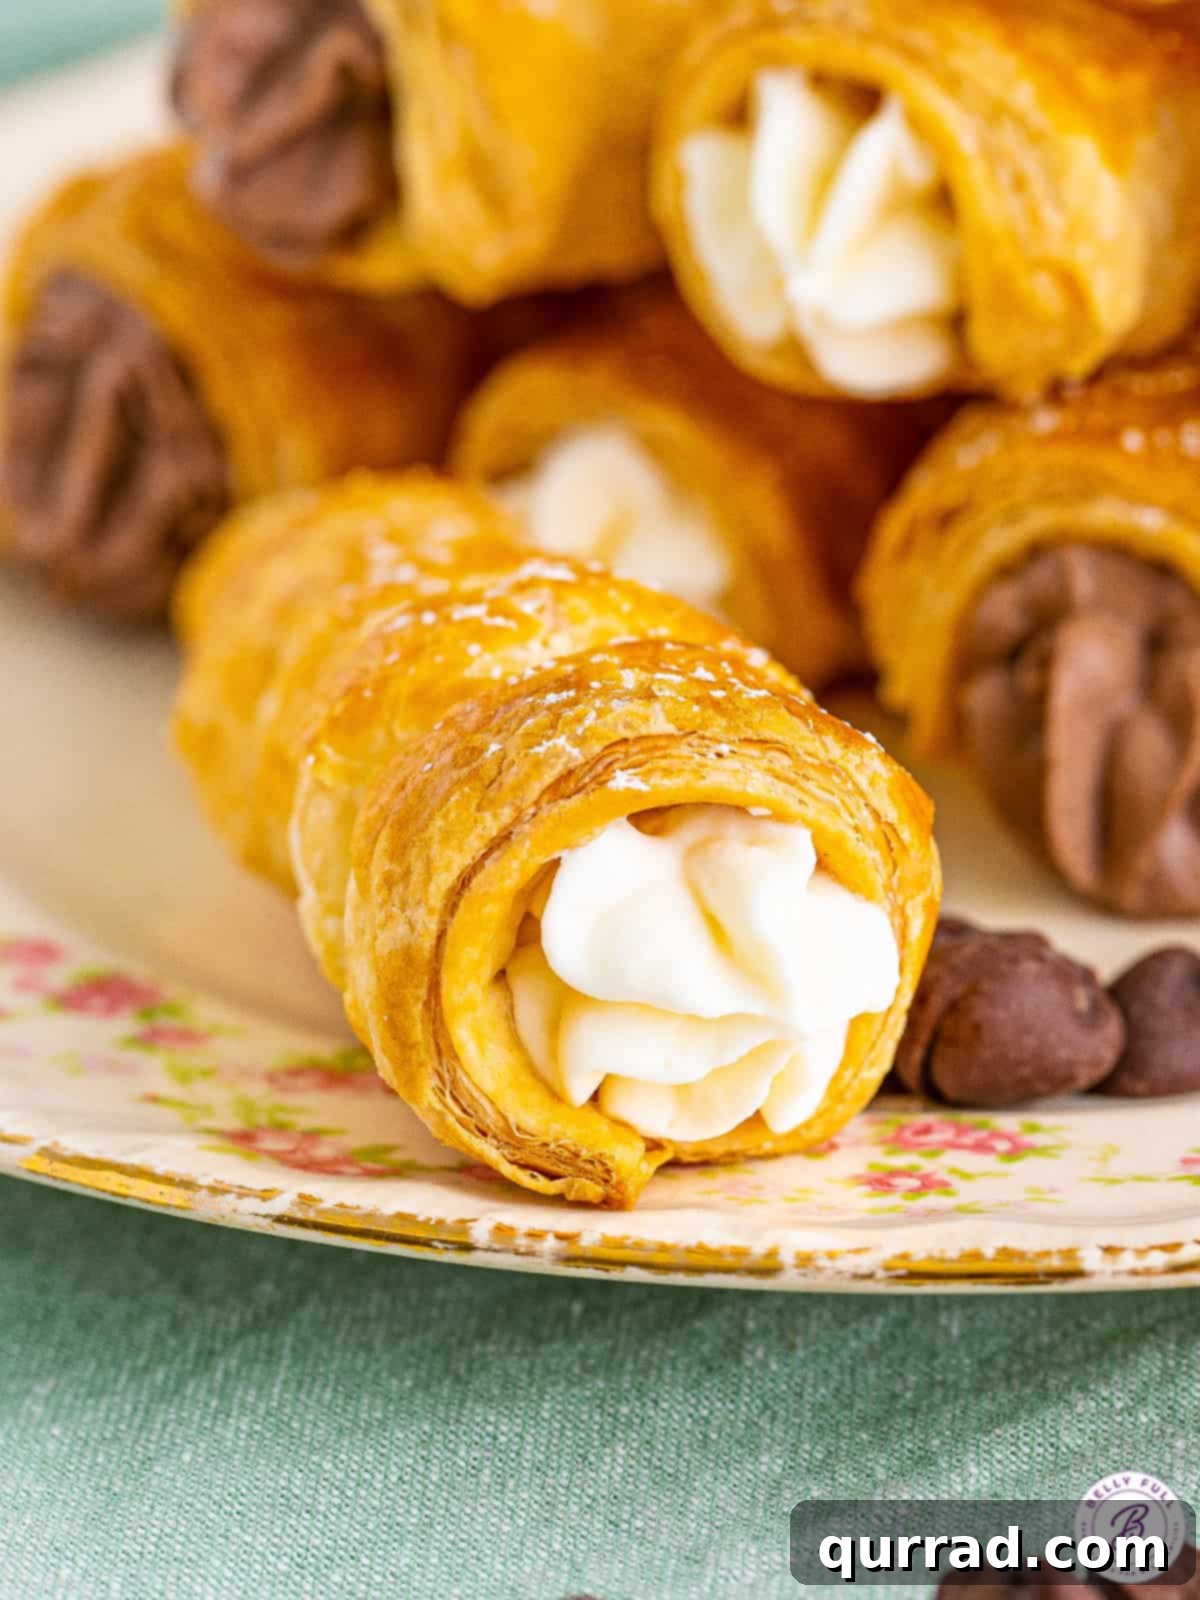
For best results and a professional look, I recommend using a pastry bag fitted with an open star tip to fill your cream horns. Fill half of the prepared cream horns with the vanilla cream and the other half with the chocolate cream. Serve these delectable treats immediately to enjoy their crisp pastry and fluffy filling at their peak.
Video
Nutrition
Calories:
175
kcal
|
Carbohydrates:
11
g
|
Protein:
2
g
|
Fat:
14
g
|
Saturated Fat:
6
g
|
Polyunsaturated Fat:
1
g
|
Monounsaturated Fat:
5
g
|
Trans Fat:
0.001
g
|
Cholesterol:
30
mg
|
Sodium:
67
mg
|
Potassium:
39
mg
|
Fiber:
0.3
g
|
Sugar:
4
g
|
Vitamin A:
322
IU
|
Vitamin C:
0.1
mg
|
Calcium:
19
mg
|
Iron:
0.5
mg
Nutritional information given is an automatic calculation and can vary based on the exact products you use and any changes you make to the recipe. If these numbers are very important to you, I would recommend calculating them yourself.
Did you make this? Leave a rating below!
How to Craft Perfect Cream Horns: A Detailed Guide
Creating these delightful Cream Horns is a straightforward process, and with a little attention to detail, you’ll achieve bakery-quality results. Follow these steps for flaky pastry shells and luscious fillings:
Preparing Your Workspace and Pastry
- Preheat and Prepare: Begin by preheating your oven to a robust 400°F (200°C). This high temperature is crucial for achieving that characteristic puff and golden hue. Line several baking sheets with parchment paper to prevent sticking and ensure easy cleanup. Next, lightly coat your cream horn molds with cooking spray. These molds are essential for shaping the pastry, so make sure they are well-greased for easy removal.
- Create the Egg Wash: In a small bowl, whisk together one large egg with just a splash of water (about ½ to 1 teaspoon). This egg wash will give your cream horns a beautiful golden sheen and help create a crisp texture. Set it aside.
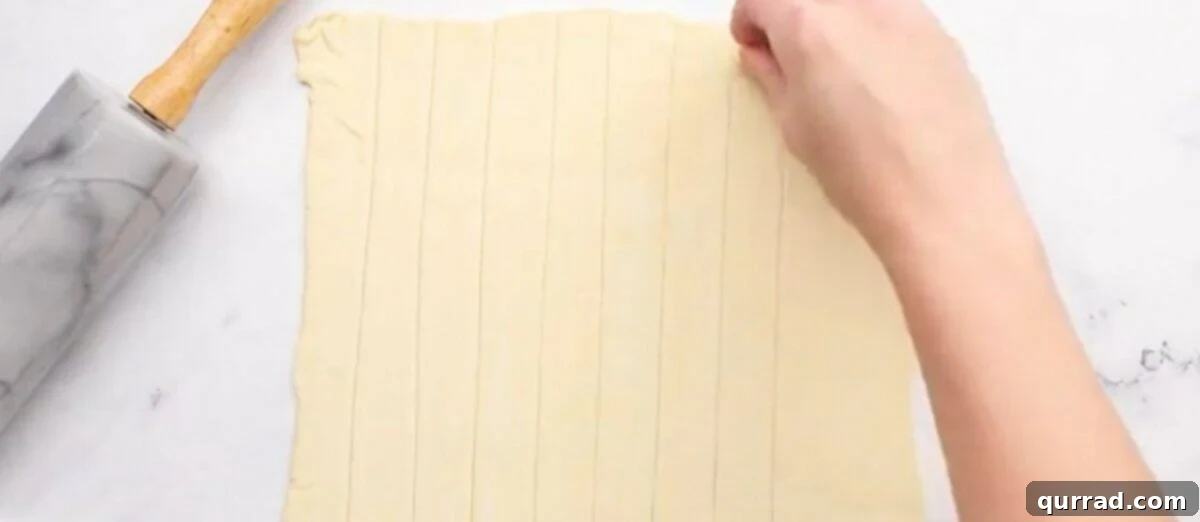
- Prepare Puff Pastry Strips: Carefully unfold your thawed puff pastry sheets one at a time. Puff pastry is delicate, so handle it gently. Use a rolling pin to lightly flatten each sheet, ensuring an even thickness. Then, using a sharp knife or a pizza cutter, cut each pastry sheet into eight uniform 1-inch (2.5 cm) wide strips. Discard any small leftover scraps.
Wrapping, Baking, and Cooling
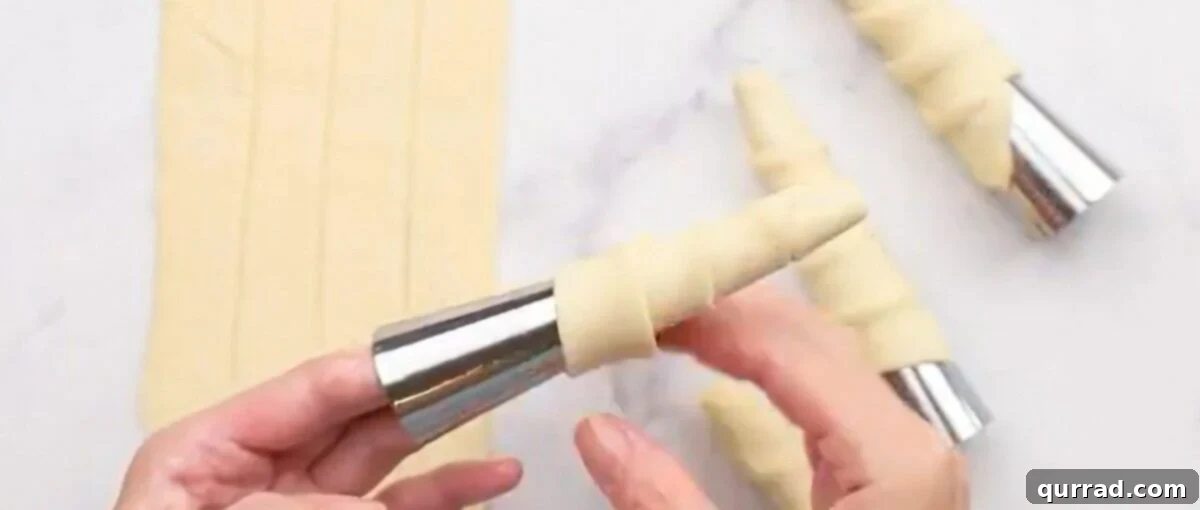
- Wrap the Molds: Take one pastry strip and begin wrapping it around the pointed tip of a greased cream horn mold. Overlap the pastry slightly as you spiral it up the mold, covering it completely. Gently press the edges of the pastry together to create a secure seal. This ensures the horn holds its shape during baking.
- Arrange and Brush: Place each wrapped mold, seam-side down, onto one of your prepared baking sheets. This prevents the seam from opening during baking. Once all molds on a sheet are wrapped, brush the exposed pastry with your prepared egg wash. This step contributes to the golden color and a slight crispness.
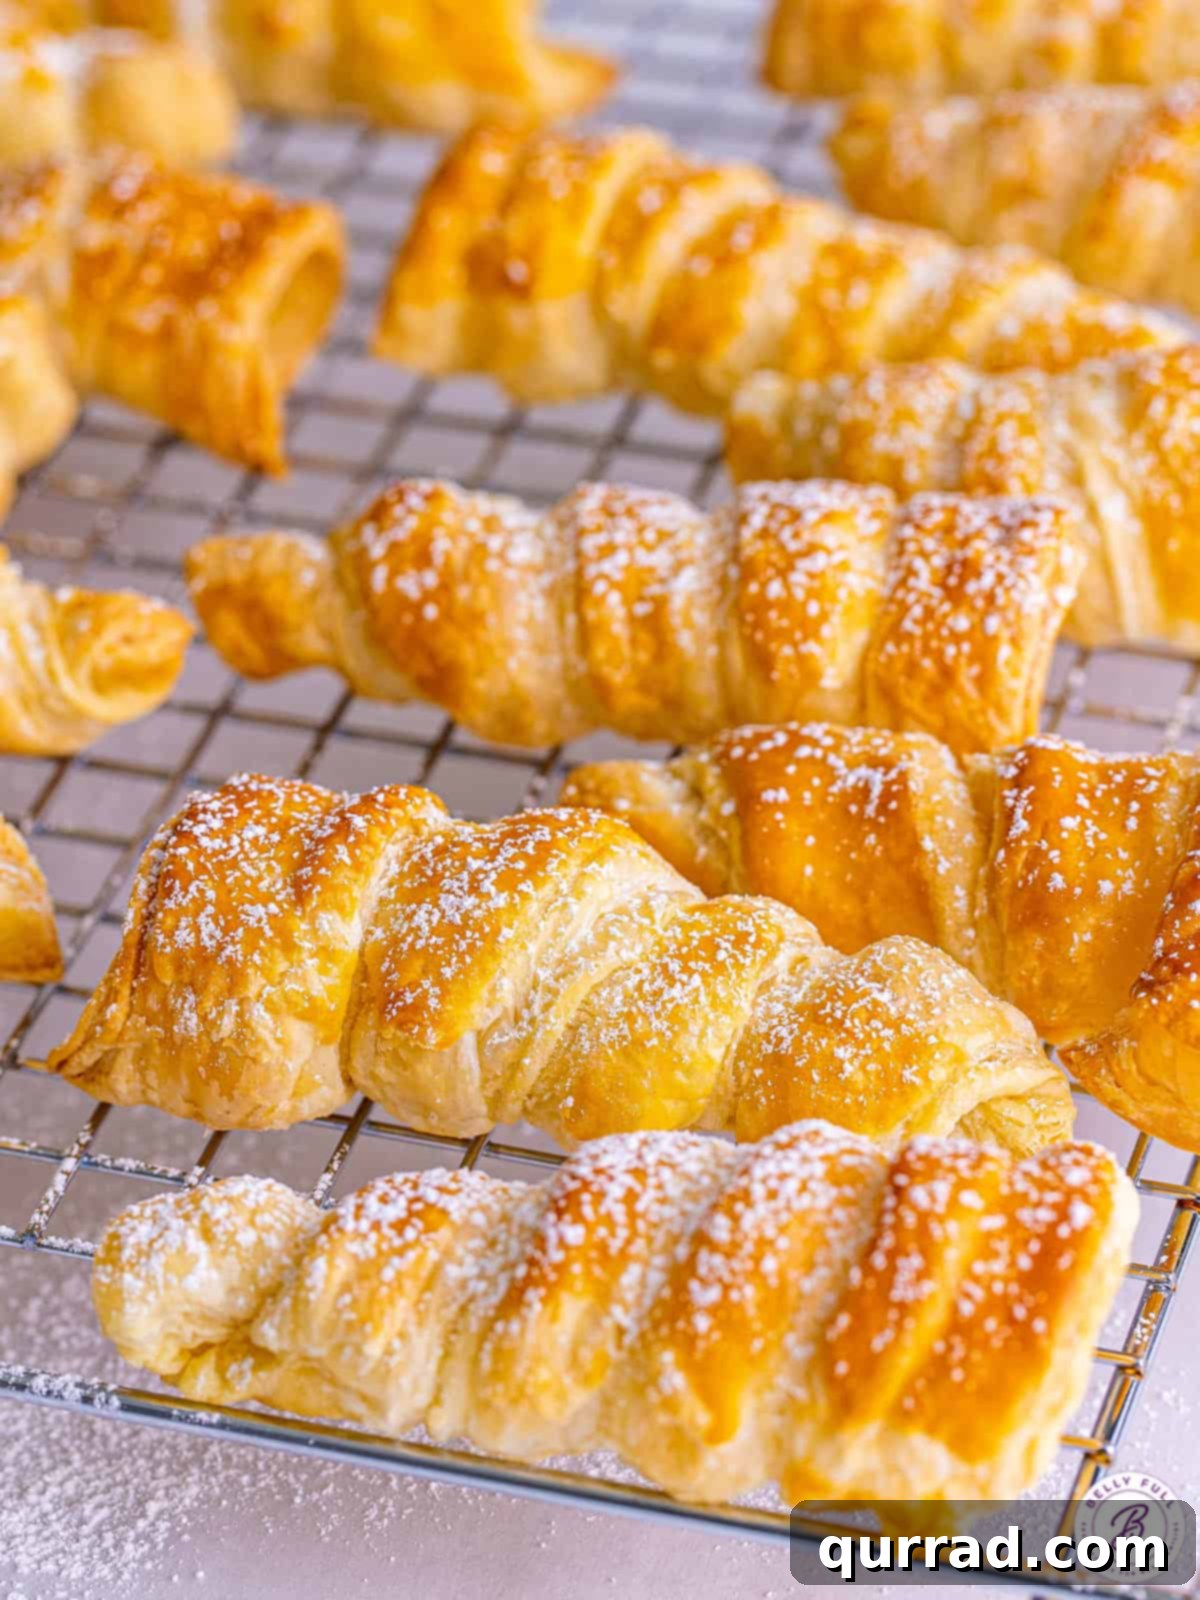
- Bake to Golden Perfection: Bake the cream horns in the preheated oven for 14 to 16 minutes. Keep an eye on them; they should become beautifully puffed and golden brown. The baking time may vary slightly depending on your oven. Once baked, allow them to cool on the baking sheet for a few minutes while still in their molds. You will likely need to bake these in batches, so continue wrapping new molds with pastry strips while your previous batches are baking.
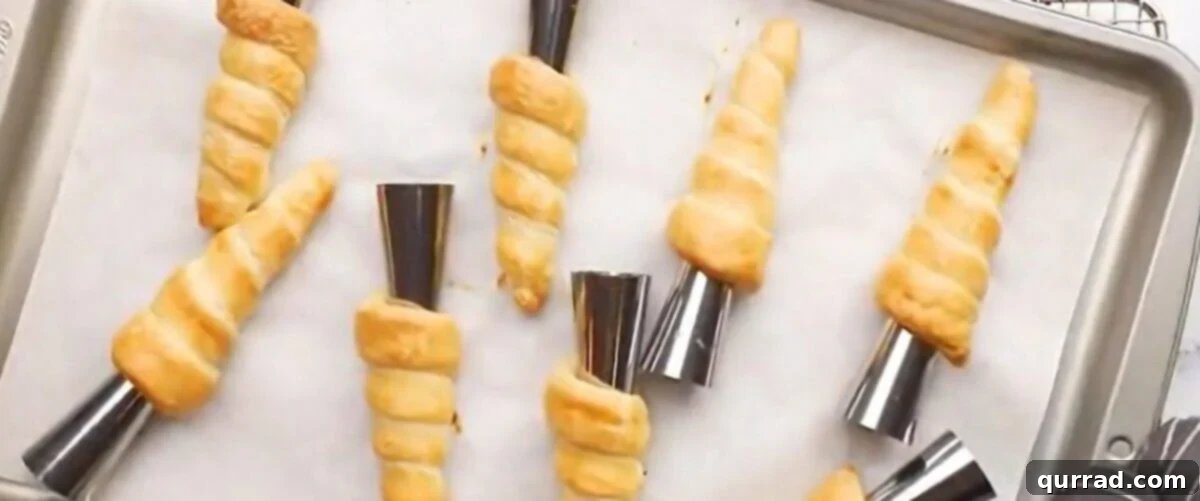
- Cool Completely: After baking, carefully remove the warm cream horns from their molds. Transfer the empty pastry shells to a wire rack to cool completely. It’s important for them to be entirely cool before filling, as warm pastry can melt the cream.
Crafting the Cream Cheese Filling
- Whip the Cream Cheese: In the bowl of a stand mixer fitted with the whisk attachment, beat 8 ounces of softened cream cheese until it is perfectly smooth and free of lumps. This creates a creamy base for your filling.
- Sweeten and Flavor: Gradually add ¾ cup of powdered sugar to the cream cheese, mixing until fully combined. Make sure to scrape down the sides of the bowl as needed to ensure everything is incorporated. Stir in 1 tablespoon of vanilla extract for a classic, aromatic flavor.
- Add Heavy Cream and Whip: With the mixer on low speed, slowly stream in 2 cups of cold heavy cream. Once it’s just mixed in, stop the mixer, scrape down the sides, and then increase the speed to medium-high. Whip the mixture until stiff peaks form. This usually takes about 1 minute. The cream should be thick and hold its shape.
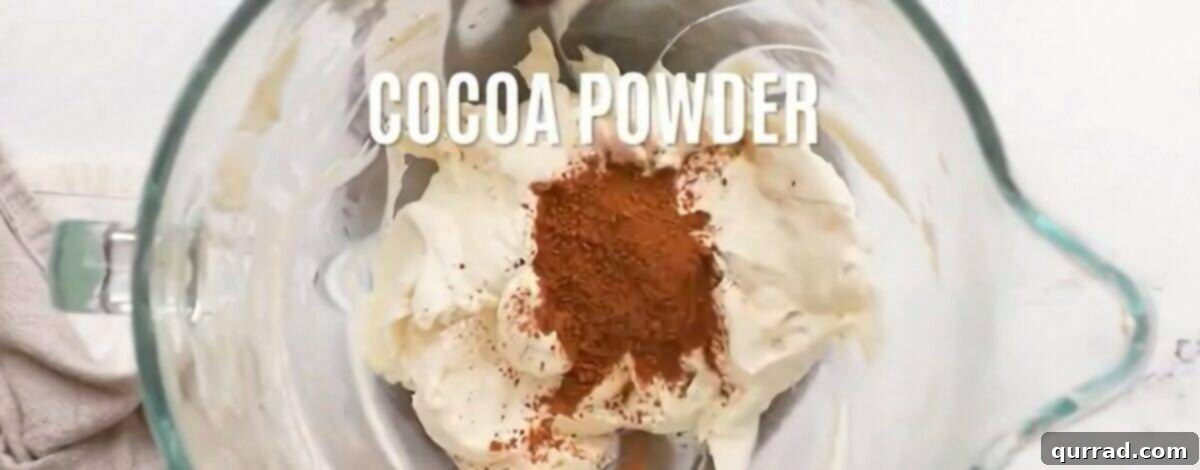
- Divide for Vanilla and Chocolate: Carefully transfer half of this luscious cream filling to a separate bowl – this will be your vanilla cream filling. To the remaining cream in the stand mixer, add 1½ tablespoons of unsweetened cocoa powder. Mix on low speed until the cocoa powder is just combined and the cream turns a rich chocolate brown. Be careful not to overmix.
Filling and Serving
- Dust with Sugar: If desired, lightly dust your cooled cream horn shells with a little extra powdered sugar using a fine-mesh sieve. This adds a beautiful finishing touch.
- Fill and Serve: For a professional presentation, load your vanilla and chocolate fillings into separate pastry bags fitted with an open star tip. Fill half of your cream horn shells with the vanilla cream and the other half with the decadent chocolate cream. These Cream Horns are best enjoyed immediately after filling to ensure the pastry remains crisp and the cream light and fluffy.

Expert Tips for Cream Horn Success
Achieving bakery-worthy cream horns is easier than you think with these expert tips:
- Puff Pastry Temperature is Key: Ensure your puff pastry is thawed but still cold when you work with it. If it gets too warm, it becomes sticky and difficult to handle, and the butter layers can melt, resulting in less flaky pastry.
- Don’t Over-Flour: While a lightly floured surface can prevent sticking, too much flour can make the pastry tough. Use just enough to work with comfortably.
- Proper Sealing: When wrapping the pastry strips around the molds, gently press the overlapping edges together to create a good seal. This prevents the pastry from unraveling during baking. Placing them seam-side down on the baking sheet also helps.
- Egg Wash for Color and Shine: Don’t skip the egg wash! It gives the horns that beautiful golden-brown color and a lovely subtle sheen.
- Don’t Overcrowd the Baking Sheet: Give your cream horns space to puff up properly. Overcrowding can lead to uneven baking.
- Cool Completely: The pastry shells must be completely cool before you add the cream filling. Warm pastry will cause the cream to melt and lose its delightful texture.
- Softened Cream Cheese: For the filling, ensure your cream cheese is properly softened to room temperature. This will prevent lumps and ensure a super smooth, creamy consistency.
- Don’t Overwhip the Cream: While stiff peaks are desired for the filling, be careful not to overmix, especially once the heavy cream has been added. Overwhipping can cause the cream to become grainy or even turn into butter.
- Piping Bag for Easy Filling: A pastry bag with an open star tip (or even just a round tip) makes filling the horns quick, clean, and gives them a professional look.
- Serve Immediately: Cream horns are best enjoyed fresh. The pastry is crispest and the cream is fluffiest right after filling.
Exciting Filling Variations for Your Cream Horns
While the classic vanilla and chocolate fillings are undeniably delicious, the beauty of Cream Horns lies in their versatility. Don’t hesitate to get creative with your fillings!
- Go All In on One Flavor: If you’re a devout chocolate lover, double the cocoa powder (use 3 tablespoons for the entire batch) and make all chocolate cream horns. Alternatively, omit the cocoa entirely for a batch of pure, delicate vanilla.
- Explore Different Extracts: Beyond vanilla, a world of flavor awaits! Experiment with other extracts to infuse your cream with unique tastes. Almond extract adds a sophisticated nutty note, strawberry extract brings a summery fruitiness, orange extract offers a bright citrusy zing, or for a festive twist, try peppermint extract.
- Fruity Fun: Swirl in some fruit purées or finely diced fresh fruit (like raspberries or blueberries) into your vanilla cream for a burst of freshness. A hint of lemon zest or lime zest can also brighten the flavor profile.
- Nutty Indulgence: Fold in finely crushed nuts like pistachios, pecans, or almonds into your cream. A drizzle of hazelnut spread or peanut butter could also create a decadent treat.
- Spiced Delights: For a comforting flavor, add a pinch of cinnamon, nutmeg, or even a touch of pumpkin spice to your cream cheese filling.
- Other Creamy Fillings: If you’re looking to completely change the cream, consider these alternatives:
- Stabilized Whipped Cream: A classic and light option.
- Buttercream: Richer and more stable, great for piping intricate designs. Try a chocolate buttercream or even a strawberry frosting.
- Marshmallow Frosting: For an extra airy and sweet, fluffy texture.
- Custard or Pastry Cream: A more traditional French patisserie filling, offering a denser, richer experience.
Storage Solutions for Cream Horns
Proper storage is crucial for maintaining the quality and deliciousness of your Cream Horns, especially when dealing with cream fillings. Here’s what you need to know:
- Serving Fresh is Best: Cream Horns with a whipped cream filling are truly at their peak when served immediately after filling. The delicate cream can start to “wilt” or soften after about 10-15 minutes at room temperature, losing its airy texture. For the best experience, fill them just before your guests arrive or right before you plan to enjoy them.
- Pre-Baking the Shells: You can absolutely make the puff pastry shells in advance! Once baked and completely cooled, store the unfilled shells in an airtight container at room temperature for up to 2-3 days. You can also dust them with powdered sugar just before filling. This allows for quick assembly when you’re ready to serve.
- Leftover Cream Filling: While tempting, I do not recommend storing leftover cream cheese whipped cream filling in the refrigerator for later use. Even chilled, it tends to lose its firm, whipped consistency and can become watery. It’s best to prepare only as much filling as you need.
- Freezing Filled Cream Horns: This is where the magic happens! Cream Horns filled with this cream cheese whipped cream freeze beautifully. I actually adore eating them straight from the freezer – it transforms them into a delightful, light ice cream-like treat. This makes them an excellent make-ahead option for parties or entertaining.
- To freeze: Once filled, arrange the cream horns in a single layer on a baking sheet and flash freeze for about an hour until firm. Then, transfer them to an airtight container or freezer bag, separating layers with parchment paper if stacking.
- Storage Duration: They will keep well in the freezer for up to 3 months.
- To Serve from Frozen: Simply take them out of the freezer 5-10 minutes before serving. They will soften slightly but remain wonderfully chilled and delicious.
Frequently Asked Questions (FAQs)
Here are some common questions about making Cream Horns:
- Can I use store-bought puff pastry? Absolutely! This recipe is specifically designed to use store-bought puff pastry, which makes it incredibly quick and easy. Look for good quality all-butter puff pastry for the best flavor and flakiness.
- Where can I find cream horn molds? Cream horn molds are readily available online through retailers like Amazon, or at specialty kitchen supply stores. They are typically metal cones, either stainless steel or tin.
- What if I don’t have cream horn molds? While the molds give them their signature shape, you can try creating your own makeshift cones from aluminum foil. Roll sturdy pieces of foil into cone shapes, ensuring they are tightly packed to hold their form during baking.
- Why did my pastry not puff up? Several factors can prevent puff pastry from rising properly:
- The oven wasn’t hot enough (it needs high heat to create steam).
- The pastry got too warm before baking, causing the butter to melt out.
- The pastry strips were pressed too hard or handled excessively, compressing the layers.
- The pastry is expired or was thawed and refrozen multiple times.
- Can I make the cream filling less sweet? Yes, you can adjust the amount of powdered sugar to your preference. Start with half the recommended amount and add more to taste.
- How do I get my cream cheese soft enough? For best results, take your cream cheese out of the refrigerator at least 30-60 minutes before you plan to use it. If you’re in a hurry, you can unwrap it and microwave it on low power for 10-15 seconds at a time until just softened (not melted).
Perfect Pairings: What to Serve With Cream Horns
Cream Horns are delightful on their own, but pairing them with the right accompaniments can elevate the experience even further. Their light, sweet nature makes them incredibly versatile:
- Fresh Fruit: Complement the richness of the cream with the vibrant freshness of fruit. A colorful fresh fruit salad or a zesty honey lime fruit salad adds a wonderful contrast in flavor and texture. Berries, sliced peaches, or kiwi would all be excellent choices.
- Hot Beverages: For an elegant afternoon treat or a comforting evening dessert, serve Cream Horns with a steaming cup of coffee, tea, or even a spirited Irish coffee. The warmth of the beverage pairs beautifully with the cool, creamy filling.
- Dessert Spreads: Offer a variety of mini desserts alongside your Cream Horns for a lavish dessert spread at parties. They mingle well with other small cakes, cookies, or fruit tarts.
- Light After-Dinner Treat: After a hearty meal, these Cream Horns provide the perfect light and satisfying sweet finish without being overly heavy.
More Indulgent Creamy Desserts to Savor
If you have a love for creamy, dreamy desserts, you’re in for a treat! Explore these other fantastic recipes:
- Simple Chocolate Mousse
- Lemon Cheesecake Mousse
- Classic Butterscotch Pudding
- Silky Vanilla Panna Cotta
- Sweet Cranberry Fluff
- Retro Watergate Salad (Pistachio Fluff)
I hope you enjoy making and sharing these delightful Cream Horns as much as I do. They’re a testament to how simple ingredients can come together to create something truly special and memorable!