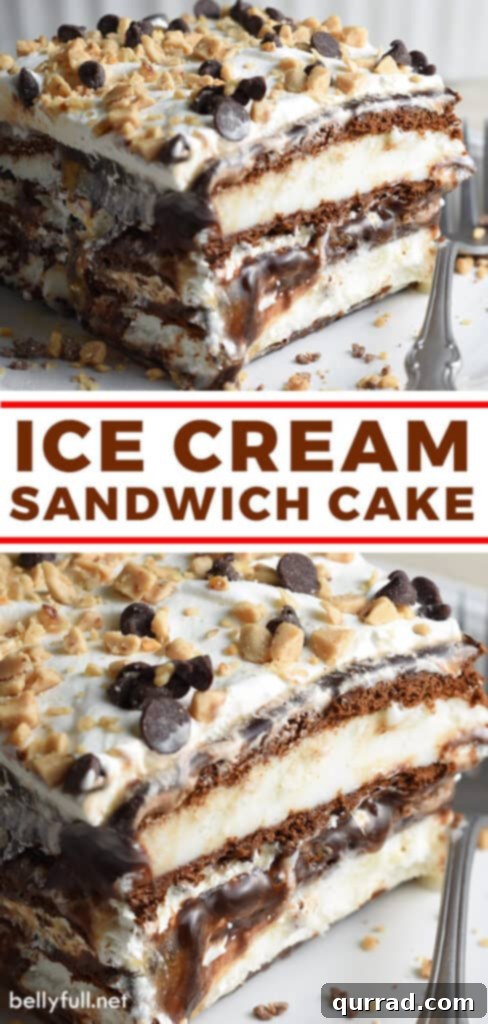
Effortless Indulgence: The Ultimate No-Bake Ice Cream Sandwich Cake
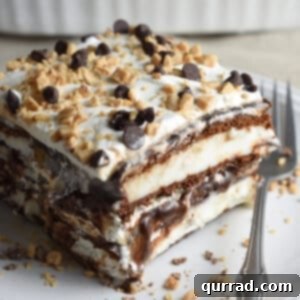
Discover the simplest, most delightful dessert that will impress everyone without breaking a sweat! This Ice Cream Sandwich Cake is a masterpiece of ease and flavor, artfully layered with classic ice cream sandwich bars and an array of your favorite sundae toppings. It’s the perfect treat for any occasion, especially those warm summer gatherings, yet equally fantastic all year round. Forget complicated baking, this recipe delivers maximum wow-factor with minimal effort, making it a true dessert hero.
Craving more frozen delights that don’t require an oven? You’ve come to the right place! Explore our collection of easy ice cream recipes, including our beloved no-churn Strawberry Ice Cream and the refreshingly delicious Dole Whip for more sensational no-bake treats that are guaranteed to cool you down and sweeten your day!
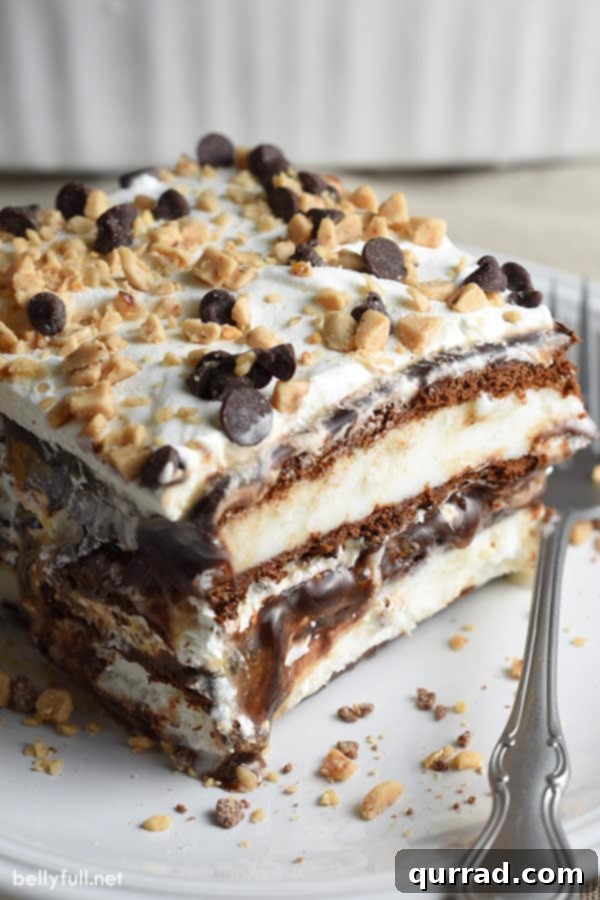
Why This No-Bake Ice Cream Sandwich Cake is a Game-Changer
For anyone who finds themselves intimidated by the intricate world of baking – battling with delicate cake layers, precise oven temperatures, or the demanding nature of traditional pies – this Ice Cream Sandwich Cake is about to become your new culinary best friend. It’s the ultimate shortcut to dessert glory, offering all the joy of a homemade treat with none of the usual stress. Whether you’re hosting a backyard barbecue, looking for a potluck contribution that everyone will rave about, or simply need a quick dessert for family movie night, this cake delivers. It’s so simple, yet so visually appealing and incredibly delicious, guaranteeing compliments and smiles from everyone who takes a bite.
Beyond its undeniable ease, this dessert shines with its versatility. Imagine a cake that can be customized to suit any palate, holiday, or personal craving! From vibrant sprinkles for festive occasions to rich, indulgent toppings for a sophisticated touch, the possibilities are limitless. This isn’t just a recipe; it’s a foundation for countless delicious creations, each one as simple and satisfying as the last. Get ready to embrace the art of no-bake desserts and make this your go-to recipe for effortless entertaining.
The Delectable Layers: Essential Ingredients for Your Ice Cream Sandwich Cake
Our winning Ice Cream Sandwich Cake recipe is a testament to the power of simplicity, requiring just a handful of ingredients and minimal assembly time. The magic happens in the freezer, allowing flavors to meld into a creamy, dreamy dessert that tastes far more elaborate than its preparation suggests. Here’s what you’ll need to create this irresistible treat:
- Ice Cream Sandwiches: The foundation of our cake! We typically opt for the classic rectangular ice cream sandwiches due to how neatly they fit into a standard baking dish. However, don’t hesitate to use square ones if that’s what’s available; just be prepared to adjust the quantity slightly to ensure full coverage of your pan. These humble treats transform into soft, cake-like layers when frozen and combined with toppings.
- Hot Fudge Topping: A quintessential sundae staple and a non-negotiable layer in our cake. The rich, deep chocolate flavor of hot fudge provides a decadent contrast to the creamy ice cream. While store-bought hot fudge is perfectly convenient and delicious, feel free to elevate your cake with a batch of our Homemade Chocolate Sauce for an extra special touch. The warm, gooey texture when slightly softened makes it incredibly easy to spread.
- Caramel Sauce: Adding another layer of irresistible sweetness and complexity, caramel sauce is the perfect companion to hot fudge. Its buttery, rich notes complement the chocolate and vanilla beautifully. You can easily pick up a jar from your local grocery store, or for a truly homemade experience, whip up our simple and delicious Caramel Sauce. Its smooth consistency creates a luscious ribbon throughout the cake.
- Whipped Topping: While we cherish the light, airy goodness of homemade whipped cream, for a frozen dessert like this, a store-bought whipped topping (like Cool Whip) is often preferred. Its stability holds up exceptionally well in the freezer, maintaining its fluffy texture without collapsing. Remember to allow it sufficient time to thaw in the refrigerator before assembly, ensuring it’s soft enough to spread evenly over the layers.
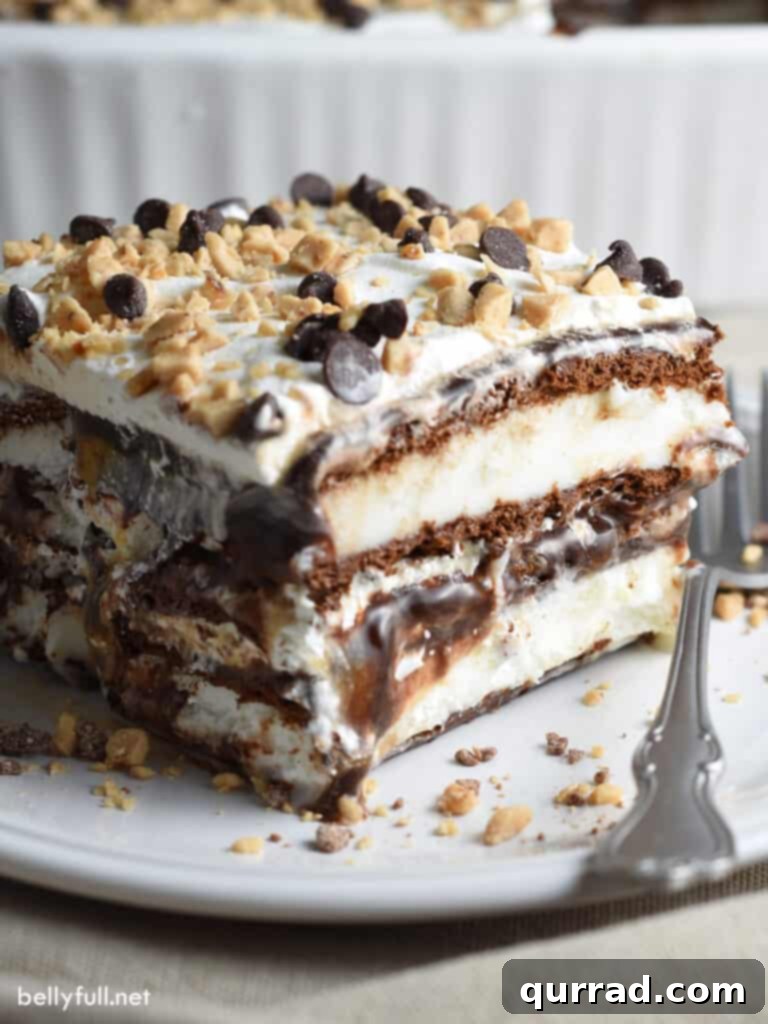
- Toppings: The finishing touch that adds both visual appeal and textural contrast! Our favorites include crunchy mini chocolate chips for an extra cocoa kick and buttery toffee pieces for a delightful chewiness. These small additions provide bursts of flavor and a satisfying crunch that elevates the entire dessert experience.
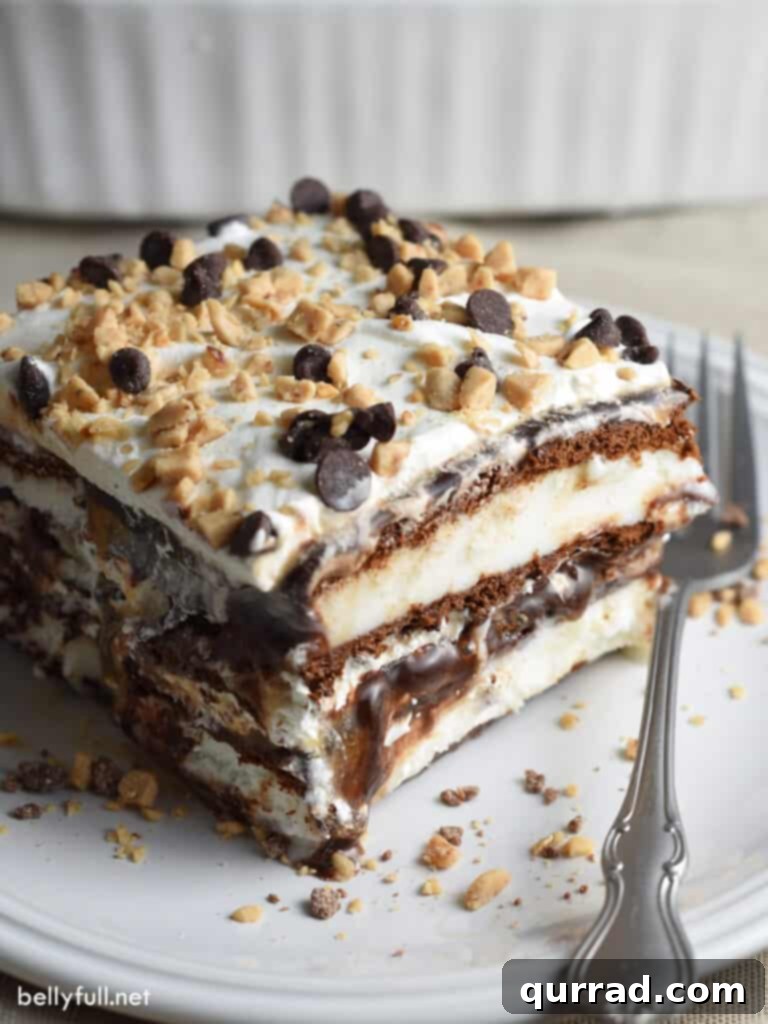
Unleash Your Creativity: Endless Ice Cream Sandwich Cake Variations
One of the most exciting aspects of this no-bake ice cream sandwich cake is how incredibly adaptable it is. Once you’ve mastered the basic structure, the possibilities for customization are virtually endless, allowing you to create a unique dessert for any palate or occasion. Let your imagination run wild with these inspiring variations:
- Change Up the Toppings: This is where you can truly express your creativity! Instead of (or in addition to) mini chocolate chips and toffee, consider a diverse array of options. Crush up your favorite cookies like Oreos or shortbread for a delightful crunch. M&Ms, Reese’s Pieces, or chopped candy bars add bursts of color and flavor. Fresh fruit, such as sliced strawberries, raspberries, or bananas, can provide a refreshing counterpoint to the sweetness. For nutty indulgence, sprinkle on chopped peanuts, pecans, or walnuts. A drizzle of chocolate syrup or extra caramel can also enhance the presentation.
- Neapolitan Ice Cream Sandwich Cake: For a classic flavor trio, seek out Neapolitan ice cream bar sandwiches. These offer a delightful combination of chocolate, strawberry, and vanilla in each bite, creating a visually stunning and multi-flavored cake that requires no extra effort on your part. It’s a fantastic way to introduce more complexity without adding more steps.
- Match Sprinkles for the Holidays: This simple trick instantly transforms your ice cream cake into a festive centerpiece. Use red, white, and blue sprinkles for patriotic celebrations like the 4th of July. Pastel-colored sprinkles are perfect for Easter or spring gatherings. Come winter, switch to vibrant red and green sprinkles to create a joyful Christmas dessert. This easy adjustment makes the cake perfect for birthdays, baby showers, or any themed party you can imagine.
- Experiment with Ice Cream Sandwich Flavors: Don’t limit yourself to just vanilla! Many brands offer ice cream sandwiches in a variety of flavors like chocolate, mint chip, cookies & cream, or even seasonal pumpkin spice. Choosing a different base flavor can dramatically alter the cake’s profile, leading to exciting new taste experiences.
- Alternative Sauces and Spreads: Beyond hot fudge and caramel, consider other delicious drizzles. A homemade strawberry sauce or raspberry coulis would add a fruity tang. Peanut butter sauce (slightly warmed to make it spreadable) offers a rich, nutty twist. Even a simple chocolate syrup or a white chocolate ganache could create a different character for your cake.
- Add a Cookie Crust: For an extra layer of texture and flavor at the bottom, consider adding a crushed cookie crust. Graham cracker crumbs mixed with melted butter, or crushed Oreo cookies, pressed into the bottom of the dish before the first layer of ice cream sandwiches, can elevate the cake further.
Step-by-Step Guide: How to Assemble Your Ice Cream Sandwich Cake
This dessert is celebrated for its incredible ease, and the assembly process truly reflects that. You can have this cake prepared and chilling in under 10 minutes, making it an ideal choice for last-minute gatherings or when you need a quick, impressive treat. Follow these simple steps for a perfect ice cream sandwich cake every time:
- Prepare Your Sauces: First, ensure your hot fudge and caramel toppings are easily spreadable. If they are too thick, gently warm them in the microwave for approximately 15-20 seconds. Stir well until they reach a pourable or spreadable consistency. This quick step is crucial for achieving smooth, even layers.
- Lay the Foundation: Take a standard 9×13-inch baking dish. Carefully unwrap about 10 of your rectangular ice cream bars and arrange them in a single, snug layer across the bottom of the dish. It’s okay if you need to trim a few of the sandwiches slightly to get them to fit perfectly edge-to-edge. This layer forms the sturdy and delicious base of your cake.
- First Layer of Indulgence: Now, it’s time to build the flavor! Evenly spread half of your warmed hot fudge topping over the ice cream sandwiches. Follow this with a layer of the caramel sauce, distributing it as evenly as possible. Finally, gently spread about half of your thawed whipped topping over the caramel. This creates a rich, creamy interlude between the ice cream layers.
- Sprinkle and Repeat: Over the whipped topping, sprinkle half of your chosen crunchy toppings – mini chocolate chips and toffee pieces. These add essential texture and bursts of flavor. Now, repeat the entire layering process: add another layer of ice cream sandwiches (the remaining 10 bars), followed by the remaining hot fudge, caramel, whipped topping, and finally, the rest of your chocolate chips and toffee pieces.
- Freeze Until Firm: Once all your layers are complete, cover the baking dish tightly with plastic wrap or aluminum foil. Place the cake in the freezer and allow it to firm up for at least 1 hour. For best results and easier slicing, letting it freeze for 2-3 hours, or even overnight, is recommended.
- Serve and Enjoy: When ready to serve, remove the cake from the freezer. For cleaner slices, let it sit at room temperature for about 5-10 minutes to soften just slightly. This brief thaw makes it easier to cut through the frozen layers. Slice into generous squares, serve immediately, and revel in the cheers from your delighted guests!
Make Ahead and Storage for Optimal Freshness
The beauty of this ice cream sandwich cake extends to its fantastic make-ahead capabilities and simple storage. This makes it an ideal dessert for planning parties or ensuring you always have a delightful treat on hand without last-minute stress. You can prepare this ice cream cake up to 3 days in advance. Simply assemble it as directed, then cover the baking dish tightly with plastic wrap and aluminum foil to prevent freezer burn and keep it fresh. Store it in the coldest part of your freezer until you’re ready to serve.
When it’s time to enjoy your masterpiece, remove the cake from the freezer and allow it to thaw for approximately 5-10 minutes at room temperature before slicing. This brief period helps soften the layers just enough to make cutting effortless, resulting in perfect, clean squares. Any leftover cake can be stored in the same tightly covered dish in the freezer for up to a week, though it’s so delicious, it rarely lasts that long!
Expert Tips for a Perfect Ice Cream Sandwich Cake
While this recipe is incredibly straightforward, a few expert tips can ensure your ice cream sandwich cake turns out perfectly every time, cementing its status as a crowd-pleaser:
- Thawing Whipped Topping: Always thaw your whipped topping in the refrigerator for several hours or overnight. Never try to thaw it at room temperature or in the microwave, as this can compromise its texture and stability, making it watery and difficult to spread.
- Softening Sauces: If your hot fudge or caramel is too thick to spread easily, microwave it in 5-10 second intervals, stirring well after each, until it reaches a warm, pourable consistency. Be careful not to overheat, as this can make it too runny and difficult to control.
- Even Layers are Key: For a beautiful presentation and balanced flavor in every bite, aim for even layers of ice cream sandwiches, sauces, and whipped topping. Take a moment to gently spread each component to the edges of the pan.
- Cutting Ice Cream Sandwiches: If your ice cream sandwiches don’t fit perfectly in your dish, you can easily trim them with a sharp knife. Just be quick, as they will melt! The small trimmed pieces can be used to fill in any gaps, ensuring a solid base.
- Slicing for Success: For the neatest slices, use a long, sharp knife. Dip the knife in hot water and wipe it clean between each cut. This technique helps the knife glide through the frozen layers without sticking, creating perfectly defined portions.
- Personalized Topping Combinations: Don’t feel limited by the suggested toppings. Think about your favorite ice cream sundae combinations. Crushed cookies (Oreo, Biscoff), chopped candies (Snickers, Butterfinger), different sprinkles, mini marshmallows, or even a handful of toasted nuts can add fantastic variety.
- Freezing Time is Important: While 1 hour is the minimum, allowing the cake to freeze for 2-3 hours or overnight ensures it is completely firm. This prevents layers from shifting and makes for a much more stable cake when slicing and serving.
Frequently Asked Questions About Ice Cream Sandwich Cake
Here are some common questions to help you master this delicious no-bake dessert:
- Can I use homemade ice cream for this recipe? While technically possible, store-bought ice cream sandwiches are designed for stability and consistent texture, making them ideal for this cake. Homemade ice cream, especially no-churn varieties, might be too soft or melt too quickly when layered. For best results and the easiest prep, stick with commercial ice cream sandwiches.
- What if I don’t have a 9×13-inch baking dish? You can adapt this recipe to other sizes. A 9×9-inch square dish or even a loaf pan will work, but you’ll need fewer ice cream sandwiches and may need to adjust the number of layers to fit. The key is to ensure the layers are relatively even.
- How do I cut clean slices of the cake? The trick for neat slices is to let the cake sit out for 5-10 minutes before cutting, allowing it to slightly soften. Use a long, sharp knife that has been run under hot water and dried. Clean the knife between each slice for the cleanest cuts.
- Can I use real whipped cream instead of whipped topping? While fresh whipped cream is delicious, it doesn’t hold up as well in the freezer as stabilized whipped toppings like Cool Whip. Real whipped cream can become icy or lose its texture when frozen and thawed. For a truly no-fail frozen cake, whipped topping is the recommended choice.
- Can I make this cake ahead of time for a party? Absolutely! This cake is perfect for making ahead. You can assemble it up to 3 days in advance and keep it tightly covered in the freezer. This allows you to prepare your dessert well before your event, reducing stress on the day of the party.
Ice Cream Sandwich Cake Video
For those who prefer a visual guide, a video demonstrating the simple steps of assembling this delightful Ice Cream Sandwich Cake is often available. Seeing the layering process in action can provide extra confidence and ensure your cake turns out perfectly!
Other Irresistible No-Bake Desserts We Love!
If you’ve fallen in love with the ease and deliciousness of no-bake desserts, you’re in for a treat! Here are some other fantastic recipes that require no oven and are guaranteed to satisfy your sweet tooth:
- Key Lime Pie {only 6 ingredients!} – A tangy, refreshing classic.
- Homemade Banana Pudding – Layers of creamy goodness and sweet bananas.
- Chocolate Lasagna – A rich, decadent layered dessert with a cookie crust.
- Easy Tiramisu – An elegant Italian classic simplified for your enjoyment.
- Jello Pie – A light, fruity, and incredibly simple dessert.
We hope you adore this delightful and easy Ice Cream Sandwich Cake recipe! If you make it, please consider leaving a review below to share your experience. Don’t forget to follow Belly Full on Facebook, Instagram, Pinterest, and YouTube for more fantastic recipes and culinary inspiration!
Ice Cream Sandwich Cake
10
1
1 20
15
Pin
Ingredients
- 20 ice cream sandwiches, (you may need more if they’re the square kind)
- 2 cups hot fudge topping
- 3/4 cup caramel topping
- 8 ounce tub Cool Whip, thawed
- 1/2 cup mini chocolate chips
- 1/2 cup toffee pieces
Instructions
-
Microwave the fudge and caramel topping for about 15-20 seconds to loosen it and make it spreadable, if necessary.
-
Line the bottom of a 9×13 baking dish with a layer of the ice cream bars (10 of them; trim if necessary.)
-
Spread half of the hot fudge, followed by the caramel, and then Cool Whip over the sandwiches. Sprinkle on half of the chocolate chips and toffee pieces. Repeat layers.
-
Freeze until firm, about 1 hour. Cut into squares and serve.
Video
A video tutorial for this recipe can typically be found within the full article to guide you through each step visually.
Nutrition
Calories: 457kcal
|
Carbohydrates: 75g
|
Protein: 6g
|
Fat: 15g
|
Saturated Fat: 6g
|
Cholesterol: 21mg
|
Sodium: 315mg
|
Potassium: 247mg
|
Fiber: 1g
|
Sugar: 39g
|
Vitamin A: 275IU
|
Vitamin C: 0.1mg
|
Calcium: 118mg
|
Iron: 0.8mg
Nutritional information given is an automatic calculation and can vary based on the exact products you use and any changes you make to the recipe. If these numbers are very important to you, we recommend calculating them yourself.
Did you make this? Leave a rating below!