
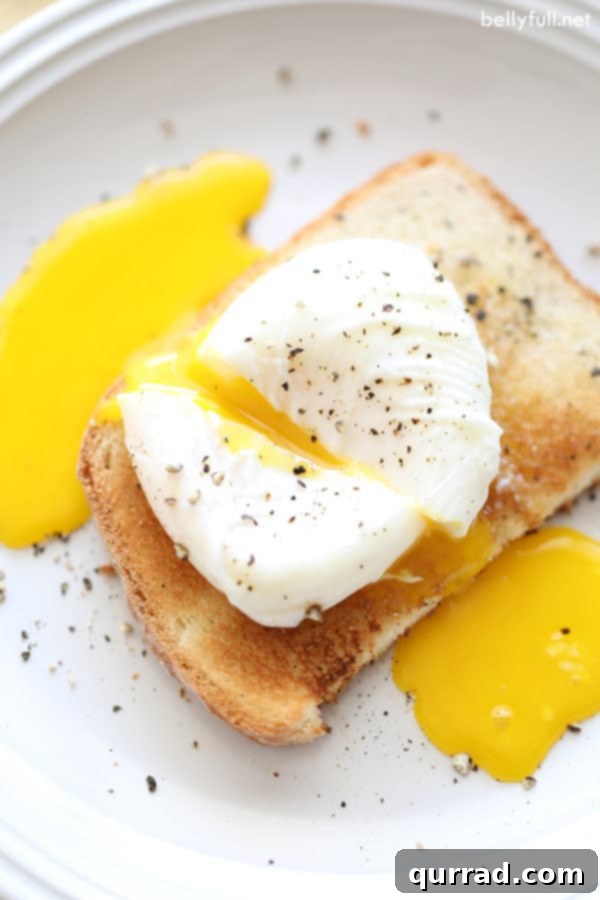
Start your culinary journey to perfection with our ultimate guide on how to make flawless poached eggs every single time! This detailed article, complete with expert tips and a video tutorial, will demystify the process and help you achieve restaurant-quality results in your own kitchen.
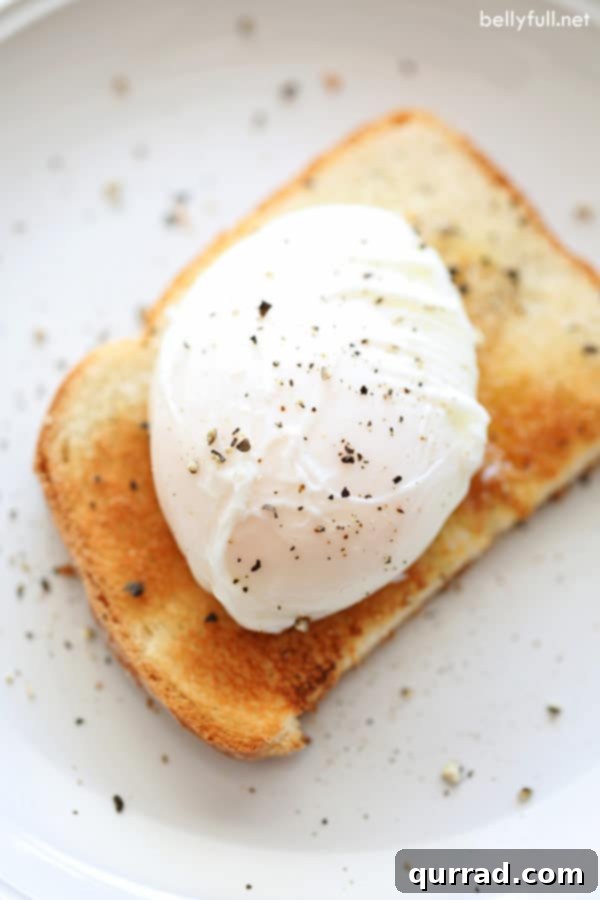
The Ultimate Guide to Perfect Poached Eggs: Achieve a Runny Yolk Every Time
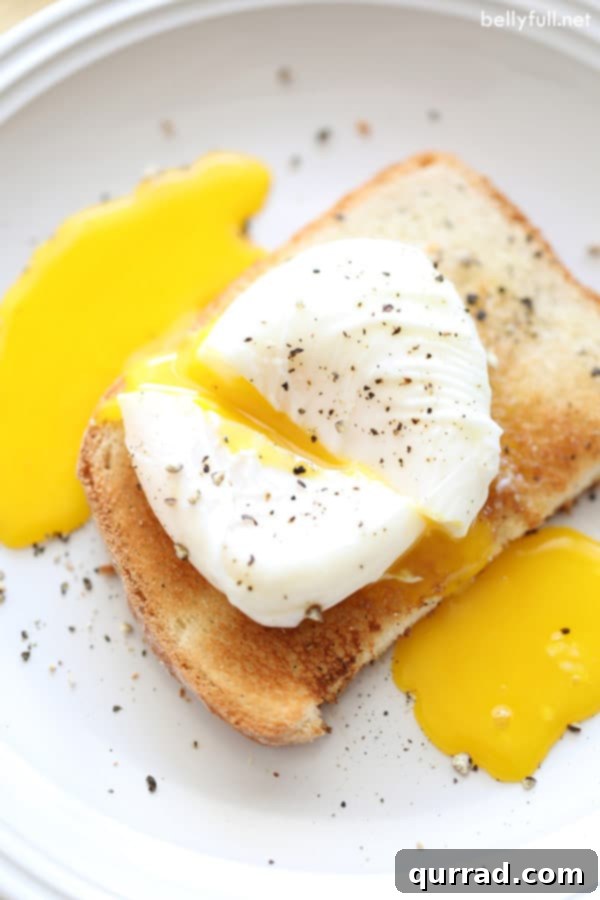
Following the popularity of our guides for perfect hard-boiled eggs and fluffy scrambled eggs, it’s high time we shared the secrets to making perfect poached eggs. There’s a distinct satisfaction that comes with creating a delicate, tender egg white cradling a warm, velvety, runny yolk – a true breakfast masterpiece that elevates any meal.
Oh, the sublime pleasure of a perfectly runny egg! Its golden liquid heart is a versatile addition, whether it’s generously coating a piece of crispy toast, enriching a savory bowl of Ramen noodles, or adding a gourmet touch to the top of a juicy burger. While alternatives like fried eggs (sunny-side up or over easy) also deliver that coveted runny center, poached eggs offer a unique advantage: they are the healthiest cooking method for eggs, requiring absolutely no butter or oil. This makes them an excellent choice for a light yet incredibly satisfying meal, packed with protein and nutrients without the added fats.
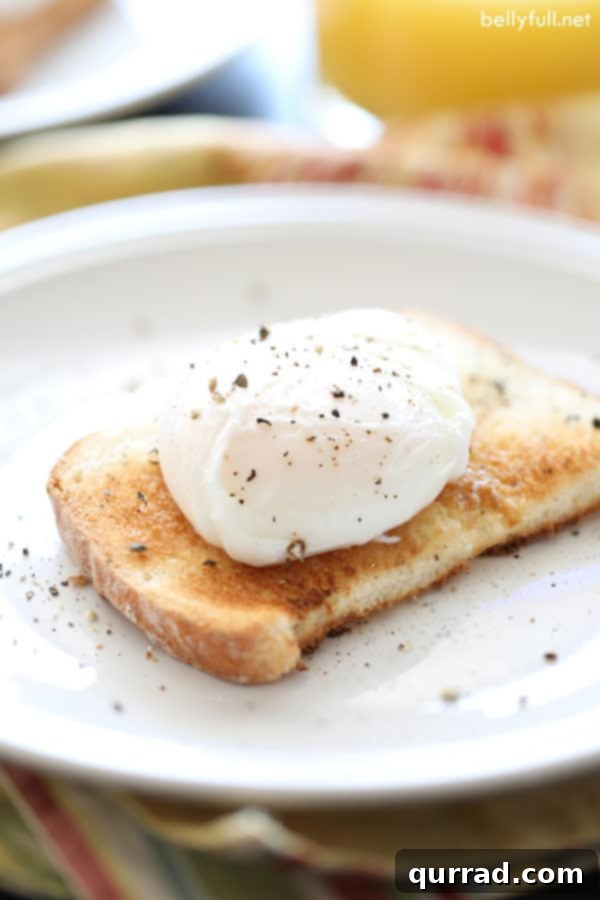
Understanding Poaching: The Gentle Art of Egg Preparation
At its core, poaching is a cooking technique where food is submerged in a liquid (most commonly water) that is held at a temperature just below the simmering point. For eggs, this ideal temperature typically hovers around 185 degrees Fahrenheit (approximately 85 degrees Celsius). This gentle heat ensures a delicate cooking process, allowing the egg whites to set softly while the yolk remains wonderfully liquid and warm.
The term “poaching” has a fascinating origin, tracing back to the Middle French verb pochier, which means to cook in a small amount of liquid. This, in turn, is derived from the Old French noun poche, meaning “bag” or “pocket.” This etymology perfectly describes the appearance of a well-poached egg, where the white forms a neat, self-contained “pouch” or “pocket” that cradles the yolk within. This visual elegance is part of what makes a perfectly poached egg so appealing to both the eye and the palate.
Unlock Flawless Poached Eggs: Essential Tips and Techniques
Achieving consistently perfect poached eggs might seem like a chef’s secret, but with a few key techniques and careful attention to detail, anyone can master this delicate art. These tips are designed to prevent common pitfalls like feathering and ensure your eggs turn out beautifully shaped with that irresistible runny yolk.
- Prioritize the Freshest Eggs: The single most impactful factor in poaching success is the freshness of your eggs. Ideally, use eggs that are just a few days old, or even farm-fresh. Fresher eggs possess a thicker, more viscous albumen (egg white) that holds its shape tightly around the yolk. This structural integrity is crucial for creating that desirable compact, round poached egg without unwanted “feathering” – those wispy, stringy bits of white that can separate in the water. As eggs age, the thick white gradually thins out, leading to more dispersion. If your eggs aren’t super fresh, don’t worry entirely; you can still poach them, but they might not achieve that perfect spherical appearance.
- Utilize a Fine Mesh Sieve for Pre-Draining: This clever trick is a game-changer, especially for eggs that aren’t impeccably fresh. Carefully crack each egg into a fine-mesh sieve and let it sit for about 30 seconds. This allows the thinner, more watery outer layer of the egg white to drain away. It’s this thinner white that often causes significant feathering. What remains is the firmer, thicker albumen, which will then beautifully cling to the yolk, resulting in a much neater and more compact poached egg.
- Individual Custard Cups or Ramekins are Your Friends: After sieving, gently transfer each egg into its own small custard cup or ramekin. This simple step is vital for a controlled entry into the poaching water. Instead of dropping an egg from a height (which can cause the yolk to rupture or the whites to scatter), you can lower the cup close to the water surface and smoothly pour the egg in. This controlled descent helps maintain the egg’s delicate structure and ensures a more aesthetically pleasing shape.
- Omit Salt from the Poaching Water: Contrary to many cooking instincts, adding salt to your poaching water can actually be counterproductive. Research and culinary experience suggest that salt can encourage the egg whites to disperse and feather more readily. For best results, keep the poaching water unsalted and season your perfectly cooked egg once it’s on your plate.
- Incorporate Vinegar into the Water: A small amount of neutral vinegar, such as white vinegar or apple cider vinegar (typically 1-2 teaspoons per pot of water), is highly recommended. The acidity of the vinegar helps the egg whites to coagulate (set) more quickly and firmly, preventing them from spreading out excessively in the water. Rest assured, this minimal amount of vinegar diluted in a large volume of water will not impart any noticeable vinegary taste to your delicate poached eggs.
The Critical Role of Pot Size and Water Depth
The size and type of your cooking vessel, along with the depth of the water, play a significant role in the outcome of your poached eggs. Adjusting these elements can help you achieve different results, whether you’re aiming for a single, perfectly round egg or efficiently poaching several at once.
- For a Single, Perfectly Spherical Egg: The Whirlpool Method. When your goal is one perfectly formed, spherical poached egg, select a fairly large pot and fill it with about 4 inches of water. Bring this water to a full rolling boil, then immediately remove the pot from the heat. Using the handle of a wooden spoon or a whisk, vigorously stir the water in a strong, continuous circular motion to create a deep whirlpool in the center. Gently lower your prepared egg (from its ramekin) directly into the heart of this swirling vortex. The dynamic motion of the water helps to tightly wrap the egg whites around the yolk, encouraging that desirable, compact, and perfectly round shape.
- For Poaching Multiple Eggs: The Covered Skillet Method. If you need to prepare several poached eggs simultaneously, perhaps for a family brunch or meal prepping, a nonstick skillet with a lid is the ideal choice. Fill the skillet with approximately 2 inches of water. The broader surface area of a skillet allows you to poach multiple eggs without overcrowding them, which is crucial for even cooking. The lid serves a vital purpose here: it traps steam, ensuring that the tops of the eggs – which might occasionally float to the surface – cook evenly and set properly. While eggs cooked using this method might not be as impeccably spherical as those from the whirlpool technique, the efficiency and convenience of preparing several at once often make it the preferred choice for practical cooking.
Optional Finishing Touch: Trimming Ragged Edges. Many professional chefs and high-end restaurants opt to trim away any slightly ragged or uneven cooked edges from poached eggs using a dull knife or kitchen shears. This is purely for presentation, to create an even more pristine and aesthetically perfect shape for plating. While it doesn’t affect the taste, it’s a detail you can embrace if you’re looking to impress.
Optimal Poaching Time for that Perfect Runny Yolk
The exact cooking duration is paramount for achieving the hallmark of a perfect poached egg: firm, yet tender whites and a lusciously runny yolk. For most palates, a cooking time of **3 to 3 1/2 minutes** in gently simmering water will yield precisely these desired results. This timeframe allows the egg whites to fully set without becoming rubbery, while the yolk remains warm, liquid, and ready to burst with flavor.
If you plan to make poached eggs ahead of time and intend to reheat them later, it’s advisable to slightly reduce the initial poaching time to **3 minutes**. This subtle adjustment accounts for the additional heat exposure the eggs will experience during the reheating process. By undercooking them slightly during the first round, you ensure that they do not become overcooked or lose their desired runny center when warmed up again, maintaining their perfect texture and taste.
Preparing Poached Eggs in Advance: Your Secret to Effortless Entertaining
Absolutely! Poached eggs can be successfully made ahead of time, transforming them into a fantastic option for stress-free entertaining or simply for having quick, healthy breakfasts on hand throughout the week. The key to successfully preparing poached eggs in advance lies in a simple yet effective technique: using an ice water bath.
How to Store and Reheat Pre-Poached Eggs
Once your eggs have finished poaching to your desired doneness, use a slotted spoon to gently transfer them immediately into a large bowl filled with ice-cold water. This immediate chilling serves a crucial purpose: it halts the cooking process, preventing the eggs from overcooking and preserving their ideal firm-white, runny-yolk texture. Once the eggs are thoroughly cooled in the ice bath, you can store them in an airtight container in the refrigerator for up to **3 days**.
When you’re ready to enjoy your make-ahead poached eggs, reheating is incredibly simple and quick. Carefully place the chilled poached egg(s) into a small bowl and pour warm (not boiling) tap water over them. Let them sit in the warm water for approximately 20 to 30 seconds, or until they are warmed through to your liking. This gentle rewarming method ensures that the yolk remains perfectly runny and the whites retain their tender texture, making them taste just as delightful as freshly poached eggs.
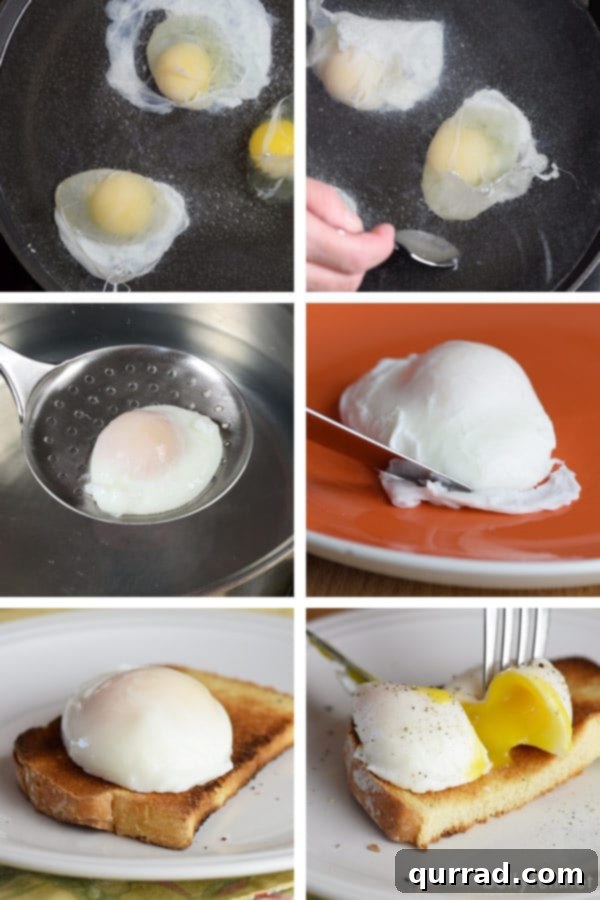
Step-by-Step Instructions: Mastering the Art of Poached Eggs
It’s time to put these techniques into practice! Follow these detailed, step-by-step instructions to create perfect poached eggs, whether you’re preparing a single serving or cooking for a small group.
For Poaching a Single Egg (Whirlpool Method)
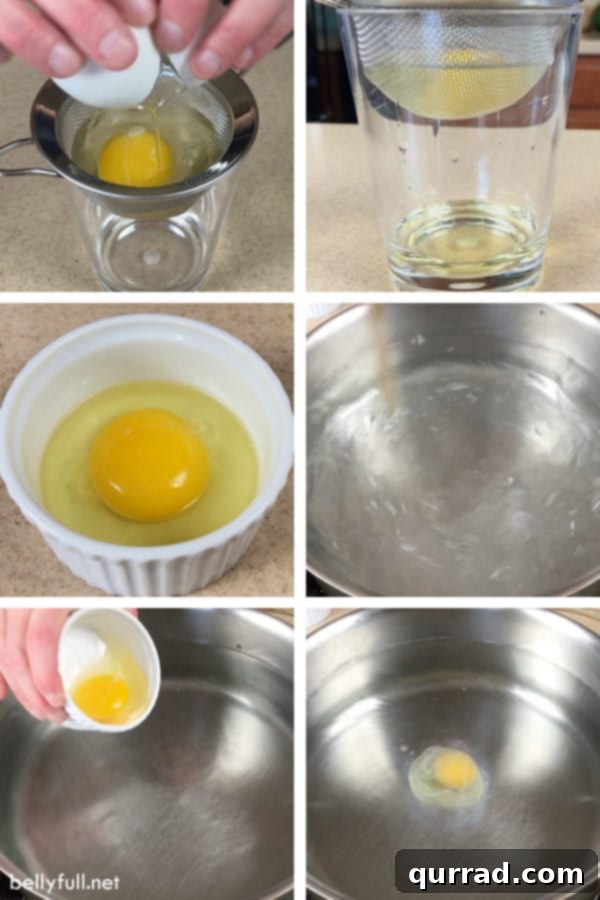
- Prepare the Egg: Crack the freshest large egg you can find into a fine-mesh sieve positioned over a bowl. Allow the egg to sit for about 30 seconds to drain off the thinner, more watery egg whites.
- Transfer: Gently transfer the sieved egg into a small custard cup or ramekin, ensuring the yolk remains intact.
- Boil Water: In a large, deep pot, bring approximately 4 inches of water to a vigorous rolling boil over high heat.
- Remove from Heat & Add Vinegar: Once the water is boiling rapidly, remove the pot from the heat source. Add 1 to 2 splashes (roughly 1-2 teaspoons) of neutral vinegar, such as white vinegar or apple cider vinegar, to the hot water.
- Create Whirlpool: Using the handle of a wooden spoon or a whisk, vigorously stir the water in a continuous circular motion to create a strong, deep whirlpool in the center of the pot.
- Gently Poach: Carefully lower the ramekin containing the egg into the very center of the swirling water. Gently tip the egg from the ramekin into the whirlpool. Immediately set a timer for 3 to 3 1/2 minutes.
- Remove: When the timer expires, use a slotted spoon to carefully retrieve the perfectly poached egg from the water.
- Drain (Optional): If you notice any excess water clinging to the egg, gently dab the bottom with a paper towel.
- Serve Immediately: Enjoy your exquisitely poached egg right away, perhaps over toast or as part of a larger dish!
For Poaching Multiple Eggs (3-4 Eggs – Covered Skillet Method)
- Prepare Eggs: Crack your freshest large eggs, one at a time, into a fine-mesh sieve. Allow each egg to drain for about 30 seconds to remove the thinner whites before transferring it to its own small custard cup or ramekin.
- Prepare Skillet: In a large nonstick skillet with a tight-fitting lid, add about 2 inches of water. Bring the water to a gentle simmer over medium-high heat (small bubbles should form at the bottom, but the water should not be vigorously boiling). You may lightly coat the skillet with nonstick cooking spray if desired, though often unnecessary with a good nonstick surface.
- Add Vinegar: Once the water is at a gentle simmer, add a few splashes (approximately 2-3 teaspoons) of neutral vinegar to the skillet.
- Gently Lower Eggs: Carefully lower each ramekin with an egg into the simmering water, ensuring there are a few inches of space between each egg. Avoid dropping them from a height.
- Shape Whites (Optional): If any egg whites appear to be spreading too much, gently use a spoon to nudge them closer to the yolk, helping them to form a more compact shape.
- Cover and Poach: Immediately place the lid securely on the skillet. Set a timer for 3 to 3 1/2 minutes.
- Remove: When the timer goes off, carefully remove the poached eggs from the water using a slotted spoon.
- Drain (Optional): If desired, gently dab the bottom of each egg with a paper towel to remove any excess water.
- Serve Immediately: Serve your multiple perfectly poached eggs straight away, or prepare them for make-ahead storage if not consuming immediately.
Creative Ways to Enjoy Your Perfect Poached Eggs
Now that you’ve mastered the art of poaching, the culinary possibilities for these versatile eggs are truly boundless! Poached eggs can enhance a wide array of dishes, transforming them into something truly special, from classic breakfast and brunch favorites to elegant lunch and even dinner options.
- The Legendary Eggs Benedict: This iconic dish is perhaps the most celebrated application of poached eggs. Serve your perfectly poached eggs on toasted English muffins, layered with savory Canadian bacon or ham, and generously draped with a rich, creamy hollandaise sauce. It’s an undisputed brunch classic!
- Elevated Avocado Toast: Transform your everyday avocado toast into a gourmet experience. A warm, runny poached egg atop mashed avocado on toasted bread creates an incredibly creamy, satisfying, and visually appealing meal.
- Healthy and Hearty Salads: Add a luxurious touch and a significant protein boost to any green or grain-based salad. The warm, flowing yolk acts as a natural, emulsifying dressing, beautifully complementing fresh vegetables, crisp greens, and hearty grains.
- Savory Ramen and Noodle Bowls: A perfectly poached egg is a traditional and highly recommended addition to many Asian noodle soups. Its rich yolk enriches the broth and adds a delightful depth and substance to your comfort food meal.
- Gourmet Burgers: For an indulgent and truly memorable dining experience, crown your favorite burger with a perfectly poached egg. The runny yolk creates an incredible, natural sauce that melds with the burger patty and other toppings.
- Alongside Roasted Vegetables or Grains: For a simple yet sophisticated meal, serve poached eggs alongside steamed asparagus, roasted seasonal vegetables, or a wholesome bowl of quinoa, farro, or lentils. It’s a balanced, nutritious, and incredibly flavorful combination.
- A Quick Addition to Stews or Shakshuka: While eggs are often cooked directly into these dishes, a gently placed poached egg can also be a wonderful and quick way to add protein and richness to a warm bowl of shakshuka or a hearty lentil stew.
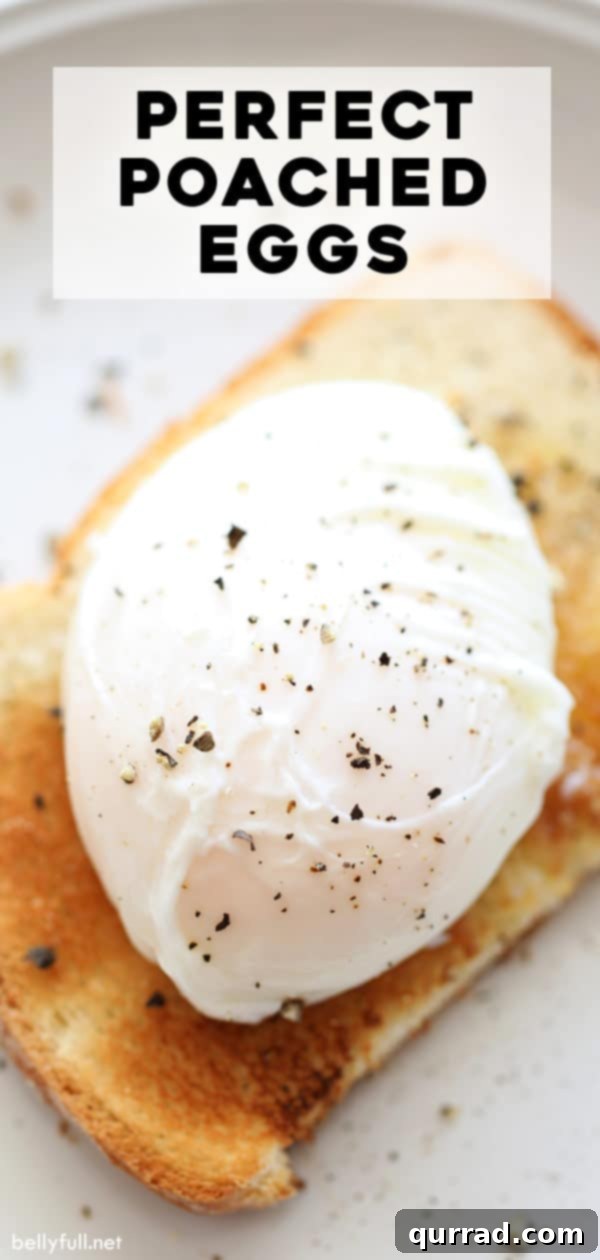
Frequently Asked Questions About Poached Eggs
- Why do my poached eggs “feather,” and how can I prevent it?
- Feathering occurs when thin egg whites separate and create wispy strands in the water. This is commonly caused by using older eggs (which have thinner whites), having the water at a rapid boil, or adding salt to the poaching water. To prevent feathering, use the freshest eggs possible, employ the fine-mesh sieve method to drain thin whites, and ensure your water is at a gentle simmer (not a rolling boil). Adding a splash of vinegar also greatly helps.
- Can I poach eggs without adding vinegar to the water?
- Yes, you certainly can, especially if you are using exceptionally fresh eggs. However, adding a small amount of neutral vinegar (like white or apple cider vinegar) helps the egg whites coagulate more quickly and firmly, resulting in a more compact and neatly shaped poached egg. The minimal amount used will not impart any noticeable flavor.
- My egg yolk broke during poaching. What went wrong?
- A broken yolk typically happens if the egg is dropped from too great a height into the water, or if the egg is not fresh, which can weaken the yolk membrane. Always transfer your prepared egg very gently and close to the water’s surface, ideally by sliding it in from a small ramekin.
- How do I know when my poached egg is perfectly done?
- For the ideal combination of firm whites and a runny yolk, aim for a poaching time of 3 to 3 1/2 minutes. The egg whites should appear opaque and fully set, and the egg should feel slightly firm yet still have a gentle jiggle in the center when lightly touched with a slotted spoon.
- What is the ideal water temperature for poaching eggs?
- The water should be at a gentle simmer, not a vigorous rolling boil. You should see small, consistent bubbles forming at the bottom of the pot and a slight trembling on the surface, but no rapid, turbulent movement. An ideal temperature is around 185°F (85°C).
Perfect Poached Eggs Recipe Card
Perfect Poached Eggs

Pin
Ingredients
- 1 large egg
- 2 splashes neutral vinegar
- water
Instructions
For 1 Egg (Whirlpool Method)
- Crack the freshest egg possible into a fine mesh sieve and allow the thinner whites to drain out for 30 seconds.
- Transfer the egg to a small custard cup/ramekin.
- Bring 4 inches of water to a rolling boil in a large pot; then remove from heat.
- Add a few splashes of neutral vinegar.
- Using the handle of a wooden spoon, stir the water vigorously to create a whirlpool.
- Gently lower the ramekin with the egg into the middle of the whirlpool and pour in; set a timer for 3-3 1/2 minutes.
- When the egg is done poaching, remove it with a slotted spoon.
- You can gently dab with a paper towel to remove any excess water, if desired.
- Eat immediately!
For 3-4 Eggs (Covered Skillet Method)
- Crack the freshest eggs possible (one by one) into a fine mesh sieve and allow the thinner whites to drain out for 30 seconds.
- Transfer the eggs to small individual custard cups/ramekins.
- Bring 2 inches of water to a gentle simmer in a large skillet (coated with nonstick cooking spray if not a nonstick pan); then remove from heat briefly if boiling too vigorously.
- Add a few splashes of neutral vinegar.
- Gently lower the ramekins with the eggs into the skillet, leaving a few inches of space between them.
- Using a spoon, you can gently move the water around the egg whites to help form them if needed.
- Put the lid on and set a timer for 3-3 1/2 minutes.
- When the eggs are done poaching, remove them with a slotted spoon.
- You can gently dab with a paper towel to remove any excess water, if desired.
- Eat immediately!
Video Tutorial
Notes for Success
- Make-Ahead & Storage: Poached eggs can be prepared in advance. After cooking, immediately transfer them to an ice water bath. Once completely cooled, store them in an airtight container in the refrigerator for up to 3 days.
- Reheating: To reheat, place chilled poached eggs in a small bowl with warm tap water for approximately 20-30 seconds until warmed through.
- For more detailed insights, troubleshooting tips, and step-by-step photos, please refer to the comprehensive article above.
Nutrition Information (per egg)
Carbohydrates: 1g |
Protein: 7g |
Fat: 5g |
Saturated Fat: 2g |
Cholesterol: 211mg |
Sodium: 81mg |
Potassium: 78mg |
Sugar: 1g |
Vitamin A: 306IU |
Calcium: 32mg |
Iron: 1mg
Nutritional information provided is an automatic calculation and serves as an estimate. Actual values may vary significantly based on the specific ingredients and exact products used, as well as any modifications made to the recipe. If precise nutritional data is critical for your dietary needs, we recommend independently calculating these values based on your chosen ingredients.
We sincerely hope this comprehensive guide inspires and empowers you to create perfect poached eggs with confidence in your own kitchen! Your feedback is invaluable – please consider leaving a rating and review below if you found this article helpful. And for more delectable recipes and culinary inspiration, don’t forget to connect with us on Facebook, Instagram, Pinterest, and YouTube!