
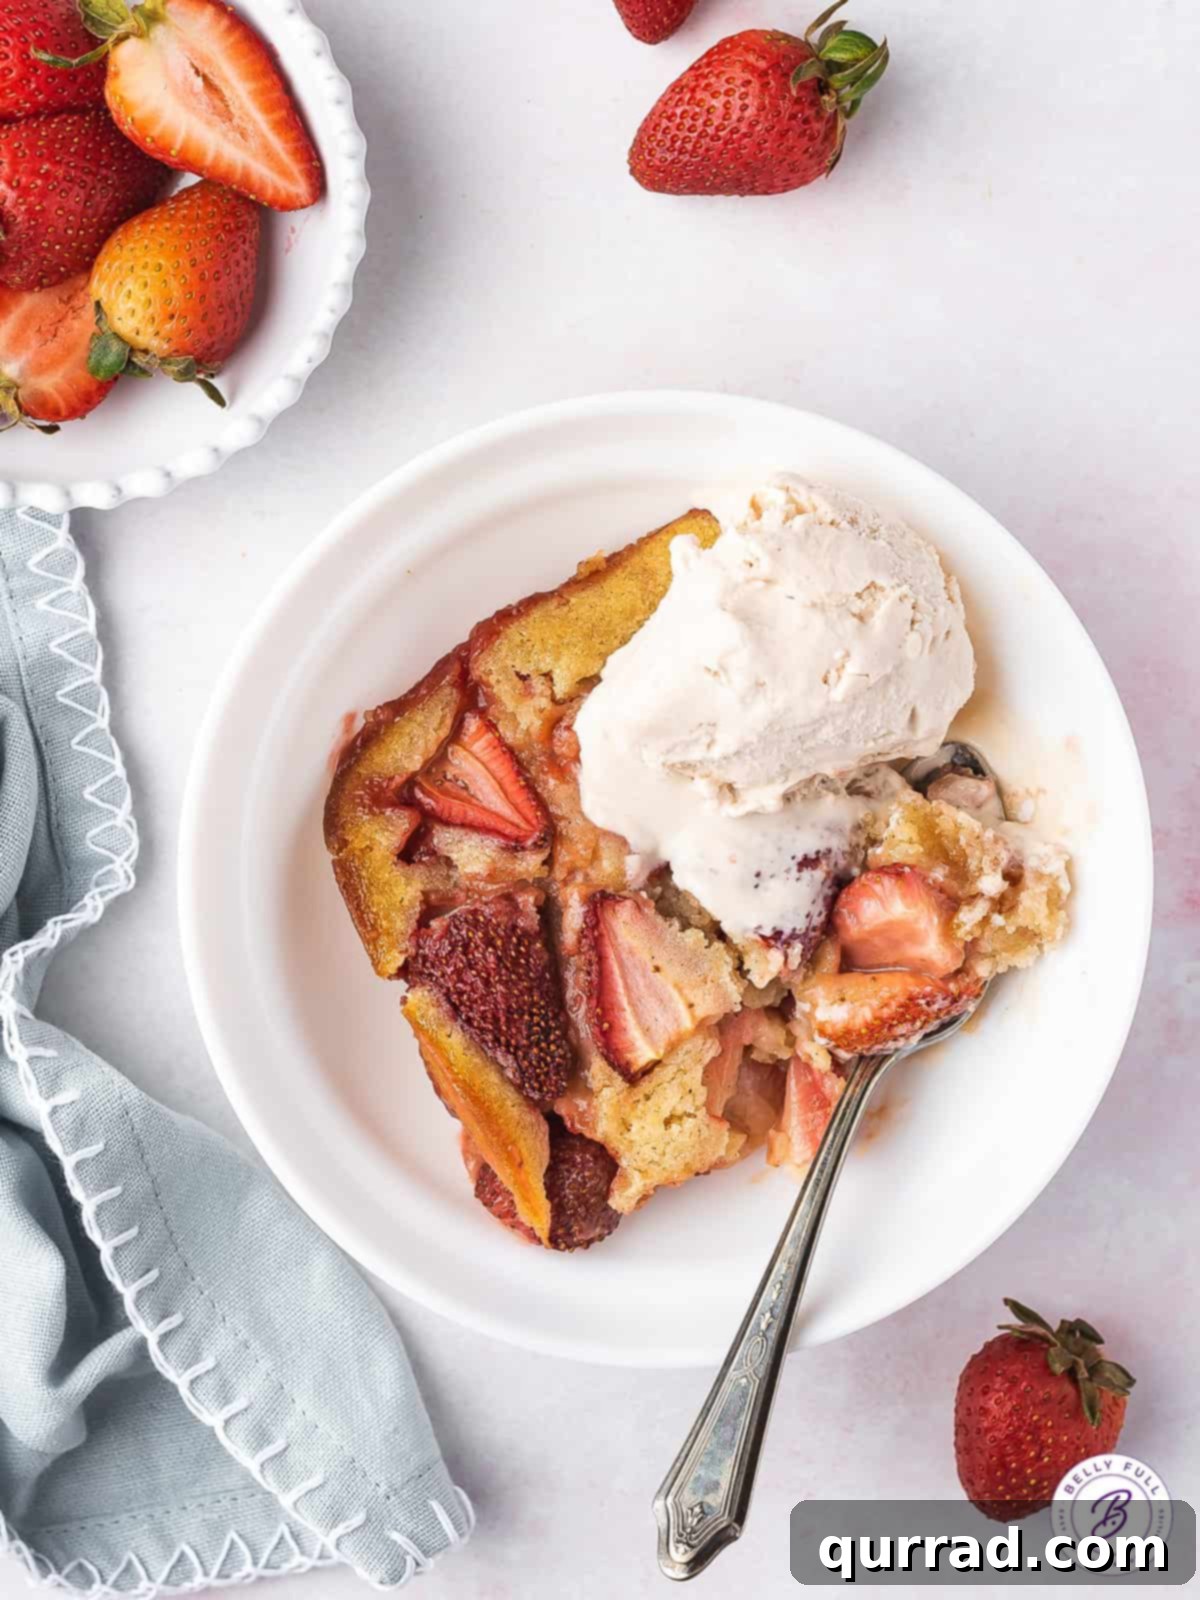
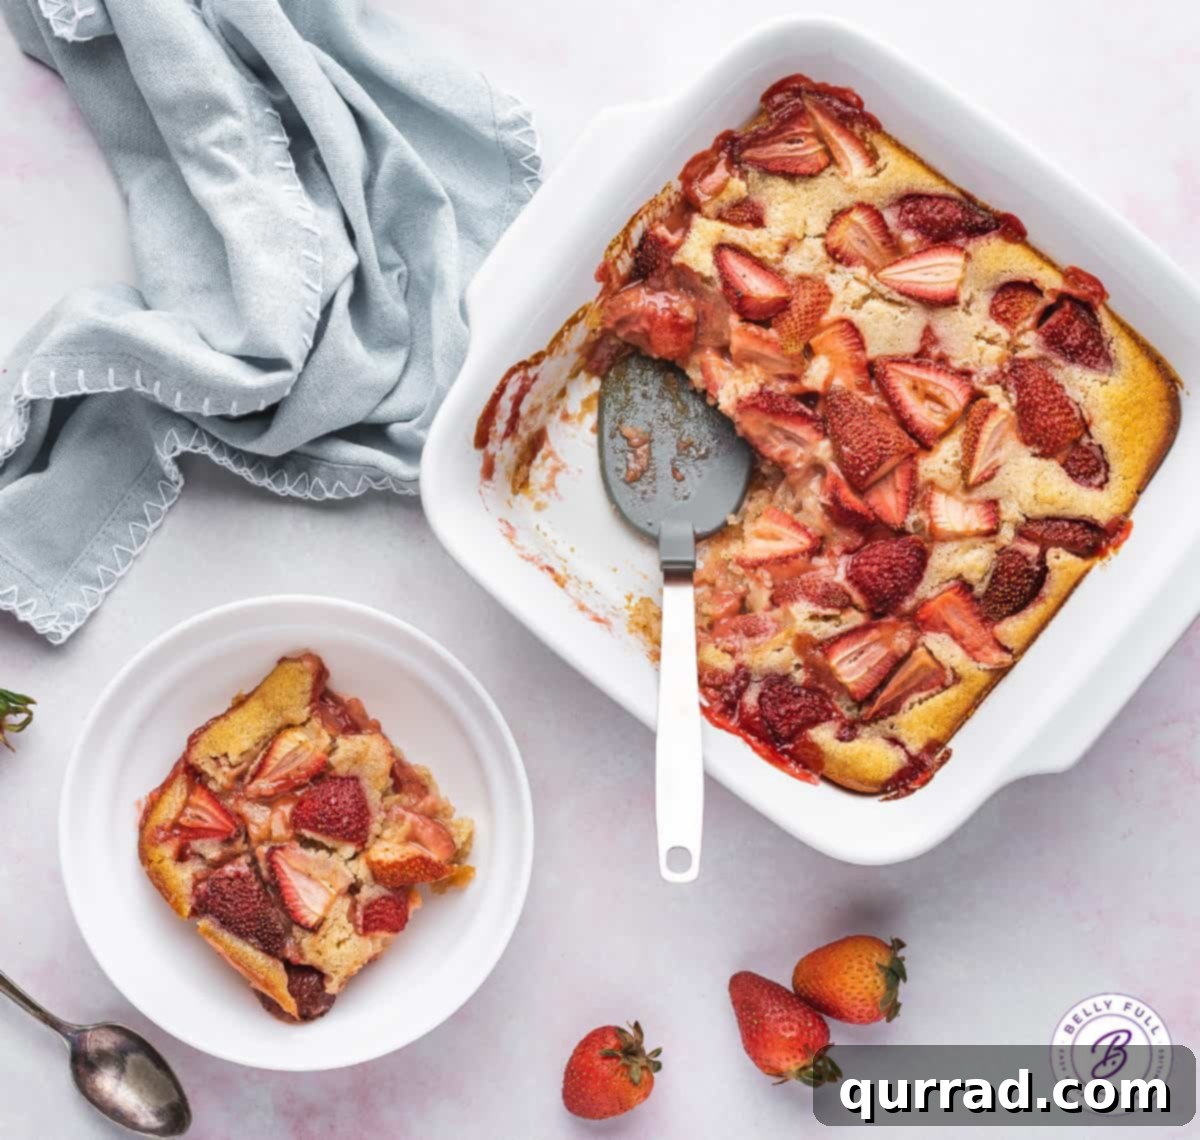
With sweet, juicy strawberries baked in a vibrant, citrus-infused sauce and topped with a golden, biscuit-like crust, this Easy Strawberry Cobbler is truly a dessert sensation. Whether strawberries are in peak season or you’re craving a taste of summer in the depths of winter, this recipe conveniently allows you to use both fresh or frozen fruit. It’s a comforting treat that shines on its own or reaches new heights of deliciousness when served warm with a generous scoop of vanilla ice cream.
If you love the simplicity and heartwarming appeal of fruit cobblers, be sure to explore our other delightful recipes. Indulge in a classic Apple Cobbler, a refreshing Blueberry Cobbler, or even an indulgent Chocolate Cobbler for those who prefer a different kind of sweet satisfaction!
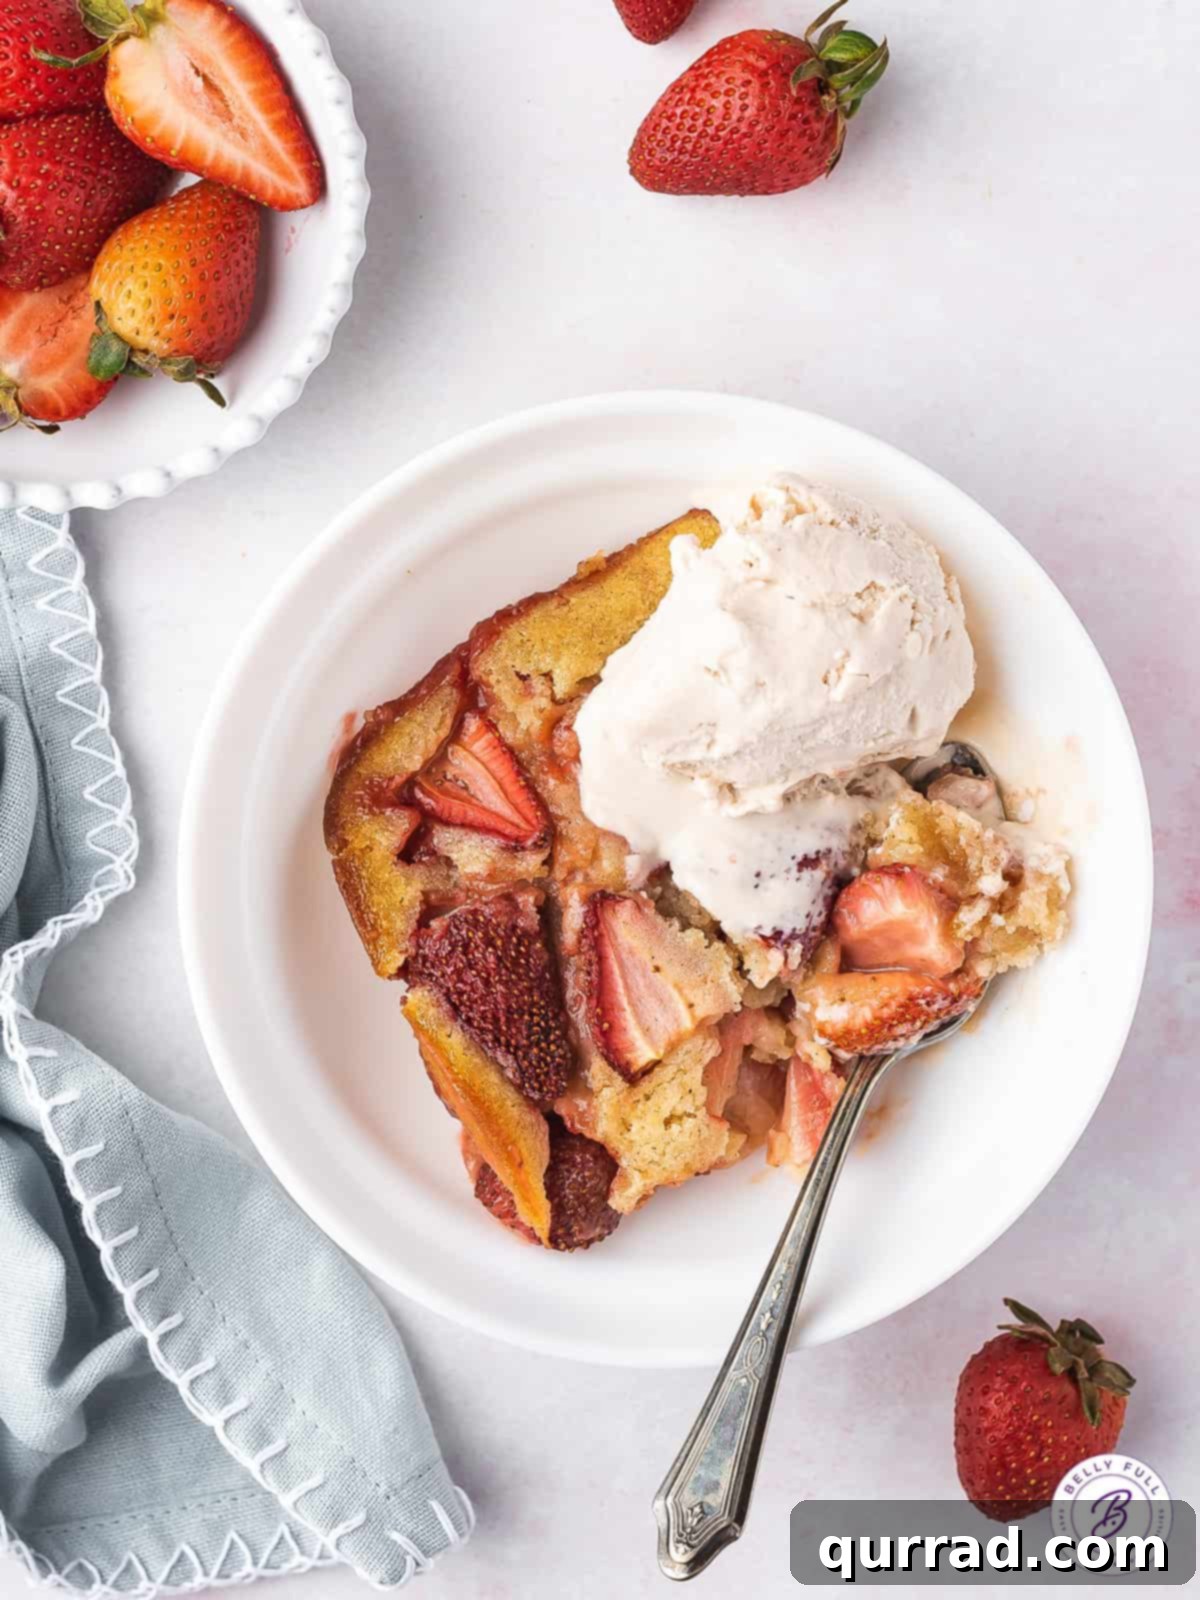
The Ultimate Easy Strawberry Cobbler: A Classic Homemade Dessert
Few desserts evoke the cozy comfort and nostalgic charm quite like a perfectly baked cobbler. At its heart, a cobbler is a delightful baked fruit dessert, traditionally crowned with a thick, tender, and often buttery biscuit-like topping. The name “cobbler” itself is said to originate from the way the irregular drops of dough on top of the fruit resemble a cobbled stone road, creating a rustic, inviting appearance. While some variations feature cookie dough or cake batter for the topping, our beloved strawberry cobbler recipe focuses on a homemade biscuit batter that offers a uniquely satisfying texture and flavor.
What sets this particular strawberry cobbler apart is its innovative construction: we start with a luscious, buttery biscuit batter generously spread at the bottom of the baking dish, and then carefully spoon the vibrant fruit mixture directly on top. As this culinary masterpiece bakes, a magical transformation occurs. The soft, sweet batter slowly envelops the fruit, soaking up all the fragrant, bubbly juices. This method ensures a perfectly moist and flavorful crust that’s infused with strawberry goodness, creating a dessert that’s not only incredibly easy to prepare but also a guaranteed family favorite, especially when enjoyed warm with a scoop of creamy vanilla ice cream on a balmy summer evening. It’s truly a celebration of simple ingredients creating extraordinary results.
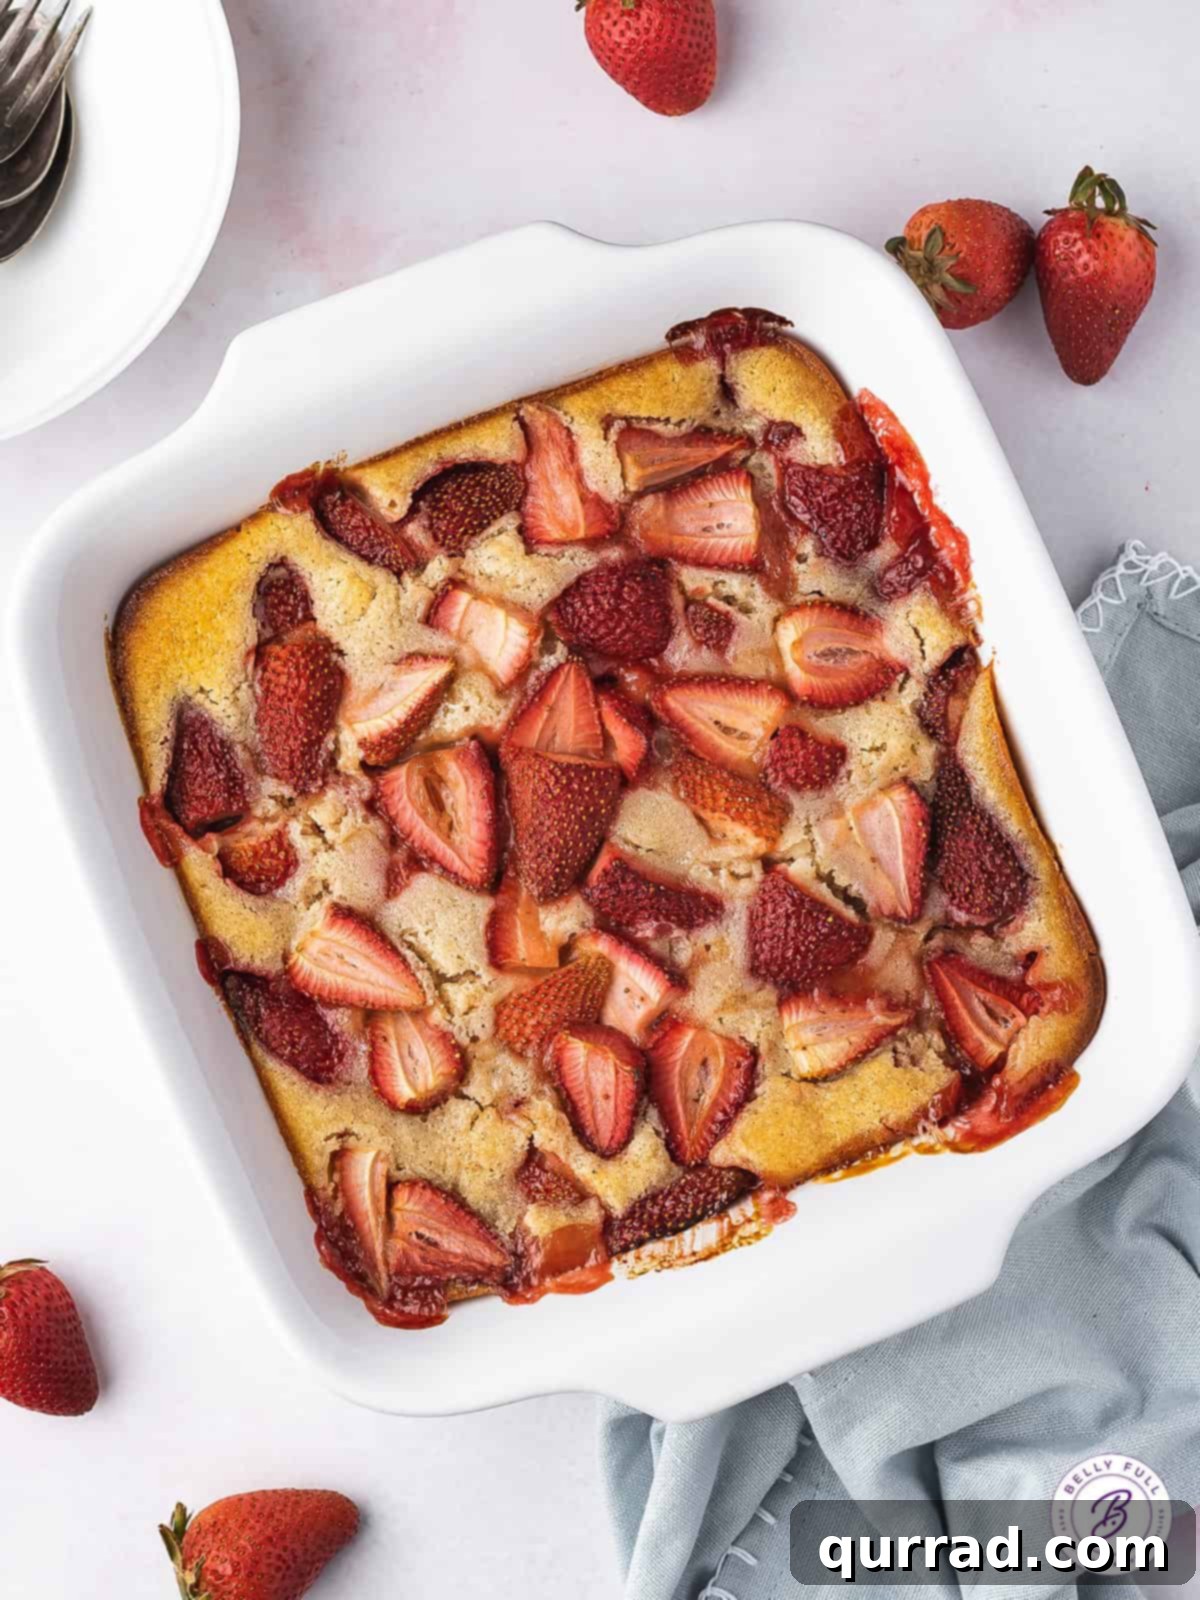
Why This Easy Strawberry Cobbler Will Become Your Go-To Recipe
This recipe isn’t just easy; it’s a testament to simple ingredients coming together to create extraordinary flavor and comfort. Here’s why you’ll want to add it to your permanent baking repertoire and keep coming back to it:
- Effortless Preparation: With straightforward steps and readily available ingredients, even novice bakers can achieve spectacular results. There’s no complex dough to handle or intricate layering, just simple mixing and assembly.
- Versatile Fruit Options: Whether you have a bounty of peak-season fresh strawberries or need a taste of summer during colder months, this recipe accommodates both fresh and frozen berries, making it a truly year-round treat.
- Perfect Texture Balance: Experience the delightful contrast of a golden, slightly crisp biscuit topping that gives way to a tender, cake-like interior. This perfectly complements the soft, sweet, and juicy fruit filling.
- Irresistible Flavor Profile: The natural sweetness and slight tang of strawberries are magnificently enhanced by a hint of bright citrus and the warm notes of vanilla, creating a well-balanced and incredibly satisfying dessert that’s never overly sweet.
- Crowd-Pleaser: Cobblers are universally loved! This comforting classic appeals to almost everyone, making it ideal for casual family dinners, festive potlucks, holiday gatherings, or simply a cozy evening at home.
- Serving Flexibility: Delicious and satisfying on its own, but truly transformative with a scoop of melting vanilla ice cream, a dollop of freshly whipped cream, or a drizzle of homemade strawberry sauce. The warm-cold contrast is simply heavenly.
- Minimal Cleanup: Unlike some elaborate desserts, this cobbler typically bakes in a single dish, minimizing your post-baking cleanup.
Get ready to impress your family and friends with a dessert that tastes like it took hours, but only requires a short amount of active preparation time!
Essential Ingredients for Your Perfect Strawberry Cobbler
Creating this delectable strawberry cobbler requires a handful of simple, wholesome ingredients that come together to form a harmonious blend of flavors and textures. Each component plays a vital role in achieving that perfect homemade taste and the signature comfort of a classic cobbler. Below is a detailed look at what you’ll need to gather from your pantry and fridge:
For the Luscious Strawberry Filling:
- Fresh or Frozen Strawberries: These are, without a doubt, the star of our show! When strawberries are in season, typically late spring through early summer, opt for ripe, sweet fresh berries for the most vibrant flavor and appealing texture. If fresh aren’t available or if you simply crave this dessert year-round, high-quality frozen whole or sliced strawberries work wonderfully. We’ll delve deeper into the nuances of using frozen berries in a dedicated section below.
- Granulated Sugar & Brown Sugar: This dynamic duo provides the essential sweetness and helps to create that luscious, saucy consistency as the strawberries naturally release their juices during baking. Granulated sugar offers pure, clean sweetness, while brown sugar adds a subtle molasses note and a deeper, richer flavor dimension, contributing to a more complex and caramelized fruit base.
- Fresh Lemon Juice: A squeeze of fresh lemon juice is crucial. It acts as a natural flavor enhancer, brightening the overall taste of the strawberries and balancing their inherent sweetness. The acidity from the lemon adds a delightful tang that prevents the dessert from being overly cloying and truly makes the strawberry flavor pop!
- Pure Vanilla Extract: Vanilla is a fantastic and versatile flavor enhancer that complements the sweet and tart notes of strawberries beautifully. Its warm, aromatic notes weave subtly through the fruit mixture, adding an extra layer of gourmet taste and a comforting aroma.
For the Golden Biscuit Topping:
Our topping is not just any crust; it’s a tender, fluffy, biscuit-like batter that provides a perfect textural and flavorful contrast to the soft, juicy fruit. Here’s what goes into crafting this irresistible crown:
- All-Purpose Flour: This forms the foundational structure of our biscuit topping, providing the necessary body and substance for a tender crumb. Ensure it’s spooned and leveled for accurate measurement.
- Granulated Sugar: Sweetens the topping itself, ensuring it’s not bland against the vibrant fruit and contributes to its golden-brown finish.
- Cornstarch: A small but mighty addition! Cornstarch in the topping contributes to a more tender and delicate crumb, helping to prevent a tough texture, and also plays a role in absorbing some moisture from the fruit.
- Baking Powder: This is our primary leavening agent. Baking powder ensures the topping rises beautifully in the oven, becoming wonderfully light and fluffy with that characteristic biscuit-like texture we all love.
- Salt: A crucial ingredient in all baking, a tiny pinch of salt is essential to balance the sweetness of both the topping and the fruit, enhancing all the other flavors and preventing the dessert from tasting flat.
- Ground Cinnamon (Optional): For those who appreciate a hint of warmth and cozy spice, cinnamon adds a wonderful aromatic dimension that pairs exceptionally well with the sweet tartness of strawberries. Feel free to adjust the amount or omit it entirely based on your personal preference.
- Unsalted Butter (Melted): Butter is key for providing richness, moisture, and tenderness to the topping. Using melted butter makes the batter incredibly easy to mix and ensures a consistent, flavorful crust.
- Whole Milk: Provides the necessary liquid to bring all the dry ingredients of the batter together, ensuring a smooth, pourable consistency and helping the topping to bake up tender and golden brown.
Recommended Serving Accompaniments:
While this cobbler is undeniably delicious on its own, these optional additions can elevate the experience to an even more memorable dessert:
- Vanilla Ice Cream: The quintessential pairing! A scoop of cold, creamy vanilla ice cream melting decadently into the warm, bubbly cobbler creates an exquisite contrast of temperatures and textures that is truly magical. It’s a combination that simply cannot be beaten.
- Homemade Whipped Cream: Light, airy, and delicately sweet, a dollop of freshly made whipped cream adds a touch of elegance and a cloud-like texture that perfectly complements the fruit, offering a lighter alternative to ice cream.
- Fresh Strawberry Sauce: For an extra boost of intense strawberry flavor, a drizzle of homemade strawberry sauce can make this dessert even more decadent and visually appealing, deepening the berry experience.
Fresh vs. Frozen Strawberries: A Guide to Year-Round Cobbler Enjoyment
One of the many beauties of this strawberry cobbler recipe is its remarkable adaptability, allowing you to enjoy this comforting dessert regardless of the season. Whether plump, ruby-red strawberries are abundant in your local market or out of season, you can still whip up this delectable treat with ease.
Using Fresh Strawberries: The Peak Season Choice
When fresh strawberries are abundant and at their peak, typically during late spring and early summer, they are undoubtedly the ideal choice. They bring an unparalleled natural sweetness, a delicate acidity, and a vibrant aroma that truly sings in this cobbler. To prepare fresh strawberries:
- Selection: Look for firm, bright red berries with green caps. Avoid any that are bruised, moldy, or pale.
- Preparation: Simply hull them (remove the green leafy tops and the small core underneath) and slice them in half. If your strawberries are particularly large, quartering them ensures they soften evenly during baking and are easier to spoon into portions.
- No Extra Steps: There’s no need for any pre-cooking or thawing – just toss them with the sugars, lemon juice, and vanilla, and they’re ready for the pan.
Using Frozen Strawberries: The Convenient Year-Round Option
Don’t despair if fresh strawberries are out of season or difficult to find! High-quality frozen strawberries are a fantastic, convenient alternative that allows you to make this comforting dessert year-round without compromising too much on flavor or texture. When using frozen berries, there are a few key points to consider for the best results:
- No Thawing Required: The best part about using frozen strawberries for cobbler is that you do not need to thaw them before adding them to the recipe. Adding them frozen can actually be beneficial, as they slowly release their juices as they bake, which the cobbler topping eagerly absorbs.
- Potential for Increased Baking Time: Because frozen berries are colder than fresh ones, they can slightly increase the overall baking time of the cobbler. It might take an extra 5-10 minutes for the fruit to soften and the filling to bubble vigorously. Always rely on visual cues (golden-brown topping, bubbling fruit) rather than strict timing.
- Managing Excess Moisture: Frozen strawberries tend to release more liquid than fresh ones as they cook. While the biscuit topping is quite adept at soaking up these delicious juices, if you’re concerned about a potentially runny filling, you can add an extra teaspoon of cornstarch to your strawberry mixture. This small addition will help thicken the fruit sauce further.
- Preventing Over-Browning of the Topping: If you notice the biscuit topping browning too quickly towards the end of the baking time, especially with the extended cooking needed for frozen fruit, simply tent the baking dish loosely with aluminum foil. This will protect the topping from burning while allowing the fruit to continue cooking through and bubbling nicely underneath.
Regardless of whether you choose fresh or frozen, you’re in for a truly delightful treat with this incredibly versatile strawberry cobbler!
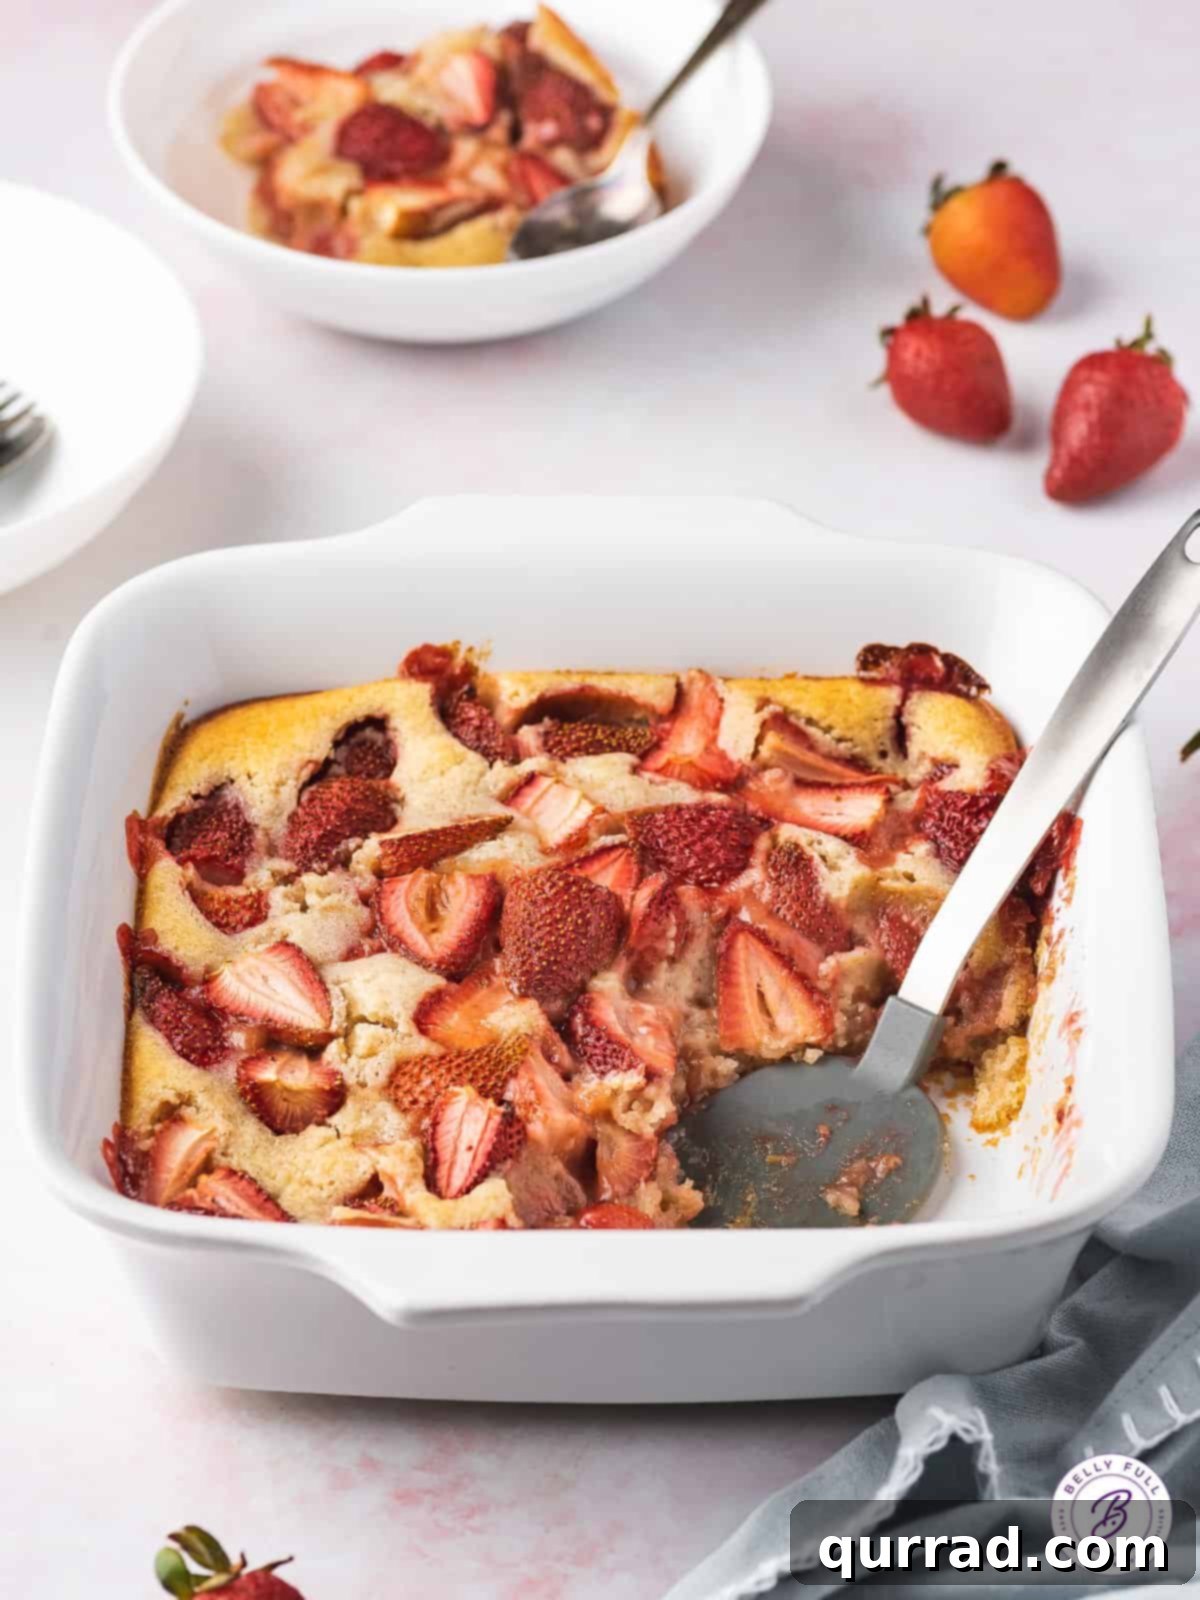
How to Create Your Homemade Strawberry Cobbler: A Simple Step-by-Step Guide
One of the most appealing aspects of cobblers is their relative ease of preparation, making them an ideal choice for both seasoned bakers and complete beginners. This recipe breaks down into two straightforward stages: preparing the rich, biscuit-like batter and crafting the sweet, tangy strawberry filling. Follow these steps meticulously for a perfect strawberry cobbler every single time:
Detailed Preparation Steps:
- Preheat Your Oven & Prepare Your Baking Dish: Begin by preheating your oven to a steady 375 degrees Fahrenheit (190 degrees Celsius). This ensures your oven is at the correct temperature for even baking and proper leavening of the topping. Next, lightly coat a 9-inch square baking dish with a nonstick cooking spray. This crucial step is vital for preventing the cobbler from sticking to the pan and making serving clean, easy portions a breeze.
- Craft the Buttery Biscuit Batter: In a medium-sized mixing bowl, combine all the dry ingredients for the topping: all-purpose flour, granulated sugar, cornstarch, baking powder, a pinch of salt, and the optional ground cinnamon (if you’re using it for that extra warmth). Whisk these dry ingredients together thoroughly for about 30 seconds to ensure they are well combined and evenly distributed. This helps the leavening agent (baking powder) work effectively throughout the batter. Next, gradually whisk in the whole milk and the melted butter until you achieve a smooth, lump-free batter. Be careful not to overmix; stop as soon as the ingredients are just combined, as overmixing can lead to a tough and dense crust. Pour this glorious batter evenly into your prepared baking dish, forming a beautiful, uniform base for your cobbler.
- Prepare the Sweet & Tangy Strawberry Layer: In a separate medium bowl, gently combine your hulled and sliced strawberries with both granulated sugar and brown sugar, the fresh lemon juice, and the vanilla extract. Toss gently with a spoon or your hands until the strawberries are well coated with the sugary mixture. This combination will create a beautiful, bubbling, syrupy sauce as it bakes. Carefully spoon this entire strawberry mixture evenly over the top of the batter in the baking dish. A crucial note here: DO NOT STIR! The magic of this cobbler lies in the batter rising up around the fruit as it bakes, absorbing its delicious juices and creating a distinct, delightful separation between the tender crust and the luscious, saucy fruit. Stirring would disrupt this beautiful process and could result in a less desirable texture.
- Bake to Golden Perfection: Place your prepared baking dish into the preheated oven and bake for approximately 35 to 40 minutes. You’ll know your cobbler is perfectly ready when the biscuit topping turns a beautiful golden brown and is set firm to the touch. Simultaneously, the fruit filling underneath should be visibly bubbling vigorously around the edges of the dish. This bubbling indicates that the fruit is thoroughly cooked through and its juices have thickened into a delicious, aromatic sauce.
- Serve Warm & Indulge: Once baked, carefully remove the cobbler from the oven. It’s tempting to dig in immediately, but allow it to cool for just about 5 to 10 minutes to allow the fruit juices to settle and thicken slightly, which makes for a more cohesive and less watery serving. Then, serve warm. While this cobbler is exceptional on its own, for an unforgettable culinary experience, pair each portion with a generous scoop of cold vanilla ice cream. The exquisite contrast of warm fruit and cold, melting cream is simply divine and enhances every spoonful!
Expert Tips for a Flawless Strawberry Cobbler Every Time
While this recipe is incredibly forgiving and easy, a few expert tips can elevate your strawberry cobbler from great to absolutely unforgettable:
- Don’t Overmix the Batter: This is a golden rule for many baked goods, especially those with a biscuit-like texture. Overmixing flour develops gluten, which can lead to a tough, rubbery, and dense crust instead of the desired tender, fluffy topping. Mix just until the ingredients are combined and no dry streaks of flour remain – a few small lumps are perfectly fine.
- Evenly Distribute the Fruit: When spooning the strawberry mixture over the batter, take a moment to spread it as evenly as possible across the surface. This ensures that every single bite you take will have a delightful balance of luscious fruit and tender topping.
- Monitor Baking Closely: Oven temperatures can vary significantly from one kitchen to another. It’s always a good idea to keep a close eye on your cobbler, especially during the last 10-15 minutes of baking. If you notice the topping browning too quickly before the fruit is fully cooked and bubbling, simply tent the baking dish loosely with aluminum foil. This will prevent the topping from burning while allowing the fruit to finish cooking through perfectly.
- Rest Before Serving: We know it’s incredibly tempting to dig into a piping hot cobbler straight out of the oven, but exercising a little patience will be greatly rewarded. Letting the cobbler rest for at least 5-10 minutes after coming out of the oven allows the hot fruit juices to settle and thicken slightly. This results in a more cohesive, less watery dessert that holds its shape better when served.
- Adjust Sweetness to Taste: The natural sweetness of strawberries can vary widely depending on the variety, ripeness, and time of year. If your berries are particularly tart, feel free to add an extra tablespoon or two of sugar to the fruit mixture. Conversely, if your berries are exceptionally sweet, you might consider slightly reducing the sugar for a more balanced flavor.
- Check for Doneness: Beyond the visual cues of a golden-brown topping and bubbling fruit, you can gently jiggle the dish. If the center fruit still looks very liquidy and moves freely, it needs a little more time.
Storing and Reheating Your Delicious Strawberry Cobbler
Strawberry cobbler is undoubtedly at its best when served fresh from the oven, warm and fragrant, with its topping slightly crisp and the fruit filling bubbling. However, should you find yourself with leftovers (a rare but delightful occurrence!), rest assured that they remain incredibly enjoyable the next day, and even for a few days after. Proper storage and reheating techniques will ensure your cobbler stays as delicious as possible.
Storing Leftovers for Maximum Freshness:
To keep your leftover cobbler fresh and prevent it from drying out or absorbing unwanted refrigerator odors, follow these simple steps:
- Cool Completely: Always allow the cobbler to cool completely to room temperature before storing it. Attempting to store it while still warm can create condensation inside the container, leading to a soggy topping and potentially faster spoilage.
- Airtight Container: Once cooled, transfer any remaining portions of the cobbler to an airtight container. If you have a lid for your baking dish, you can use that directly. Otherwise, transfer individual portions to smaller containers.
- Refrigeration: Store the airtight container in the refrigerator. Properly stored, the cobbler will keep beautifully for up to 4 days. While the topping might lose some of its initial crispness, the flavors will have melded even further, often tasting even better on subsequent days!
Reheating Your Cobbler for Renewed Enjoyment:
Bringing your chilled cobbler back to a warm, comforting state is easy, and you have a couple of options depending on how much cobbler you’re reheating:
- Microwave Method (For Individual Portions): For a quick and convenient reheat, individual servings can be warmed efficiently in the microwave. Place a single portion in a microwave-safe bowl and heat on medium power for 30-60 seconds, or until it is warmed through to your liking. Be careful not to overheat, as this can sometimes make the topping rubbery or the fruit too mushy.
- Oven Method (For Larger Portions or the Whole Remaining Dish): For a larger portion or if you’re reheating the entire remaining dish, the oven method is generally preferred. This method helps to crisp up the topping slightly, bringing it closer to its freshly baked texture.
- Remove the baking dish from the refrigerator and allow it to come to room temperature for about 15-20 minutes. This helps ensure more even reheating.
- Preheat your oven to 350 degrees Fahrenheit (175 degrees Celsius).
- Bake the cobbler for approximately 15-20 minutes, or until it is warmed through to the center and the topping has regained some pleasant crispness.
- If you notice the topping beginning to brown excessively before the cobbler is fully heated, simply cover the dish loosely with aluminum foil to protect it from burning.
No matter how you enjoy your strawberry cobbler, it promises a delightful experience, whether it’s piping hot and fresh or a comforting treat from the fridge after a gentle reheat.
Explore More Delicious Strawberry Desserts
If your love affair with strawberries extends beyond this incredible cobbler, you’re in for a treat! Strawberries are one of the most versatile and beloved fruits, lending their sweet, tangy flavor and beautiful color to a myriad of desserts. Here are some more of our favorite strawberry-infused recipes that are sure to tantalize your taste buds and inspire your next baking adventure:
- Easy Strawberry Skillet Cake: A simple, rustic, and incredibly flavorful cake baked directly in a cast-iron skillet, bursting with fresh strawberry goodness. It’s perfect for a casual weeknight dessert.
- Strawberry Rhubarb Crumble: Experience the perfect harmony of sweet strawberries and tart rhubarb, crowned with a buttery, crunchy oat crumble topping. A classic combination that’s hard to resist.
- No-Churn Strawberry Ice Cream: Enjoy the creamy, refreshing taste of homemade strawberry ice cream without the need for a specialized ice cream maker. It’s surprisingly easy and utterly delicious.
- Easy Strawberry Pie: A timeless and refreshing pie showcasing an abundance of fresh strawberries suspended in a glistening, sweet glaze. It’s a beautiful centerpiece dessert.
- Strawberry Shortcake Scones: A delightful fusion of a flaky scone and the beloved flavors of strawberry shortcake. Perfect for breakfast, brunch, or a charming afternoon tea dessert.
Strawberry Cobbler Recipe Card
This detailed recipe provides all the measurements and step-by-step instructions you need to make a perfect strawberry cobbler. Enjoy creating this wonderful dessert!
Prep Time: 20 minutes
Cook Time: 40 minutes
Total Time: 1 hour
Servings: 6
Ingredients
FOR THE TOPPING
- 2/3 cup all-purpose flour, spooned and leveled
- 1/2 cup granulated sugar
- 1/2 teaspoon cornstarch
- 1/2 teaspoon baking powder
- 1/4 teaspoon cinnamon, optional
- pinch of salt
- 3/4 cup whole milk
- 1/2 cup butter, melted
FOR THE STRAWBERRIES
- 3 cups strawberries, hulled and sliced in half (or quartered if strawberries are very large)
- 2 tablespoons granulated sugar
- 2 tablespoons brown sugar
- 2 teaspoons lemon juice
- 1 teaspoon vanilla extract
FOR SERVING (Optional)
- vanilla ice cream
- whipped cream
- strawberry sauce
Instructions
- Preheat Oven: Preheat oven to 375 degrees F (190 C). Lightly coat a 9-inch square baking dish with nonstick cooking spray.
- Prepare Batter: In a medium bowl, whisk together the flour, sugar, cornstarch, baking powder, cinnamon (if using), and salt. Slowly whisk in the milk and melted butter until just combined. Pour this batter evenly into the prepared baking dish.
- Prepare Strawberry Mixture: In another medium bowl, gently toss the strawberries with both granulated sugar, brown sugar, lemon juice, and vanilla extract until well coated.
- Assemble Cobbler: Carefully spoon the strawberry mixture evenly over the top of the batter in the baking dish. DO NOT STIR.
- Bake: Bake in the preheated oven for 35 to 40 minutes, or until the topping is golden brown and set, and the fruit filling is visibly bubbling around the edges.
- Serve: Remove from the oven and let cool for 5-10 minutes. Serve warm, ideally with a scoop of vanilla ice cream or your preferred topping.
Recipe Notes
Fresh or Frozen Strawberries: For the best flavor, use fresh strawberries when they are in season. If using frozen berries, they do not need to be thawed before adding them to the mixture. Be aware that using frozen strawberries may slightly increase the baking time. If the topping starts to brown too quickly, you can loosely tent the dish with aluminum foil.
Approximate Nutrition Information (Per Serving)
Calories: 350kcal | Carbohydrates: 48g | Protein: 3g | Fat: 17g | Saturated Fat: 10g | Polyunsaturated Fat: 1g | Monounsaturated Fat: 4g | Trans Fat: 1g | Cholesterol: 70mg | Sodium: 147mg | Potassium: 138mg | Fiber: 2g | Sugar: 34g | Vitamin A: 598IU | Vitamin C: 15mg | Calcium: 29mg | Iron: 1mg
Nutritional information provided is an automatic calculation and can vary based on the exact products you use and any modifications made to the recipe. If precise nutritional values are crucial for your dietary needs, it is highly recommended to calculate them independently using your specific ingredients.
We hope you thoroughly enjoy preparing and savoring this delightful and easy strawberry cobbler recipe! We’d love to hear your thoughts, see your creations, and understand your experience with this classic dessert. Please consider leaving a review or comment below to share your culinary journey.
For more delicious recipes, culinary tips, and inspiring food content, don’t forget to follow us and join our community on social media:
- TikTok
- YouTube