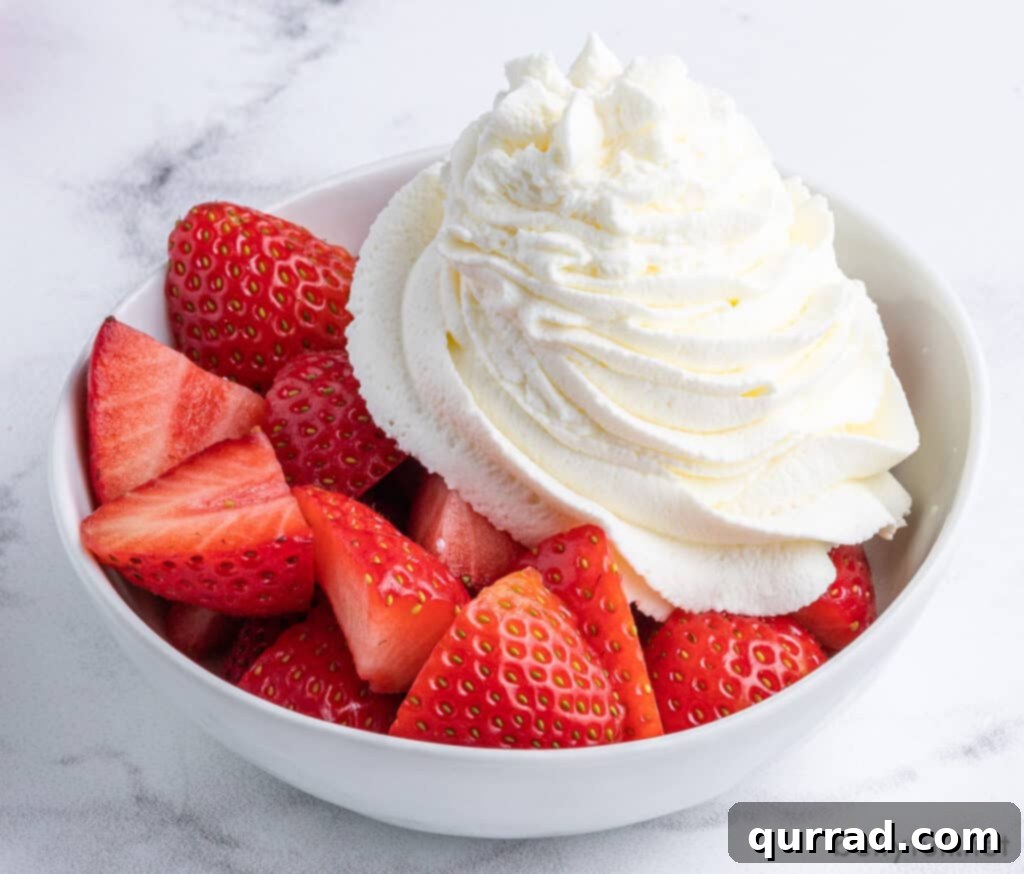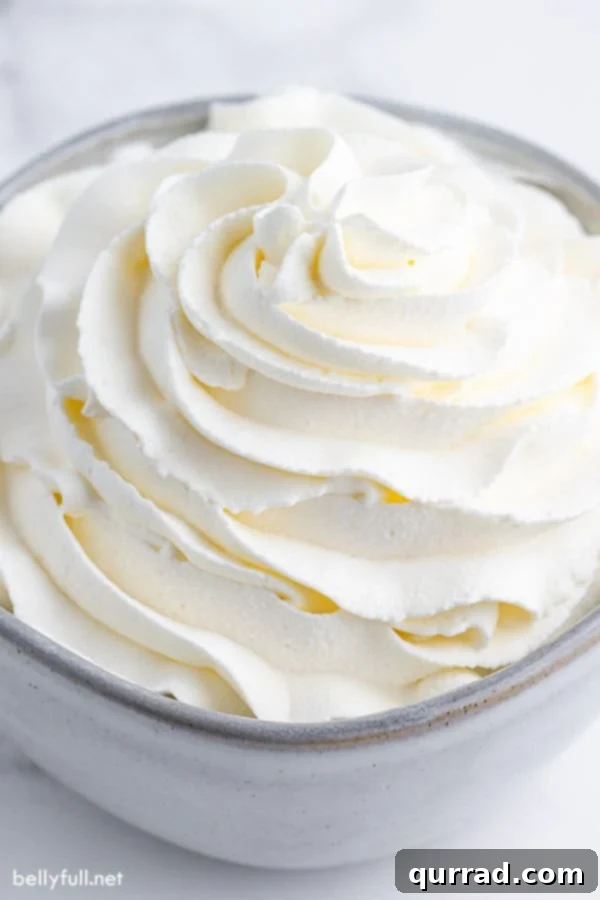
Unlock the secret to creating the most luxurious, cloud-like Homemade Whipped Cream you’ve ever tasted. Forget those aerosol cans or tubs of artificial toppings; with just three simple ingredients and five minutes of your time, you can elevate any dessert into a gourmet experience. This recipe is so incredibly easy and consistently foolproof, it will change your dessert game forever.
5 STAR REVIEW
Charlotte says, “This was my first time making whipped cream. I included the cream of tartar as suggested in the article and it was amazing. Stood on its own and tasted great. I will never buy cool whip again. This tastes so fresh and wonderful.”
There’s a reason so many dessert recipes on this website, and countless others, implore you to “top with a dollop of homemade whipped cream.” It’s not just a suggestion; it’s an unspoken rule for culinary excellence! A freshly whipped, airy topping transforms an ordinary dessert into something truly extraordinary. It adds a light texture, a hint of sweetness, and a creamy richness that no store-bought alternative can replicate. It’s the ultimate finishing touch, whether you’re serving a simple fruit tart, a decadent chocolate cake, or just a bowl of fresh berries.
Today, we’re diving deep into the art of making the perfect whipped cream. This isn’t just about combining ingredients; it’s about understanding the nuances that turn good whipped cream into spectacular, foolproof, and long-lasting whipped cream. Our basic recipe only calls for heavy cream, sugar, and about five minutes of your time. For an added layer of flavor and stability, we’ll also discuss incorporating vanilla extract and a touch of cream of tartar, ingredients that make a big difference without altering the exquisite taste.
Why Homemade Whipped Cream Is Always Better
Once you try homemade whipped cream, you’ll understand why it’s worth the minimal effort. The difference in taste and texture is simply incomparable to store-bought varieties. Homemade whipped cream offers:
- Unmatched Freshness: Made with real cream and your choice of sweetener, it delivers a pure, clean dairy flavor that artificial toppings can’t match.
- Perfect Texture: It’s light, airy, and melts beautifully in your mouth, a stark contrast to the often dense or gummy texture of commercial products.
- Customizable Sweetness: You control the amount and type of sugar, allowing you to tailor it to your preference or the specific dessert you’re pairing it with.
- Versatile Flavor Profile: Easily infuse it with different extracts, spices, or liqueurs to create unique flavor combinations.
- No Unwanted Additives: You know exactly what’s in it – no preservatives, artificial flavors, or stabilizers unless you choose to add them yourself.
The Essential Ingredients for Perfect Whipped Cream
Achieving whipped cream perfection starts with selecting the right ingredients. Each plays a crucial role in the final texture and flavor:
- Heavy Whipping Cream: The Foundation. This is the star of the show. Look for “heavy whipping cream” specifically, which contains at least 36% milk fat. Regular “heavy cream” has slightly less fat, and while it will whip, heavy whipping cream yields a creamier, more stable product that holds its shape much better, especially for piping. The high-fat content is key to creating those stable air bubbles that give whipped cream its luscious volume.
- Sugar: Sweetness and Stability. You have a choice here: granulated sugar or powdered sugar (confectioners’ sugar). My preference leans heavily towards powdered sugar because it dissolves more quickly and completely, resulting in a smoother, more stable whipped cream. It also often contains a small amount of cornstarch, which acts as a natural stabilizer, helping the whipped cream hold its structure longer. If you only have granulated sugar, it will work, but ensure you whip a little longer to allow the sugar crystals to fully dissolve, preventing a grainy texture.
- Vanilla Extract: A Touch of Aroma. While optional, a dash of pure vanilla extract adds a subtle warmth and depth of flavor that complements almost any dessert. Don’t underestimate the power of a good vanilla; it truly enhances the overall taste experience. You can also experiment with other extracts like almond, peppermint, or even citrus for different flavor profiles.
- Cream of Tartar (Optional, for Stabilization): For whipped cream that needs to stand up for longer periods or hold intricate piped shapes, cream of tartar is your secret weapon. This acidic powder helps to stabilize the protein structure in the cream, preventing it from weeping and collapsing. It’s flavorless in the small amount used, so it won’t affect the taste of your delicious creation.
Helpful Tips for Whipped Cream Success
Mastering homemade whipped cream is less about complex techniques and more about understanding a few fundamental principles:
- Temperature is Key: Always Use Very Cold Cream. This cannot be stressed enough. Cold cream is essential because the fat globules in cold cream are firm and distinct, forming a robust network that traps air bubbles efficiently. As you whip, these fat particles surround the air bubbles, creating a stable, voluminous foam. If the cream is warm, the fat globules are softer and tend to clump together, making it difficult to incorporate and hold air, resulting in a thin, runny, or collapsed whipped cream. Keep your heavy whipping cream in the coldest part of your refrigerator until the very last minute.
- Chill Your Equipment for Maximum Volume. Just as important as cold cream is cold equipment. For optimal volume and texture, place your mixing bowl (preferably metal or glass) and electric beaters (or whisk attachment for a stand mixer) in the freezer for about 15-20 minutes before you begin. This helps maintain the cream’s cold temperature throughout the whipping process, crucial for achieving that light, fluffy consistency and preventing the cream from warming up too quickly.
- Start Slow, Then Increase Speed. When using an electric mixer, begin whipping the cold cream on a medium-low speed. This gentle start helps to evenly incorporate air and gradually build structure. After a minute or two, increase the speed to medium-high or high. This gradual approach “trains” the cream to hold its shape better, contributing to a more stable whipped cream that will last longer in the refrigerator without deflating as quickly.
- Watch for Peaks – Don’t Over-Beat! This is the most critical step to avoid disaster. Whipping cream transitions quickly from soft peaks to stiff peaks, and then, if you’re not careful, to grainy, curdled butter. As soon as the beaters begin to leave visible tracks in the cream, pay close attention. You’ll soon reach soft peaks, which gracefully droop when the beater is lifted. For stiff peaks, continue whipping for another minute or two until the peaks hold their shape firmly. Stop immediately when your desired consistency is reached. Over-beating results in irregular clumps and a texture akin to cottage cheese, and once curdled, it’s very difficult to fully recover.
Homemade Whipped Cream
Pin
Ingredients
- 1 cup cold heavy whipping cream
- 3 tablespoons powdered sugar
- 1/2 teaspoon vanilla, (optional)
- 1/4 teaspoon cream of tartar, (optional – for stabilized whipped cream, see note)
Instructions
-
To ensure optimal results, begin by chilling your mixing bowl and beaters (or whisk attachment) in the freezer for approximately 15 minutes. This step is crucial for maintaining the cream’s cold temperature throughout the whipping process.
-
Carefully pour the very cold heavy whipping cream into the chilled bowl. Add the powdered sugar, along with vanilla and cream of tartar if you choose to use them. Using either a handheld electric mixer or a stand mixer fitted with the whisk attachment, begin beating on a medium speed. Continue beating, gradually increasing the speed to high, until the cream visibly thickens and soft peaks begin to form.
-
If your recipe calls for stiff peaks, continue to mix for an additional minute or two. The whipped cream should become firm enough to hold its shape perfectly when the beaters are lifted. Exercise caution during this stage: it’s very easy to over-beat the cream, which will lead to a clumpy, curdled texture. Stop mixing as soon as you achieve the desired consistency.
-
Your homemade whipped cream is now ready! Use it immediately to garnish your favorite desserts or incorporate it into pastries. Enjoy the fresh, luxurious taste!
To make stabilized whipped cream: As Charlotte mentioned in her review, adding cream of tartar is an excellent way to help your whipped cream hold its shape beautifully and last longer without altering its delicious taste.
Notes
For an in-depth exploration of tips, variations, and answers to frequently asked questions, please refer to the comprehensive article above and below the recipe card.
Nutrition
Nutritional information given is an automatic calculation and can vary based on the exact products you use and any changes you make to the recipe. If these numbers are very important to you, I would recommend calculating them yourself.
Adding in Flavors and Creative Variations
Once you’ve mastered the basic homemade whipped cream recipe, the real fun begins: experimentation! Whipped cream is a fantastic canvas for various flavors, allowing you to customize it for any occasion or dessert. Here are some of my favorite ways to infuse your whipped cream with exciting new tastes:
- Extracts: Beyond classic vanilla, consider adding 1/2 teaspoon of almond extract for a nutty depth, 1/4 teaspoon of peppermint extract for a festive touch (perfect for holiday desserts), or even a touch of orange or lemon extract for a bright, citrusy note.
- Spices: Warm spices can transform your whipped cream. Stir in 1/2 teaspoon of ground cinnamon for apple pies or pumpkin desserts, a pinch of nutmeg for eggnog flavors, or even a dash of cardamom for an exotic twist.
- Liqueurs: For an adult-friendly treat, a tablespoon of your favorite liqueur can add sophistication. Try 1/2 tablespoon of Kahlúa for a coffee-infused cream, coconut rum for tropical desserts, or Grand Marnier for an orange kick. Adjust to taste, but remember a little goes a long way!
- Citrus Zest: Brighten up your whipped cream with finely grated zest. 2 teaspoons of lemon or orange zest can provide a vibrant aroma and a subtle tangy flavor that cuts through richness.
- Cocoa Powder: For chocolate lovers, sift in 1-2 tablespoons of unsweetened cocoa powder along with the sugar for a rich chocolate whipped cream.
- Coffee or Espresso Powder: A teaspoon of instant espresso powder enhances chocolate flavors and adds a subtle coffee note.
Remember to add any liquid flavorings or spices at the same time as the sugar, before whipping, to ensure they are fully incorporated.
Soft Peaks vs. Stiff Peaks: What You Need to Know
The consistency of your whipped cream is not just a matter of personal preference; it’s often dictated by how you plan to use it. Understanding the difference between soft and stiff peaks will ensure your whipped cream perfectly complements your dessert.
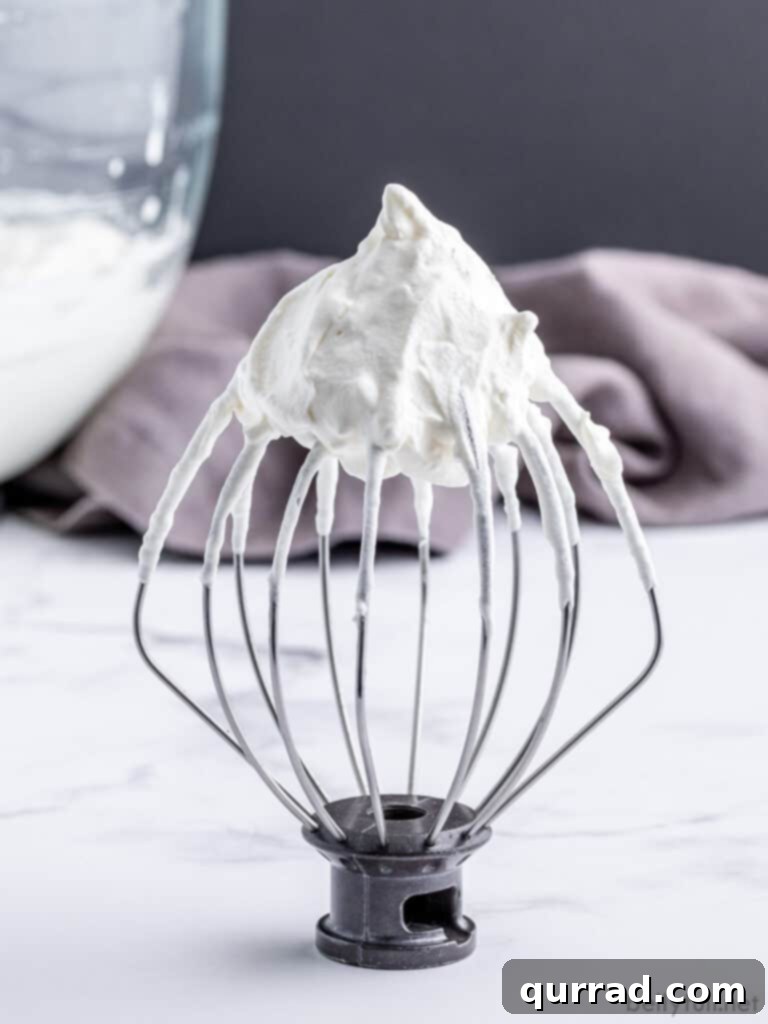
- Soft Peaks: These are achieved when the cream is thick and fluffy, but when you lift the whisk, the peak gently folds over and droops. This lighter consistency is ideal for delicate desserts where you want a pillowy topping that almost melts into the dish. Think classic tapioca pudding, a generous dollop on angel food cake, or stirred into hot chocolate. It has a more liquid, flowing texture.
- Stiff Peaks: To reach stiff peaks, you continue whipping past the soft peak stage. When you lift the whisk, the cream will hold its shape firmly, forming a distinct peak that stands straight up. This robust consistency is perfect when you need the whipped cream to maintain its structure, such as spreading it over a chocolate pie, creating decorative swirls, or piping it onto a cheesecake or into pastries. Stiff peaks are also crucial for stabilized whipped cream, which we’ll discuss next.
The key is to stop mixing as soon as you achieve your desired consistency. Even a few extra seconds can push it past stiff peaks towards over-beating, so always keep a watchful eye!
Make Stabilized Whipped Cream for Lasting Perfection
While fresh whipped cream is truly divine, it has a tendency to deflate and weep over time. This is where stabilized whipped cream comes to the rescue! If you need to prepare your whipped cream in advance, or if you plan to pipe intricate decorations that need to hold their shape, stabilization is crucial. My preferred method for stabilization is adding a touch of cream of tartar, as it provides excellent structural integrity without affecting the delicate flavor.
- Using Cream of Tartar: For every cup of heavy whipping cream, simply add 1/4 teaspoon of cream of tartar along with the powdered sugar before you begin whipping. The cream of tartar, an acidic salt, helps to fortify the protein structure within the cream, allowing it to hold its air longer and resist deflating or weeping. It’s a fantastic, invisible helper!
- Other Stabilization Options:
- Gelatin: For even stronger stability, dissolve 1 teaspoon of unflavored gelatin in 1-2 tablespoons of cold water, then gently heat until fully dissolved (do not boil). Let it cool slightly, then slowly drizzle it into the cream while whipping at medium-high speed. This creates a very firm, long-lasting whipped cream.
- Cornstarch or Tapioca Starch: A teaspoon or two of cornstarch or tapioca starch per cup of cream can also help, similar to the cornstarch often found in powdered sugar. Whisk it in with the sugar.
- Meringue Powder: This powdered egg white product can also be used. Add about 1 tablespoon per cup of cream with the sugar for added stability and a slightly firmer texture.
Stabilized whipped cream is a game-changer for layered desserts, cakes, and anything that needs to look picture-perfect for hours.
Troubleshooting Common Whipped Cream Problems
Even with the simplest recipes, sometimes things go awry. Don’t worry, whipped cream mishaps are often fixable! Here’s how to tackle a couple of common issues:
- How to Fix Over-beaten Whipped Cream: This is arguably the most common mistake. You’ve gone a little too far, and your once-smooth cream now looks grainy or slightly curdled. Don’t panic immediately! Sometimes you can rescue it. Try adding 1 to 2 tablespoons of fresh, very cold heavy cream to the bowl. Then, using a whisk (by hand, not the electric mixer!), gently whisk it in until the texture smooths out and it returns to a soft peak consistency. If your whipped cream has separated completely into butter and buttermilk, unfortunately, it’s past the point of no return for whipped cream, and you might need to start fresh.
- What if I Don’t Have an Electric Mixer? No problem! While an electric mixer certainly speeds up the process, you can absolutely make whipped cream without one.
- By Hand with a Whisk: This method is the most traditional and requires some elbow grease! Pour your cold cream and sugar into a chilled bowl and whisk vigorously and continuously. It can take anywhere from 8 to 15 minutes, depending on your strength and the temperature of your ingredients, but it’s incredibly satisfying. Be prepared for a good arm workout!
- The Jar Method: This is a fun, kid-friendly alternative. Pour all your cold ingredients into a tightly sealed glass jar (make sure there’s plenty of headspace, about half full). Shake vigorously for several minutes. You’ll want to occasionally loosen the lid to release pressure buildup. After about 5-7 minutes of shaking, you should have beautiful whipped cream!
- Immersion Blender: If you have an immersion blender, it can work in a pinch. Use a tall, narrow container and blend on low speed, moving it up and down gently, until peaks form.
- My Cream Isn’t Whipping! If your cream isn’t thickening, the most likely culprit is temperature. Ensure your cream is extremely cold and your bowl/beaters are chilled. Also, make sure you’re using heavy whipping cream (not half-and-half or light cream) and that it’s not expired. If all else fails, pop the bowl and cream into the freezer for 10-15 minutes and try again.
Make Ahead and Storage Tips for Homemade Whipped Cream
While homemade whipped cream is best enjoyed fresh, you can certainly prepare it ahead of time with a few considerations:
- How Long Does Homemade Whipped Cream Last? Unstabilized homemade whipped cream will keep its integrity in the refrigerator for about 1 to 2 days. Beyond that, it tends to lose volume, deflate, and start to weep (separate liquid). Stabilized whipped cream, however, can last beautifully for 2 to 3 days, making it a better option for advanced preparation. For the freshest taste and fluffiest texture, I always recommend using it shortly after it’s made.
- Reviving Deflated Whipped Cream: If your whipped cream has lost some of its volume after sitting in the fridge, don’t throw it out! You can often revive it by giving it a quick whisk by hand or with an electric mixer on low speed for 30-60 seconds. This will reincorporate some air and thicken it back up, though it might not achieve its original peak volume.
- How to Store Homemade Whipped Cream: Always store whipped cream in an airtight container in the coldest part of your refrigerator. This prevents it from absorbing odors from other foods and helps maintain its temperature and texture. Avoid leaving it out at room temperature for more than 30 minutes, as warmth will quickly cause it to melt and deflate.
- Can You Freeze Whipped Cream? Yes, you can! Pipe dollops or swirls onto a parchment-lined baking sheet and freeze until solid. Once frozen, transfer the individual portions to an airtight freezer bag. They can be stored for up to one month. Thaw them in the refrigerator for a few hours before serving, or add frozen dollops directly to hot beverages like cocoa.
Serving Suggestions: Endless Ways to Enjoy
Now that you’ve whipped up a batch of glorious homemade cream, the possibilities are truly endless! It’s not just a topping; it’s an ingredient that elevates everything it touches. Here are some delightful ways to enjoy your fresh creation:
- Classic Desserts: A dollop on banana pudding, mini pumpkin pies, or a slice of apple pie is pure comfort.
- Fruit: Simply serve with fresh berries (strawberries, raspberries, blueberries) for an elegant and light dessert. It’s a match made in heaven!
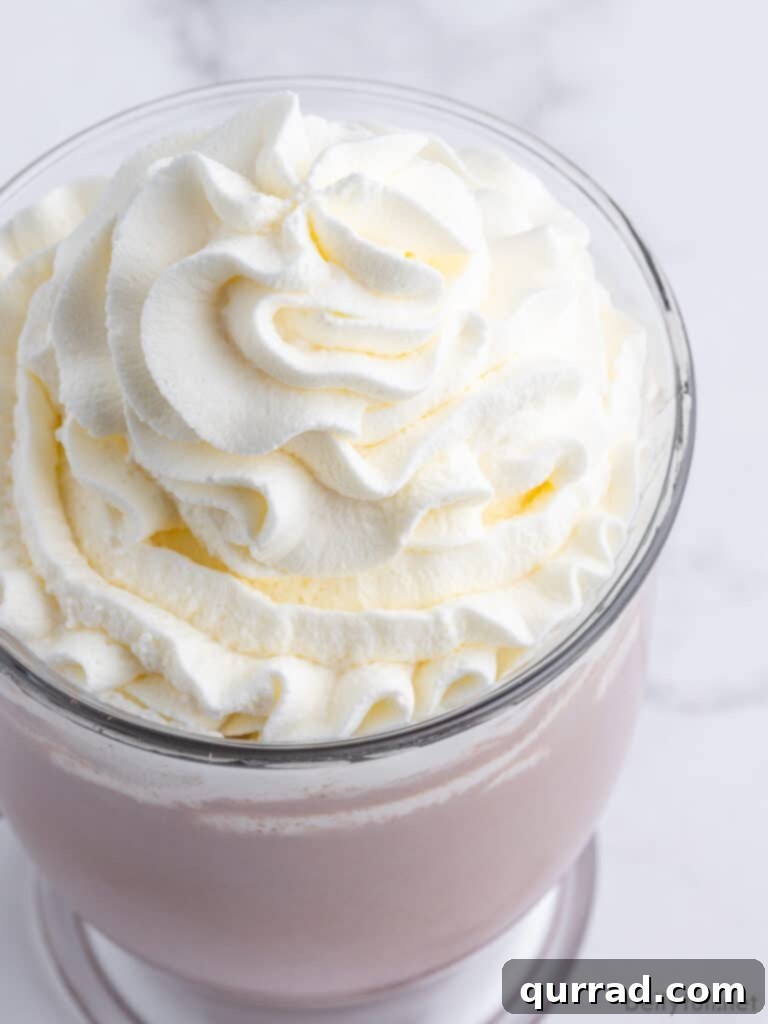
- Hot Beverages: Swirl a generous amount into your morning coffee, hot chocolate, or even a chai latte for an indulgent treat.
- Trifles and Parfaits: Layer it into desserts like a vibrant lemon trifle or simple fruit parfaits for a creamy, ethereal texture.
- Puddings and Mousse: Top off a rich sticky toffee pudding or a decadent chocolate mousse for an extra layer of luxury.
- Cheesecakes and Cakes: Pipe decorative borders on an Oreo cheesecake, a classic Victoria sponge, or even a simple cupcake.
- Pancakes & Waffles: Elevate your breakfast or brunch by substituting syrup with a dollop of whipped cream and fresh fruit.
- Ice Cream Sundaes: Take your homemade sundaes to the next level with fresh whipped cream, hot fudge, and your favorite toppings.
Frequently Asked Questions About Whipped Cream
- Can I use half-and-half or milk instead of heavy cream?
No, unfortunately, half-and-half or milk do not contain enough milk fat to whip into a stable foam. Heavy whipping cream (with at least 36% fat) is essential for achieving the correct volume and texture. Lower fat creams might get slightly frothy but won’t hold peaks.
- What’s the difference between heavy cream and heavy whipping cream?
Heavy whipping cream typically has a milk fat content of 36% or more, while heavy cream (also sometimes called whipping cream) usually has 30-36% milk fat. Both will whip, but heavy whipping cream yields a more stable, voluminous, and richer whipped product, making it the preferred choice for best results.
- Can I make dairy-free whipped cream?
Absolutely! Full-fat canned coconut cream (chilled overnight, with the liquid drained off) can be whipped into a delicious dairy-free alternative. There are also commercial plant-based whipping creams available that perform similarly to dairy cream.
- Why did my whipped cream turn out soupy?
The most common reasons for soupy whipped cream are warm ingredients/equipment, not enough fat content in the cream (e.g., using light cream), or simply not whipping it long enough. Ensure everything is very cold before starting.
- Can I use brown sugar or honey instead of powdered sugar?
While you can, it will change the texture and flavor. Brown sugar might make the cream slightly gritty and impart a caramel flavor. Honey or maple syrup are liquid sweeteners, which can make the cream softer and less stable. If using liquid sweeteners, reduce the amount and whip immediately after adding. For best stability and a smooth texture, powdered sugar is recommended.
I hope you cherish this delightful and straightforward recipe – remember to leave a review below and share your experience! And don’t forget to connect with Belly Full on TikTok, Facebook, Instagram, Pinterest, and YouTube for more delicious recipes and cooking inspiration!