

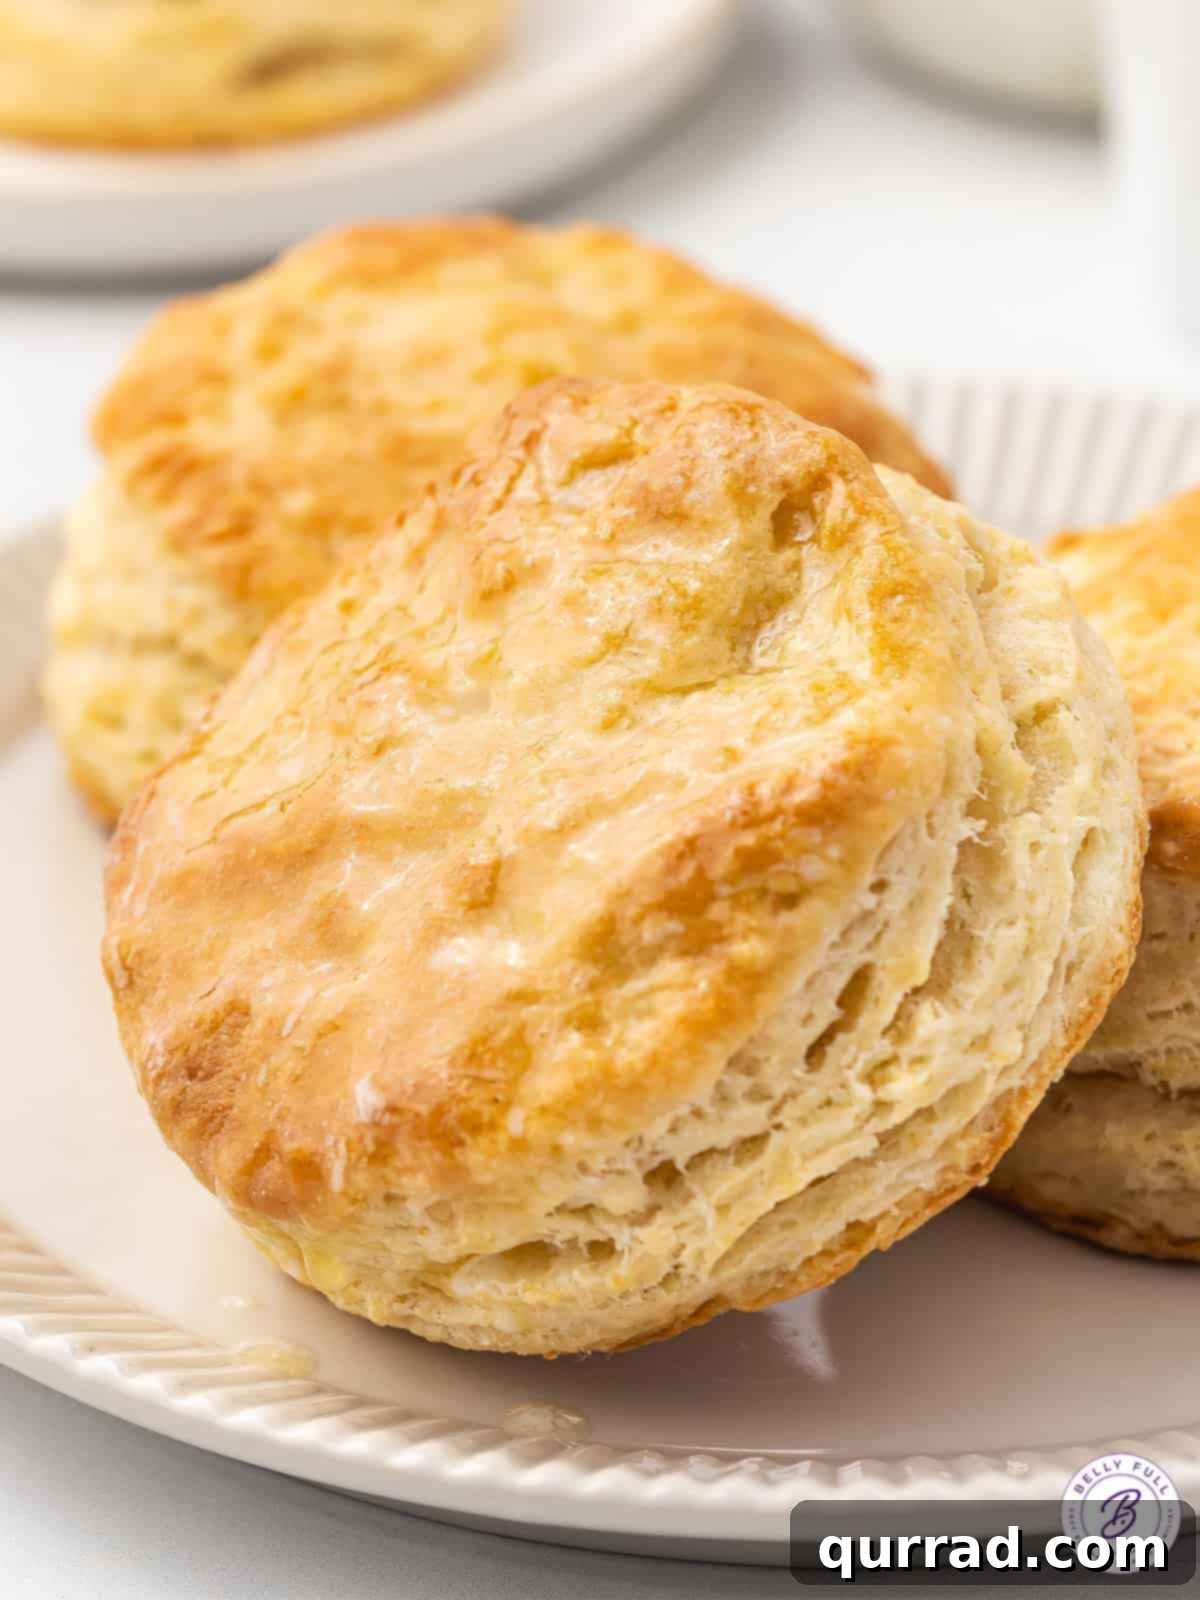
There’s nothing quite as comforting and delightful as a batch of freshly baked homemade biscuits. These Easy Homemade Biscuits are exceptionally soft, remarkably flaky, and rich with buttery flavor. Crafted from just a few common pantry ingredients and requiring no special equipment, they come together effortlessly in about 30 minutes. This timeless recipe is perfect to have on hand year-round, serving as an ideal complement to any breakfast, brunch, or dinner.
5 STAR REVIEW
“I’m ditching all my other biscuit recipes – this was PERFECTION. Light and fluffy with flaky layers as promised. I did use buttermilk as written, but rarely have it in the house so will try whole milk next time. This was 10/10.” – Donna
The Ultimate Easy Homemade Biscuit Recipe
A reliable recipe for truly tender, buttery, and flaky homemade biscuits is an indispensable asset in any cook’s collection. But we’re not just aiming for any biscuit; we’re striving for the gold standard. The perfect biscuit boasts an incredibly soft and light texture, an impressive number of flaky layers that practically melt in your mouth, a rich, unmistakable buttery flavor, and, most importantly, doesn’t demand hours in the kitchen. This is precisely what this easy buttermilk biscuit recipe delivers.
While these versatile biscuits are a perfect holiday side dish staple, adding a touch of rustic elegance to any festive meal, their appeal extends far beyond special occasions. I personally enjoy them immensely for a hearty breakfast, generously topped with jam or smothered in gravy, or as an effortlessly impressive side dish for dinner throughout the entire year. Their swift preparation time means you can indulge in these warm, golden delights whenever the craving for quick homemade biscuits strikes.
Why These Buttermilk Biscuits Stand Out
What makes this particular recipe superior to countless others? The secret lies in a few carefully considered elements that guarantee a consistently perfect result every time you bake:
- Unmatched Flakiness: Our technique for incorporating butter, combined with specific dough-folding steps, creates distinct, airy layers that separate beautifully, giving these biscuits their signature texture.
- Irresistible Tenderness: Buttermilk is the hero here, its natural acidity reacting with the leavening agents to produce an exceptionally tender crumb that simply melts in your mouth, far surpassing biscuits made with regular milk.
- Rich Buttery Flavor: We use real, unsalted, and exceptionally cold butter generously. This ensures that deep, savory, and satisfying buttery flavor that is the hallmark of a truly great biscuit.
- Surprisingly Quick to Prepare: From the initial mixing to warm biscuits on your plate, the entire process takes approximately 30-35 minutes. This makes homemade biscuits achievable even on the busiest weeknights or for a leisurely weekend morning.
- Simple, Accessible Ingredients: You won’t need any exotic flours or hard-to-find items. Just everyday pantry staples are transformed into something truly extraordinary with this recipe.
Essential Ingredients for Perfect Buttermilk Biscuits
Crafting extraordinary biscuits doesn’t demand an extensive list of gourmet ingredients. In fact, the magic happens with just a handful of basic pantry staples. Understanding the role each component plays is crucial for achieving the best possible results:
- All-Purpose Flour: This forms the essential structure of our biscuits. It’s critical to measure it using the “spooned and leveled” method – gently spoon the flour into your measuring cup and then level it off with a straight edge. This prevents over-measuring, which can lead to dense, dry biscuits.
- Baking Powder: Our primary leavening agent. It reacts with the buttermilk’s acidity and the oven’s heat to create carbon dioxide bubbles. These bubbles provide the remarkable lift and airy pockets within the biscuit, contributing significantly to its characteristic lightness and flakiness.
- Granulated Sugar: A small amount of sugar works wonders, balancing the savory notes of the butter and salt. It also aids in achieving that beautiful golden-brown crust, adding a subtle sweetness without making the biscuits dessert-like.
- Coarse Salt: An absolute must for enhancing and rounding out all the flavors. Skipping the salt will result in flat-tasting biscuits.
- Unsalted Butter: This is arguably the most critical ingredient for achieving those coveted flaky layers. Using very well chilled, preferably frozen, unsalted butter is non-negotiable. As the tiny, cold pieces of butter encounter the hot oven, the water content within them rapidly turns to steam. This steam then pushes the layers of dough apart, creating the incredible flakiness we desire. Using unsalted butter allows precise control over the overall salt content of the recipe.
- Cold Full-Fat Buttermilk: The star ingredient for incredibly tender and subtly tangy biscuits. The acidity in buttermilk reacts with the baking powder, producing additional leavening action. Furthermore, full-fat buttermilk contributes vital richness and moisture that is essential for the perfect crumb. It’s important to avoid using 2% milk, skim milk, or non-dairy alternatives, as they lack the necessary fat and acidity for optimal results. If you don’t have buttermilk on hand, you can create a simple homemade substitute: add 1 tablespoon of lemon juice or white vinegar to a liquid measuring cup, then fill the rest with whole milk until it reaches ¾ cup. Let it sit for 5-10 minutes until it slightly curdles, then use as directed.
Helpful Tips for Biscuit Perfection
Achieving those coveted light, fluffy biscuits with tender layers is simpler than you might imagine, especially when you adhere to a few fundamental principles. These tried-and-true tips will consistently guide you toward biscuit success:
- Freeze the Butter: The Foundation of Flakiness. This is perhaps the single most crucial step. Using extremely cold, ideally frozen, butter is paramount for developing those distinctive, airy layers. When minuscule pieces of frozen butter hit the intensely hot oven, the moisture within them rapidly converts to steam. This steam then forces the layers of dough apart, resulting in an exquisitely flaky interior. Similarly, keeping your buttermilk thoroughly chilled is vital, as it helps maintain the butter’s cold temperature during the mixing process. The objective is for the butter to melt gradually and deliberately in the oven, rather than prematurely liquefying while you are preparing the dough.
- Do Not Overwork the Dough: Gentle Handling is Key. Overworking biscuit dough is the primary cause of tough, dense biscuits. Once you’ve added the cold buttermilk, stir just enough to bring the ingredients together into a shaggy, somewhat loose dough. When you transfer the dough to your floured work surface, handle it only as much as is absolutely necessary to form a cohesive mass. The specific folding and rotating technique (approximately 6-7 times) is designed to build layers without over-developing the gluten. Excessive kneading or vigorous handling will strengthen the gluten strands, leading to a chewy, bread-like texture rather than the desired tender, melt-in-your-mouth quality of a true biscuit.
- Adjust Dough Consistency as Needed: Trust Your Intuition. The ideal consistency of biscuit dough can fluctuate slightly due to environmental factors like humidity or minor variations in ingredient measurement. If you find the dough overly sticky and difficult to manage on your floured surface, carefully incorporate just a tiny amount more all-purpose flour, a teaspoon at a time, until it becomes more pliable. Conversely, if the dough appears too dry, crumbly, and struggles to come together, add a touch more cold buttermilk, also a teaspoon at a time, until it achieves the correct consistency – moist but not wet or gooey.
- Avoid the Rolling Pin: Use Your Hands Gently. For optimal rise and the most delicate flakiness, resist the temptation to use a rolling pin. The heavy, even pressure of a rolling pin can compress the delicate layers you’ve meticulously created through your folding technique, hindering them from puffing up properly and achieving maximum height in the oven. Instead, use the palms of your hands to gently pat and flatten the dough into a uniform rectangle of approximately 1-inch thickness. This tender handling preserves the integrity of those vital layers.
- Cut Biscuits Close Together for Maximum Yield. To extract the greatest number of biscuits from your precious dough, position your biscuit cutter as close together as possible with each cut. This minimizes excess scraps. After you’ve cut the initial round of biscuits (you should typically get 4 or 5), gently gather the remaining dough scraps. Stack them neatly on top of each other (do not ball them up or knead them) and lightly pat them down once more to cut an additional one or two biscuits. It’s important to avoid extensively re-working the dough at this stage, as repeated handling will inevitably lead to tougher biscuits in the subsequent batch.
Easy Homemade Buttermilk Biscuits
20 mins
12 mins
32 mins
6 biscuits
Soft, flaky, and buttery, these Easy Homemade Biscuits are made with just a few pantry ingredients in 30 minutes. Keep this perfect biscuit recipe on hand year-round to complete any breakfast or dinner.
See below for step-by-step images and more detailed tips to ensure your success.
Ingredients
- 2 cups all-purpose flour, spooned and leveled
- 1 tbsp baking powder
- 1 tbsp granulated sugar
- 1 tsp coarse salt
- 6 tbsp unsalted butter, very well chilled (preferably frozen)
- ¾ cup cold full-fat buttermilk, (or more, as needed), or homemade substitute (see tips), avoid 2%, skim, or non-dairy alternatives
Instructions
-
Place the unsalted butter in the freezer for 30 minutes to ensure it’s extremely cold.
-
Preheat your oven to 425°F (220°C) and line a baking sheet with parchment paper. Set aside.
-
In a large mixing bowl, whisk together the flour, baking powder, sugar, and salt until thoroughly combined.
-
Using a box grater, shred the chilled butter directly over the flour mixture. Toss to coat, then use your hands or a pastry blender to cut in the butter until the mixture resembles coarse crumbs with some pea-sized butter pieces still visible.
-
Add the cold buttermilk and stir with a wooden spoon until just combined. Be careful not to over-mix the dough; it should look shaggy.
-
Transfer the biscuit dough to a well-floured surface. Use your hands to gently bring the dough together. If too sticky, add a bit more flour; if too dry, add a touch more buttermilk.
-
Fold the dough in half over itself and gently flatten the layers with your hands. Rotate the dough 90 degrees and repeat the fold and flatten process 5 more times (for a total of 7 folds). Avoid overworking.
-
Using only your hands (no rolling pin), gently flatten the dough to a 1-inch thickness. Lightly dust a 2 & 3/4-inch round biscuit cutter with flour.
-
Press the biscuit cutter straight down into the dough, making cuts as close together as possible. Do not twist the cutter. Place the biscuits onto your prepared baking sheet.
-
Gently gather the dough scraps, stack them (do not knead), lightly pat down, and cut out any additional biscuits. Aim for at least 6 biscuits.
-
Bake for 12-15 minutes, or until the tops are just lightly golden brown.
-
Immediately after removing from the oven, brush the tops with a bit of melted butter. Serve warm and enjoy your perfect homemade biscuits!
Nutrition Information
Per serving (1 biscuit):
Calories: 280kcal | Carbohydrates: 36g | Protein: 5g | Fat: 13g | Saturated Fat: 8g | Polyunsaturated Fat: 1g | Monounsaturated Fat: 3g | Trans Fat: 0.5g | Cholesterol: 33mg | Sodium: 423mg | Potassium: 291mg | Fiber: 1g | Sugar: 4g | Vitamin A: 399IU | Calcium: 131mg | Iron: 2mg
Nutritional information provided is an automatic calculation and should be considered an estimate. It can vary based on the exact products you use and any modifications you make to the recipe. If precise nutritional values are critical for your dietary needs, we recommend calculating them independently using your specific ingredients.
Step-by-Step Visual Guide to Homemade Biscuits
Sometimes, a visual guide can be incredibly beneficial when mastering a new recipe. Below, you’ll find key stages of our biscuit-making process illustrated to ensure your journey to flaky, buttery perfection is smooth and successful. Each step reinforces the important principles we’ve discussed, bringing you closer to your ideal homemade biscuit.
1. Prepare Your Ingredients & Preheat: Ensure your butter is well-chilled (or frozen) and your oven is preheated to 425°F (220°C). Line a baking sheet with parchment paper. This essential prep guarantees everything is ready for a seamless baking process.
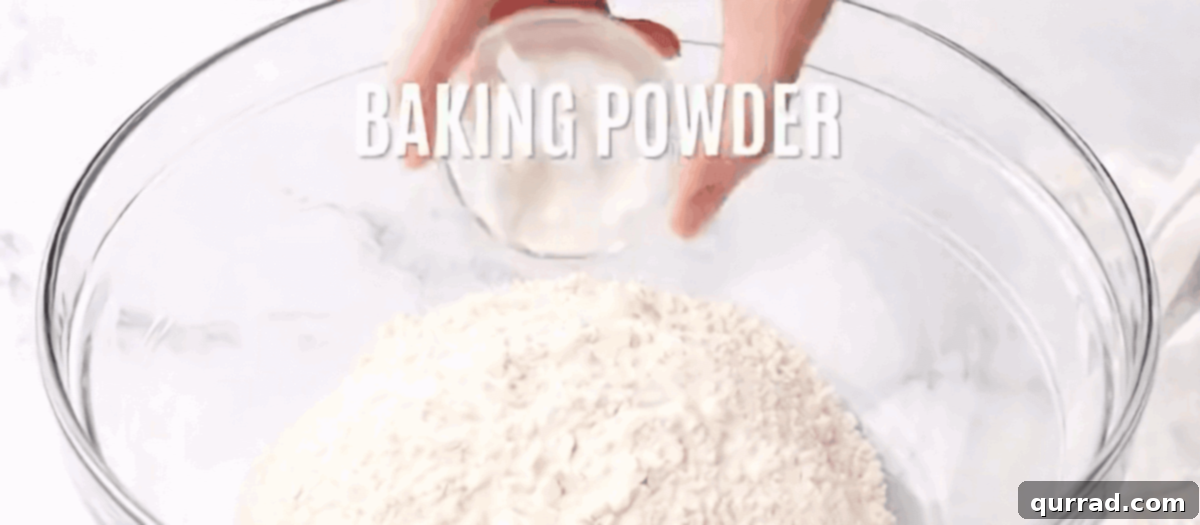
2. Combine Dry Ingredients: In a large mixing bowl, whisk together the measured all-purpose flour, baking powder, granulated sugar, and coarse salt until they are thoroughly combined. This even distribution of leavening agents and seasoning is crucial for uniform texture and flavor.
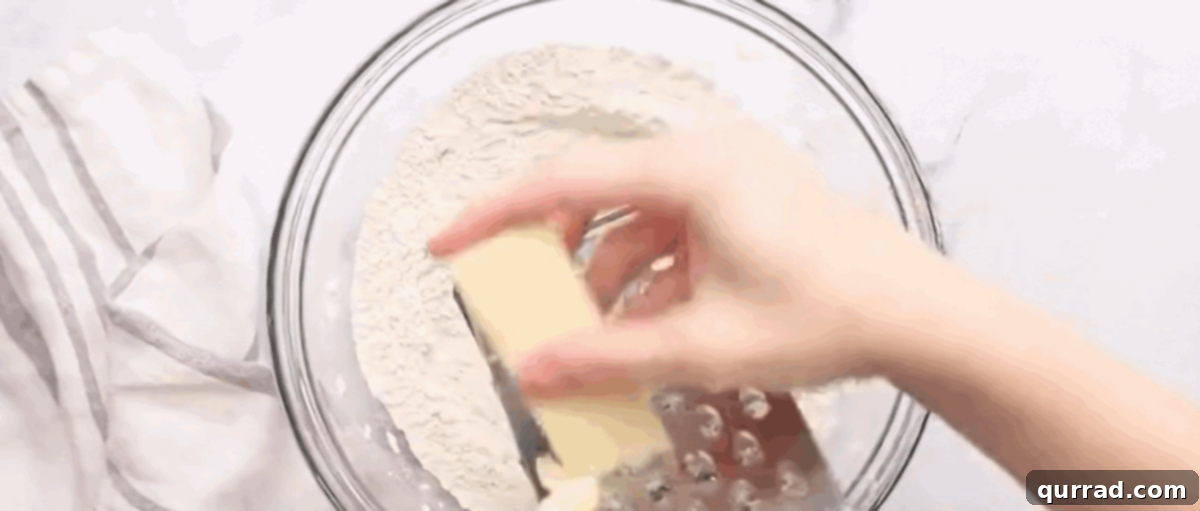
3. Incorporate Butter and Buttermilk: Grate the very cold (or frozen) butter directly over the flour mixture. Using your hands or a pastry blender, gently work the butter into the flour until the mixture resembles coarse crumbs with some pea-sized pieces of butter still visible. This specific texture is vital for creating those distinct flaky layers during baking. Finally, add the cold buttermilk and stir gently with a wooden spoon until just combined, ensuring not to overmix.

4. Fold the Dough for Layers: Transfer your shaggy biscuit dough to a well-floured surface. Gently bring the dough together with your hands. Fold the dough in half over itself, then lightly pat it down to flatten the layers. Rotate the dough 90 degrees and repeat this folding and flattening motion. Continue this layering process 5 more times (for a total of 7 folds) to build up those incredible flaky layers without developing excess gluten. Remember to always handle the dough gently.
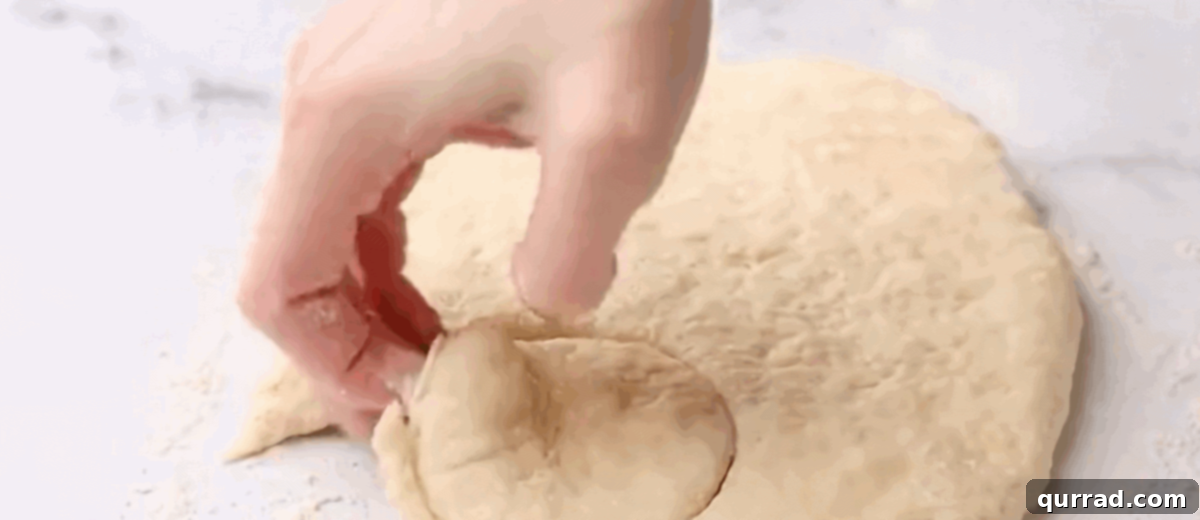
5. Form and Cut the Biscuits: Using only your hands (avoiding a rolling pin to maintain the delicate layers), gently flatten the dough to a uniform thickness of about 1 inch. Lightly dust a 2 & 3/4-inch round biscuit cutter with flour to prevent sticking. Press the cutter straight down into the dough, making cuts as close together as possible. Crucially, do not twist the cutter, as this can seal the edges and inhibit rise. Place the cut biscuits onto your prepared baking sheet. Gather any remaining dough scraps, stack them gently (without kneading), pat them down, and cut out any additional biscuits. You should yield at least 6 perfectly formed biscuits.
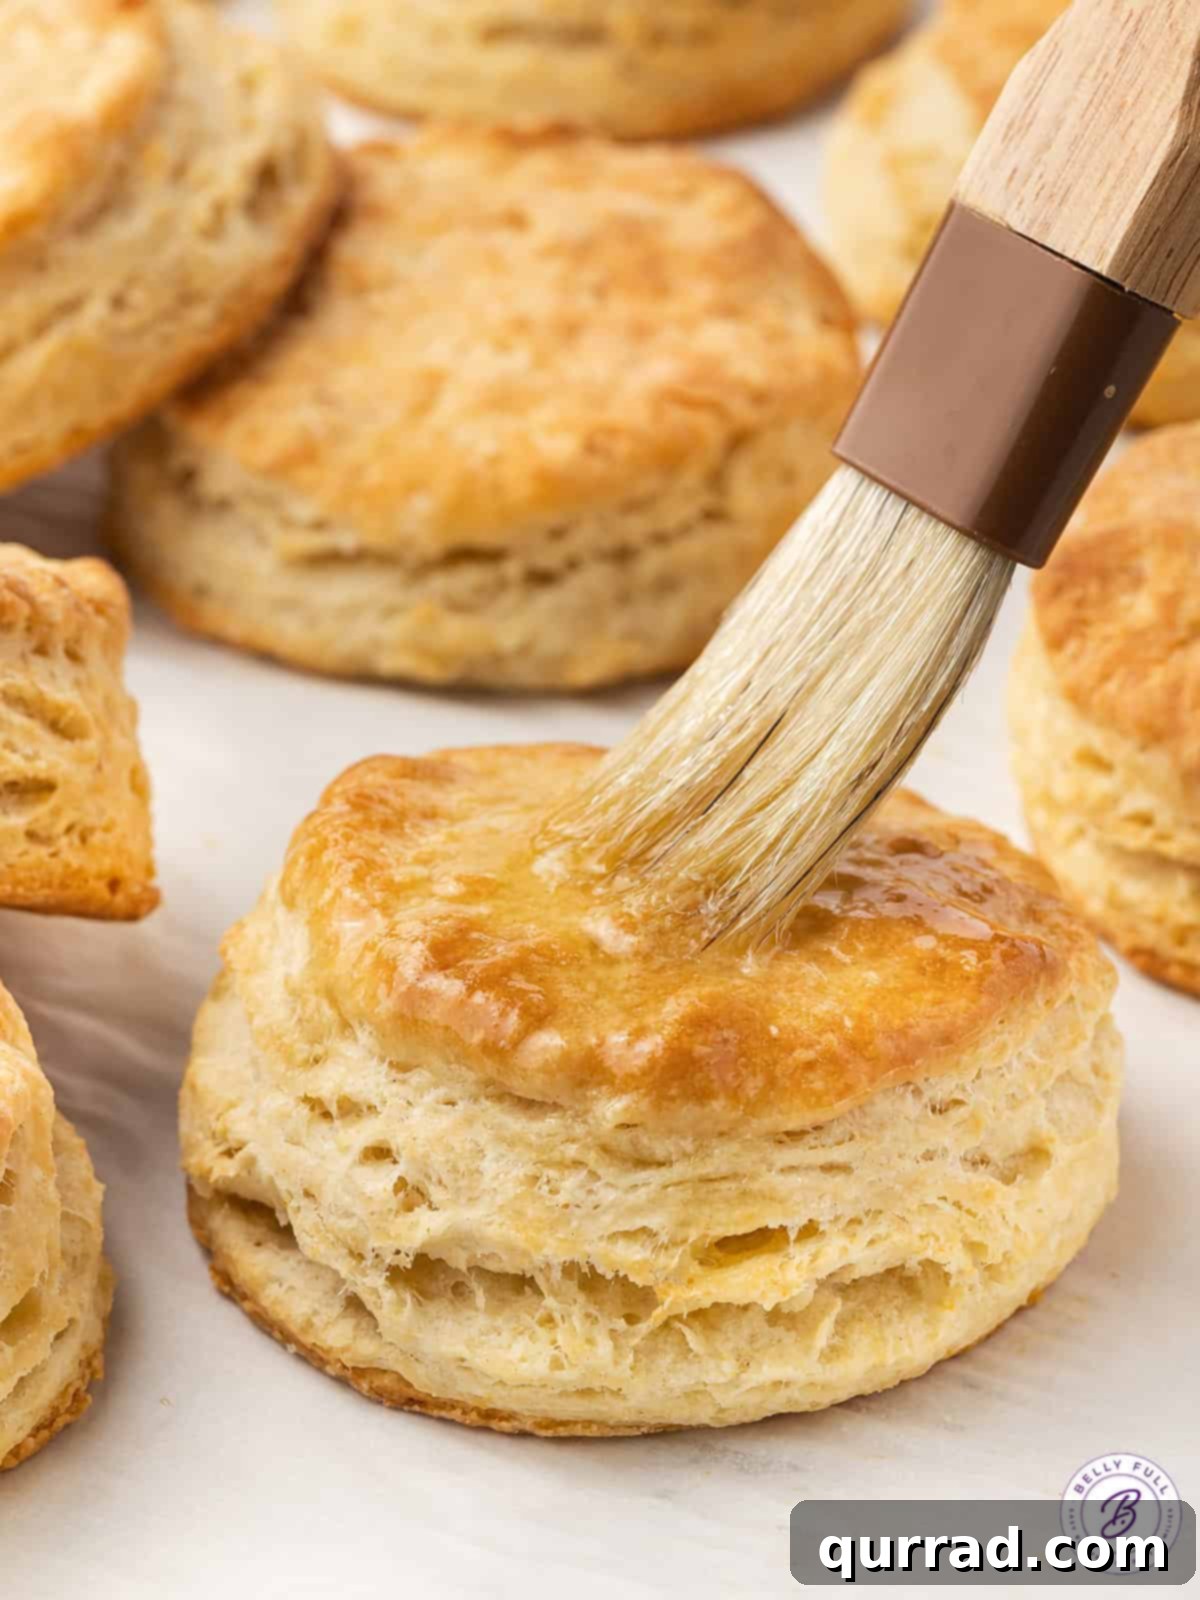
6. Bake to Golden Perfection: Bake your biscuits in the preheated oven at 425°F (220°C) for 12-15 minutes, or until their tops have just begun to turn a beautiful, light golden brown. As soon as they emerge from the oven, generously brush them with a bit of melted butter. This adds an extra touch of richness and a lovely sheen. Serve them warm and savor every tender, flaky bite!
How to Store Homemade Buttermilk Biscuits for Freshness
Proper storage is key to ensuring your delicious homemade buttermilk biscuits remain fresh and enjoyable for as long as possible. Whether you’ve baked a large batch or prefer to prepare them ahead of time, these practical tips will help:
Short-Term Storage (Baked Biscuits):
Once your biscuits have completely cooled to room temperature, transfer them into an airtight container. They will maintain their freshness and tender texture on your kitchen counter for up to 3 days. To revive their warmth and softness, simply pop them into the microwave for a brief 15-20 seconds, or gently reheat them in a toaster oven until warmed through.
Long-Term Storage (Freezing Biscuits):
Homemade biscuits are exceptionally well-suited for freezing, both in their baked and unbaked states. This offers a fantastic convenience, allowing you to have fresh biscuits ready on demand whenever a craving strikes!
- Freezing Unbaked Biscuits: This method provides the ultimate convenience for baking fresh biscuits whenever you desire. After you have cut out your biscuit shapes, arrange them on a baking sheet lined with parchment paper, ensuring they are not touching each other. Flash freeze them until they are completely solid – this typically takes about 1 to 2 hours. Once solidly frozen, carefully transfer the unbaked biscuits to a freezer-safe container or a heavy-duty freezer bag, making sure to remove as much air as possible before sealing. They can be stored in the freezer for up to 3 months. When you’re ready to bake, you can transfer them directly from the freezer to your prepared baking sheet. Add an extra 5-10 minutes to the usual baking time, keeping a close watch until they achieve a beautiful golden-brown color.
- Freezing Baked Biscuits: If you’ve found yourself with an abundance of baked biscuits or simply wish to have quick, reheatable options, allow your freshly baked biscuits to cool completely. Place them in a freezer-safe container or a freezer bag. They will keep remarkably well in the freezer for up to 3 months. To reheat, you can either thaw them on the counter for an hour or two, then warm them in the microwave, toaster oven, or a preheated oven (around 300°F/150°C for 5-10 minutes) until they are soft and warm throughout.
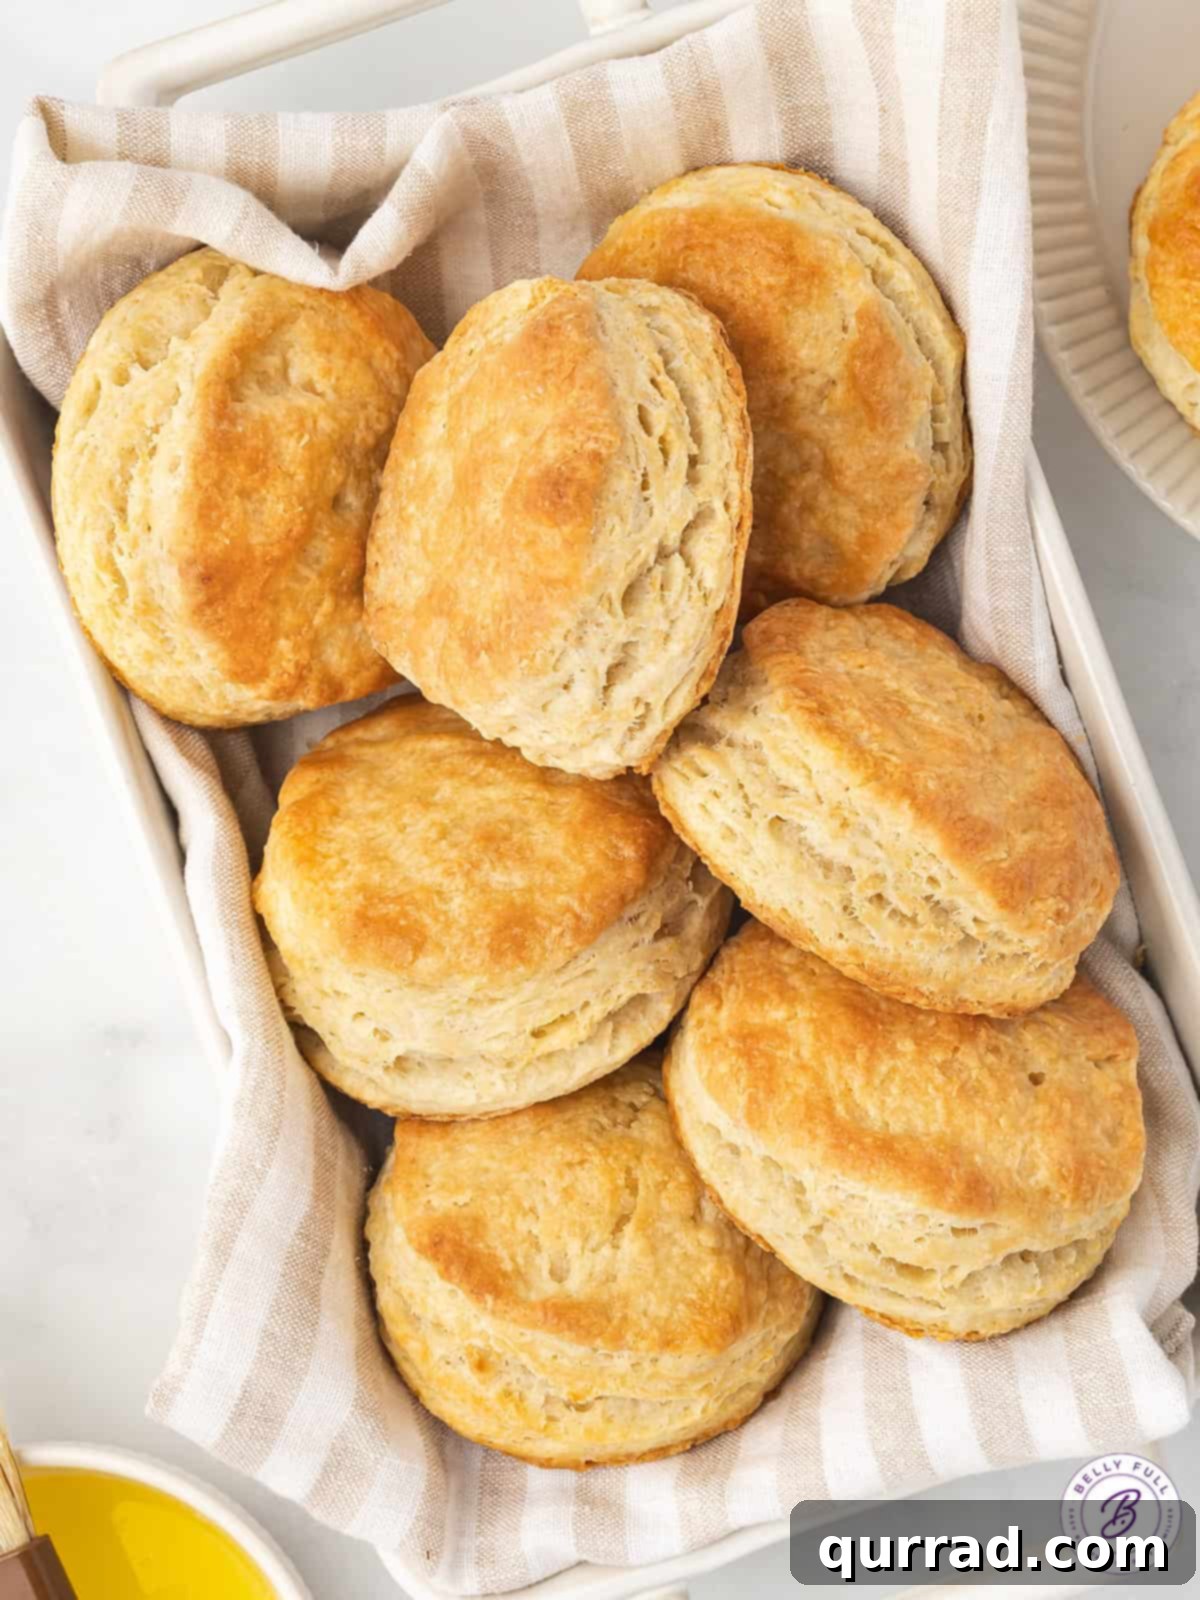
Delightful Serving Suggestions for Your Biscuits
The true charm of light, flaky, and buttery homemade biscuits lies in their incredible versatility. They can grace your table in countless ways, adapting perfectly to virtually any meal or craving. Here are some delightful ideas to inspire your culinary creations:
For Holiday Feasts & Special Occasions:
Biscuits are an indispensable and cherished addition to any festive spread. Their comforting presence beautifully complements rich and robust flavors. Whether you’re serving up a magnificent roast turkey, a succulent honey-orange glazed ham, or a luxurious prime rib, homemade biscuits provide the perfect tender counterpoint. They pair exquisitely with other classic holiday sides like creamy green bean casserole, decadent sweet potato casserole, or a savory cornbread dressing.
For Breakfast & Brunch: The Ultimate Comfort Food:
Start your day off right with a warm, freshly baked biscuit. They are a true breakfast superstar, offering endless delicious possibilities:
- Sweet & Simple: Enjoy them warm with a generous dollop of your favorite jam, jelly, or preserves. I’m particularly partial to the rich sweetness of fig jam and the bright, luscious notes of peach jam! A drizzle of golden honey or pure maple syrup is also absolutely divine.
- Savory Indulgence: Elevate these biscuits into a quintessential Southern treat by pairing them with a rich, creamy, and flavorful sausage gravy. The harmonious combination of fluffy biscuit and hearty gravy is pure culinary bliss.
- Hearty Breakfast Sandwich: Split a warm biscuit and fill it with a perfectly cooked fried egg, a juicy slice of breakfast sausage or crispy bacon, and a slice of melty cheese for a truly satisfying homemade breakfast sandwich that can easily rival any diner’s offering.
As a Versatile Dinner Side:
Beyond breakfast and holidays, these biscuits excel as a fantastic everyday side dish. Serve them warm alongside a hearty stew, a comforting bowl of chili, perfectly grilled meats, or any family dinner. Often, a simple pat of butter, allowed to melt luxuriously into the warm, layered interior, is all they need to truly shine.
Frequently Asked Questions (FAQs) About Homemade Biscuits
Got questions about mastering the art of making the perfect batch of homemade biscuits? We’ve got clear and concise answers to help you along your baking journey!
- Can I use regular milk instead of buttermilk?
- While buttermilk consistently yields the best results due to its unique acidity and fat content, you can certainly create a passable substitute in a pinch. To do so, add 1 tablespoon of lemon juice or white vinegar to a liquid measuring cup, then fill the remaining volume with whole milk (up to ¾ cup for this recipe). Let this mixture sit for 5-10 minutes until it visibly curdles slightly. However, for that authentic tenderness, rich flavor, and optimal rise, full-fat buttermilk is always highly recommended.
- Why are my biscuits tough or dense?
- The most common culprits behind tough or dense biscuits are typically overworking the dough and using a rolling pin with excessive pressure. Overworking develops the gluten strands in the flour, which leads to a chewy texture. Always handle the dough gently, only as much as absolutely needed, and use your hands to flatten the dough rather than a heavy rolling pin to preserve those delicate layers.
- What kind of flour is best for biscuits?
- Standard all-purpose flour is generally ideal and works wonderfully for this recipe, delivering excellent results. Some traditional Southern biscuit recipes specifically call for soft wheat flour (such as White Lily brand), which has a lower protein content. This type of flour can result in an even more exceptionally tender biscuit, but it’s not strictly necessary for a fantastic outcome.
- Can I make the biscuit dough ahead of time?
- Yes, you can prepare the biscuit dough up to the point of cutting out the individual biscuits. Simply cover the flattened dough tightly with plastic wrap and refrigerate it for up to 1-2 hours. For longer storage and ultimate convenience, you can also cut out the biscuits and then flash freeze them before transferring them to a freezer bag (please refer to our detailed freezing instructions provided above for the best method).
More Irresistible Biscuit Recipes To Explore
If you’ve fallen in love with the rewarding process of making homemade biscuits, there’s a whole world of delightful variations and unique twists waiting to be discovered. Each recipe offers a fresh take on this beloved classic, allowing you to expand your baking repertoire. Explore these fantastic options for more biscuit inspiration:
- 7 Up Biscuits: A surprisingly simple recipe that cleverly uses lemon-lime soda for an unbelievably fluffy and light texture.
- Buttermilk Drop Biscuits: For those times when you crave the tender goodness of biscuits without the fuss of rolling and cutting, these incredibly easy drop biscuits deliver on both flavor and tenderness.
- Cheddar Bay Biscuits: Recreate the famous restaurant classic in your own kitchen – these cheesy, garlicky, and utterly addictive biscuits are always a crowd-pleaser.
- Apple Cheddar Biscuits: A truly delightful sweet and savory combination, these biscuits are perfect for autumn gatherings or as a unique and flavorful brunch item.
- Pumpkin Drop Biscuits: Embrace the flavors of the season with these spiced and comforting drop biscuits, an ideal treat for fall and beyond.
Happy baking!