
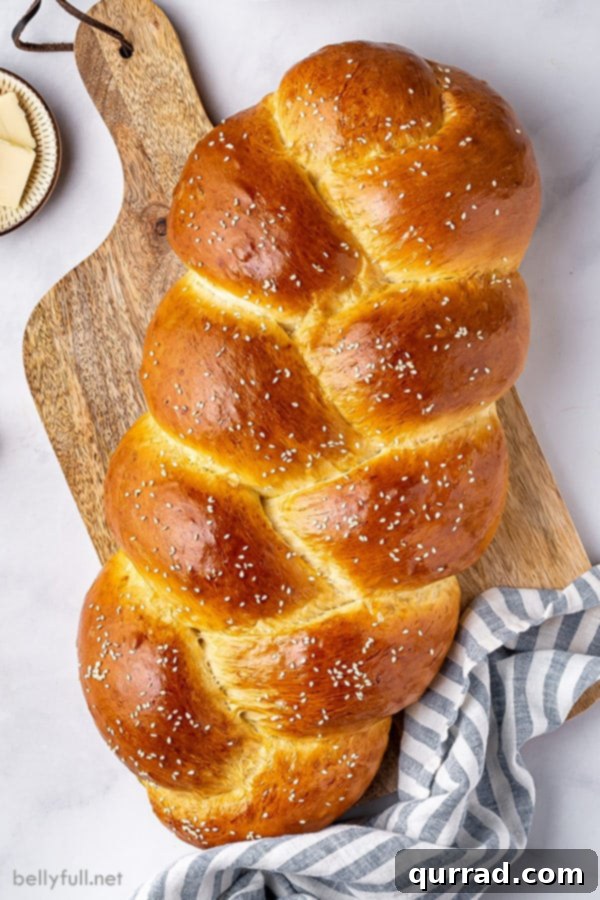
Challah, a truly enchanting bread, is more than just a culinary delight; it’s a rich tapestry of tradition, flavor, and artisanal beauty. This slightly sweet, incredibly soft, and pillow-y loaf holds a special place in Jewish culture, gracing tables weekly for the Sabbath (Shabbat) and serving as a centerpiece for major holidays like Rosh Hashanah and Hanukkah. Its deeply golden, often braided appearance is undeniably impressive, yet the journey from simple ingredients to this magnificent bread is surprisingly straightforward and immensely rewarding. Baking Challah at home is an experience that fills your kitchen with warmth and an irresistible aroma, promising a showstopper that will capt captivate guests and create lasting memories around any dinner table.
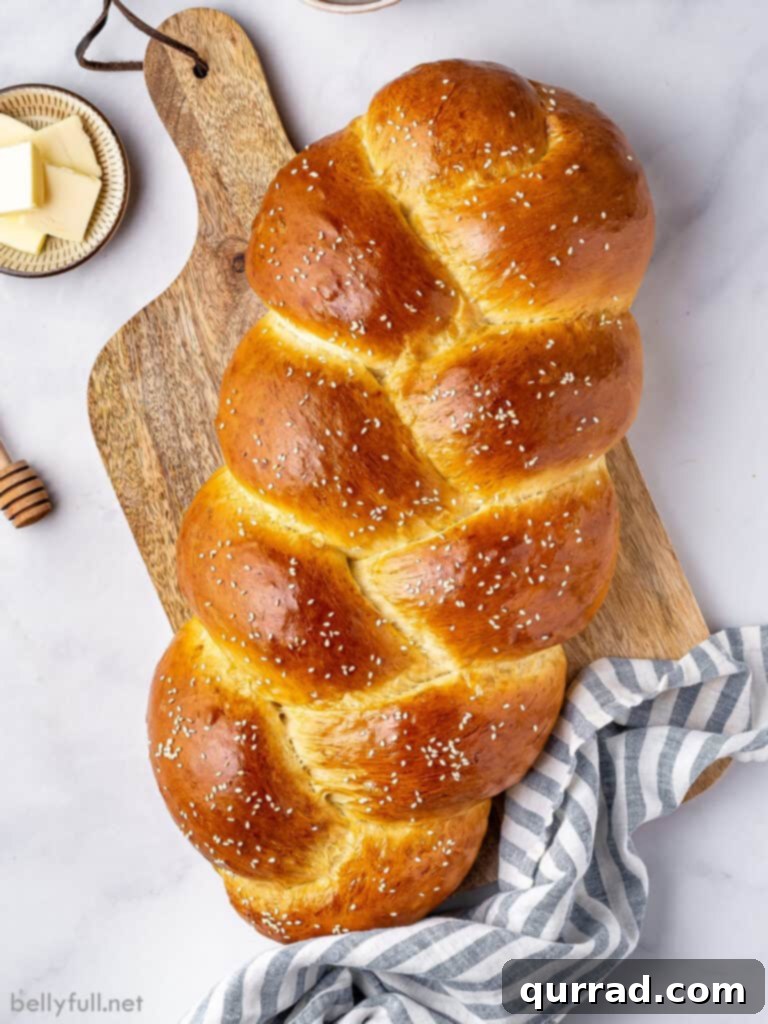
Unraveling the Essence: What is Challah Bread?
At its heart, Challah (pronounced “ha-luh,” with a silent ‘c’) is an enriched yeast bread. Its unique character stems from a rich dough made with eggs and a touch of sugar for subtle sweetness. Traditionally, butter is replaced with oil in kosher versions to ensure it can be served with meat dishes without violating dietary laws. What truly distinguishes Challah, however, is not just its ingredients, but the artistry involved in its preparation and its breathtaking presentation once baked. The dough is carefully divided into strands, intricately braided, then generously brushed with an egg wash before baking to achieve that signature tender crumb and glorious golden-brown crust.
Beyond its simple definition, Challah carries profound cultural and spiritual weight within Jewish communities. It is a cornerstone of Shabbat, the weekly day of rest, where two loaves are traditionally served at Friday dinner. Its presence also marks significant Jewish holidays, symbolizing blessings, continuity, and joy. This special bread transcends mere sustenance, acting as a tangible link to heritage and shared celebration.
The Art and Symbolism of Challah’s Braids
Perhaps the most iconic feature of Challah is its exquisite braid, a visual feast that perfectly complements its golden sheen. While Challah can take various forms, from simple round loaves to complex multi-strand designs, the most traditional and widely recognized is the three-strand braid. This particular braid is often imbued with deep symbolism, representing core values such as love, peace, and justice within Jewish tradition. When two loaves of Challah are served, as is customary for Shabbat, the combined six strands are sometimes seen to symbolize the six work days of the week, preceding the restful Sabbath.
For Rosh Hashanah, the Jewish New Year, Challah is frequently baked in a round spiral shape rather than a straight braid. This circular form holds its own powerful symbolism, representing the cyclical nature of a year, without a definitive beginning or end, and signifying wishes for a sweet and complete year ahead. Exploring different braiding techniques, from simple three-strand to more elaborate four, six, or even twelve-strand braids, can be a delightful journey for any home baker, each adding to the bread’s visual appeal and deepening its connection to tradition.
Mastering Homemade Challah Bread: A Step-by-Step Guide
Baking Challah from scratch is a deeply satisfying process, and this recipe streamlines it, making it accessible even for novice bakers. With just a handful of pantry staples and a little patience, you’ll create two beautiful loaves that are far superior to anything store-bought. Here’s a detailed look at what you’ll need and how to bring this magical bread to life:
Essential Ingredients for Perfect Challah:
- All-Purpose Flour: The backbone of our Challah. Always spoon and level your flour for accuracy to prevent a dense loaf. Keep a little extra on hand for dusting and adjusting dough consistency.
- Active Dry Yeast: This is the leavening agent that gives Challah its incredible rise and airy texture. Ensure your yeast is fresh and active for the best results.
- Lukewarm Water: Crucial for activating the yeast. The ideal temperature is around 110°F (43°C). It should feel warm, like a baby’s bath, but not hot to the touch. Too hot will kill the yeast, too cold won’t activate it.
- Granulated Sugar: Provides the characteristic subtle sweetness and helps to feed the yeast, aiding in fermentation and browning.
- Large Eggs: Eggs are fundamental to Challah, enriching the dough, adding a beautiful golden hue, and contributing to its soft, tender crumb and pillow-like texture. They also act as a binding agent.
- Unsalted Butter: (Or neutral-flavored oil for kosher) Adds incredible richness and contributes significantly to the bread’s melt-in-your-mouth texture. If observing kosher dietary laws, substitute with an equal amount of vegetable or canola oil to keep the bread pareve (neither dairy nor meat).
- Kosher Salt: Essential for balancing the sweetness and enhancing all the flavors in the bread.
- Egg Wash: A simple mixture of beaten eggs and water, brushed generously over the loaves before baking. This is what creates Challah’s iconic lustrous, deep golden-brown crust.
- Vegetable Oil: A small amount is needed for lightly greasing the rising bowls, preventing the dough from sticking.
- Optional Toppings: For an extra layer of flavor and visual appeal, consider sprinkling sesame seeds, poppy seeds, or a blend of both over the egg-washed dough before baking.
Step-by-Step Challah Baking Instructions:
- Activate the Yeast: In a small bowl, combine the lukewarm water and 1 tablespoon of granulated sugar. Sprinkle the active dry yeast evenly over the surface. Let it sit undisturbed for about 5-10 minutes. The mixture should become visibly foamy and bubbly, indicating the yeast is alive and active. If it doesn’t foam, your yeast may be expired, and you should start over with a fresh batch.
- Combine Dry Ingredients: In a very large mixing bowl, whisk together the 7 cups of all-purpose flour, the remaining ½ cup of granulated sugar, and the kosher salt. Create a deep well in the center of the flour mixture.
- Add Wet Ingredients: Pour the beaten eggs and melted butter (or oil) into the well. Gently pour the activated yeast mixture into the center as well. Using a sturdy wooden spoon or your hands, begin mixing the wet ingredients into the dry, gradually incorporating flour from the sides of the bowl until a shaggy, cohesive dough forms.
- Knead the Dough: Turn the shaggy dough out onto a lightly floured surface. Knead continuously for 8-10 minutes. The dough should transform from sticky to smooth, elastic, and no longer wet to the touch. If it remains overly sticky, add flour a teaspoon at a time until the desired consistency is achieved. It should spring back slowly when poked.
- First Rise: Divide the kneaded dough evenly in half. Lightly grease the insides of two large bowls with vegetable oil. Place one dough ball into each bowl, turning once to coat. Cover the bowls tightly with plastic wrap and place them in a warm, draft-free area of your kitchen. Allow the dough to rise until it has doubled in size, which typically takes between 1 to 1.5 hours, depending on your room temperature.
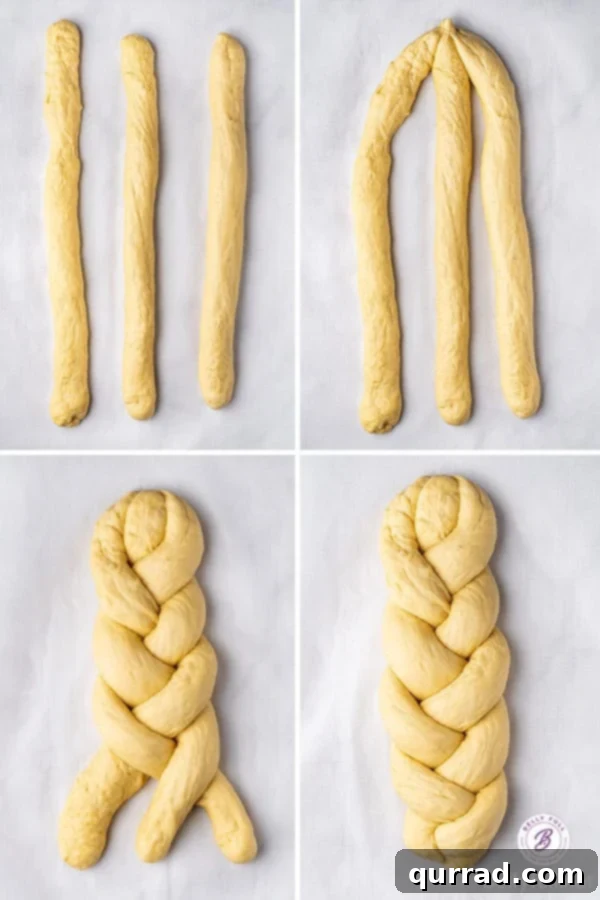
- Prepare for Braiding: Once the dough has doubled, gently punch it down to release the air. Transfer one half of the dough to a lightly floured surface. Divide this dough into three equal pieces.
- Form the Strands: Roll each of the three pieces of dough into long, uniform ropes, approximately 16-18 inches long and about 1 inch thick. If the dough resists stretching and shrinks back, let it rest for 5-10 minutes to allow the gluten to relax, then try rolling again.
- Braid the Loaf: Gather the three ropes at one end and firmly pinch them together to secure. Begin braiding them as you would hair, keeping the braid snug but not too tight. Once braided, pinch the other end firmly to seal. Repeat this process with the second half of the dough to form your second loaf.
- Second Rise: Carefully transfer each braided loaf onto a baking sheet lined with parchment paper. Cover the loaves loosely with a clean kitchen towel and let them rise again in a warm place for another 45-60 minutes, or until they look visibly puffy and pillowy.
- Preheat Oven & Egg Wash: While the loaves are on their second rise, preheat your oven to 350°F (175°C) and position an oven rack in the center. In a small bowl, whisk together the ingredients for the egg wash (typically 1-2 eggs with 1-2 tablespoons of water).
- Apply Toppings (Optional): Once the loaves have completed their second rise, gently brush each loaf generously with the egg wash, ensuring it coats all surfaces and gets into the crevices of the braid for that beautiful shine. If desired, sprinkle one loaf with poppy seeds and the other with sesame seeds for added texture and flavor.
- Bake to Golden Perfection: Place the baking sheets in the preheated oven. Bake for 30-35 minutes, rotating the baking sheets halfway through to ensure even browning. The Challah is done when it’s deep golden brown, and an instant-read thermometer inserted into the very center registers 190°F (88°C).
- Cool and Serve: Remove the baked Challah from the oven and transfer it to a wire rack to cool slightly. While it’s delicious warm, allowing it to cool until just warm makes for easier slicing. Slice and enjoy on its own, with a pat of butter, or alongside your favorite meal!
Challah vs. Brioche: A Sweet Comparison
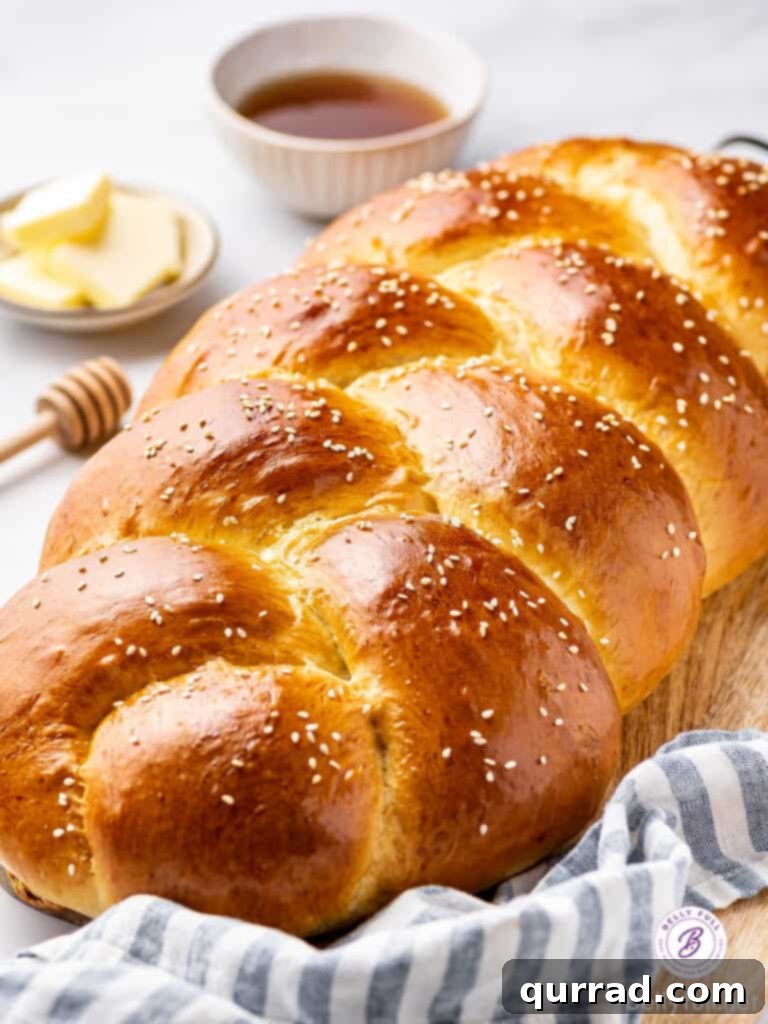
Challah is often compared to French brioche, and for good reason. Both are celebrated as enriched yeast breads, meaning their doughs are made richer with the addition of eggs, and often butter or oil. They share a similar delightful sweetness, a luxurious golden crust, and an incredibly soft, pillow-like interior that makes them irresistible. The commonalities end there, however, when diving into their cultural roots and key ingredients.
The most significant distinction lies in their culinary traditions and core fats. Challah, deeply embedded in Jewish culture, is traditionally prepared with oil (such as vegetable or canola) instead of butter to ensure it remains kosher. This allows it to be served alongside meat dishes, adhering to the Jewish dietary laws that prohibit mixing meat and dairy. Brioche, on the other hand, is quintessentially French and always made with a generous amount of butter, giving it a distinct richness and slightly different flavor profile. While our shared recipe includes butter for a universally appealing richness, understanding this traditional ingredient difference is key to appreciating Challah’s cultural context. For a kosher version, simply swap butter for a neutral oil.
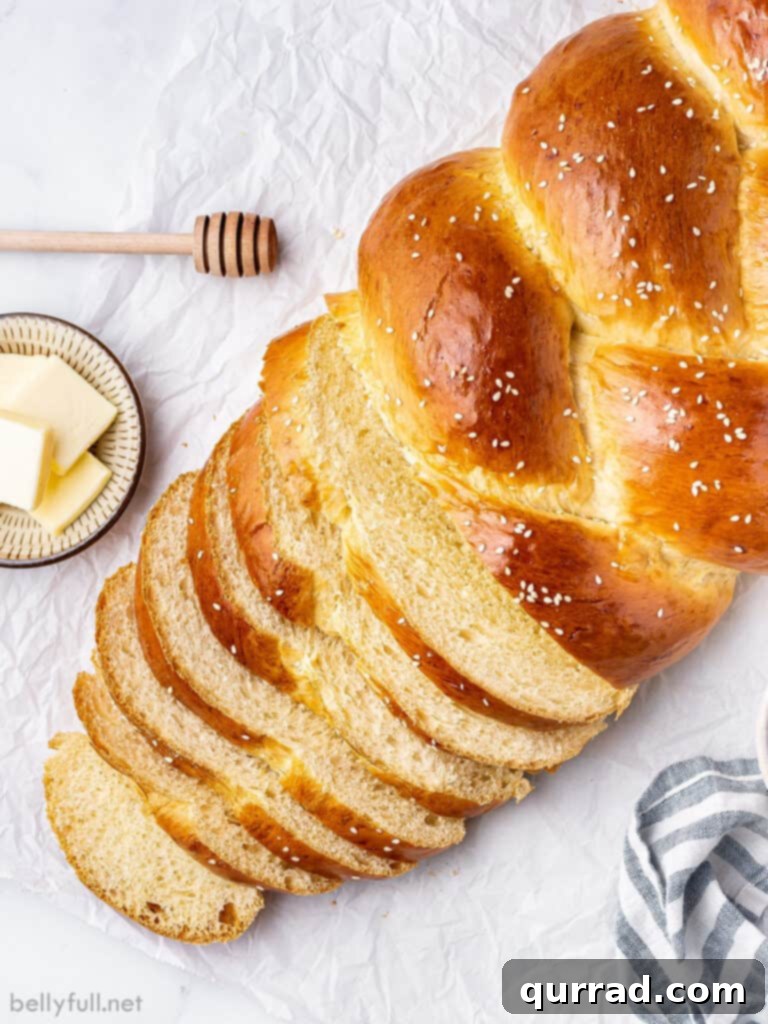
Beyond the Plate: Creative Uses for Leftover Challah
If you’re fortunate enough to have any Challah leftover – a rare but delightful occurrence – its rich, slightly sweet nature makes it incredibly versatile for reimagining into new culinary treats. Leaving slices of Challah uncovered on the counter overnight allows them to slightly stale, creating the perfect texture for absorption without becoming soggy, which is ideal for:
- The Best French Toast Ever: Its rich egg-and-sugar content makes Challah the ultimate bread for French toast. Each slice soaks up the custard beautifully, yielding a custardy interior and a perfectly browned exterior.
- Decadent French Toast Casserole: For a brunch crowd or make-ahead meal, Challah shines in a baked French toast casserole. Assemble the night before and bake in the morning for an effortless feast.
- Comforting Bread Pudding: Transform leftover Challah into a warm, inviting bread pudding. Its natural sweetness and tender crumb are perfect for soaking up a rich, creamy custard, especially with added fruits or spices.
- Gourmet Sandwiches: Elevate your everyday sandwiches. The soft, subtly sweet Challah pairs wonderfully with savory fillings, from classic roast beef and turkey to sophisticated cheese and vegetable combinations.
- Crispy Croutons: Cut Challah into cubes, toss with olive oil and herbs, then toast in the oven for homemade croutons that add a delicious crunch to salads and soups.
- Sweet Bread Crumbs: Process dried Challah into fine bread crumbs for use in baking or as a coating for savory dishes, adding a touch of richness.
Preserving Freshness: How to Store Challah Bread
Proper storage is key to enjoying your homemade Challah for as long as possible:
- Storing Leftovers at Room Temperature: Once your Challah has cooled completely, wrap it tightly in plastic wrap, place it in a large Ziploc bag, or store it in another airtight container. Stored this way, it will remain fresh and delightfully soft on your kitchen counter for up to 3-4 days. For optimal freshness, avoid refrigeration, as it can dry out bread quickly.
- Freezing Challah Bread: This recipe yields two generous loaves, making it perfect for freezing one for later enjoyment. Challah freezes exceptionally well, whether as a whole loaf or individual slices. To prevent freezer burn, wrap the cooled bread first in a layer of plastic wrap, then an additional layer of aluminum foil. It will maintain its quality in the freezer for 2-3 months. When ready to enjoy, simply thaw the bread on the counter at room temperature. For a “freshly baked” experience, you can gently warm thawed slices or a whole loaf in a preheated oven (around 300°F/150°C) for a few minutes.
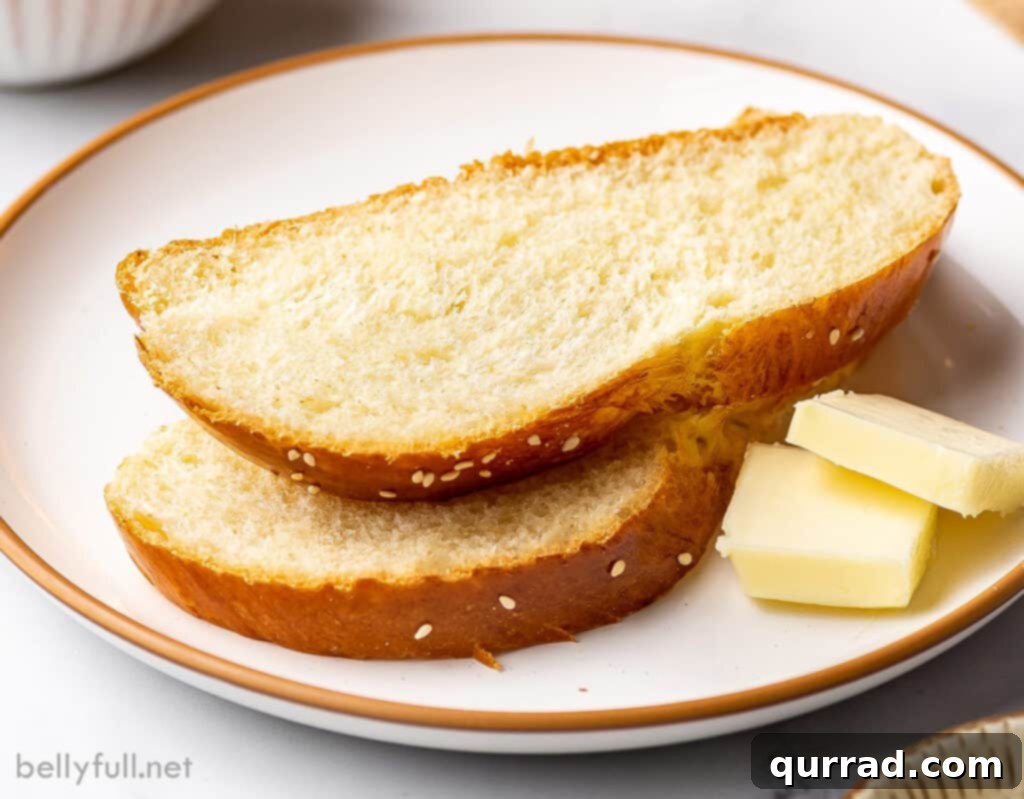
Frequently Asked Questions About Challah Bread
- What makes Challah different from regular white bread? Challah is an “enriched” bread, meaning it contains higher amounts of eggs, and sometimes butter or oil, compared to lean white bread doughs (which are typically just flour, water, yeast, and salt). This enrichment gives Challah its signature rich flavor, tender crumb, and beautiful golden color.
- Can I make Challah without a stand mixer? Absolutely! While a stand mixer makes kneading easier, you can certainly knead Challah dough by hand. It requires about 10-15 minutes of vigorous kneading until the dough is smooth and elastic.
- How do I know if my yeast is active? When you combine active dry yeast with lukewarm water and a pinch of sugar, it should become foamy and bubbly within 5-10 minutes. If it doesn’t, your yeast is likely dead, and you’ll need to use a new batch.
- My Challah isn’t very shiny. What went wrong? A lack of shine usually means the egg wash wasn’t applied evenly or generously enough. Ensure you brush the entire surface, including the crevices of the braid, right before baking. Sometimes, adding a touch of milk to the egg wash can enhance shine too.
- Why did my Challah come out dense? A dense Challah can be due to several factors: expired yeast, not allowing enough time for the dough to rise (first and second proofing), or adding too much flour during kneading, making the dough too stiff.
- Can I add honey instead of sugar? Yes, honey can be a delightful substitute for some or all of the granulated sugar, adding a distinct flavor and helping with browning. You might need to slightly adjust the liquid amount as honey is also a liquid.
- What’s the best way to slice Challah? For beautiful, even slices, use a sharp serrated knife. Allow the Challah to cool down to at least warm before slicing, as cutting it too hot can compress the crumb.
Discover More Traditional Jewish Food:
- Matzo Ball Soup
- Potato Latkes
- Rugelach
- Kugel
- Sufganiyot (Jelly Donuts)
- Cheese Blintz
- Beef Brisket
I genuinely hope you cherish this delicious and easy Challah bread recipe. It’s a journey into rich tradition and incredible flavor that’s well worth embarking on. Don’t forget to share your creations and experiences!
Challah Bread
Prep Time: 20 mins
Cook Time: 30 mins
Rising Time: 2 hrs 30 mins
Total Time: 3 hrs 20 mins
Servings: 28 slices (2 loaves)
Challah is a rich and slightly sweet pillow-y bread that is traditionally served every week for the Sabbath and major Jewish holidays. Anyone can make it, though…and should! Despite its incredibly impressive look, preparing it is quite easy. And absolutely delicious.
Ingredients
- 2 cups lukewarm water (around 110°F)
- 2 tablespoons active dry yeast
- 1/2 cup + 1 tablespoon granulated sugar, divided
- 7 cups all-purpose flour, spooned and leveled (plus more if needed)
- 1 tablespoon kosher salt
- 4 large eggs, beaten
- 1/2 cup unsalted butter, melted (see note below for kosher alternative)
- Vegetable oil (for greasing bowls)
- Egg wash (2 eggs beaten with 2 tablespoons water – you may not need it all)
- Poppy seeds and/or sesame seeds, for topping (optional)
Instructions
- In a small bowl, sprinkle the yeast over the water and add the 1 tablespoon sugar. Let bloom until a frothy layer develops on top; about 5 minutes. (If the yeast doesn’t foam, it isn’t good anymore. Toss it and start over.)
- In a large bowl, whisk together the 7 cups of flour, 1/2 cup sugar, and salt. Make a well in the center and add the beaten eggs and melted butter. Mix together with a wooden spoon, gradually pulling in a little flour from the sides of the bowl. Stir in the yeast mixture. Mix to combine until a shaggy dough is formed.
- Turn the dough out onto a lightly floured surface and knead well for about 6-8 minutes. If the dough is very sticky, work in a teaspoon of flour at a time until the dough is smooth, pliable, not wet, and holds a ball-shape.
- Divide the dough evenly in half.
- Lightly oil the inside of two large bowls. Place one dough half inside each; cover with plastic wrap in a warm, draft-free place. Let rise until doubled in size, 60-90 minutes.
- Working with one mound of dough at a time, gently punch down dough and separate into 3 equal parts. Roll each piece of dough into long ropes about 16 inches long and 1-inch thick. (If the ropes shrink as you try to roll them, let them rest for 5 minutes to relax the gluten and then try again.) Gather the 3 strands and squeeze them together at the top. Then snugly braid together as if you were braiding hair and squeeze the bottom ends together when done to secure.
- Repeat with the other mound of dough.
- Gently transfer each braid to parchment-lined baking sheets. Cover with a clean dish towel and allow to rise until double in size and pillowy, about 1 hour.
- Preheat oven to 350 degrees F (175°C) with the rack in the center position.
- Brush both loaves all over with the egg wash, making sure to get in the cracks and along the sides of the loaf. Sprinkle one loaf with some poppy seeds and the other with some sesame seeds, if desired.
- Bake for about 30-35 minutes, rotating the baking sheets halfway through, until deep golden brown and registers 190°F (88°C) in the very middle with an instant-read thermometer.
- Remove from the oven and allow to cool until just slightly warm. Slice and enjoy on its own or with a slab of butter!
Notes
Use fresh yeast: If the yeast doesn’t foam after activation, it isn’t good anymore. Always start with fresh yeast for a proper rise.
Keeping kosher: If keeping kosher, substitute the butter with a neutral-flavored oil such as vegetable or canola.
Storing leftovers: You can store your cooled challah on the counter for up to 4 days. Secure it tightly in plastic wrap, store it in a Ziploc bag, or another airtight container to maintain freshness.
To freeze: You can freeze an entire loaf or individual slices. Wrap it in both plastic wrap and aluminum foil to prevent freezer burn. It will keep in the freezer for 2-3 months. Thaw on the counter before enjoying.
Nutrition
Calories: 168kcal | Carbohydrates: 28g | Protein: 4g | Fat: 4g | Saturated Fat: 2g | Polyunsaturated Fat: 1g | Monounsaturated Fat: 1g | Trans Fat: 1g | Cholesterol: 35mg | Sodium: 261mg | Potassium: 47mg | Fiber: 1g | Sugar: 4g | Vitamin A: 140IU | Vitamin C: 1mg | Calcium: 10mg | Iron: 2mg
Nutritional information given is an automatic calculation and can vary based on the exact products you use and any changes you make to the recipe. If these numbers are very important to you, I would recommend calculating them yourself.