
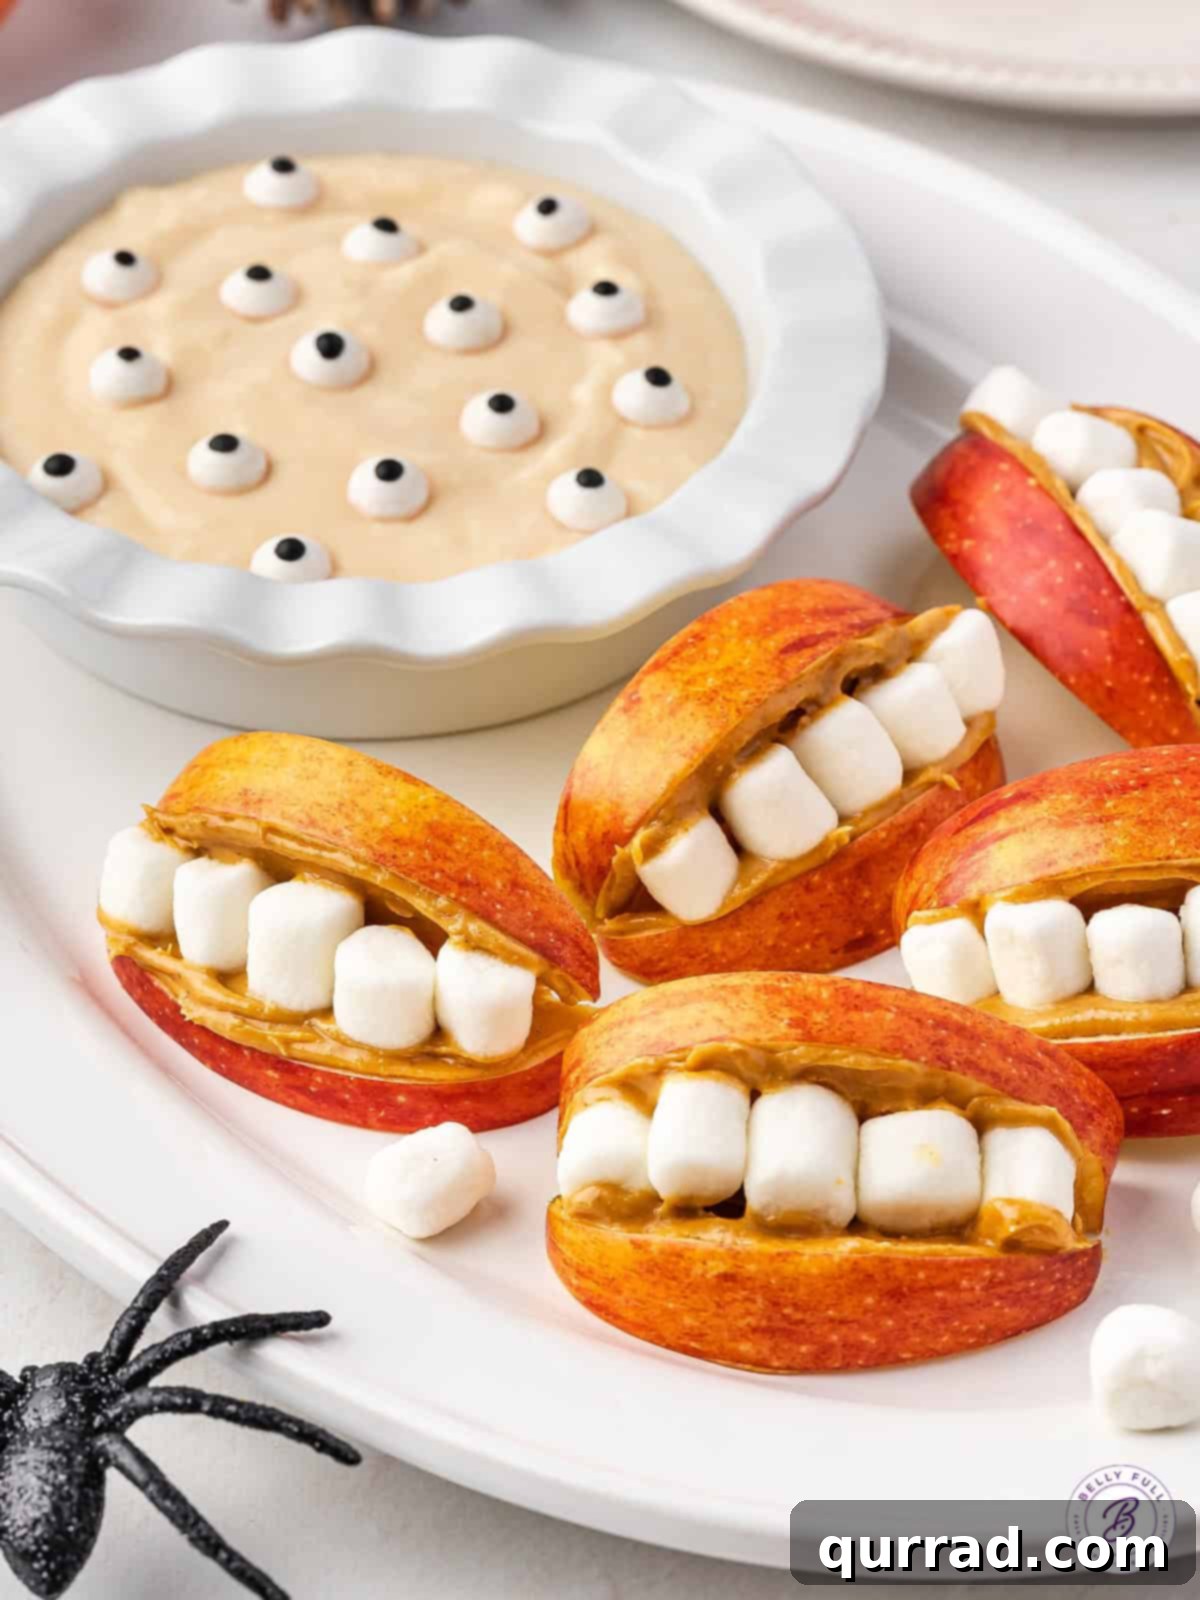
Delightfully Spooky: Easy Apple Monster Mouths with Irresistible Monster Fruit Dip for Halloween
Get ready for a treat that’s as fun to make as it is to eat! These Apple Monster Mouths with Monster Fruit Dip are the ultimate Halloween snack, combining simple ingredients into a festive, healthier option that kids and adults alike will adore. Forget overly complicated recipes; this one brings big smiles and spooky charm with minimal effort, making it perfect for last-minute party prep or a creative afternoon activity with the little ones.
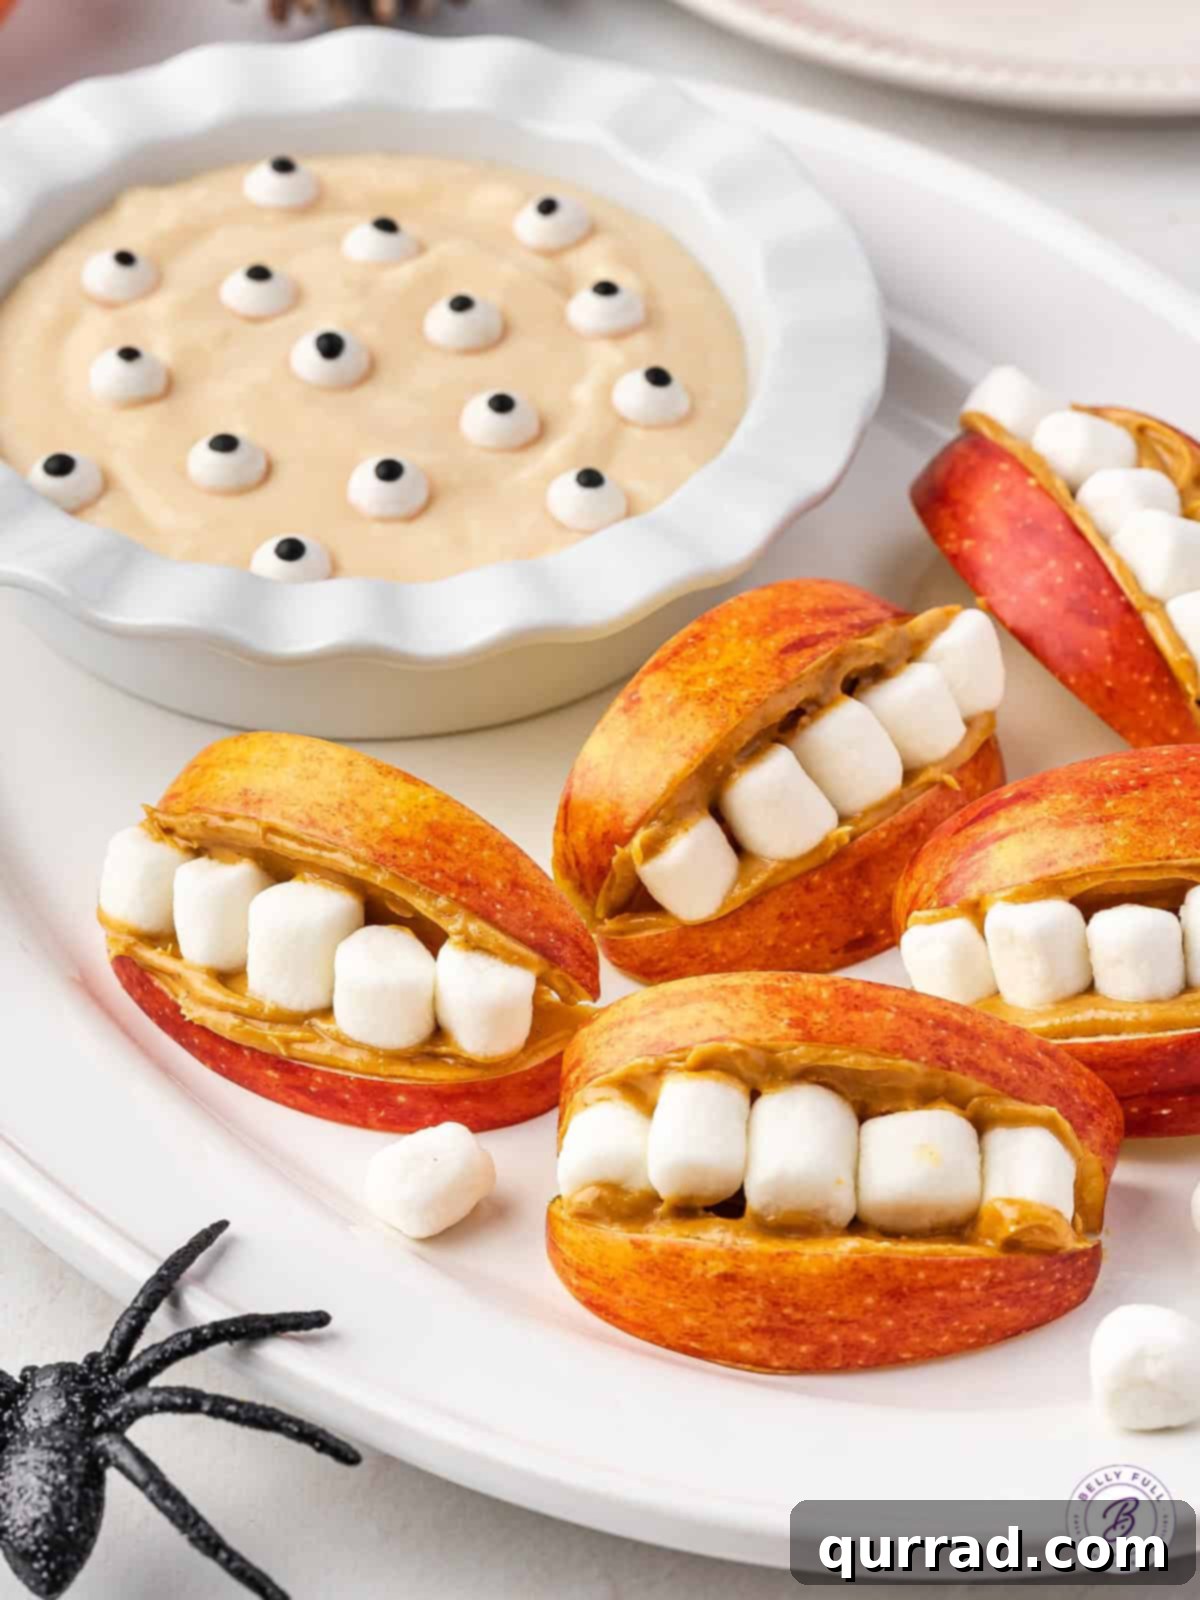
Why These Apple Monster Mouths Are a Halloween Must-Have
As a parent, finding snacks that are both enjoyable for kids and subtly healthy feels like a win. These Apple Monster Mouths hit that sweet spot perfectly. They’re effortlessly delicious, making fruit eating an exciting adventure rather than a chore. While many children don’t need much convincing to enjoy a crisp apple, transforming it into a grinning monster with “teeth” takes the fun factor to a whole new level, especially around Halloween!
I distinctly remember the joy these brought my kids when they were younger. A recipe was always a success if they begged for it again the very next day. Made from vibrant apple slices, creamy peanut butter, and fluffy mini marshmallows, these monster mouths were an instant hit and remain a beloved treat even now that my children are teenagers. It’s a testament to their timeless appeal and irresistible charm.
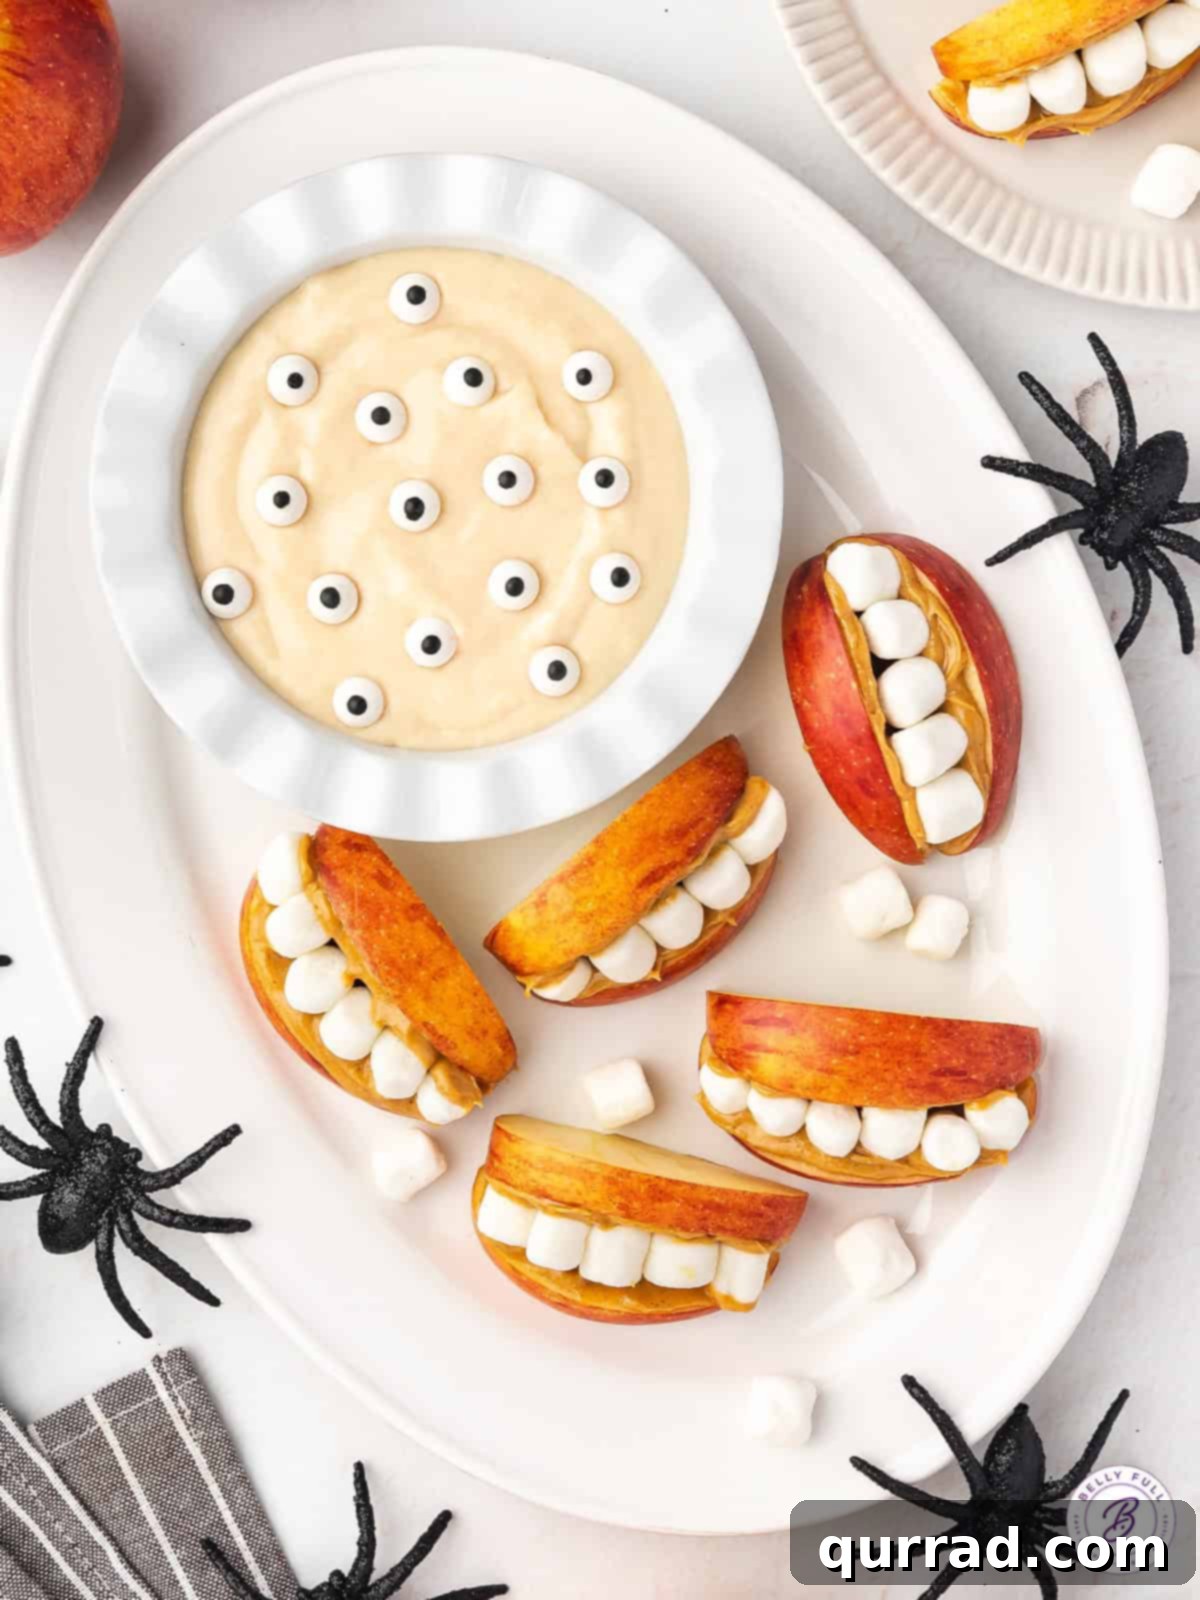
Unveiling the Simple Ingredients for This Spooky Treat
Crafting these adorable monster mouths and their accompanying dip requires just a handful of readily available ingredients. You’ll be amazed at how quickly you can whip up this festive snack!
For the Whimsical Apple Mouths
- Apples: The star of our show! While any apple variety works, I highly recommend using crisp, red apples like Red Delicious or Honeycrisp. Their vibrant color naturally enhances the Halloween aesthetic, making your monster mouths look even more authentic and appealing. Choose firm apples for the best texture.
- Peanut Butter: This creamy, sticky spread serves a dual purpose. Firstly, it’s the perfect “glue” to secure the mini marshmallow “teeth” onto the apple slices. Secondly, it adds a delightful flavor and a boost of protein and healthy fats. For those with nut allergies, feel free to substitute with almond butter, cashew butter, or a sunflower seed butter (like SunButter) to keep it safe and inclusive for everyone.
- Mini Marshmallows: These small, fluffy delights are crucial for creating the comical, spooky teeth of your monster mouths. Their soft texture contrasts beautifully with the crisp apple, adding a touch of sweetness that kids adore.
For the Irresistible Monster Fruit Dip (Optional, but Highly Recommended!)
While the apple mouths are fantastic on their own, this optional fruit dip elevates the experience, turning a simple snack into an extraordinary Halloween centerpiece. It adds a creamy, sweet, and tangy dimension that perfectly complements the apples.
- Yogurt: An orange creme yogurt, such as Yoplait, is ideal for its color and flavor profile, instantly giving the dip a festive, pumpkin-like hue. The creamy base provides a healthy tang that balances the sweetness.
- Marshmallow Creme: This sweet, sticky ingredient is key to achieving the dip’s light, fluffy texture and adds a delightful marshmallow sweetness. It helps bind the ingredients together for a smooth consistency.
- Cream Cheese: Softened at room temperature, cream cheese provides richness and a slight tartness that beautifully complements the other sweet ingredients. Full-fat or reduced-fat cream cheese both work wonderfully, just ensure it’s properly softened to prevent lumps and ensure easy blending.
- Vanilla Extract: Just a touch of pure vanilla extract enhances all the flavors, adding a warm, aromatic depth to the dip. Don’t skip this subtle but impactful ingredient!
- Edible Candy Eyes: This is where the “monster” truly comes to life! While entirely optional, these small, round edible eyes transform your fruit dip into a quirky, fun, and Halloween-ready creation. Scatter them on top of the dip for an extra touch of spooky charm that will surely get a giggle.
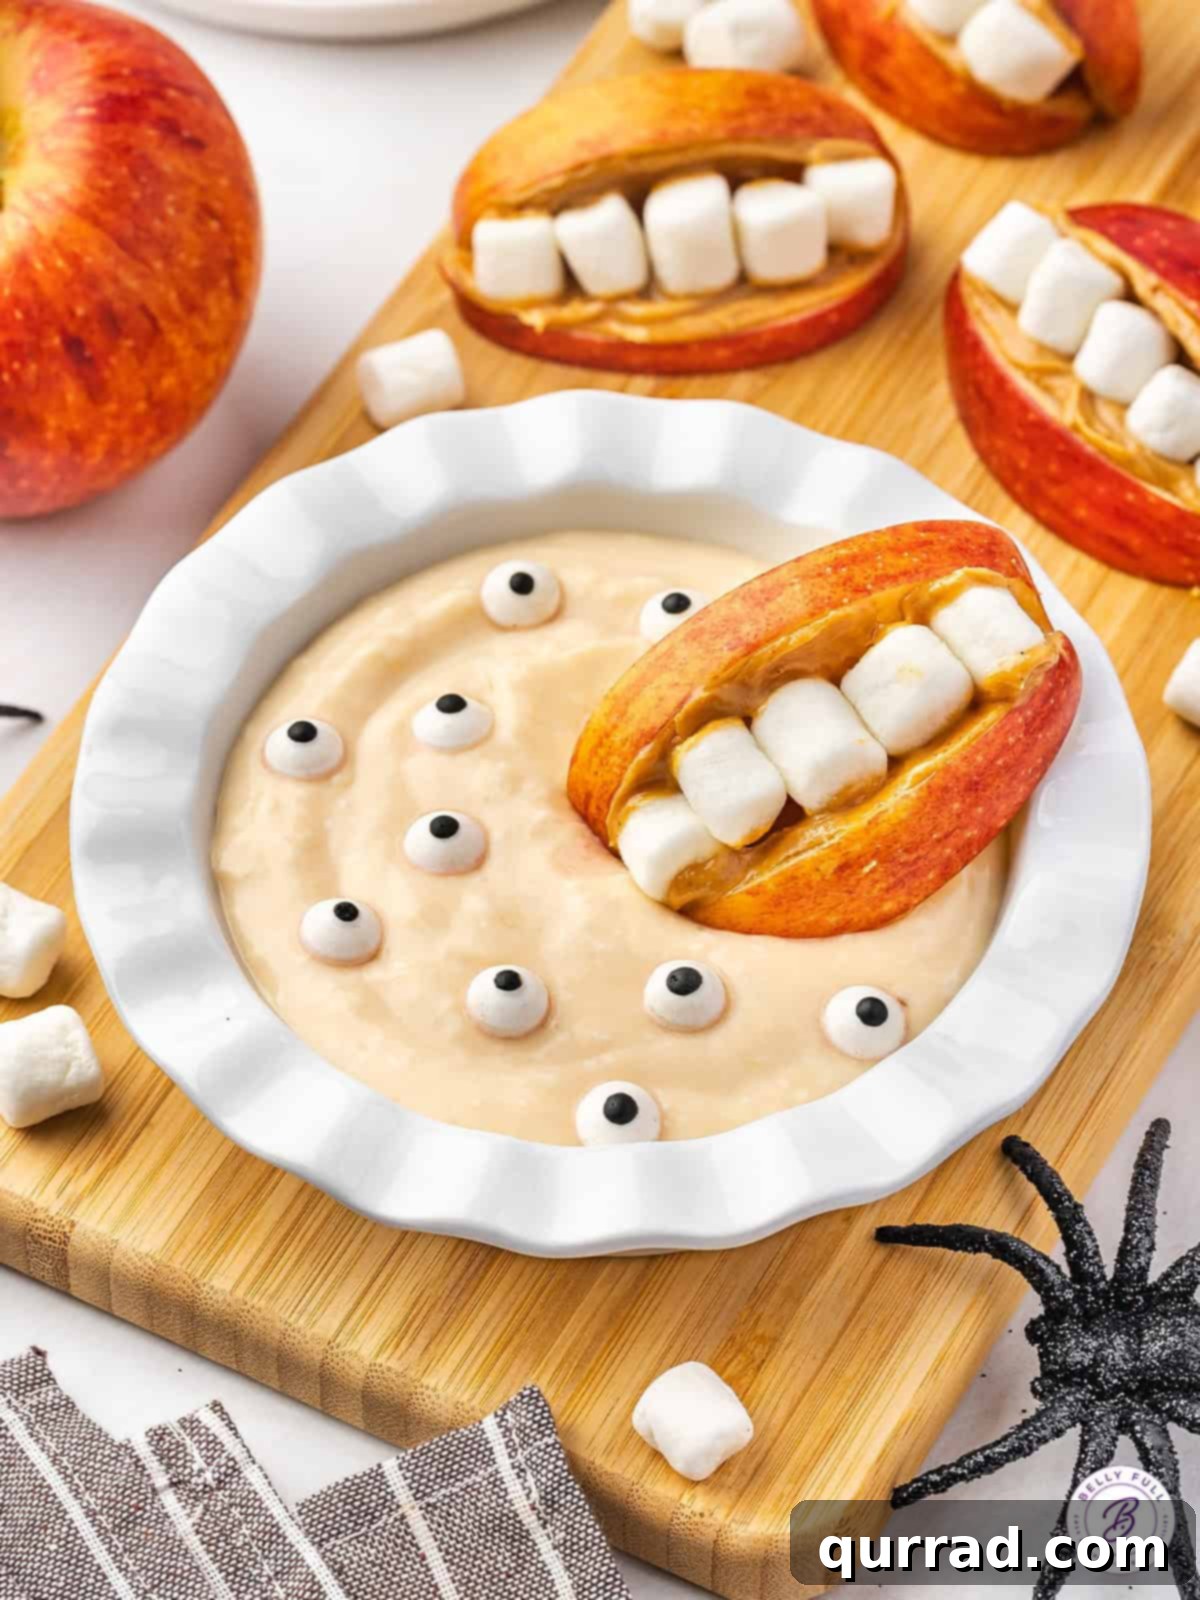
Simple Recipe: Apple Monster Mouths with Fruit Dip
Apple Monster Mouths with Fruit Dip
Prep Time: 15 mins | Total Time: 15 mins
Servings: 4
Ingredients
For the Fruit Dip (optional)
- 6 ounce container orange creme yogurt (such as Yoplait)
- 1/2 cup marshmallow creme
- 4 ounces cream cheese, softened at room temperature
- 1 teaspoon vanilla extract
- Edible candy eyes (optional, for decoration)
For the Apple Mouths
- 1 large red delicious apple (or preferred crisp red apple)
- 1/4 cup creamy peanut butter (or almond butter, sunflower butter)
- Mini marshmallows (about 1 cup, as needed)
Instructions
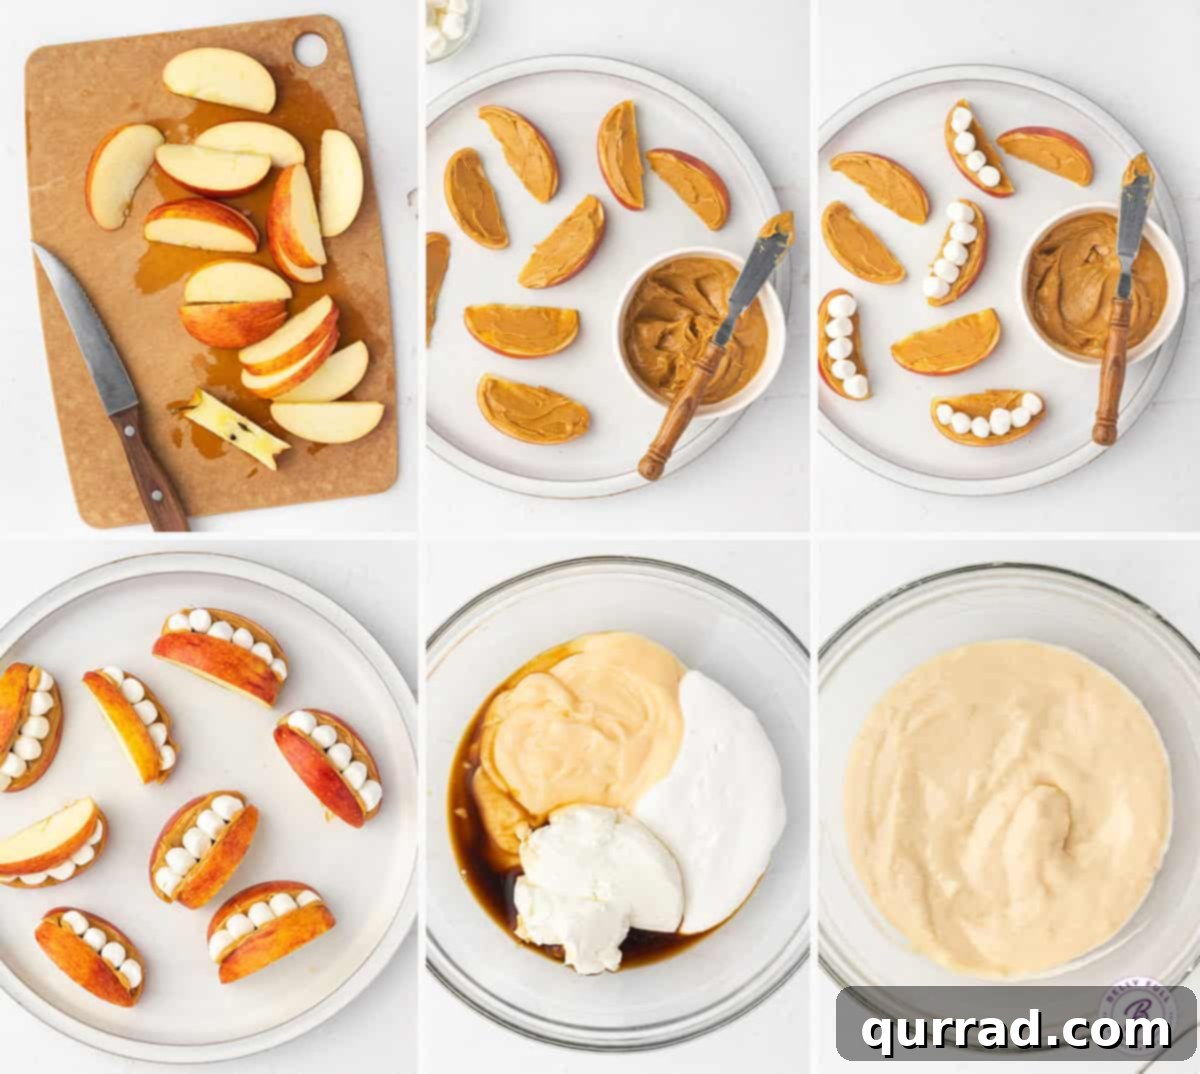
- Prepare the Fruit Dip: In a medium mixing bowl, combine the orange creme yogurt, marshmallow creme, softened cream cheese, and vanilla extract. Use a handheld mixer to blend all ingredients until the mixture is thoroughly combined, smooth, and creamy. Set aside.
- Slice the Apples: Wash and dry your apple. Carefully cut the apple into quarters. Remove the core piece from each quarter. Then, cut each quarter into smaller, thin slices. Aim for slices that are sturdy enough to hold their shape but not too thick.
- Assemble the Monster Mouths: Take one apple slice and spread approximately two teaspoons of peanut butter (or chosen nut/seed butter) evenly over one side. Arrange a single row of mini marshmallows along the peanut butter-covered edge of this slice, creating the “teeth.”
- Form the Mouth: Take another apple slice and spread peanut butter on one side. Gently place this second slice on top of the marshmallows, peanut butter-side down, forming a “sandwich.” Press firmly but carefully to ensure the slices adhere and the marshmallows resemble a set of goofy, spooky teeth. Repeat with remaining apple slices and marshmallows.
- Serve and Enjoy: Transfer the prepared fruit dip to a serving bowl. Scatter the edible candy eyes over the top of the dip for a fun, monstrous effect. Arrange the Apple Monster Mouths alongside the dip and serve immediately for the freshest, crispiest experience.
Nutrition Information (per serving, approximate)
- Calories: 320 kcal
- Carbohydrates: 35g
- Protein: 7g
- Fat: 18g
- Saturated Fat: 8g
- Polyunsaturated Fat: 2g
- Monounsaturated Fat: 7g
- Cholesterol: 32mg
- Sodium: 182mg
- Potassium: 265mg
- Fiber: 2g
- Sugar: 26g
- Vitamin A: 424 IU
- Vitamin C: 3mg
- Calcium: 85mg
- Iron: 0.4mg
Nutritional information is an automatic calculation and may vary based on specific brands and ingredients used. If precise figures are critical, please calculate them independently.
Step-by-Step Guide: How to Bring Your Apple Monsters to Life
Creating these captivating Apple Monster Mouths is incredibly straightforward, perfect for involving young chefs in the kitchen. Here’s a detailed breakdown of each step. Remember, the full printable recipe card with exact measurements is available above!
- Prepare the Ghastly Good Fruit Dip: Begin by combining the orange creme yogurt, marshmallow creme, softened cream cheese, and a dash of vanilla extract in a medium-sized mixing bowl. Using a handheld mixer, whip these ingredients together until you achieve a wonderfully smooth, uniform, and airy consistency. This vibrant orange dip will be the perfect accompaniment to your monster mouths.
- Master the Apple Slices: Thoroughly wash and dry your chosen apple. The key to perfect monster mouths is in the apple slices. Start by cutting the apple into four even quarters. Carefully remove the central core from each quarter, ensuring no seeds remain. Then, slice each quarter into several thinner, crescent-shaped pieces. Aim for slices that are about 1/4 to 1/2 inch thick – thick enough to be sturdy but thin enough to bite into comfortably.
- Assemble the Adorable Monster Mouths: Take one of your apple slices and generously spread about two teaspoons of your preferred creamy nut or seed butter over one flat side. Next, carefully place a single row of mini marshmallows along one of the curved edges of the peanut butter-covered apple slice. These marshmallows will form the playful “teeth” of your monster.
- Seal the Spooky Grin: With another apple slice, spread a similar amount of nut butter on one flat side. Gently press this second slice on top of the marshmallows, ensuring the peanut butter side faces down. Press firmly but carefully to make sure both apple slices adhere well to the marshmallows and to each other, forming a complete “mouth” with the marshmallows peeking out like quirky teeth. Repeat this process until you’ve used all your apple slices and marshmallows.
- Present and Devour: Arrange your freshly assembled Apple Monster Mouths artfully on a serving platter. Alongside them, place the bowl of your orange Monster Fruit Dip, generously garnished with edible candy eyes. This presentation truly brings the spooky theme to life! Serve immediately to enjoy the crispness of the apples and the fresh creaminess of the dip. What a fun and festive treat!
Expert Tips for Perfect Monster Mouths Every Time
To ensure your Apple Monster Mouths are not just delicious but also visually impressive and easy to prepare, consider these helpful tips:
- Preventing Apple Browning: Apples can brown quickly once cut. To slow this process, you can lightly brush the apple slices with a mixture of lemon juice and water (1 tablespoon lemon juice to 1 cup water) before spreading the peanut butter. Alternatively, a quick dip in pineapple juice or even a soda like Sprite can also help preserve their fresh appearance.
- Nut Butter Alternatives: As mentioned, for those with peanut allergies, almond butter, cashew butter, or sunflower seed butter are excellent substitutes. Ensure the consistency is creamy enough to act as a good adhesive for the marshmallows.
- Marshmallow Placement: For the most realistic (and fun!) “teeth,” try to place the mini marshmallows somewhat irregularly. Some can be slightly taller or shorter, mimicking the imperfect charm of a monster’s grin.
- Adding Extra Spookiness: For an even more monstrous look, you can add a sliver of a blanched almond or a sunflower seed as a “fang” at the corners of some mouths before sandwiching the apple slices together. A small dot of red food coloring gel (applied with a toothpick) on the peanut butter can mimic a “gummy” look for the marshmallow teeth.
- Making Ahead: While best served fresh, if you need to prepare these slightly in advance, follow the browning prevention tip. Assemble the mouths without the dip and store them in an airtight container in the fridge for up to a few hours. Assemble the dip separately.
- Choosing the Right Apples: Firm and crisp apples like Gala, Fuji, or Granny Smith (if you prefer a tart flavor) also work wonderfully. Their crunch provides a great contrast to the soft marshmallows and creamy dip.
Creative Serving Ideas for Halloween and Beyond
These Apple Monster Mouths with Monster Fruit Dip are undeniably a Halloween showstopper, but their simple charm makes them versatile for many occasions. Here are some ideas:
- Halloween Party Platter: Serve them as a centerpiece on a spooky buffet. Pair them with other themed treats like 5-Layer Spiderweb Dip for another savory option, a slice of Halloween Poke Cake for dessert, a bowl of sweet and savory Monster Munch, and bubbly Witches Brew Punch for a complete festive spread.
- School Lunch Fun: Pack them in your child’s lunchbox for a surprise Halloween-themed treat. Keep the dip in a separate small container.
- After-School Snack: A perfect, healthier option for a post-school pick-me-up that won’t spoil dinner.
- Fall Harvest Celebrations: While undeniably spooky, the apple and peanut butter combination is perfect for any autumn gathering or harvest festival. Just skip the edible eyes in the dip for a less “monster” look.
- Playdate Treat: A fantastic way to entertain little guests. Kids will love helping to assemble their own monster mouths!
Storing Leftovers: Keep the Spooky Fun Going
Sometimes, even delicious monster mouths survive the initial feast! Here’s how to properly store any leftovers to enjoy later:
- Apple Monster Mouths: Any leftover apple mouths should be tightly wrapped in plastic cling film or stored in an airtight container in the refrigerator. They will keep for a few days, but be aware that the apple slices may start to brown slightly, and the marshmallows will soften further over time. They’ll still be tasty, just not as crisp.
- Monster Fruit Dip: Transfer any remaining fruit dip into a sealed container and refrigerate it. It will stay fresh for up to 3 days. Before serving it again, give it a good stir, as the ingredients may separate slightly during storage. If the dip seems a bit thick, you can add a tiny splash of milk or orange juice and stir to regain its creamy consistency.
Frequently Asked Questions About Apple Monster Mouths
Got questions? We’ve got answers to help you perfect your spooky snack!
- Can I use different fruits? While apples are ideal for their crispness and shape, you could experiment with other sturdy fruits like pear slices for a similar effect, though they may brown even faster. For the “teeth,” a thick slice of banana or even a strawberry half could potentially work, but the classic apple and marshmallow combination is highly recommended for best results.
- How do I make this more allergy-friendly? The recipe is easily adaptable! As mentioned, use a sunflower seed butter (like SunButter) instead of peanut butter for a nut-free version. Ensure your marshmallows and yogurt are also free from any allergens you are avoiding.
- Can I make the fruit dip less sweet? Yes, you can adjust the sweetness to your preference. Start with less marshmallow creme and taste as you go, adding more if desired. You could also use plain Greek yogurt for a tangier base, which will naturally cut through some of the sweetness.
- What if I don’t have a handheld mixer for the dip? A whisk will work just fine! Just be prepared to put in a little more arm work to ensure the cream cheese is fully incorporated and the dip is smooth and lump-free.
- Can I use full-sized marshmallows? While mini marshmallows are perfect for “teeth,” you could cut larger marshmallows into smaller pieces if that’s all you have on hand. Just be sure they are uniform in size to create an even row of teeth.
More Delightful Snack Ideas to Explore
If you loved these fun and easy monster mouths, you might enjoy exploring other creative and delicious snack recipes:
- Caramel Apple Grapes
- Stovetop Popcorn
- Hot Buttered Cheerios
- Stuffed Mini Peppers
- Bacon Crackers
A Sweet & Spooky Conclusion
Whether you’re hosting a grand Halloween bash or simply looking for a fun and healthy activity with your kids, these Apple Monster Mouths with Monster Fruit Dip are an absolute winner. They prove that healthy treats can be just as exciting and delicious as their sugary counterparts, especially when they’re dressed up for a spooky celebration. We hope you and your loved ones enjoy creating and devouring these adorable monsters. Don’t forget to share your creations and thoughts – we love hearing from you!