
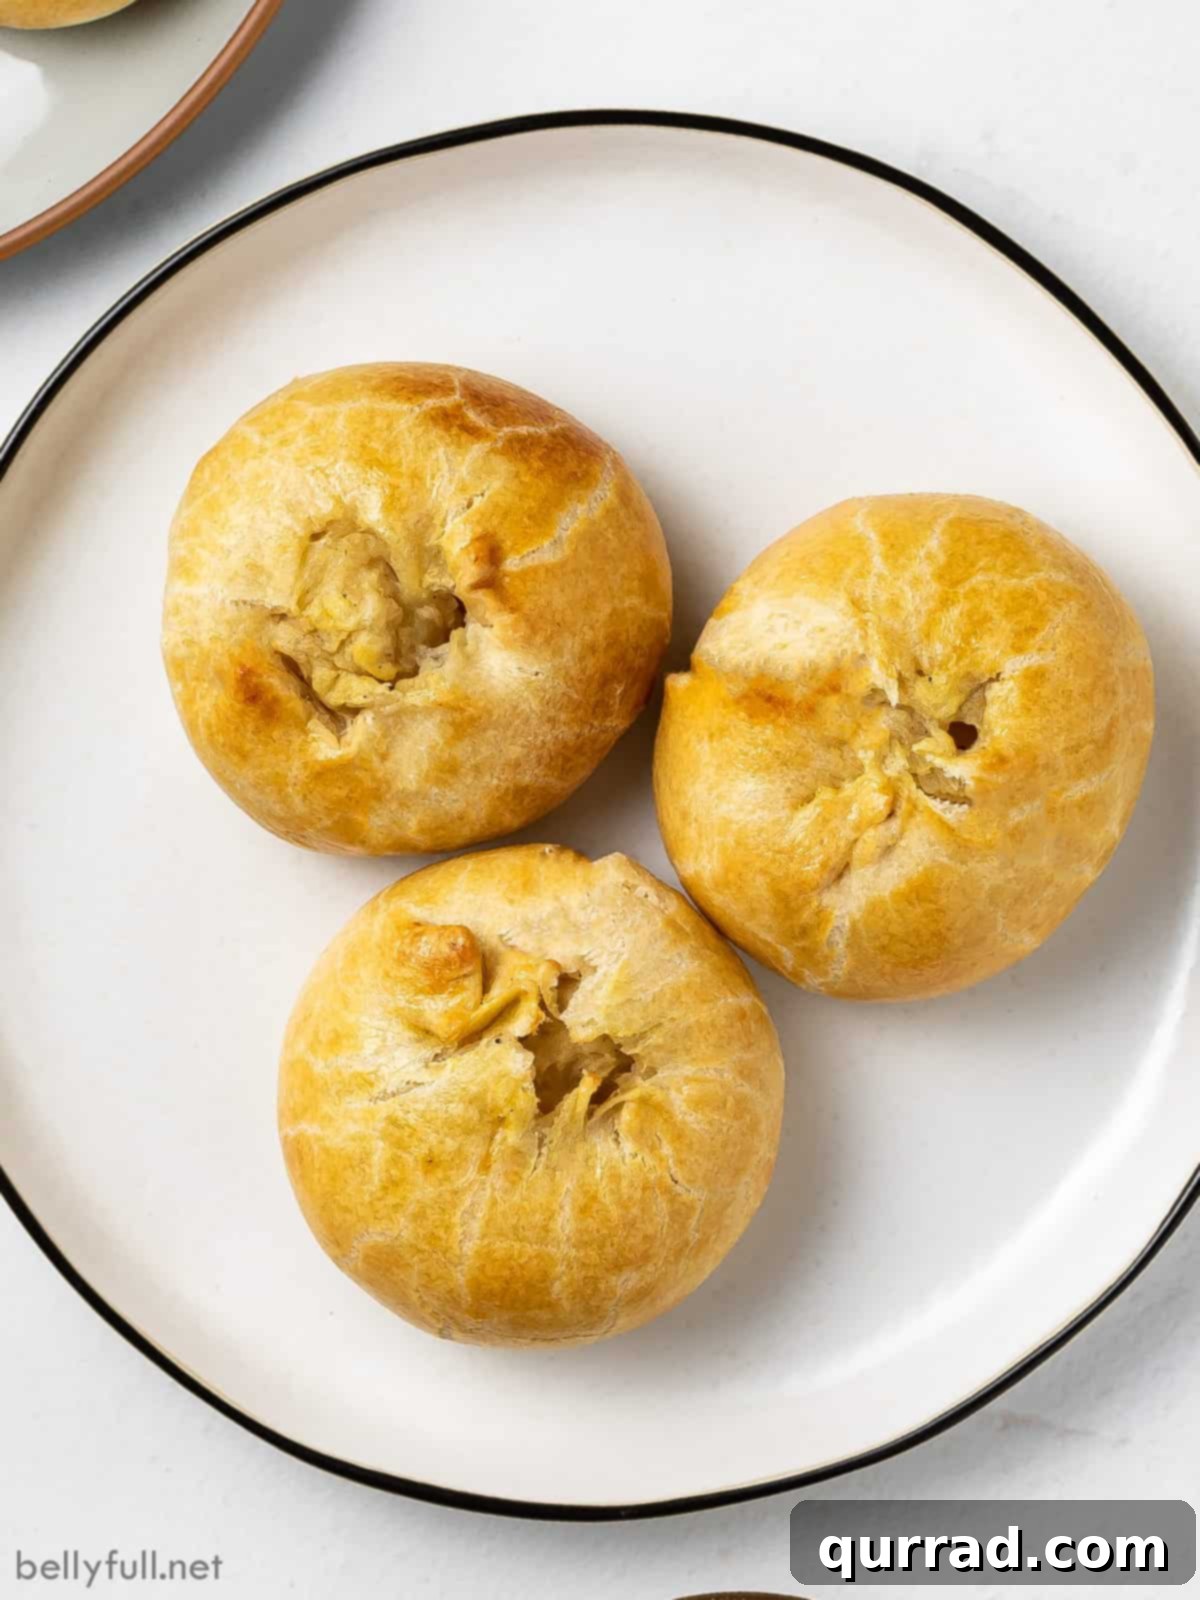
Discover the irresistible allure of a classic potato knish, a timeless culinary delight where a rich, savory potato filling is lovingly enveloped in a delicate, flaky pastry. Each knish boasts a beautifully golden crust that yields to a tender, steamy interior, offering a truly comforting and satisfying bite. This cherished recipe allows you to savor the knish warm, at room temperature, or even cold, making it a remarkably versatile treat for any occasion.
Like countless beloved Jewish dishes, potato knishes carry a deeply rooted history and cultural significance. Today, we delve into the captivating origins of this iconic nosh, alongside providing a meticulously crafted recipe, complete with comprehensive step-by-step photos and a helpful video tutorial, ensuring your homemade knishes are nothing short of perfect.
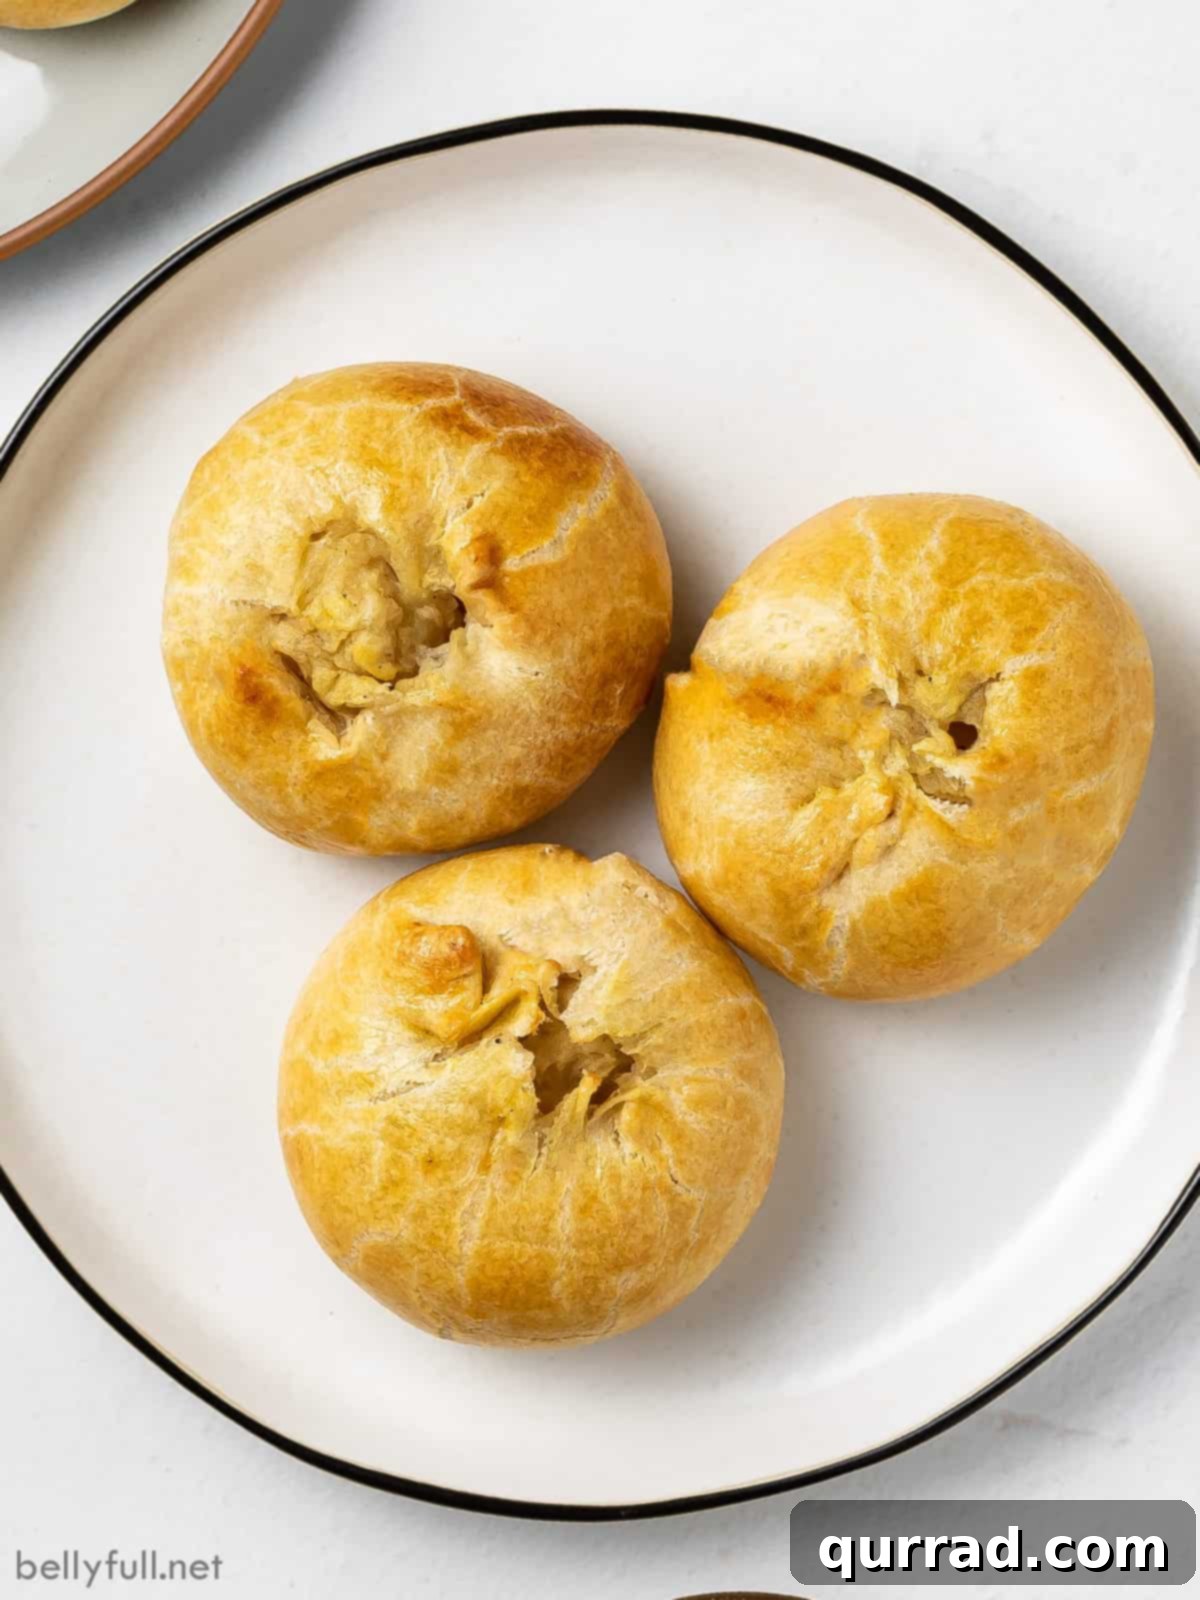
The Ultimate Potato Knishes Recipe: A Taste of Tradition
For those who have long yearned to master the art of making an authentic New York-style knish, your quest ends here. Reliable, easy-to-follow recipes for potato knishes are surprisingly scarce, often leaving home cooks feeling frustrated and uncertain. Recognizing this challenge, I embarked on an extensive journey of experimentation, dedicating countless hours and an almost “obscene” number of batches to perfect this recipe. The good news is, I’ve done all the hard work for you, meticulously refining every detail to create a foolproof guide. Now, you can bypass the endless searching and confidently bake your own delicious, traditional potato knishes, guided by clear instructions, detailed photos, and a practical video tutorial. Huzza!
Full transparency: crafting homemade potato knishes is a labor of love that requires time and patience. From preparing the dough and the flavorful potato mixture to sautéing onions, meticulously forming each pastry, and finally baking them to golden perfection, you should set aside a few hours for this culinary endeavor. However, the effort is undeniably worth it! The unparalleled taste and texture of fresh, homemade knishes far surpass any store-bought alternative. One of their most appealing qualities is their versatility; knishes are equally delightful served warm straight from the oven, at room temperature, or even cold. This makes them an ideal portable snack for busy days, a satisfying addition to any lunchbox, or a fantastic centerpiece for picnics and gatherings.
What is a Knish? A Journey into Eastern European Comfort Food
The precise origins of the knish remain a delightful mystery, lost to the annals of culinary history. However, its widespread popularity in America can be traced back to 1910 when Yonah Schimmel’s Knishery opened its doors on Manhattan’s bustling Lower East Side, initially offering these savory pastries as popular street food from a pushcart. This pioneering establishment is often credited with introducing and popularizing the knish to a broader American audience, transforming a humble ethnic dish into a beloved urban staple. Like many resourceful Jewish Eastern European immigrants, Schimmel understood the art of creating nourishing and delicious food with limited ingredients and resources, a skill that elevated the knish to a symbol of resilience and culinary ingenuity. Since then, the knish has become an indispensable item at Jewish delicatessens across the country, a testament to its enduring appeal.
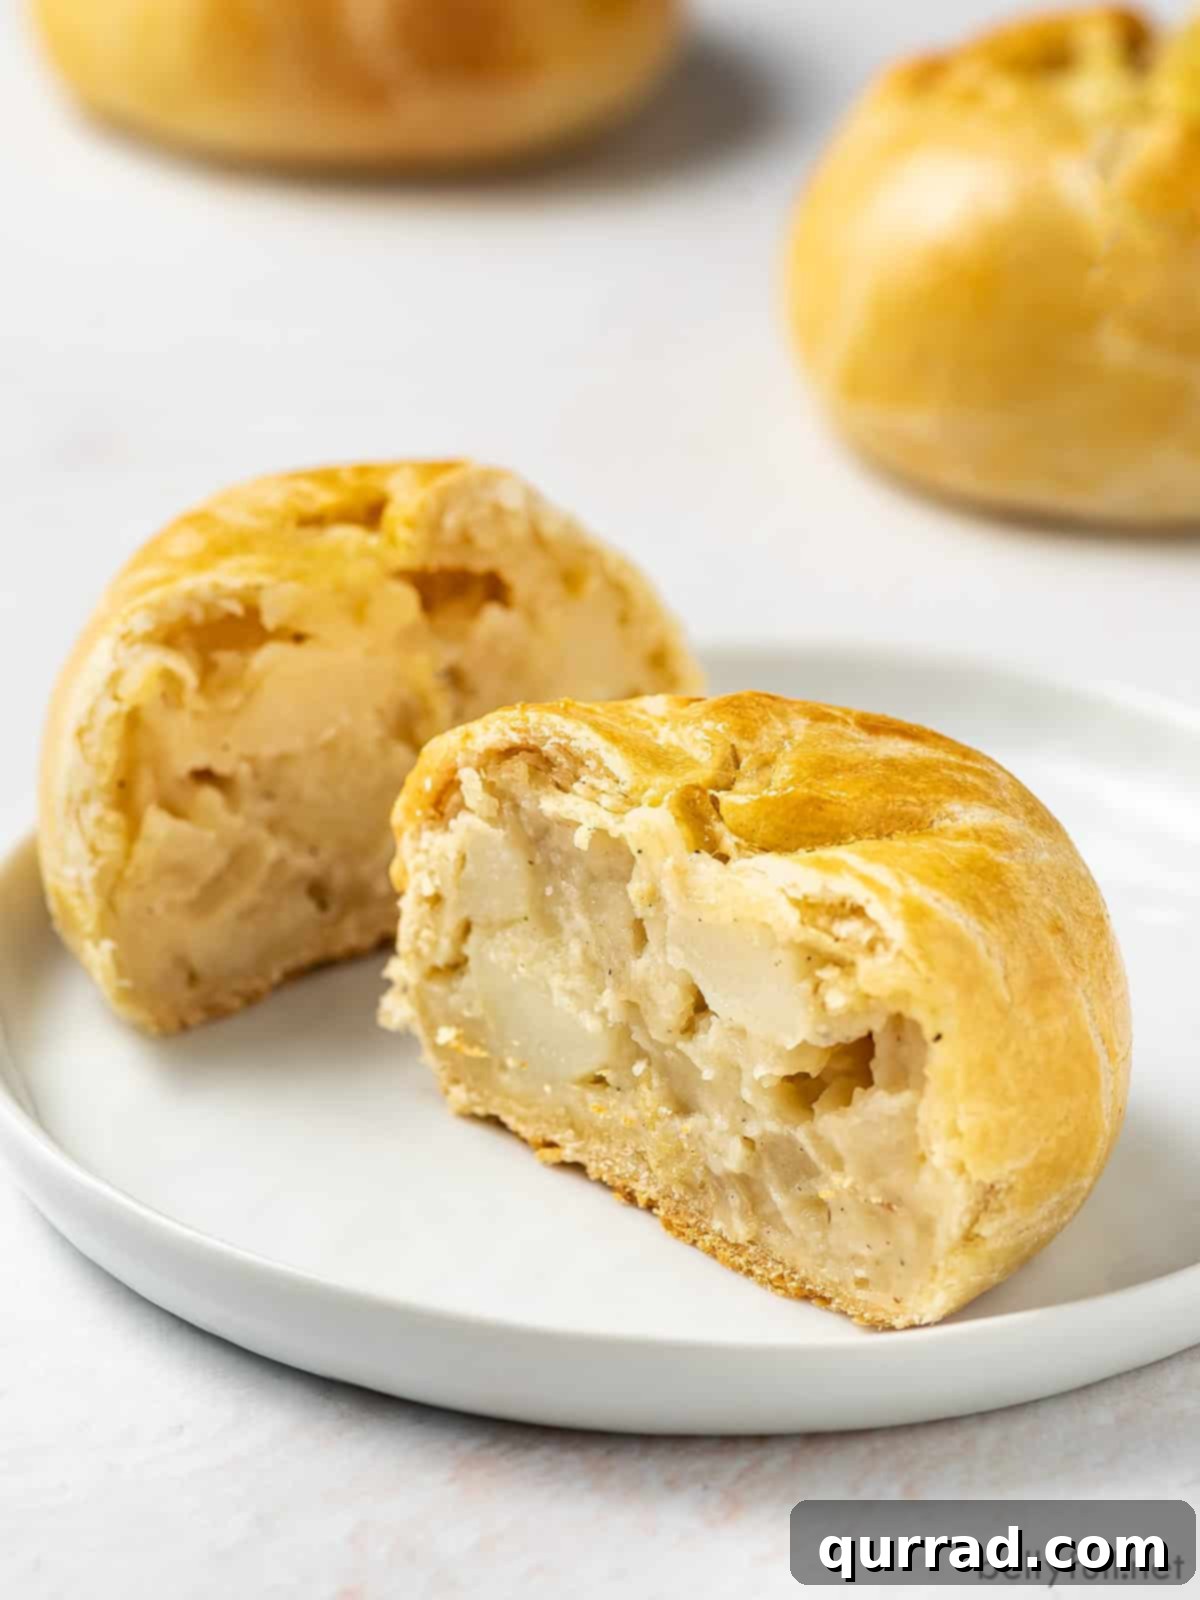
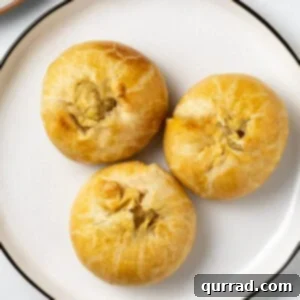
While the knish has undergone various Americanized and mass-produced transformations, with countless variations emerging over time, there’s truly nothing that compares to the authentic, classic rendition. At its heart, a knish is a generous portion of seasoned potato mixture meticulously wrapped in a delicate, often slightly stretchy, homemade dough. This pastry is then brushed with an egg wash and baked until it achieves a mesmerizing golden-brown hue. The result is a textural masterpiece: an exterior that is delightfully crisp and flaky, giving way to an interior that is wonderfully tender, steamy, and bursting with savory flavor. It’s a glorious celebration of carbohydrates stuffed with even more carbohydrates, and it asks for no apologies. One well-made knish is surprisingly substantial and incredibly satisfying.
Traditionally, an authentic knish is characterized by its distinct round shape, a departure from the square, often deep-fried versions found in some contemporary eateries. It is always baked, never deep-fried, allowing the delicate pastry to develop its characteristic flaky texture without becoming greasy. Crucially, the best knishes are always made with homemade dough, which provides a superior texture and flavor profile compared to ready-made puff pastry. While the primary ingredient is almost invariably potato, the filling offers room for creative variations, often incorporating deeply caramelized onions for an added layer of sweetness and depth. Other traditional fillings might include chopped meats, such as succulent leftover corned beef (a truly delicious addition!), or even kasha (buckwheat groats). Although firmly established as a Jewish “nosh” or snack, the simple, wholesome deliciousness of a knish transcends cultural boundaries. After all, who could resist the comforting combination of flaky pastry and perfectly seasoned potatoes?
Potato Knish Recipe Ingredients: The Heart of the Flavor
For this authentic knish recipe, I’ve chosen to adhere to the cherished traditional methods, featuring a rich, homemade dough and a deeply satisfying potato-onion filling. Each ingredient plays a vital role in achieving that perfect balance of flavor and texture that defines a classic knish. (Detailed measurements and a printable recipe card can be found below.)
- For the Knish Dough: The foundation of an exceptional knish lies in its dough. While many of the ingredients are standard pantry staples—such as all-purpose flour, eggs, canola oil, white vinegar, baking powder, and kosher salt—one ingredient truly elevates the flavor: schmaltz. Schmaltz, which is rendered chicken fat, is a cornerstone of traditional Jewish cuisine, imparting an incredibly rich, savory depth and helping to create that signature flaky texture. You can typically find schmaltz conveniently jarred near other cooking oils in specialty stores or well-stocked supermarkets. If schmaltz is unavailable, or if you’re not keeping kosher, bacon grease serves as an excellent, flavorful substitute, contributing a similar richness. The white vinegar in the dough acts as a tenderizer, helping to create a more pliable and delicate pastry.
- For the Knish Filling: The star of the knish is its potato filling. I highly recommend using Yukon Gold potatoes for their naturally buttery flavor and creamy texture when mashed, which holds up beautifully without becoming gummy. Complementing the potatoes are finely diced yellow onions, which are sautéed until deeply caramelized, adding a profound sweetness and aromatic complexity. Sour cream contributes a delightful tang and extra creaminess, while shredded sharp white cheddar cheese introduces a savory, slightly pungent note that perfectly balances the rich potatoes. A touch of butter, additional schmaltz, kosher salt, and freshly ground pepper complete this harmonious blend, creating a filling that is both comforting and exquisitely flavorful.
How to Make Knish: A Step-by-Step Guide
As previously mentioned, making knishes is not overly complicated, but it does require a dedicated chunk of time, making it an ideal weekend project. The process is divided into four key stages: 1) preparing the dough, 2) crafting the savory filling, 3) assembling and forming the knishes, and 4) baking them to golden perfection. Here’s a brief overview of each step, designed to guide you through this rewarding culinary journey. (Remember to scroll down to the printable recipe card for precise details and measurements.)
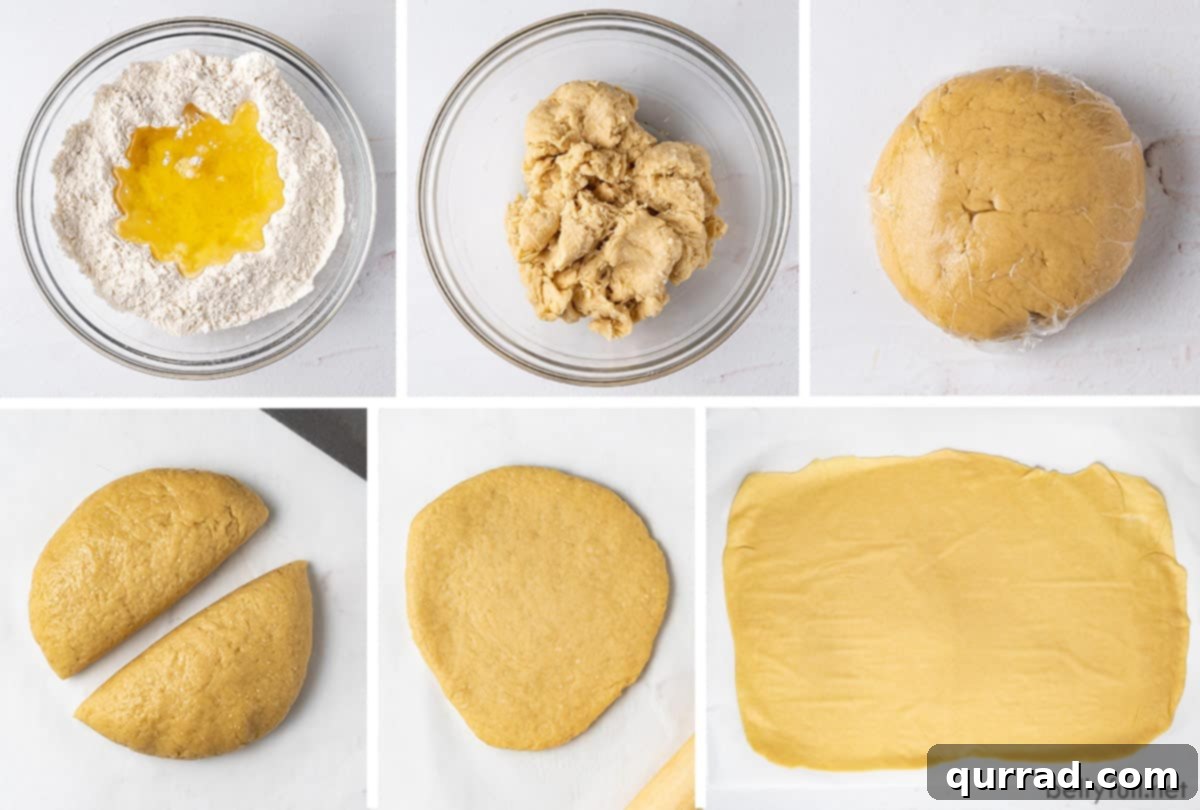
Crafting the Knish Dough. The process of making knish dough shares similarities with preparing a perfect pie crust. Begin by whisking together the dry ingredients—flour, salt, and baking powder—in a large bowl. Create a well in the center of the dry mixture, then pour in the wet ingredients: beaten egg, white vinegar, canola oil, melted schmaltz, and warm water. Gradually combine the ingredients, mixing by hand until the dough gracefully pulls together into a cohesive mass. Turn the dough out onto a lightly floured surface and knead it gently yet thoroughly until it transforms into a soft, smooth, and wonderfully elastic ball. This kneading develops the gluten, contributing to the dough’s desired pliability and delicate texture. Once kneaded, wrap the dough tightly in plastic wrap and set it aside to rest while you prepare the filling. This resting period is crucial, as it allows the gluten to relax, making the dough easier to roll out thinly without tearing.
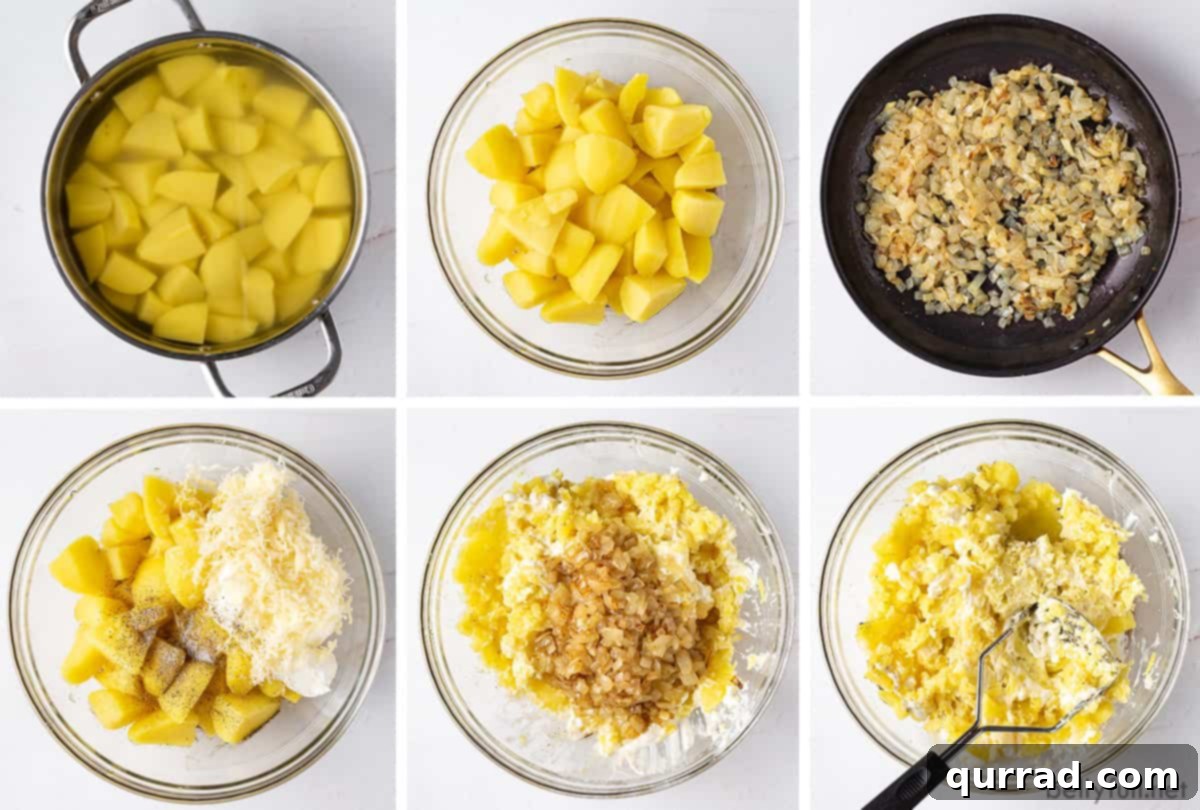
Preparing the Knish Filling. The heart of your knish is its rich and flavorful filling, a delightful medley of seasoned mashed potatoes, tangy sour cream, sharp cheddar cheese, and deeply caramelized diced onions. To begin, boil the peeled and quartered Yukon Gold potatoes in generously salted water until they are just fork-tender. Drain them thoroughly, then transfer to a large mixing bowl. Mash them with sour cream, shredded cheese, and a touch of salt and pepper, aiming for a texture that retains some slight lumps – you’ll mash them further with the onions, and you want to avoid a gummy consistency. Separately, sauté the diced yellow onions in butter and schmaltz over medium heat until they turn soft and achieve a beautiful golden-brown color, which typically takes about 10 minutes, unlocking their natural sweetness. Once the onions are perfectly caramelized, add them to the mashed potatoes and combine thoroughly. Season again with salt and pepper to taste. It is absolutely critical that the potato filling cools down to room temperature, or at least is only slightly warm, before you proceed with assembly. If the filling is hot, it will melt the delicate dough, making it incredibly difficult to work with and compromising the knish’s flaky structure.
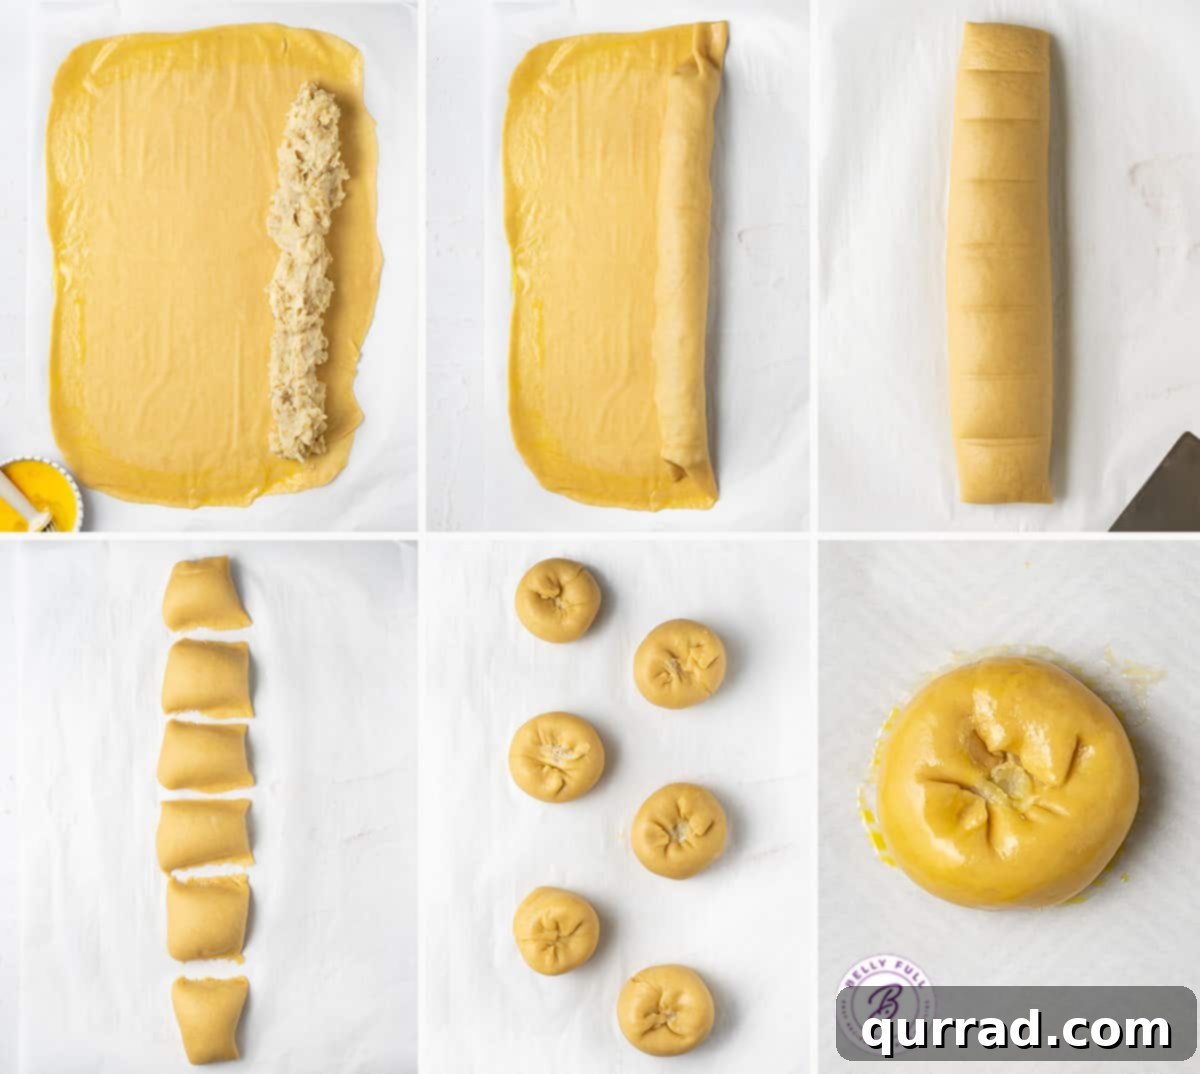
Assembly: Bringing the Knish to Life. With both the dough and filling prepared, it’s time for the magical step of assembly. First, divide the rested knish dough in half. Take one half and flatten it into a rough rectangle on a lightly floured surface. Using a rolling pin, carefully roll the dough out into a thin, large rectangle, aiming for a thickness of about 1/8-inch. Don’t be afraid to gently pull at the corners to achieve the desired shape and thinness; the elasticity of the dough will allow for this. Next, divide the cooled potato filling in half. Place one half of the filling in a log shape along one long end of the rolled-out dough, leaving a small border of uncovered dough (approximately 2-3 inches) on all sides. In a small bowl, beat an egg with a splash of water to create an egg wash. Brush this egg wash over the opposite long end of the dough and slightly up the sides of the filling-covered edge. Carefully stretch the dough over the filling, then gently roll it up towards the egg-washed side, creating a sealed log. Ensure the seam is pressed firmly to seal, then roll the entire log so the seam-side rests on the bottom. Trim off any excess dough from the ends to create neat edges.
Forming the Knish. Once you have a perfectly sealed dough log, use a bench scraper or a sharp knife to gently mark (do not cut all the way through yet) the dough into 8 equal pieces. These marks will serve as your guides. Next, lightly flour the side of your hand and press it firmly into each mark, gently rubbing back and forth against the counter to cleanly separate each individual knish portion. For each piece, position it with one cut end facing down and the other facing up. To achieve the traditional round knish shape, carefully squish down the top of the pastry and tuck all the edges and filling inwards towards the center. This creates a compact, round, and beautifully textured knish. Repeat this process for all the marked portions.
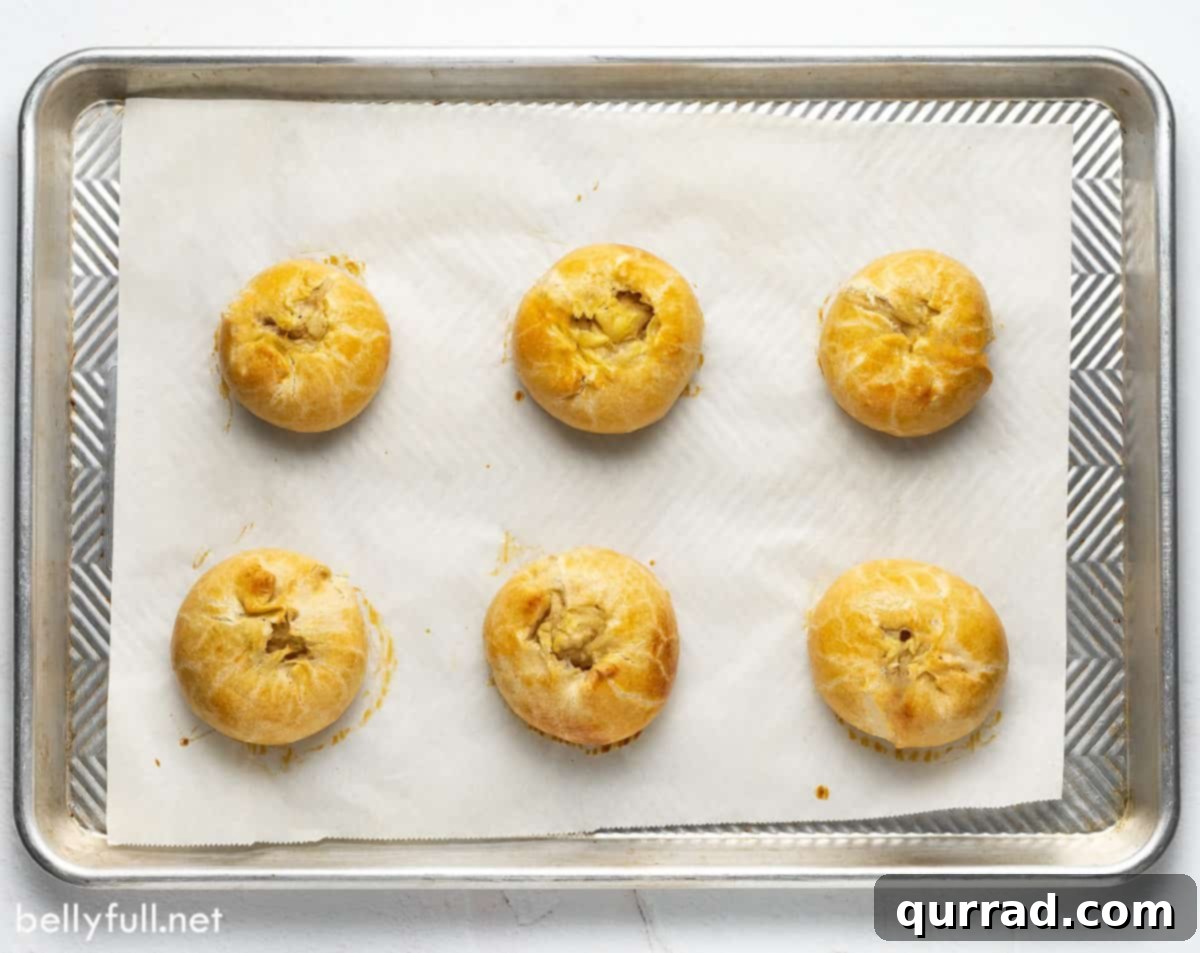
Bake to Golden Perfection. Prepare your baking sheets by lining them with parchment paper or silicone mats. Lightly brush the bottoms of each formed knish with olive oil, then carefully arrange them on the prepared baking sheets, ensuring adequate space between each one. Finally, brush the tops of all the knishes generously with the remaining egg wash; this will give them that signature golden, glossy finish. Bake in a preheated oven at 375 degrees F (190 degrees C) for approximately 40 minutes, or until the knishes are beautifully golden brown and the crust is flaky and crisp.
What to Eat with Potato Knishes: Serving Suggestions and Pairings
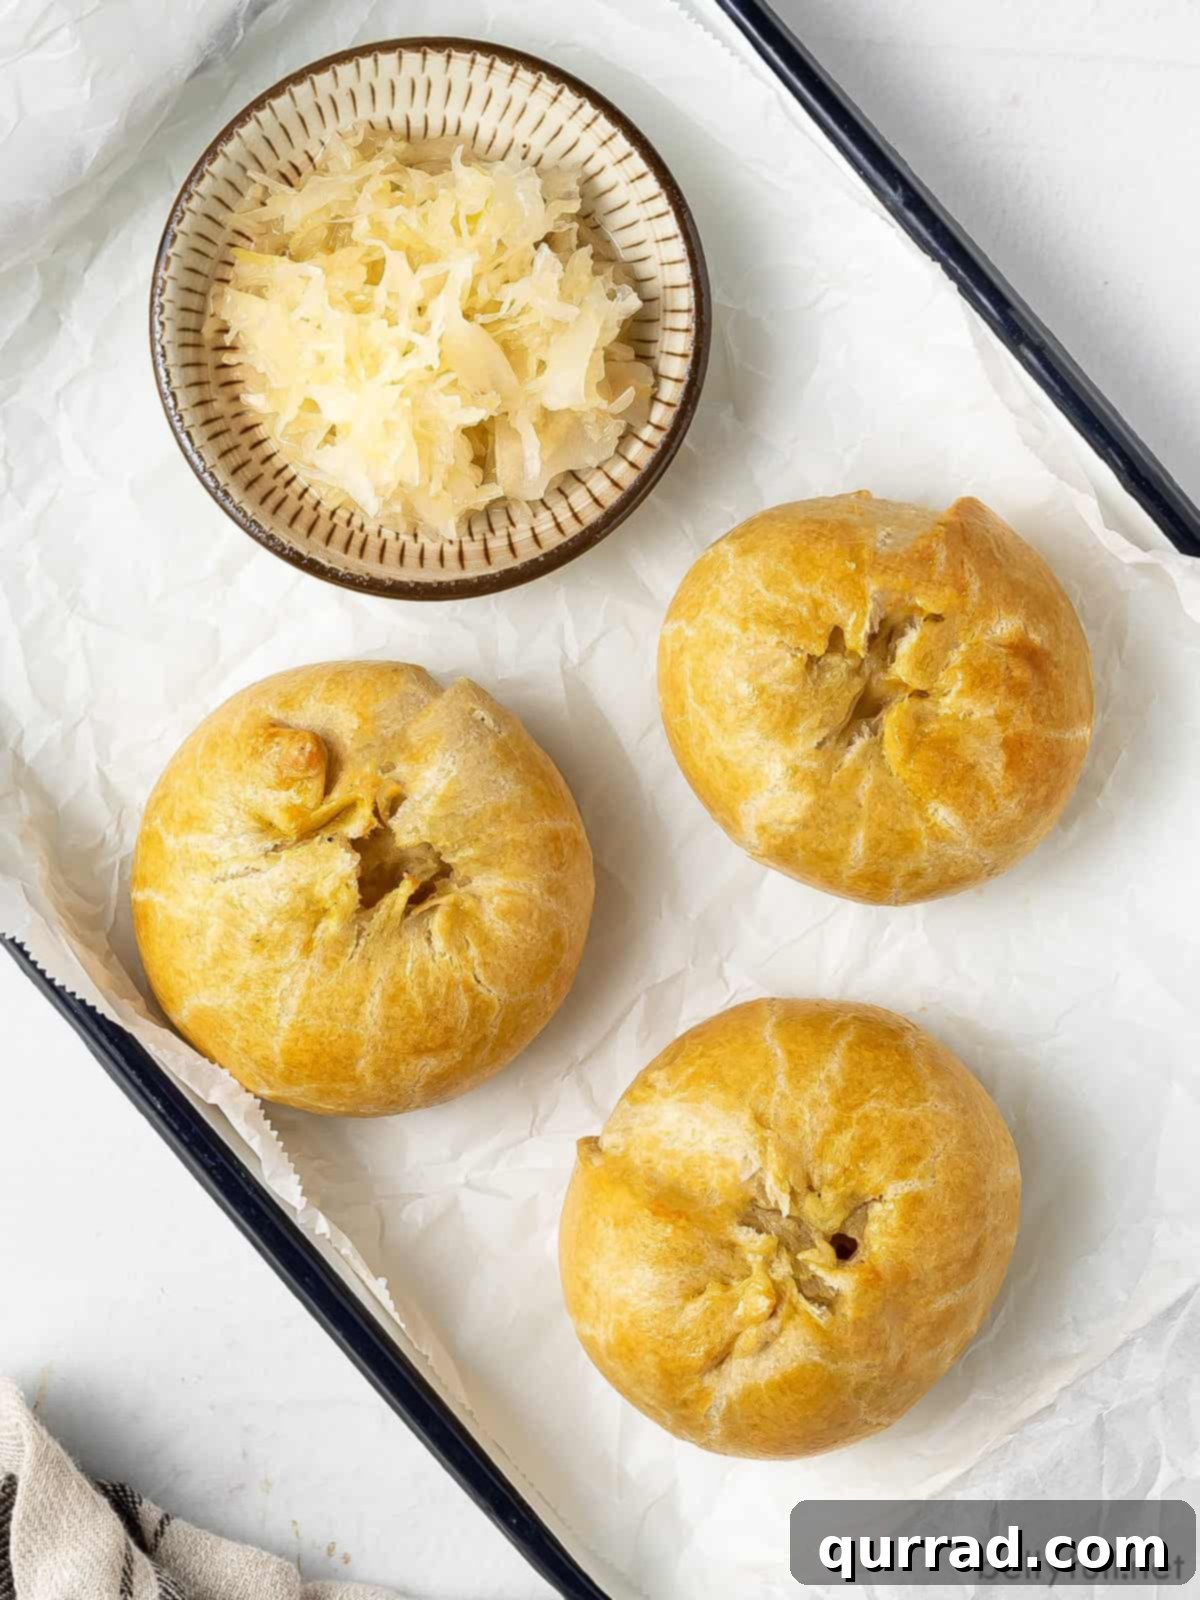
While potato knishes are undeniably delicious enjoyed entirely on their own, their rich, savory flavor can be beautifully complemented by a variety of traditional accompaniments. Serving them with a robust, spicy mustard, a zesty horseradish, or a tangy sauerkraut is a popular and highly recommended choice, adding a delightful counterpoint to the knish’s comforting richness. Beyond these classics, consider pairing your knishes with a dollop of cool sour cream for added creaminess, a side of sweet applesauce for a surprising contrast, or even simple dill pickles for a refreshing crunch. Knishes are remarkably versatile in temperature preference; they are equally excellent served warm straight from the oven, at room temperature, or even cold. This adaptability makes them a fantastic choice for a casual snack, a satisfying lunchbox item, or a staple at picnics and potlucks. For a more substantial meal, knishes can be served alongside a hearty bowl of matzo ball soup, a simple green salad, or even as a side dish to a classic roast brisket, creating a truly authentic and fulfilling dining experience.
How to Store and Enjoy Potato Knishes Later
One of the many advantages of homemade potato knishes is how well they store, making them perfect for meal prep or enjoying delicious leftovers. Here’s how to best store and reheat your knishes:
- Make the Dough Ahead: To streamline your knish-making process, you can prepare the dough up to 3 days in advance. Simply wrap it tightly in plastic wrap and store it in the refrigerator. When you’re ready to use it, allow the chilled dough to sit at room temperature for about 30-60 minutes to soften slightly before attempting to roll it out. This makes it more pliable and easier to work with.
- Storing Leftovers: Any leftover baked knishes should be wrapped securely in aluminum foil or placed in an airtight container. Store them in the refrigerator, where they will maintain their freshness and flavor for up to 5 days.
- Freezing for Later: Knishes freeze exceptionally well, making them an excellent candidate for making a double batch! Once your baked knishes have cooled completely to room temperature, arrange them in a single layer on a rimmed baking sheet. Place the baking sheet in the freezer until the knishes are solid, typically 1-2 hours. This step prevents them from sticking together. Once frozen, transfer the solid knishes to a freezer-safe container or a heavy-duty freezer bag, ensuring as much air is removed as possible to prevent freezer burn. They will keep beautifully frozen for up to 2 months. To thaw, simply transfer them to the refrigerator overnight.
- Reheating Instructions: If you prefer your knishes warm, the oven is the best method for reviving their crispness. Preheat your oven to 350°F (175°C) and gently reheat the knishes for about 10-15 minutes, or until they are warmed through and the crust has regained some of its crisp texture. Alternatively, for a quicker reheat, you can pop them in the microwave for 1-3 minutes, depending on the number of knishes, until the center is hot. Be aware that microwave reheating will make the dough softer and less crisp, but they will still be delicious.
More Jewish Food Favorites:
Explore the rich and diverse world of Jewish cuisine with these other cherished recipes:
- Challah Bread
- Matzo Ball Soup
- Potato Latkes
- Rugelach
- Charoset
- Kugel
- Sufganiyot (Jelly Donuts)
- Cheese Blintz
We hope you adore this delicious and authentic potato knish recipe! We’d love for you to leave a rating and review below if you try it. Don’t forget to follow Belly Full on TikTok, Facebook, Instagram, Pinterest, and YouTube for more delightful recipes!
Potato Knish
Pin
Ingredients
FOR THE DOUGH
- 2 1/2 cups all-purpose flour, (or more as needed), spooned and leveled
- 1 teaspoon kosher salt
- 1 teaspoon baking powder
- 1 large egg, beaten
- 1 teaspoon white vinegar
- 1/4 cup canola oil
- 1/4 cup schmaltz, (rendered chicken fat) – SEE NOTE
- 1/2 cup warm water
FOR THE POTATOES
- 2 1/2 pounds Yukon gold potatoes, peeled and quartered (about 6 medium/large)
- 1 tablespoon kosher salt
- 1/2 cup sour cream
- 1 cup shredded sharp white cheddar cheese
- salt and pepper, to taste
FOR THE ONIONS
- 1/4 cup butter, sliced
- 3 cups diced yellow onion
- 2 tablespoons schmaltz
- 1 1/2 teaspoons kosher salt
- salt and ground black pepper, to taste
EGG WASH
- 1 egg
- 2 teaspoons water, or as needed
- 1 tablespoon olive oil, or as needed (for brushing pan bottoms)
Instructions
MAKE THE DOUGH
-
Whisk flour, salt, and baking powder together in a large bowl. Create a well in the center. Add the beaten egg, white vinegar, canola oil, melted schmaltz, and warm water into the well. Mix by hand, gradually incorporating the dry ingredients into the wet, until the dough comes together and forms a cohesive mass. Turn the dough out onto a lightly floured surface and knead for about 5-7 minutes until it becomes soft, smooth, and elastic. Wrap the kneaded dough tightly in plastic wrap to prevent it from drying out, and set it aside to rest at room temperature while you prepare the filling (or place it in the fridge for up to 3 days if preparing ahead).
MAKE THE MASHED POTATOES
-
Place the peeled and quartered Yukon Gold potatoes in a large pot. Add 1 tablespoon of kosher salt (do not use table salt as it can make potatoes gluey) and enough cold water to cover the potatoes by about 1 inch. Bring the water to a rolling boil over high heat, then reduce the heat to a gentle simmer. Cook until the potatoes are just fork-tender, which usually takes around 10-15 minutes, depending on their size. Be careful not to overcook them, as this can lead to a watery filling. Drain the cooked potatoes thoroughly in a colander, shaking off any excess water, then transfer them to a large mixing bowl. Add in the sour cream, shredded cheddar cheese, and a pinch of salt and pepper to taste. Mash the potatoes using a potato masher, leaving some small lumps for texture. You’ll mash again with the onion mixture, so avoid over-mashing at this stage to prevent a gummy consistency.
SAUTE THE ONIONS
-
In a large skillet, melt the butter over medium heat. Add the diced yellow onion, schmaltz, and 1 1/2 teaspoons of kosher salt. Cook and stir frequently, allowing the onions to slowly caramelize until they are very soft and deeply golden brown. This process should take about 10-15 minutes, developing a rich, sweet flavor. Transfer the caramelized onion mixture directly to the bowl with the warmed mashed potatoes. Season the combined mixture with a touch more salt and freshly ground black pepper to taste. Mash everything together until well combined. Allow the filling to cool completely to room temperature before proceeding with assembly. This step is crucial; a hot filling will melt and break down the delicate knish dough, making it impossible to work with.
ASSEMBLE THE KNISH
-
Preheat your oven to 375 degrees F (190 degrees C). Line two large baking sheets with silicone baking mats or parchment paper to prevent sticking.
-
Divide the rested knish dough in half. Take one half and flatten it into a rough rectangle on a lightly floured surface. Using a rolling pin, roll the dough out into a thin, large rectangle, aiming for a consistent thickness of about 1/8-inch. Gently pull the dough from the corners as needed to achieve the desired rectangular shape.
-
Place half of the cooled potato filling in a log shape along one long end of the rolled-out dough, ensuring it is about 3 inches away from the edges. In a small bowl, whisk together 1 egg with 2 teaspoons of water to create an egg wash. Brush this egg wash over the opposite long end of the dough and slightly up the sides of the dough around the filling. Carefully stretch the dough to fully cover the filling, then gently roll it up towards the egg-washed side, creating a tight log. Fold the last 3 or 4 inches of the dough over the top, then press firmly along the seam to seal the roll completely. Turn the roll over so that the seam-side is now on the bottom. Trim off any excess dough from the ends of the log to create neat, even edges.
-
Using a bench scraper or a sharp knife, gently mark (do not cut all the way through) the dough log into 8 equal pieces. Lightly flour the side of your hand and press firmly into each marked section. Gently rub back and forth against the counter to cleanly separate each piece. Position each individual knish piece with one cut end facing down and the other facing up. To form the traditional round knish shape, gently squish down on the top of each piece and carefully tuck all the exposed edges and filling inwards toward the center. This creates a compact, plump, and appealingly round knish.
-
Repeat the entire assembly and forming process with the remaining half of the dough and the other half of the potato filling.
-
Lightly brush the bottoms of the formed knishes with olive oil and carefully place them on the prepared baking sheets, leaving adequate space between each for even baking. Brush the tops of all the knishes generously with the leftover egg wash.
BAKE
-
Bake in the preheated oven for approximately 40 minutes, or until the knishes are puffed up, beautifully golden-brown on top, and the crust appears flaky and crisp. Let them cool on the baking sheets until they are just warm or reach room temperature before serving.
Serve your delicious homemade knishes with your favorite mustard, a zesty horseradish, or a tangy sauerkraut for an authentic experience.
Video
For a visual guide, watch our step-by-step video on how to make the perfect Potato Knish. (Note: Video content is embedded from a third-party service.)
Notes
Temperature of filling before assembly: It is crucial that the potato filling is cooled to room temperature or is only slightly warm before you begin assembling the knishes. If the filling is hot, it will melt the delicate dough, making it very difficult to work with and potentially compromising the texture of your baked knishes.
Nutrition
Nutritional information given is an automatic calculation and can vary based on the exact products you use and any changes you make to the recipe. If these numbers are very important to you, I would recommend calculating them yourself.