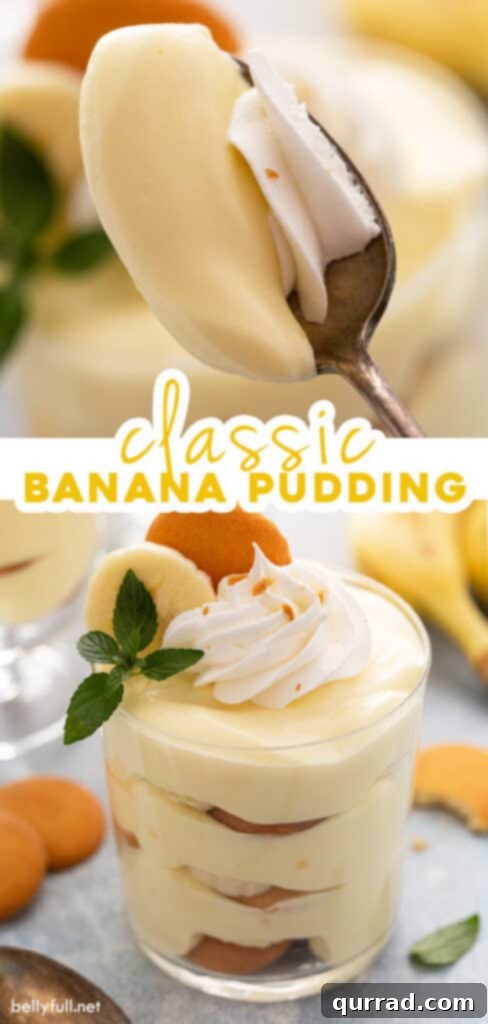
Delight in the sweet embrace of a true Southern classic with this incredible no-bake homemade Banana Pudding recipe. More than just a dessert, it’s a comforting journey back to childhood, a taste of nostalgia, and a perfectly creamy indulgence in every single spoonful. Forget complicated baking, because this easy-to-make treat brings together layers of rich flavor and delightful texture without ever needing to turn on your oven.
If you’re a fan of bananas and easy desserts, be sure to explore our other no-bake banana creations, like the luscious Banana Cream Lush and the refreshing Frozen Chocolate Banana Pops. These recipes are perfect for satisfying your sweet tooth with minimal effort!
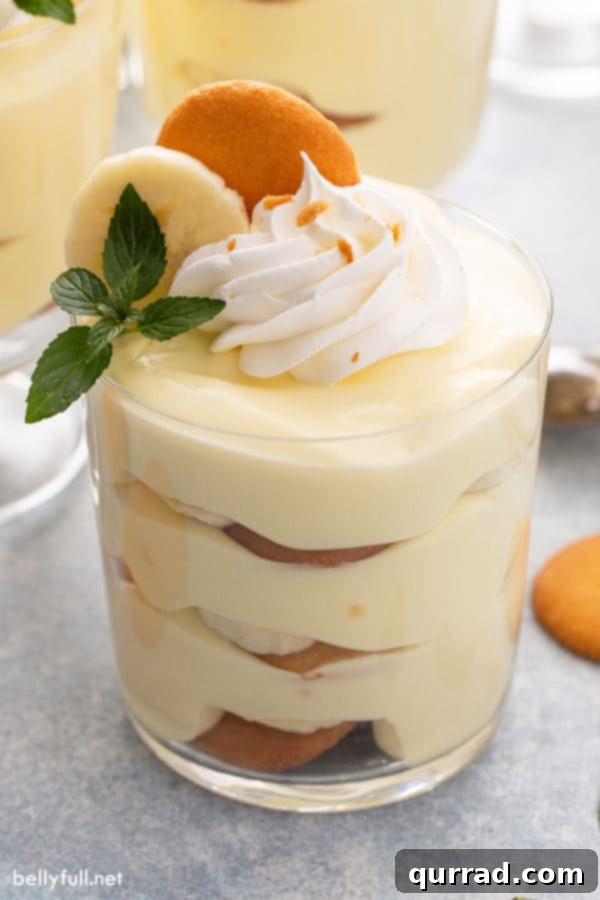
Bananas are a constant presence in my kitchen, a versatile fruit that often inspires spontaneous dessert creations. While some eventually find their destiny in a warm loaf of banana bread, the perfectly ripe (but still firm!) ones are often destined for quick, delightful treats like fried bananas or, most frequently, this exceptional banana pudding. It’s a simplified, yet equally sensational, version of a banana cream pie, often elegantly presented in individual parfait glasses, making it ideal for both casual family gatherings and more special occasions.
What Exactly is Banana Pudding? A Southern Delicacy Explored
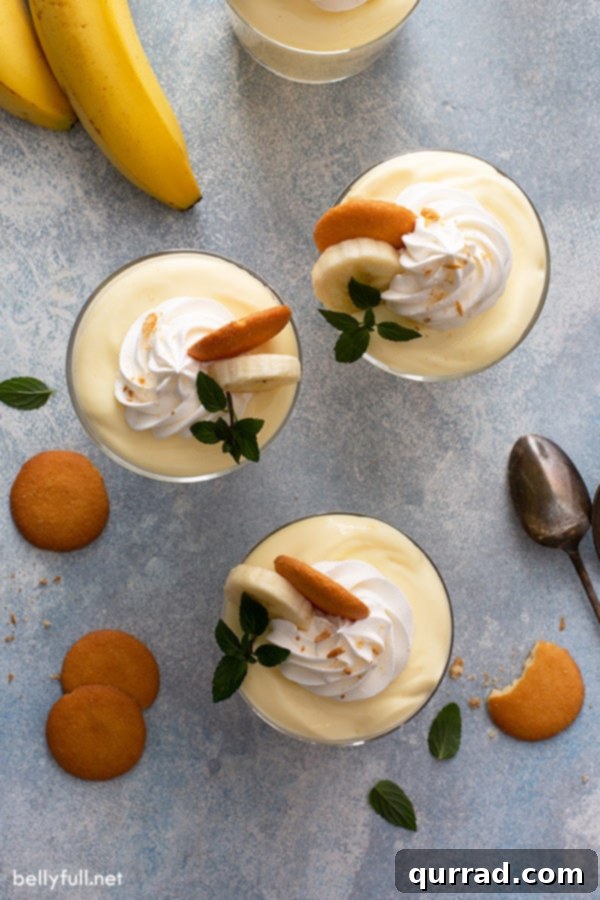
At its heart, banana pudding is an iconic old-fashioned Southern dessert, cherished for its simple yet profound flavors and textures. Traditionally, it’s a symphony of layers, typically featuring crisp butter cookies (most famously Nilla Wafers), a rich, creamy vanilla custard, and perfectly ripe, sliced bananas. This delightful ensemble is then often crowned with either a delicate meringue, baked to a golden perfection, or a generous dollop of sweet, airy whipped cream. The beauty of banana pudding lies in its presentation versatility; it can be majestically assembled in a large glass serving dish, a decorative trifle bowl, or charmingly portioned into individual custard cups or parfait glasses, each offering a personal slice of heaven. For many, classic banana pudding holds a place in American culinary tradition akin to the reverence Italians have for Tiramisu—a universally beloved dessert that evokes comfort and celebration.
The origins of banana pudding are deeply rooted in the American South, where bananas became more widely available and affordable in the late 19th and early 20th centuries. It quickly became a staple at church potlucks, family reunions, and holiday feasts, evolving into a symbol of hospitality and homemade goodness. Its appeal lies not just in its taste but also in its accessibility; made with readily available ingredients, it’s a dessert that anyone can create, yet it always feels special. While traditional recipes might involve baking the custard or meringue, our no-bake version captures all the authentic flavors and textures with even greater ease, making it a perfect choice for warm weather or when you simply crave a quick, comforting treat.
Why This No-Bake Banana Pudding Recipe Stands Out
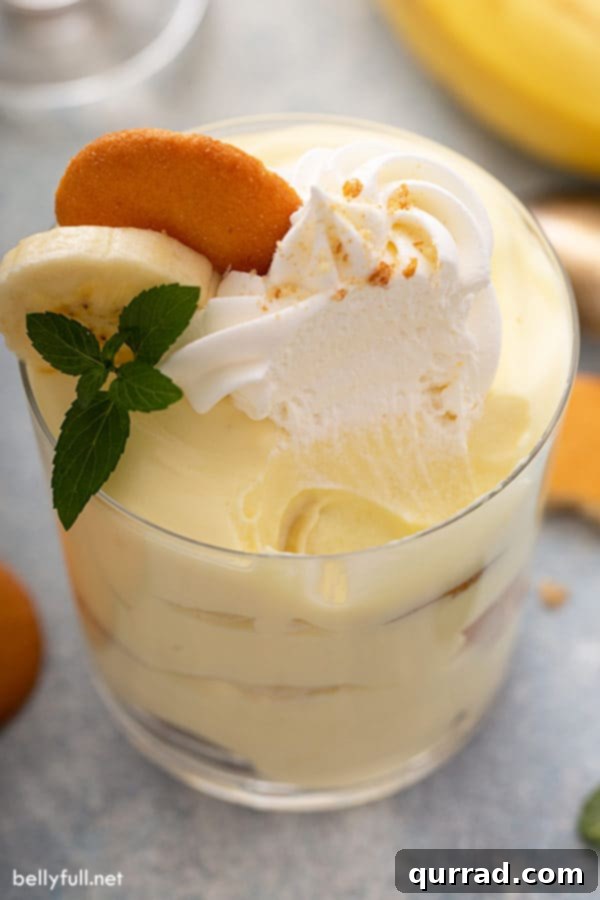
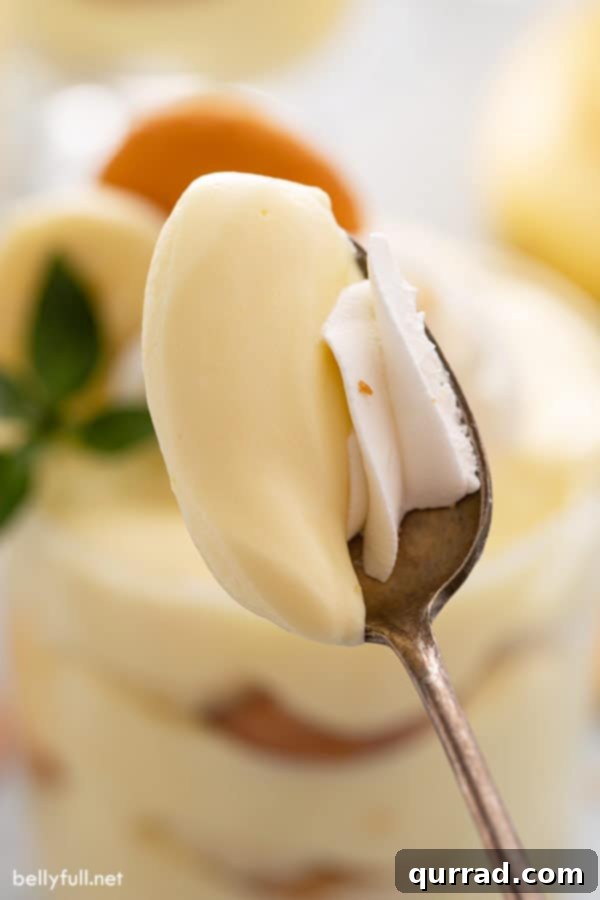
While there are countless banana pudding recipes out there, this no-bake homemade version truly elevates the classic to new heights. The genius of a no-bake approach means less time in the kitchen and more time enjoying this delectable dessert. What sets this recipe apart is not just its simplicity, but the inclusion of a few key ingredients that transform a good banana pudding into an absolutely unforgettable one. We ditch the store-bought whipped topping in favor of real, freshly whipped cream, adding an unparalleled lightness and authentic dairy flavor. But the true game-changer? A delightful combination of cream cheese and sweetened condensed milk in the pudding base. This duo creates an impossibly rich, velvety, and smooth custard-like texture that makes every bite feel incredibly decadent, without any cooking required. It’s this thoughtful blend that gives our banana pudding an irresistible depth and creaminess that is simply addictive.
Beyond its luxurious texture, this recipe is incredibly versatile. It’s the perfect dessert for a summer barbecue because it doesn’t require oven space, making preparation stress-free. For holiday gatherings, its nostalgic charm and crowd-pleasing flavor ensure it’s always a hit. And for those days when you simply need a comforting treat, the ease of assembly means a delicious dessert is just a few steps away. We’ve refined the process to ensure maximum flavor and minimal fuss, giving you a banana pudding that tastes like it came from a beloved Southern grandmother’s kitchen, but with modern convenience.
Essential Ingredients for Your Perfect Homemade No-Bake Banana Pudding
Crafting this phenomenal banana pudding requires a careful selection of ingredients, each playing a vital role in achieving its signature taste and texture. Here’s a detailed look at what you’ll need and why these choices make all the difference:
- Instant Pudding Mix: For this recipe, we lean on instant French vanilla pudding mix, which provides a traditional, delicate vanilla backdrop that beautifully complements the bananas. However, feel free to experiment! Using instant banana pudding mix will intensify the banana flavor, or you could even combine both vanilla and banana for a nuanced profile. Just ensure it’s instant pudding, not cook-and-serve, for the no-bake method to work correctly.
- Whole Milk: This is absolutely non-negotiable for the pudding mix. The higher fat content in whole milk is crucial for the pudding to set properly, yielding that thick, luxurious consistency we’re aiming for. Skim or low-fat milk simply won’t achieve the same firm, creamy result.
- Heavy Cream and Powdered Sugar: While many recipes opt for Cool Whip for convenience (which is perfectly acceptable!), we believe that nothing beats the natural, rich taste and superior texture of freshly whipped heavy cream. Beating heavy cream with powdered sugar creates a light, airy, and truly decadent topping that elevates the entire dessert. The powdered sugar dissolves smoothly and sweetens without adding graininess.
- Cream Cheese: This is arguably the “secret weapon” that takes this simple banana pudding to an entirely new level of richness and creaminess. Blended into the pudding base, softened cream cheese adds a slight tang and an incredibly smooth, almost cheesecake-like texture that makes the pudding exceptionally satisfying and luxurious.
- Sweetened Condensed Milk: This thick, sweet, and incredibly rich milk product is another cornerstone of our pudding base. When blended with cream cheese, it contributes to the pudding’s luscious texture and provides a perfectly balanced sweetness, eliminating the need for additional granulated sugar in the pudding mixture itself.
- Cookies: The classic choice for banana pudding is undoubtedly Nilla wafer cookies, which readily soften into a cake-like consistency as they absorb the pudding’s moisture. However, don’t limit yourself! Pepperidge Farm Chessmen cookies offer a slightly richer, buttery flavor and a lovely rectangular shape, while Lorna Doone shortbread cookies provide a crumbly, buttery base. Essentially, any plain butter cookie will work wonderfully. For a different twist, some even enjoy using slices of pound cake, which absorb the flavors beautifully and offer a denser texture.
- Bananas: The star of the show! You’ll need ripe but still firm banana slices. Look for bananas that are fully yellow with minimal to no brown spots. Overly ripe bananas will be too soft and might become mushy, while underripe ones lack the signature sweetness and flavor that makes this dessert so special. Slicing them uniformly ensures even distribution and appealing presentation.
Crafting Your Delicious Banana Pudding: A Simple No-Bake Guide
One of the greatest joys of this dessert is how effortlessly it comes together. With no baking required, you’ll be amazed at the depth of flavor and luscious texture you can achieve. Follow these straightforward steps to create layers of pure bliss:
- Prepare the Luxurious Whipped Cream: Begin by chilling a large mixing bowl and your whisk attachment (if using a stand mixer) or beaters (if using a hand mixer) in the freezer for about 10-15 minutes. This cold environment is crucial for achieving stiff peaks. Once chilled, pour the cold heavy whipping cream and powdered sugar into the bowl. Beat on medium-high speed until firm, stiff peaks form. Be careful not to overbeat, or it could turn grainy. Transfer this beautiful whipped cream to the refrigerator to keep it cold while you prepare the pudding.
- Create the Velvety Pudding Base: In a separate large mixing bowl, beat together the softened cream cheese and the can of sweetened condensed milk until the mixture is completely combined and wonderfully smooth. There should be no lumps of cream cheese. Next, add the instant pudding mix and the cold whole milk. Continue to beat for approximately 5 minutes, or until all ingredients are thoroughly incorporated and the pudding has begun to thicken significantly. Don’t forget to scrape down the sides of the bowl periodically to ensure everything is evenly mixed. Once thickened, gently fold in about half of the chilled whipped cream you prepared earlier. This step lightens the pudding and adds another layer of creamy texture. Reserve and chill the remaining whipped cream for garnishing later. For easier layering, transfer the pudding mixture into a large piping bag (you can also just use a spoon or a large scoop).
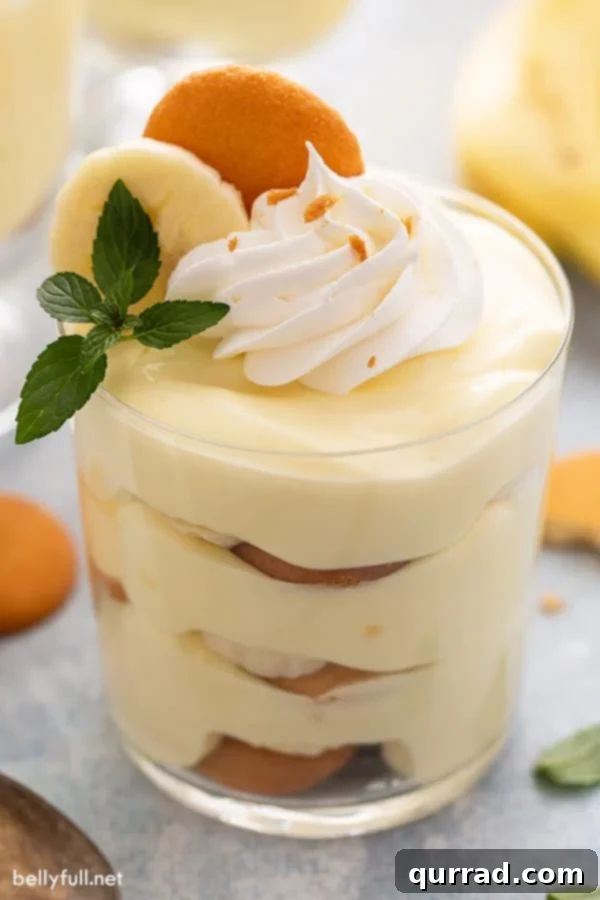
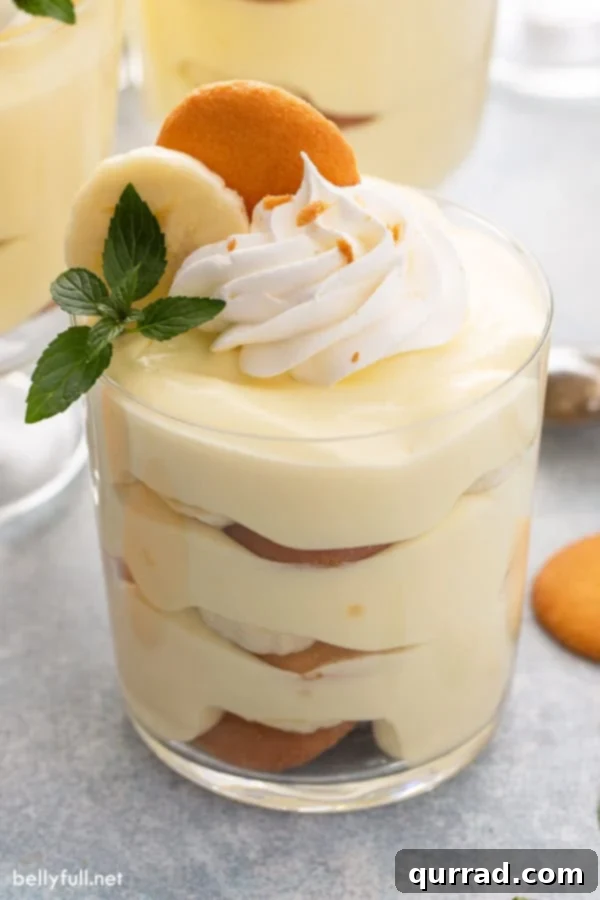
- Mastering the Layers: Assembly Tips: Now for the fun part – assembling your pudding! You can use individual parfait glasses for elegant single servings (typically 12 glasses for this recipe), or a large glass trifle bowl or serving dish for a communal dessert. Start by arranging a single layer of Nilla wafer cookies (about 2-3 per parfait glass, or enough to cover the bottom of a large dish). Follow this with an even layer of freshly sliced bananas (3-4 slices per glass). Then, pipe or spoon a generous layer of the pudding mixture over the bananas. Repeat these layers until you’ve used all your ingredients or reached your desired height, typically ending with a layer of pudding. Ensure the bananas are mostly covered by pudding to minimize browning.
- The Crucial Chill Time for Perfect Texture: Once assembled, cover your banana pudding tightly with plastic wrap. This is essential to prevent a skin from forming on the pudding and to protect it from absorbing other refrigerator aromas. Place it in the refrigerator to chill for a minimum of 4 hours, or ideally, overnight. This chilling period allows the flavors to meld beautifully and, more importantly, gives the cookies ample time to soften and transform into that delightful, cake-like consistency that is a hallmark of classic banana pudding.
- Garnish and Serve for a Stunning Presentation: Just before serving, retrieve the reserved whipped cream from the fridge. Pipe or dollop a generous amount on top of each individual pudding or over the entire large dish. For an extra touch of elegance and to visually highlight the star ingredient, garnish each serving with a fresh banana slice and a whole Nilla wafer cookie. Serve immediately and prepare for rave reviews!
Achieving the Ideal Set: How Long Does Banana Pudding Need to Chill?
The chilling time is a critical step for achieving the perfect banana pudding, directly impacting the texture of your cookies. The duration required largely depends on your cookie choice and your preference for their softness.
Generally, Nilla wafers, being lighter and more porous, tend to soften relatively quickly. For these, a minimum of 4 hours in the refrigerator is sufficient for them to absorb enough moisture from the pudding. However, for an ideal texture where the cookies are thoroughly softened but still retain a subtle hint of their original form, 6-8 hours is usually perfect. We recommend not exceeding 12 hours for chilling, as beyond this point, the cookies can become overly mushy, and the bananas might start to break down too much, affecting the overall integrity of the dessert.
If you opt for denser cookies like Pepperidge Farm Chessmen or Lorna Doone shortbread, anticipate a slightly longer softening period. These might require closer to the 6-8 hour mark to reach a desirable cake-like consistency. For those who enjoy a bit of crunch in their banana pudding, a wonderful alternative is to crush the cookies and sprinkle them over the layers right before serving, ensuring they maintain their crispness. Alternatively, if you prefer the cookies to remain crunchy within the pudding layers, reduce the chill time significantly or add them just an hour or two before serving, understanding that they will still absorb some moisture over time. Experimentation will help you find your personal preference for the ultimate pudding texture.
Expert Tips to Prevent Bananas from Browning in Banana Pudding
One of the most common dilemmas when making banana pudding is preventing the sliced bananas from browning, which can quickly make an otherwise appealing dessert look less appetizing. While there are a few methods, each comes with its own considerations:
- Lemon Juice Method: The most widely known technique is to lightly toss your banana slices with a small amount of lemon juice. The ascorbic acid in lemon juice acts as an antioxidant, significantly slowing down the oxidation process that causes browning. After tossing, gently pat the slices dry with a paper towel to remove excess liquid. The drawback here is that bananas can absorb some of that lemon flavor, which some find undesirable in their sweet pudding. If you’re not a fan of a citrusy hint, this might not be your preferred method.
- Submersion is Key: A more subtle approach is to ensure your banana slices are completely submerged within the creamy pudding layers. By minimizing their exposure to air, you naturally reduce the rate of oxidation. This is why layering quickly and generously covering the bananas with pudding is so important.
- Serve Promptly: The freshest banana pudding is the best banana pudding! While chilling is essential for the cookies to soften, consuming the dessert within the first 24-36 hours will ensure the bananas are at their most appealing. Beyond this, even submerged bananas will eventually start to show signs of browning.
- Alternative Acids: For those who dislike lemon, other mild acids can be used sparingly. A tiny splash of pineapple juice (which also contains bromelain, an enzyme that can help) or even a citrus-flavored soda like Sprite or 7-Up can offer similar anti-browning benefits without a strong taste, if used very lightly. Again, pat dry after a quick dip.
- Choose Your Bananas Wisely: Starting with perfectly ripe but firm yellow bananas, rather than those already showing brown spots, will naturally give you more time before browning becomes an issue.
Enhance Your Banana Pudding: Creative Recipe Notes & Variations
This classic no-bake banana pudding is fantastic as is, but it also serves as a wonderful canvas for creative enhancements and variations. Here are a few ideas to customize your dessert:
- Cover the Pudding with Plastic Wrap: Always ensure your pudding is tightly covered with plastic wrap, directly touching the surface, especially if it’s chilling for an extended period. This not only prevents a rubbery “skin” from forming on top but also stops the pudding from absorbing unwanted aromas from other items in your refrigerator, preserving its pure, sweet flavor.
- A Touch of Southern Charm: Spiced Rum Infusion: For an adult twist, consider adding a splash of rum. You can lightly coat the banana slices with a bit of dark or spiced rum before layering for a “Bananas Foster” inspired flair. Alternatively, stir a few splashes of rum (coconut rum would be particularly delicious!) directly into the pudding mixture for a subtle, warming note that enhances the overall flavor profile.
- Crushed Cookies for a Cake-Like Texture: Instead of layering whole Nilla wafers, you can crush them into crumbs. This technique results in a pudding with a more uniform, cake-like texture throughout, as the crumbs absorb the pudding much quicker and more completely. If you prefer this style, keep in mind they will soften faster, so adjust your chill time accordingly.
- Understanding Nutritional Information: Each serving of this delightful banana pudding (when divided into 12 parfaits) contains approximately 555 calories. While it’s certainly an indulgence, we believe it’s worth every single one! If you’re mindful of calorie intake, you can easily adjust the serving size by using smaller glasses, which will naturally reduce the calorie count per portion. Remember, all nutritional figures provided in the recipe card below are estimates, and exact values can fluctuate based on the specific brands and slight modifications you make to the recipe.
- Gluten-Free Considerations and Alternatives: As written, this banana pudding recipe is not gluten-free due to the use of Nilla wafer cookies and typical instant pudding mixes, which often contain gluten. However, it can easily be adapted! Look for certified gluten-free vanilla wafers or shortbread cookies, and ensure your instant pudding mix is explicitly labeled gluten-free. With these simple substitutions, those with gluten sensitivities can still enjoy this wonderful dessert.
- Serving Ideas and Occasions: While individual parfait glasses are charming, consider serving this in a large trifle bowl for a dramatic presentation at holidays or potlucks. Top with extra whipped cream, toasted coconut flakes, chocolate shavings, or a drizzle of caramel sauce for added elegance.
Storing Your Delicious Creation: Best Practices
Proper storage is essential to maintain the quality and freshness of your homemade banana pudding. Here’s what you need to know:
- How Long Does Banana Pudding Last in the Fridge? This no-bake banana pudding will keep beautifully, tightly covered with plastic wrap (directly touching the surface of the pudding), for up to 3 days in the refrigerator. However, for optimal texture and appearance, it is best enjoyed within the first 2 days. After about 48 hours, the cookies will become very soft, and the pudding itself might start to get a bit runnier as the bananas release more moisture.
- Can You Freeze Banana Pudding? Unfortunately, no. This specific banana pudding recipe does not freeze well, primarily due to its dairy-heavy base and the fresh bananas. Upon thawing, the dairy components tend to separate, resulting in a watery, mushy, and unappealing texture. The bananas also break down significantly, losing their firmness and becoming overly soft. For these reasons, it’s best to enjoy this dessert fresh and plan to consume it within its refrigerated shelf life.
A Visual Guide: Watch How It’s Made
Seeing the steps in action can make all the difference! (A video demonstrating the simple steps for creating this classic no-bake banana pudding will be embedded here soon to guide you through the process, ensuring perfect results every time!)
There’s truly nothing quite like homemade banana pudding. It’s so incredibly easy to prepare and offers a taste that far surpasses any store-bought alternative – they are barely even comparable! This delightful dessert is a fantastic choice for any occasion, whether it’s a casual summer get-together, a festive holiday celebration, or simply a craving for a comforting, sweet treat.
More Irresistible Pudding Recipes to Explore
If you’ve fallen in love with the ease and deliciousness of this banana pudding, you’ll be thrilled to discover more of our favorite homemade pudding recipes:
- Creamy Homemade Tapioca Pudding
- Rich & Decadent Chocolate Pudding
- Classic Butterscotch Pudding
We sincerely hope you cherish this delicious and incredibly easy recipe. Please consider leaving a review below to share your experience! And don’t forget to connect with Belly Full on Facebook, Instagram, Pinterest, and YouTube for more delightful recipes and culinary inspiration!
Homemade No-Bake Banana Pudding Recipe
This no-bake homemade Banana Pudding recipe is a wonderful classic dessert. Easy, comforting, nostalgic, and oh so deliciously creamy in every bite! Great in the summer, for holidays, and anytime!
Prep Time: 20 mins
Chill Time: 4 hrs
Total Time: 4 hrs 20 mins
Yields: 12 servings
Ingredients
- 2 1/4 cups cold heavy whipping cream
- 1/2 cup powdered sugar
- 8 ounce package cream cheese, softened
- 14 ounce can sweetened condensed milk
- 3.4 ounce box of Jello instant French vanilla pudding mix (or regular vanilla)
- 2 cups cold whole milk
- 11 ounce box Nilla wafer cookies (approximately 60 cookies)
- 4-5 ripe, firm bananas, sliced into rounds
Instructions
- Make the Whipped Cream: In a cold bowl, beat together the whipping cream and powdered sugar with an electric mixer until stiff peaks are reached. Transfer to the fridge.
- Make the Pudding: In a large bowl, beat together the softened cream cheese and sweetened condensed milk until combined and smooth. Add the instant pudding mix and cold whole milk; beat for about 5 minutes until thick and fully incorporated, scraping the sides of the bowl as needed. Gently fold in half of the chilled whipped cream (reserve the rest for topping).
- Transfer to Piping Bag: For easier assembly, transfer the pudding mixture into a piping bag.
- Assemble the Layers: Line the bottom of 12 individual parfait glasses (or a large serving dish) with 2-3 Nilla wafer cookies each. Follow with 3-4 banana slices. Pipe or spoon a layer of the pudding mixture on top. Repeat the cookie, banana, and pudding layers until you reach the rim of the glass or dish, ending with a pudding layer.
- Cover and Chill: Cover each glass or the large dish tightly with plastic wrap, ensuring the wrap touches the surface of the pudding. Chill in the refrigerator for at least 4 hours, or ideally overnight, to allow the cookies to soften and flavors to meld.
- Garnish and Serve: Just before serving, pipe the remaining whipped cream on top. Garnish each serving with a fresh banana slice and a Nilla wafer cookie. Serve immediately and enjoy!
Notes
For additional helpful tips, creative variations, and detailed storage advice, please refer to the comprehensive article provided above.
Nutrition
Calories: 555kcal | Carbohydrates: 62g | Protein: 7g | Fat: 32g | Saturated Fat: 18g | Cholesterol: 97mg | Sodium: 293mg | Potassium: 399mg | Fiber: 1g | Sugar: 45g | Vitamin A: 1089IU | Vitamin C: 5mg | Calcium: 189mg | Iron: 1mg
Disclaimer: Nutritional information is an estimate and can vary based on exact product choices and recipe modifications. If precise values are critical, please calculate them independently.