

Prepare to fall in love with Cheese Zombies, the pillowy soft, incredibly buttery bread rolls bursting with luscious, gooey cheese. Served fresh and warm straight from the oven, these delectable treats are utterly irresistible. Whether you’re reliving cherished childhood memories or discovering them for the very first time, these homemade Cheese Zombies promise a delightful experience that’s both comforting and satisfying.

5 STAR REVIEW
“I am so glad to have found this! Tiny moments of joy from pillowy cheese buns!!” -Adi
Easy Homemade Cheese Zombies: A Nostalgic School Lunch Favorite
For years, the idea of baking anything with yeast felt daunting. The precision, the waiting, the fear of a flat, dense dough – it was a culinary hurdle I hesitated to cross. However, once I embraced the challenge and mastered the art of yeasted bread, these incredible Cheese Zombies quickly became a cherished staple in our household. And for that, I am eternally grateful!
These aren’t just any cheesy bread rolls; Cheese Zombies hold a special place in the hearts of many, particularly those who grew up in Concord, CA, and attended schools within the Mt. Diablo school district decades ago. Back in my high school days, these savory sensations were a legendary item, sold for a mere 50 cents during our first break. I distinctly remember buying one almost every single day. Today, their price tag would likely be closer to $3, a testament to their enduring popularity!
It’s truly astonishing that Cheese Zombies haven’t achieved national recognition, because they absolutely should! Consequently, finding a truly authentic and reliable recipe online can be a challenge. But if you’re a fellow alum yearning for that taste of yesteryear, rest assured, I’ve got the perfect recipe for you. And for those unfamiliar with this cheesy delight, prepare to be introduced to the most scrumptious stuffed bread rolls you never knew you needed until now. These aren’t just food; they’re a piece of history, a bite of pure comfort, and a testament to simple, delicious perfection.
Why You’ll Love This Cheese Zombie Recipe
- Irresistibly Soft & Buttery: Each bite offers a cloud-like texture and rich, buttery flavor that melts in your mouth.
- Gooey, Melty Cheese Core: The magic of Velveeta creates an unbelievably smooth, stretchy, and savory cheese filling.
- Easy to Master: Don’t be intimidated by yeast! Our step-by-step guide makes this recipe approachable for bakers of all skill levels.
- Perfect for Any Occasion: Ideal as a side dish, a hearty snack, or even a light meal, these rolls are versatile and always a crowd-pleaser.
- A Taste of Nostalgia: For many, Cheese Zombies evoke fond memories of school days, making them a delightful trip down memory lane.
- Customizable: While Velveeta is traditional, you can experiment with other meltable cheeses or add-ins once you’ve tried the classic.
Helpful Tips for Perfect Cheese Zombies
- The Temperature of the Water Matters Greatly. Precision is key when working with yeast. For optimal activation, your water needs to be precisely around 110°F (43°C). If the water is too hot, it will unfortunately kill the delicate yeast organisms, preventing your dough from rising. Conversely, if the water isn’t warm enough, the yeast won’t activate properly, resulting in a sluggish or non-existent proof. To ensure accuracy and consistent results, it’s highly recommended to use a kitchen thermometer. This small step makes a huge difference in the success of your dough.
- Always Use Fresh Yeast. Yeast is a living organism, and like all living things, it has a shelf life. Old or inactive yeast is the most common reason for a failed bread recipe. After combining the warm water, yeast, and a pinch of sugar, allow it to sit for 5-10 minutes. During this time, the yeast should become visibly foamy and bubbly on the surface. If you don’t observe this frothy activity, it’s a clear indication that your yeast is no longer viable. In such cases, it’s best to discard the mixture and start fresh with a new packet of yeast. Don’t risk a flat batch of Cheese Zombies!
- Measure the Flour Correctly. The amount of flour in a dough recipe can significantly impact its final texture. Too much flour leads to dense, dry, and tough rolls, while too little can make the dough too sticky and difficult to handle. The best method for measuring flour for baking is the “spoon and level” technique: gently spoon flour into your measuring cup until it overflows, then use a straight edge (like the back of a knife) to level off the excess without compacting the flour. Avoid scooping directly from the bag, as this can pack in an extra 20-30% of flour.
- Embrace Velveeta Cheese. This might be the most controversial, yet crucial, tip for authentic Cheese Zombies. While many home bakers prefer to use “real” cheddar cheese, the magic of a Cheese Zombie lies in the unique melting properties of Velveeta processed cheese. Velveeta is specifically engineered to melt into an incredibly soft, smooth, evenly textured, and wonderfully clump-free gooey filling. Traditional cheddar, on the other hand, often melts with a slightly grainy texture and can become greasy. For that truly nostalgic, perfect gooey center, Velveeta is non-negotiable. Don’t worry, the “cheese police” won’t come knocking, and enjoying a couple of these delightful treats won’t instantly clog your arteries. Trust the process for the ultimate Cheese Zombie experience!
- Patience is a Virtue (Especially with Proofing). Yeast dough requires time to rise and develop its full flavor and tender texture. Resist the urge to rush the proofing stages. A warm, draft-free environment is ideal for rising. If your kitchen is cool, you can create a warm spot by heating your oven to its lowest setting for a minute, then turning it off and placing the covered bowl inside. Proper proofing ensures light, airy, and flavorful rolls.
Ultimate Cheese Zombies
1 hour
20 minutes
1 hour 20 minutes
16

Pin
Find step-by-step photos and detailed instructions further down the page, below the recipe card.
Ingredients
- ½ cup warm water
- 1½ tablespoons active dry yeast, instant also works
- 1/3 cup plus 1 teaspoon granulated sugar, divided
- 1 cup lukewarm whole milk
- ¼ cup unsalted butter, softened, salted also works
- 1 teaspoon salt, if using salted butter, omit
- 1 large egg, lightly beaten
- 4½ cups unbleached all-purpose flour, spooned and leveled
- 8 ounces Velveeta processed cheese, cut into 16 cubes
- ¼ cup unsalted butter, melted
Instructions
-
Line two large baking sheets with parchment paper to prevent sticking and ensure easy cleanup. Set them aside for later.
-
In a spacious mixing bowl, combine the ½ cup of warm water, 1½ tablespoons of active dry yeast, and 1 teaspoon of granulated sugar. Stir gently to ensure the sugar and yeast dissolve into the water. Let this mixture sit undisturbed for 5-10 minutes. During this time, the yeast should activate and become foamy and bubbly on the surface, indicating it’s alive and ready to work.
-
To the foamy yeast mixture, add the 1 cup of lukewarm whole milk, ¼ cup of softened unsalted butter, 1 teaspoon of salt (omit if using salted butter), the remaining 1/3 cup of granulated sugar, and the lightly beaten large egg. Mix these ingredients thoroughly until they are well combined. Next, gradually incorporate the unbleached all-purpose flour, adding it ½ cup at a time. Continue mixing until the dough begins to pull away cleanly from the sides of the bowl. You might not need to use all of the flour, so add just enough to achieve a workable, slightly tacky dough.
-
Lightly dust a clean work surface with a small amount of flour. Transfer the dough from the bowl to this floured surface. Knead the dough for about 5-7 minutes until it transforms into a soft, smooth, and elastic consistency. This kneading process develops the gluten, which is essential for the rolls’ pillowy texture.
-
Lightly oil a clean bowl with a neutral-flavored oil. Place the kneaded dough into the oiled bowl, turning it once to coat the entire surface. Cover the bowl snugly with plastic wrap or a clean kitchen towel. Allow the dough to rise in a warm, draft-free place for approximately 15 minutes. This is a short initial rise that helps the dough relax before shaping.
-
Turn the slightly risen dough out onto your lightly floured surface. Gently shape it into a rectangle and divide it into 16 equal pieces. Take each piece and gently roll it into a smooth round ball, then lightly flatten it into a disk. Carefully tuck one cube of Velveeta processed cheese into the center of each flattened dough disk. Bring the edges of the dough up around the cheese, pinching them tightly together at the bottom to fully enclose the cheese. Work carefully to shape each one into a round, tight ball, ensuring no cheese is exposed.
-
Arrange the shaped rolls, seam-side down, on your prepared baking sheets. Make sure to space them about 2 inches apart to allow for expansion during the final rise and baking. Cover the baking sheets loosely with plastic wrap. Let the rolls rise again in a warm place for another 30 minutes. This second proof is crucial for achieving light and fluffy Cheese Zombies.
-
While the rolls are completing their second rise, preheat your oven to 375°F (190°C). This ensures the oven is at the correct temperature when the rolls are ready to bake, contributing to an even bake and golden crust.
-
Once risen, gently brush the tops of the rolls with a portion of the ¼ cup melted unsalted butter. Place the baking sheets in the preheated oven. Bake for 15 minutes, swapping and rotating the baking sheets halfway through for even cooking. After 15 minutes, remove, brush with the remaining melted butter, and bake for another 5 minutes, or until they achieve a gorgeous golden-brown hue on top.
-
Carefully remove the baked Cheese Zombies from the oven. While the aroma is intoxicating, allow them to cool slightly on the baking sheets for a few minutes. They’re best enjoyed warm enough to reveal that incredible, stretchy, gooey cheese when torn open, but not so hot that you burn yourself. Serve immediately and savor every cheesy bite!
Video Tutorial
Nutrition Information
Carbohydrates: 34g |
Protein: 7g |
Fat: 8g |
Saturated Fat: 5g |
Trans Fat: 1g |
Cholesterol: 34mg |
Sodium: 383mg |
Potassium: 116mg |
Fiber: 1g |
Sugar: 6g |
Vitamin A: 359IU |
Vitamin C: 1mg |
Calcium: 108mg |
Iron: 2mg
Nutritional information provided is an automatic calculation and should be considered an estimate. It can vary significantly based on the exact brands and products you use, as well as any modifications made to the recipe. For precise dietary information, it is recommended to calculate these values independently using your specific ingredients.
Did you make this? Leave a rating below!
How to Make Cheese Zombies: A Step-by-Step Visual Guide
Making these delightful Cheese Zombies from scratch is a rewarding experience. Follow these detailed steps, complete with visual aids, to ensure your rolls turn out perfectly soft, buttery, and filled with gooey cheese.
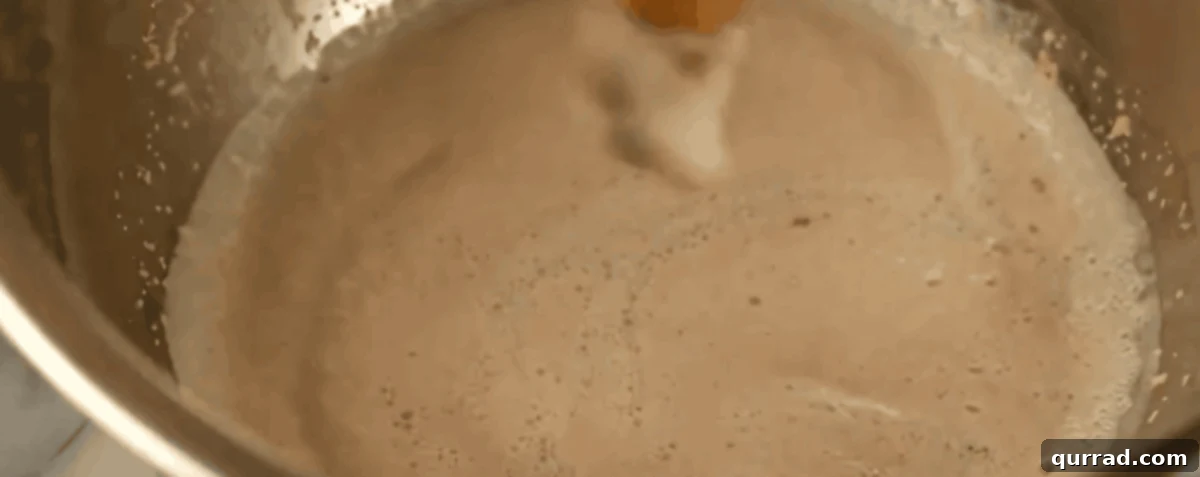
1. Activate the Yeast: In a large bowl, combine ½ cup warm water (around 110°F), 1½ tablespoons active dry yeast, and 1 teaspoon granulated sugar. Stir gently to dissolve. Let the mixture sit for 5-10 minutes until it becomes visibly foamy. This confirms your yeast is active. While it proofs, line two baking sheets with parchment paper and set them aside.
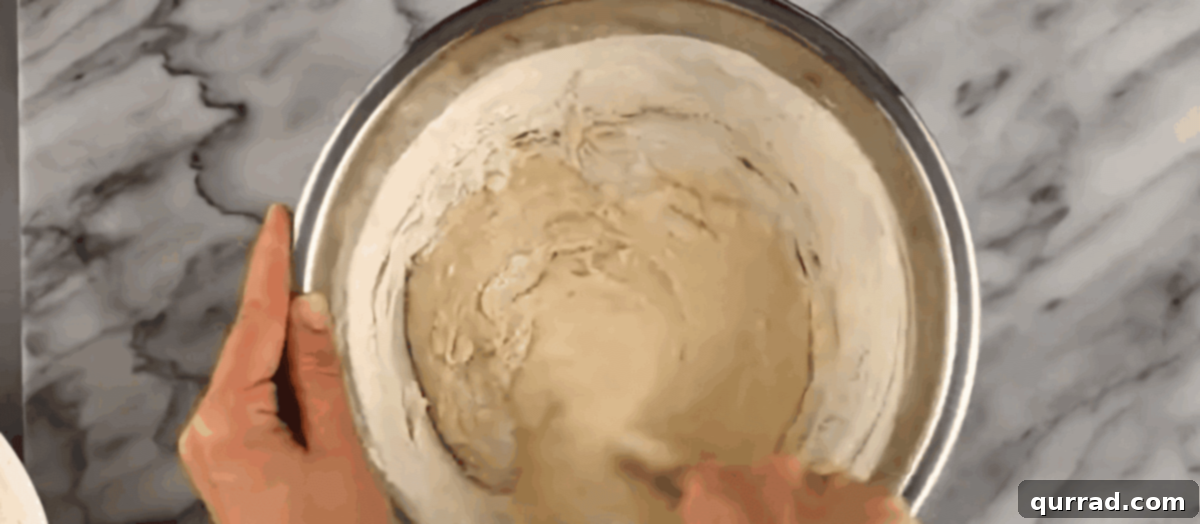
2. Prepare the Dough: To the activated yeast mixture, add 1 cup lukewarm whole milk, ¼ cup softened unsalted butter, 1 teaspoon salt (adjust or omit if using salted butter), the remaining 1/3 cup granulated sugar, and 1 lightly beaten large egg. Mix these wet ingredients thoroughly. Then, gradually add the 4½ cups of unbleached all-purpose flour, ½ cup at a time. Mix until the dough starts to pull away from the sides of the bowl. You might not need all the flour; stop when the dough is soft but manageable, not overly sticky.
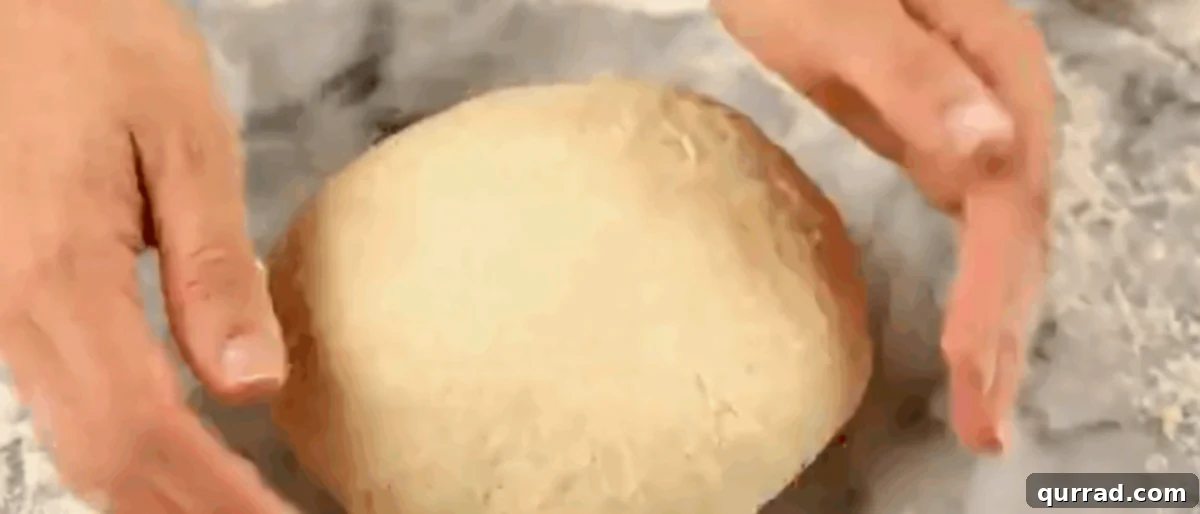
3. Knead and First Rise: Transfer the dough to a lightly floured surface. Knead for about 5-7 minutes until it becomes soft, smooth, and elastic. Place the kneaded dough in a lightly oiled bowl, turn it once to coat, cover with plastic wrap, and let it rise in a warm place for about 15 minutes. This brief rest period helps the gluten relax, making the dough easier to work with.
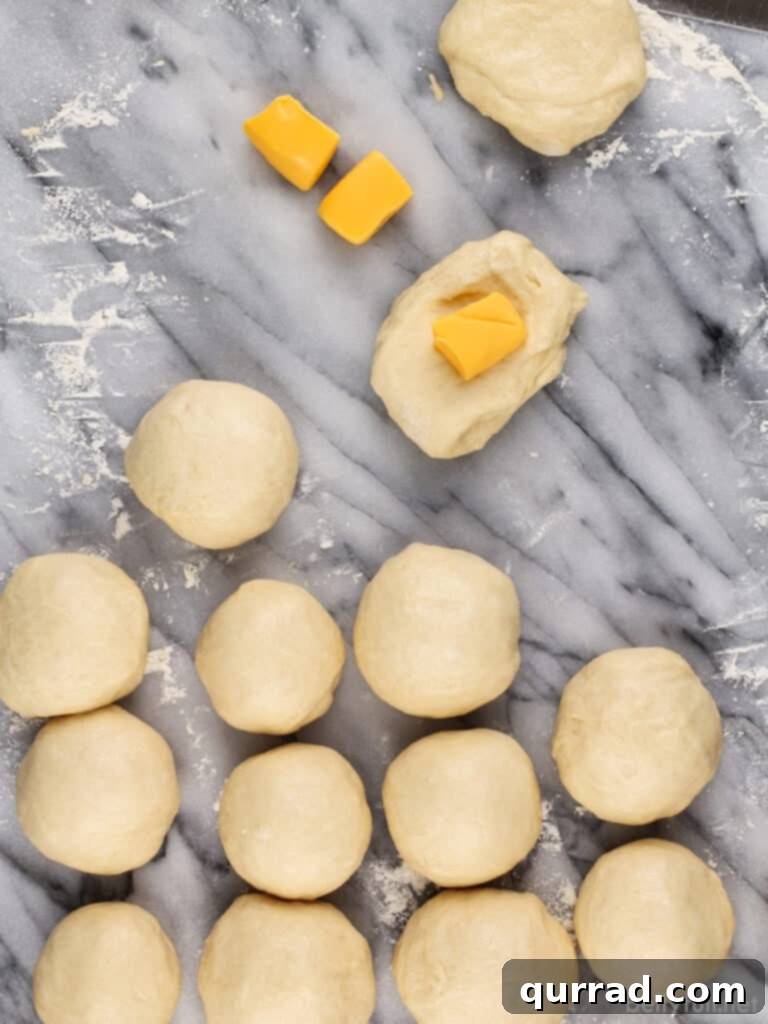
4. Fill and Shape the Rolls: Turn the dough out onto your lightly floured surface. Gently roll it into a rectangle and divide it into 16 equal pieces. Shape each piece into a round, then flatten it slightly into a disk. Place one cube of Velveeta processed cheese in the center of each disk. Carefully pull the edges of the dough around the cheese, pinching them tightly together at the bottom to seal completely. Roll each filled piece into a smooth, tight ball, ensuring the cheese is fully enclosed.
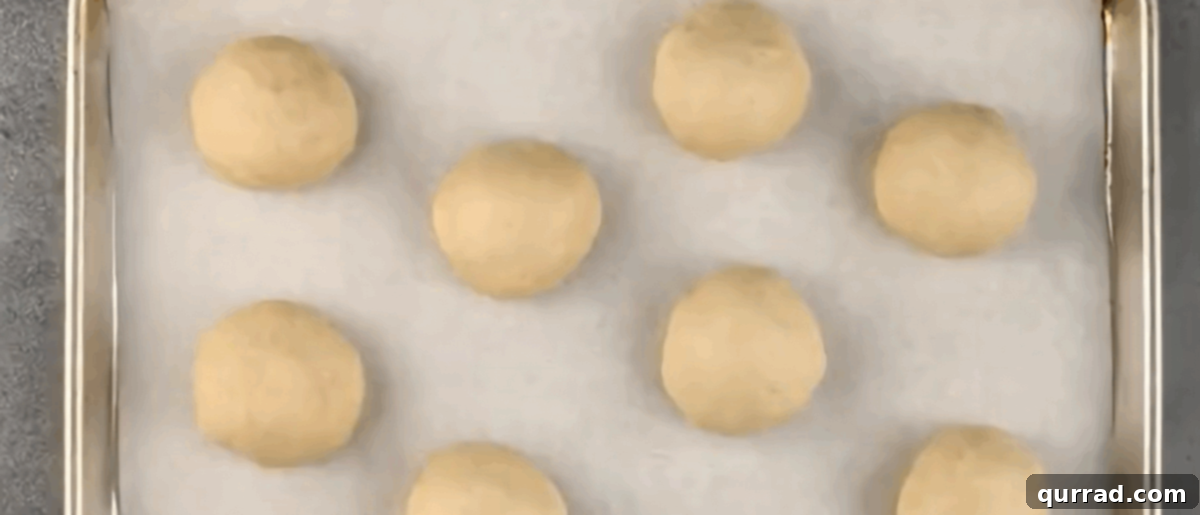
5. Second Rise: Place the shaped rolls, pinched-side down, on the prepared baking sheets, leaving about 2 inches between each roll. Cover loosely with plastic wrap and let them rise again in a warm place for approximately 30 minutes. This final proof will make the rolls beautifully airy and light.
6. Bake to Golden Perfection: While the rolls are completing their second rise, preheat your oven to 375°F (190°C). Once risen, gently brush the tops of the rolls with a portion of the ¼ cup melted unsalted butter. Place the baking sheets in the preheated oven. Bake for 15 minutes, swapping and rotating the baking sheets halfway through for even cooking. After 15 minutes, remove, brush with the remaining melted butter, and bake for another 5 minutes, or until they achieve a gorgeous golden-brown hue on top.

7. Cool and Serve: Remove the Cheese Zombies from the oven. While the aroma is intoxicating, allow them to cool slightly on the baking sheets for a few minutes. They’re best enjoyed warm enough to reveal that incredible, stretchy, gooey cheese when torn open, but not so hot that you burn yourself. Serve immediately and savor every cheesy bite!
How to Store & Reheat Cheese Zombies
Like most fresh, yeasted bread, Cheese Zombies are undoubtedly at their peak deliciousness when consumed straight from the oven. The warm, soft bread combined with the piping hot, gooey cheese is an unparalleled experience. Given their cheesy filling, freshness truly is best.
If, by some miracle, you find yourself with leftovers, ensure they cool completely to room temperature before storing. Covering warm rolls can trap moisture, leading to a soggy texture that compromises their delightful pillowy softness. While refrigeration isn’t strictly recommended as it can cause the bread to dry out and become stale faster, you can store them in an airtight container at room temperature for up to 2-3 days. For longer storage, consider freezing.
To Reheat: For best results, wrap each leftover roll individually in aluminum foil. Place the foil-wrapped rolls on a baking sheet and reheat in a preheated 350°F (175°C) oven for about 10-15 minutes, or until they are warmed through and the cheese is beautifully melted and gooey again. Avoid microwaving if possible, as it can make the bread tough and the cheese less pleasant.
Freezing Instructions: To freeze Cheese Zombies, allow them to cool completely. Wrap each individual roll tightly in plastic wrap, then place them in a freezer-safe bag or airtight container. They can be stored in the freezer for up to 1 month. When ready to enjoy, thaw them overnight in the refrigerator, then reheat as directed above for freshly baked taste and texture.

What to Serve With Your Homemade Cheese Zombies
Every time I bake a batch of these glorious Cheese Zombies, I intend for them to be a simple side dish for dinner. Yet, without fail, they often steal the show and become the main event, as everyone (myself included!) can easily devour three or four of these delightful rolls! Their versatility, however, makes them a fantastic accompaniment to a wide variety of meals.
For a hearty and comforting dinner, I often pair these cheesy rolls with classic American comfort foods. They’re excellent alongside a rich Salisbury steak with creamy mashed potatoes, or served alongside succulent baked chicken breast and a fresh green salad. The soft, buttery bread perfectly soaks up any sauces or gravies from your main course.
If you’re aiming for a lighter meal or a delightful brunch spread, Cheese Zombies are still a perfect fit. They complement egg dishes beautifully, such as an air fryer egg frittata or a fluffy scramble. They’re also fantastic dipped into a warm bowl of tomato soup, chili, or a creamy vegetable bisque, providing that extra layer of comfort and satisfying texture.
Beyond traditional pairings, consider serving them with a vibrant pasta salad for a quick lunch, or even as a standalone snack with a side of marinara sauce for dipping. Their simple yet profound cheesy flavor ensures they can enhance almost any meal or satisfy a craving all on their own.
Frequently Asked Questions (FAQs)
- Can I use a different type of cheese instead of Velveeta?
- While Velveeta is traditional for its smooth, gooey melt, you can experiment. For a sharper flavor, try using a blend of shredded mozzarella and a little cream cheese to aid in melting. Be aware that other cheeses might not yield the exact same signature gooey texture and can sometimes become slightly oily when melted.
- What if my dough isn’t rising?
- The most common culprit is inactive yeast or water that’s too hot/cold. Double-check your yeast’s expiration date and ensure your water temperature is around 110°F (43°C). If the yeast mixture doesn’t foam after 5-10 minutes, you’ll need to start over with fresh yeast.
- Can I make these ahead of time?
- You can prepare the dough up to the first rise (step 4), then punch it down, cover it tightly, and refrigerate it overnight. Allow it to come to room temperature for about 30-60 minutes before proceeding with shaping and the second rise. For freezing baked rolls, see the “How to Store” section above.
- How do I ensure the cheese doesn’t leak out?
- The key is to pinch the dough very tightly around the cheese cube at the bottom, creating a secure seam. Ensure the cheese is fully enclosed and the ball is tight before the second rise. Any exposed cheese can melt out during baking.
More Irresistible Bread Recipes To Love
- Classic Garlic Bread
- Artisan Dutch Oven Bread
- Easy Focaccia Bread with Pesto
- Spicy Jalapeño Pull Apart Bread
Indulge in Homemade Cheese Zombie Bliss
From the first moment you pull these golden, aromatic Cheese Zombies from the oven, you’ll understand their enduring appeal. The delightful contrast of the soft, slightly sweet bread with the savory, molten cheese center creates a culinary experience that is simply unforgettable. Whether you’re seeking a comforting taste of nostalgia or an exciting new addition to your baking repertoire, this recipe delivers on every front. Gather your ingredients, follow these simple steps, and prepare to delight your family and friends with these truly irresistible cheesy bread rolls. Happy baking!