

Indulge in the irresistible allure of these sensational Butterfinger Cookies, a delightful treat that perfectly blends soft, chewy textures with the signature crispiness and rich peanut butter flavor of your favorite Butterfinger candy bars. Whether you’re looking for a creative way to use up leftover Halloween candy or simply craving a unique homemade dessert, this recipe promises an unforgettable experience that will become a year-round favorite. Prepare to be amazed by how easily you can create these crowd-pleasing cookies, ready to enjoy in just a short amount of time!

The Ultimate Soft & Chewy Butterfinger Cookies
If the distinctive crunch and creamy peanut butter profile of a Butterfinger candy bar make your taste buds sing, then this cookie recipe is tailor-made for you. Our Butterfinger Cookies are generously studded with finely crushed pieces of Butterfinger, ensuring that every single bite delivers that iconic crisp, crunchy texture and an explosion of delightful peanut butter goodness. This isn’t just a cookie; it’s a celebration of one of America’s most beloved candy bars, transformed into a baked masterpiece.
To elevate these cookies to an extraordinary level of pillowy softness and incredible flavor, we’ve incorporated a secret ingredient: instant vanilla pudding mix. The addition of pudding mix is a game-changer for cookie recipes, a technique I often employ in favorites like my chocolate chip pudding cookies and blueberry cheesecake cookies. It’s a simple yet effective method to guarantee consistently soft, moist, and tender cookies with a delightful chewiness that melts in your mouth. Get ready for cookies that are not only packed with flavor but also boast an unbelievably tender crumb.
Why You’ll Fall in Love with This Butterfinger Cookie Recipe
These Butterfinger cookies aren’t just a treat; they’re a revelation for any dessert lover. Here are just a few compelling reasons why this recipe will quickly become a cherished part of your baking repertoire:
- Effortlessly Quick and Simple: Life is busy, but that shouldn’t stop you from enjoying homemade cookies. This recipe is designed for maximum flavor with minimal fuss. The dough comes together in under 10 minutes, and baking requires only 10 minutes. Factor in a brief cooling period, and you’ll be savoring warm, fresh cookies in less than half an hour. It’s the perfect solution for sudden dessert cravings or last-minute entertaining.
- Unrivaled Softness and Chewiness: Thanks to the ingenious addition of instant vanilla pudding mix, these cookies transcend ordinary chewiness. They emerge from the oven remarkably soft, tender, and moist, with a delightful chew that makes each bite incredibly satisfying. The pudding mix works wonders in enhancing moisture retention, ensuring your cookies stay fresh and delectable for longer.
- Bursting with Authentic Butterfinger Flavor: The star of this recipe is undoubtedly the crushed Butterfinger candy bar. We don’t just sprinkle a few pieces; we load the dough with them, guaranteeing that every single morsel is infused with that unique combination of crispy, crunchy texture and rich, nutty peanut butter flavor. This isn’t a subtle hint; it’s a full-on Butterfinger experience.
- Perfect for Any Occasion: From casual family gatherings to festive holiday parties, these cookies fit right in. They make fantastic gifts, delightful after-school snacks, or the perfect accompaniment to a cup of coffee or tea. Their vibrant flavor and satisfying texture make them suitable for any time of year.
- A Fantastic Way to Repurpose Candy: If you find yourself with an abundance of leftover Halloween candy, this recipe offers a delicious and creative solution. Instead of letting those Butterfinger bars sit untouched, transform them into something truly magical.

Essential Ingredients for Your Butterfinger Cookies
Crafting these delectable Butterfinger pudding cookies requires a handful of common pantry staples, plus the crucial additions of vanilla pudding mix and, of course, crushed Butterfinger candy. Each ingredient plays a vital role in achieving the perfect texture and flavor profile. Below, you’ll find a detailed list to guide you:
- Unsalted Butter: We opt for unsalted butter to maintain precise control over the overall saltiness of the cookies, especially since additional salt will be incorporated later. Ensure your butter is softened to room temperature, but not melted. Softened butter creams beautifully with sugar, incorporating air for a light and fluffy dough, which contributes significantly to the cookies’ tender texture.
- Sugar (Brown & Granulated): A thoughtful combination of both brown sugar and granulated sugar is essential. Brown sugar provides moisture and a lovely caramel-like depth of flavor, contributing to the cookies’ chewiness and rich hue. Granulated sugar, on the other hand, ensures proper spreading and a crisp edge.
- Large Eggs: Eggs serve multiple critical functions in our cookie dough. They act as a binder, holding all the ingredients together, and contribute to the structure and richness of the cookies. Additionally, the fat in the yolks adds to the tender texture.
- Pure Vanilla Extract: A touch of high-quality vanilla extract enhances all the other flavors in the cookie, adding a warm, aromatic note that complements the peanut butter and caramel tones of the Butterfinger candy. Don’t skip this!
- All-Purpose Flour: The foundation of our cookie structure. For accurate measurement and best results, remember to use the “spoon and level” technique: spoon the flour into your measuring cup and then level it off with a straight edge, avoiding packing the flour. This prevents dense, dry cookies.
- Instant Vanilla Pudding Mix: This is our secret weapon for ultra-soft and chewy cookies. Be sure to select instant pudding mix, not the “cook and serve” variety. You will only be using the dry powder from the box; do not prepare the pudding. It adds moisture, tenderness, and an extra layer of vanilla flavor, making these cookies truly exceptional.
- Baking Soda: A crucial leavening agent that reacts with the acidic brown sugar to help the cookies rise beautifully in the oven, creating a light and airy interior.
- Kosher Salt: Essential for balancing the sweetness of the sugars and candy. Salt enhances all the flavors, preventing the cookies from tasting overly saccharine and bringing out the best in the peanut butter and chocolate notes.
- Butterfinger Candy Bars: The star attraction! You’ll need unwrapped and coarsely chopped Butterfinger candy bars. Chopping them ensures that the distinctive crispy, crunchy bits and peanut butter flavor are evenly distributed throughout every single bite of the cookie.
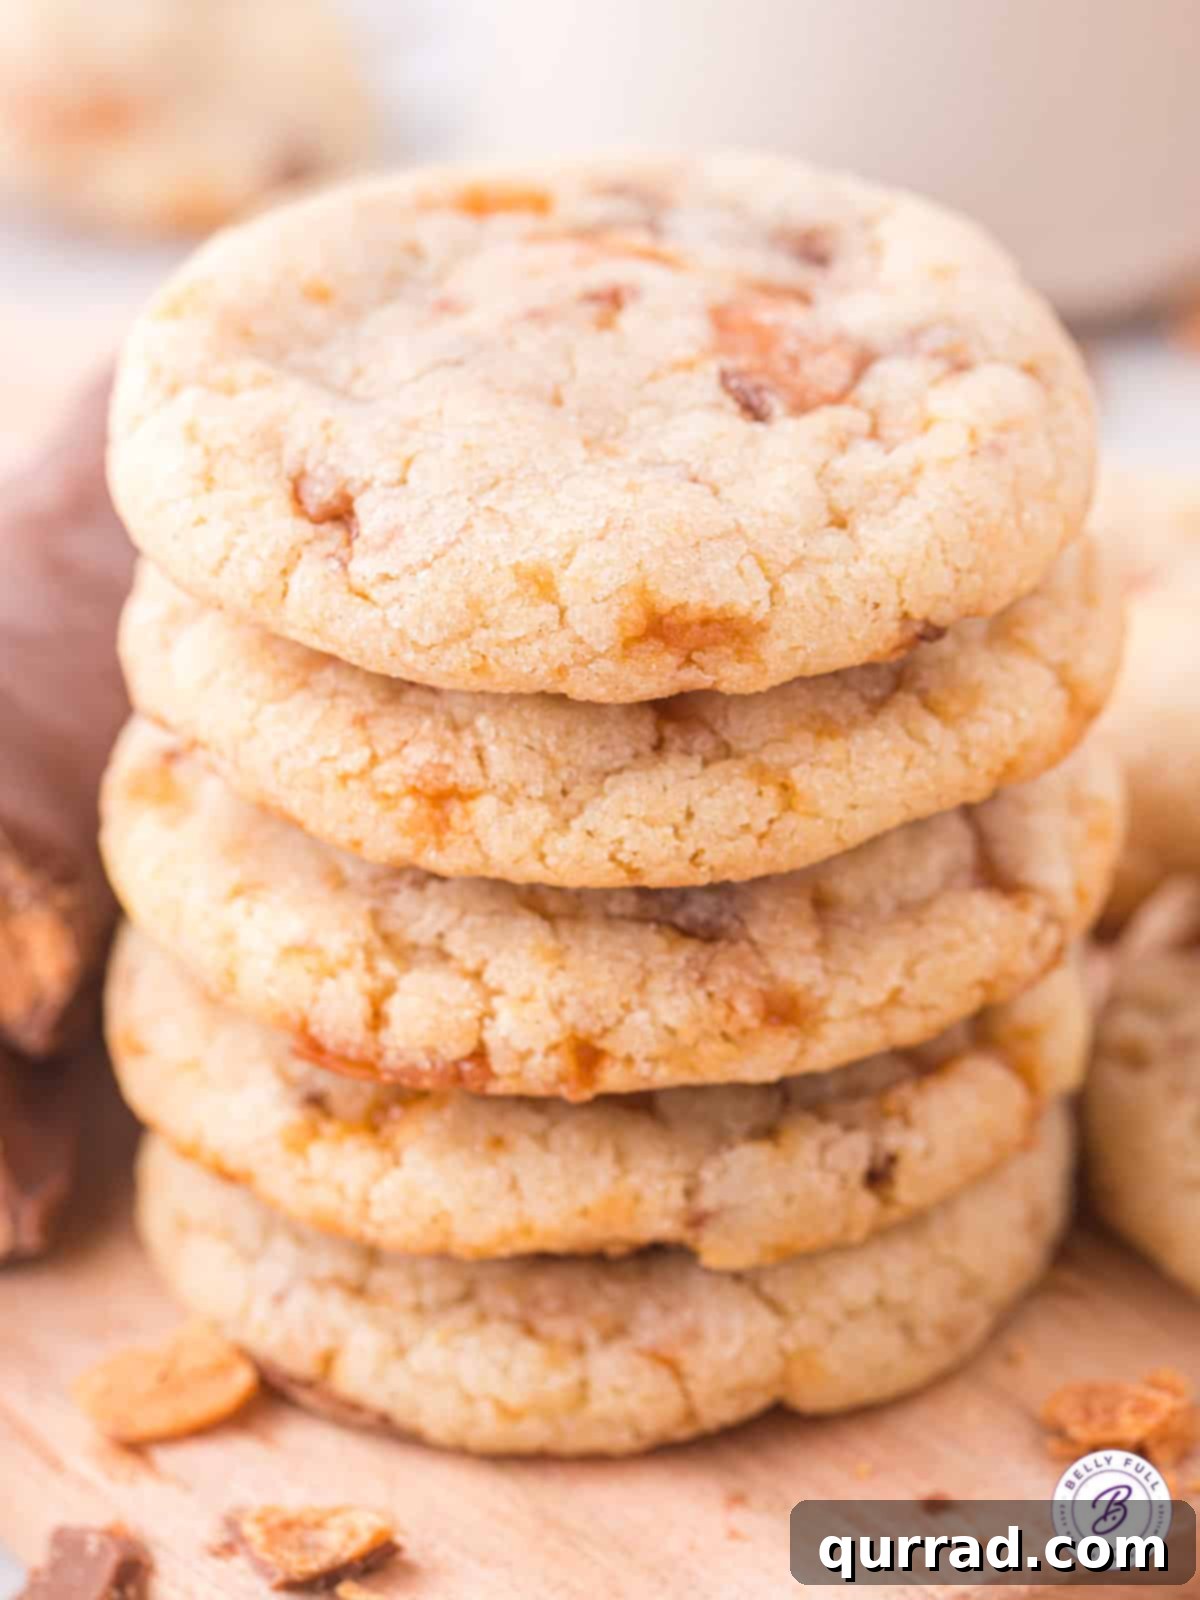
How to Bake Perfect Butterfinger Cookies
Creating these delightful Butterfinger cookies is a straightforward process that yields incredibly rewarding results. With just a few simple steps and approximately 10 minutes of baking time, you’ll be enjoying warm, homemade treats. Follow these instructions carefully for cookie perfection:
- Prepare Your Workspace: Begin by preheating your oven to 350°F (175°C) and positioning an oven rack in the center. Line two standard-sized baking sheets with parchment paper. Parchment paper is essential as it prevents sticking and promotes even baking, making cleanup a breeze.
- Cream Wet Ingredients: In a large mixing bowl, combine the softened unsalted butter with both the brown sugar and granulated sugar. Using an electric mixer, cream these ingredients together on medium speed until the mixture is light, fluffy, and pale in color. This typically takes about 2 minutes, ensuring that air is incorporated into the butter for a tender cookie. Next, add the eggs one at a time, beating well after each addition until fully incorporated. Finish by stirring in the vanilla extract until just combined.
- Combine Dry Ingredients: In a separate, medium-sized bowl, whisk together the all-purpose flour, instant vanilla pudding powder, baking soda, and kosher salt. Whisking ensures that the leavening agents and salt are evenly distributed throughout the flour, preventing pockets of unmixed ingredients.
- Mix Dry into Wet: Gradually add the dry ingredient mixture to the wet ingredient mixture. Mix on low speed or by hand until just combined. Be careful not to overmix the dough, as overmixing can lead to tough cookies. Stop mixing as soon as no streaks of flour are visible.
- Fold in Butterfinger Candy: Gently fold in the chopped Butterfinger candy pieces until they are evenly distributed throughout the cookie dough. A spatula works best for this step to avoid crushing the candy too much.
- Scoop and Bake: Using a tablespoon-sized cookie scoop or two spoons, scoop out portions of the dough and roll them into smooth balls. Do not flatten the dough balls; they will naturally spread in the oven. Place the dough balls onto the prepared baking sheets, ensuring you leave at least 2 inches of space between each cookie to allow for proper spreading during baking.
- Bake to Golden Perfection: Bake the cookies for exactly 10 minutes. The edges should be lightly golden, and the centers should still look slightly soft and puffy. Overbaking will result in dry cookies, so keep a close eye on them!
- Cool and Enjoy: Once baked, remove the baking sheets from the oven. Allow the cookies to cool on the baking sheet for about 2 minutes. This brief cooling period helps them set and prevents them from breaking when transferred. After 2 minutes, carefully transfer the cookies to a wire cooling rack to cool completely. This allows air to circulate around them, preventing soggy bottoms. Once cooled to your liking, grab one and savor the delightful taste!
Expert Tips for Butterfinger Cookie Success
Achieving bakery-quality Butterfinger cookies is easier than you think with these expert tips and tricks:
- The Magic of Pudding Mix: If you’re wondering, “Why use pudding mix in cookies?” the answer is simple yet profound. As seen in many of my recipes, including my popular pistachio cookies, instant pudding mix is a game-changer. It acts as a tenderizer, helping to create incredibly soft, fluffy, and moist cookies that stay fresh for longer. Beyond texture, it also infuses the entire cookie with a subtle yet delicious additional layer of vanilla flavor, enhancing the overall taste profile significantly.
- Resist the Urge to Flatten: When you scoop and roll the cookie dough into balls, resist the temptation to flatten them onto the baking sheet. These cookies are designed to spread perfectly on their own in the oven. Flattening them can lead to thinner, crispier cookies rather than the desired soft and chewy texture. Leaving them as balls helps create those delightful thick, soft centers.
- Generous Spacing is Key: Ensure you leave ample space, at least 2 inches, between each dough ball on the baking sheet. These cookies will spread during baking, and adequate spacing prevents them from merging into one giant cookie. Proper spacing also allows for even heat distribution, ensuring all your cookies bake consistently.
- Patience During Cooling: It’s crucial to let the cookies cool on the baking sheet for about 2 minutes immediately after removing them from the oven. Cookies continue to bake slightly from residual heat even after being removed from the oven. This short period allows their structure to set, making them less fragile. After 2 minutes, transfer them to a wire rack to finish cooling completely. Cooling on a rack prevents the bottoms from becoming soggy and helps achieve that perfect texture throughout.
- Don’t Overmix the Dough: Once you add the dry ingredients to the wet, mix only until just combined. Overmixing develops the gluten in the flour, which can result in tough, dense cookies instead of the soft, tender ones we’re aiming for. A few streaks of flour are okay; they will disappear during the final mixing of the candy.
- The Right Butterfinger Crush: For the best texture, aim for a coarse chop or crush of your Butterfinger candy. You want noticeable pieces in every bite, not a fine powder. Placing the unwrapped candy bars in a zip-top bag and gently crushing them with a rolling pin works wonderfully.
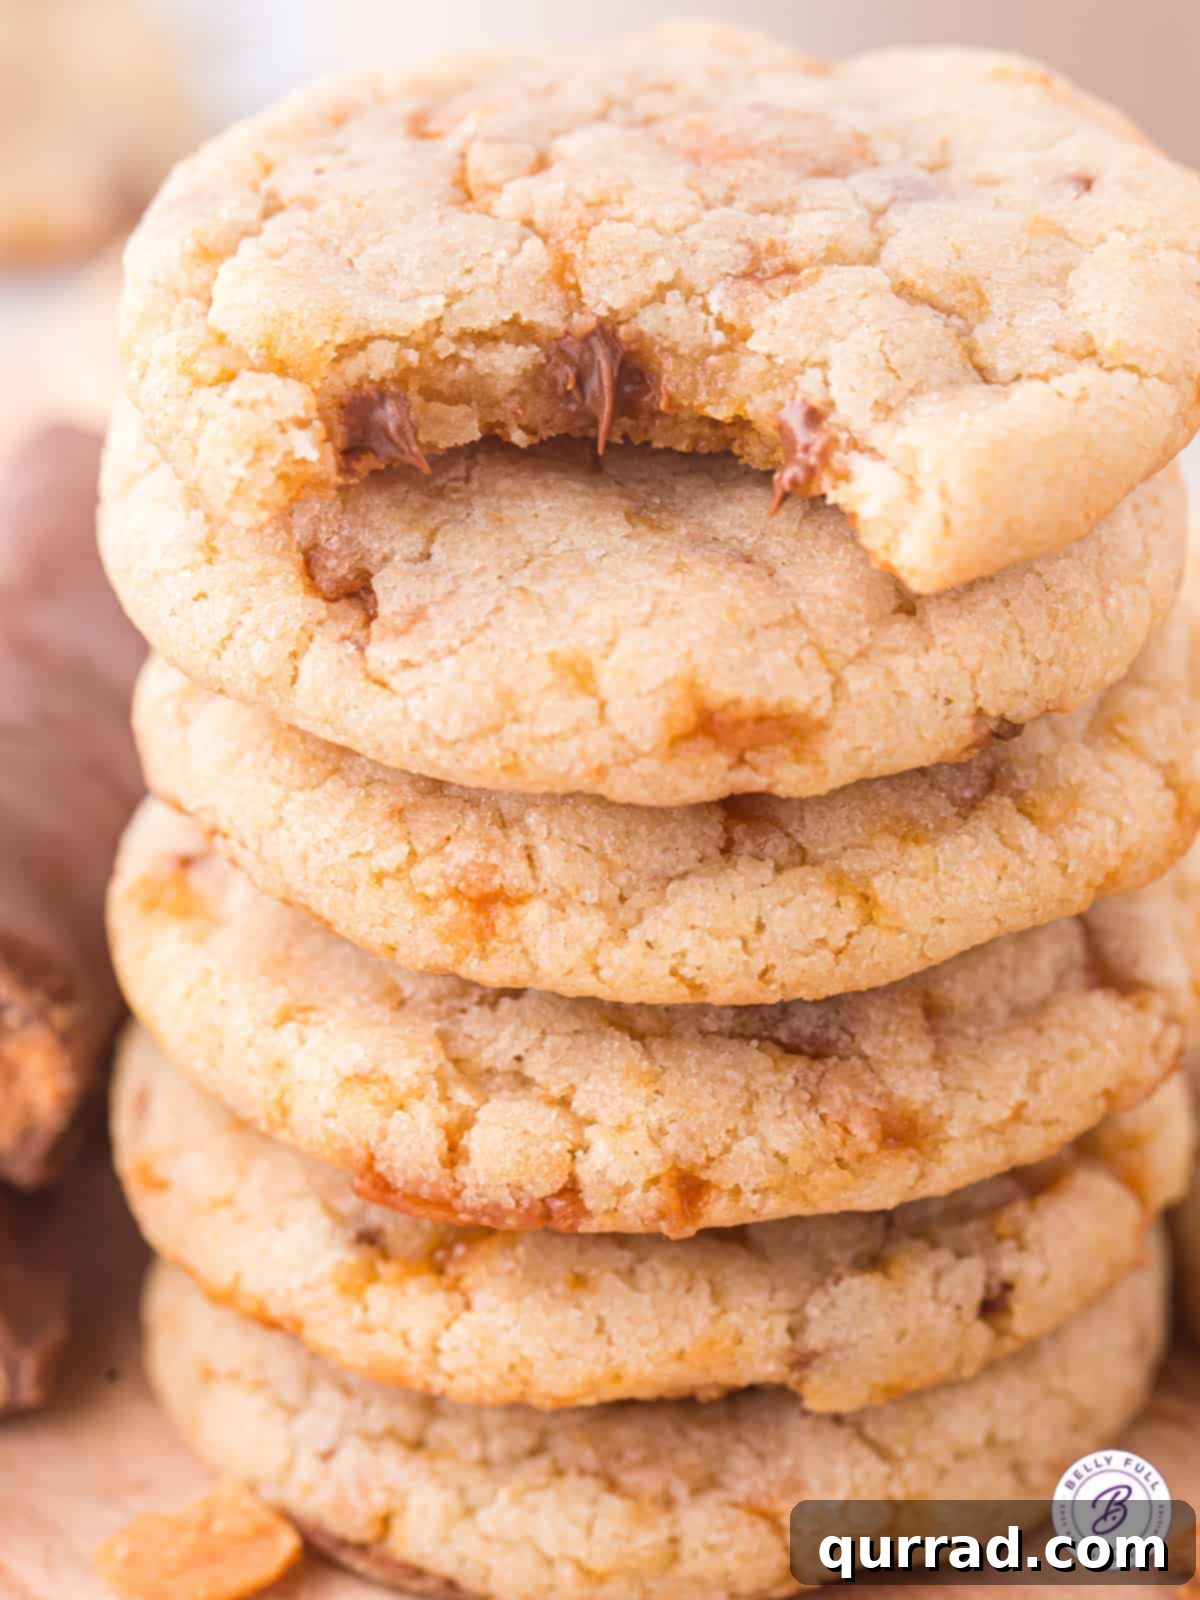
Customizing Your Cookie Experience: Other Candy Bar Variations
Absolutely! One of the joys of baking is customization, and this Butterfinger cookie recipe serves as a fantastic base for experimenting with other candy bars. Feel free to get creative and chop up any of your favorite candy bars to mix into the dough. Imagine the possibilities:
- Snickers Cookies: For a delightful combination of nougat, caramel, peanuts, and chocolate.
- Kit Kat Cookies: Offering a lighter crunch and classic milk chocolate flavor.
- Reese’s Peanut Butter Cup Cookies: Doubling down on the peanut butter goodness with smooth, melt-in-your-mouth chocolate.
- Twix Cookies: Bringing in that buttery shortbread and caramel chew.
- M&M’s Cookies: For a burst of colorful chocolate and a delightful crunch.
The beauty of this recipe is its adaptability. Simply substitute the Butterfinger candy with an equal amount (or slightly more, if you’re feeling indulgent!) of your preferred chopped candy bar. Each variation will offer a unique flavor and texture profile, making these cookies a versatile treat for every palate and every occasion.
Proper Storage for Lasting Freshness
To ensure your delicious Butterfinger cookies remain soft, chewy, and fresh for as long as possible, proper storage is essential. Here’s how to keep them at their best:
- Countertop Storage: Thanks to the moisture-retaining properties of the pudding mix, these cookies will stay wonderfully soft and fresh at room temperature for approximately 3 to 5 days. Once they have cooled completely to avoid condensation, store them in an airtight container. You can also place a slice of bread in the container with the cookies; the bread will absorb moisture, keeping the cookies softer for longer.
- Refrigeration: While not strictly necessary due to the pudding mix, if you live in a very warm or humid climate, or prefer your cookies chilled, you can store them in an airtight container in the refrigerator for up to a week. Be aware that refrigeration can sometimes slightly alter the texture of cookies, making them a bit firmer.
- Freezer Storage: These Butterfinger cookies freeze exceptionally well, allowing you to enjoy homemade treats whenever a craving strikes. After the cookies have cooled completely, transfer them to a freezer-safe ziploc bag or an airtight container. For best results, you can layer the cookies with parchment paper to prevent them from sticking together. Freeze for up to 3 months. To enjoy, simply thaw them at room temperature, or warm them slightly in the microwave for a fresh-baked experience.
More Easy Cookie Recipes to Explore:
If you loved making these Butterfinger cookies, you’re in for a treat! Discover more fantastic and easy cookie recipes that are perfect for any occasion:
- Easy Sugar Cookies: A classic, versatile cookie that’s perfect for decorating.
- Easy Peanut Butter Cookies: Rich, nutty, and irresistibly delicious – a timeless favorite.
- DoubleTree Cookies: Recreate the magic of the famous hotel’s beloved chocolate chip cookies at home.
- Potato Chip Cookies: An unexpected combination of sweet and salty that will surprise and delight you.
- Ranger Cookies: Packed with oats, coconut, and cornflakes for a hearty and flavorful treat.
- No Bake Cookies: Quick, simple, and perfect for when you need a chocolatey fix without turning on the oven.
We hope you thoroughly enjoy this delicious and incredibly easy Butterfinger cookie recipe! Don’t forget to leave a review below to share your experience. For more delectable recipes and baking inspiration, be sure to follow Belly Full on TikTok, Facebook, Instagram, Pinterest, and YouTube!
Butterfinger Cookies

Pin
Ingredients
- 1 cup unsalted butter, softened
- 3/4 cup brown sugar
- 1/4 cup granulated sugar
- 2 large eggs
- 1 teaspoon vanilla
- 2 1/4 cups all-purpose flour, spooned and leveled
- 3.4 ounce box vanilla instant pudding, (just the powder)
- 1 teaspoon baking soda
- 1 teaspoon kosher salt
- 3/4 cup Butterfinger candy, unwrapped and chopped
Instructions
- Preheat oven to 350 degrees F with rack in the center. Prepare two regular sized baking sheets with parchment paper.
- In a large bowl, cream the butter, brown sugar, and granulated sugar together until well combined and fluffy, about 2 minutes. Add eggs, one at a time. Add the vanilla.
- In a separate bowl combine the flour, pudding powder, baking soda, and salt. Add to the wet mixture and mix until combined.
- Add the chopped butterfinger candy and combine again.
- Scoop out tablespoon sized scoops and roll into balls (do not flatten), leaving at least a 2 inch space between each cookie.
- Bake 10 minutes and remove from the oven.
- Let cool on the baking sheet for 2 minutes before moving to a cooling rack. Eat and enjoy!
Notes
Nutrition
Nutritional information given is an automatic calculation and can vary based on the exact products you use and any changes you make to the recipe. If these numbers are very important to you, I would recommend calculating them yourself.