
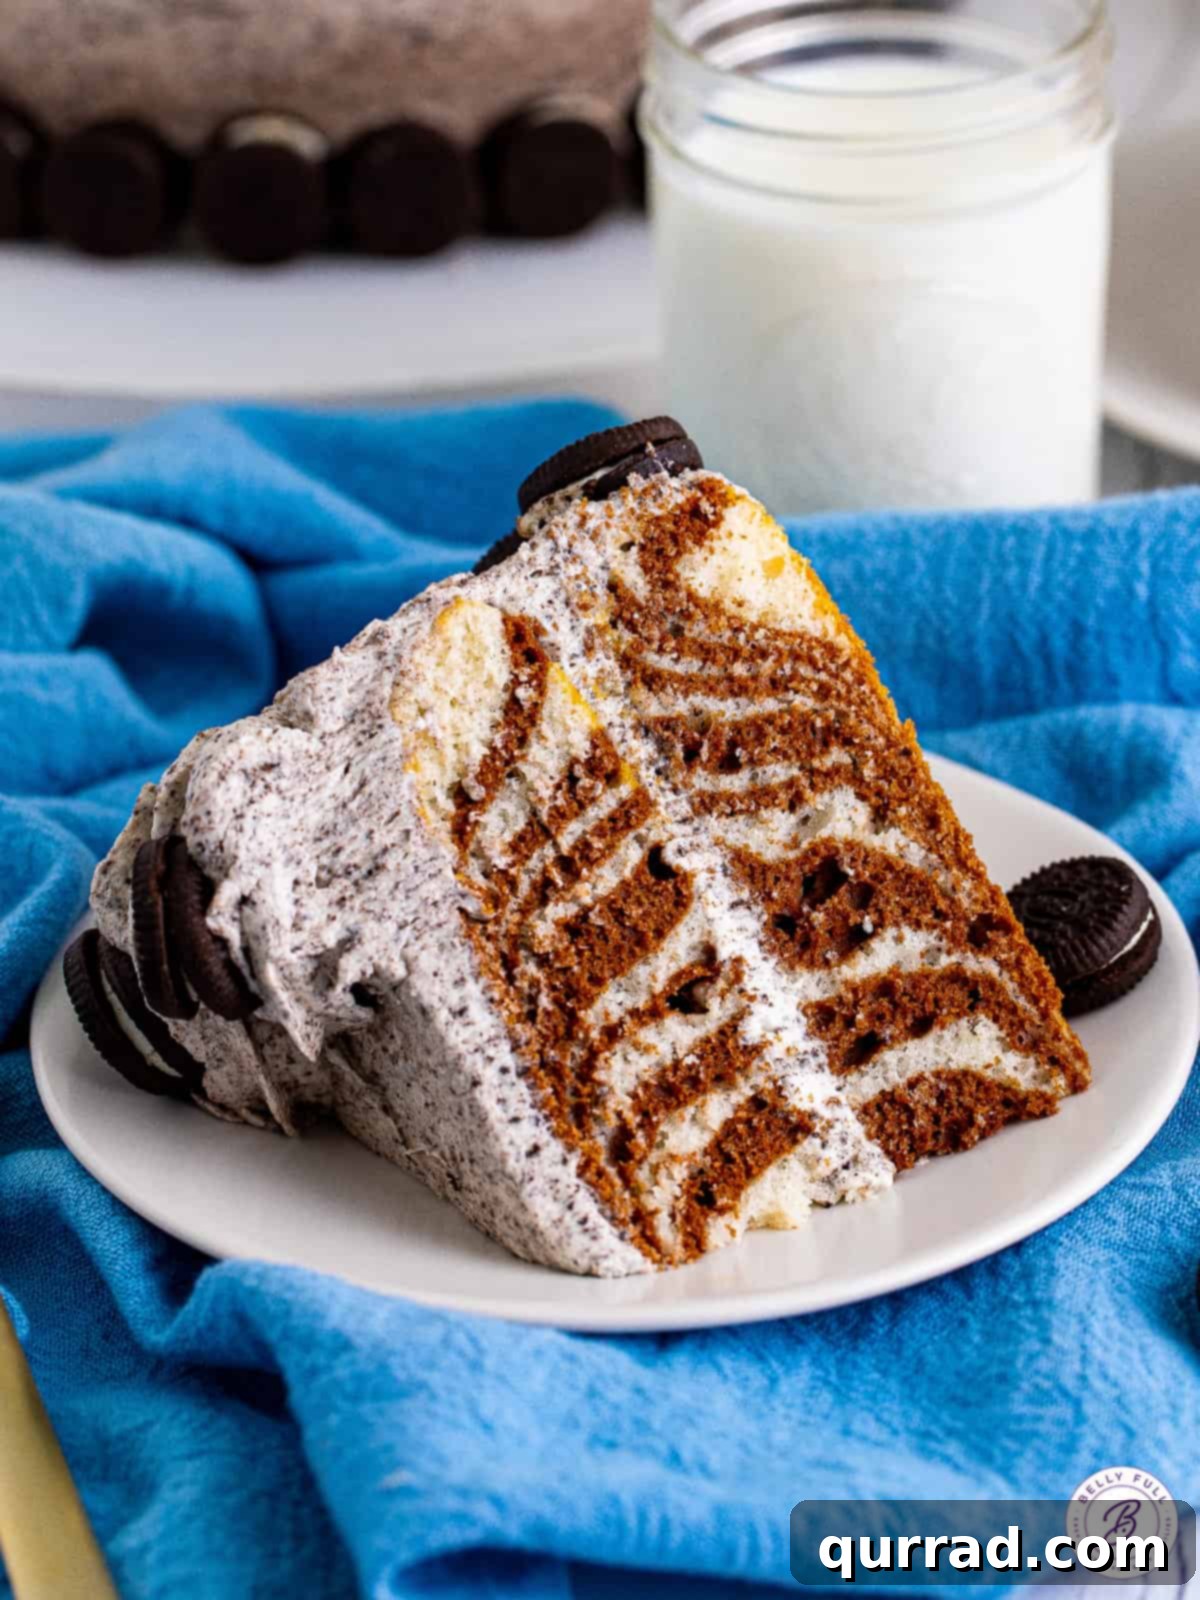
Welcome to the delightful world of the Zebra Cake, a visually stunning dessert that combines the classic flavors of vanilla and chocolate in elegant, mesmerizing stripes. This two-layer masterpiece, generously adorned with a rich and creamy cookies and cream frosting, promises a show-stopping presentation without the fuss typically associated with elaborate baking projects. Thanks to the smart use of a box cake mix, this decadent treat remains surprisingly simple and accessible, allowing anyone to achieve bakery-quality results right in their own kitchen. Prepare for a chorus of “ooohs” and “aaahs” when you reveal its captivating interior!
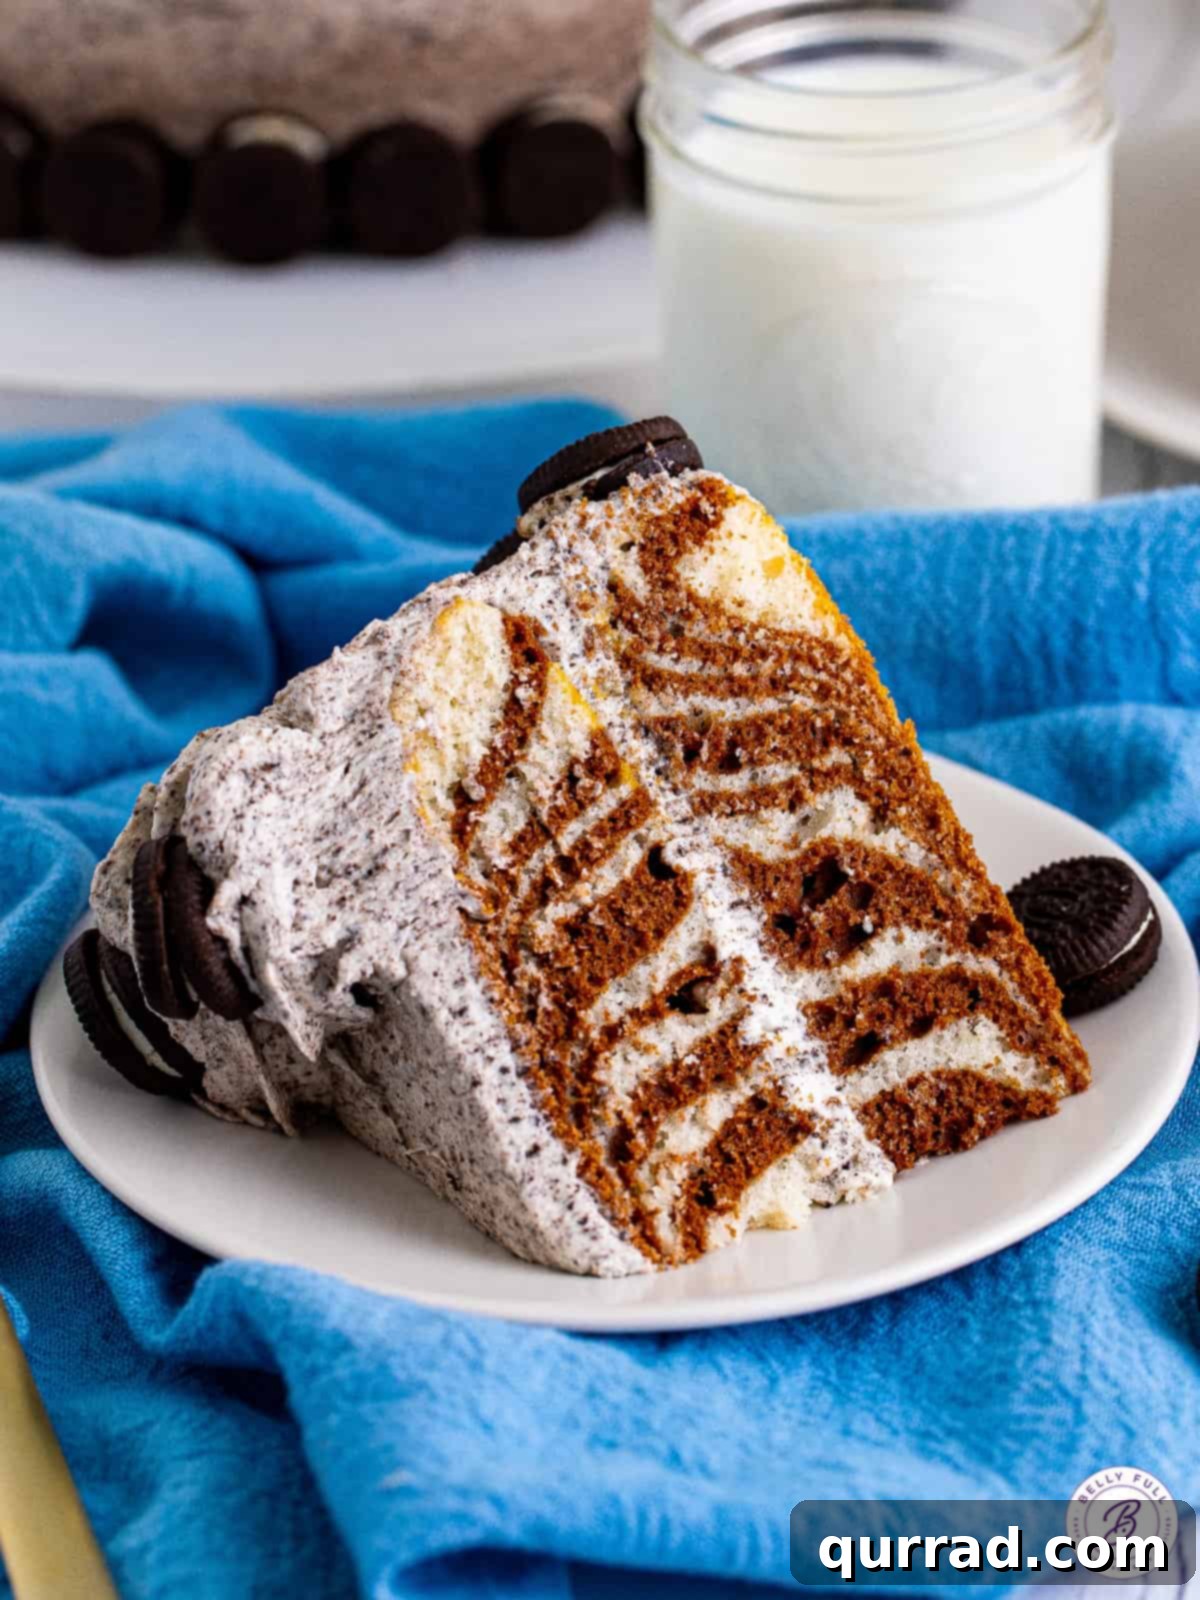
Unveiling the Easy Zebra Cake Recipe with Irresistible Cookies and Cream Frosting
This playful Zebra Cake stands as a testament to the idea that impressive desserts don’t always require advanced culinary skills. The distinctive black and white zebra stripes, a hallmark of this cake, are achieved through a remarkably straightforward layering technique, not intricate piping or specialized equipment. It’s truly as simple as alternating dollops of vanilla and chocolate cake batter, letting gravity do most of the work to create that iconic pattern.
To ensure this spectacular chocolate and vanilla cake recipe remains incredibly easy, we begin with a humble box cake mix. While the convenience of a mix is unmatched, we elevate its flavor and texture by incorporating a few key ingredients: rich whole milk for added moisture and depth, vegetable oil to ensure a tender crumb, and fluffy egg whites for a lighter, more ethereal texture. A touch of unsweetened cocoa powder transforms half of the batter into its essential chocolate counterpart, completing the zebra effect.
Beyond its striking appearance, the true star of this cake is undoubtedly the luxurious cookies and cream frosting. While the cake layers themselves are moist and perfectly balanced with a subtle vanilla and light chocolate flavor, the frosting delivers an explosion of rich, decadent taste. Here, the crushed Oreo cookies and tangy cream cheese truly shine, creating a frosting that is both incredibly flavorful and wonderfully textured, offering a delightful contrast to the soft cake beneath. Every bite is a harmonious blend of creamy, crunchy, sweet, and tangy, making this not just a cake, but an experience.
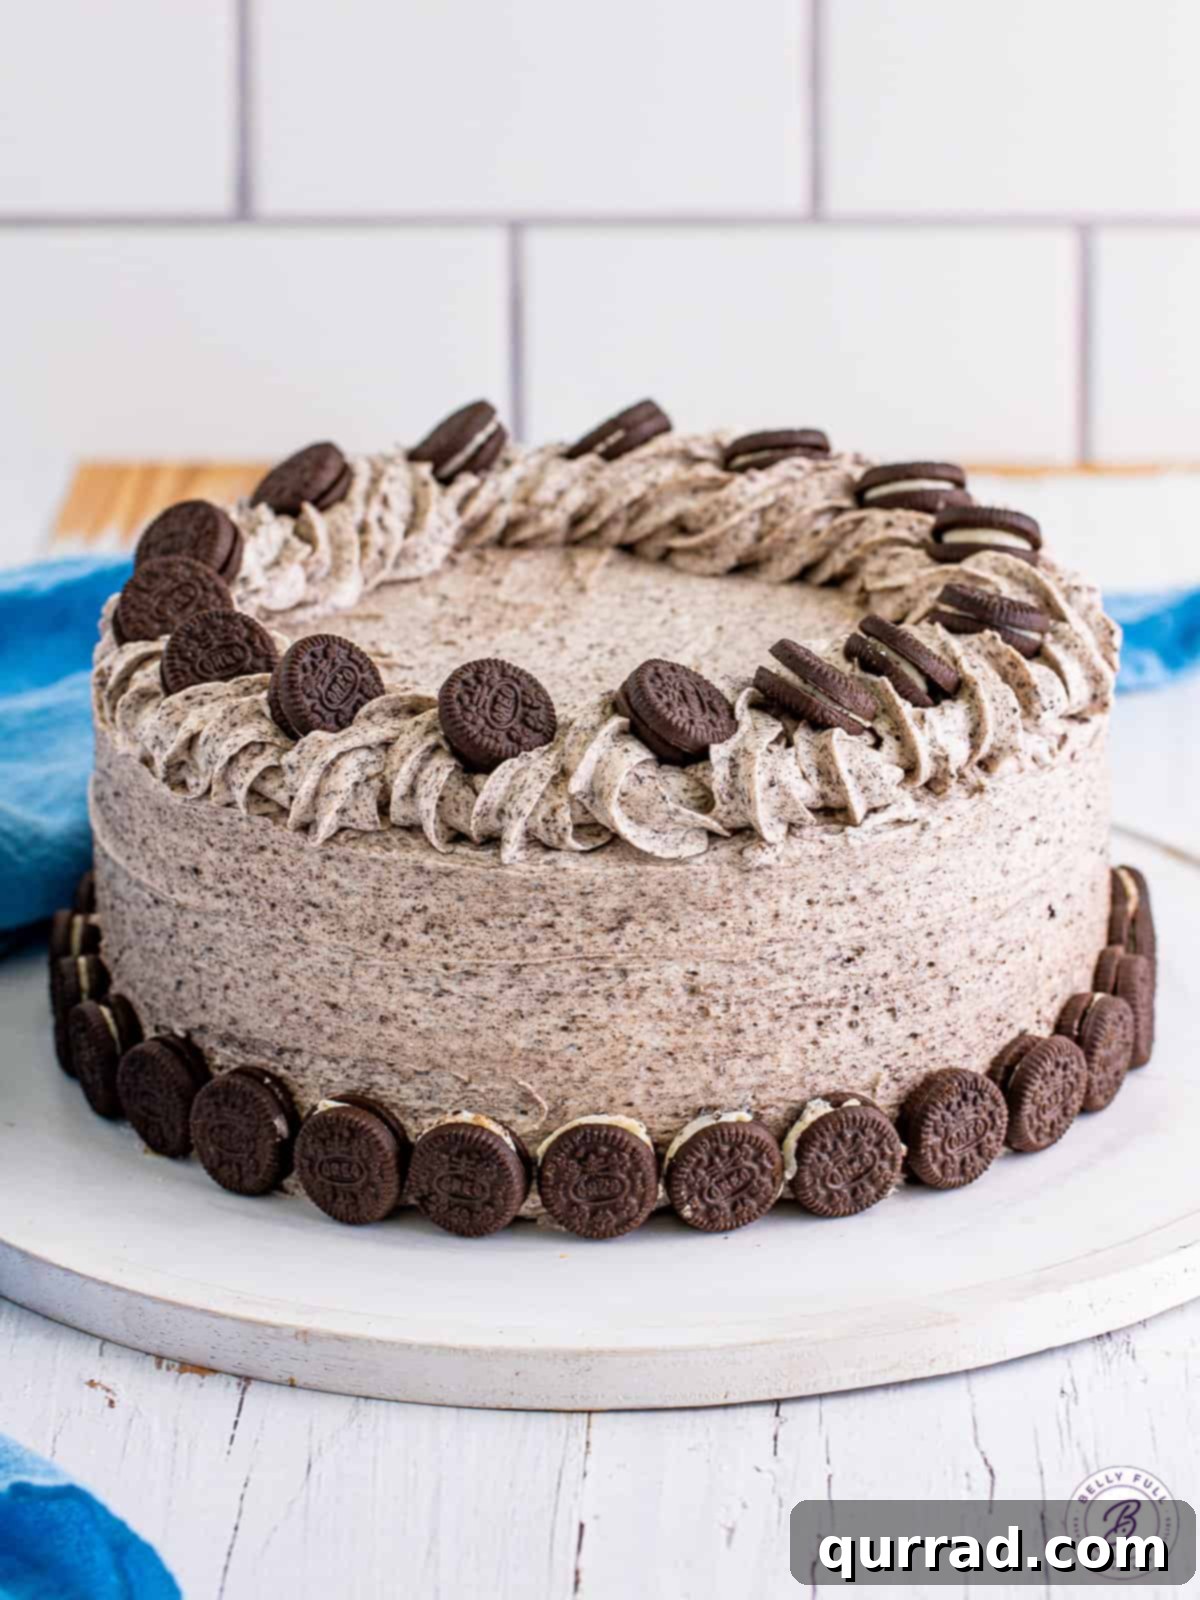
Essential Ingredients for Your Striped Masterpiece
Crafting this stunning marble layer cake requires only a handful of readily available ingredients, particularly since we’re embracing the convenience of a box cake mix. This carefully selected list ensures maximum flavor and optimal texture for both the cake and its irresistible frosting.
For the Cake Layers:
- White Cake Mix: The foundation of our easy zebra cake. Opting for a quality white cake mix streamlines the baking process significantly without compromising on taste or texture. Any reputable brand will work perfectly.
- Whole Milk: Stepping up from water, whole milk introduces essential fat and contributes to a denser, more tender crumb and a richer flavor profile, making your homemade cake taste truly exceptional.
- Vegetable Oil: A crucial ingredient for moisture, vegetable oil ensures your cake remains wonderfully moist and tender, preventing it from drying out during baking or storage.
- Large Egg Whites: For a light, airy, and structurally sound cake. Using only egg whites results in a brighter, whiter vanilla batter, which is essential for the striking contrast in our zebra pattern, and helps achieve a delicate, springy texture.
- Unsweetened Cocoa Powder: The key to creating the distinct chocolate stripes. This provides rich chocolate flavor and a deep, inviting color for the darker portions of your marble cake.
For the Creamy Cookies and Cream Frosting:
- Oreo Cookies: The heart and soul of this frosting! These iconic chocolate sandwich cookies provide both the signature flavor and delightful textural specks. Remember to reserve some extra mini Oreos for an elegant garnish.
- Unsalted Butter: Softened to room temperature, unsalted butter forms the creamy base of our frosting, contributing richness and a smooth, luxurious mouthfeel.
- Cream Cheese: Also softened to room temperature, cream cheese adds a wonderful tang and velvety texture to the frosting, balancing the sweetness and providing a slight firmness that makes it easy to work with.
- Powdered Sugar (Confectioners’ Sugar): Sifting your powdered sugar first is a crucial step to prevent any lumps, ensuring a silky-smooth, effortlessly spreadable frosting. This provides the primary sweetness and structure.
- Heavy Cream: This ingredient stabilizes the frosting, giving it a light, fluffy consistency and ensuring it holds its shape beautifully on your layer cake.
- Vanilla Extract: A splash of pure vanilla extract enhances all the other flavors in the frosting, adding a warm, aromatic depth that complements the chocolate and cream cheese perfectly.
Crafting Your Striking Zebra Cake: A Simple Guide
Despite its intricate appearance, assembling this zebra cake is surprisingly simple and immensely satisfying. This technique is incredibly versatile, inviting you to experiment with various color combinations and cake flavors once you’ve mastered the basic process. Follow these straightforward steps to create a visually stunning and incredibly delicious dessert.
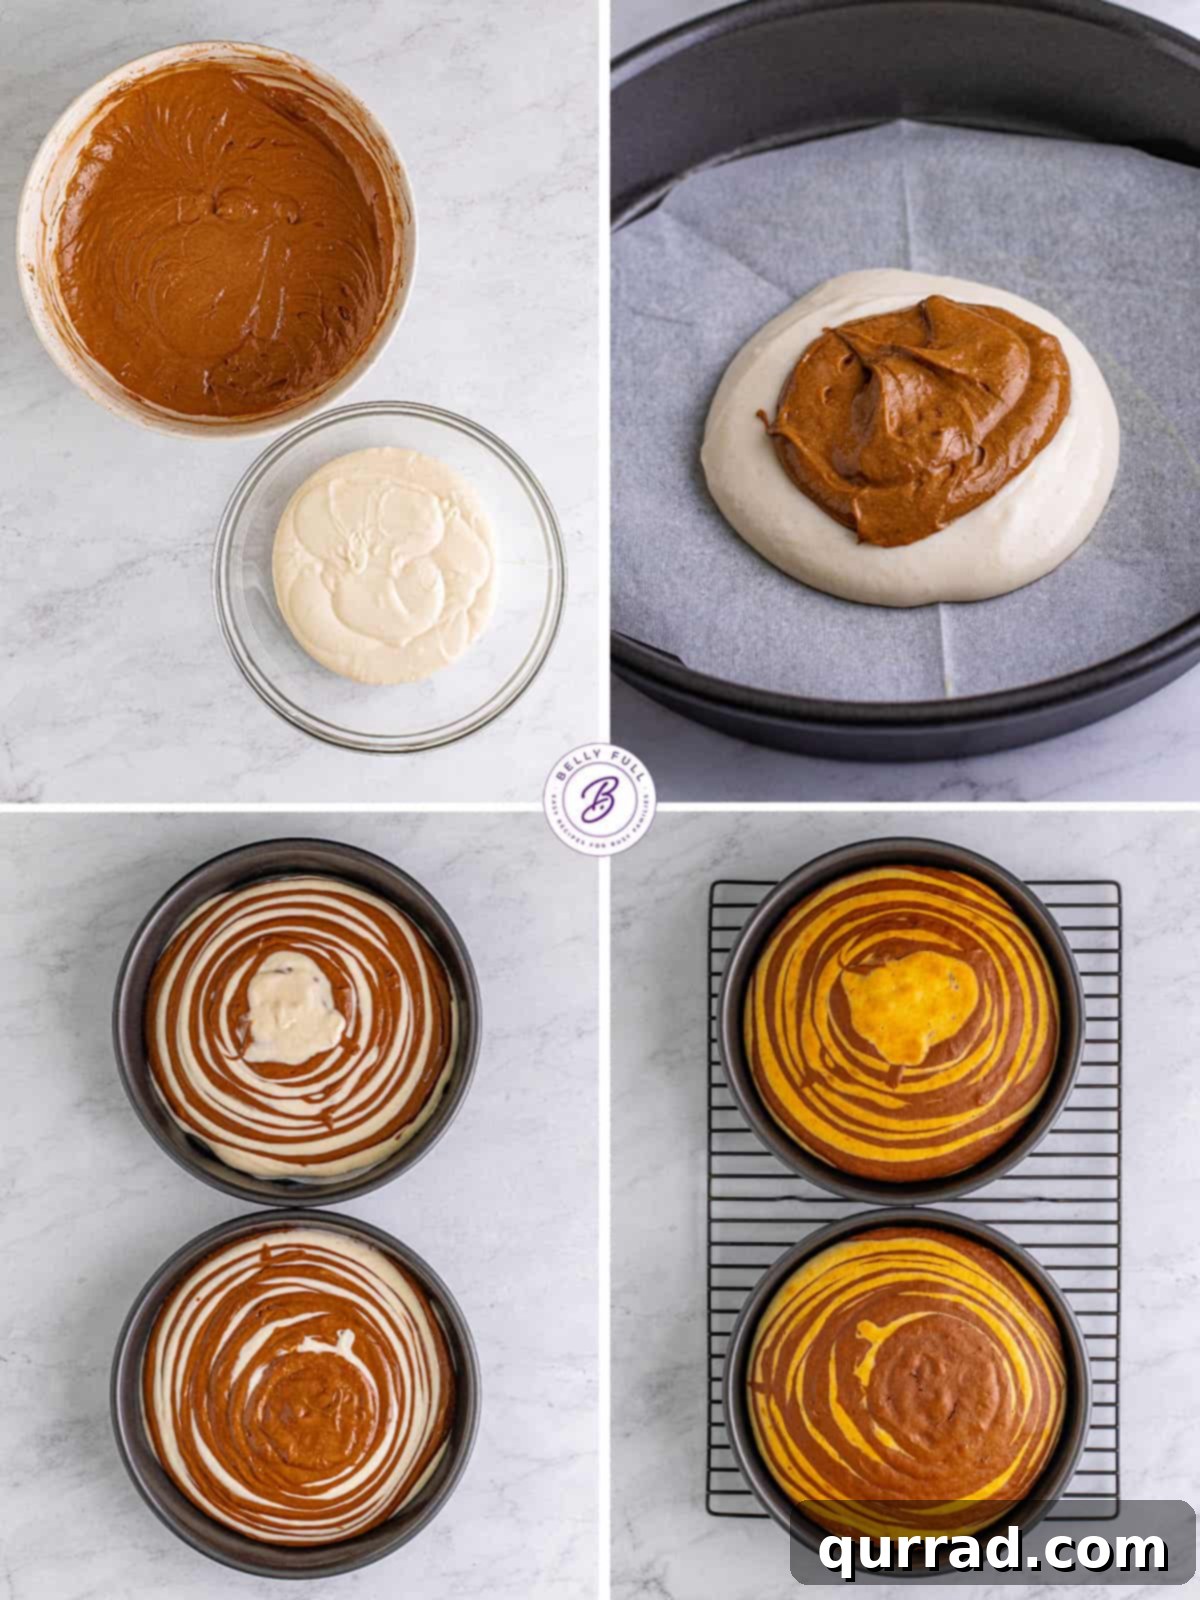
- Prepare Your Baking Pans: Begin by preheating your oven to 350°F (175°C). Prepare two 9-inch round cake pans by spraying them thoroughly with cooking spray. Line the bottom of each pan with a circle of parchment paper, then give the parchment paper another light spray of cooking spray. This meticulous preparation ensures your cakes release cleanly and effortlessly.
- Whisk Up the Cake Batter: In a large mixing bowl, combine the white cake mix, whole milk, vegetable oil, and egg whites. Stir these ingredients together for about 30 seconds, just until they are fully moistened and combined. Then, increase the speed to medium and mix for a full 2 minutes, allowing air to incorporate for a lighter cake.
- Divide and Conquer: Carefully transfer exactly half of the prepared white cake batter into a separate medium-sized bowl. To the remaining half of the batter in the large bowl, add the unsweetened cocoa powder. Stir it gently until the cocoa powder is fully integrated and the batter is uniformly chocolate-colored. Be careful not to overmix.
- Create the Iconic Zebra Effect: This is where the magic happens! Take both prepared cake pans and alternate dollops of batter. Start by adding approximately 1/4 cup of the white cake batter to the very center of each pan. Immediately follow this by adding about 1/4 cup of the chocolate batter directly into the center of the white batter. The batter will naturally spread outwards. Continue this process, alternating between white and chocolate batter, always pouring into the center of the previous color, until all of the batter is used up and distributed evenly between the two pans. You’ll see the rings forming beautifully.
- Bake to Perfection: Place your pans into the preheated oven and bake for 22 to 25 minutes. The cakes are done when a wooden skewer or toothpick inserted into the center comes out clean. Once baked, allow the cakes to cool completely in their pans on a wire rack before attempting to frost them. This is crucial for structural integrity and easy handling.
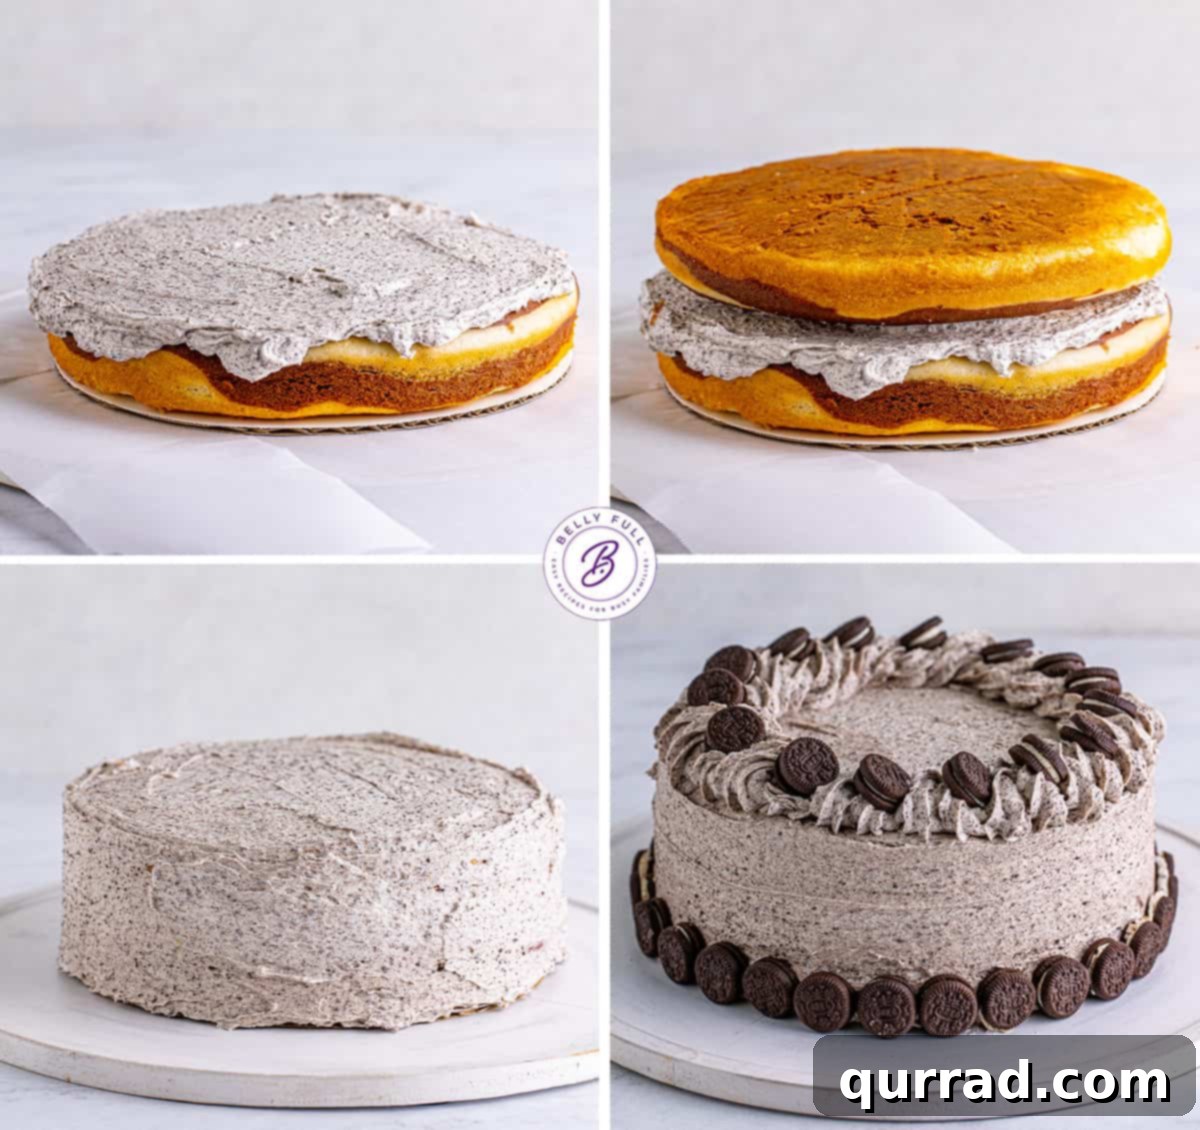
- Whip Up the Delectable Frosting: First, prepare your Oreos by placing the whole cookies into a food processor and pulsing until they are finely crushed into crumbs. Set these aside. In the bowl of a stand mixer fitted with the paddle attachment (or using an electric hand mixer), cream together the softened unsalted butter and cream cheese until the mixture is completely smooth and free of lumps. Gradually add the sifted powdered sugar, a little at a time, mixing until fully combined. Scrape down the sides of the bowl as needed to ensure everything is incorporated. Next, add the heavy cream and vanilla extract, stirring until just combined. Increase the mixer speed to medium-high and whip for 3 full minutes until the frosting is wonderfully light and fluffy. Finally, gently fold in the crushed cookie crumbs using a spatula to ensure they are evenly distributed, giving your frosting its signature speckled appearance.
- Assemble and Frost Your Layer Cake: Use a serrated knife to carefully level the cooled cake layers, slicing off any domed tops to create flat surfaces. This ensures your cake layers stack neatly. Place one cake layer, bottom-side down, onto your chosen serving platter or cake stand. Spread about 1 cup of the prepared cookies and cream frosting evenly over the top of this layer, extending it to the edges. Carefully place the second cake layer on top, bottom-side down, aligning it precisely. Apply a thin “crumb coat” of frosting over the entire cake (top and sides). This traps any loose crumbs. Transfer the cake to the refrigerator and chill for 1 to 2 hours, allowing the crumb coat to set firm.
- Final Frosting and Decoration: Once the cake is thoroughly chilled, remove it from the fridge. Apply the remaining frosting in a thicker, even layer over the entire cake, smoothing the top and sides to your desired finish. Now comes the fun part: decorating! Use any leftover frosting to create decorative swirls or patterns, and proudly adorn your masterpiece with mini Oreos or other desired garnishes. Slice and serve immediately to enjoy its fresh flavors and stunning interior.
Troubleshooting Tip: What If My Batter Doesn’t Spread Evenly?
It’s a common concern when creating the zebra pattern: sometimes the batter doesn’t quite spread perfectly into neat, concentric circles. If you notice that your white or chocolate batter isn’t spreading as smoothly as you’d like while layering it into the pans, don’t fret! The solution is simple and won’t compromise your beautiful zebra design. Gently tilt and rotate the baking pan back and forth. This gentle movement will encourage the batter to spread outwards, naturally filling the bottom of the pan and maintaining the integrity of the striped pattern. Continue layering and tilting until both pans are evenly filled, ensuring each cake achieves that perfect, striking look.
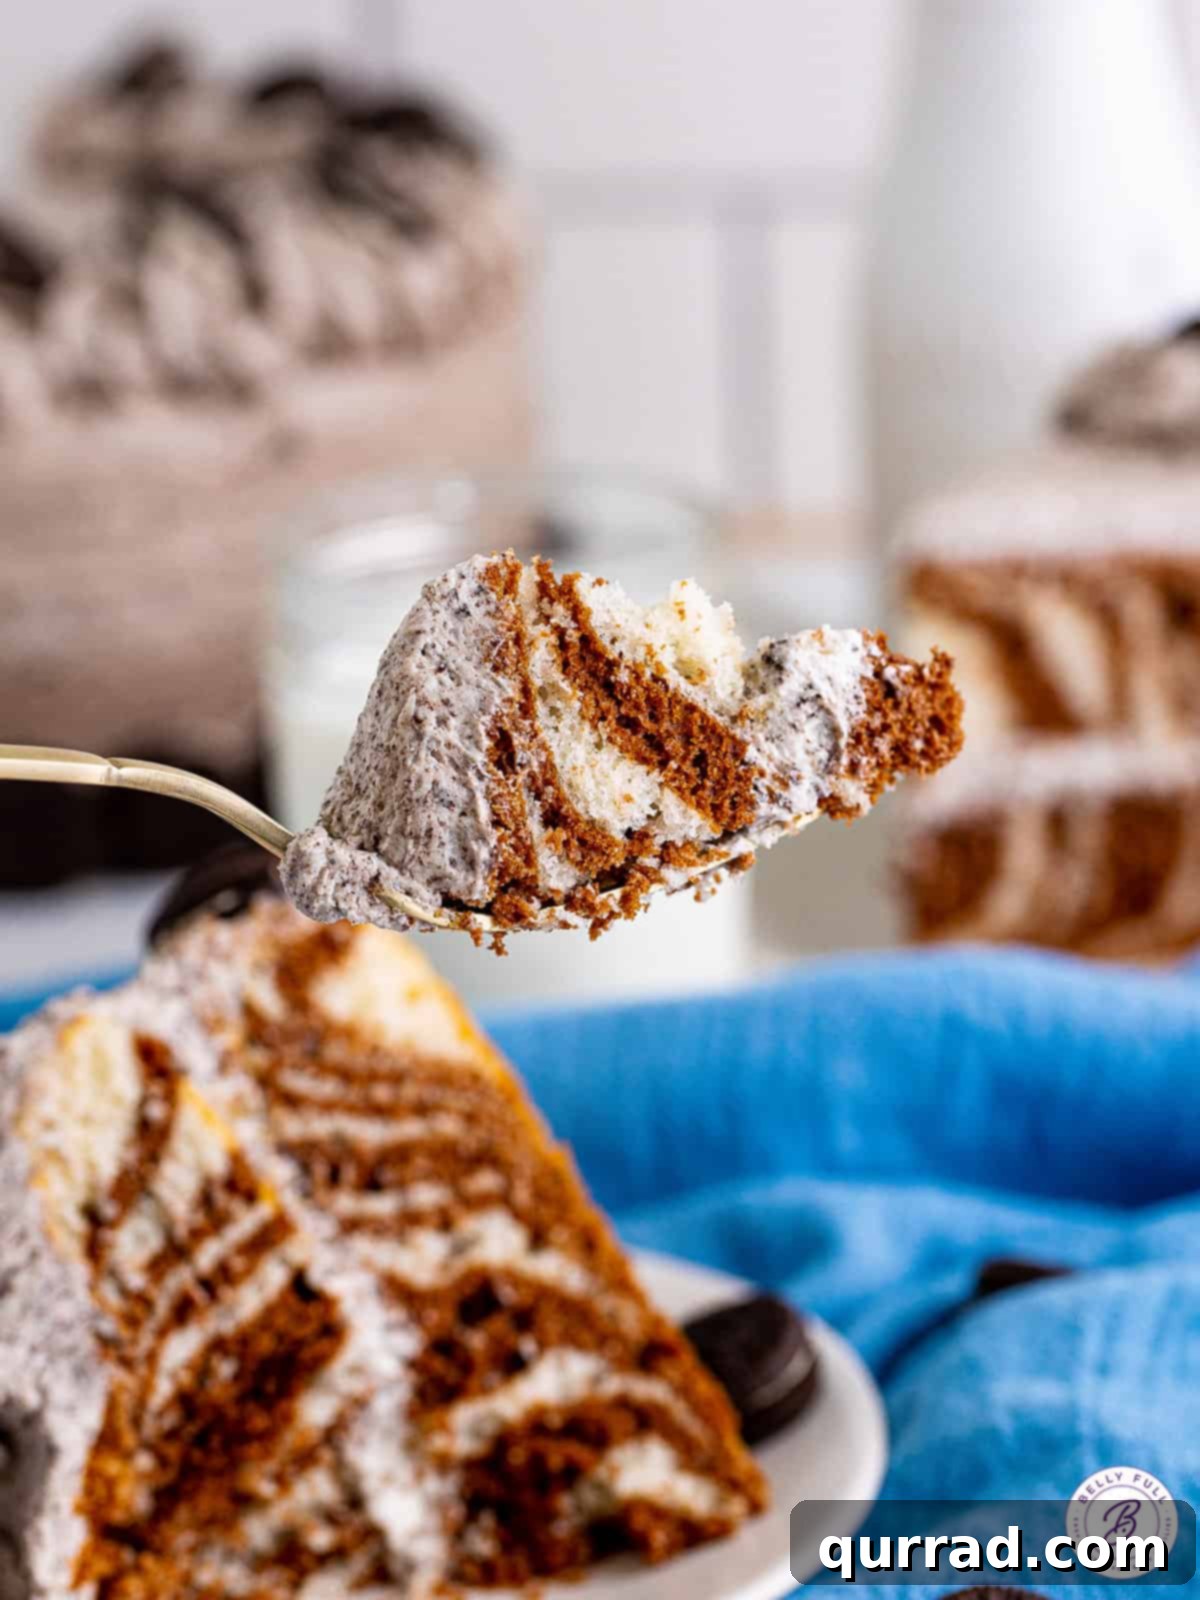
Exploring Different Frosting Pairings
While our cookies and cream frosting perfectly complements the vanilla and chocolate stripes, the true visual impact of this zebra cake comes from its internal design. This means you have ample freedom to experiment with various frosting flavors if you desire something different or simply want to try a new combination. The subtle vanilla and light chocolate cake layers are incredibly versatile and pair well with a wide array of options. Here are a few delectable alternatives that would be equally delightful:
- Classic Chocolate Buttercream: A timeless choice that deepens the chocolate notes and adds a rich, familiar sweetness.
- Velvety Vanilla Buttercream: For those who prefer a simpler, more classic flavor, a smooth vanilla buttercream allows the cake’s unique pattern to truly shine.
- Decadent Peanut Butter Frosting: A fantastic option for peanut butter lovers, offering a creamy, nutty contrast to the mild cake flavors.
- Light Strawberry Frosting: For a fruity twist and a pop of color, a homemade strawberry frosting can add a lovely fresh dimension to your zebra cake.
- Cream Cheese Frosting (Plain): If you love the tanginess of cream cheese but want to skip the Oreos, a classic cream cheese frosting offers a rich, smooth finish.
Feel free to get creative and choose a frosting that best suits your taste or the occasion! The beauty of the zebra cake will still captivate everyone when you slice into it.
Creative Decorating Ideas to Elevate Your Zebra Cake
Once your zebra cake is beautifully frosted with the luscious cookies and cream masterpiece, the fun doesn’t have to stop there! This cake is a fantastic canvas for your creative decorating ideas. While mini Oreos are a classic and charming touch, consider these additional toppings to truly make your cake stand out:
- More Crushed Oreos: Sprinkle a generous amount of extra crushed Oreos over the top and around the base for added texture and an intensified cookies and cream experience.
- Chocolate Sprinkles: A festive and easy way to add a playful touch. Both classic jimmies or nonpareils in chocolate or even a mix of black and white sprinkles would look fantastic.
- Elegant Chocolate Shavings or Curls: For a more sophisticated look, use a vegetable peeler or a sharp knife to create delicate chocolate shavings or curls from a bar of good quality chocolate.
- Melted Chocolate Drizzle: A simple yet effective way to add visual appeal. Melt some chocolate chips or baking chocolate, let it cool slightly, then drizzle it artfully over the top of the cake, allowing it to drip down the sides for a professional finish.
- Fresh Berries: For a touch of freshness and color, raspberries or strawberries can provide a beautiful contrast to the black and white theme.
- Whipped Cream Dollops: Pipe small dollops of whipped cream around the top edge or base of the cake, especially if serving immediately.
Note on Frosting Quantity: The recipe provided for the cookies and cream frosting makes a generous amount. This ensures you have plenty to both fill and frost the two-layer cake, with a good quantity leftover for elaborate decorating as you see fit. If you prefer a more minimalist approach and only wish to apply a basic frosting without extensive decoration, you can easily halve the frosting ingredients. This adjustment will still provide enough delicious frosting for a standard crumb coat and a beautiful final layer.
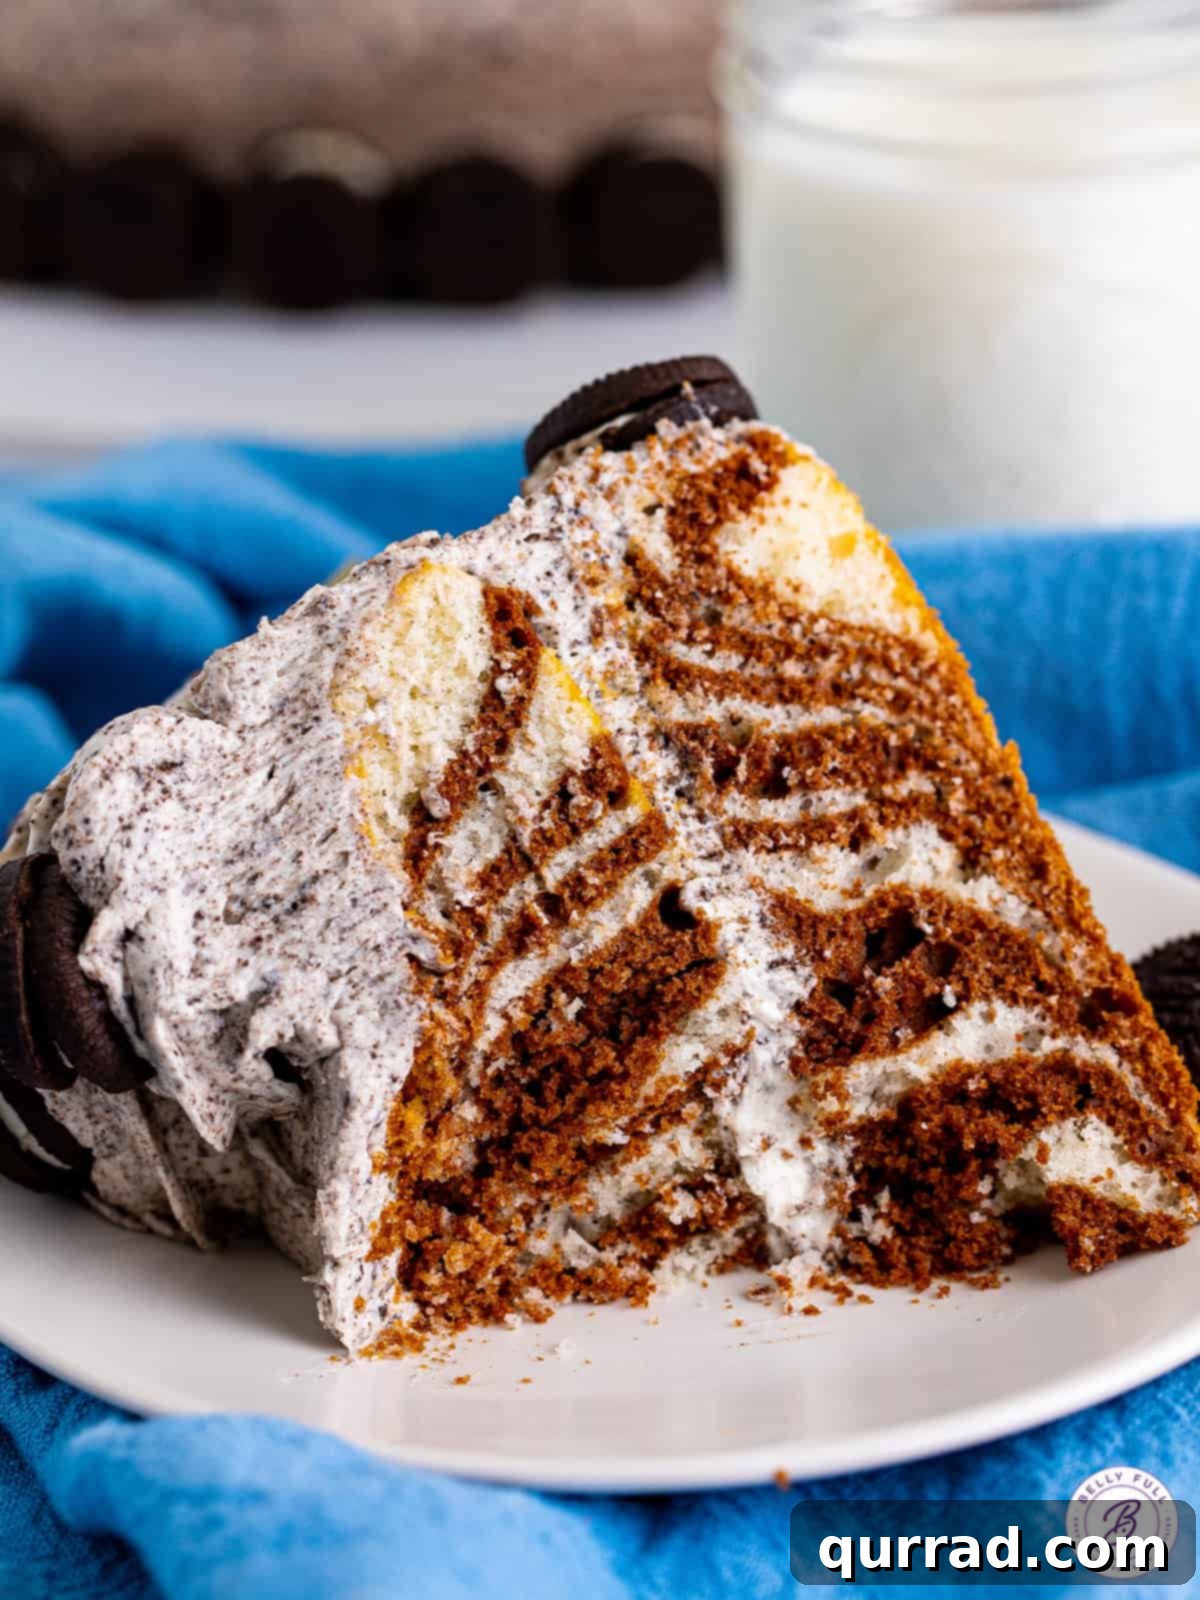
Serving Your Delicious Zebra Cake
While this stunning marble cake requires refrigeration to keep its creamy frosting perfectly chilled and firm, it truly shines when served at room temperature. Allowing the cake to sit out on the counter for about 30-60 minutes before serving lets the frosting soften slightly and the cake layers become more tender, enhancing the overall flavor and texture experience. Once enjoyed, any remaining cake should be returned to the refrigerator to maintain its freshness. Of course, if you prefer a firmer, colder slice, there’s absolutely nothing wrong with enjoying it straight from the fridge!
Make Ahead Tips and Proper Storage
Planning ahead can make baking this zebra cake even more enjoyable, especially for special occasions. Both the cake layers and the frosting can be prepared in advance, saving you time on the day of assembly.
- Making Ahead:
- Cake Layers: Once your cake layers have completely cooled, wrap each one tightly in several layers of plastic wrap. They can be stored at room temperature for up to 2 days, or in the refrigerator for up to 5 days. For longer storage, they can be frozen (see “To Freeze” section).
- Frosting: Prepare the frosting as directed, but here’s a crucial tip: do not add the cookie crumbs until you are ready to assemble and frost the cake. Store the prepared cream cheese frosting (without crumbs) in an airtight container in the refrigerator for up to 3 days. When you’re ready to use it, let it come to room temperature for about 30 minutes, then re-whip it briefly to restore its fluffy texture, and finally, fold in your crushed Oreo crumbs. Adding the crumbs too early will cause them to soften and eventually meld into the frosting, resulting in a dull grey color rather than the attractive speckled look you desire.
- Storing Leftovers: Any leftover zebra marble cake should be stored in an airtight container or tightly covered with plastic wrap to prevent it from drying out. Kept in the refrigerator, it will remain fresh and delicious for up to 6 days.
- To Freeze: This cake is also excellent for freezing, either whole or in individual slices. For a whole cake, first, freeze the frosted cake until firm (this helps prevent the frosting from sticking to the wrap). Then, wrap it tightly in plastic wrap, followed by a layer of aluminum foil. For slices, wrap each piece individually in plastic wrap and then foil. The cake can be frozen for up to 3 months. To thaw, simply transfer it to the refrigerator overnight or for several hours, then let it come to room temperature before serving for the best texture.
More Fun Cake Recipes to Explore:
- Hummingbird Cake
- Shirley Temple Cake
- Ice Cream Sandwich Cake
- Chocolate Swiss Roll
- Pinata Cake
- Blue Ombre Cake
We truly hope you adore this simple yet spectacular Zebra Cake recipe. It’s designed to bring joy and a touch of edible artistry to your table without any stress. Don’t forget to share your creations and experiences with us!
Zebra Cake Recipe
Prep Time: 20 mins
Cook Time: 25 mins
Chill Time: 1 hr 30 mins
Total Time: 2 hrs 15 mins
Servings: 12 slices
Recipe Summary
This Zebra Cake features striking stripes of vanilla and chocolate cake in two layers, generously topped with a rich and creamy cookies and cream frosting. It’s incredibly delicious and fun to make, and despite its impressive appearance, it’s actually very easy!
Ingredients
For the Cake
- 1 box white cake mix
- 1 cup whole milk
- 1/2 cup vegetable oil
- 4 large egg whites
- 1/4 cup unsweetened cocoa powder
For the Frosting
- 16 whole Oreo cookies
- 1 cup unsalted butter, softened to room temperature
- 8 ounces cream cheese, softened to room temperature
- 8 cups sifted powdered sugar
- 6 tablespoons heavy cream
- 2 teaspoons vanilla extract
- Mini Oreos, for garnish (optional)
Instructions
- Preheat the oven to 350°F (175°C). Spray two 9-inch round cake pans with cooking spray. Add a circle of parchment paper to the bottom of each pan and spray the top of the parchment paper with more cooking spray. Set aside.
- In a large bowl, using an electric hand mixer, stir the cake mix, milk, oil, and egg whites for 30 seconds until just combined. Mix on medium speed for 2 minutes.
- Take half of the cake batter and transfer it into a medium-sized bowl. This will be your vanilla batter.
- To the remaining cake batter in the large bowl, add the cocoa powder and stir it in until just combined and the batter is a uniform chocolate color. This is your chocolate batter.
- Working with both cake pans simultaneously, add about 1/4 cup of the white cake batter to the very center of each pan. Then, add about 1/4 cup of the chocolate batter into the center of the white batter in each pan. Continue repeating this process, alternating batters and always pouring into the center, until all of the batters are used up and the cakes have an even amount of batter in each pan. If the batter isn’t spreading evenly, gently tilt the baking pan until it fills out the bottom. This will not disturb the zebra design.
- Bake for 22-25 minutes, or until a toothpick inserted into the center of the cakes comes out clean. Allow the cakes to cool completely in their pans on a wire rack.
- Make the frosting: Place the Oreo cookies into a food processor and process into fine crumbs. Set aside. In the body of a stand mixer with the paddle attachment (or using an electric hand mixer), cream together the softened butter and cream cheese until smooth and well combined. Gradually add the sifted powdered sugar, a little at a time, mixing until fully incorporated. Scrape down the sides of the bowl as needed. Add the heavy cream and vanilla extract, and stir until combined. Increase the mixer speed to medium-high and whip for 3 minutes until the frosting is light and fluffy. Gently fold in the cookie crumbs using a spatula to ensure they are evenly distributed, creating a speckled appearance.
- Once the cakes are completely cool, use a serrated knife to carefully cut off any domed tops, making them flat. Place one of the cake layers, bottom-side down, onto your serving platter. Spread about 1 cup of the prepared frosting evenly over the top, extending it to the edges.
- Place the second cake layer on top, bottom-side down, aligning it carefully. Apply a thin layer of frosting over the entire cake (top and sides) to create a “crumb coat.” Place the cake in the refrigerator for 1-2 hours to allow this crumb coat to set.
- Once chilled, remove the cake from the fridge. Apply another generous layer of frosting around the whole cake, smoothing the top and sides. Take any remaining frosting and decorate as you wish. Garnish with mini Oreos if desired. Slice and serve immediately.
Notes
- Wait to add cookie crumbs to the frosting: For the best visual and textural results, do not add the cookie crumbs into the frosting until you are ready to assemble the cake. If added too soon, the crumbs will soften and can blend completely into the frosting, potentially giving it a greyish appearance instead of the desired speckled look.
- Adjust frosting quantity as desired: This frosting recipe yields a generous amount, ensuring you have plenty for a decadent filling, a smooth exterior, and ample leftover for decorative flourishes. If you prefer a simpler finish without additional decorating, you can halve the frosting ingredients.
Nutrition
Calories: 729kcal | Carbohydrates: 119g | Protein: 6g | Fat: 27g | Saturated Fat: 17g | Polyunsaturated Fat: 1g | Monounsaturated Fat: 7g | Trans Fat: 1g | Cholesterol: 71mg | Sodium: 395mg | Potassium: 145mg | Fiber: 1g | Sugar: 99g | Vitamin A: 870IU | Vitamin C: 0.05mg | Calcium: 151mg | Iron: 1mg
Nutritional information is an automatic calculation and can vary based on the exact products you use and any changes you make to the recipe. If these numbers are very important to you, it is recommended to calculate them yourself.