

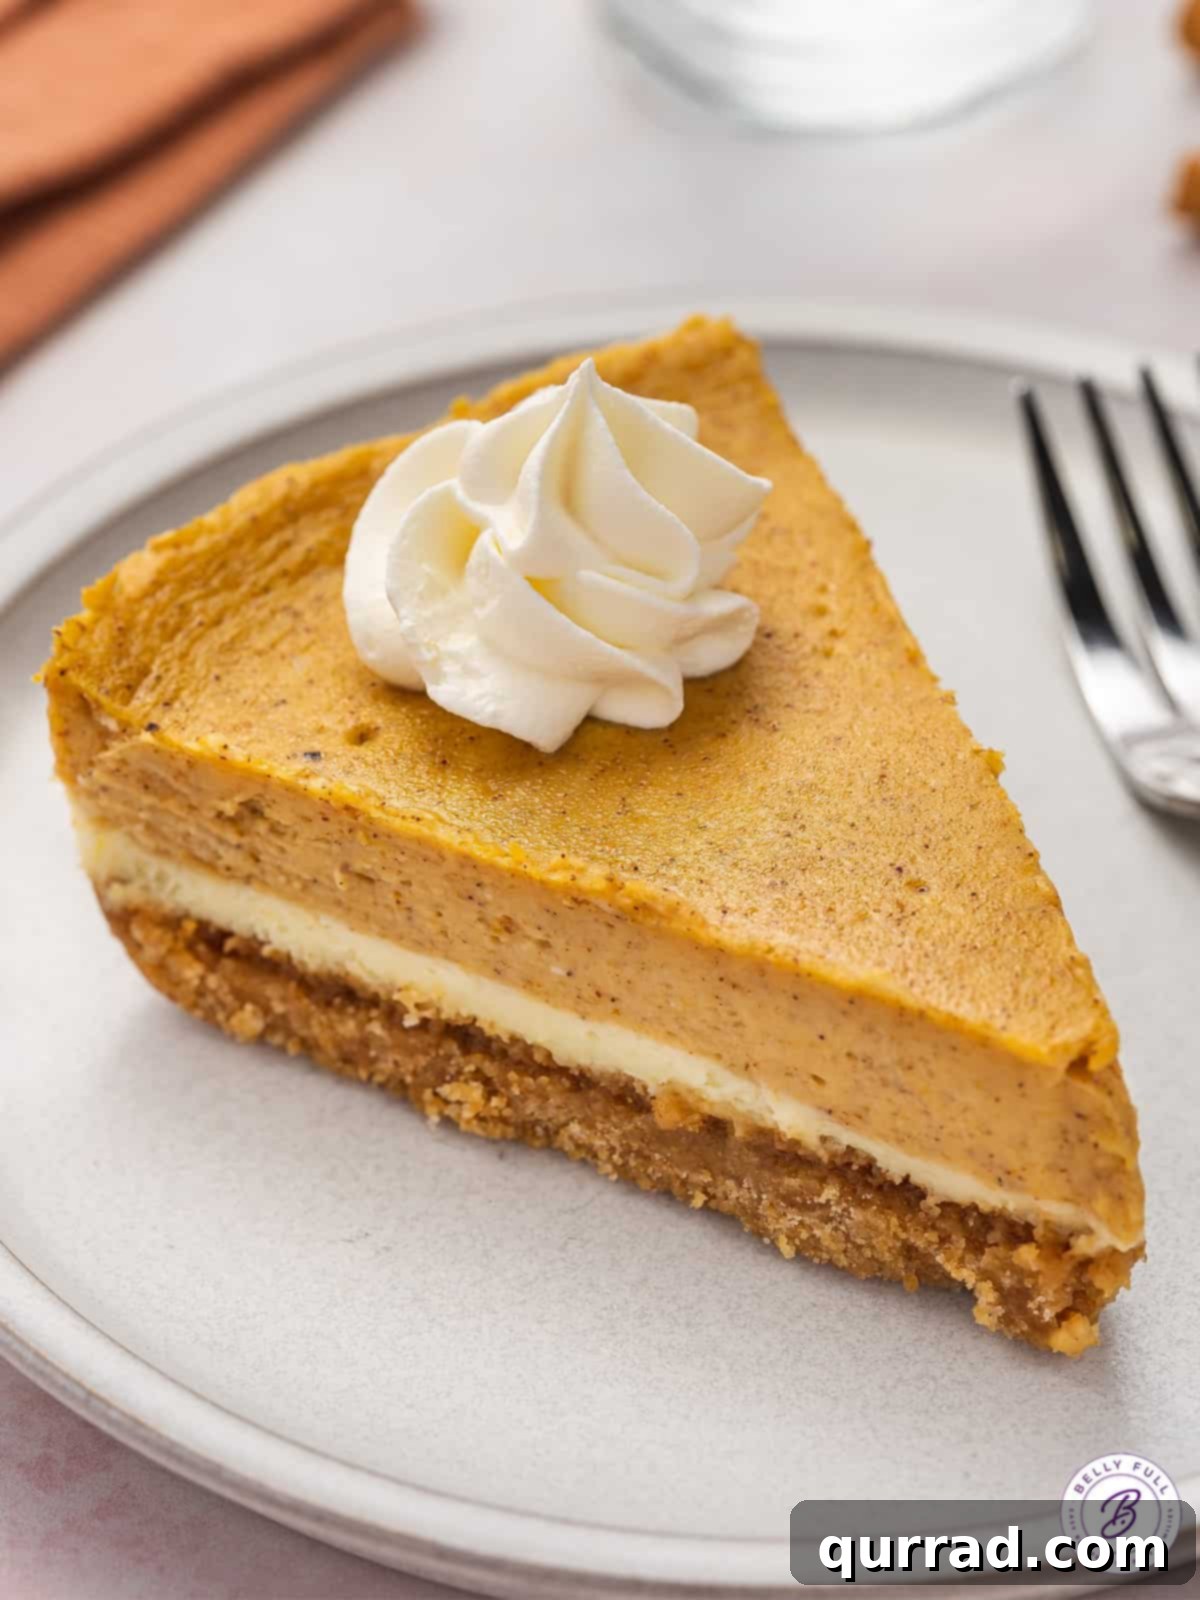
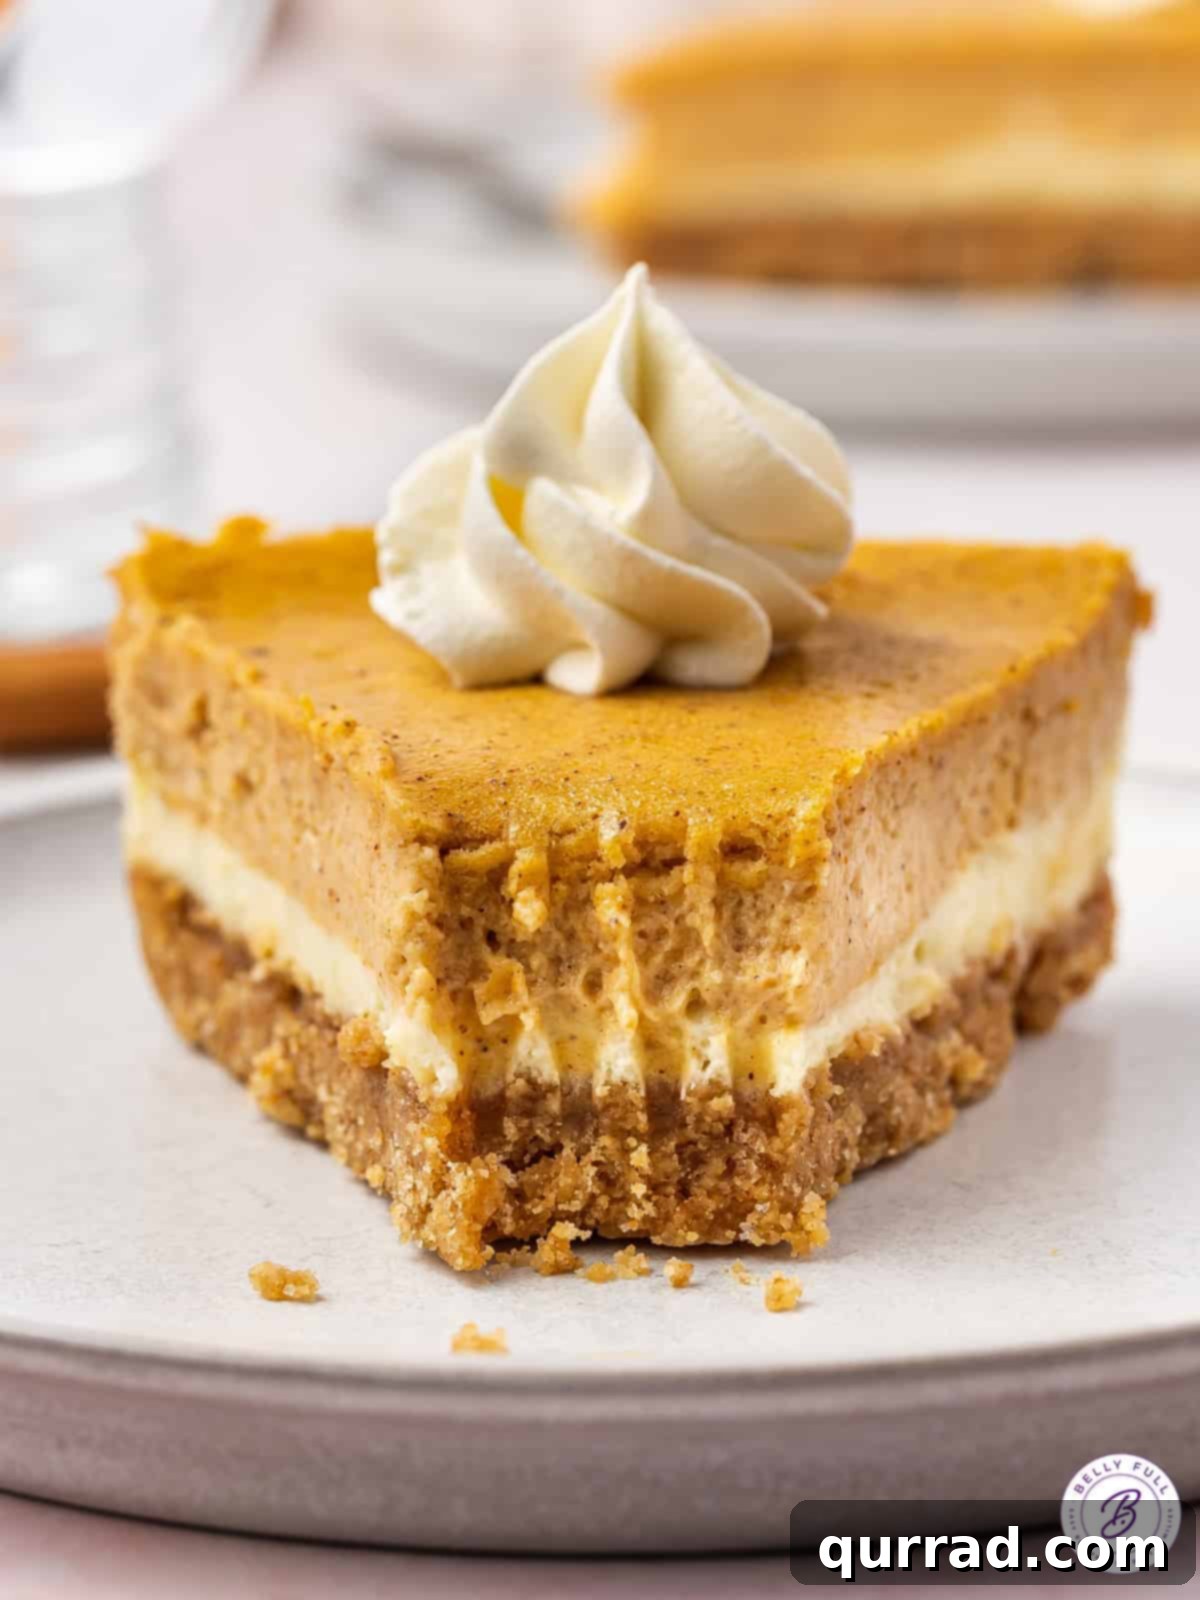
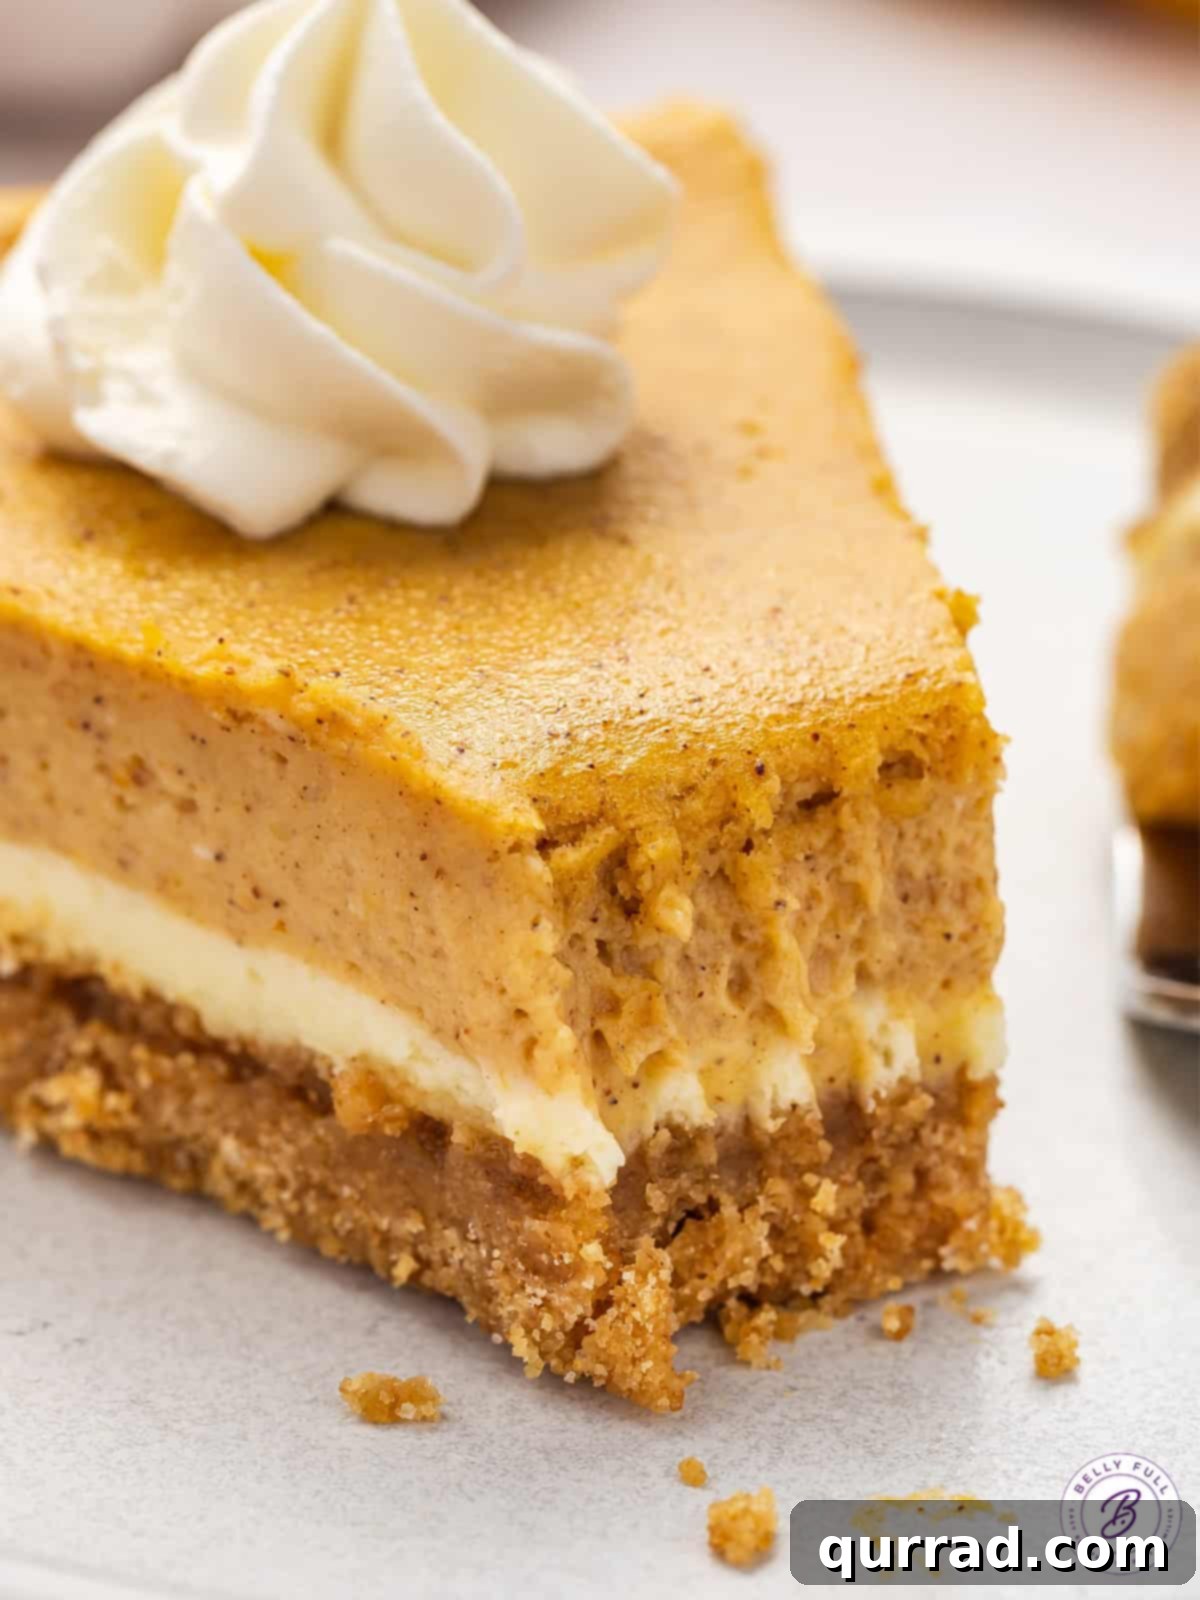
Indulge in the ultimate autumnal delight with this spectacular Layered Pumpkin Cheesecake. This exquisite dessert masterfully combines the rich, creamy texture of a classic cheesecake with the warm, aromatic spices of a traditional pumpkin pie. Featuring a perfectly crisp graham cracker crust, a smooth base layer of vanilla cheesecake, and a vibrant, spiced pumpkin cheesecake topping, it’s designed to satisfy every palate. Whether you’re a devout pumpkin pie enthusiast or a steadfast cheesecake connoisseur, this impressive creation offers the best of both worlds, making it the quintessential centerpiece for your holiday celebrations and fall gatherings.
Discover the Best Layered Pumpkin Cheesecake Recipe for Your Holiday Table
Prepare to elevate your dessert game with what truly is the ultimate holiday treat: our Layered Pumpkin Cheesecake. This recipe is a celebration of fall flavors, blending the sweet and tangy notes of cheesecake with the comforting, spicy essence of pumpkin pie. Its stunning two-tone appearance is as appealing as its complex flavor profile, making it a showstopper at any festive occasion. Imagine the warm aroma of cinnamon, nutmeg, ginger, and cloves filling your kitchen as this magnificent dessert bakes to golden perfection.
One of the most appealing aspects of this cheesecake is its remarkable ease of preparation, especially considering its impressive presentation. Moreover, it’s an ideal make-ahead dessert, allowing you to prepare it a day or two in advance. This means less stress and more time to enjoy your guests on the big day, while ensuring your cheesecake is perfectly chilled and set for optimal flavor and texture. Add this unforgettable Layered Pumpkin Cheesecake to your Thanksgiving or Christmas menu, and watch it become an instant family favorite!
Why This Layered Pumpkin Cheesecake Recipe Will Be Your New Go-To
There are countless reasons why this particular Layered Pumpkin Cheesecake recipe stands out and is destined to become a beloved tradition in your household. Its unique design and simple method offer convenience without compromising on taste or elegance.
- A Harmonious Blend of Two Iconic Desserts: Why choose between creamy cheesecake and classic pumpkin pie when you can have both? This recipe brilliantly combines the best elements of each. You’ll savor the signature tangy, rich, and velvety texture of a traditional cheesecake, perfectly complemented by a distinct layer infused with the cozy, aromatic spices and earthy sweetness of pumpkin pie. It’s a truly balanced flavor experience that appeals to all.
- Effortless Entertaining with Make-Ahead Convenience: Holiday meal planning can be demanding, but this cheesecake simplifies your dessert preparations. It’s a fantastic candidate for making a day or two in advance, as chilling overnight significantly enhances its flavor and ensures a firm, sliceable texture. This valuable feature allows you to free up precious kitchen time on the day of your event, reducing stress and letting you focus on other aspects of your gathering or simply enjoying the festivities.
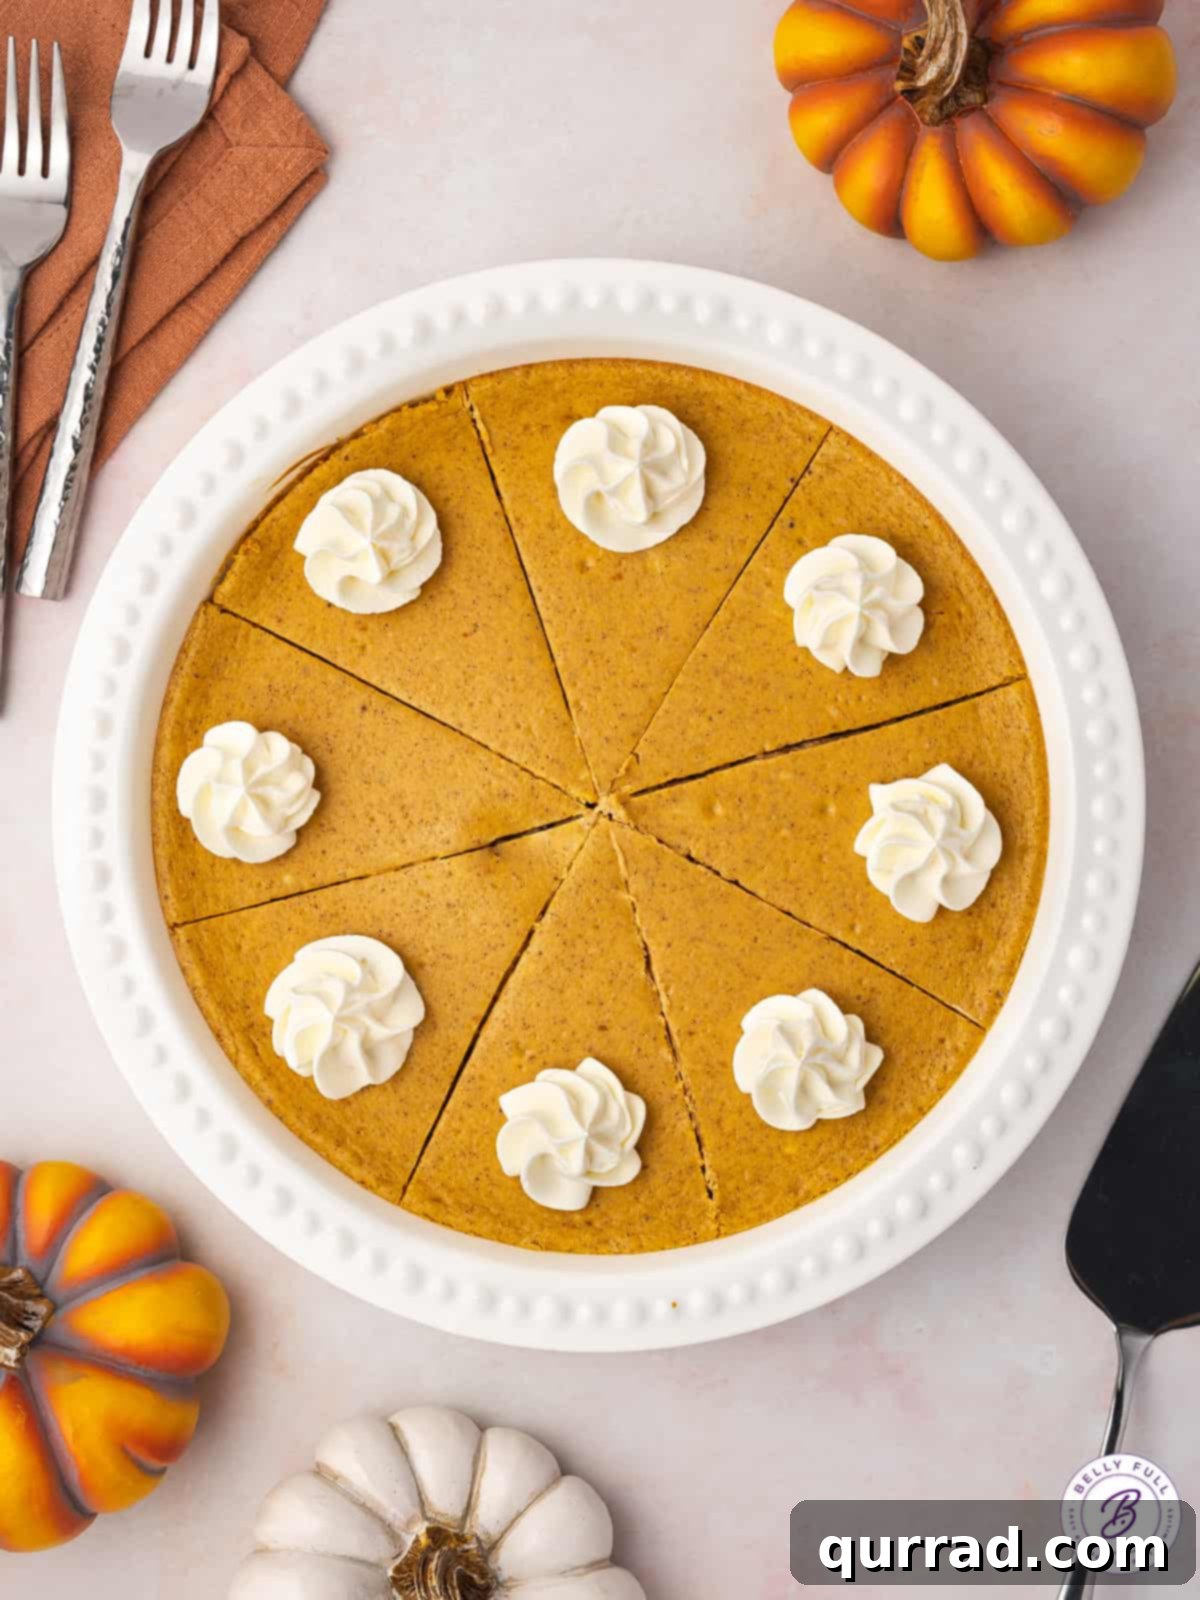
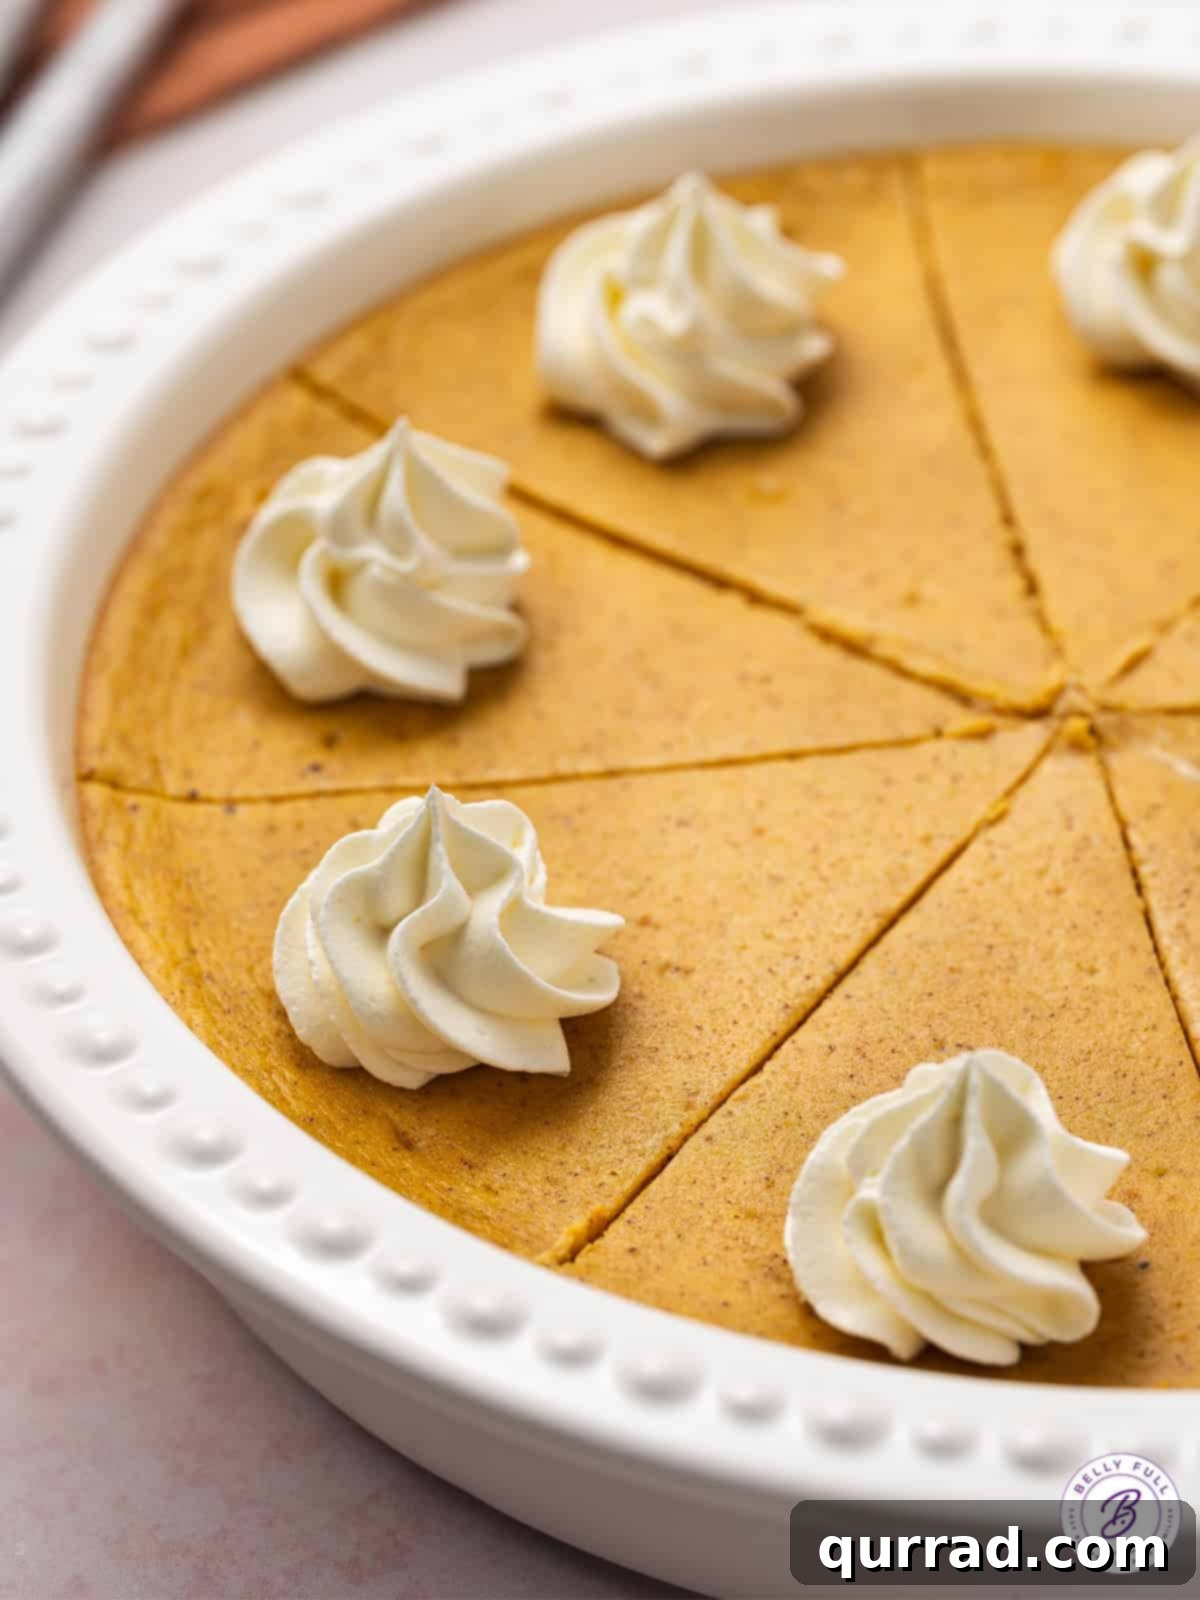
- No Water Bath Required for a Perfect Finish: Many bakers shy away from cheesecakes due to the perceived complexity of a water bath. Good news! This recipe eliminates that step entirely, simplifying the process without sacrificing quality. We’ve perfected a method that yields a beautifully smooth, crack-free cheesecake every time, giving you confidence and an impressive result with less fuss. This makes it an approachable recipe for both novice and experienced bakers alike.
Essential Ingredients for Your Layered Pumpkin Cheesecake
Crafting this delightful Layered Pumpkin Cheesecake requires a selection of fresh, high-quality ingredients, readily available at most grocery stores. Each component plays a vital role in achieving the perfect balance of flavor and texture. For precise measurements and detailed instructions, remember to refer to the printable recipe card at the bottom of this article.
- Graham Cracker Crumbs: These form the foundation of our irresistible crust. You can easily create your own by finely crushing about 10 full graham cracker sheets, or opt for pre-ground crumbs for convenience. The fine texture is key for a cohesive crust.
- Melted Butter: Essential for binding the graham cracker crumbs together, melted butter creates a rich, sturdy, and flavorful crust that holds its shape beautifully. We recommend unsalted butter to control the overall sodium content.
- Granulated Sugar and Brown Sugar: A blend of both sugars provides the ideal sweetness and depth of flavor. Granulated sugar contributes a clean sweetness to the plain cheesecake layer, while brown sugar adds a nuanced caramel-like note and moistness to the pumpkin layer, enhancing its autumnal character.
- Cream Cheese: The star of any cheesecake! Ensure your cream cheese is softened to room temperature. This is crucial for achieving a lump-free, silky-smooth cheesecake batter that bakes evenly and has the perfect creamy consistency. Full-fat cream cheese is recommended for the best results.
- Vanilla Extract: A splash of pure vanilla extract enhances the overall sweetness and adds a warm, aromatic depth to the cheesecake layers, complementing both the creamy and spiced elements.
- Large Eggs: Eggs are critical for the structure and stability of the cheesecake. They act as a binder, helping the cheesecake set properly and giving it that classic smooth, custardy texture. Ensure they are at room temperature for better incorporation into the batter.
- Pumpkin Puree: Be sure to use 100% canned pumpkin puree, not pumpkin pie filling. Pumpkin pie filling contains added spices and sweeteners that would alter the intended flavor profile of this recipe. Plain pumpkin puree allows you to control the seasoning precisely.
- Pumpkin Pie Spice: This blend of warm spices is what gives the pumpkin layer its signature fall flavor. We love using our homemade pumpkin pie spice recipe for optimal freshness and potency, but a high-quality store-bought blend works wonderfully too. It typically includes cinnamon, nutmeg, ginger, and cloves.
- Whipped Cream: A generous dollop of freshly piped whipped cream serves as the perfect airy, creamy garnish, providing a lovely contrast to the dense, rich cheesecake and completing the dessert experience.
Step-by-Step Guide: How to Make Layered Pumpkin Cheesecake
Creating this stunning Layered Pumpkin Cheesecake is a straightforward process, designed for success even without the traditional water bath. Follow these detailed steps for a dessert that’s as delightful to make as it is to eat. For a complete, printable recipe with exact measurements, please scroll to the bottom of this page.
- Prepare the Graham Cracker Crust: Begin by preheating your oven to 350°F (175°C). In a medium-sized mixing bowl, combine the graham cracker crumbs, melted butter, and 1/4 cup of granulated sugar. Mix these ingredients thoroughly until the crumbs are evenly moistened. Press this mixture firmly and evenly into the bottom and slightly up the sides of a 9-inch pie pan or springform pan. A flat-bottomed measuring cup can help achieve a compact crust. Bake the crust for 7-8 minutes, then remove it from the oven and allow it to cool completely on a wire rack while you prepare the filling.
- Craft the Silky Cheesecake Layer: Once the crust is cooling, reduce your oven temperature to 325°F (160°C). In a large bowl, using an electric mixer, beat the softened cream cheese with 1/2 cup of granulated sugar and vanilla extract until the mixture is beautifully smooth and entirely lump-free. This ensures a wonderfully creamy cheesecake texture. Next, add the eggs one at a time, beating just until each egg is incorporated before adding the next. Be careful not to overmix the batter at this stage, as too much air can cause cracking during baking.
- Form the Base Cheesecake Layer: Carefully scoop out exactly one cup of this plain cheesecake batter. Evenly spread this portion over your cooled graham cracker crust. This will form the distinct, unspiced base layer of your cheesecake.
- Infuse the Pumpkin Layer with Fall Spices: To the remaining cheesecake batter in the bowl, add the canned pumpkin puree, brown sugar, and pumpkin pie spice. Gently fold and stir these ingredients until they are thoroughly blended and the batter is uniformly colored and spiced. Again, avoid overmixing.
- Layer the Pumpkin Mixture: With care, spread the spiced pumpkin cheesecake mixture evenly over the plain cheesecake layer already in the crust. Take your time to create a smooth, beautiful top layer.
- Bake to Perfection: Place your layered cheesecake in the preheated 325°F (160°C) oven. Bake for approximately 35 to 40 minutes. The cheesecake is ready when its edges appear puffed and set, and the surface is mostly firm, with only a slight jiggle in the very center when the pan is gently shaken. This subtle movement indicates perfect doneness and prevents overbaking.
- Cool Slowly and Thoroughly: Once baked, remove the cheesecake from the oven and place it on a wire rack to cool completely to room temperature. This process usually takes 1 to 2 hours. Slow cooling is critical to prevent cracks from forming on the surface. After it has reached room temperature, transfer the cheesecake to the refrigerator and chill for a minimum of 4 hours, though ideally overnight. Overnight chilling allows the flavors to meld beautifully and the cheesecake to set to its optimal firm, creamy consistency for easy slicing.
- Serve and Enjoy: Once thoroughly chilled, slice your spectacular Layered Pumpkin Cheesecake and serve each piece with a dollop of fresh, piped whipped cream for a truly decadent finish.
Expert Tips and Creative Variations for Your Pumpkin Cheesecake
Achieving a perfect Layered Pumpkin Cheesecake is easier than you think, especially with a few insider tips and creative variations. These suggestions will help you ensure a flawless bake and offer ideas to customize your dessert to your liking.
- Opt for a Prepared Crust for Speed: If time is of the essence or you simply prefer a shortcut, a store-bought 9-inch graham cracker crust is an excellent alternative to making one from scratch. Ensure it fits your pie pan snugly and skip the initial crust baking step, moving directly to filling it.
- Whip Up Your Own Pumpkin Pie Spice: Don’t have a pre-mixed pumpkin pie spice on hand? No problem! You can easily create your own aromatic blend. Combine 1/2 teaspoon of ground cinnamon, 1/4 teaspoon of ground nutmeg, and 1/8 teaspoon each of ground ginger and ground cloves. This homemade blend often tastes fresher and more vibrant.
- Master the Doneness Test: Knowing exactly when your pumpkin cheesecake is perfectly baked is crucial. Look for edges that are visibly puffed and a surface that feels firm to the touch. The key indicator is a small, central area that still exhibits a slight, gentle jiggle when you carefully shake the pan. This slight wobble means it’s set enough but not overbaked, which can lead to a dry texture and cracks.
- Prioritize Slow Cooling to Prevent Cracks: Rapid temperature changes are a cheesecake’s nemesis. After baking, it’s absolutely vital to let your pumpkin cheesecake cool gradually on a wire rack until it reaches room temperature. Only then should you transfer it to the refrigerator. Chilling a warm cheesecake too quickly can cause it to contract unevenly, resulting in unsightly cracks on the surface. Patience truly pays off here.
- Don’t Overmix the Batter: When incorporating ingredients, especially after adding eggs, mix only until just combined. Overmixing introduces too much air into the batter, which can cause the cheesecake to puff up excessively in the oven and then fall dramatically, leading to cracks.
- Perfect Your Cream Cheese Temperature: Ensure your cream cheese is truly at room temperature. Cold cream cheese will result in a lumpy batter that’s hard to smooth out, affecting the final texture of your cheesecake.
- Garnish Creatively: Beyond whipped cream, consider adding a sprinkle of extra cinnamon or pumpkin pie spice, a dusting of cocoa powder, or even candied pecans or a drizzle of caramel sauce for an extra touch of elegance and flavor.
Video Guide: Crafting Your Layered Pumpkin Cheesecake
For visual learners, we’ve prepared a comprehensive video tutorial that walks you through each step of creating this delicious layered pumpkin cheesecake. Watch as we demonstrate how to achieve the perfect crust, mix the silky smooth cheesecake batters, expertly layer them, and bake your dessert to flawless perfection. This video companion will build your confidence and ensure your homemade cheesecake is a resounding success.
Proper Storage for Extended Freshness
To ensure your Layered Pumpkin Cheesecake remains fresh and delicious for as long as possible, proper storage is key. Here’s how to keep your masterpiece at its best:
- Refrigerator Storage: Leftover pumpkin cheesecake should always be stored in the fridge. For optimal freshness and to prevent it from absorbing other food odors, place slices or the entire cheesecake in an airtight container. Alternatively, wrap it tightly in plastic wrap, ensuring all surfaces are covered. When stored correctly, your cheesecake will maintain its delightful taste and texture for up to 4 days.
- Freezer Storage: This cheesecake is also freezer-friendly, allowing you to enjoy a taste of fall anytime! To freeze, first ensure the cheesecake is completely chilled in the refrigerator. Then, wrap it tightly first in plastic wrap, followed by a layer of aluminum foil. This double-layer protection helps prevent freezer burn. You can freeze the entire cheesecake or individual slices for up to 3 months. When you’re ready to enjoy, thaw the cheesecake slowly in the refrigerator overnight. Once thawed, it will be ready to slice and serve, tasting just as wonderful as when it was first baked.
Frequently Asked Questions (FAQs) About Layered Pumpkin Cheesecake
Here are answers to some common questions you might have when preparing your Layered Pumpkin Cheesecake:
- Can I use fresh pumpkin instead of canned puree? While you can use fresh pumpkin puree, it often has a higher water content than canned. If you opt for fresh, make sure to cook it down thoroughly and drain any excess liquid to prevent your cheesecake from becoming too watery. Canned pumpkin puree is generally recommended for its consistent texture and moisture level.
- My cheesecake cracked during cooling. What went wrong? Cracks usually occur due to sudden temperature changes or overbaking. Ensure you don’t overmix the batter (which incorporates too much air) and always allow the cheesecake to cool very slowly to room temperature on a wire rack before refrigerating.
- How can I tell if my cream cheese is at room temperature? Room temperature cream cheese should feel soft to the touch and easily indent when pressed lightly. If it’s too cold, it will be firm and difficult to blend smoothly, leading to lumps.
- Can I make this cheesecake in a different size pan? This recipe is optimized for a 9-inch pie or springform pan. Adjusting the pan size would require altering baking times and potentially ingredient quantities to maintain the proper layer thickness and baking consistency.
- What’s the best way to slice cheesecake cleanly? For perfectly neat slices, use a thin, sharp knife. For even cleaner cuts, run your knife under hot water and wipe it dry between each slice. This warms the blade slightly, allowing it to glide through the cheesecake without sticking.
More Delightful Pumpkin Desserts to Explore
If you’re a fan of pumpkin, there’s a whole world of delicious treats waiting to be discovered! Expand your autumnal baking repertoire with these fantastic recipes that celebrate the warmth and flavor of pumpkin:
- Pumpkin Slab Pie
- Pumpkin Dump Cake
- Mini Pumpkin Pies
- Pumpkin Scones
Thank you for exploring this delicious and easy Layered Pumpkin Cheesecake recipe! We hope you enjoy making and sharing it as much as we do. For more culinary inspiration and delightful recipes, be sure to follow Belly Full on TikTok, Facebook, Instagram, Pinterest, and YouTube!
Layered Pumpkin Cheesecake
15 mins
40 mins
6 hrs
6 hrs 55 mins
8 slices
Ingredients
- 1 & 1/2 cups graham cracker crumbs (see note)
- 6 tablespoons butter, melted
- 1/4 cup granulated sugar
- 16 ounces cream cheese, softened to room temperature
- 1/2 cup granulated sugar
- 1 teaspoon vanilla extract
- 2 large eggs
- 1/2 cup canned pumpkin puree
- 3 tablespoons brown sugar
- 1 teaspoon pumpkin pie spice
- fresh piped whipped cream, for serving
Instructions
- Preheat the oven to 350 degrees F (175°C).
- Make the graham cracker crust. In a medium bowl, combine the graham cracker crumbs, melted butter, and 1/4 cup granulated sugar until well combined. Press crumbs firmly into a 9-inch pie pan using your fingers or the back of a measuring cup. Bake for 7-8 minutes, then let cool completely on a wire rack.
- Reduce the oven temperature to 325 degrees F (160°C).
- Make cheesecake layer: Beat 16 ounces cream cheese, 1/2 cup granulated sugar, and vanilla in a large bowl with an electric mixer until smooth and lump-free. Add eggs, one at a time, blending well after each addition until just combined.
- Scoop out 1 cup of the plain cheesecake batter and spread it evenly in the cooled graham cracker crust.
- Make pumpkin layer: Add pumpkin puree, brown sugar, and the pumpkin pie spice to the remaining cheesecake batter; stir gently until well blended and uniform.
- Carefully spread the pumpkin mixture on top of the plain cheesecake layer in the crust.
- Bake in the preheated 325°F (160°C) oven until the edges are puffed and the surface is firm, except for a small spot in the center that slightly jiggles when the pan is gently shaken, approximately 35 to 40 minutes.
- Remove from the oven, set on a wire rack, and cool to room temperature (1 to 2 hours).
- Then refrigerate for at least 4 hours, ideally overnight, to allow the cheesecake to set completely and flavors to meld.
- Slice and serve with a dollop of fresh piped whipped cream.
Notes
Use a prepared crust. To save preparation time, you can opt for a pre-made 9-inch graham cracker crust instead of preparing the homemade version.
Nutrition
Nutritional information provided is an automatic calculation and may vary based on the exact products used and any modifications made to the recipe. If precise nutritional values are crucial, we recommend calculating them independently using your specific ingredients.