
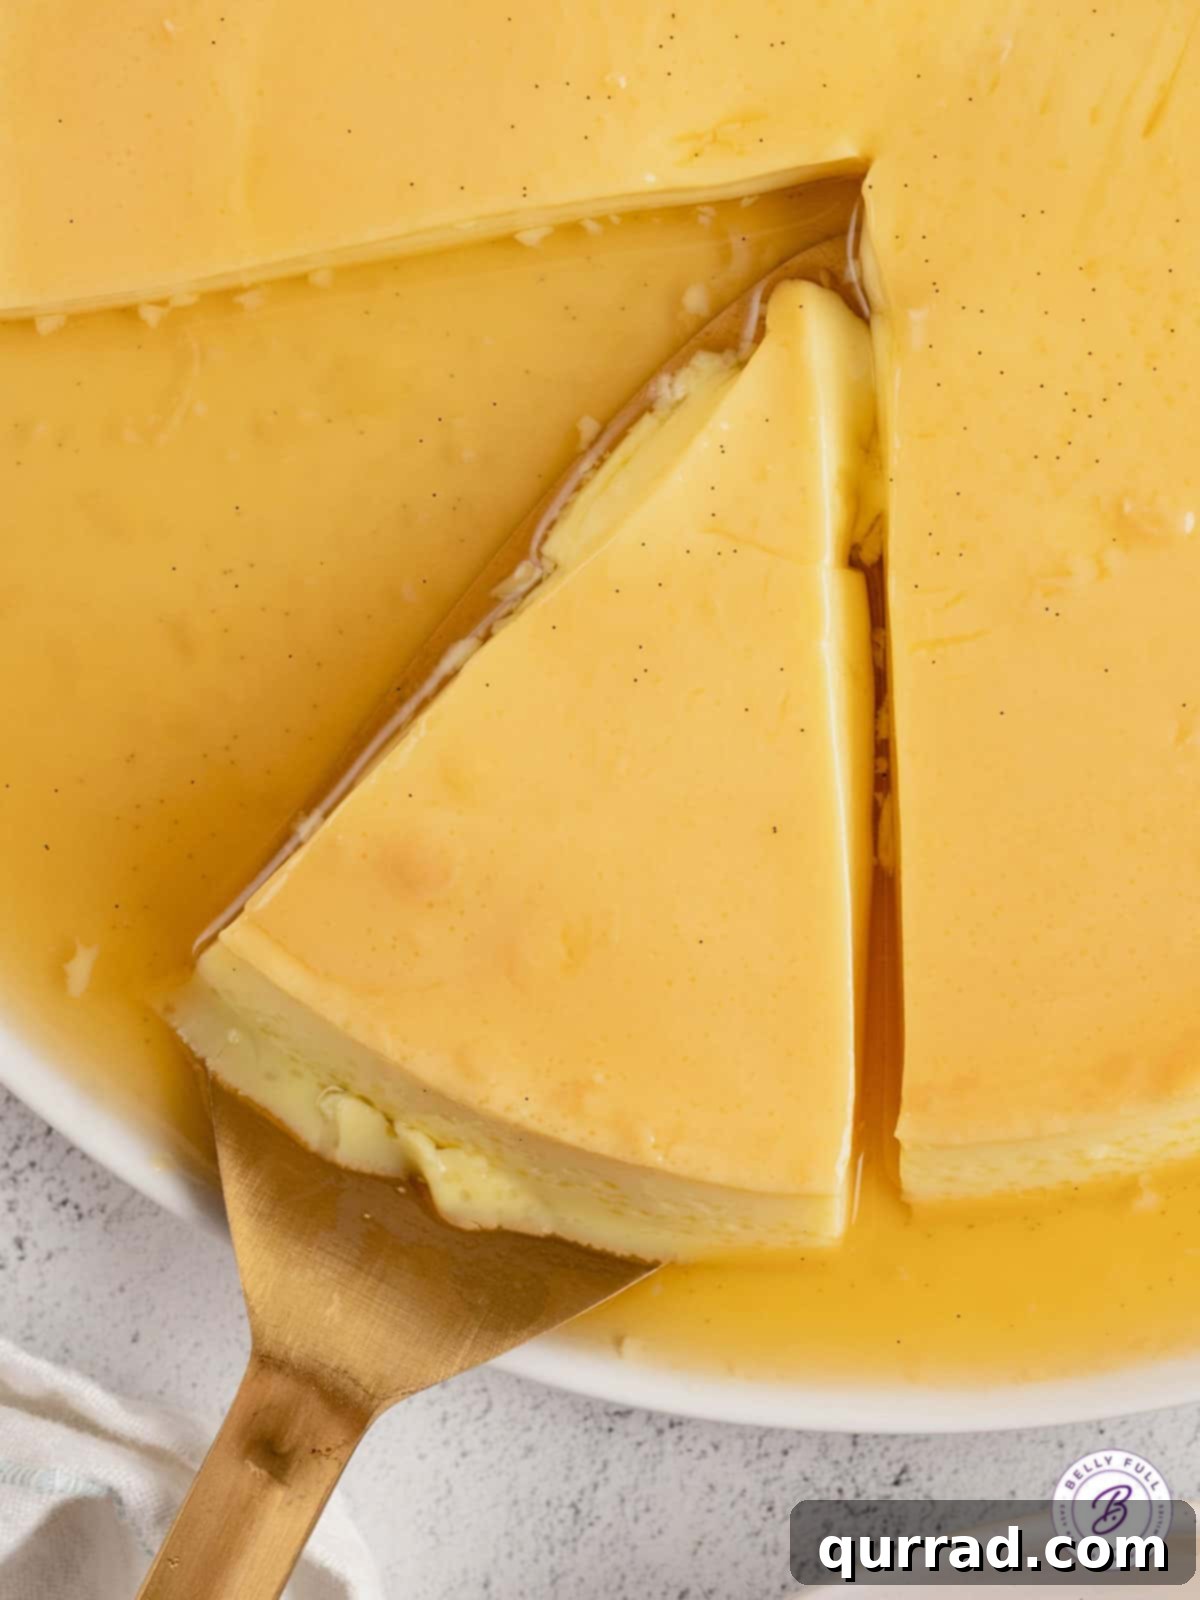
Prepare to be utterly captivated by a dessert that is as simple to create as it is breathtaking to behold: the magnificent flan. This Easy Flan Recipe promises a delicate, creamy custard, exquisitely enrobed in a luscious, golden caramel sauce. Crafted with just a handful of readily available ingredients, this recipe transforms humble components into a show-stopping masterpiece, making it perfect for anyone aspiring to impress without spending endless hours in the kitchen. Whether you’re a seasoned baker or a curious beginner, this guide will walk you through creating a dessert that truly shines, combining timeless elegance with effortless execution.
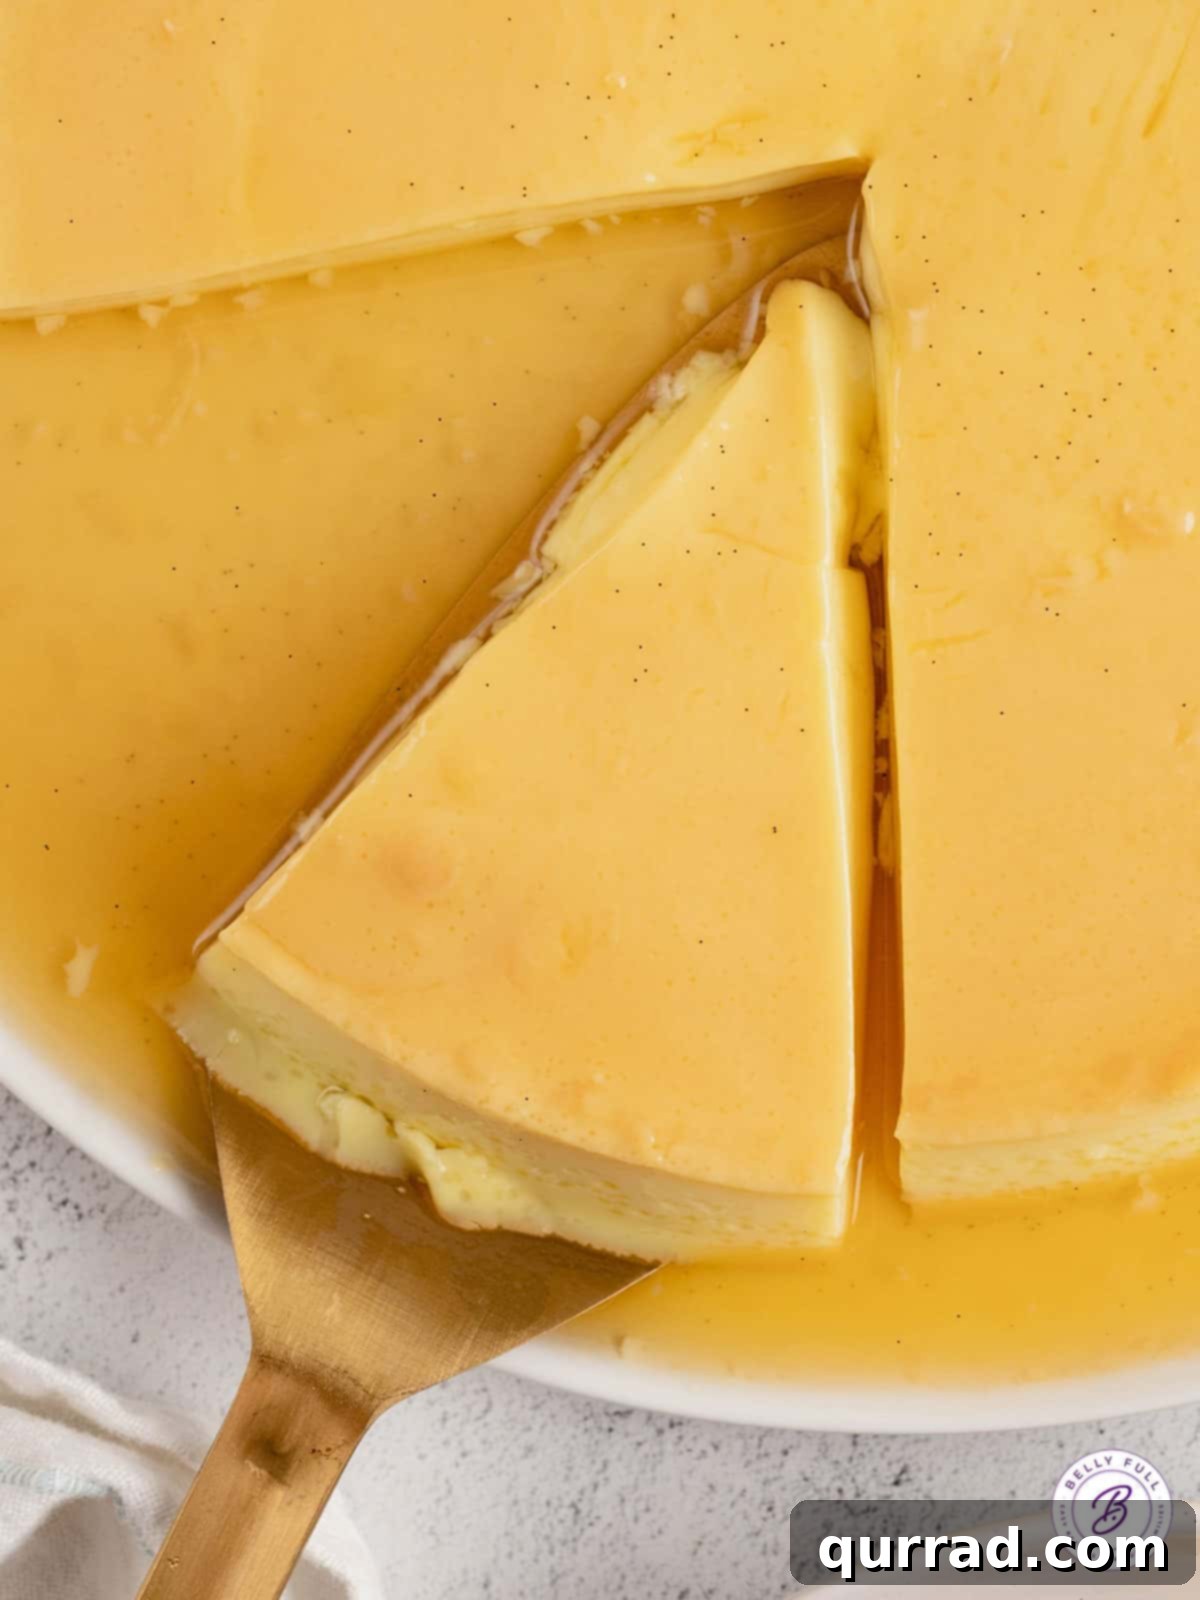
Discovering the Magic of Mexican Flan
There’s a reason why Mexican flan holds such a revered place in culinary traditions; its rich flavor and silken texture are simply irresistible. This particular recipe for Mexican flan is specifically designed to minimize your time in the kitchen while maximizing the “wow” factor. With just about 25 minutes of active preparation and a mere hour in the oven, most of the waiting is for the essential cooling and chilling phase. This means you can easily whip it up a day in advance, allowing you to relax and enjoy your guests without any last-minute dessert stress. The true beauty of this flan lies in its traditional approach, free from canned ingredients, which ensures a profoundly delicate flavor profile, subtly enhanced by hints of pure vanilla. Its texture is exceptionally silky and tender, demanding a gentle touch when serving to preserve its perfect integrity.
What Exactly Is Flan? A Journey into Caramel Custard
Flan is a beloved dessert, celebrated across diverse cultures, universally recognized by its signature caramel topping and velvety custard filling. Often drawing comparisons to other custard-based delights like crème brûlée, flan distinguishes itself with its unique preparation method and the captivating inversion ritual that reveals its shimmering caramel coat. While the core concept remains consistent, each country and region boasts its own distinctive interpretation. Our focus today is on the classic Mexican flan, a variation cherished for its straightforward elegance and harmonious balance of flavors.
Exploring Flan Varieties: Mexican, Cuban, and Spanish
The subtle differences in flan recipes often come down to a few key ingredients and preparation techniques. Mexican flan typically relies on simple, wholesome components: granulated sugar for the rich caramel, cream of tartar to stabilize it, fresh eggs for structure, whole milk for its luxurious creaminess, a pinch of salt to enhance flavor, and a generous touch of vanilla for aromatic depth. These ingredients combine to create a custard that is both delicate and satisfying.
Other versions, however, introduce intriguing variations. For instance, traditional Spanish flan frequently emphasizes a higher proportion of egg yolks over whole eggs, contributing to an even richer, denser custard. Cuban flan, on the other hand, often deviates from whole milk, instead incorporating evaporated and/or condensed milk. This substitution not only lends a sweeter, more concentrated flavor but also results in a slightly firmer, more decadent texture. Furthermore, while vanilla is a hallmark of Mexican flan, it is not always a standard inclusion in other international renditions, underscoring the unique aromatic signature of the Mexican variety.
Essential Ingredients for Your Easy Flan
Crafting this exquisite flan requires just six fundamental ingredients, each playing a crucial role in achieving its perfect balance of flavor and texture. Precision and quality ingredients are key to a truly successful homemade flan.
- Granulated Sugar: This is the cornerstone of our flan, forming the glorious caramel topping. Its sweetness is undeniable, but it’s the transformation into a rich, amber caramel that truly elevates the dessert.
- Cream of Tartar: A small but mighty ingredient, cream of tartar acts as an anti-crystallizing agent for the caramel. It ensures your caramel remains smooth and pliable. If you don’t have it on hand, a tablespoon of corn syrup can serve as an effective substitute, preventing sugar crystals from forming.
- Eggs: Eggs are the structural backbone of the custard, providing essential binding and helping it set into that wonderfully delicate, yet firm, consistency. Using fresh, large eggs will yield the best results.
- Whole Milk: For an optimally creamy and rich custard, whole milk is indispensable. Its higher fat content contributes significantly to the silky mouthfeel of the flan. Substituting with skim or low-fat milk is not recommended, as it will dilute the mixture too much and compromise the desired delicate texture.
- Salt: A pinch of salt is crucial for balancing the sweetness and enhancing the complex flavors of both the caramel and the custard. It prevents the dessert from being overwhelmingly sweet, adding depth and dimension.
- Vanilla: Vanilla provides the signature aromatic warmth and depth to Mexican flan. For the most authentic and intense flavor, we highly recommend splitting and scraping the seeds from a fresh vanilla bean. However, high-quality pure vanilla extract can be used as a convenient and delicious alternative if a vanilla bean is unavailable.
Step-by-Step Guide: How to Make Flan from Scratch
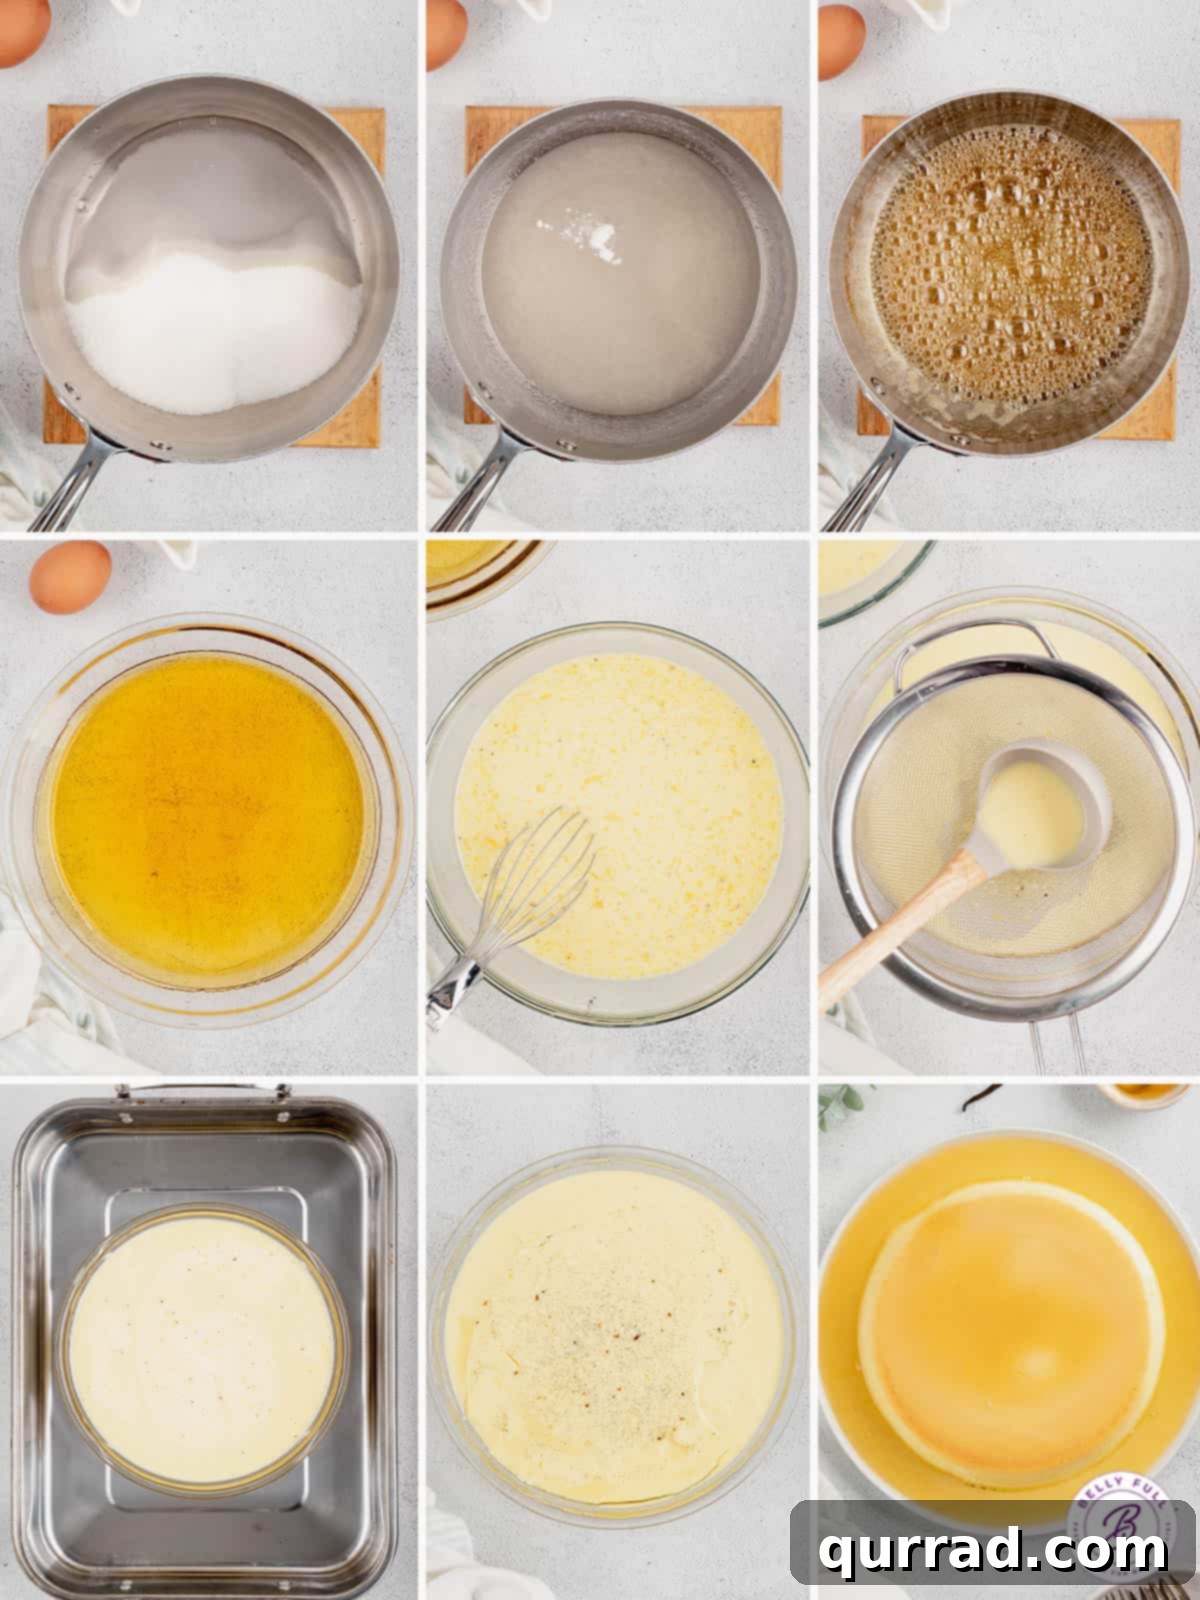
While homemade flan might seem intimidating, it’s surprisingly accessible, demanding more patience and attention to detail than intricate skills. The active prep time is minimal, around 25 minutes. If you can master a basic caramel sauce, you’re already halfway to creating a perfect flan. Follow these detailed steps for a flawless result:
- Prepare Your Workspace and Oven: Begin by preheating your oven to 350°F (175°C). Select a large roasting pan that is spacious enough to comfortably accommodate your chosen pie dish or flanera. Prepare a small bowl of water and place it next to your stovetop, along with a pastry brush. Also, bring a small pot or tea kettle of water to a boil and ensure it remains hot, as you will need it for the water bath later.
- Craft the Perfect Caramel: In a medium, heavy-bottomed saucepan, combine 1 cup of granulated sugar with 1/4 cup of water. Place the pan over low heat, stirring gently until the sugar has completely dissolved, which typically takes about 3 minutes. Once dissolved, add the cream of tartar (or corn syrup, if using) and increase the heat to medium, bringing the sugar syrup to a boil. As it boils, dip your pastry brush into the small bowl of water and quickly brush down any sugar crystals that form on the sides of the pan, washing them back into the syrup. Continue to boil the mixture without stirring. Instead, gently swirl the pan occasionally to ensure even cooking. Watch closely as the mixture thickens and begins to transform, browning into a beautiful caramel. The key is to achieve a rich golden honey color. Do not overcook, as it can quickly turn bitter.
- Transfer the Caramel with Care: The moment your caramel reaches that perfect golden-honey hue, immediately remove it from the heat. Carefully and quickly pour the hot caramel into the bottom of your pie dish. Swirl the dish gently to ensure the entire bottom surface is coated evenly with the shimmering caramel. Once coated, place this pie dish securely inside the larger roasting pan you prepared earlier.
- Prepare the Silky Custard Mixture: In a separate medium-sized bowl, combine the remaining 1/2 cup of granulated sugar, the four large eggs, 2 cups of whole milk, 1/4 teaspoon of salt, and the scraped seeds from your vanilla bean (or vanilla extract). Whisk these ingredients together until they are well combined and smooth. To achieve an exceptionally smooth custard and remove any potential bits of chalazae or undissolved sugar, strain this mixture directly into the pie dish, pouring it carefully over the caramel layer. Once the custard is in the dish, tightly cover the entire pie dish with aluminum foil.
- Set Up the Essential Water Bath: Carefully pull out the bottom rack of your oven just far enough to safely place the roasting pan onto it. Now, pour the hot water you prepared earlier into the roasting pan. Fill it until the water level reaches approximately halfway up the sides of the pie plate. With extreme caution, gently push the oven rack and the roasting pan back into the oven, taking extra care to avoid splashing any water onto the custard-filled pie dish. The water bath is crucial for even, gentle cooking.
- Bake, Cool, and Chill for Perfection: Bake the flan, still covered with foil, for 55 minutes. To test for doneness, carefully remove the foil and gently insert a thin knife into the center of the custard. It should come out clean, but the custard itself should still have a slight jiggle to it; this indicates it is perfectly cooked and will set further as it cools. Remove the pie dish from the oven and allow it to cool completely to room temperature. Once cooled, wrap the pie dish tightly with plastic wrap and transfer it to the refrigerator. For the best results and a fully set, firm texture, chill the flan overnight, or for a minimum of 5 hours.
The Indispensable Role of a Water Bath in Flan Making
When it comes to baking flan, the water bath (bain-marie) is not merely an optional step—it is absolutely essential for achieving the characteristic silky, smooth texture that defines a perfect flan. The hot water surrounding the pie dish creates a moist, even, and gentle cooking environment. This prevents the custard from cooking too quickly, cracking, or becoming rubbery. Without the insulating effect of the water bath, the edges of the flan would overcook and dry out before the center could properly set, resulting in an unpleasant and uneven texture. The slow, steady heat allows the delicate custard proteins to set uniformly, yielding that luxurious, melt-in-your-mouth consistency we all crave in a well-made flan.
Expert Tips for Flan Success
Even with an easy recipe, a few insider tips can make all the difference, transforming a good flan into an unforgettable one. Keep these crucial points in mind for homemade flan perfection:
- Resist the Urge to Stir the Caramel: Once your sugar syrup begins to boil and caramelize, it’s vital to avoid stirring it directly with a spoon or whisk. Stirring can introduce air and cause the sugar crystals to re-form, leading to a grainy or lumpy caramel. Instead, if you notice uneven browning or need to encourage mixing, gently swirl the entire saucepan from time to time.
- Monitor Caramel Color Carefully: The color of your caramel directly impacts its flavor. A lighter, golden caramel will be sweeter and milder, while a darker amber will develop a more complex, slightly bittersweet note. Experimentation with shades can be fun, but exercise caution. I strongly advise against letting the caramel progress beyond a dark amber. Beyond this point, it can quickly burn, resulting in an acrid, intensely bitter taste that will ruin your flan. Always err on the side of a slightly lighter caramel if you are unsure.
- Reviving Cooled Caramel: Sometimes, caramel can cool and harden too quickly as you’re trying to swirl it into the pie dish, making it difficult to spread. Don’t panic! If this happens, simply place the pie dish with the stiff caramel into your preheated warm oven for just a few minutes. The gentle heat will soften the caramel, allowing it to become more liquid and spreadable again.
- Understanding Flan Doneness: Knowing when your flan is perfectly baked is crucial. When it’s ready, the custard should still exhibit a distinct “jiggle” when you gently shake the dish. It won’t be completely firm, and that’s exactly what you want! The residual heat and subsequent chilling process will allow it to set up beautifully. However, for reassurance, you can insert a thin knife into the center; it should come out mostly clean, indicating the custard has cooked through.
Choosing the Right Baking Dish for Your Flan
This flan recipe is quite versatile when it comes to baking dishes. It has been thoroughly tested and proven successful with both a standard-depth pie dish and a deep-dish pie plate. While both work, be aware that a standard-depth dish will be filled right to the very top, which can make the initial transfer into the oven (especially into the water bath) a bit more challenging. For ease of handling and peace of mind, a deep-dish pie plate is often preferred.
Beyond traditional pie dishes, you have other excellent options. You can use 6 individual ramekins for single-serving flans, a 9-inch round cake pan, or even a standard rectangular loaf pan. If opting for individual ramekins, begin checking for doneness after approximately 40 minutes, as smaller portions will bake more quickly.
Serving Your Elegant Homemade Flan
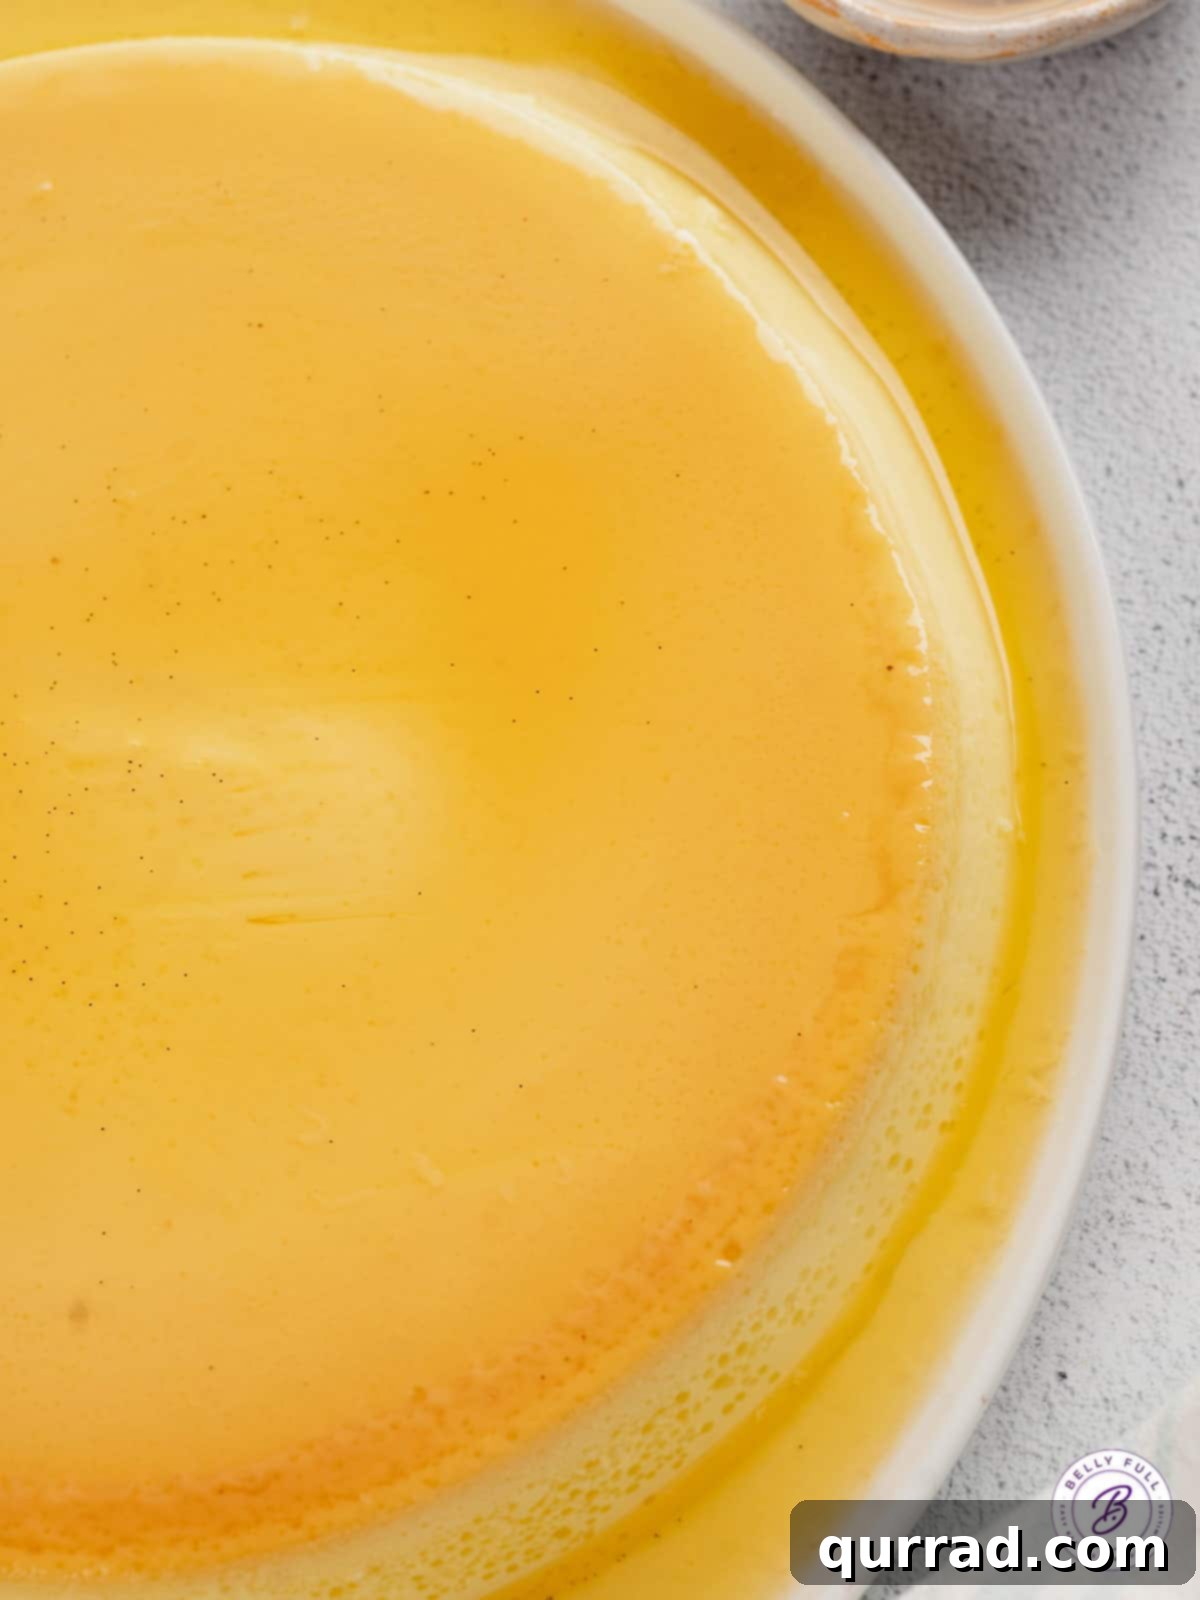
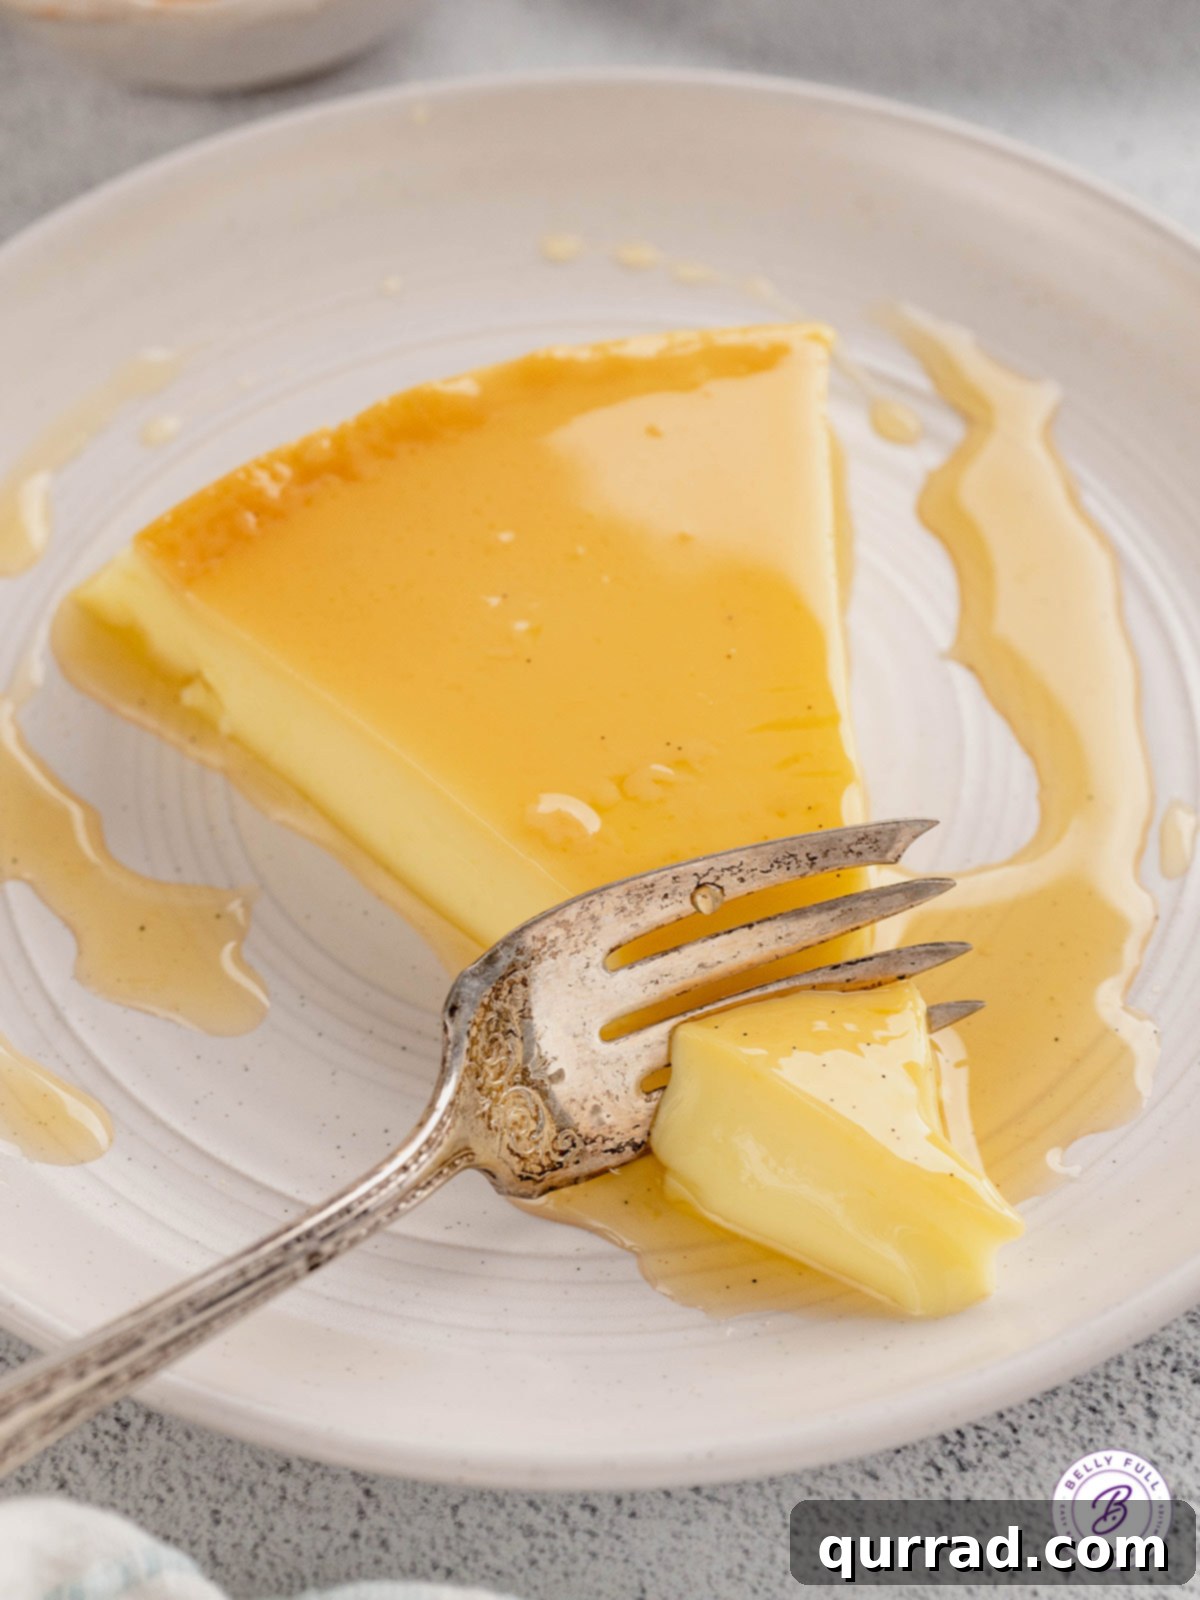
The moment of truth arrives when it’s time to unveil your beautifully set flan. To ensure a smooth release and that stunning cascade of caramel, keep your Mexican flan refrigerated until just before serving. When ready, take a thin, dull knife and gently run it around the entire edge of the flan, separating it from the sides of the dish. Next, place a large serving platter or plate inverted directly on top of the flan. Holding the pie dish and the platter tightly together, quickly and confidently flip them over. The flan should gracefully slide out of its dish, allowing the caramel, which was at the bottom, to artfully drizzle over the top. Some hardened caramel might remain in the pan, which is perfectly normal.
If, for any reason, the flan seems to be sticking to the pan after the initial flip, don’t despair! Gently tap the bottom of the pie dish a few times. As an alternative, you can dampen a kitchen towel with hot water, wring out the excess, and place the warm, moist towel on the inverted bottom of the pie dish for a brief moment. This warmth will help loosen any stubborn caramel, after which you can try to lift the pan again. With these simple tricks, your flan should slide out effortlessly, ready to be enjoyed. Traditionally, flan is served simply as is, with its own rich caramel sauce as the only adornment.
Storing Your Delicious Homemade Flan
While flan is undeniably best when fresh, proper storage allows you to enjoy its delightful flavors for a short period. For optimal taste and texture, this flan recipe should ideally be served within 24 hours of being fully chilled. Beyond approximately 18 hours in the refrigerator, the custard can begin to slightly liquefy, affecting its delicate consistency. Therefore, while preparing it the day before serving is highly recommended to allow ample resting time, I do not advise making it too far in advance if you intend to have leftovers. Any remaining portions should be kept tightly covered in the original pie dish and stored promptly in the refrigerator to maintain their quality for as long as possible within the recommended timeframe.
More Irresistible Mexican Dessert Recipes:
- Mexican Horchata
- Churros
- Tres Leches Cake
- Sopapilla Cheesecake
- Mexican Chocolate Popsicles
We truly hope you enjoy making and savoring this utterly delicious and remarkably easy flan recipe. It’s a timeless dessert that never fails to charm. If you loved it, please consider leaving a review! Don’t forget to connect with us on social media for more culinary inspiration!
Flan Recipe
This Easy Flan Recipe is so simple yet impressive! A sweet caramel sauce coats a delicate, creamy custard made with just 5 ingredients. It’s a great recipe for those looking to make a show-stopping dessert, without spending all day in the kitchen.
Equipment
- 9” pie dish (deep dish is best)
- Pastry brush
- Large shallow roasting pan
Ingredients
For the Caramel Layer:
- 1 cup granulated sugar
- 1/4 cup water
- 1/8 teaspoon cream of tartar (or 1 tablespoon of corn syrup)
For the Custard Layer:
- 1/2 cup granulated sugar (remaining from 1 & 1/2 cups total)
- 4 large eggs
- 2 cups whole milk
- 1/4 teaspoon salt
- 1 vanilla bean, split and seeds scraped (or 1 teaspoon vanilla extract)
Instructions
- Prepare Oven & Supplies: Preheat the oven to 350°F (175°C). Prepare a large roasting pan that will fit your pie dish. Fill a small bowl with water, set next to the stovetop with a pastry brush. Boil a tea kettle or small pot of water; keep hot.
- Make the Caramel: In a medium, heavy-bottomed saucepan, combine 1 cup sugar and 1/4 cup of water. Gently heat on low, stirring until the sugar is completely dissolved, about 3 minutes. Add in cream of tartar (or corn syrup) and turn the heat up to medium to start boiling the sugar syrup. Once boiling, dip a pastry brush in water and quickly brush any crystallized sugar off the sides of your pan, washing it down into the syrup. Boil until the mixture becomes thickened and starts to brown and caramelize. DO NOT stir the caramel as it cooks; instead, very gently swirl the pan if necessary. Remove the caramel from the heat when it reaches a golden honey color.
- Transfer the Caramel: Pour the hot caramel into the bottom of the pie dish, quickly swirling to get an even coating of caramel. Set this dish inside of the roasting pan.
- Make the Custard Mixture: In a medium-sized bowl, add the remaining 1/2 cup sugar, eggs, whole milk, salt, and vanilla bean seeds (or extract). Combine well. Strain this mixture through a fine-mesh strainer into the pie dish, on top of the caramel. Tightly wrap the pie dish with aluminum foil.
- Prepare the Water Bath: Pull out the bottom rack of your oven just enough to safely place the roasting pan on the oven rack. Pour the hot water into the roasting pan until it comes up to about halfway up the sides of the pie plate. Gently push the oven rack and roasting pan into the oven, being extremely careful not to splash water onto the pie dish with the custard.
- Bake, Cool, and Chill: Bake, covered with the foil, for 55 minutes. Check the flan for doneness; a knife inserted into the middle should come out clean, but the custard should still be jiggly (it will set as it cools). Remove the pie dish from the oven and cool to room temperature. Wrap tightly in plastic wrap, then chill in the fridge ideally overnight (or for at least 5 hours).
- To Serve: Run a thin, dull knife around the edge of the flan. Place an inverted large plate or serving platter on top of the flan and, holding tightly together, quickly flip the flan onto the plate. It should slide right out, and the caramel that was on the bottom will run over the top. Some hardened caramel may remain in the pan. If the flan sticks, give it a few gentle taps or dampen a kitchen towel under hot water, wring it out, and place the hot towel on the bottom of the pie dish before trying to lift the pan again.
Nutrition Information (per serving, estimated)
Nutritional information is an automatic calculation and can vary based on the exact products you use and any changes you make to the recipe. If these numbers are very important to you, we recommend calculating them yourself.
- Calories: 217kcal
- Carbohydrates: 40g
- Protein: 5g
- Fat: 4g
- Saturated Fat: 2g
- Polyunsaturated Fat: 1g
- Monounsaturated Fat: 1g
- Trans Fat: 0.01g
- Cholesterol: 100mg
- Sodium: 59mg
- Potassium: 135mg
- Sugar: 40g
- Vitamin A: 234IU
- Calcium: 89mg
- Iron: 0.5mg