
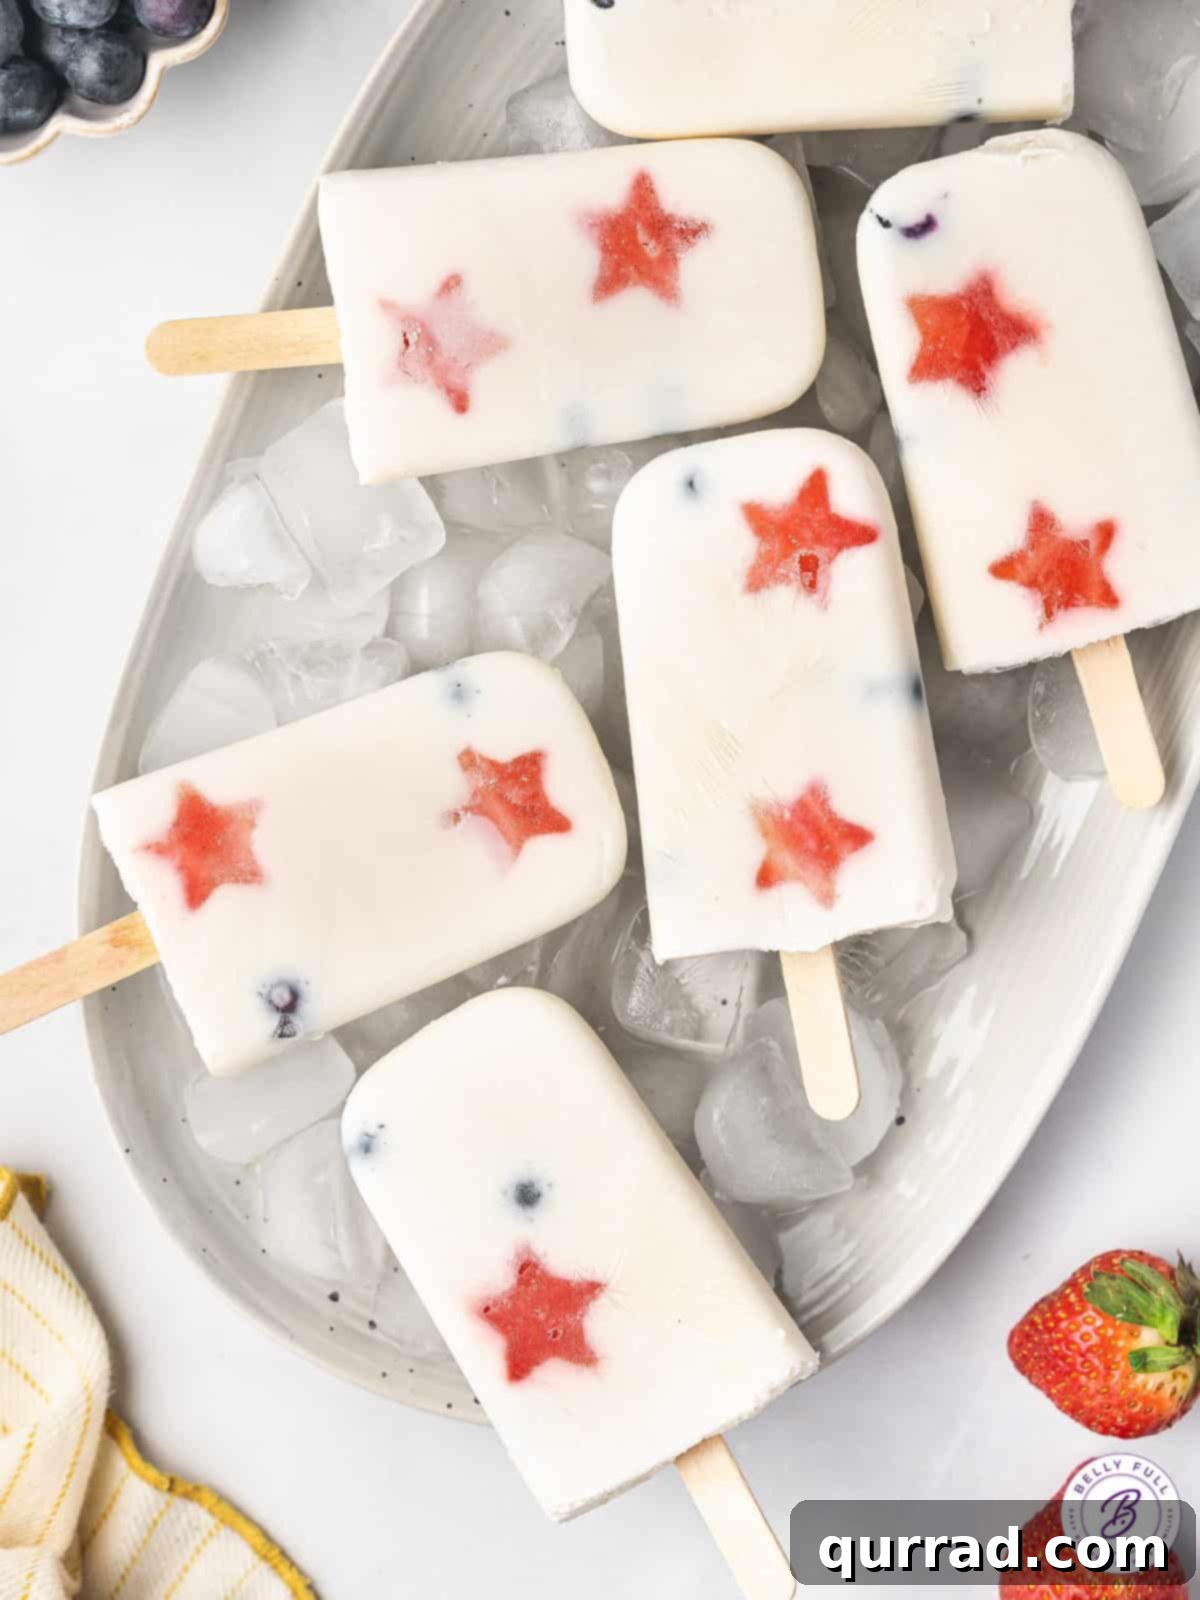
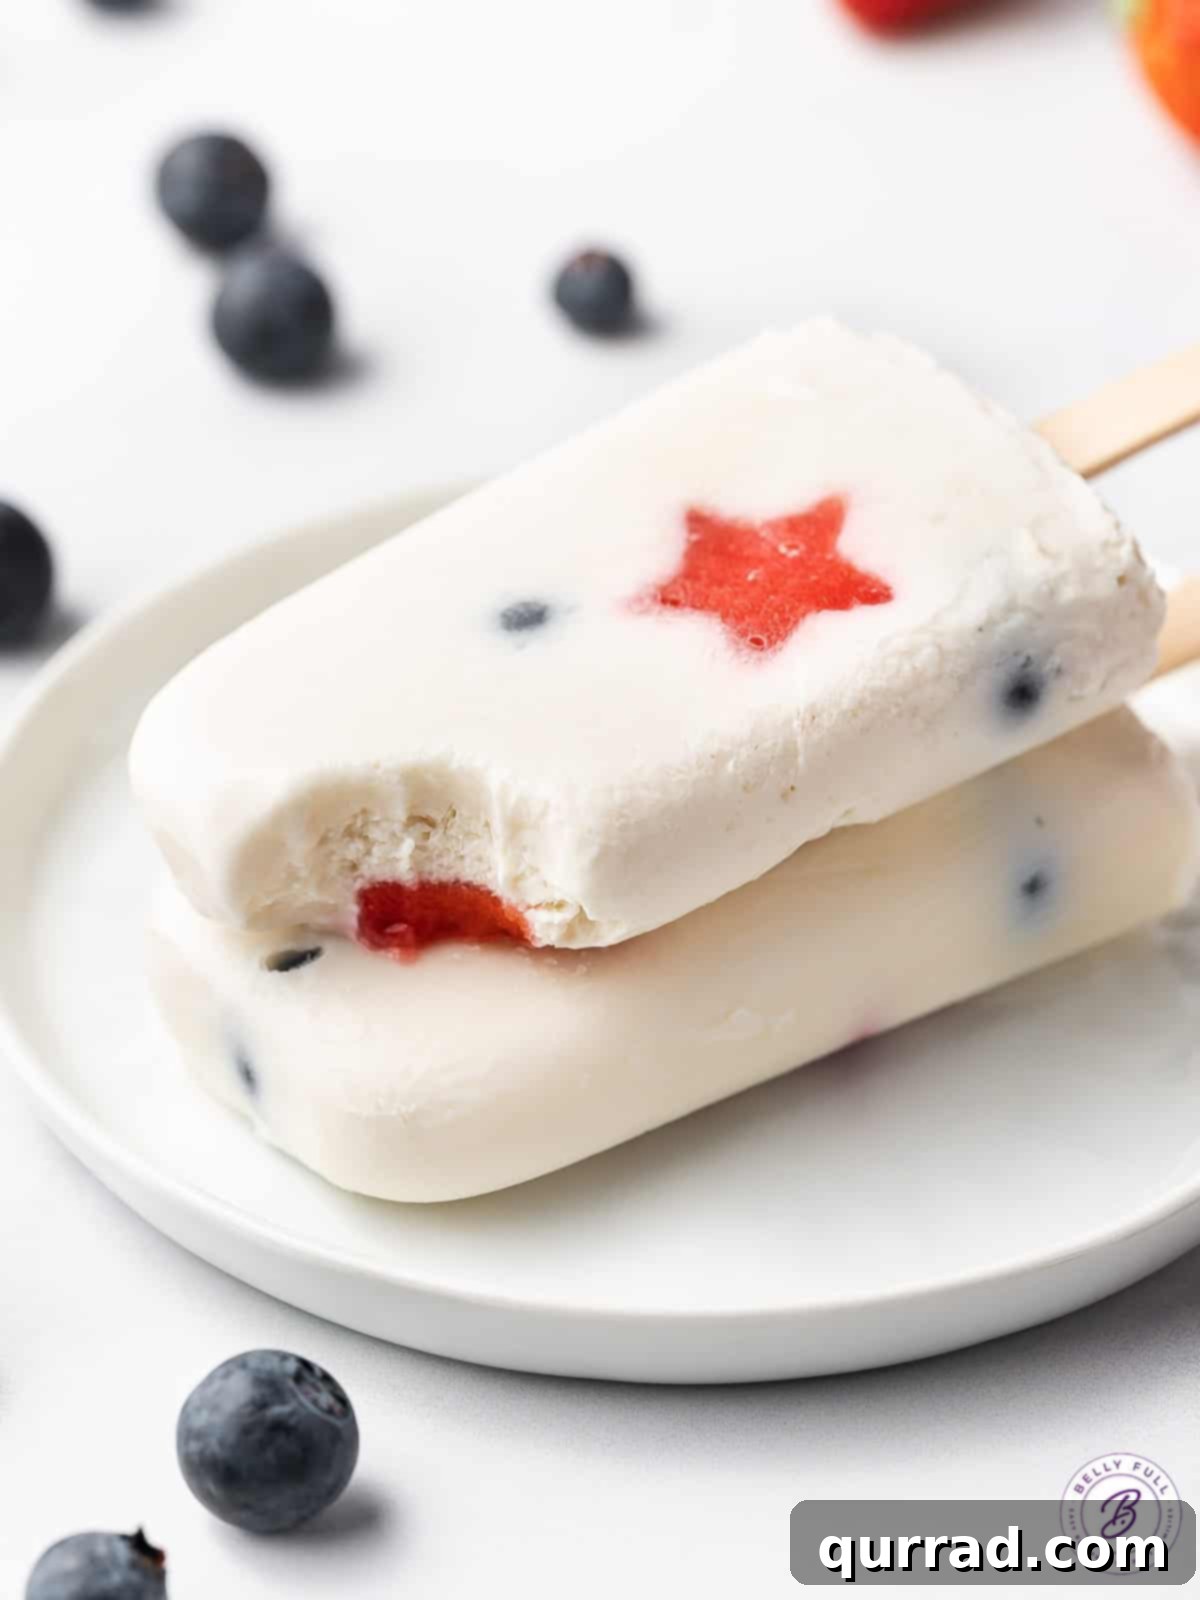
Brighten up your summer with these delightful Red, White, and Blue Popsicles! Crafted with the fresh flavors of strawberries, blueberries, and creamy yogurt, these popsicles are not just a treat for the eyes but also a healthier alternative to traditional frozen desserts. They’re the perfect patriotic snack or light dessert for festive occasions like the 4th of July, Memorial Day, or Labor Day. Even better, their refreshing taste makes them an ideal cool-down treat to enjoy all summer long, earning rave reviews from kids and adults alike for their incredible ease of preparation and delicious taste.
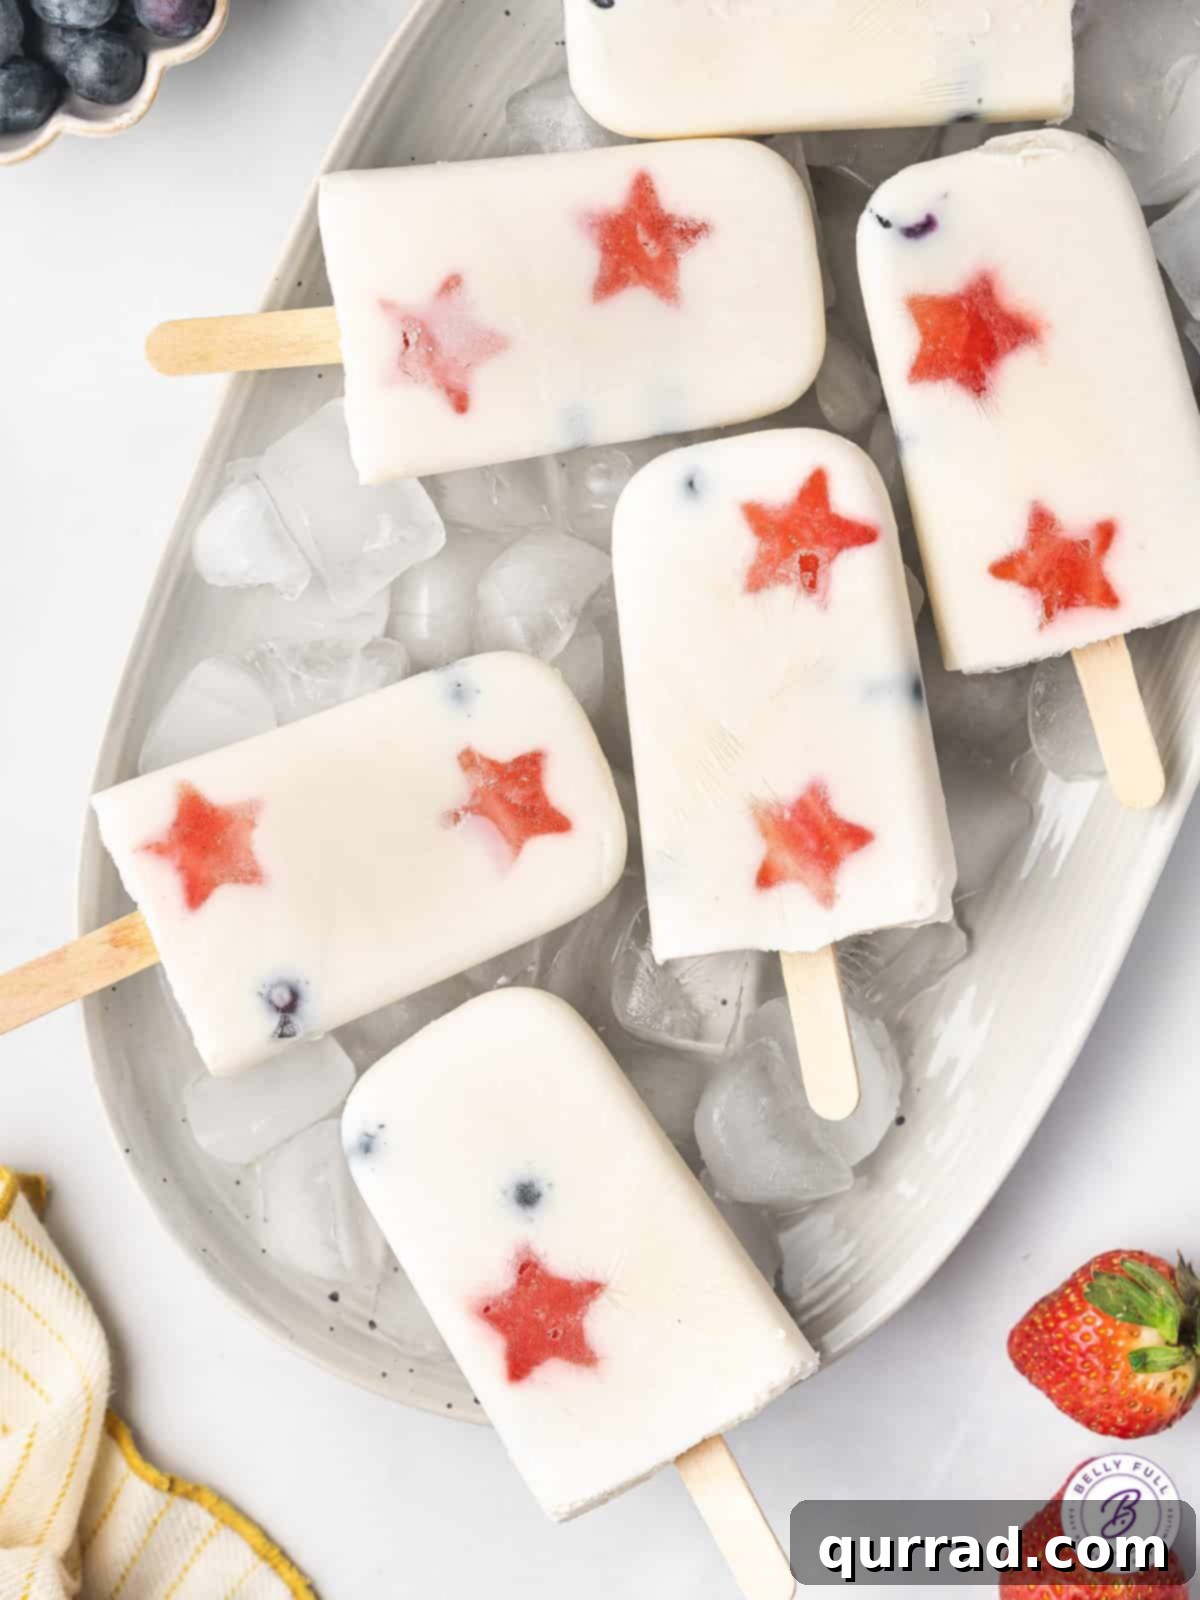
Effortlessly Delicious Red, White, and Blue Popsicles
Imagine the smiles these vibrant popsicles will bring to your next summer gathering! We are always on the lookout for exciting patriotic dessert ideas, such as a layered red, white, and blue poke cake, to effortlessly prepare for any celebratory occasion. These Red, White, and Blue Popsicles have quickly become a favorite for their irresistible charm and straightforward recipe. They are truly a showstopper that requires minimal effort!
Featuring a simple blend of fresh, juicy fruit, smooth vanilla yogurt, a touch of pure maple syrup for natural sweetness, and a splash of heavy cream for an extra luxurious, creamy texture, these fruit-packed popsicles are incredibly simple to whip up. While initially designed as a festive 4th of July dessert, their refreshing nature makes them an absolute must-have throughout the entire summer season, especially on those sweltering hot days when you crave something cool and invigorating.
Why These Homemade Yogurt Popsicles Will Be Your New Summer Favorite
There are countless reasons to fall in love with these vibrant fruit popsicles. We’re convinced they’ll become a staple in your freezer, offering a refreshing escape from the summer heat and a guilt-free indulgence. Here are just a few reasons why we cherish them – and why we believe you will too:
- Perfect for Patriotic Celebrations: Whether it’s the 4th of July, Memorial Day, or Labor Day, these red, white, and blue popsicles are the quintessential festive treat. Their striking colors instantly evoke a sense of patriotism, making them an ideal addition to any holiday barbecue or picnic. Beyond holidays, their playful appearance is perfect for any summer party or just a regular day when you want a little burst of joy.
- A Wholesome and Healthy Indulgence: Unlike many store-bought frozen treats loaded with artificial ingredients and excessive sugars, these homemade popsicles are a truly healthy alternative. Made with real fresh fruit and wholesome yogurt, they offer a nutritious snack that you can feel good about. For an added protein boost, feel free to swap regular yogurt for Greek yogurt, enhancing their nutritional value without sacrificing flavor or texture.
- A Family Favorite, Kid-Approved: While sophisticated enough for adults to enjoy, these popsicles are an absolute hit with children. Their fun colors and fruity taste make them an exciting treat for little ones at summer gatherings, playdates, or as an everyday after-school snack. Involving kids in the simple assembly process can also be a fantastic way to introduce them to healthy eating and the joy of homemade treats.
- Remarkably Easy to Make: Don’t let their impressive appearance fool you; these popsicles are surprisingly simple to create. With just a handful of common ingredients and minimal prep time, you can have a batch chilling in the freezer in no time. The hardest part is truly the waiting game while they freeze to perfection!
- Versatile and Customizable: While we love the classic red, white, and blue combination, this recipe serves as a fantastic base for endless customization. Experiment with different fruits, yogurt flavors, or natural sweeteners to create your unique summer concoctions. This versatility ensures you can enjoy a new flavor experience every time you make them.
Essential Ingredients for Your Homemade Popsicles
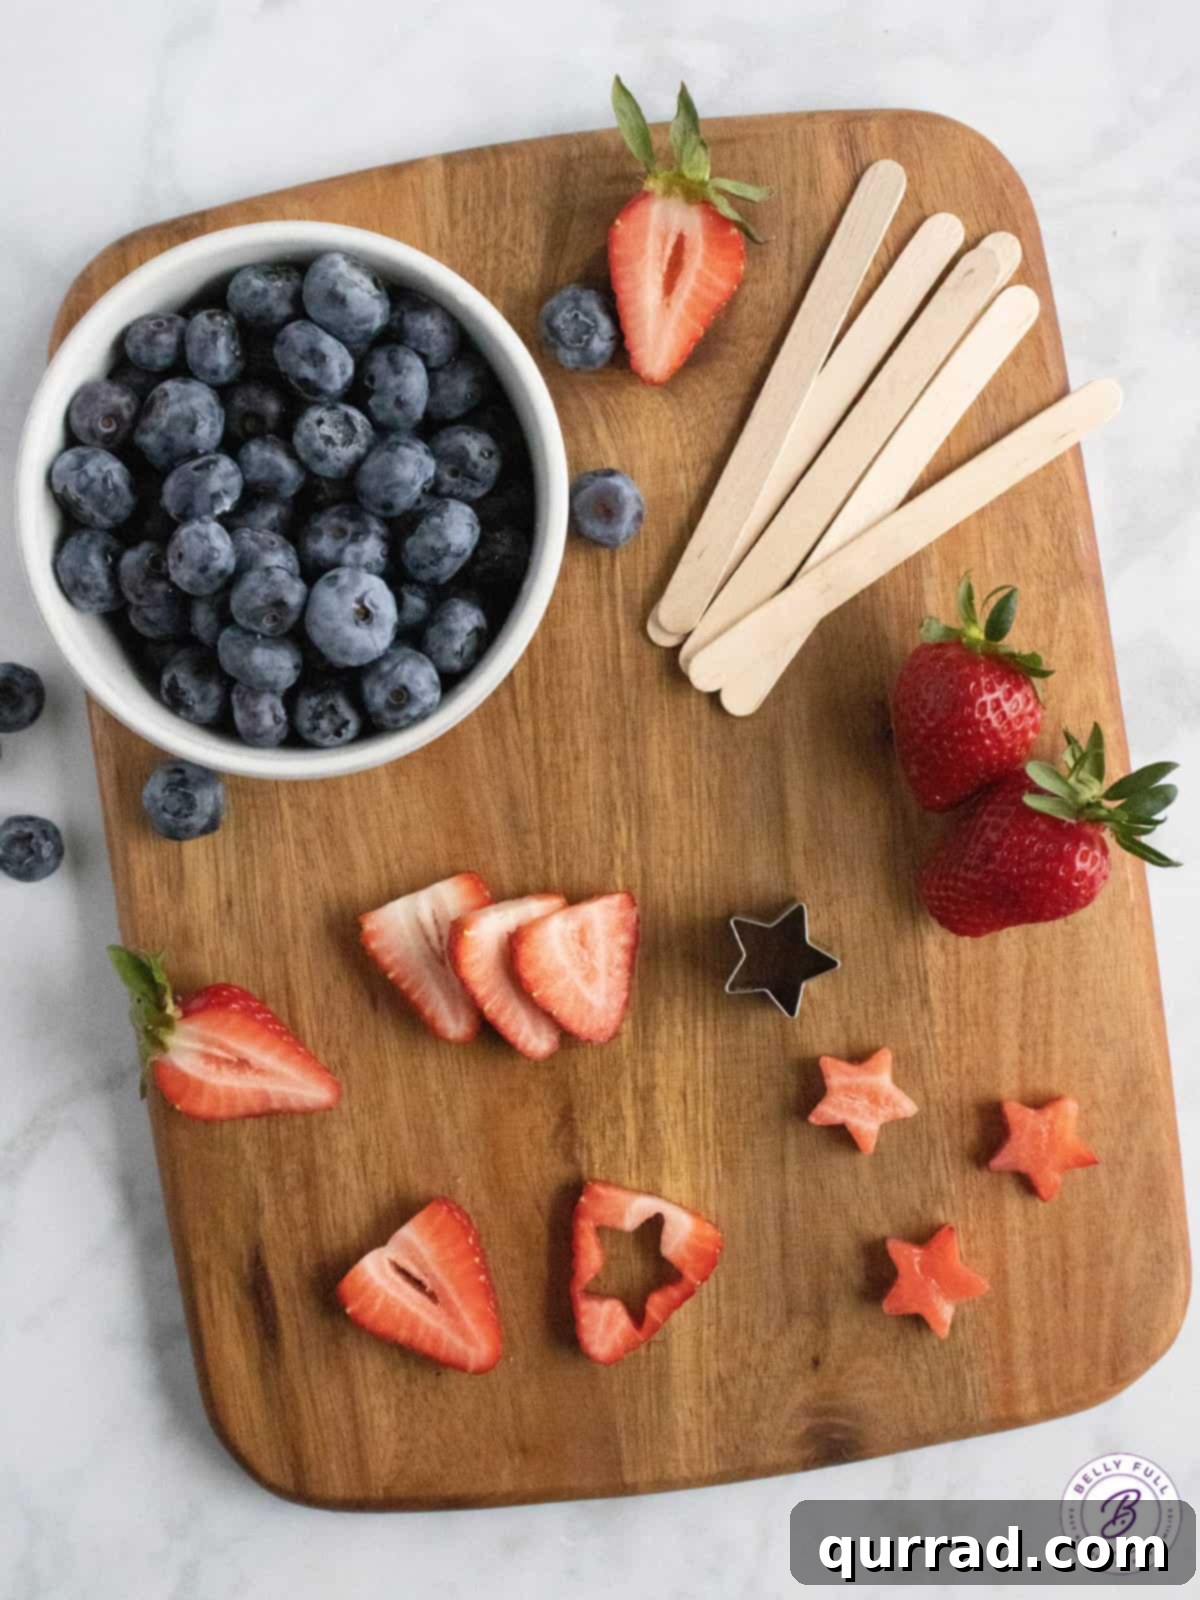
Crafting these delectable fruit yogurt popsicles requires only five core ingredients, making them an incredibly easy and healthy option for any summer day. Simplicity meets flavor in this refreshing recipe. For precise measurements and detailed instructions, remember to consult the printable recipe card below.
- Fresh Berries: To achieve those iconic red and blue layers in your patriotic popsicles, you’ll need fresh, ripe blueberries and strawberries. Opt for firm, brightly colored berries for the best flavor and visual appeal. The sweetness of the strawberries beautifully complements the slight tartness of the blueberries, creating a balanced fruity profile.
- Creamy Yogurt: The heart of these popsicles is the yogurt. You have the flexibility to use either regular or Greek yogurt, depending on your preference for creaminess and protein content. Vanilla yogurt is a fantastic choice for its subtle sweetness and complementary flavor, but plain yogurt offers a blank canvas if you prefer to control the sweetness entirely. Lemon yogurt can also introduce a lovely, zesty twist that pairs wonderfully with berries.
- Heavy Whipping Cream (or Milk of Choice): A splash of heavy whipping cream is the secret to achieving an incredibly smooth and luscious texture in these popsicles, minimizing ice shards for a truly melt-in-your-mouth experience. If you’re looking for a lighter option or prefer a dairy-free alternative, any milk will work as a substitute. We’ve had great success with an almond-coconut milk blend, which adds a subtle, pleasant flavor. Just be aware that lower-fat milk might result in a slightly icier, less creamy popsicle.
- Pure Maple Syrup (or Honey): To naturally sweeten your popsicles, pure maple syrup is an excellent choice. It dissolves easily and imparts a clean, sweet taste without altering the fruit or yogurt flavors. If you prefer, honey can be used as an alternative, offering a slightly different, more floral sweetness. We found maple syrup to provide a purer sweetness that allowed other flavors, like extracts, to shine through more distinctly.
- Vanilla Extract (or Other Flavorings): Vanilla extract enhances the overall flavor profile, adding a warm, aromatic note to the creamy yogurt base. However, don’t limit yourself! Feel free to experiment with other extracts like strawberry, citrus (orange or lemon), or coconut for different flavor experiences. A tablespoon of fresh lemon or lime juice can also add a delightful tangy brightness, elevating the fruit flavors even further.
Essential Tools to Craft Perfect Red, White, and Blue Treats
Making homemade popsicles is a breeze, and having the right tools makes the process even more enjoyable. You’ll only need a few basic items to create these stunning red, white, and blue treats. Here’s a rundown of what we used to achieve perfection:
- Small Bowl or Measuring Cup with Spout: A small bowl is ideal for mixing your yogurt base, ensuring all ingredients are well combined. However, a measuring cup with a convenient spout is a game-changer when it comes to pouring the creamy yogurt mixture neatly into the popsicle molds. This prevents spills and makes assembly much cleaner and more efficient, especially with multiple molds.
- Star-Shaped Cookie Cutters: These are key for creating the charming strawberry stars that give our popsicles their patriotic flair. We recommend using metal cookie cutters for the cleanest, sharpest cuts, especially when working with soft fruit like strawberries. A set with varying sizes, such as 1-inch, 1.3-inch, and 1.6-inch, offers flexibility depending on the size of your strawberries and popsicle molds. For this recipe, the 1-inch cutter was perfect, but larger cutters can be used if your strawberries are particularly big.
- Popsicle Molds: The right mold can make a big difference in both the ease of removal and the final shape of your popsicles. We highly recommend a silicone mold for its flexibility, which makes extracting the frozen treats incredibly easy without any fuss or breakage. Alternatively, for a budget-friendly and readily available option, small paper cups can work wonderfully as makeshift molds. Remember to choose molds that are sturdy enough to hold their shape in the freezer.
- Popsicle Sticks: Of course, you’ll need something to hold onto! Standard wooden popsicle sticks are perfect for this. Ensure they are food-grade and fit comfortably into your chosen popsicle molds. If using paper cups, you’ll insert the sticks after a brief initial freeze to ensure they stand upright.
Step-by-Step Guide: How to Make Fruit Yogurt Popsicles
Creating these beautiful and delicious fruit yogurt popsicles is a straightforward process. The most challenging part is simply waiting for them to freeze solid! Follow these detailed steps for perfect results. For a visual guide and additional insights, refer to the full recipe card below.
- Prepare the Strawberry Stars: Begin by washing your fresh strawberries thoroughly. Carefully slice off the green stems. Then, slice each strawberry from top to bottom into approximately 1-centimeter (about 0.4-inch) thick pieces. Using your chosen star-shaped cookie cutter (we recommend a 1-inch metal cutter for precision), press firmly into each strawberry slice to cut out perfect star shapes. Repeat this process with all your strawberries and set the stars aside. Don’t discard the leftover strawberry scraps – we have creative ideas for them below!
- Whisk the Yogurt Mixture: In a small mixing bowl or, ideally, a measuring cup with a spout for easy pouring, combine the yogurt (vanilla, Greek, plain, or lemon), heavy whipping cream (or your preferred milk), pure maple syrup (or honey), and vanilla extract (or other chosen extract/juice). Whisk all the ingredients together thoroughly until the mixture is smooth, well combined, and lump-free.
- Assemble the Fruit Popsicles: Carefully arrange your strawberry stars and fresh blueberries inside your popsicle molds. For the best visual effect, gently push the strawberry stars against the sides of the mold so they are visible from the outside once frozen. If some blueberries are particularly large, try to place them along the sides as well, avoiding the very center initially to prevent them from being pushed down too far when inserting the stick later. Pour the prepared yogurt mixture into each mold, filling it about halfway. Add another layer of berries, then continue pouring the yogurt mixture until the mold is nearly full, leaving a small gap at the top for expansion. Each popsicle typically uses a little less than 1/3 cup of the yogurt mixture.
- Initial Freeze & Stick Insertion: Place the lids firmly onto your popsicle molds. Transfer the molds to the freezer and allow them to freeze for an initial period of 45 to 60 minutes. This partial freeze will help the mixture firm up just enough to hold the popsicle sticks upright. After this initial freeze, carefully remove the molds from the freezer and insert a popsicle stick into the center of each popsicle, ensuring it goes deep enough but leaves a small space from the very bottom.
- Final Freeze & Enjoy: Return the molds with the inserted sticks to the freezer. Allow them to freeze for an additional 3 hours, or until they are completely firm and frozen solid. The longer they freeze, the more stable they will be. Once fully frozen, your delightful Red, White, and Blue Popsicles are ready to be enjoyed!
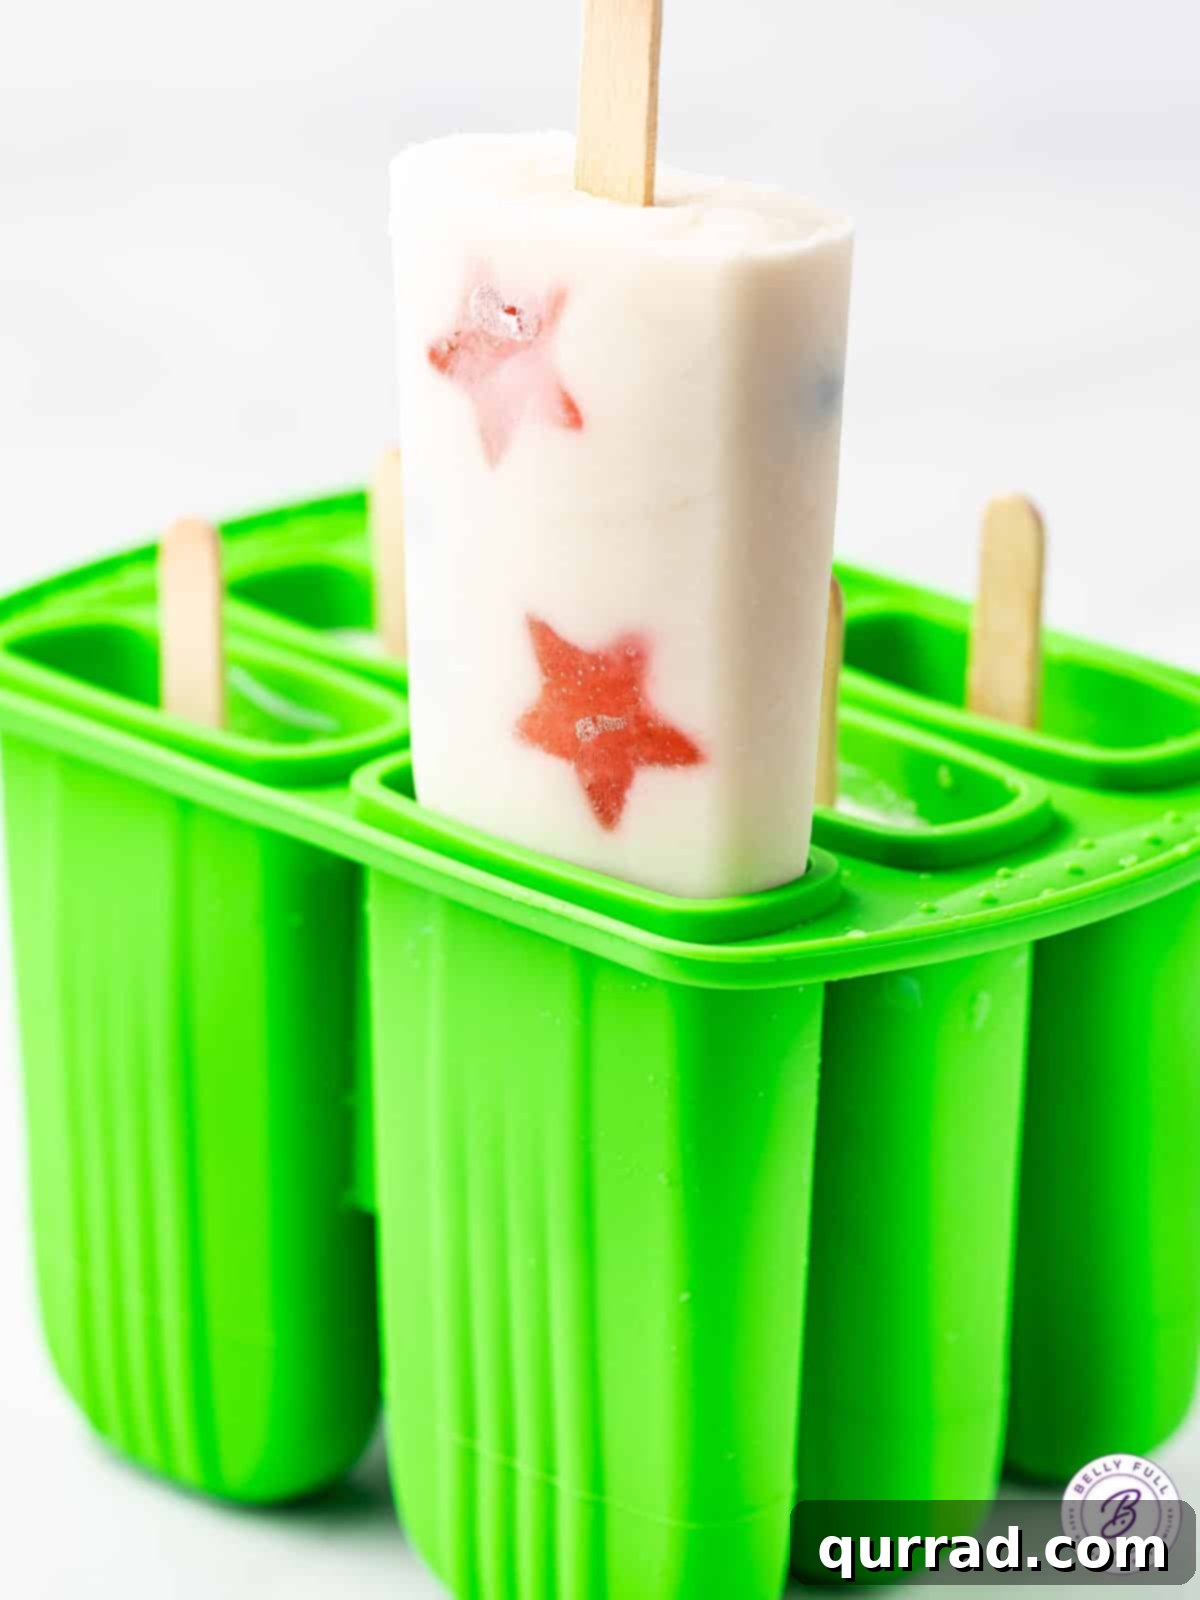
- Demold with Ease: To remove the yogurt popsicles from their molds, especially if using silicone, gently push up on the bottom of the mold while pulling on the popsicle stick. If you encounter any difficulty, run warm (not hot) water over the outside bottom of the mold for just 5-10 seconds. This will slightly loosen the popsicle from the edges, making removal much easier.
Fruit Popsicle Variations & Handy Tips for Success
Making homemade popsicles is an art, and a little knowledge can go a long way in perfecting your technique. Here are some essential tips for making your red, white, and blue popsicles, along with exciting variations to spark your creativity:
- Effortless Popsicle Removal: To ensure your beautiful fruit popsicles slide out of their molds seamlessly, a clever trick is to run warm (not hot) water over the outside bottoms of the molds for a mere 5 to 10 seconds. This gentle warmth helps to slightly melt the outer layer, making extraction effortless. If you’re using silicone molds, an additional tip is to gently push up on the bottom of the mold while simultaneously pulling on the popsicle stick. This combination of techniques almost guarantees a perfect, intact popsicle every time.
- Customize Your Dairy Base: The beauty of homemade popsicles lies in their adaptability. While heavy whipping cream provides an incredibly rich and smooth texture, you can absolutely swap it for a milk with a lower fat content, such as 2% milk, for a lighter option. For those seeking dairy-free alternatives, almond milk or coconut milk work wonderfully. Keep in mind that lower fat content may result in a slightly icier texture, but the flavor will still be fantastic. Experiment to find your perfect balance!
- Embark on Flavor Adventures: Vanilla extract offers a classic and comforting flavor, but don’t hesitate to explore a world of other extracts to infuse your popsicles with new dimensions. Consider strawberry extract to amplify the berry flavor, citrus extract (like lemon or orange) for a bright, tangy zest, or coconut extract for a tropical twist. Alternatively, a tablespoon of fresh lemon or lime juice can add a delightful natural tartness that beautifully complements the sweetness of the fruit and yogurt.
- Boost Your Berry Count: Our recipe suggests approximately 4-5 strawberry stars and 4-5 blueberries per popsicle, providing a lovely balance of fruit and creamy yogurt. However, if you’re a true berry enthusiast, feel free to increase the quantity! Load up your molds with more red and blue goodness for an even fruitier, more vibrant treat. Just ensure there’s still enough room for the yogurt mixture to bind everything together and allow the popsicle stick to be inserted properly.
- Achieving Optimal Consistency: For the creamiest popsicles, ensure your yogurt mixture is thoroughly blended. Avoid overfilling your molds, as the liquid will expand slightly during freezing. If your popsicles turn out a bit too icy, try increasing the heavy cream slightly next time, or consider adding a touch more maple syrup, as sugar helps to lower the freezing point and creates a softer texture.
- Layering Techniques: For a more distinct layered look, you can freeze each layer (strawberry, yogurt, blueberry) for about 30-45 minutes before adding the next. This ensures sharper color separation, though it does add to the overall preparation time.
Creative Ways to Use Leftover Strawberry Scraps
When crafting those beautiful strawberry stars for your patriotic popsicles, you’ll inevitably end up with some leftover strawberry scraps. But don’t even think about throwing them away! These delicious bits of fruit are far too good to waste and can be cleverly repurposed into a variety of other fantastic recipes. Here are some of our favorite ideas to ensure every delicious piece of strawberry is enjoyed:
- Smoothie Boost: Freeze the strawberry scraps and add them directly to your morning smoothies. They’ll lend natural sweetness and a refreshing chill, perfect for recipes like a creamy strawberries and cream smoothie.
- Homemade Jam or Sauce: Transform your scraps into a delightful homemade strawberry jam or a versatile strawberry sauce. This can be drizzled over ice cream, pancakes, waffles, or used as a topping for cheesecakes.
- Dessert Enhancer: Incorporate the strawberry pieces into baked goods. They’re fantastic in a rustic strawberry cobbler, crumbles, muffins, or even a simple cake batter.
- Infused Water: Add the scraps to a pitcher of water with a few mint leaves or a slice of lemon for a naturally flavored and refreshing strawberry-infused water.
- Cocktail/Mocktail Mixer: Muddle the strawberry scraps with some fresh mint and lime for a delicious base for strawberry margaritas or non-alcoholic spritzers.
- Refreshing Beverages: Use them to make homemade strawberry lemonade, for a burst of fresh fruit flavor in a classic drink.
- Salad Topping: Toss the smaller pieces into a fresh spinach salad with poppyseed dressing for a sweet and tangy contrast.
How to Properly Store Your Homemade Popsicles
Once your delicious homemade popsicles are frozen, proper storage is key to maintaining their freshness and preventing freezer burn. If you plan to enjoy them regularly over a few days, you can conveniently keep them in their original molds in the freezer. This makes them easy to grab whenever a craving strikes.
However, if you’ve made a larger batch or don’t anticipate eating them all within a few days, it’s best practice to remove them from the molds. Transfer them to reusable plastic freezer bags or an airtight, freezer-safe plastic container. To prevent them from sticking together, especially if stacking multiple layers, place a piece of parchment paper between each layer of popsicles. Stored correctly, these homemade Red, White, and Blue Popsicles will stay wonderfully fresh and delicious for up to a month in the freezer, allowing you to enjoy a taste of summer long after they’re made.
More Festive & Summer Recipes to Explore
Looking for more delicious ways to celebrate summer or patriotic holidays? Here are some other fantastic recipes that are sure to be a hit:
- Red White Blue Muddy Buddies
- Patriotic Cookie Ice Cream Sandwiches
- Red White Blue Deviled Eggs
- Red White Blue Jello Poke Cake
- 4th of July Caramel Corn
- Dessert Fruit Kabobs
- Red White and Blue Cheesecake Mousse
Red, White and Blue Popsicles Recipe
Equipment
- Small bowl or measuring cup with a spout
- Small star-shaped cookie cutters (1-inch recommended)
- Popsicle mold (silicone recommended, or paper cups)
- Popsicle sticks
Ingredients
- 6 to 8 large strawberries (about 5 ounces)
- 1/2 cup blueberries (about 2.5 ounces)
- 1 cup vanilla yogurt or vanilla Greek yogurt (or plain or lemon yogurt)
- 1/2 cup heavy whipping cream (or milk of choice)
- 1/4 cup pure maple syrup (or honey)
- 1 teaspoon vanilla extract (or other flavor extract/juice)
Instructions
-
To make strawberry stars: Wash and remove stems from strawberries. Slice each strawberry from the top down to about 1 centimeter thick. Use a 1-inch star cookie cutter to punch out star shapes from each slice and set aside. Repeat for all strawberries. (See the article for ideas on how to repurpose leftover scraps!)
-
In a measuring cup with a spout, combine the yogurt, heavy whipping cream, maple syrup, and vanilla extract. Whisk until well combined and smooth.
-
Place strawberry stars and blueberries into the popsicle molds. Push the strawberry stars towards the sides of the mold for better visibility. If blueberries are large, place them along the sides too, avoiding the very center initially. Pour the yogurt mixture in halfway, then add more berries, and repeat until the molds are almost full (approximately a little less than 1/3 cup of yogurt mixture per popsicle).
-
Place the lids on the molds and transfer them to the freezer for 45 to 60 minutes, allowing them to partially freeze.
-
After the initial freeze, insert a popsicle stick into the center of each popsicle, leaving a small space from the bottom. Place the molds back into the freezer for at least 3 hours, or until completely firm and frozen.
-
To remove, gently push on the bottom of silicone molds while pulling up on the popsicle stick. If needed, run warm (not hot) water over the outside bottoms of the mold for 5-10 seconds to loosen from the edges.
Nutrition Information
Nutritional information provided is an automatic calculation and may vary based on the exact products used and any modifications to the recipe. If precise nutritional values are crucial, we recommend calculating them independently.