
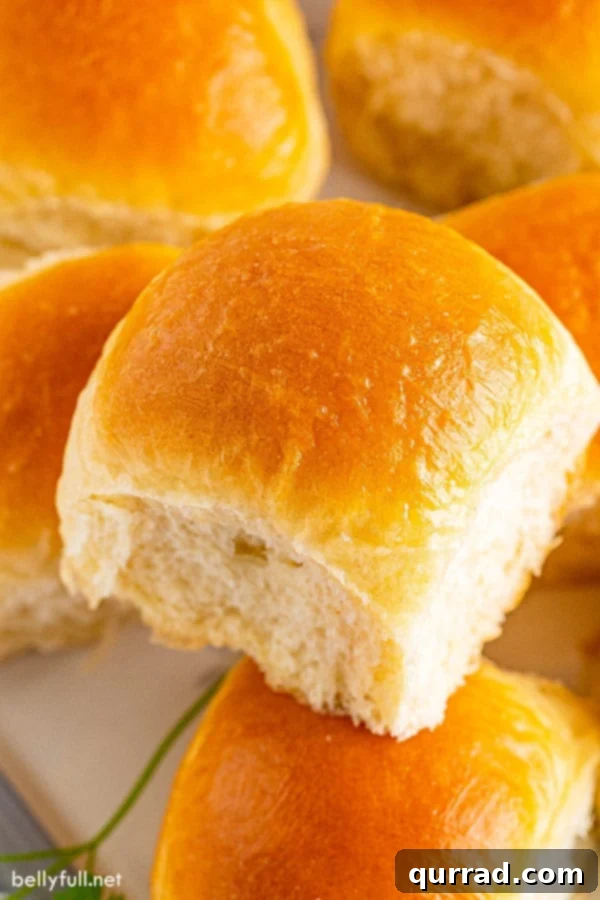
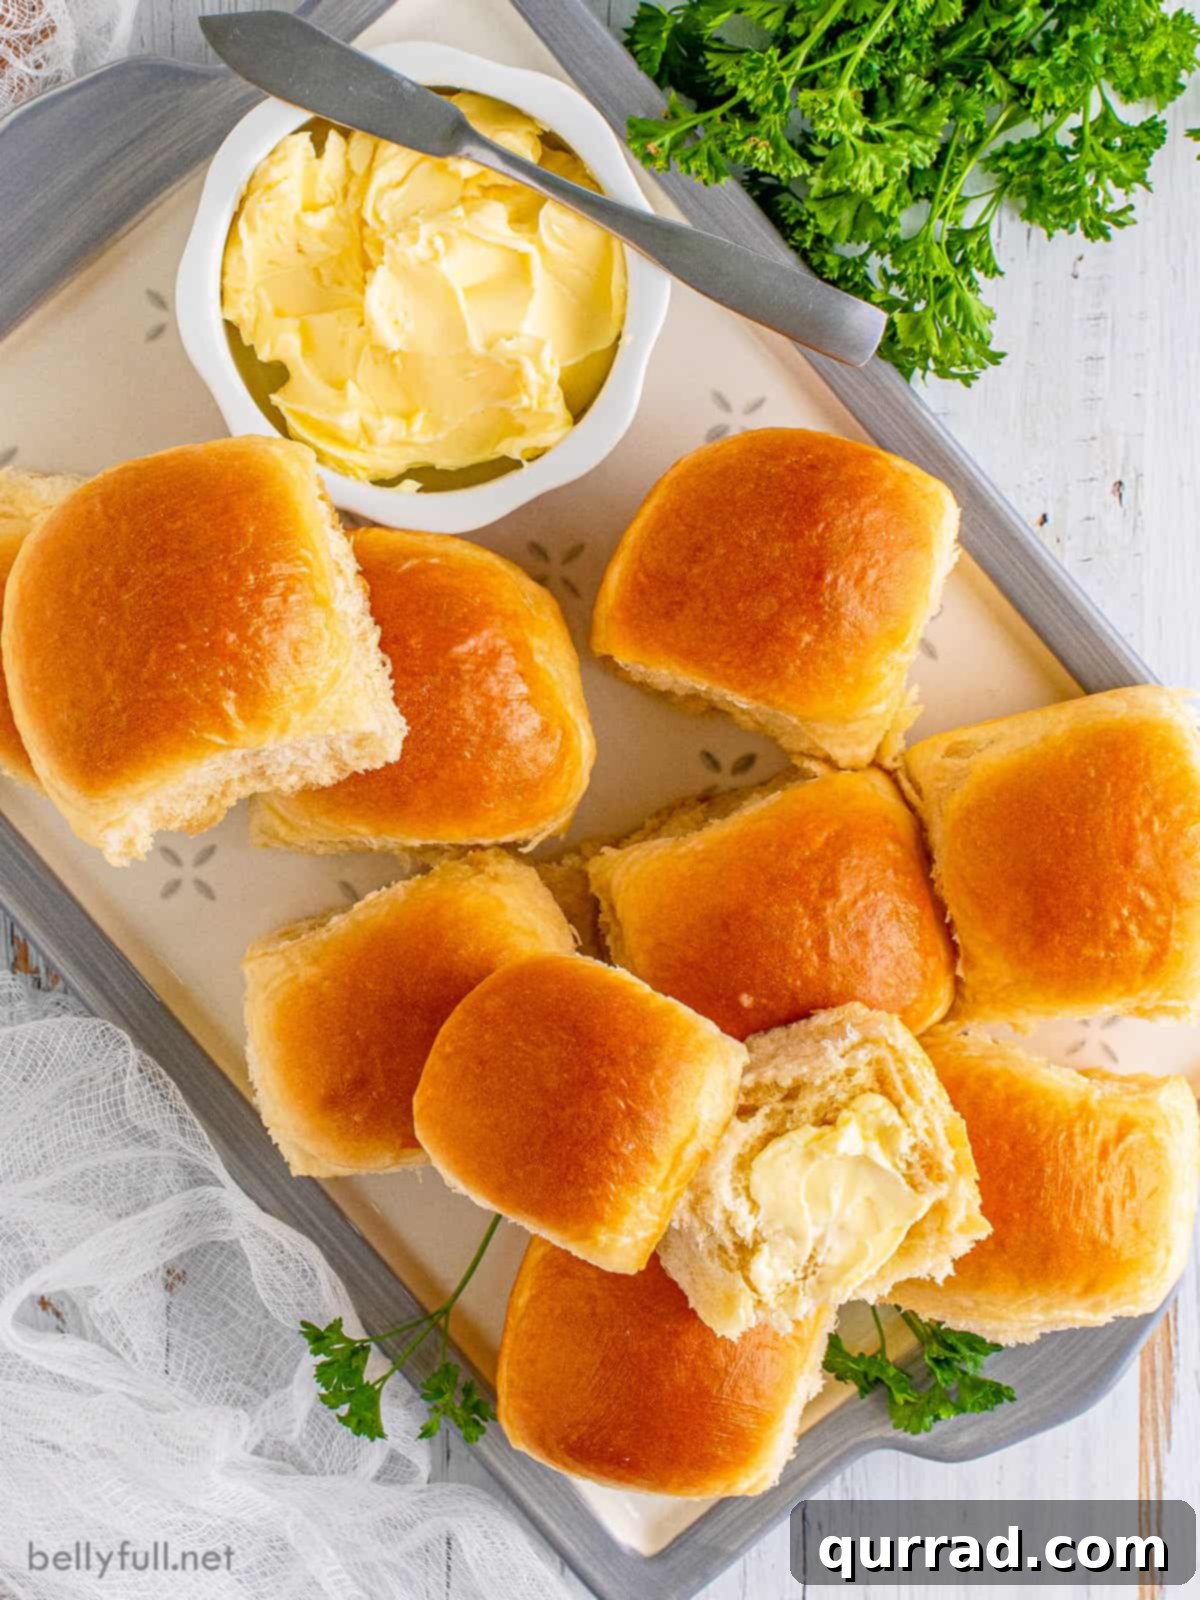
Welcome to the ultimate guide for crafting the most delightful Homemade Dinner Rolls. Forget store-bought options; these rolls are a testament to the magic of simple ingredients transformed into something extraordinary. Imagine light, fluffy, buttery, and subtly sweet rolls, fresh from the oven, filling your home with an irresistible aroma. This recipe isn’t just about baking; it’s about creating moments, perfect for any occasion, from grand holiday feasts to cozy weeknight dinners. With a straightforward approach and essential tips, you’ll master the art of yeast rolls and impress everyone at your table.
Our perfected recipe yields rolls that are not only incredibly tender and rich but also astonishingly easy to make. They are the ideal accompaniment to a holiday spread, pairing beautifully with creamy mashed potatoes, tangy cranberry sauce, or hearty gravy. Beyond the festive table, these versatile dinner rolls elevate any meal. Picture them alongside a comforting beef stew on a chilly evening or soaking up the flavors of a creamy corn chowder. They’re even fantastic for transforming into savory treats like Hot Ham and Cheese Sliders, making them a true culinary chameleon.
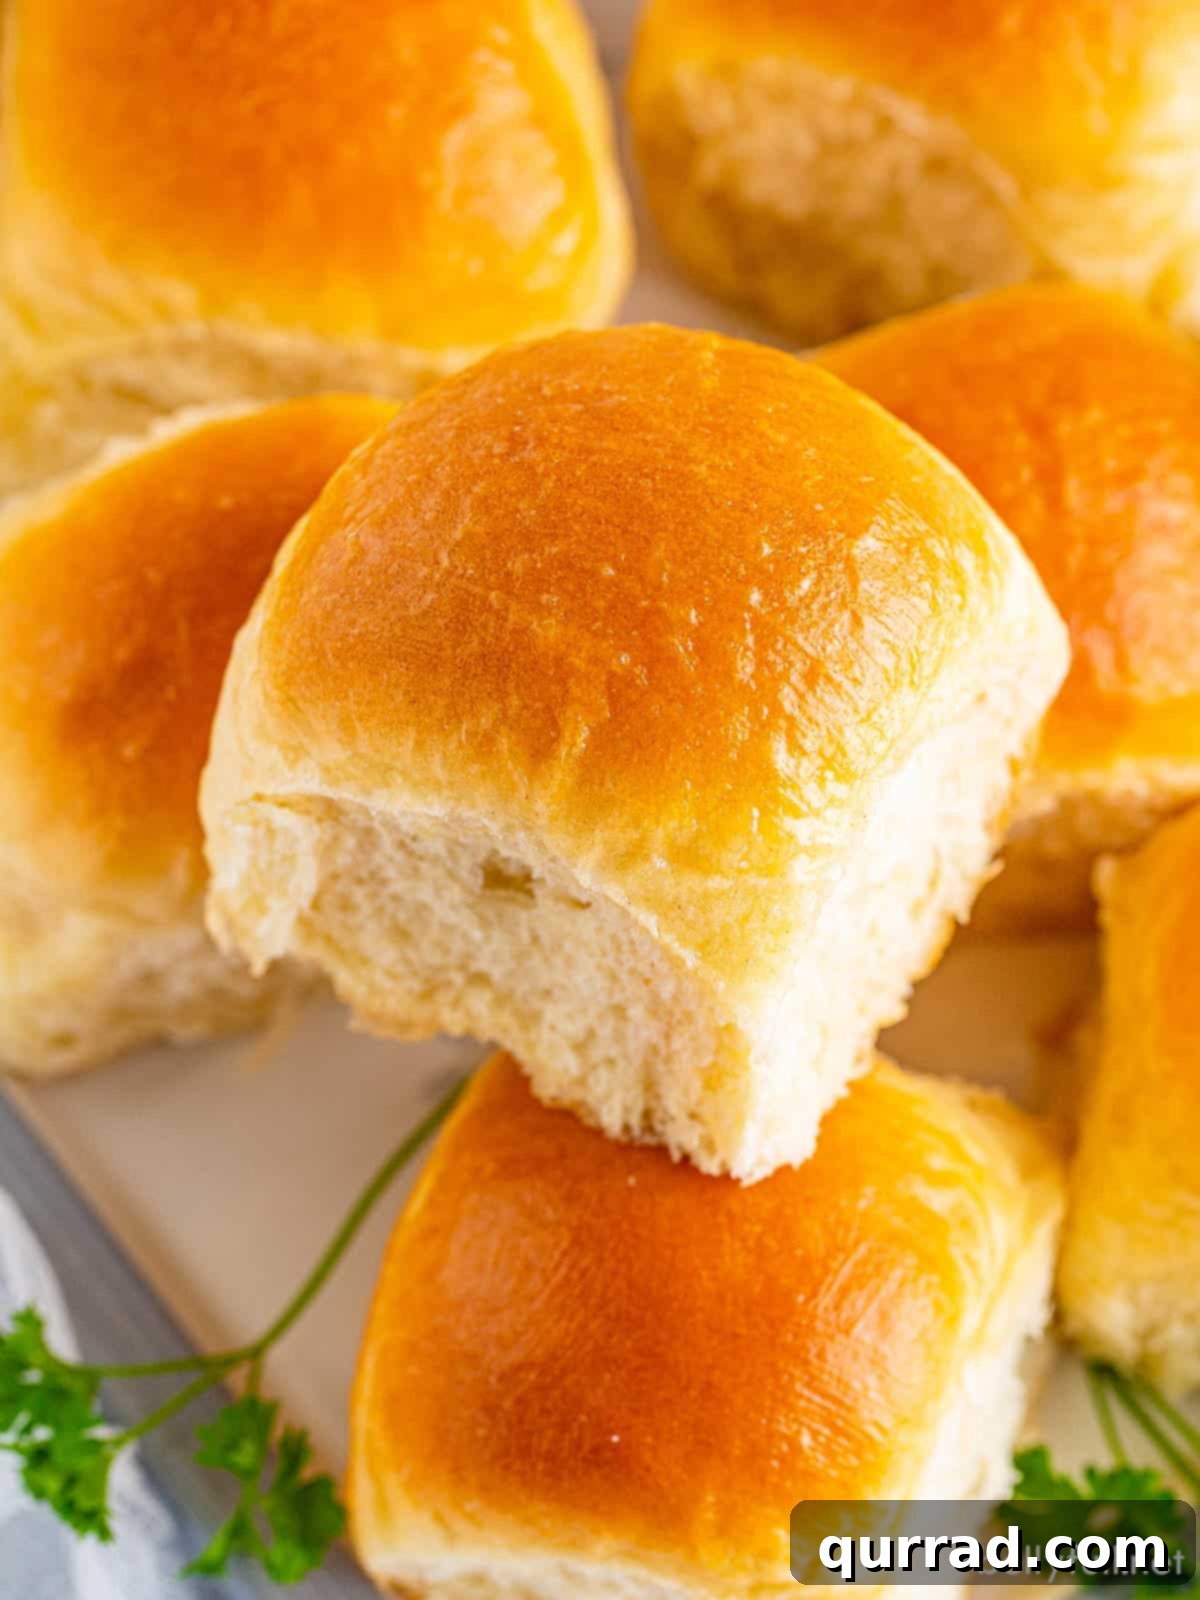
The Ultimate Homemade Dinner Rolls Recipe: Light, Fluffy & Buttery
If you’ve been on a quest for the perfect dinner roll—one that consistently delivers on lightness, fluffiness, and a rich buttery taste—your search ends here. This recipe for yeast rolls is designed to be approachable, even for those new to working with yeast. We’ve distilled the process into clear, manageable steps, complete with expert tips to ensure your success, guaranteeing consistently perfect dinner rolls every single time you bake.
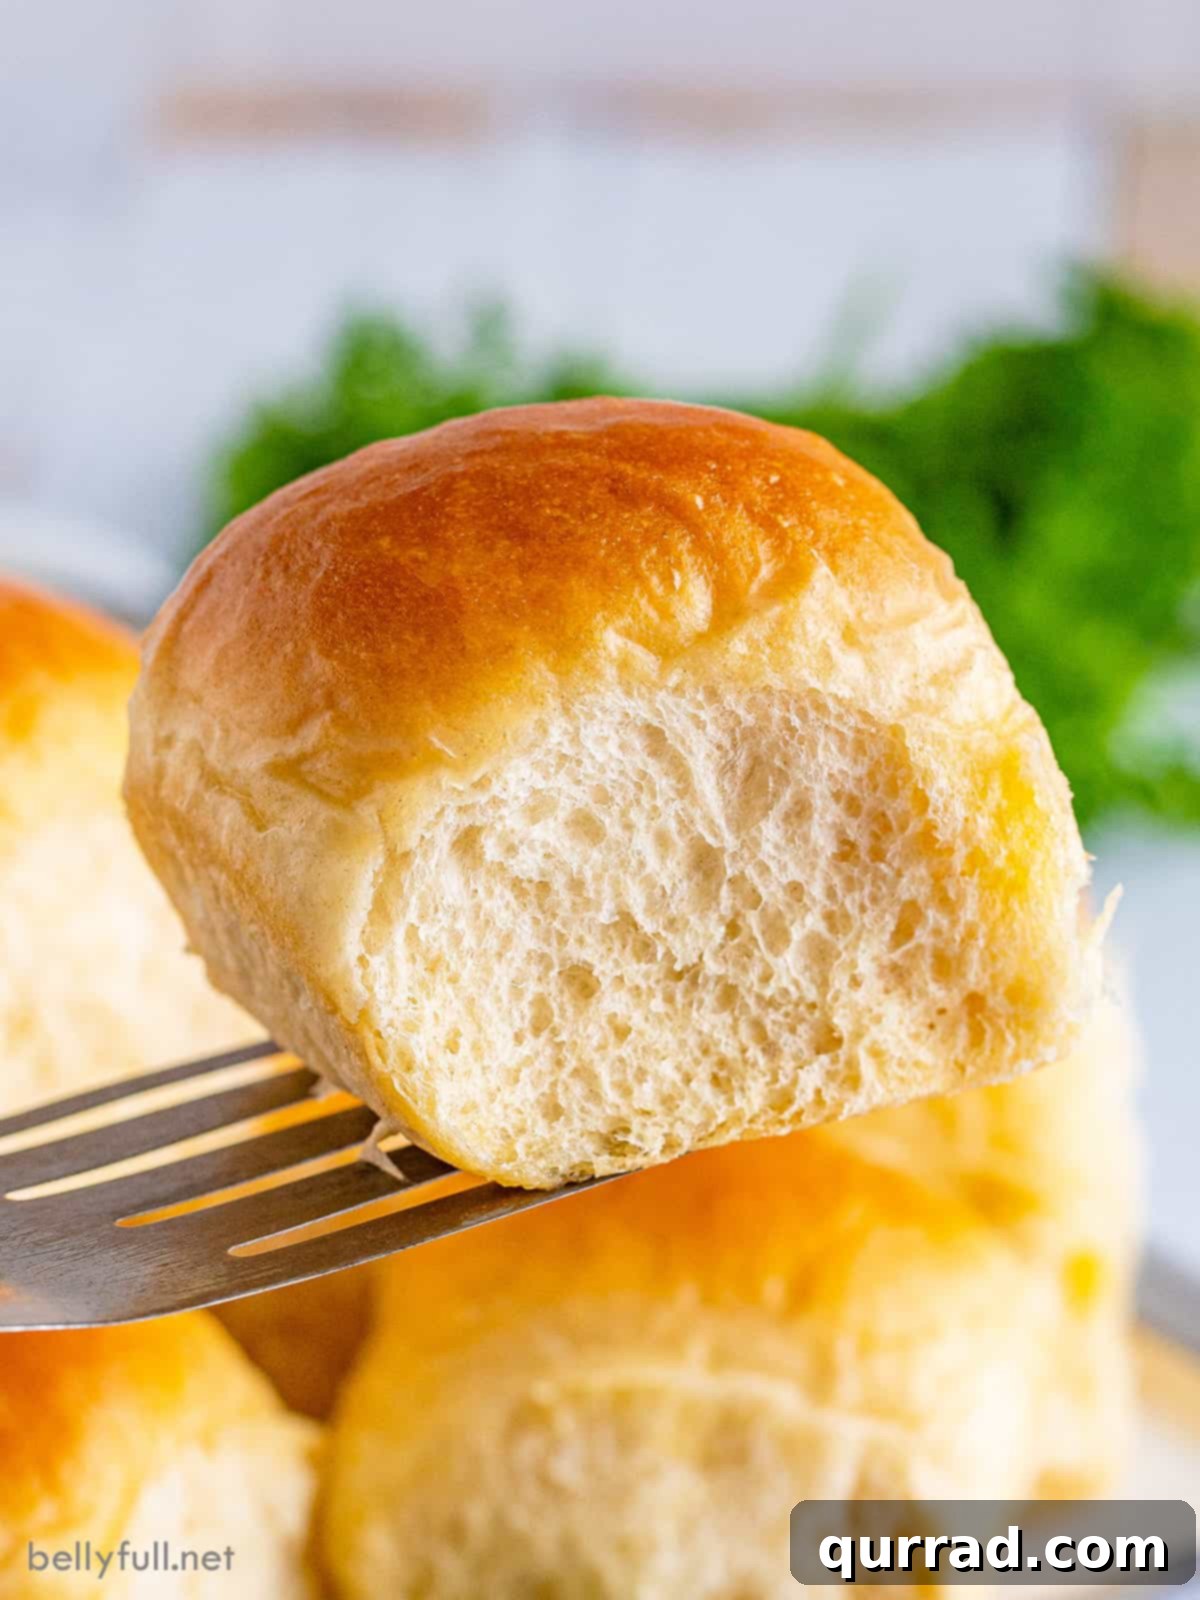
The flavor profile of these rolls strikes a delightful balance between rich butteriness and a subtle sweetness, making them utterly addictive. Their texture is so incredibly soft and airy that they virtually melt in your mouth with each bite. Honestly, these dinner rolls are so flavorful on their own that you can enjoy them straight from the oven, unadorned by any additional butter or spread. They are undeniably a star addition to any holiday dinner, from the abundance of Thanksgiving to the freshness of Easter, but their simplicity and ease of preparation mean you can indulge in them as a cherished side for any meal throughout the year.
While the process involves two crucial rising stages, requiring a total of just over three hours, the effort is well worth it. The good news is that any leftover rolls can be conveniently frozen, allowing you to enjoy warm, buttery dinner rolls on demand, whenever a craving strikes. This makes them an excellent option for meal planning or for always having a delicious side dish at the ready.
Why Homemade Dinner Rolls Are Always Best
There’s an undeniable charm and superior quality to homemade dinner rolls that store-bought varieties simply can’t replicate. The process of baking them yourself fills your home with an inviting aroma that immediately signals warmth and comfort. But beyond the sensory experience, homemade rolls offer numerous advantages:
- Unmatched Freshness and Flavor: Nothing beats the taste of a roll pulled directly from the oven. The butter is more pronounced, the sweetness perfectly balanced, and the texture incredibly soft.
- Control Over Ingredients: You know exactly what goes into your rolls. Using high-quality, fresh ingredients ensures a superior product free from preservatives or artificial flavors often found in commercial breads.
- Customization: As you’ll see in our variations section, homemade rolls are a blank canvas for your culinary creativity. Add herbs, cheese, or spices to suit any meal or preference.
- Cost-Effective: Making rolls from scratch is often more economical than buying premium bakery rolls, especially when feeding a crowd.
- The Joy of Baking: There’s immense satisfaction in creating something delicious from basic ingredients. The process can be therapeutic, and the end result is a source of pride.
Essential Ingredients for Fluffy Dinner Rolls
Achieving the perfect homemade dinner roll requires a handful of common pantry items. Each ingredient plays a vital role in creating that signature light, fluffy, and buttery texture. Understanding their purpose helps in mastering the recipe. (For precise quantities and a printable recipe card, please refer to the detailed recipe instructions below.)
- Unsalted Butter: We specify unsalted butter because it gives you complete control over the saltiness of your final product. Butter is not just for flavor; it contributes significantly to the tenderness and richness of the rolls, creating that melt-in-your-mouth quality. You’ll use it in the dough and for brushing on top for an extra buttery finish.
- Granulated Sugar: Beyond adding a delightful hint of sweetness to the rolls, sugar is absolutely essential for activating and feeding the yeast. This “food” for the yeast helps it ferment effectively, producing the carbon dioxide necessary for the dough to rise fully, resulting in a soft and airy texture. Sugar also aids in achieving that beautiful golden-brown crust during baking.
- Kosher Salt: A fundamental flavor enhancer, kosher salt balances the sweetness and brings out the deeper, more complex flavors of the other ingredients. It also plays a role in regulating yeast activity and strengthening the gluten structure in the dough, contributing to a better texture.
- Whole Milk: The choice of milk significantly impacts the final texture and richness of your dinner rolls. Whole milk, with its higher fat content, creates a remarkably richer, softer crumb compared to lower-fat milk options or water. The fats in whole milk tenderize the dough, leading to an incredibly moist and succulent roll. Warm milk is also crucial for activating the yeast properly.
- Active Dry Yeast: This is the leavening agent responsible for making your rolls rise and become light and airy. Always ensure your yeast is fresh and active. If your yeast doesn’t become foamy when proofed with warm milk and sugar, it means it’s no longer active, and you’ll need to discard it and start with a fresh batch to guarantee a successful rise.
- Large Egg: An egg in the dough contributes to both richness and structure. It helps bind the ingredients together, adding moisture and aiding in the dough’s elasticity. The egg also lends a beautiful golden hue to the interior of the rolls and a slightly richer flavor.
- All-Purpose Flour: This is the foundational ingredient for the dough. All-purpose flour provides the right balance of protein to develop sufficient gluten for a chewy yet tender crumb. While bread flour can also be used for a slightly chewier roll, we do not recommend substituting with whole wheat flour or other types, as they can significantly alter the texture and density of these light dinner rolls.
- Vegetable Oil: A small amount of vegetable oil is used to coat the dough bowl during the rising process. This prevents the dough from sticking and helps keep it moist as it expands, promoting an even and full rise.
Creative Recipe Variations to Elevate Your Rolls
While these classic homemade dinner rolls are perfect as is, they also serve as a wonderful base for creative flavor variations. You can easily add a mix-in or two to the dough just before the kneading process to introduce exciting new dimensions. Here are a few inspiring ideas to customize your next batch:
- Savory Seasonings: Infuse your rolls with aromatic herbs and spices. A generous pinch of dried garlic powder can transform them into garlic knots. Fresh or dried dill adds a bright, herbaceous note, while rosemary or thyme lend an earthy, fragrant quality perfect for pairing with roasted meats. For a burst of flavor and texture, sprinkle in everything bagel seasoning, or evoke Italian cuisine with a blend of Italian seasoning.
- Cheesy Delights: Cheese is always a welcome addition! Shredded cheddar cheese melts beautifully into the dough, creating pockets of savory goodness. Parmesan cheese offers a sharper, saltier kick, making the rolls irresistible, especially when served with pasta dishes or soups. You can even try a combination of cheeses for more complexity.
- Spicy Jalapeño Kick: For those who enjoy a little heat, finely chopped fresh or pickled jalapeños can add a vibrant, spicy, and slightly tangy flavor. Be sure to remove the seeds and membranes if you prefer less heat. This variation is fantastic with chili or tacos.
- Fresh Chives: Incorporate finely chopped fresh chives for a delicate, subtle onion flavor and a touch of color. Chives pair wonderfully with creamy dishes, fish, or simply with butter.
- Sweet Touches: For a sweeter roll, consider adding a teaspoon of cinnamon and a handful of raisins or dried cranberries to the dough. This transforms them into a lovely breakfast or brunch pastry.
- Herbed Garlic Butter Topping: Instead of just melted butter, mix finely chopped fresh parsley or chives with melted butter and a pinch of garlic powder to brush over the hot rolls straight from the oven for an extra layer of flavor.
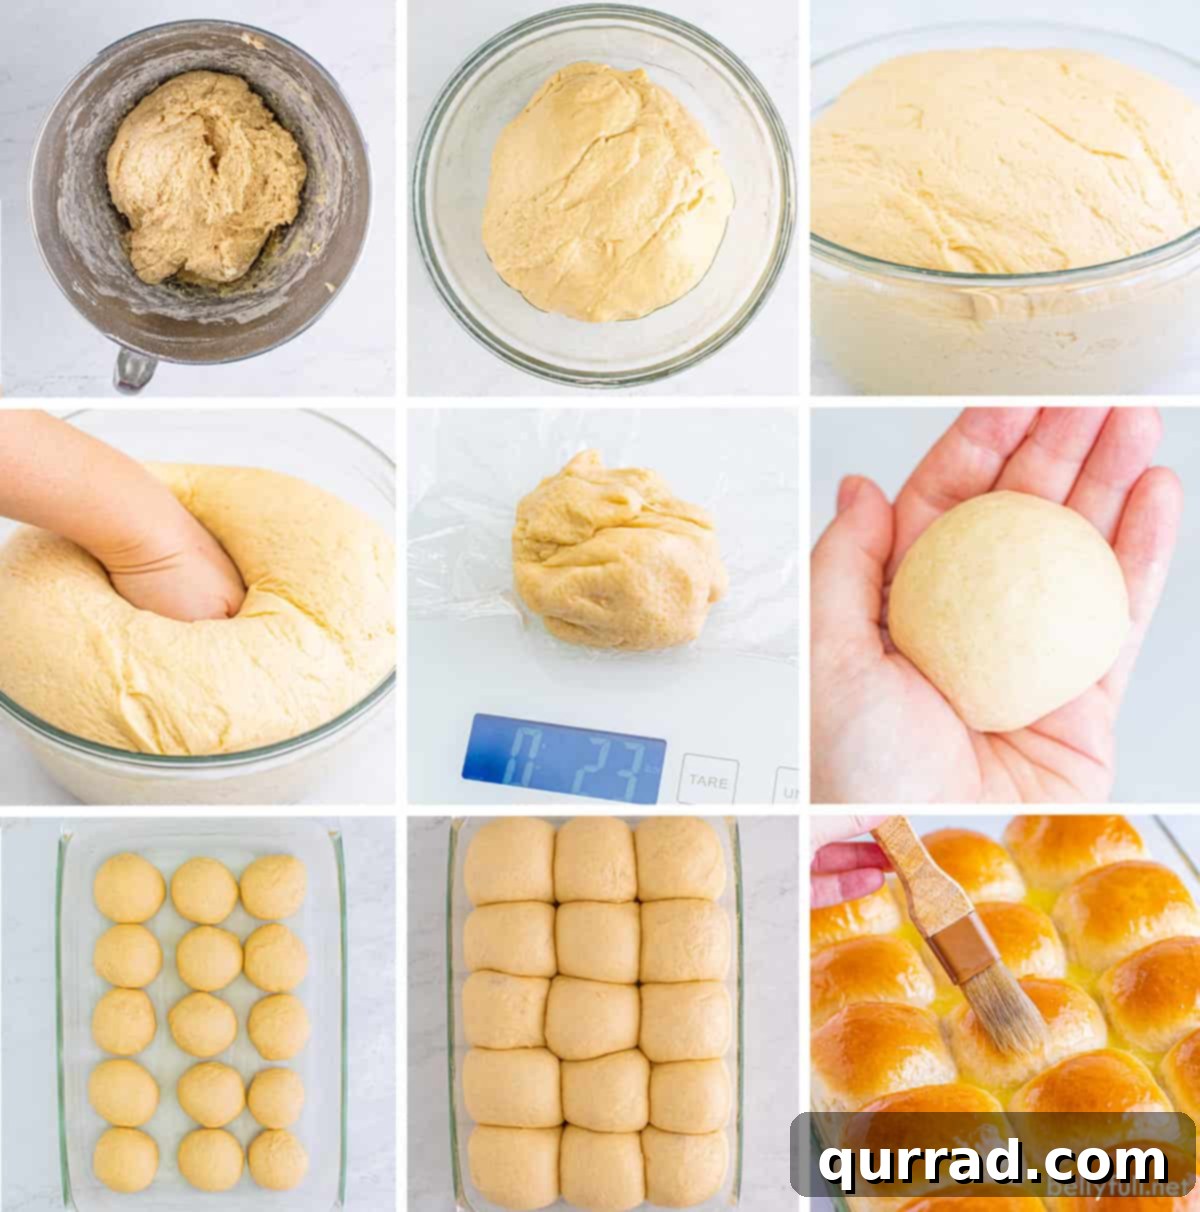
How to Bake Perfect Homemade Dinner Rolls: Step-by-Step Guide
Creating these incredibly soft and buttery yeast rolls is a rewarding experience, and it’s simpler than you might imagine. This detailed summary will guide you through each stage of the baking process. (Remember to consult the complete printable recipe card below for all specific measurements and comprehensive instructions.)
- Activate the Yeast & Prepare the Dough Base: Begin by thinly slicing half of your unsalted butter and placing these slices at the bottom of your stand mixer bowl. This allows the butter to soften and melt gently. Add the granulated sugar and kosher salt directly over the butter. Next, gently warm 1 cup of the whole milk to a temperature between 105-110°F (39-43°C). It’s crucial not to overheat the milk, as temperatures above 110°F can kill the yeast. Pour this warm milk over the butter mixture in the mixer bowl. In a separate small bowl, combine the remaining 1/4 cup of warm milk with the active dry yeast, stir briefly, and let it sit for about 5 minutes until it becomes visibly foamy. This foaming indicates your yeast is active and ready. Once foamy, add the yeast mixture to your stand mixer bowl, along with the beaten large egg.
- Knead the Dough to Perfection: Attach the dough hook to your stand mixer. Gradually add the all-purpose flour, one cup at a time, mixing on a low speed. Scrape down the sides of the bowl as needed to ensure all ingredients are incorporated. After adding about 3 1/2 cups of flour, the mixture should start to resemble a shaggy dough. Increase the mixer speed to medium-high and continue to knead. Observe the dough: if it’s still overly sticky and doesn’t begin to pull away cleanly from the sides of the bowl, add additional flour, one tablespoon at a time, up to an extra half-cup, until the dough is smooth, elastic, and mostly clears the sides of the bowl. A small amount of dough sticking to the very bottom is acceptable. Knead the dough for a full 3 minutes at this speed to develop the gluten.
- First Rise (Proofing): Lightly grease a large clean bowl with 1 teaspoon of vegetable oil, swirling it around to coat the bottom and sides. Transfer the kneaded dough into this oiled bowl, turning it over once to ensure it’s fully coated in oil. This prevents a dry skin from forming. Cover the bowl tightly with plastic wrap and place it in a warm, draft-free location. Allow the dough to rise for 1 to 2 hours, or until it has visibly doubled in size. A warm oven (turned off) or a sunny spot are good options.
- Shape the Rolls: Once the first rise is complete, gently punch down the dough to release the accumulated air bubbles. Melt the remaining 1/4 cup of butter. Lightly brush the bottom of a 9×13-inch baking dish with a small amount of this melted butter. Divide the dough into 15 equal sections. For consistent roll sizes, which ensures even baking, we recommend weighing the entire dough and then dividing that weight by 15 to determine the target weight for each individual roll. Take each dough section and, using your hands, gently stretch it out slightly. Then, tuck the ends of the dough underneath itself to form a smooth, round ball. Pinch the seams firmly together at the bottom and gently roll the ball between your palms to refine its shape.
- Second Rise & Final Proof: Arrange the perfectly shaped dough balls seam-side down in the prepared baking dish, creating 5 rows of 3 rolls. Ensure they are spaced evenly, as they will expand. Cover the baking dish loosely with plastic wrap once more and let the rolls undergo their second rise in a warm place for approximately 1 hour, or until they have doubled in size again and appear visibly puffy.
- Bake and Finish: While the rolls are completing their second rise, preheat your oven to 350°F (175°C). Once the oven is ready and the rolls have risen sufficiently, carefully remove the plastic wrap from the baking dish. Bake the rolls for 20 to 25 minutes. They are done when their tops are beautifully golden brown and, when lightly tapped, they produce a hollow sound. Immediately upon removing them from the oven, generously brush the remaining melted butter all over the hot rolls. The warmth of the rolls will absorb the butter, enhancing their flavor and shine. Allow the rolls to cool slightly in the pan before serving warm.
Baking Without a Stand Mixer: A Hand-Kneading Guide
While a stand mixer simplifies the kneading process, it’s absolutely possible to achieve exceptional dinner rolls by hand. Don’t let the lack of specialized equipment deter you! The key is proper technique and a bit of patience. Here’s how you can adapt this recipe for hand-kneading:
- Initial Mixing: Follow the first three steps for preparing the dough as normal, but instead of using a stand mixer bowl, use a large, sturdy mixing bowl. After adding the foamy yeast mixture and beaten egg, begin stirring in the flour one cup at a time with a strong wooden spoon or a Danish dough whisk. Continue mixing until a shaggy, cohesive dough forms.
- Kneading by Hand: Once the dough is formed, turn it out onto a clean, lightly floured work surface. Your hands will get sticky initially, so ensure you have extra flour nearby to lightly dust your hands and the surface as needed. Begin to knead the dough by pushing it away from you with the heels of your hands, then folding it back towards you. Rotate the dough slightly with each push and fold. This action stretches the gluten. Continue this kneading process for 3 to 4 minutes.
- What to Look For: As you knead, the dough will gradually transform from sticky and shaggy to smooth, elastic, and less sticky. It should feel springy and resilient to the touch. Avoid adding too much extra flour, as this can result in dense, dry rolls. Only add enough to prevent excessive sticking.
- Continuing the Recipe: Once your dough reaches the desired smooth and elastic consistency, proceed with the rest of the recipe as stated, including the first rise, shaping, second rise, and baking. The only major difference is the method of kneading, which proves that delicious homemade rolls are accessible to every home baker.
Expert Tips for Consistently Perfect Dinner Rolls
Achieving consistently perfect homemade dinner rolls is a combination of good ingredients and smart techniques. Here are a few invaluable tips to ensure your rolls are always light, fluffy, and a joy to eat:
- Accurate Flour Measurement is Key: The most common culprit for dense or dry rolls is too much flour. Flour should always be measured using the “spoon and level” method. Gently spoon the flour into your measuring cup until it overflows, then use a straight edge (like the back of a knife) to level off the excess. Never scoop flour directly from the bag with your measuring cup, as this compacts the flour and can add up to 25% more than intended.
- Weigh Dough Balls for Uniformity: For even baking and a professional presentation, it’s highly recommended to weigh your dough balls. After the first rise, punch down the dough and weigh the entire mass. Divide that total weight by 15 (the number of rolls) to get the target weight for each individual roll. Use a kitchen scale to portion out each dough ball precisely. This ensures every roll bakes at the same rate and yields a consistently delicious result.
- Monitor Yeast Activity Closely: Active dry yeast is a living organism, and its vitality is crucial. Always proof your yeast (mix it with warm milk and sugar) before adding it to the rest of the ingredients. If it doesn’t become foamy within 5-10 minutes, it’s likely dead or inactive, and your dough won’t rise. Discard it and start again with fresh yeast.
- Ideal Milk Temperature: The milk temperature for activating yeast is critical. It should be warm (105-110°F or 39-43°C), not hot. If it’s too cold, the yeast won’t activate; too hot, and it will kill the yeast. Use a kitchen thermometer for accuracy.
- Don’t Over-Flour During Kneading: While you need enough flour to prevent extreme stickiness, resist the urge to add too much. A slightly tacky dough (one that sticks to your finger but releases easily) is ideal for soft, moist rolls. Over-flouring leads to a stiff, dry dough and tough rolls.
- Proofing Environment Matters: A warm, draft-free spot is best for rising dough. If your kitchen is cool, you can turn your oven on to its lowest setting for a minute, then turn it off and let the dough rise inside (with the door ajar if it’s still too warm).
- How to Tell When Rolls Are Done Baking: These rolls typically bake in about 20-25 minutes at 350°F (175°C). You’ll know they are perfectly baked when their tops are a beautiful golden brown color. Another reliable test is to lightly tap the top of a roll; if it sounds hollow, they are done. Avoid under-baking, which can result in a doughy interior, or over-baking, which leads to dry rolls.
Make Ahead, Storing, and Reheating Instructions
One of the many advantages of homemade dinner rolls is their versatility when it comes to preparation and storage. Whether you’re planning for a big event or simply want the convenience of fresh rolls on demand, these make-ahead and storage tips will be invaluable.
- Make in Advance (Overnight Rise): If you desire freshly baked dinner rolls but lack the full three hours for rising on the day of serving, this make-ahead method is perfect. Follow the recipe instructions precisely up to the point where you shape the dough into individual balls and place them in the baking dish. Instead of covering and allowing them to rise at room temperature, cover the dish tightly with plastic wrap and transfer it to the refrigerator overnight (for up to 12-18 hours). The cold temperature will significantly slow down the yeast activity. Approximately 3 hours before you plan to bake, remove the rolls from the fridge. Let them sit at room temperature to come back up to temperature and complete their final rise. They should double in size before baking as directed.
- Storing Leftovers: Any leftover homemade dinner rolls will maintain their freshness and soft texture for up to 3 days when stored properly. Allow them to cool completely to room temperature before placing them in an airtight container or a resealable plastic bag. Store them on the counter at room temperature; refrigeration can actually make bread products dry out faster.
- Freezing Yeast Rolls: Yes, these dinner rolls freeze beautifully! This is an excellent way to enjoy them whenever you wish. Once the rolls have completely cooled after baking, arrange them in a single layer on a baking sheet and freeze until solid (this prevents them from sticking together). Once solid, transfer the frozen rolls to a freezer-safe ziploc bag or an airtight container. They can be frozen for up to 1 month without significant loss of quality. To thaw, simply place them in the refrigerator overnight.
- Reheating Dinner Rolls: To bring your dinner rolls back to their soft, warm, and delicious state, preheat your oven to 300°F (150°C). Arrange the rolls on a baking sheet and loosely tent them with aluminum foil. Warm them in the oven for about 5-10 minutes, or until they are heated through. The foil helps to prevent them from drying out. You can also lightly brush them with a little extra butter before reheating for added moisture and flavor.
More Delicious Rolls and Biscuits Recipes to Explore
If you’ve fallen in love with the art of baking homemade bread, here are more delightful recipes for rolls and biscuits that are sure to become family favorites. Expand your baking repertoire with these comforting options:
- Popovers: Light, airy, and utterly impressive, popovers are a fantastic alternative to traditional rolls, perfect with roast beef or soup.
- 7 Up Biscuits: Discover the secret to incredibly tender, flaky biscuits using a surprising ingredient – 7 Up! These are a southern classic.
- Cheddar Bay Biscuits: Recreate the beloved cheesy, garlic-infused biscuits from your favorite seafood restaurant right in your own kitchen.
- Drop Biscuits: For those times when you need warm biscuits without the fuss of rolling and cutting, these easy drop buttermilk biscuits are a revelation.
Frequently Asked Questions About Homemade Dinner Rolls
- Why didn’t my dinner rolls rise?
The most common reasons for dough not rising are inactive yeast or incorrect liquid temperature. Ensure your active dry yeast is fresh (check expiration date) and proof it in warm milk (105-110°F or 39-43°C). If the milk is too hot, it kills the yeast; if too cold, it won’t activate. Also, make sure your rising environment is warm and draft-free.
- Can I use bread flour instead of all-purpose flour?
Yes, you can. Bread flour has a higher protein content, which will result in a slightly chewier roll with a bit more structure. All-purpose flour yields a softer, more tender roll, which is typically preferred for dinner rolls. Avoid using whole wheat flour for this specific recipe, as it will make the rolls much denser.
- My rolls are dense and heavy, what went wrong?
This is usually due to too much flour or insufficient kneading. Over-flouring makes the dough stiff and dense. Always spoon and level your flour. Inadequate kneading won’t develop enough gluten, which is essential for trapping gas and creating a light, airy texture. Ensure you knead for the full 3 minutes, whether by hand or mixer.
- How can I make my rolls extra soft and fluffy?
Using whole milk instead of water or lower-fat milk contributes richness and softness. An egg also adds moisture and tenderness. Proper kneading develops gluten for structure without making it tough. Finally, allowing both rises to complete fully without rushing is crucial for maximum fluffiness. Brushing with melted butter immediately after baking also softens the crust.
- Can I use instant yeast instead of active dry yeast?
Yes, you can. Instant yeast can typically be mixed directly with the dry ingredients without proofing. However, for consistency and to ensure the yeast is active, we still recommend proofing it as directed in the recipe, especially if you’re unsure of its freshness. The quantities are generally interchangeable for most recipes.
Homemade Dinner Rolls

Ingredients
- 1/2 cup unsalted butter, divided
- 1/4 cup granulated sugar
- 1 teaspoon kosher salt
- 1 1/4 cups whole milk, divided
- 2 1/4 teaspoons active dry yeast
- 1 large egg, beaten
- 3 1/2 to 4 cups all-purpose flour, spooned and leveled
- 1 teaspoon vegetable oil
Instructions
- Take half of the butter and slice it as thin as you can, add the slices to the bottom of a stand mixer. Add the sugar and salt to the mixer.
- Warm 1 cup of the milk in a microwave-safe bowl in 15-second intervals until it reaches 105-110°F (do not warm to over 110°F). Pour this warm milk into the bowl with the butter, no need to stir, just let it sit.
- Add the yeast to the remaining 1/4 cup milk and stir. Let it sit for about 5 minutes, until foamy. Add this foamy mixture to the mixer, along with the beaten egg.
- Using the hook attachment, start stirring in the flour 1 cup at a time, scraping down the sides as needed. Do this until you’ve added 3 1/2 cups of flour. Once the mixture resembles a dough, turn the speed to medium-high and start to knead it. If it doesn’t start to clean the sides of the bowl, add a little more flour at a time (up to a 1/2 cup) until the sides of the bowl are mostly clean – if the dough is still attached at the very bottom of the bowl, that’s okay. Knead for 3 minutes.
- In a large bowl, add the vegetable oil and swirl it around. Take the dough out of the mixer and add it to the bowl with the oil, turning it around so it is coated. Cover with plastic wrap and let it rise in a warm, draft-free place for 1-2 hours until doubled in size.
- Melt the remaining 1/4 cup of butter. Brush a 9×13 baking dish with some of the butter (you will only need a small amount for brushing the pan). Set aside the rest of the melted butter for later.
- Punch down the risen dough to release the air bubbles. Divide the dough into 15 even sections. (For best results and uniform rolls, you can weigh the entire dough and then divide by 15 to determine the weight for each roll.)
- Take each dough ball with your hands and gently stretch it out. Tuck the ends of the dough around itself to form a smooth ball and pinch the seams firmly together at the bottom. Gently roll it between your hands to perfect the spherical shape.
- Place the shaped dough balls seam side down into the prepared baking dish, arranging them in 5 rows of 3 rolls. Cover again loosely with plastic wrap and allow them to rise for a second time for about 1 hour, or until they have doubled in size and look puffy.
- Preheat the oven to 350°F (175°C). Once preheated, remove the plastic wrap from the baking dish. Bake the rolls for 20-25 minutes, or until the tops are golden brown and they sound hollow when tapped. Immediately brush the remaining melted butter all over the hot rolls. Let cool slightly and serve warm.
Nutrition
Carbohydrates: 27g |
Protein: 4g |
Fat: 7g |
Saturated Fat: 4g |
Polyunsaturated Fat: 1g |
Monounsaturated Fat: 2g |
Trans Fat: 1g |
Cholesterol: 31mg |
Sodium: 170mg |
Potassium: 66mg |
Fiber: 1g |
Sugar: 4g |
Vitamin A: 240IU |
Vitamin C: 1mg |
Calcium: 31mg |
Iron: 1mg
Nutritional information provided is an automatic calculation and may vary based on the exact products used and any modifications made to the recipe. If precise nutritional values are crucial, we recommend calculating them independently.