
The Ultimate Classic Popover Recipe: Light, Buttery, and Perfectly Puffed
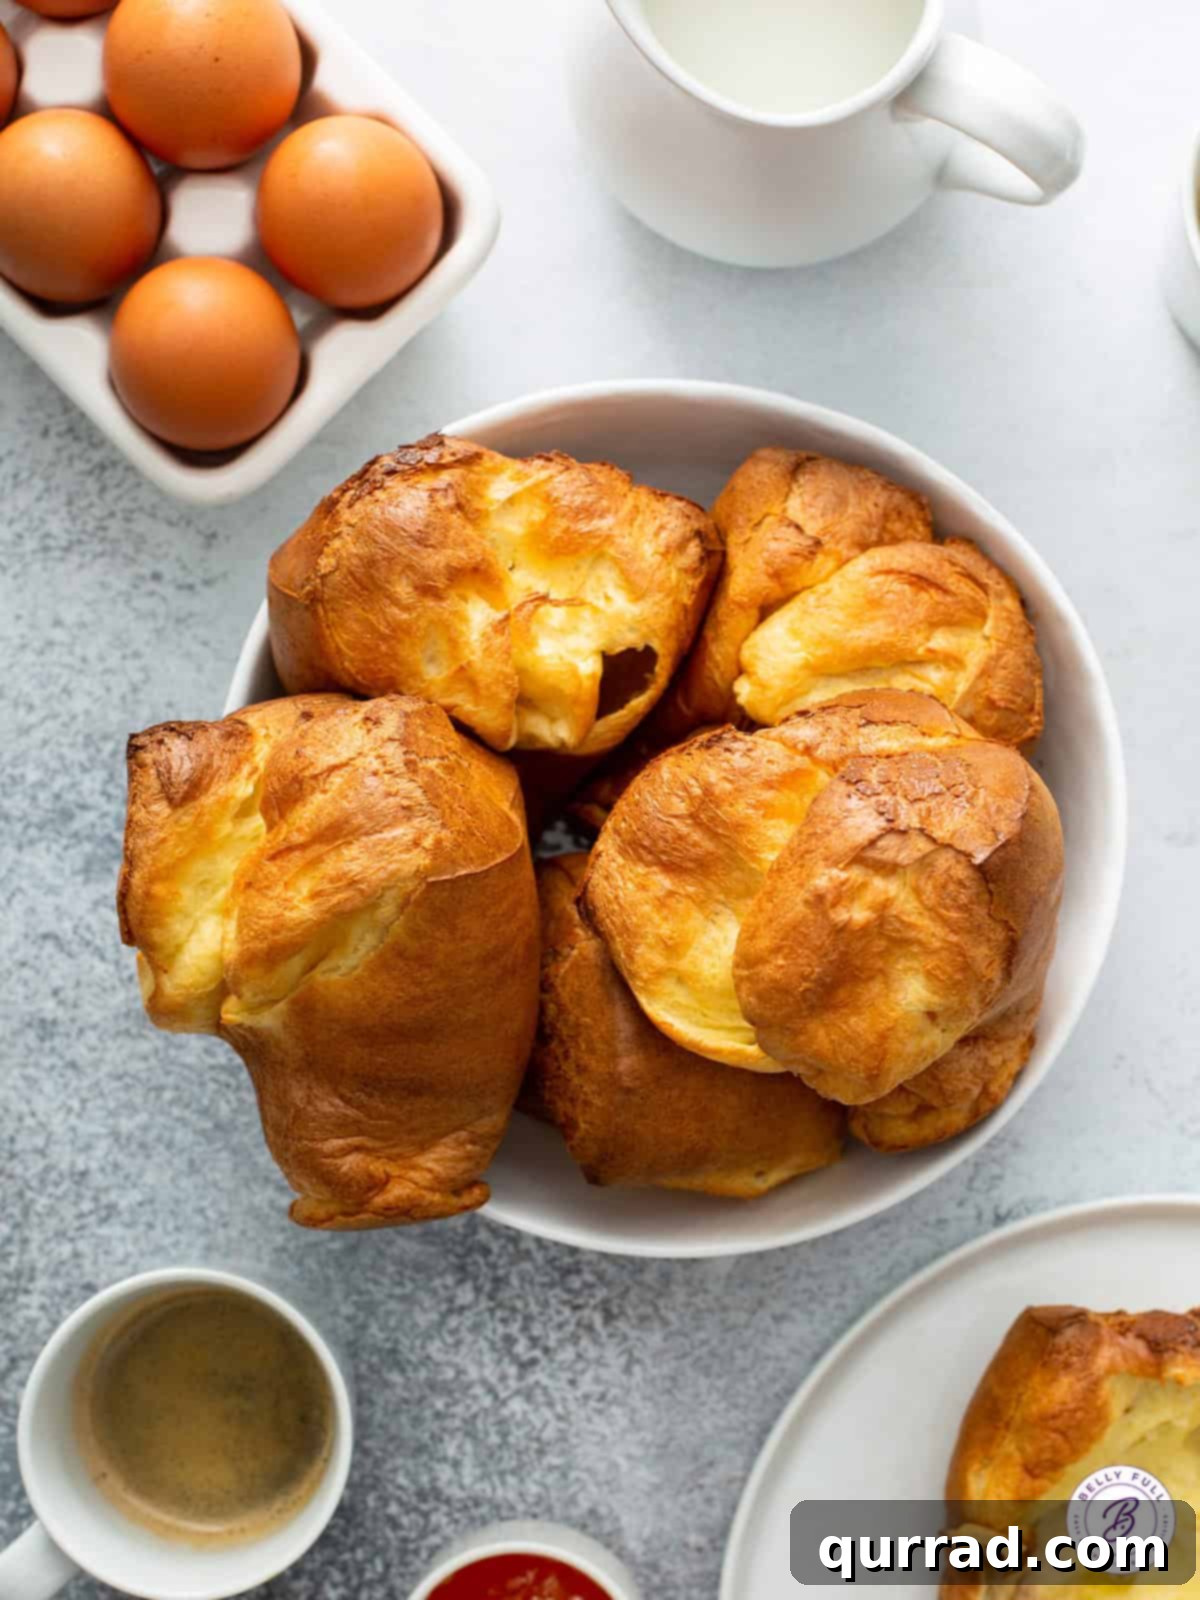
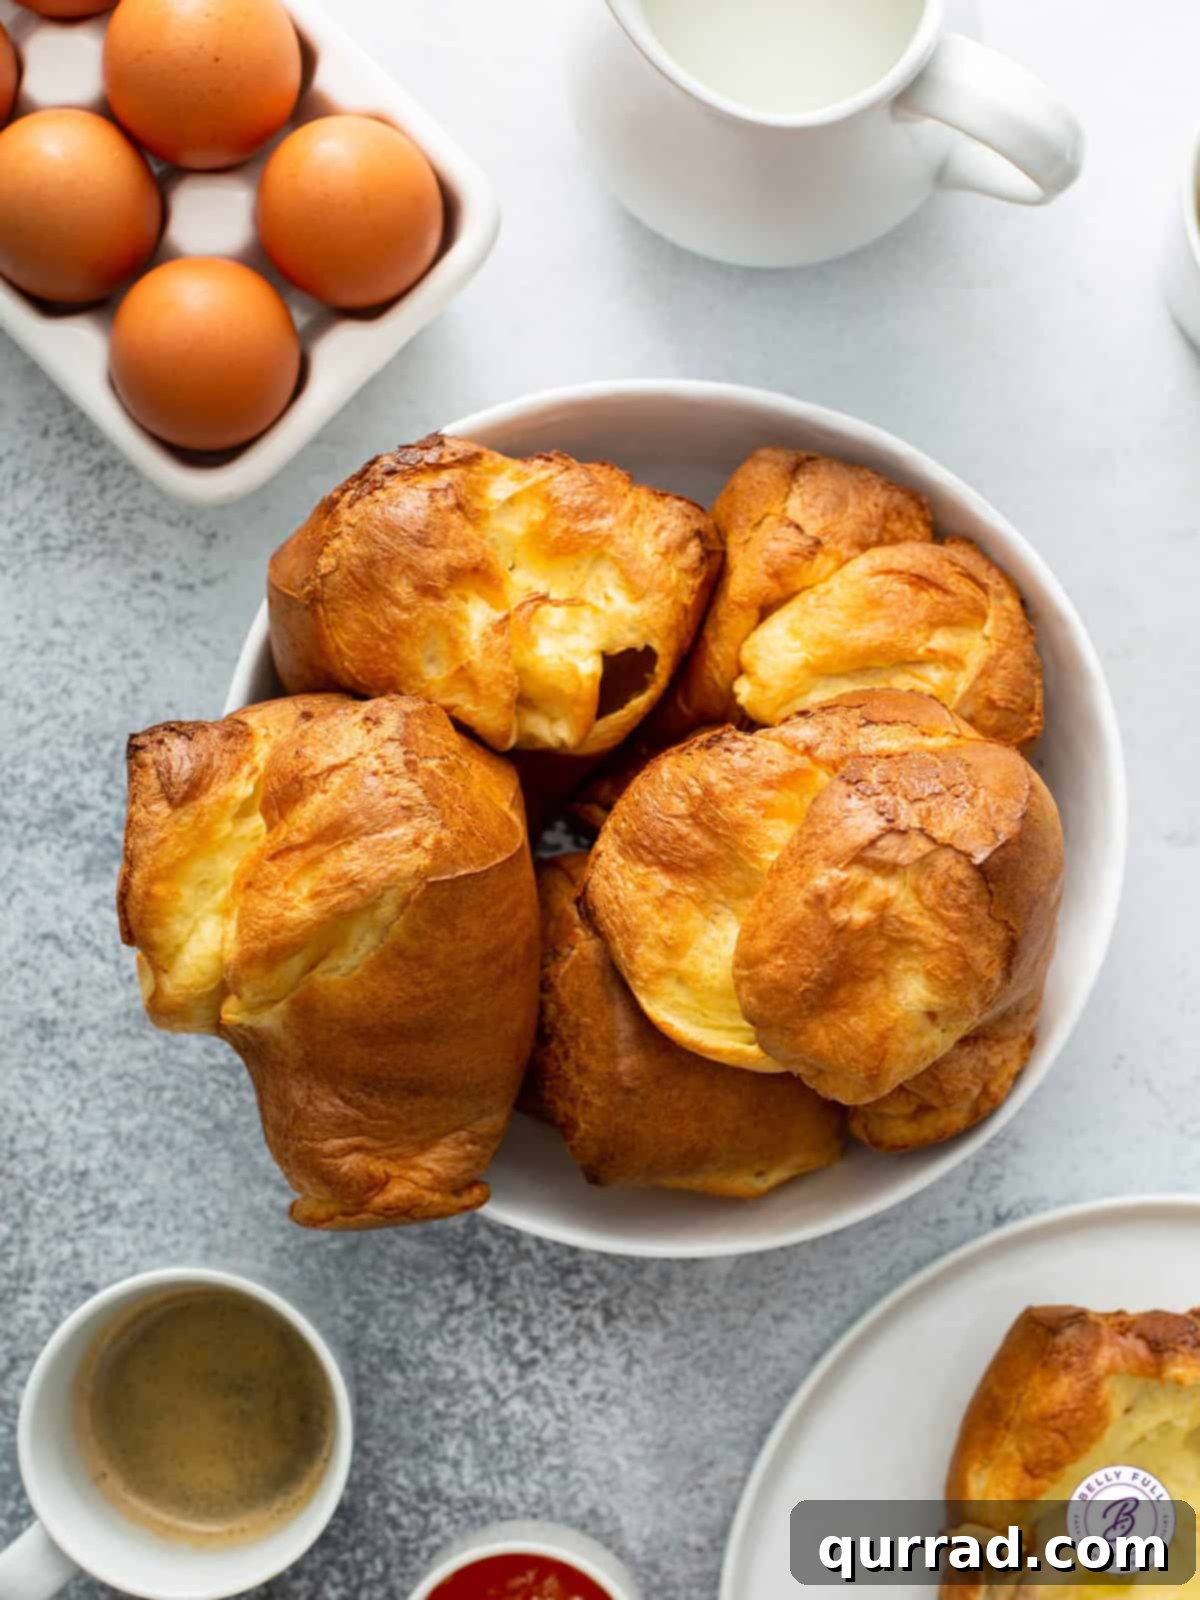
There’s nothing quite like a perfectly baked popover. Imagine a golden, airy roll, boasting a dramatically crisp exterior that gives way to a delightfully hollow, steamy interior. This classic Popover Recipe delivers just that: light, buttery, and truly fabulous rolls that elevate any meal. Much like their close cousin, the Yorkshire Pudding, these popovers rise impressively high, creating a culinary spectacle that’s surprisingly easy to achieve.
5-Star Review from Todd G.
“My wife and I have tried so many popover recipes and they all seem to fall a little short in some way. This recipe is perfect and we’re done searching.”
Growing up, these incredible popovers were a rare treat, making an appearance only during special holidays, a treasured tradition from my mother’s side of the family. I always assumed they were incredibly complicated, reserved for expert bakers and special occasions. It wasn’t until my college years that I decided to unravel the mystery myself. Armed with a popover pan and a curious spirit, I discovered a delightful truth: they are not difficult at all! In fact, the simplicity of the ingredients belies the impressive results.
Now, I whip up these delightful rolls whenever the craving strikes, which is often. My children enthusiastically request them weekly, drawn to their irresistible combination of a golden, crispy shell and a tender, buttery inside. The classic popover has become a staple in our home, a testament to its unmatched taste and satisfying texture. It’s more than just a roll; it’s an experience, transforming ordinary meals into something extraordinary.
What is a Popover? The Science Behind the ‘Pop’
A popover is a unique, light, and airy roll made from a simple, un-yeasted egg batter. Its name perfectly describes its characteristic behavior during baking: the batter “pops over” the top of the pan as it rapidly expands. This dramatic rise is attributed to the high moisture content of the batter, which, when subjected to high heat, creates steam. This steam pushes the batter upwards, causing it to puff dramatically and create its signature hollow interior.
The origin of popovers is deeply rooted in English culinary traditions, evolving from the more savory Yorkshire Pudding. Early English settlers in Maine, specifically those who founded Portland, brought their pudding recipes to America. Over time, these dense, savory puddings were Americanized, leading to the lighter, airier popover we know today. While both share a similar batter base (eggs, flour, milk), popovers are traditionally baked in specialized popover pans, often buttered, allowing for their distinct tall, cylindrical shape and crispy sides. Yorkshire pudding, on the other hand, is typically baked in the beef drippings from a roast, making it a savory accompaniment to meat.
What sets popovers apart is their incredible texture: a thin, crisp crust envelops a tender, almost custardy interior that is largely hollow. This makes them perfect for absorbing butter, jam, or the rich gravies of a main course. Despite their impressive appearance, popovers require only a handful of common pantry ingredients, making them an accessible yet show-stopping addition to any meal.
Why You’ll Love This Popover Recipe
Beyond the simple fact that they’re utterly delicious, there are numerous reasons why this classic popover recipe will become a firm favorite in your kitchen:
- Effortlessly Impressive: Popovers look sophisticated and challenging, yet the process is straightforward. They’re a fantastic way to impress guests with minimal fuss.
- Minimal Ingredients: You only need five basic pantry staples: eggs, milk, flour, butter, and salt. No fancy additions or complex leavening agents are required.
- Versatile Pairing: Whether served with sweet toppings for breakfast or brunch, as a side with savory stews and roasts, or even lightly sweetened for dessert, popovers adapt beautifully to any meal.
- Quick Preparation: The active prep time is incredibly short, making them a great option even on busy days. Most of the magic happens in the oven!
- Crispy Perfection: This recipe guarantees that coveted crispy exterior and airy, tender interior, providing a delightful textural contrast with every bite.
- A Unique Treat: Popovers offer a distinct culinary experience that stands out from typical bread rolls or muffins. They’re truly one-of-a-kind!
Tips for Optimal Results: Mastering the Perfect Popover
While popovers are simple to make, their success lies in paying attention to a few crucial details. With just 5 pantry items—eggs, milk, flour, butter, and salt (notice, no yeast, baking soda, or baking powder required!)—you can achieve consistently perfect results by following these expert tips:
- Embrace the Popover Pan: This isn’t just a suggestion; it’s a game-changer. Popover pans feature deep, straight-sided wells that force the batter upwards as it bakes. This design is key to achieving their signature tall, puffy tops and crispy sides. I highly recommend investing in one or two of these specialty popover pans. Their construction, often with cups welded to a wire rack, ensures even air and heat circulation around each cup, promoting uniform rising and crisping.
- Measure Flour with Precision: Spoon and Level. Never scoop flour directly from the bag with your measuring cup. This compacts the flour, leading to an excess amount that can result in dense, heavy popovers. Instead, use a spoon to lightly scoop flour into your measuring cup, then use a straight edge (like the back of a knife) to level off the top. This technique ensures you get the precise amount needed for that perfect airy texture.
- Mind Your Temperatures: Room Temp Eggs, Warm Milk. The temperature of your ingredients plays a vital role in creating the ideal popover batter. Eggs should be at room temperature before cracking, and milk should be lukewarm (around 110°F). Combining these temperatures helps create a smooth emulsion, which effectively traps air within the batter. As the popovers bake, this trapped air expands rapidly, contributing significantly to their impressive rise and fluffy texture.
- Allow the Batter to Rest: Patience is a Virtue. Resist the urge to bake immediately after mixing. Allowing the batter to rest at room temperature for at least 15 minutes, and up to an hour, while your oven preheats, is crucial. This resting period allows the starch molecules in the flour to fully absorb the liquid and expand, while the gluten relaxes. The result? Better-risen popovers with an incredibly airy, tender texture, rather than a chewy or rubbery one.
- Generously Coat the Pan: Nonstick is Key. Before adding your batter, spray the popover tin generously with a good quality nonstick cooking spray. Make sure to coat the inside of each deep well, as well as the rim of the pan. This meticulous coating ensures that your gorgeous, tall popovers will easily “pop” right out of the pan once baked, preserving their delicate structure and crispy edges.
- Optimal Oven Rack Position: Lower Third Shelf. Position one oven rack on the lower third shelf of your oven. This placement provides ample vertical space for the popovers to rise to their full, magnificent height without touching the top of the oven and potentially burning. If you plan to shield them from over-browning later, ensure another rack is available above.
- Do NOT Open the Oven Door During Baking. This is perhaps the most critical rule for achieving towering popovers. Opening the oven door, especially during the initial high-heat phase, causes a sudden drop in temperature. This immediate cooling can lead to your popovers deflating prematurely, losing their impressive height and airy structure. If you notice them browning too quickly during the last 5 minutes of baking, you can very quickly and briefly open the door to slide a cookie sheet onto a top oven rack. This will shield the popover tops from direct heat, preventing over-browning without a significant temperature drop.
- Release the Steam Immediately After Baking. Once your popovers emerge from the oven, they are at their peak crispiness. To maintain this texture and prevent them from becoming soggy, remove them from the pan immediately and transfer them to a wire rack. Then, promptly make a small slit in the side of each popover with a paring knife. This allows the steam trapped inside the hollow interior to escape, preserving their delightful crispness.
- Avoid Overmixing: A Light Hand is Best. While you want a smooth batter, overmixing can develop the gluten too much, leading to tough popovers. Blend or whisk just until the ingredients are combined and smooth, and the batter is frothy. A few small lumps of flour are acceptable and will often dissolve during the resting period.
Classic Popovers
This classic Popover Recipe gives you the best popovers, with a crispy exterior & a hollow interior. Light, buttery & fabulous, there’s nothing else like them!
- Prep Time: 5 mins
- Cook Time: 30 mins
- Rest Time: 15 mins
- Total Time: 50 mins
- Servings: 6 popovers

Pin Recipe
Print Recipe
Ingredients
- 4 large eggs, room temperature before cracking
- 1 & 1/2 cups whole milk, lukewarm (about 110F)
- 3/4 teaspoon salt
- 1 & 1/2 cups all-purpose flour, spooned and leveled
- 3 tablespoons melted butter, cooled slightly
Instructions
- Using a blender, combine eggs, milk, and salt. Blend until smooth. Gradually add the flour, blending until smooth. Finally, add the slightly cooled melted butter and blend until the batter is frothy. Allow the batter to rest for at least 15 minutes at room temperature while you preheat your oven. This resting period is crucial for a great rise.
- Preheat your oven to 450°F (230°C). Position one oven rack in the bottom third position to provide ample space for the popovers to rise without burning their tops. Place another rack in the top position, which may be used later to shield the popovers from direct heat if needed.
- Place a 6-slot popover pan (or a standard muffin tin if preferred) on a baking sheet. Carefully place the baking sheet with the empty pan on the lower oven rack for 2 minutes as the oven preheats. Heating the pan is essential for the immediate “pop” and crisp exterior.
- Once the pan is hot, quickly remove it from the oven and generously spray the entire pan with nonstick cooking spray, ensuring to coat the inside of each well and the outside rim. Be thorough to prevent sticking.
- Pour the rested batter evenly into the hot muffin slots, filling each one almost to the top.
- Return the baking sheet with the filled popover pan to the lower oven rack. Bake the popovers for 20 minutes at 450°F (230°C) without opening the oven door. It’s critical not to open the door during this phase to maintain consistent heat and encourage maximum rise.
- After 20 minutes, reduce the oven temperature to 350°F (175°C) (again, without opening the door). Continue to bake for an additional 10 minutes, or until the popovers are impressively tall, have “popped” over the tops of the pan, and are a deep, golden brown.
- During the last few minutes of baking, you can use the oven light to check for over-browning without opening the door. If they appear to be browning too quickly, very quickly open the oven door and slide a cookie sheet onto the upper rack. This will shield the popovers’ tops from direct heat and prevent burning.
- Carefully remove the popovers from the oven. To release steam and prevent them from becoming soggy, pierce the top or bottom of each popover with the tip of a paring knife.
- Immediately slip them out of the pan and serve warm. They are absolutely delicious split open and served with butter, jams, or savory spreads.
Notes
Experiment with flavors! Stir 1 & 1/2 teaspoons of your favorite dried herbs (like thyme, rosemary, or chives) into the batter for an aromatic savory twist. For a sweet treat, brush the tops of freshly baked popovers with melted butter, then sprinkle generously with cinnamon-sugar.
Cheese lovers can mix in a cup of shredded sharp cheddar, Gruyere, or Parmesan cheese with the flour mixture for savory cheesy popovers.
For an extra rich flavor, sometimes I also place a small dab of butter (about 1/2 teaspoon) in each well of the popover pan as it warms up in the preheating oven. The butter will melt and slightly brown, adding a nutty depth to the popovers’ crust.
Nutrition
(Approximate values per serving)
- Calories: 249kcal
- Carbohydrates: 27g
- Protein: 9g
- Fat: 11g
- Saturated Fat: 6g
- Cholesterol: 145mg
- Sodium: 415mg
- Potassium: 160mg
- Fiber: 1g
- Sugar: 3g
- Vitamin A: 454IU
- Calcium: 94mg
- Iron: 2mg
Nutritional information is an automatic calculation and can vary based on the exact products you use and any changes you make to the recipe. If these numbers are very important to you, I would recommend calculating them yourself using a reliable nutrition calculator.
Do You Need A Popover Pan To Make Popovers? The Essential Tool for Success
The short answer is: for the absolute best results, a dedicated popover pan is highly recommended. While it might seem like just another kitchen gadget, the design of a popover pan is specifically engineered to achieve that iconic, towering “pop” and crispy texture that defines a perfect popover.
Popover pans differ significantly from standard muffin tins in several key ways. They feature deep, steep-sided wells, which are crucial. This unique design forces the batter to climb vertically as it bakes, rather than spreading outwards. This upward propulsion is what creates the impressive height and the characteristic hollow interior. Furthermore, most quality popover pans have their cups welded to a wire rack. This isn’t just for aesthetics; it’s a functional design choice that promotes superior air circulation and even heat distribution around each individual cup. This consistent heating ensures uniform rising and a beautifully crispy crust on all sides.
This particular popover recipe yields enough batter to fill a standard 6-slot popover pan, producing magnificent, restaurant-quality rolls.
Can you make popovers in a muffin tin?
If you absolutely must, yes, you can use a standard muffin tin. However, be aware that the results will not be identical to those achieved with a proper popover pan. The popovers baked in a muffin tin will typically be smaller, flatter, and often more dense in texture, lacking the dramatic height and airy interior. If using a standard 12-slot muffin tin for this recipe, you may need to adjust the baking time. A good starting point would be to reduce the initial high-temperature cooking time by about 5 minutes and the subsequent lower-temperature cooking time by another 5 minutes. Always keep a close eye on them to prevent over-browning. While a muffin tin can work in a pinch, investing in a popover pan is truly worthwhile for anyone serious about mastering these delightful rolls.
Creative Popover Recipe Variations to Explore
The classic popover is a marvel on its own, but its simple base provides a fantastic canvas for culinary creativity. Whether you prefer sweet or savory, there are many ways to customize your popovers and impress your taste buds:
- Herb-Infused Savory Popovers: For a delightful savory twist, stir 1 & 1/2 teaspoons of your favorite dried herbs into the batter. Options like finely chopped fresh rosemary, thyme, chives, or a blend of Italian herbs work beautifully. These are perfect served alongside roasted meats or hearty soups.
- Sweet Cinnamon-Sugar Delights: Transform your popovers into a breakfast or dessert treat by brushing their tops with melted butter immediately after they come out of the oven. While still warm, generously sprinkle them with a mixture of cinnamon and sugar. The warm butter will help the cinnamon-sugar adhere, creating a sweet, spiced crust.
- Cheesy Popover Perfection: Elevate your popovers with a burst of savory cheese. Mix in a cup of shredded cheese, such as sharp cheddar, Gruyere, Parmesan, or a blend, with the flour mixture before adding the wet ingredients. The cheese will melt into the batter, creating a wonderfully flavorful and slightly crispy popover that pairs perfectly with chili or stew.
- Buttery Bottoms for Extra Flavor: For an extra layer of richness and a slightly crispier bottom, place a small dab (about half a teaspoon) of butter in each well of the popover pan as it warms up in the preheating oven. The butter will melt, slightly brown, and infuse the base of each popover with a delicious, nutty flavor.
- Garlic and Herb Popovers: In addition to dried herbs, consider adding a teaspoon of garlic powder or a tablespoon of finely minced fresh garlic to the batter. This creates a wonderfully aromatic popover, perfect with Italian or Mediterranean dishes.
- Black Pepper and Parmesan: For a simple yet sophisticated savory popover, add a generous grind of black pepper and a quarter cup of grated Parmesan cheese to the batter.
- Maple or Honey Drizzle: For a touch of sweetness without the cinnamon-sugar, drizzle warm maple syrup or honey over freshly baked popovers.
What To Serve with Popovers: Versatile Pairings for Any Meal
Popovers are incredibly versatile, making them a fantastic addition to almost any meal of the day. Their neutral, slightly buttery flavor and hollow interior make them ideal for absorbing a variety of flavors. Here are some ideas for how to serve these delightful rolls:
- Savory Soups and Stews: My go-to pairing! Popovers are excellent for soaking up every last drop of your favorite soup or stew. Their light texture complements hearty dishes without being too heavy.
- Classic Roast Dinners: Similar to Yorkshire puddings, popovers are a magnificent accompaniment to a traditional roast beef, chicken, or lamb dinner. They’re perfect for catching savory gravy and pan drippings.
- Breakfast and Brunch: Serve them warm with sweet spreads like raspberry jam, marmalade, or fruit curd. A simple drizzle of honey or maple syrup is also heavenly.
- Spreadable Delights: Enjoy them simply with a generous dollop of butter. For an elevated experience, try herb butter, garlic butter, or a sweet compound butter.
- Unique Savory Toppings: Explore options like bacon jam, caramelized onions, or even a spoonful of savory mushroom duxelles for a gourmet touch.
- Fresh Cheeses: A dollop of homemade ricotta cheese, cream cheese, or goat cheese with a sprinkle of chives offers a creamy, tangy contrast.
- As a Light Dessert: When sprinkled with cinnamon-sugar, they can be served as a simple, warm dessert with a scoop of vanilla ice cream or a fruit compote.
How to Store and Reheat Popovers for Maximum Enjoyment
Popovers are undeniably at their absolute best when enjoyed piping hot, fresh from the oven. The crispy exterior and steamy, hollow interior are fleeting moments of perfection. The longer they sit, the more they tend to lose their impressive height and delightful crispness, becoming a bit softer. Therefore, if at all possible, plan to bake and serve them immediately.
However, life often requires making things ahead of time, and popovers can still be enjoyed later with a little care. Here’s how to store and reheat them:
- Can you reheat popovers? Yes! While they won’t be quite as dramatically puffed as fresh, they can certainly regain much of their crispiness and warmth. To reheat, simply place cooled popovers directly into a preheated 350°F (175°C) oven. Bake for about 5 minutes, or until they are warm to the touch and the exterior feels crispy again. Avoid microwaving, as this will make them soft and chewy.
- Can you freeze popovers? Absolutely! This is a great option for meal prep or enjoying popovers on demand. First, ensure your baked popovers have cooled completely. Then, transfer them to an airtight, freezer-safe bag or container. They can be stored in the freezer for up to 2 months without significant loss of quality. To reheat from frozen, place the popovers directly from the freezer onto a baking sheet and into a preheated 350°F (175°C) oven. Bake for approximately 8 minutes, or until they are thoroughly warm and crispy.
- Can you make popover batter ahead of time? This is a debated topic among bakers. In my experience, for optimal rise and texture, the batter should be used relatively fresh. It’s perfectly fine, and even beneficial, to allow the batter to rest at room temperature for at least 15 minutes and up to 1 hour before baking. This resting period allows the flour to fully hydrate and the gluten to relax, which contributes to a more tender popover. However, I do not recommend making the batter more than an hour in advance, or refrigerating it overnight. The leavening action from the steam is best when the batter is freshly mixed and rested. If you do let it sit for the full hour, give it a gentle stir just before pouring it into the hot popover pan to ensure all ingredients are well combined.
Frequently Asked Questions About Popovers
What makes popovers “pop”?
The “pop” is a result of the high water content in the batter combined with high oven heat. The liquid in the batter quickly turns to steam, which creates pressure and forces the batter to expand rapidly and dramatically upwards, creating the signature hollow interior.
Can I use cold ingredients for popovers?
While some recipes suggest cold, this recipe recommends room temperature eggs and lukewarm milk. This helps create a smooth emulsion, which is better at trapping air and contributes to a more reliable, impressive rise and a finer texture.
Why did my popovers deflate?
The most common reasons for deflation are opening the oven door too early (which causes a sudden temperature drop) or not baking them long enough. Popovers need adequate time to set their structure. Make sure to follow the instructions carefully regarding oven temperature and not opening the door.
Can I make popovers gluten-free?
Creating gluten-free popovers that achieve the same dramatic rise and crisp-tender texture as traditional ones can be challenging. The gluten in wheat flour is crucial for building the structure that traps steam and allows the popover to rise. While some gluten-free recipes exist, they often use a blend of gluten-free flours and starches, and the results may vary in texture and height.
What if I don’t have whole milk?
Whole milk provides the best richness and tenderness, but you can use 2% milk. Skim milk might yield slightly less rich results but will still work.
I hope you love this delicious and easy recipe – be sure to give it a try and share your results! Also, don’t forget to follow Belly Full on your favorite social media platforms for more culinary inspiration!