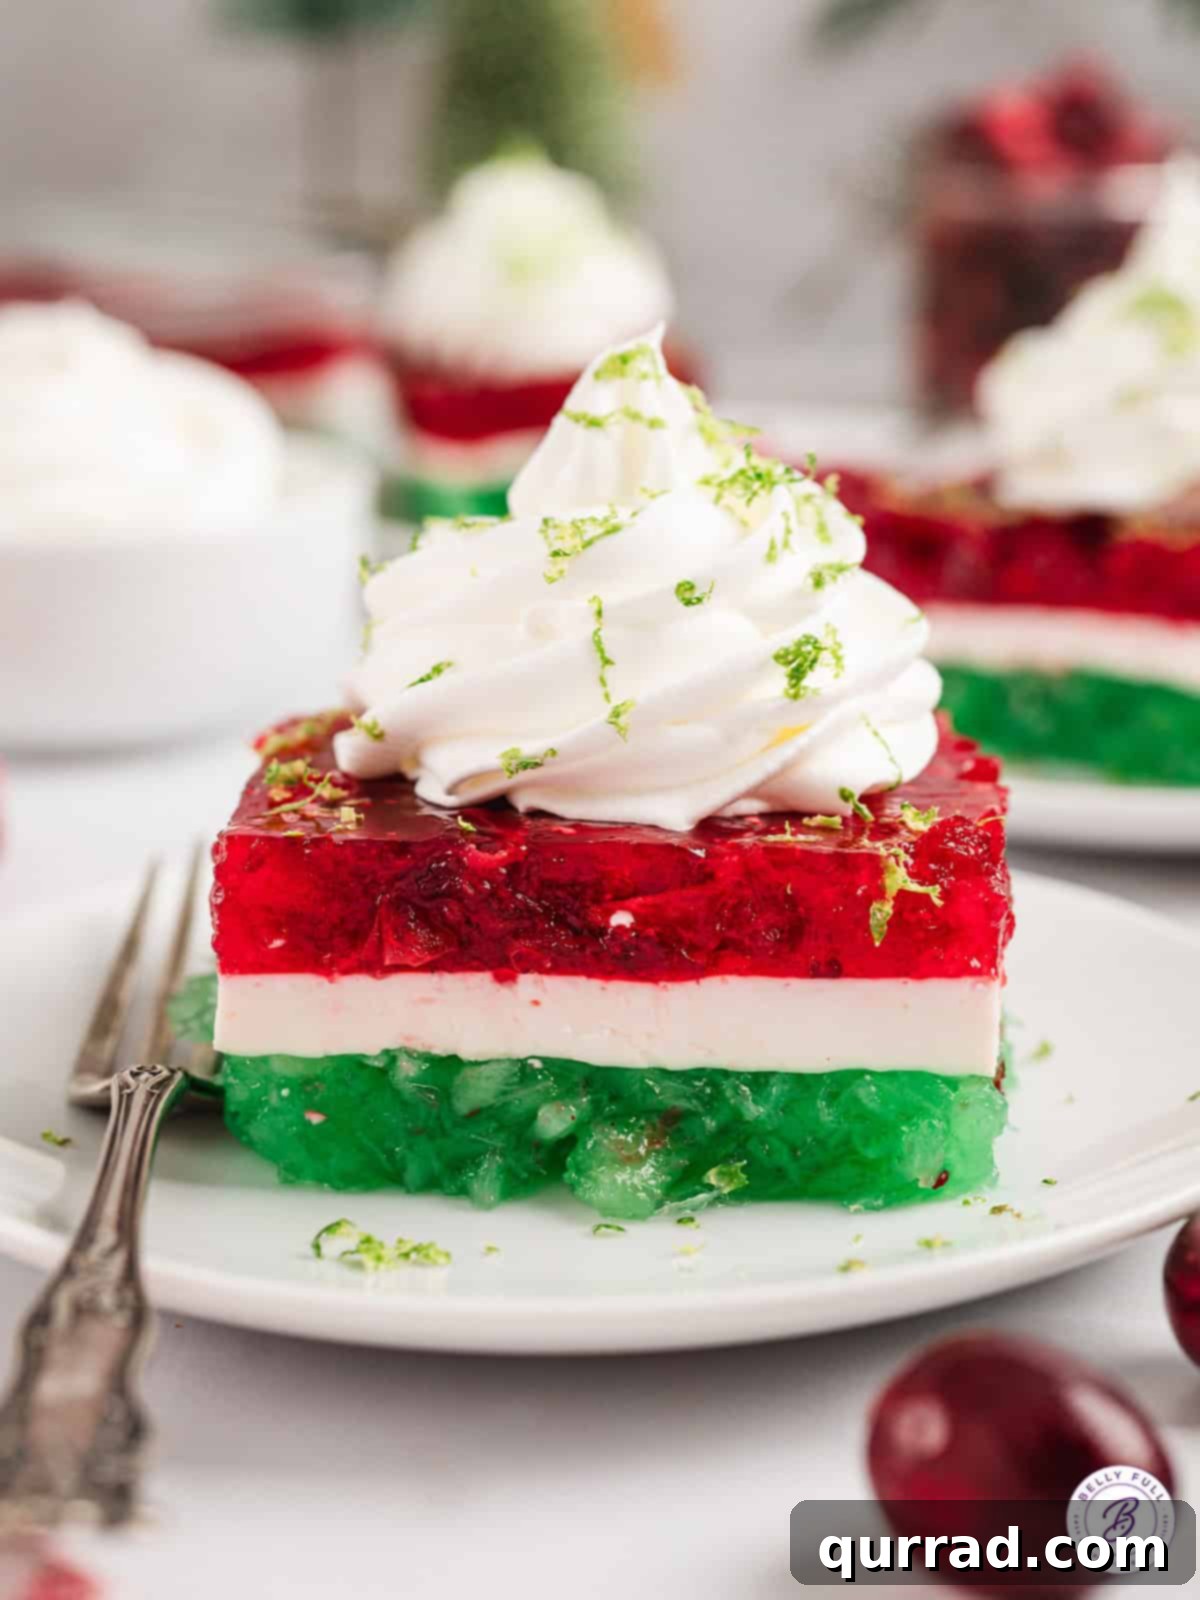
This Layered Christmas Jello recipe is a vibrant, festive, and utterly delightful no-bake dessert, perfect for your holiday celebrations. Featuring distinct layers of zesty green lime jello, a luscious creamy white gelatin, and a sweet, tart red cherry jello, each segment is elevated with a special mix-in to create an unforgettable taste experience. It’s an easy-to-make treat that adds a brilliant splash of color and cheer to any Christmas feast, promising a delicious surprise in every spoonful.
Forget everything you know about basic holiday jello! This isn’t just a simple mix; each colorful layer of this Christmas jello dessert holds a delightful secret ingredient that takes its flavor and texture to the next level. Imagine the refreshing burst of pineapple mingling with the green lime jello, or the sweet-tart goodness of whole-berry cranberry sauce swirled into the red layer. This thoughtful inclusion ensures that every single bite offers a medley of tastes and textures, making it truly special.
Despite its impressive appearance, this recipe is remarkably straightforward. The most significant requirement is patience, as each layer needs sufficient time to set perfectly before the next is added. This makes it an ideal make-ahead Christmas dessert, allowing you to prepare it a day in advance and free up valuable time on your busy holiday schedule. For those looking for an adult-only twist on layered holiday treats, you might also enjoy exploring options like candy cane jello shots for a spirited celebration.
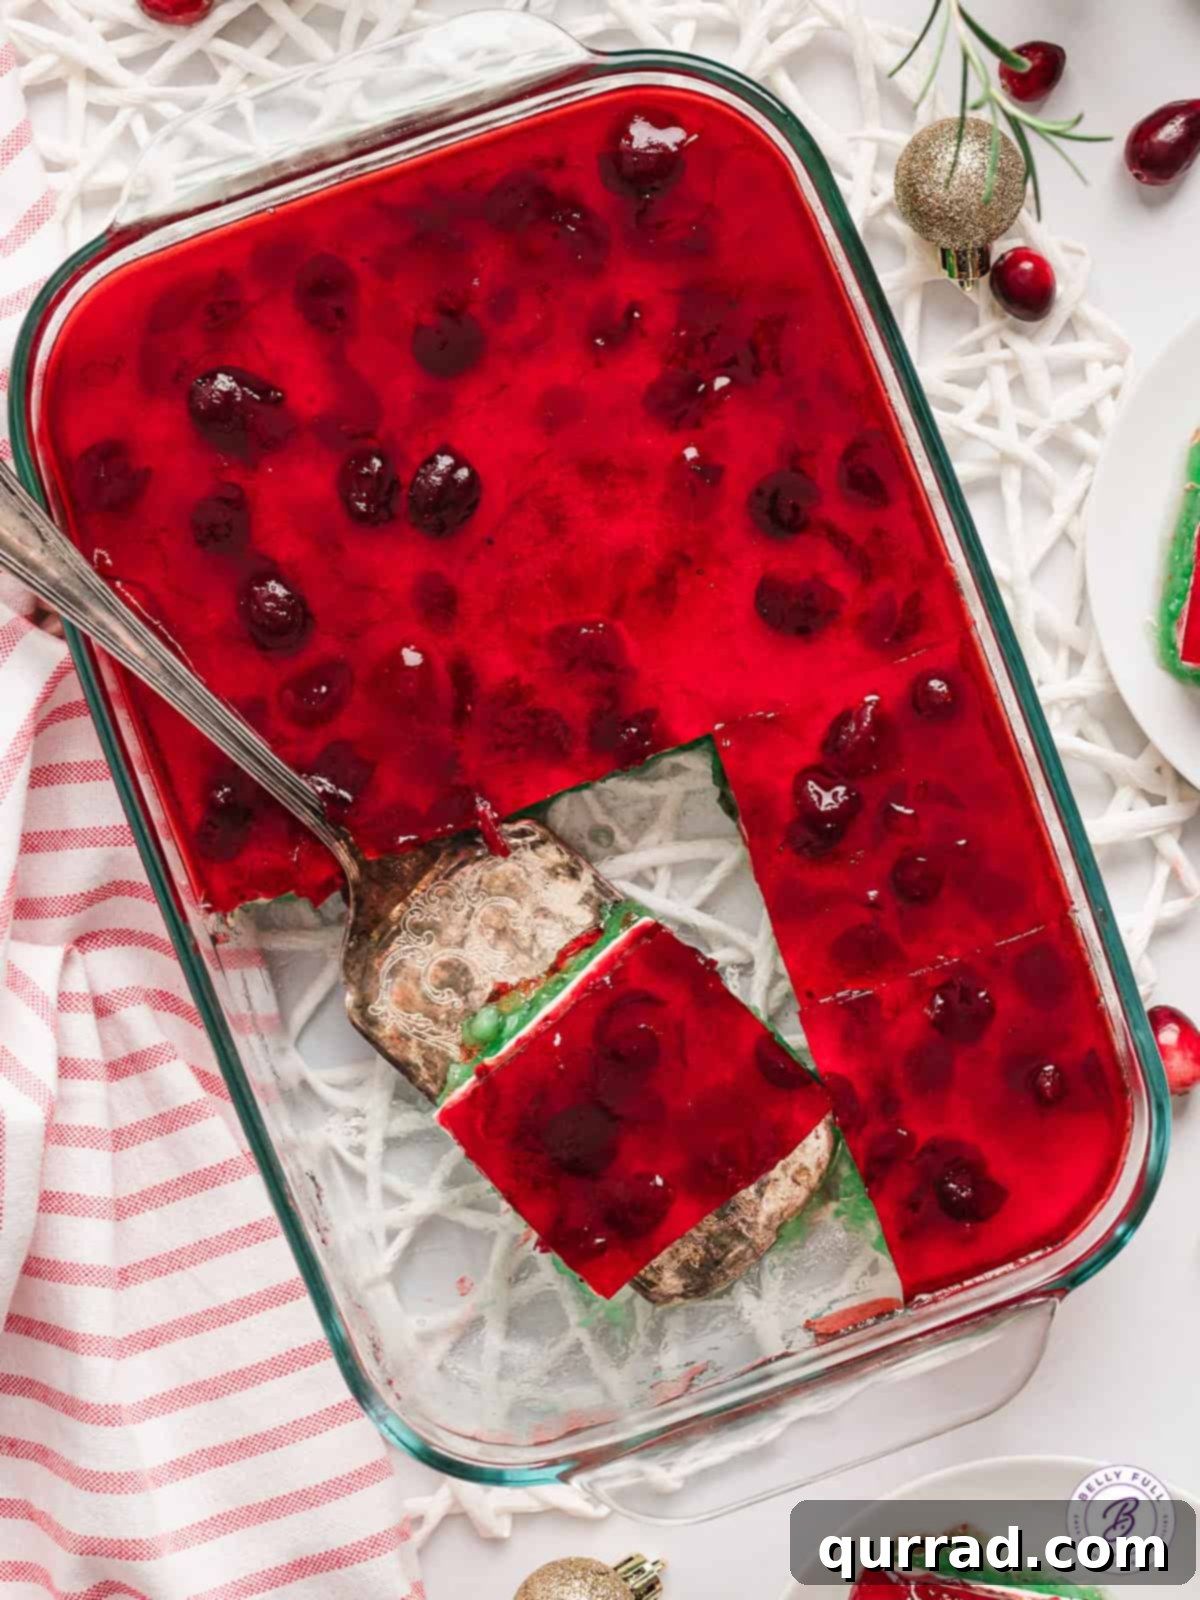
Unpacking the Delicious Layers: Ingredients for Layered Christmas Jello
Crafting this stunning layered jello requires a selection of readily available ingredients, carefully chosen to build distinct flavors and vibrant colors. Below is a detailed breakdown of what you’ll need for each festive layer, ensuring you have everything on hand for this delightful holiday gelatin dessert.
The Vibrant Green Layer
This refreshing layer sets the stage with its bright color and tangy flavor profile.
- Lime Jello: The classic choice for a festive green. Lime offers a crisp, tangy flavor that beautifully complements the sweetness of pineapple. While lime is preferred for its zest and pairing, other green jello flavors like green apple or even watermelon can be used if you prefer a different taste.
- Boiling Water: Essential for completely dissolving the jello powder, ensuring a smooth and consistent base for your green layer.
- Pineapple: This layer gets its unique texture and tropical sweetness from both pineapple juice and crushed pineapple. It’s recommended to use the juice from the crushed pineapple, but ensure it’s thoroughly chilled beforehand. Chilling the juice is crucial, as warm liquid can prevent the jello from setting properly, resulting in a runny layer.
The Creamy White Layer
Serving as a beautiful contrast and a palate cleanser between the fruit-flavored layers, this white layer adds a luxurious creaminess.
- Unflavored Gelatin: This is the structural foundation of the white layer. Being unflavored and colorless, it allows the sour cream and milk to provide the desired white hue and creamy texture without competing with other flavors.
- Ice Cold Water: Used to “bloom” the unflavored gelatin initially, preparing it for proper dissolution and setting. This step is vital for avoiding lumps.
- Sour Cream: The star ingredient for the white layer, sour cream delivers its characteristic opaque white color and a wonderfully tangy, creamy richness. Make sure it’s chilled for optimal consistency.
- Whole Milk: Helps achieve the ideal smooth, pourable consistency for the white layer. Whole milk is recommended for its fat content, contributing to the creaminess. 2% milk could work, but skim milk should be avoided as it’s too thin and may affect the setting.
- Vanilla Extract: Since the gelatin is unflavored, a touch of vanilla adds a subtle warmth and sweetness, enhancing the overall taste of this creamy layer.
The Festive Red Layer
The final, striking layer brings a burst of holiday color and a comforting, familiar flavor.
- Cherry Jello: A classic festive red, cherry jello provides a sweet and slightly tart flavor that pairs wonderfully with cranberry. This can easily be swapped for other red jello flavors like strawberry, raspberry, or even a cranberry-flavored jello for a more intense cranberry profile.
- Boiling Water: Again, necessary for ensuring the jello powder fully dissolves, creating a perfectly smooth red layer.
- Whole-Berry Cranberry Sauce: This is the secret ingredient for the red layer, adding texture and a delightful tartness that cuts through the sweetness of the jello. Using whole-berry sauce introduces lovely little bursts of cranberry. It should be thoroughly chilled before mixing to aid in setting.
For Serving and Garnish
These finishing touches elevate your jello from a simple dessert to a show-stopping holiday treat.
- Whipped Cream: A dollop of whipped cream is the perfect accompaniment, adding a light, airy contrast to the dense jello layers. You can use homemade whipped cream for extra freshness or opt for the convenience of canned whipped cream or Cool Whip.
- Lime Zest: A sprinkle of fresh lime zest on top not only adds a vibrant green garnish but also provides an aromatic citrus note that beautifully complements the lime and cherry flavors within the layers.
Choosing the Perfect Pan for Your Layered Christmas Jello
The right pan size is crucial for achieving distinct, beautiful layers in your Christmas jello. For this particular recipe, a deep 11×7-inch glass dish is ideal, providing ample depth for the three generous layers. Alternatively, a 9x9x2-inch square pan can also be used effectively. However, it’s important to avoid pans that are 8×8 inches or smaller, as these will likely be too shallow and cause the liquid layers to overflow. While a standard 9×13-inch pan can work in a pinch, be aware that the layers will naturally be thinner due to the larger surface area, which might slightly alter the visual impact and the balance of flavors in each bite.
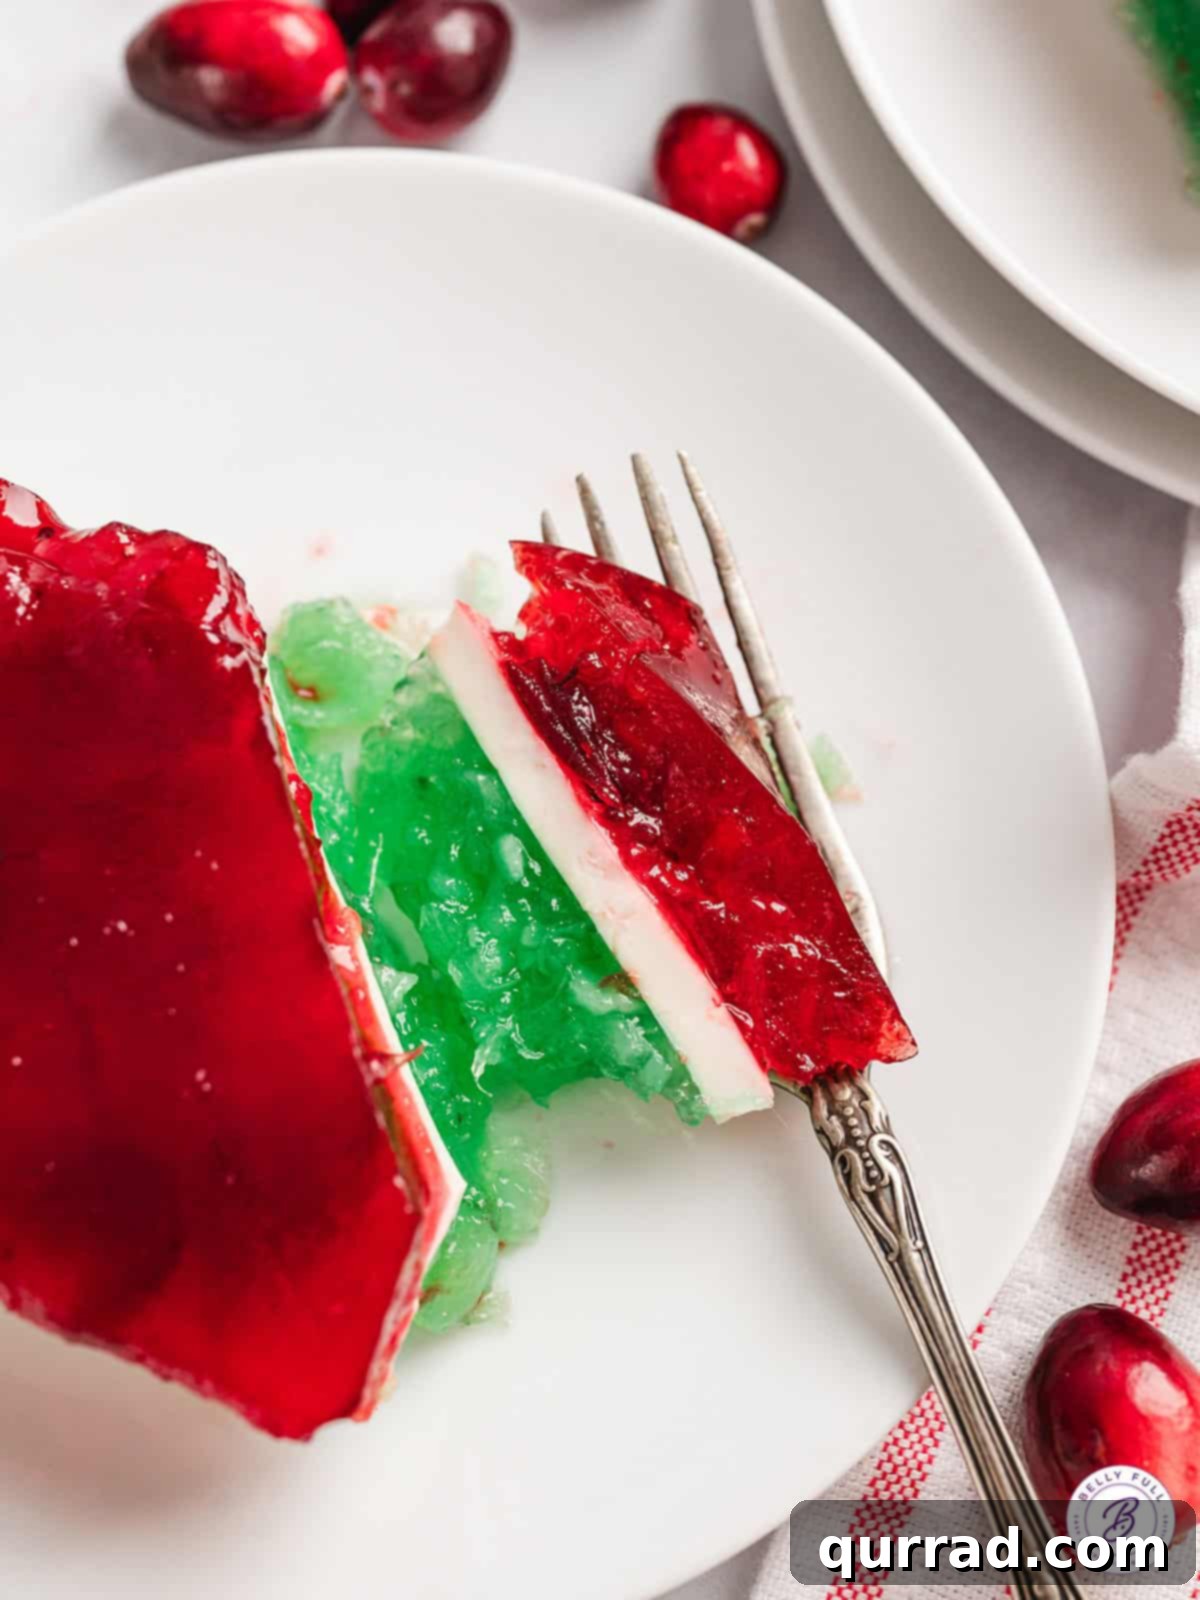
Expert Tips for Layered Jello Success
Creating a visually stunning and perfectly set layered jello is simpler than it seems, especially with these helpful tips:
- Ensure Boiling Water for Jello: For the flavored jello layers (green and red), always use genuinely boiling water. Whisking the jello powder into water that is actively boiling ensures that all the gelatin granules dissolve completely. This is fundamental for the jello to set correctly and achieve a smooth, uniform texture, preventing any gritty residue.
- Chill Your Add-ins Thoroughly: When incorporating additional ingredients like pineapple juice or cranberry sauce into the jello mixtures, make sure they are thoroughly chilled. Adding warm or even room-temperature liquids or fruit to setting jello can raise its temperature, preventing it from firming up properly. Cold add-ins help the mixture cool down faster and set more effectively.
- Patience is Key: Let Each Layer Set Adequately: The most crucial step for beautiful, distinct layers is patience. While it’s not a lot of active work, you must allow each layer to set sufficiently before adding the next. The layers don’t need to be rock-solid firm; they just need to be set enough so that the subsequent layer won’t seep into or mix with the one below. Typically, 45-60 minutes per layer in the refrigerator is a good guideline.
- Embrace an Overnight Chill for Best Results: Once all the layers are assembled, cover the dish tightly with plastic wrap and let the layered jello chill overnight in the refrigerator. This extended chilling time allows all the gelatin layers to fully firm up and meld together, making it much easier to slice into clean, crisp squares without any layers separating or falling apart. A minimum of 6 hours is required, but overnight is always best for confidence.
- Lightly Spray Your Dish: Before pouring your first layer, lightly coat your glass dish with a neutral-flavored nonstick cooking spray. This small step can make a big difference when it comes time to cleanly remove and serve the jello, preventing it from sticking to the sides.
- For Clean Slicing: To achieve perfectly neat squares, use a sharp knife that has been dipped in hot water and wiped clean between each cut. This prevents the jello from sticking to the blade and dragging, ensuring smooth, precise edges.
Creative Serving Suggestions for Your Holiday Table
This layered Christmas jello is a fantastic centerpiece for any holiday dessert spread. Once chilled and firm, simply slice the jello into elegant squares or festive shapes using cookie cutters. Arrange them artfully on individual plates or a large platter. To truly elevate its presentation and add an extra touch of festive charm, I love to pipe a generous swirl of fresh whipped cream onto each serving. A delicate sprinkle of vibrant green lime zest on top provides a beautiful color contrast and a refreshing aromatic finish. This dessert pairs wonderfully alongside other holiday favorites such as a rich 4-layer Christmas cake, fun Reindeer Chow, a whimsical Christmas Jello Poke Cake, or even a festive Christmas Tree Charcuterie Board, creating a truly memorable and delightful holiday dessert experience for all your guests.
How To Store Christmas Layered Jello
Proper storage ensures your beautiful layered Christmas jello remains fresh and delicious. Store any leftover jello in the refrigerator, tightly covered with plastic wrap, to prevent it from absorbing other odors and to maintain its texture. It is best enjoyed within 2-3 days of preparation. For the best presentation and taste, it is recommended to add the whipped cream and lime zest garnish only to the portions you plan to serve and enjoy immediately, as whipped cream can deflate or weep over time when stored.
We hope you adore this delightful and easy-to-make Christmas jello recipe. Your feedback is greatly appreciated!
Layered Christmas Jello
20
mins
6
hrs
6
hrs
20
mins
10
people
With layers of green, white, and red jello, and delicious mix-ins, this Layered Christmas Jello recipe is a fun, festive, and easy no-bake holiday dessert!
Ingredients
GREEN LAYER
- 1 box (3 ounces) lime jello
- 1 cup boiling water
- 1/3 cup pineapple juice, chilled
- 1 cup crushed pineapple, drained
WHITE LAYER
- 2 teaspoons unflavored gelatin
- 3 tablespoons ice cold water
- 8 ounces sour cream, chilled
- 1/3 cup whole milk, chilled
- 1 teaspoon vanilla
RED LAYER
- 2 boxes (3 ounces each) cherry jello, (or strawberry, raspberry, or cranberry)
- 2 cups boiling water
- 1 can (14 ounce) whole-berry cranberry sauce, chilled
FOR SERVING
- Piped whipped cream
- lime zest
Instructions
-
Lightly coat a deep 11×7-inch glass dish with nonstick cooking spray (refer to notes below for pan alternatives).
-
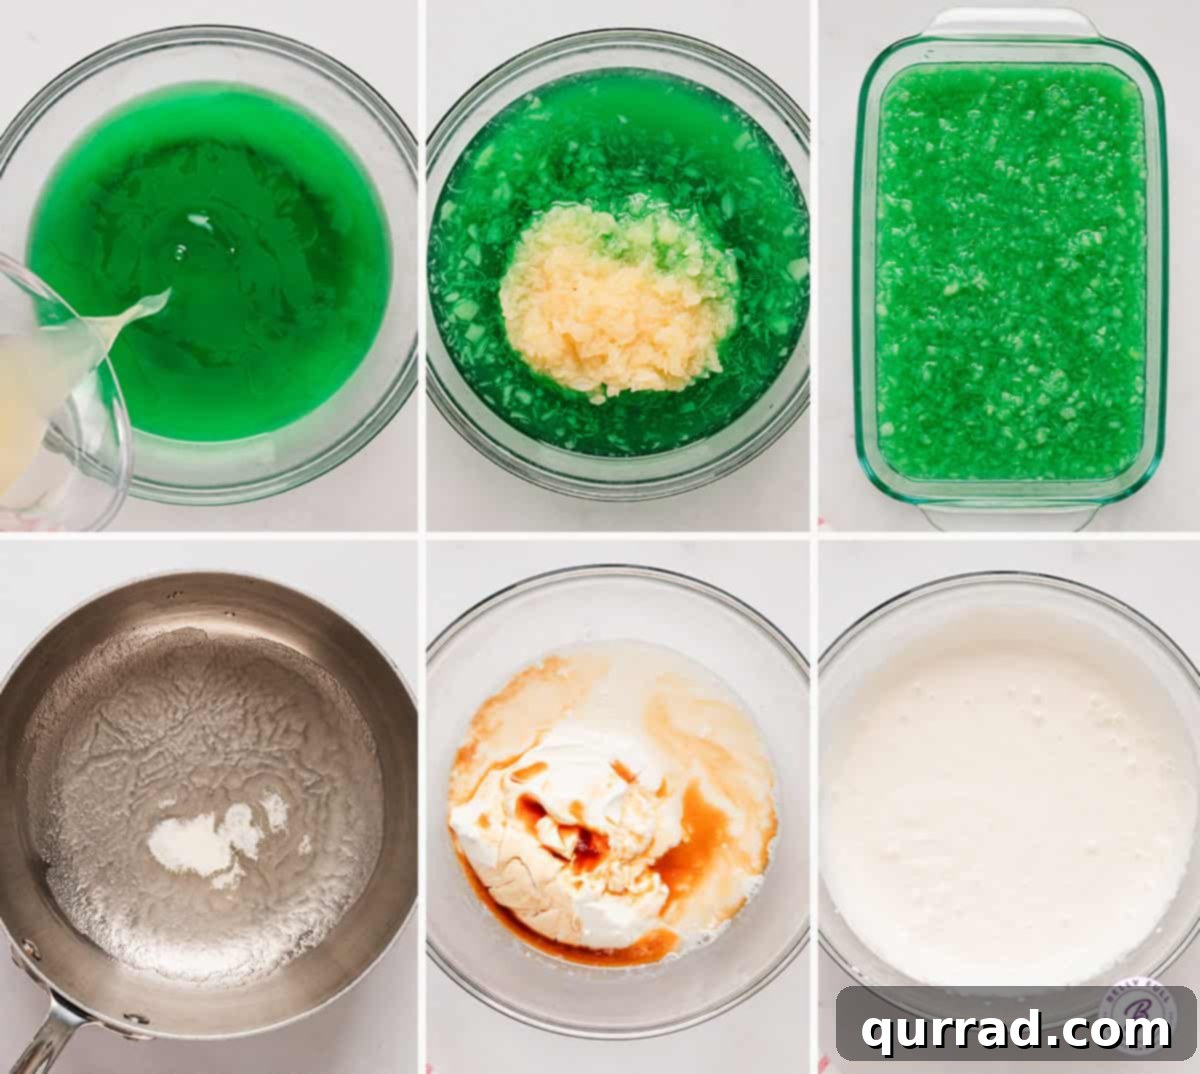
In a small mixing bowl, thoroughly dissolve the lime jello powder in 1 cup of boiling water, whisking well until no granules remain. Stir in the chilled pineapple juice. Carefully pour this green mixture into the prepared dish, ensuring an even layer. Transfer to the refrigerator for 45-60 minutes, or until the layer is set but not completely firm to the touch.
-
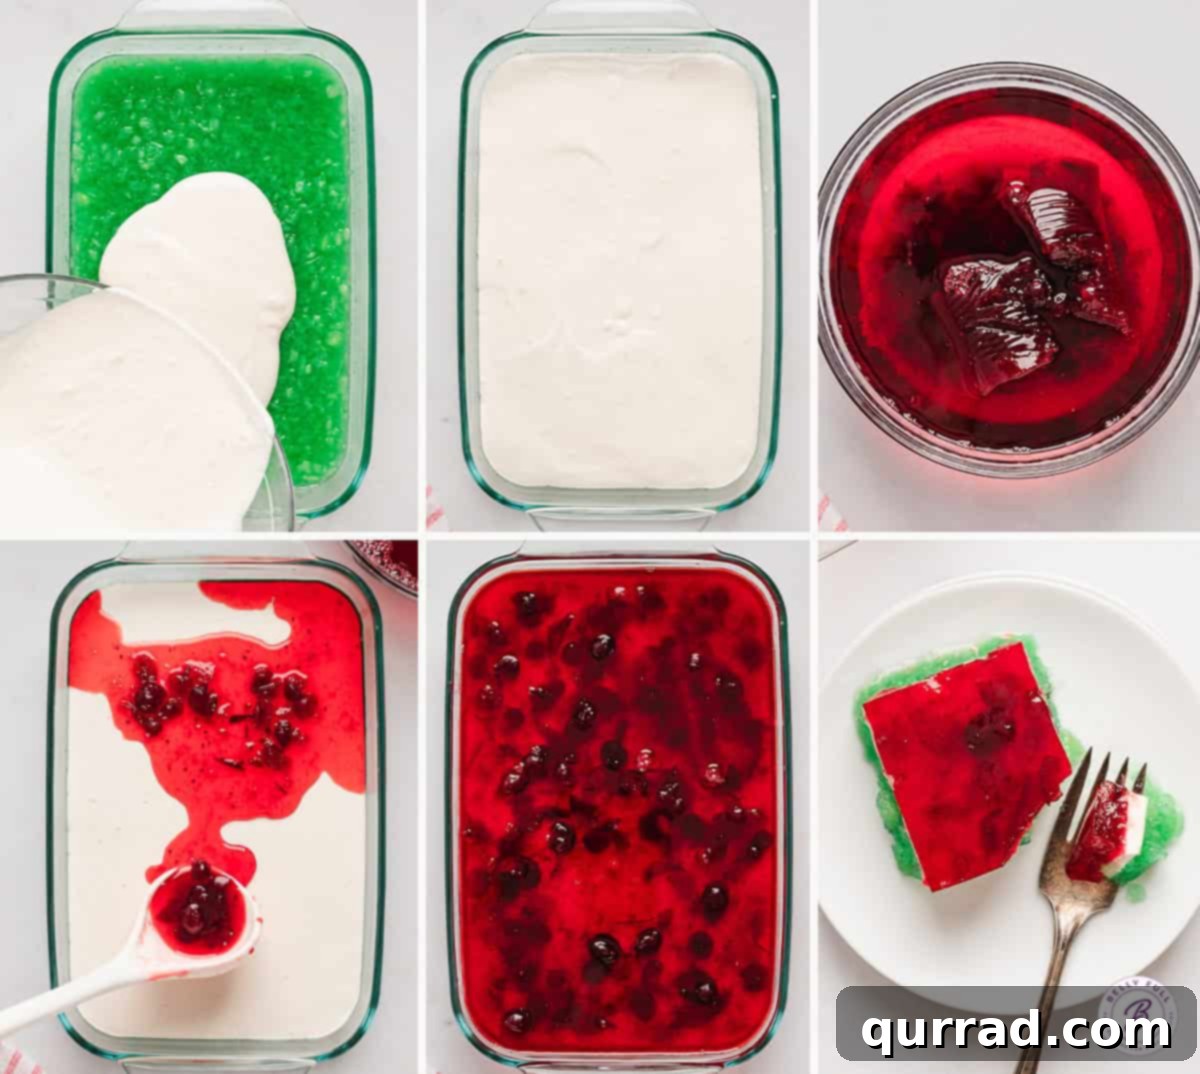
For the white layer, sprinkle the unflavored gelatin over 3 tablespoons of ice-cold water in a small pot. Allow it to stand for 1 minute to bloom. Heat the mixture over low heat, stirring continuously until the gelatin completely dissolves and the liquid is clear. Transfer this dissolved gelatin to a separate bowl and whisk in the chilled sour cream, whole milk, and vanilla extract until the mixture is smooth and fully combined. Gently spread this creamy white layer over the partially set lime layer in the dish. Return to the refrigerator for another 45-60 minutes to set.
-
In a medium mixing bowl, dissolve the cherry jello powder in 2 cups of boiling water, stirring until fully dissolved. Incorporate the chilled whole-berry cranberry sauce, mixing well. Carefully spoon this red mixture over the set sour cream layer, distributing it evenly. Transfer the dish back to the refrigerator and allow it to chill for at least 4 hours, or ideally overnight, until all layers are completely firm.
-
Once thoroughly chilled, cut the layered jello into desired squares. Serve immediately with a generous dollop of fresh whipped cream and a sprinkle of vibrant lime zest for garnish.
Notes
If you don’t have an 11×7-inch glass dish, a 9x9x2-inch square pan can be used as an alternative. However, avoid using anything smaller than a 9×9-inch pan, as an 8×8-inch pan or smaller will be too shallow and the liquid layers may overflow. A standard 9×13-inch pan will also work, but keep in mind that the layers will be thinner, which can slightly alter the visual effect.
Nutrition
Carbohydrates: 48g |
Protein: 4g |
Fat: 5g |
Saturated Fat: 2g |
Polyunsaturated Fat: 0.2g |
Monounsaturated Fat: 1g |
Cholesterol: 14mg |
Sodium: 137mg |
Potassium: 95mg |
Fiber: 1g |
Sugar: 42g |
Vitamin A: 186IU |
Vitamin C: 4mg |
Calcium: 43mg |
Iron: 0.3mg
Nutritional information provided is an automatic calculation and can vary based on the exact products you use and any changes you make to the recipe. If these numbers are very important to you, it is recommended to calculate them yourself.