
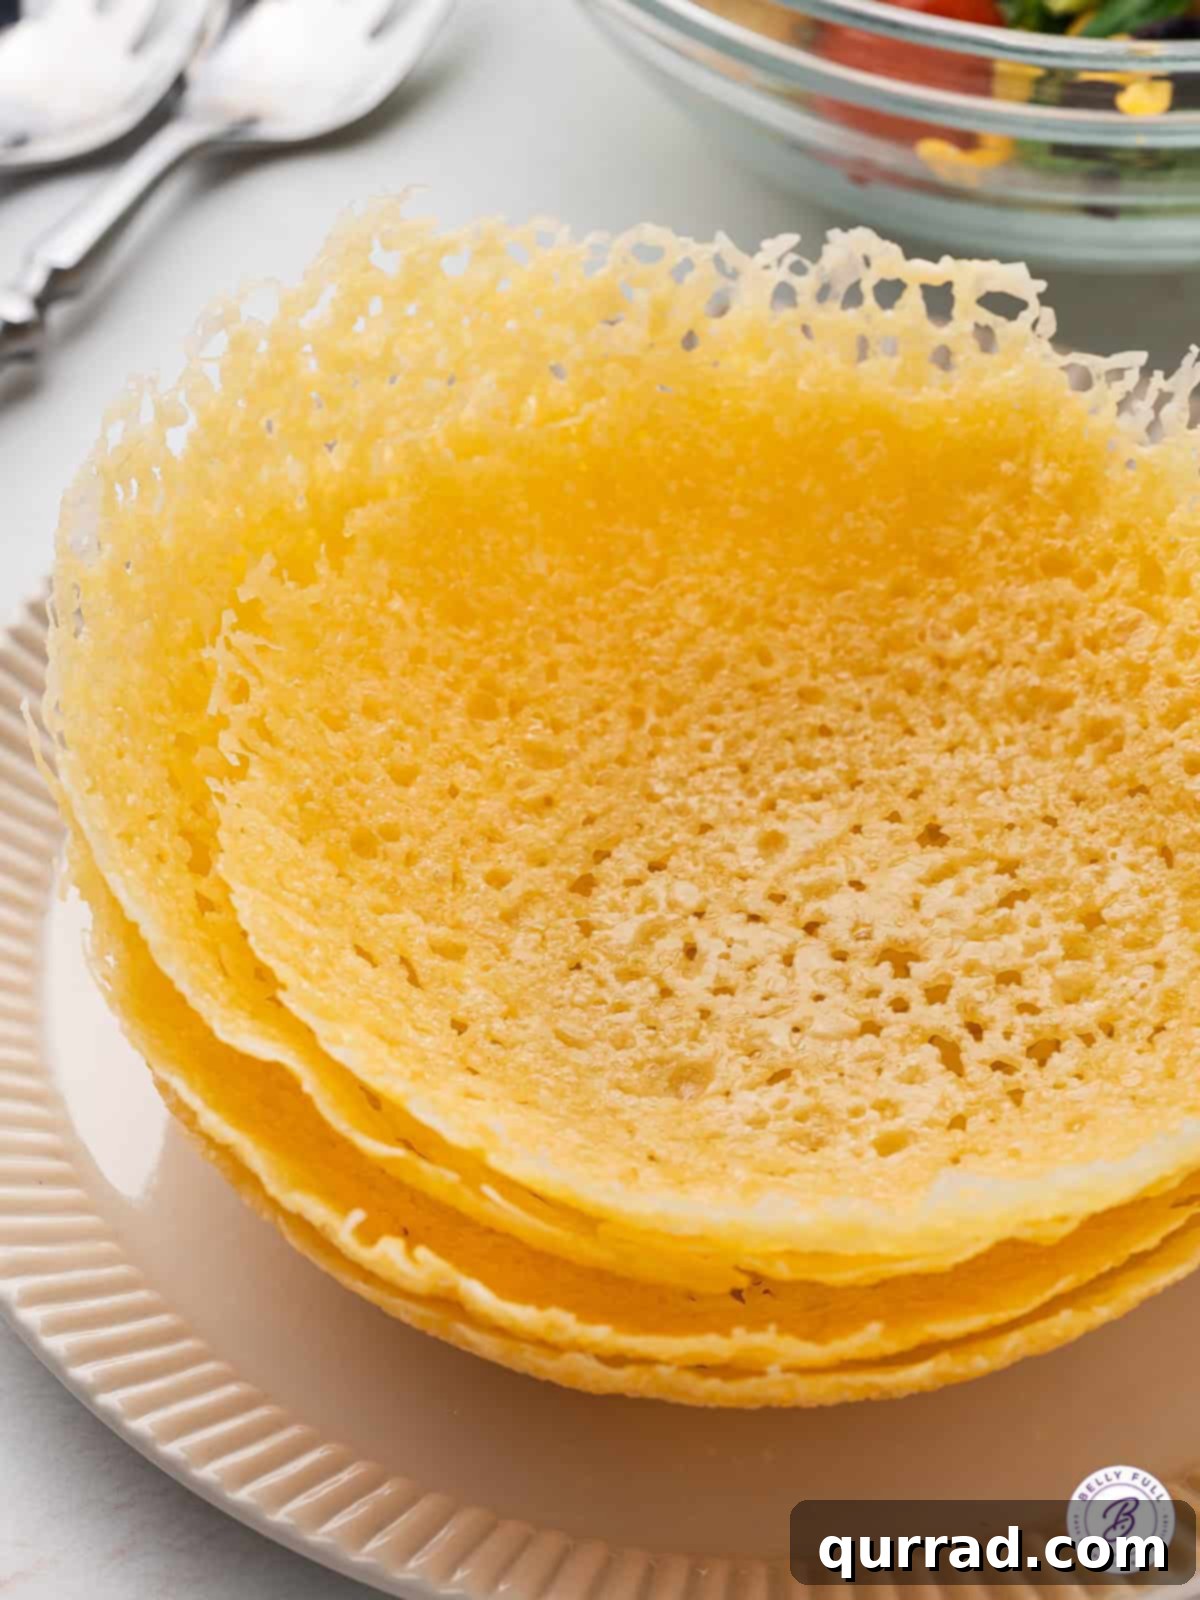
Easy Edible Parmesan Cheese Bowls: The Ultimate Guide to Crispy, Flavorful Salad Holders
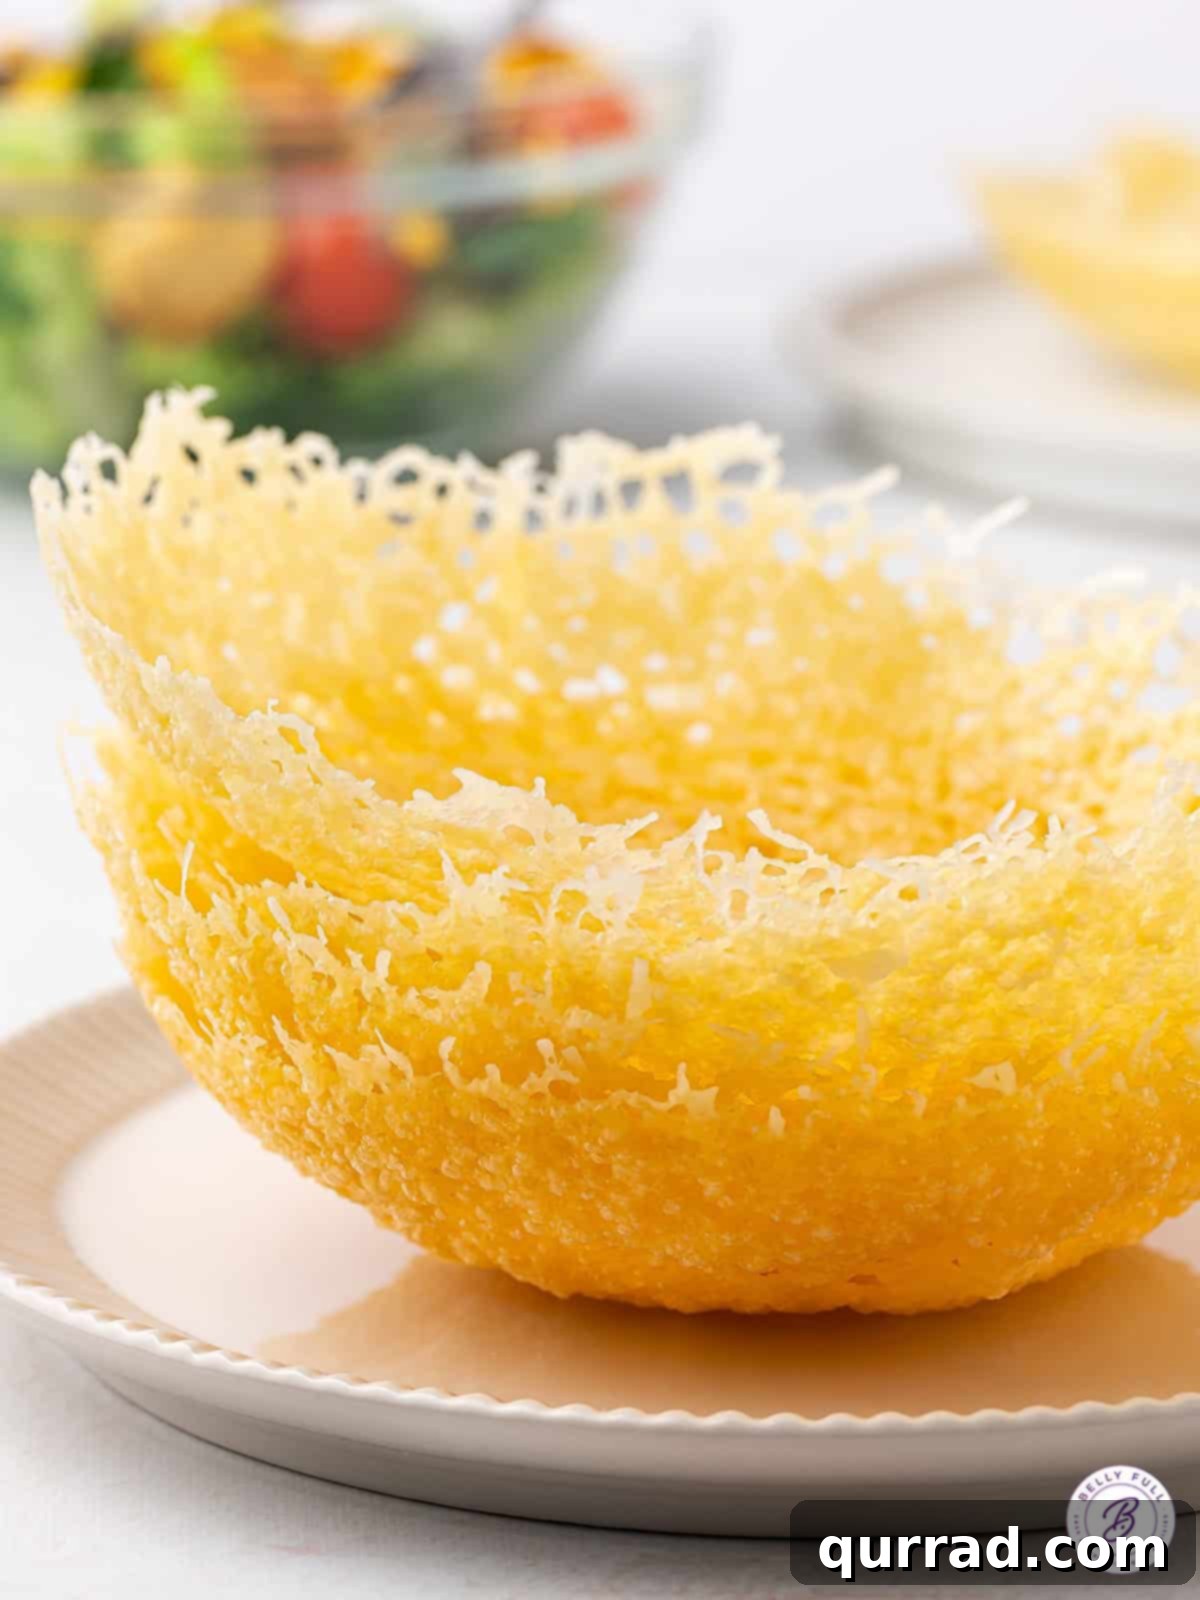
Imagine the delight of serving a fresh, vibrant salad or a delicious appetizer in a bowl that’s not only beautiful but also entirely edible. Introducing the ingenious Parmesan Cheese Bowl – a culinary marvel that is surprisingly simple to create, incredibly fun to serve, and an absolute showstopper for any occasion. Whether you’re planning a casual lunch, hosting an elegant brunch, celebrating a baby shower, or preparing a festive holiday dinner, these crispy, savory bowls elevate your presentation and add an unforgettable gourmet touch. The best part? You only need one ingredient: cheese!
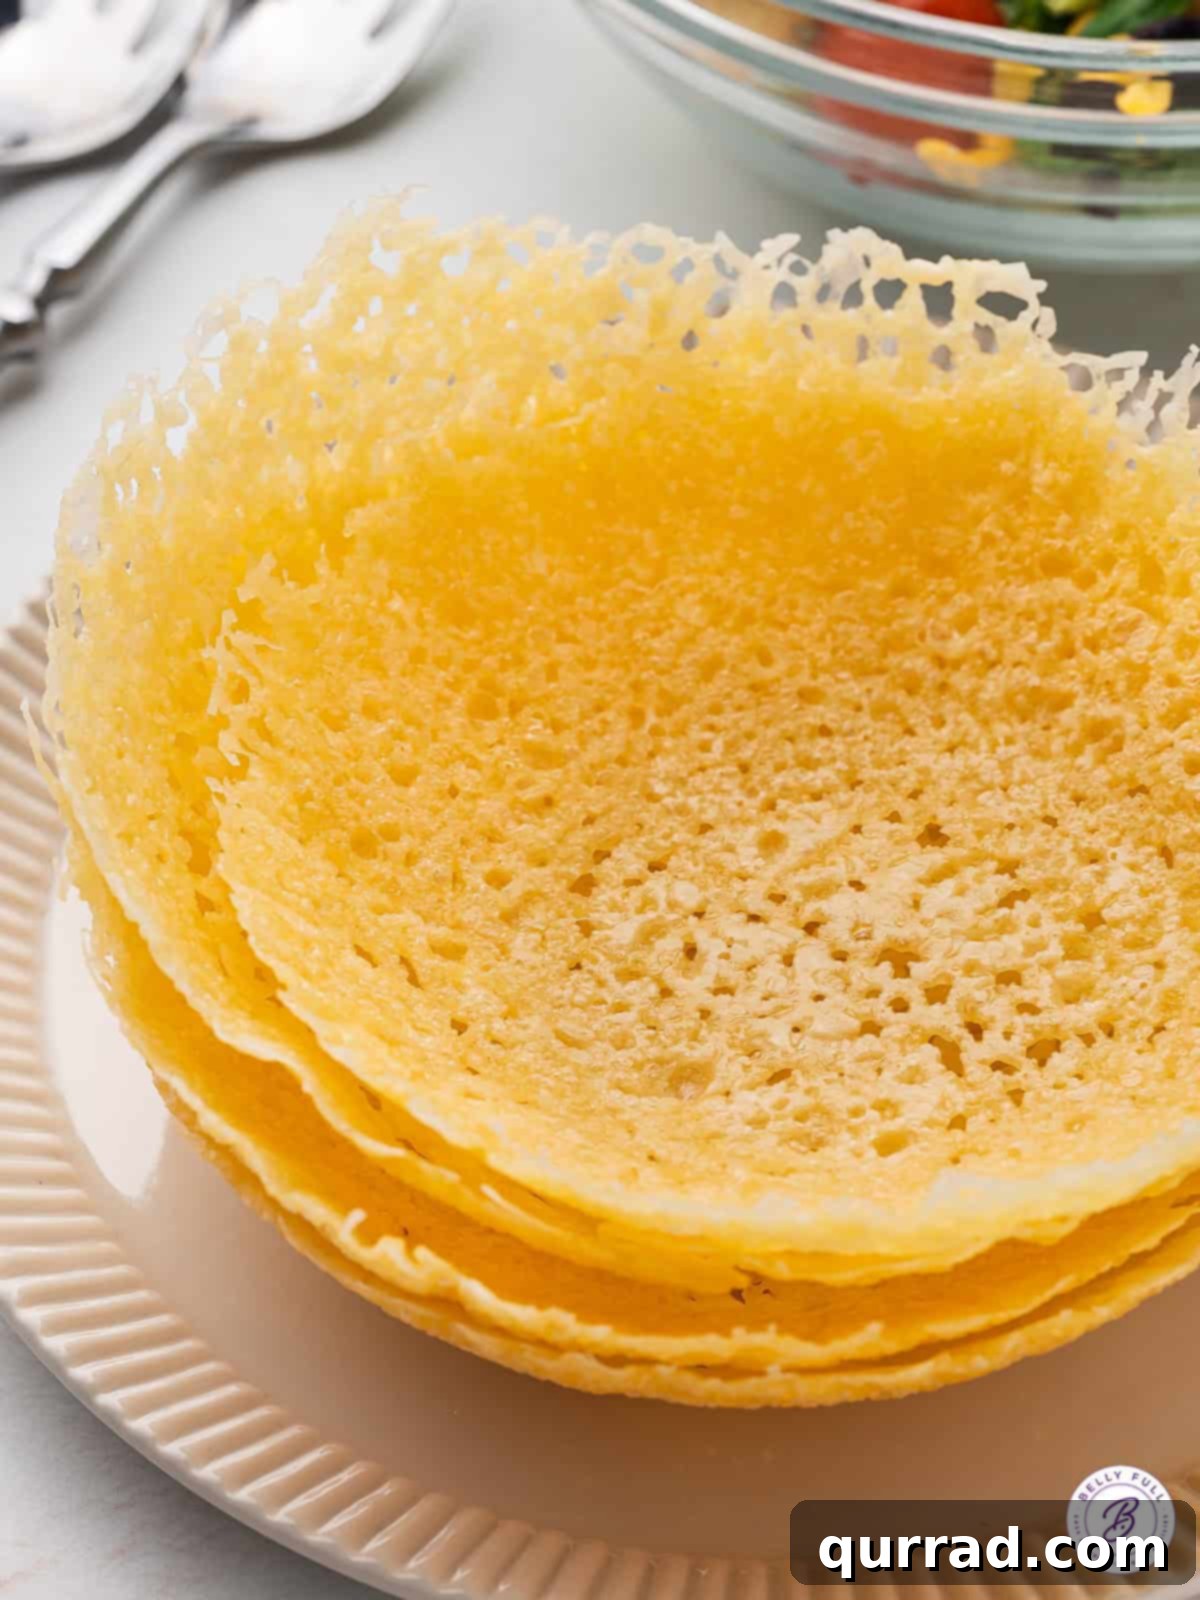
Unlock the Magic of Edible Bowls with Parmesan
The concept of edible food containers has long captivated home cooks and professional chefs alike, turning meals into multi-sensory experiences. From hearty bread bowls cradling warm soups to delicate chocolate cups holding decadent desserts, eating your dishware adds an undeniable charm. Parmesan Cheese Bowls take this innovation to savory new heights. They aren’t just bowls *for* cheese; they *are* the cheese, perfectly crisped and molded into functional, delicious vessels.
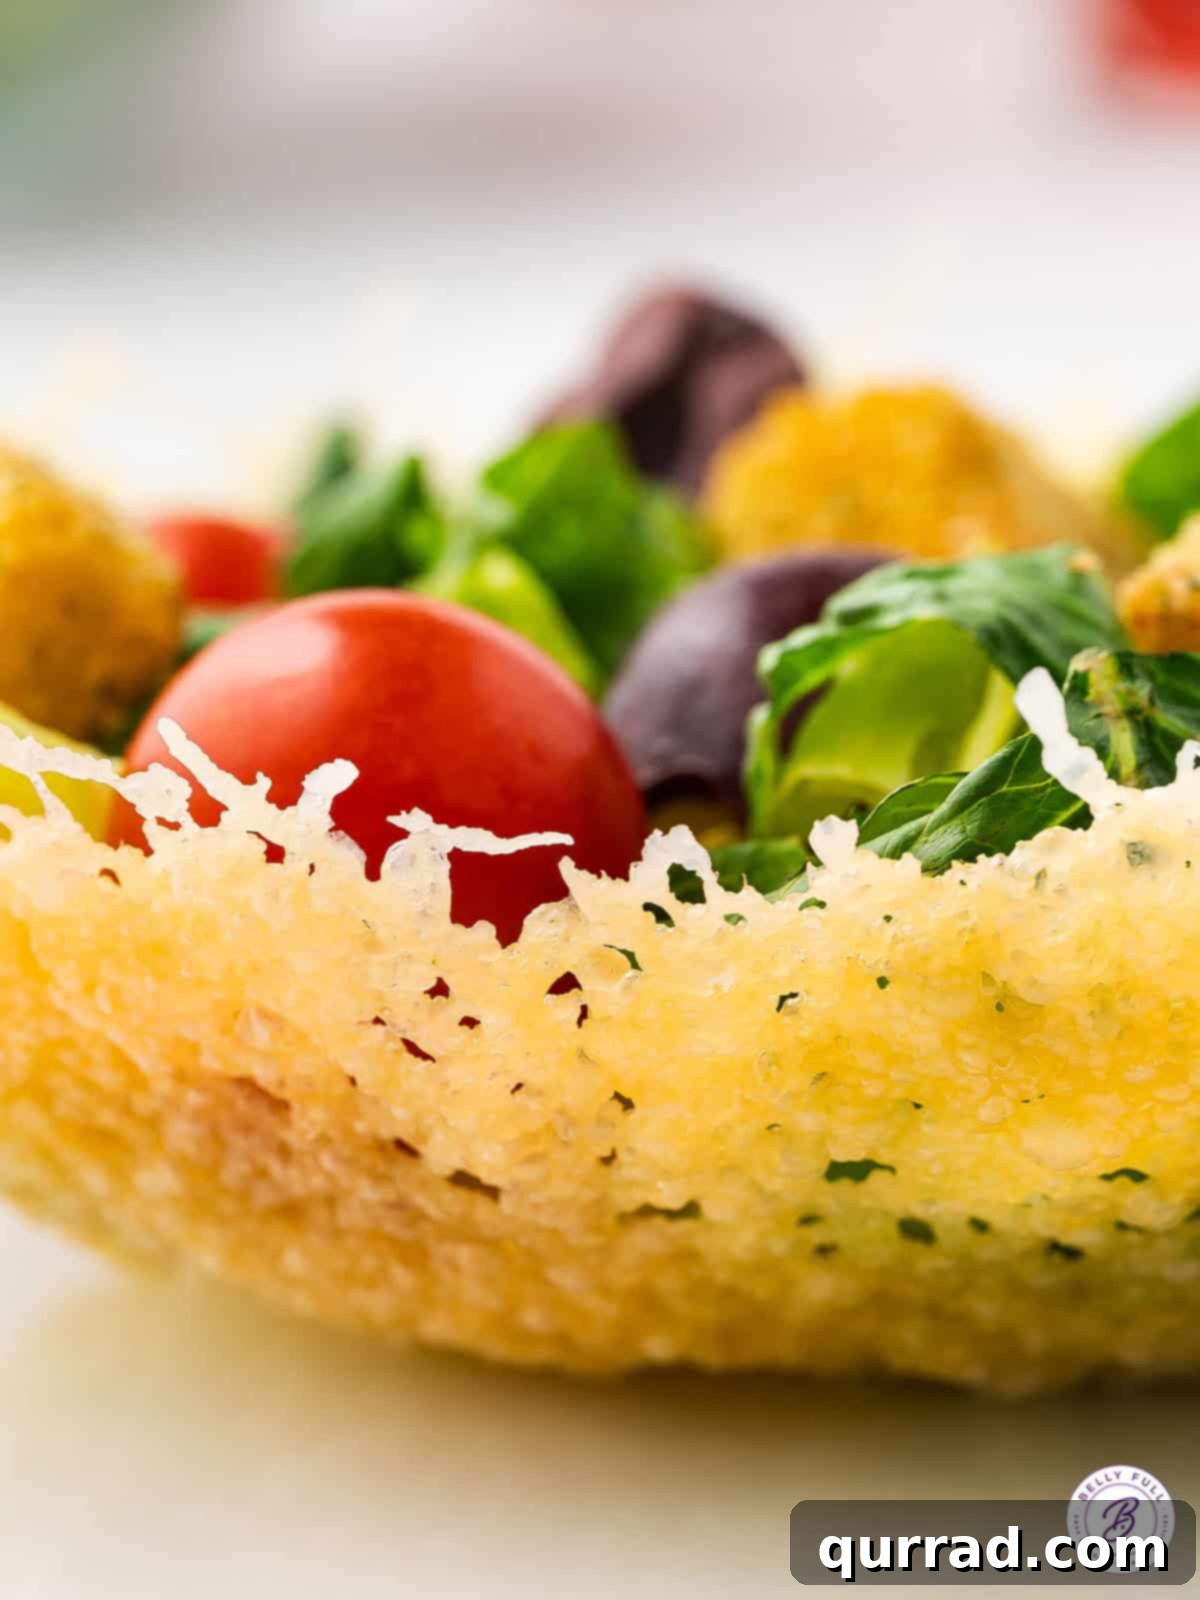
This unique presentation transforms even the most basic salad into a visually stunning and texturally exciting dish. The inherent saltiness and umami-rich flavor of Parmesan cheese infuse perfectly with your chosen fillings, creating a harmonious blend that delights the palate. Beyond their aesthetic appeal, these edible bowls offer a practical advantage: zero waste and minimal cleanup. For health-conscious diners, especially those following a keto or low-carb diet, these Parmesan crisps provide a fantastic, guilt-free way to enjoy a satisfying crunch, making them a versatile addition to any dietary plan.
I’ve personally been crafting these delightful Parmesan crisps for years, discovering their incredible versatility. While some methods involve skillets, my preferred technique using microwave-safe nesting bowls offers unparalleled ease, speed, and consistent results. It’s a remarkably simple process that brings a touch of gourmet flair to any table, proving that sophisticated dining can indeed be crazy easy.
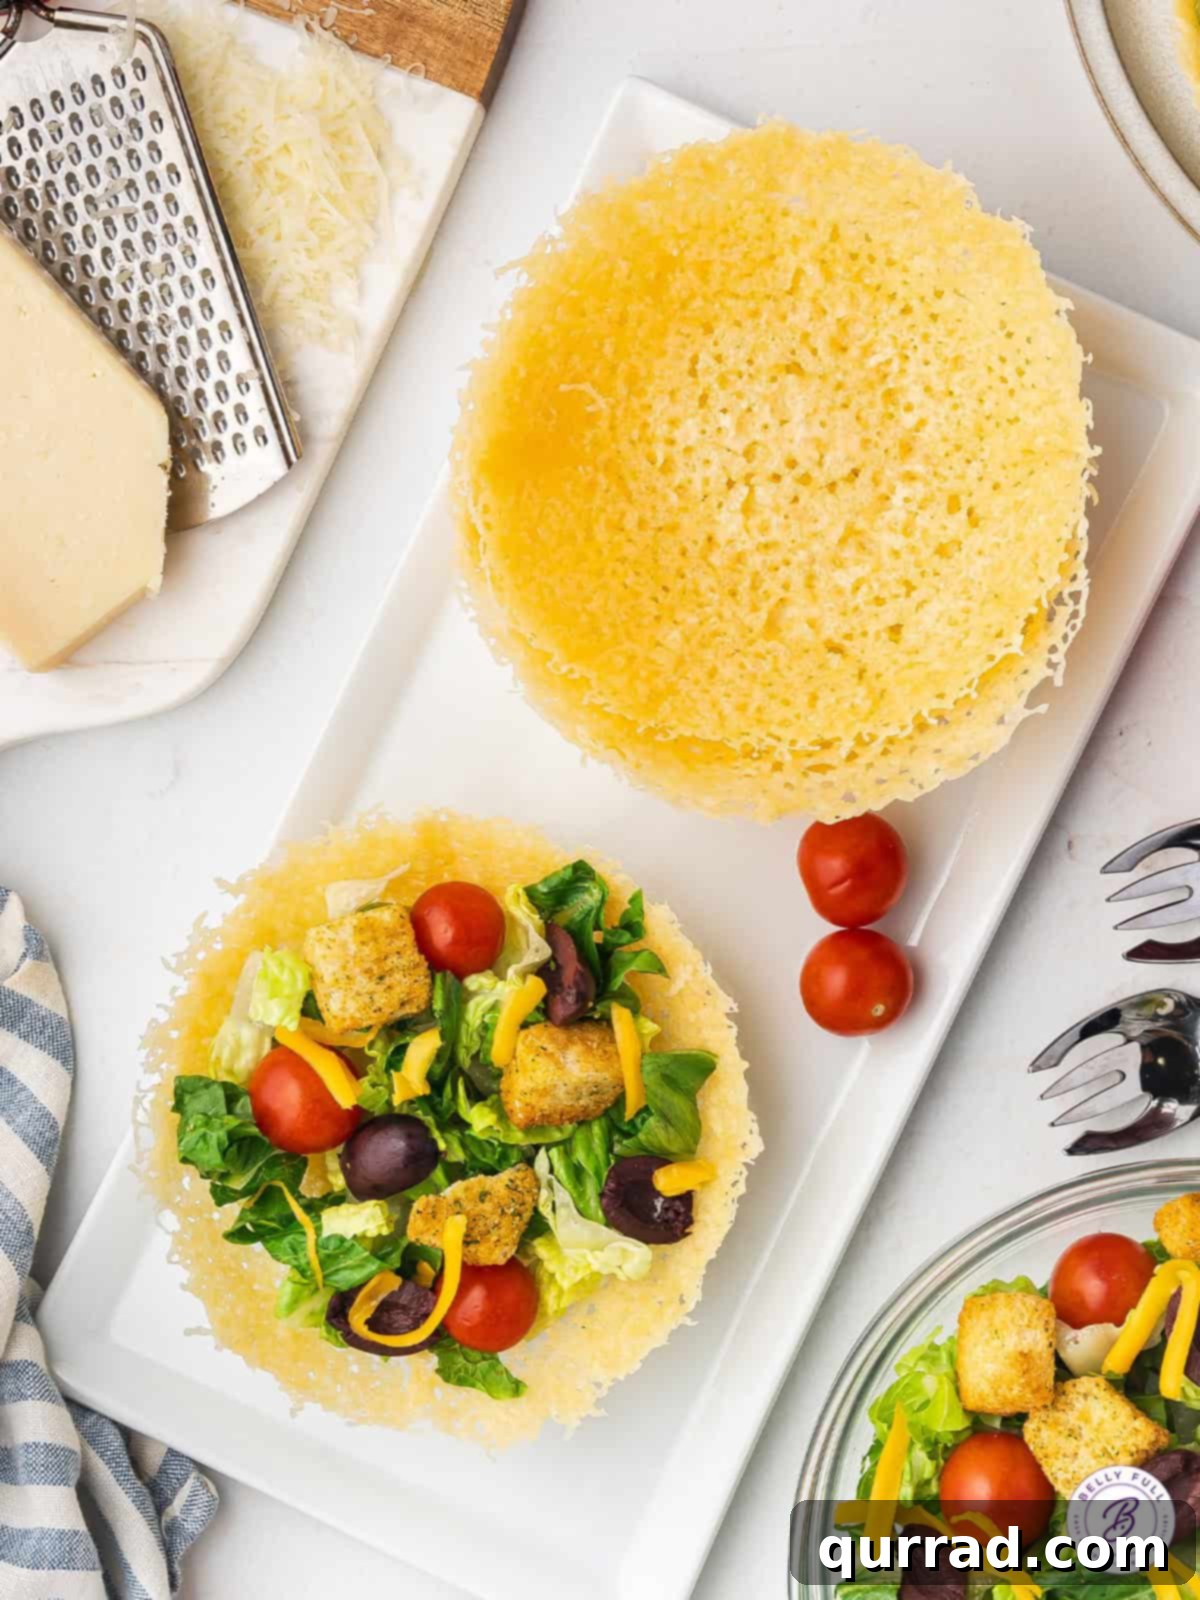
The Ultimate Ingredient: Choosing and Preparing Your Parmesan
The success of your edible cheese bowls hinges on one crucial component: Parmesan cheese. While the simplicity of a single-ingredient recipe is appealing, the quality and type of Parmesan you choose can significantly impact the final outcome. For the most robust flavor and optimal crispness, we highly recommend using freshly grated Parmigiano-Reggiano or a premium imported Parmesan.
Freshly grated cheese typically melts more uniformly and produces a clearer, crisper bowl with a richer, nutty aroma. Pre-grated Parmesan, often found in supermarket dairy aisles, can also be used, but it’s important to note that many brands contain anti-caking agents like cellulose. These agents can sometimes interfere with the melting process, potentially leading to a slightly less uniform crisp or a bowl that’s not quite as sturdy. If using pre-grated cheese, opt for brands with minimal additives. Regardless of your choice, ensure the cheese is finely grated for an even spread and consistent cooking. This attention to your primary ingredient will lay the foundation for truly spectacular edible Parmesan Cheese Bowls.
Step-by-Step Guide: How to Craft Your Parmesan Cheese Bowls
Creating these impressive cheese bowls is remarkably easy and takes just a few minutes of active time per bowl. Follow these detailed instructions to ensure perfectly formed, golden, and crispy edible containers every time. Precision and speed are your allies in this culinary endeavor.
Equipment You’ll Need:
- Parchment paper (essential for non-stick release)
- A large, flat microwave-safe plate
- Two microwave-safe bowls with an approximate 5-inch diameter opening, designed to nest inside one another. The nesting capability is key for shaping.
Ingredients:
- 1/3 cup grated Parmesan cheese (per bowl you wish to make)
- Optional enhancements: A tiny pinch of garlic powder, onion powder, a dash of Italian seasoning blend, or finely minced fresh herbs like chives or parsley for added flavor.
Instructions:
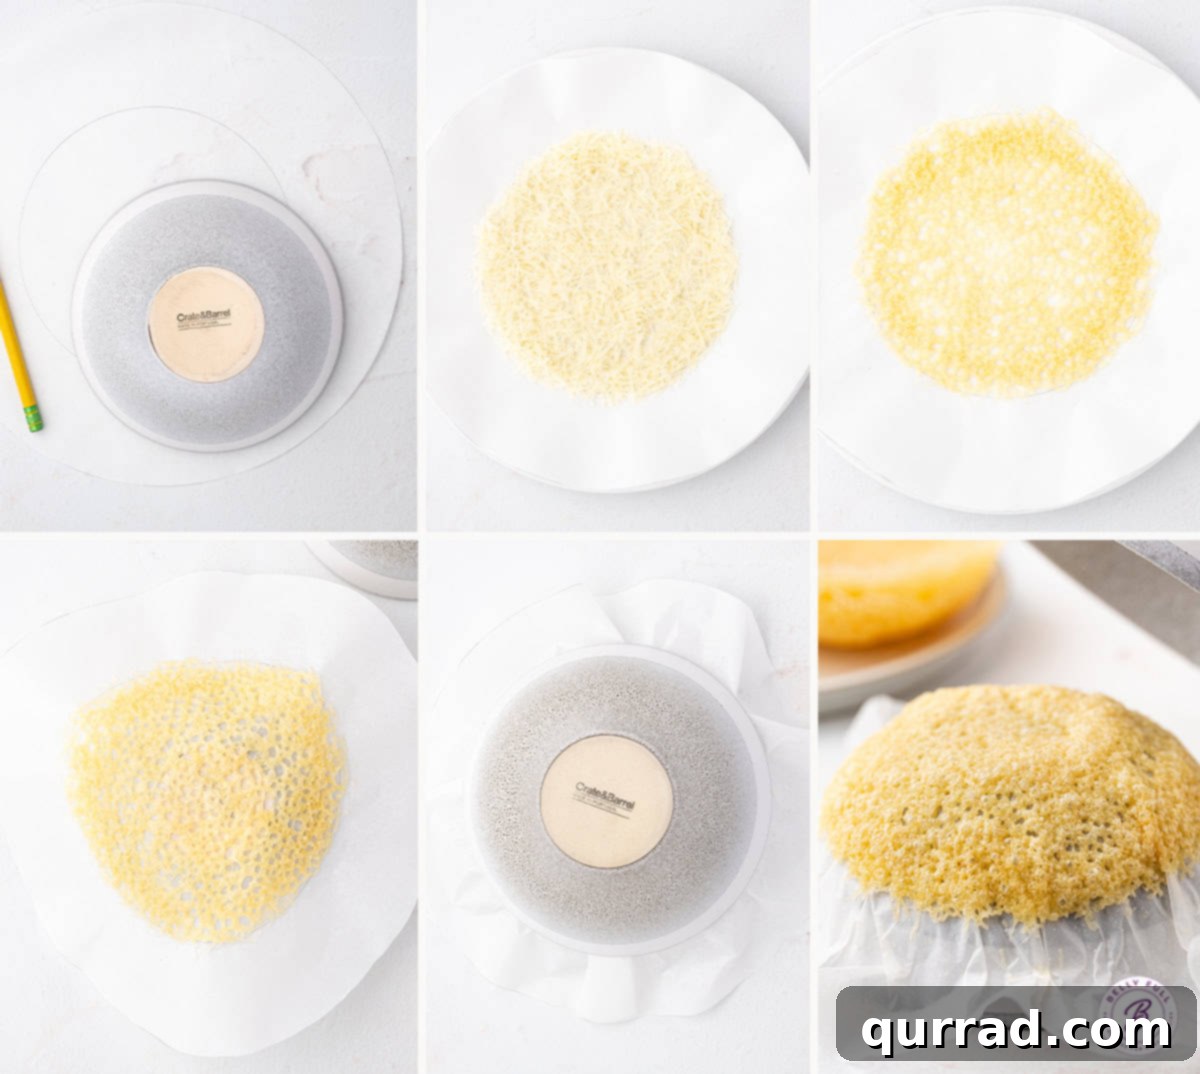
- Select and Prepare Bowls: Begin by choosing your two microwave-safe bowls. They should have roughly a 5-inch diameter opening and be able to nest comfortably within each other when one is inverted. This setup is crucial for effectively shaping the hot cheese.
- Create a Parchment Template: Lay a piece of parchment paper flat on your large microwave-safe plate. Using one of your chosen bowls as a guide, trace a circle around its opening onto the parchment paper. This traced circle will provide a visual reference for spreading the cheese evenly.
- Spread the Parmesan Evenly: Generously spread a thin, uniform layer of grated Parmesan cheese onto the parchment paper, making sure it extends slightly beyond your traced circle outline. The key here is consistency in thickness; too thin, and it might burn or become overly brittle; too thick, and it might not crisp up fully. If you’re adding optional seasonings or fresh herbs, sprinkle them evenly over the cheese at this stage.
- Microwave to Golden Perfection: Carefully transfer the plate with the cheese-covered parchment paper into your microwave. Heat on high for approximately 1 minute. Cooking times can vary significantly based on your microwave’s wattage, so it’s vital to watch the cheese closely. It should begin to melt, bubble vigorously, and turn a beautiful golden-brown color, especially around the edges. If it hasn’t achieved this molten, golden state after one minute, continue microwaving in short 10-15 second intervals until it does.
- Swiftly Shape the Bowl: This is the most time-sensitive step! As soon as the cheese emerges from the microwave, while it’s still piping hot and incredibly pliable, quickly but carefully lift the parchment paper (with the melted cheese still attached). Drape the parchment, cheese-side up, over the bottom of one of your inverted shaping bowls. Immediately place the second bowl directly on top, gently pressing down to mold the hot cheese into a distinct bowl shape. Acting quickly before the cheese begins to cool and harden is paramount for successful shaping.
- Allow to Set: Let the cheese-formed bowls sit undisturbed for about 3 minutes with the top bowl still in place. This short cooling period allows the cheese to begin setting and hardening into its new, desired form.
- Release and Final Harden: Gently remove the top bowl. With extreme care, invert the Parmesan bowl. Now, very carefully and slowly peel away the parchment paper from the fragile cheese crisp. Place the newly formed cheese bowl upright on a clean surface. Allow it to fully cool and harden for approximately 15 minutes at room temperature. This final hardening phase ensures your edible bowl is sturdy, perfectly crisp, and ready for use.
- Fill and Indulge: Once your Parmesan Cheese Bowl is completely cooled and firm, it’s ready to be filled! Spoon in your favorite fresh salad, a delectable appetizer, or a creative side dish, and serve immediately to enjoy the ultimate edible elegance.
Expert Tips and Creative Variations for Culinary Success
While the foundational recipe for Parmesan Cheese Bowls is wonderfully simple, incorporating a few expert tips and exploring creative variations can transform them from a delightful novelty into a staple of your culinary repertoire, ensuring consistent perfection and inspiring endless experimentation.
Tips for Achieving Perfect Crisps:
- Optimal Bowl Sizing: While a 5-inch diameter bowl is excellent for a standard house salad serving, don’t limit yourself. Experiment with larger bowls for more substantial main course salads or smaller ones for elegant appetizers, dips, or even savory mini-desserts. Remember that larger molds will naturally require a greater quantity of cheese to achieve a sturdy crisp.
- Stovetop Method Alternative: For those without a microwave or who prefer stovetop cooking, a small nonstick skillet over medium-low heat works beautifully. Simply sprinkle the grated cheese into a neat circle in the warm skillet and cook until it melts, bubbles, and turns golden brown. Carefully lift the crisp with a spatula and proceed with the shaping steps as described. Keep a watchful eye, as stovetop cooking can be faster.
- Handle with Utmost Care: The melted cheese, once out of the microwave, is delicate. Both when draping it over the bowl and especially when peeling away the parchment paper after cooling, extreme gentleness is required. Any sudden or harsh movements can cause the fragile cheese to tear or crumble.
- Consistency in Cheese Layer: Spreading the Parmesan in a thin, even layer is crucial. Uneven thickness can lead to parts of the crisp burning while others remain soft or undercooked, compromising the overall texture and appearance.
- The Need for Speed in Shaping: The window for shaping the cheese is very short. It must be done immediately after microwaving, while the cheese is still piping hot and highly pliable. As it cools, it rapidly hardens, becoming impossible to mold without breaking. Have your shaping bowls ready and inverted beforehand.
Creative Flavor Boosts and Cheese Variations:
The Parmesan Cheese Bowl is an excellent blank canvas for infusing additional flavors. Before microwaving, consider these enhancements:
- Herbal Aromatics: Elevate the aroma and taste by sprinkling finely minced fresh herbs like rosemary, thyme, oregano, chives, or basil over the grated Parmesan. Dried herbs can also be used sparingly.
- Spice It Up: A dash of garlic powder, onion powder, a pinch of red pepper flakes for heat, or a more exotic spice blend like Za’atar can introduce complex and exciting flavor profiles. Our favorites include Italian seasoning blend for classic Mediterranean notes.
- Everything Bagel Flair: For a trendy and remarkably tasty twist, sprinkle Everything Bagel seasoning over the cheese before cooking. The sesame seeds, poppy seeds, dried garlic, and onion create an irresistible savory crunch.
- Experiment with Other Cheeses: While Parmesan offers superior crisping and flavor, you can certainly try other hard or semi-hard cheeses. Plain cheddar works well, though be aware it tends to spread a bit more, potentially resulting in a thinner crisp. Blending Parmesan with a small amount of Gruyere, Asiago, or even a sharp provolone can add intriguing depth and complexity to your edible bowls.
Beyond the Salad: Innovative Serving Suggestions
While the Parmesan Cheese Bowl is undeniably a match made in heaven for leafy green salads, its robust flavor and structural integrity open up a world of possibilities for serving other delightful dishes. The savory crispness of these bowls makes them an ideal and elegant vessel for a wide array of appetizers, side dishes, and even some unexpected culinary creations. To maintain their exquisite crispness, it is always recommended to fill and serve them immediately, or at least shortly before consumption.
Classic Salad Pairings That Shine:
- Simple Side Salad: A foundational choice, allowing the rich Parmesan flavor to truly stand out alongside fresh greens and a light vinaigrette.
- Caesar Salad: The nutty notes of the cheese bowl perfectly complement the creamy dressing, robust romaine, and crunchy croutons of a classic Caesar.
- Arugula Beet Salad: The peppery zest of arugula combined with the earthy sweetness of roasted beets finds an exquisite balance against the salty, crispy cheese.
- Asian Chicken Salad: An inspired and delightful pairing, where the savory depth of the cheese bowl adds an unexpected layer to the sweet, tangy, and umami-rich flavors of an Asian-inspired chicken salad.
Innovative & Unexpected Serving Ideas:
- Elegant Appetizer Cups: Smaller Parmesan bowls are perfect for individual servings of olive tapenade, vibrant bruschetta toppings, mini caprese salads, refreshing shrimp cocktail, or a warm, creamy spinach and artichoke dip. They transform any gathering into an elegant affair.
- Savory Soup Garnishes: While not designed to hold hot liquids for extended periods, shards of Parmesan crisp can be served alongside or atop creamy tomato soup, hearty lentil soup, or even a classic French onion soup, providing a delightful textural counterpoint and flavor burst.
- Breakfast and Brunch Creations: For an elevated brunch presentation, a medium-sized cheese bowl can elegantly hold fluffy scrambled eggs, a petite frittata, or a medley of fresh berries drizzled with a balsamic reduction.
- Deconstructed Dishes: Use them to hold components of a deconstructed dish, such as a dollop of mashed potatoes, a serving of quinoa salad, or a unique vegetable medley, allowing guests to build their perfect bite.
Proper Storage: Keeping Your Cheese Bowls Crispy
To ensure your homemade Parmesan Cheese Bowls remain wonderfully crisp and delicious for as long as possible, proper storage is absolutely essential. The primary enemy of their delicate texture is moisture. By protecting them from humidity, these delicate edible bowls can maintain their delightful crunch for up to 5 days, making them perfect for preparing in advance for special occasions or enjoying throughout the week.
Under no circumstances should you store your cheese bowls in the refrigerator. The cold, humid environment of a fridge will quickly draw moisture into the cheese, causing them to soften and lose their coveted crispness. Instead, ensure that your Parmesan bowls are completely cooled and fully hardened at room temperature before storage. Once thoroughly cooled, carefully stack them (with a piece of parchment paper between each if stacking multiple) inside an airtight container. Place this container in a dry location in your pantry or on your kitchen counter, away from direct sunlight, excessive heat, or any sources of humidity. When you’re ready to serve, simply retrieve them from the container, fill with your chosen dish, and enjoy their perfect texture!
Parmesan Cheese Bowl Recipe
A simple yet incredibly elegant way to serve salads and appetizers, these edible Parmesan Cheese Bowls are wonderfully crispy, bursting with flavor, and remarkably easy to make with just a single ingredient.
Preparation & Cooking Times:
- Prep Time: 2 minutes
- Cook Time: 1 minute
- Cool Time: 15 minutes
- Total Time: 18 minutes
Yields:
1 serving (per individual bowl)
Equipment:
- Parchment paper
- 2 small microwave-safe nesting bowls (approximately 5-inch diameter openings)
- Large flat microwave-safe plate
Ingredients:
- 1/3 cup grated Parmesan cheese
- Optional: a small pinch of garlic powder, Italian seasoning, or finely minced fresh herbs
Instructions:
- Gather Equipment: Select two microwave-safe bowls, each with about a 5-inch diameter opening, that can be nested one inside the other.
- Prepare Parchment: Line a large flat plate with parchment paper. Using one of your bowls, trace a circle around its opening onto the parchment as a spreading guide.
- Spread Cheese: Spread a thin, even layer of grated Parmesan cheese onto the parchment, extending slightly past your traced outline. If using, sprinkle optional seasonings evenly over the cheese.
- Microwave: Place the plate with the cheese in the microwave and heat on high for approximately 1 minute. Watch closely until the cheese is fully melted, bubbling, and golden brown around the edges. Adjust time slightly if needed based on your microwave.
- Shape Bowl: Immediately (while the cheese is hot and pliable), lift the parchment paper with the melted cheese. Drape it, cheese-side up, over the bottom of an upside-down shaping bowl. Quickly place the second bowl directly on top, pressing gently to form the desired bowl shape.
- Allow to Set: Let the cheese bowl sit and cool in this molded position for 3 minutes to begin hardening.
- Release and Harden: Carefully remove the top bowl, then gently invert the Parmesan bowl. Very carefully peel away the parchment paper. Allow the cheese bowl to fully cool and harden for approximately 15 minutes at room temperature.
- Serve: Once completely firm and crisp, fill with your favorite salad or appetizer and enjoy immediately!
Notes:
- Bowl Size Flexibility: A 5-inch diameter is excellent for a side salad. Feel free to use larger bowls for bigger portions, adjusting the amount of cheese accordingly.
- Stovetop Alternative: For those preferring not to use a microwave, the cheese can be cooked in a small nonstick skillet over medium-low heat until melted and golden, then shaped as directed.
- Handle Gently: The cheese crisp is fragile after cooking. Exercise extreme care when handling and removing the parchment paper to prevent tearing or crumbling.
- Cheese Variations: While Parmesan is ideal, other hard cheeses like cheddar can be used, though cheddar tends to spread more. Experiment with blends for unique flavors.
- Flavor Customization: Enhance your bowls by sprinkling on seasonings such as garlic powder, onion powder, Za’atar, Italian blend seasoning, or Everything Bagel seasoning before microwaving.
Nutrition Information (per serving):
- Calories: 143kcal
- Carbohydrates: 1g
- Protein: 12g
- Fat: 9g
- Saturated Fat: 5g
- Cholesterol: 29mg
- Sodium: 509mg
- Potassium: 41mg
- Vitamin A: 290IU
- Calcium: 370mg
- Iron: 0.3mg
Please note that the nutritional information provided is an estimate. Values can vary based on the specific brands and exact quantities of ingredients used, as well as any modifications made to the recipe. If precise nutritional data is critical for your dietary needs, it is recommended to calculate them yourself using your exact ingredients.
Conclusion: Elevate Your Meals with Edible Elegance
In a world where culinary presentation often takes a backseat to convenience, these edible Parmesan Cheese Bowls stand out as a brilliant blend of both. They are a testament to the fact that minimal effort and a single, high-quality ingredient can culminate in truly impressive and memorable results. Easy to prepare, remarkably versatile, and undeniably satisfying, these crispy cheese vessels are destined to become a cherished addition to your recipe repertoire. Whether you’re aiming to impress guests at your next gathering or simply wish to add a touch of gourmet flair to a weeknight meal, these Parmesan crisps offer an effortless path to culinary elegance. Dare to try them, savor their unique flavor, and revel in the sophisticated simplicity they bring to every bite. Happy cooking!