
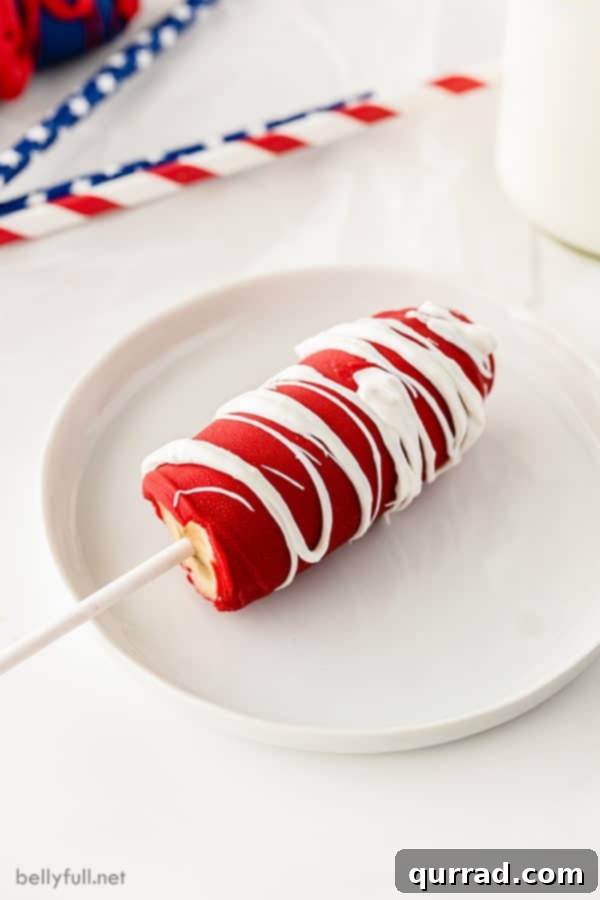
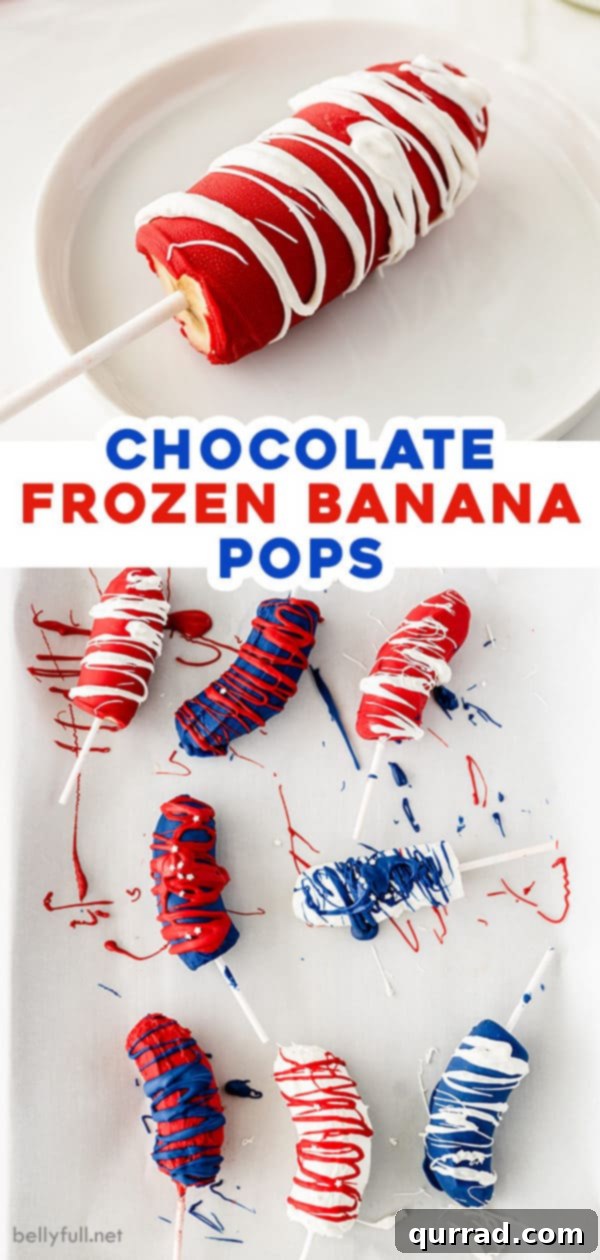
Embrace the vibrant spirit of summer and the patriotic cheer of the 4th of July with a delightful frozen treat that’s as easy to make as it is fun to eat! Forget the ordinary this year and serve up a batch of these spectacular **Frozen Chocolate Banana Pops**, adorned in festive red, white, and blue. This recipe effortlessly transforms simple fruit into an eye-catching, mouth-watering dessert, perfect for any warm-weather celebration. Crafted with ripe bananas, colorful candy melts, and sturdy lollipop sticks, these pops are a surefire hit for all ages and a refreshing way to beat the heat.
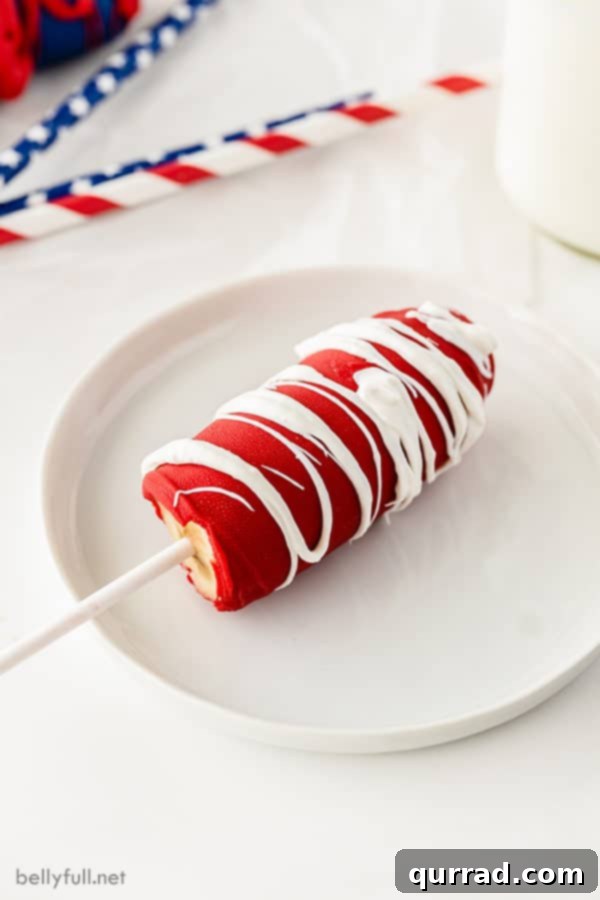
For some, bananas might not be the most exciting fruit on their own. But when transformed into something magical? That’s where the fun begins! While I’m not always keen on a plain banana, I absolutely adore them in culinary creations like Pan Fried Honey Bananas, a creamy Banana Cream Lush, or a warm slice of homemade Banana Bread. However, when you introduce the concept of frozen, chocolate-covered bananas, that’s a game-changer! These delightful treats transcend the ordinary, offering a cool, sweet escape that’s both indulgent and incredibly refreshing.
My children have always been big fans of frozen chocolate banana pops, typically enjoying them coated in classic milk or dark chocolate. But this year, as the 4th of July approached, I knew we had to add a patriotic flair. The idea of red, white, and blue frozen banana pops immediately sparked excitement, and the results are truly spectacular! These vibrant treats are not only incredibly fun to look at but also perfectly capture the festive spirit of Independence Day. They’re simple enough for kids to help prepare, making for a fantastic summer activity, and impressive enough to be the star dessert at any backyard BBQ or pool party.
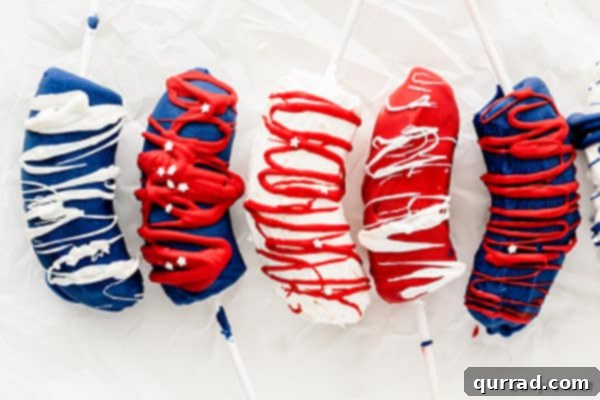
Essential Ingredients for Perfect Frozen Chocolate Banana Pops
Creating these festive frozen banana pops requires just a handful of straightforward ingredients. The beauty of this recipe lies in its simplicity, making it accessible for even novice bakers or a fun project to do with kids. Here’s what you’ll need to gather:
- **Bananas:** The star of our show! Opt for just-ripe bananas—perfectly yellow, without any green tips or brown spots. They should be firm enough to handle without mushing, yet sweet enough to enjoy.
- **Royal Blue Candy Melts:** These provide the vibrant blue hue essential for our patriotic theme. Candy melts are specifically designed to melt smoothly and set quickly, creating a beautiful, sturdy coating.
- **Red Candy Melts:** To complete the red, white, and blue trio, red candy melts add a bold and festive color.
- **White Candy Melts:** The versatile white candy melts not only contribute to the color scheme but also serve as an excellent base or a contrasting drizzle.
- **Red, White, and Blue Sprinkles:** These are a must for adding that extra sparkle and crunch, reinforcing the festive theme and making each pop irresistible.
- **Lollipop Sticks:** These handy sticks make the banana pops easy to hold and eat, perfect for mess-free enjoyment, especially for little hands.
Having these items ready ensures a smooth and enjoyable preparation process, leading to deliciously fun and Instagram-worthy frozen treats!
Crafting Your Frozen Chocolate Banana Pops: A Simple Guide
You’ll be amazed at how incredibly easy it is to assemble these delightful banana pops! This recipe is designed for maximum fun and minimal fuss, making it perfect for a quick summer activity or a party prep session. Follow these clear steps to create your vibrant red, white, and blue treats:
**Step 1: Prepare Your Bananas.** Begin by peeling your bananas. Once peeled, slice each banana in half crosswise. This ensures a stable, flat base for inserting your stick and a manageable portion size. Carefully insert a lollipop stick into the cut end of each banana half. Make sure the stick is firmly embedded to prevent the banana from wobbling or falling off. Arrange these skewered banana halves on a baking sheet lined with parchment paper. This non-stick surface is crucial for easy removal after freezing.
**Step 2: Freeze Until Firm.** Transfer the baking sheet with the skewered bananas to the freezer. Allow them to freeze for at least 1 to 2 hours, or until they are completely firm. This step is vital as it provides a solid base for the chocolate coating and helps the candy melts set quickly upon contact, preventing a messy application.
**Step 3: Melt the Candy Melts.** While the bananas are chilling, prepare your candy melts. In separate microwave-safe bowls (one for red, one for white, one for blue), melt each color of candy melts according to the package directions. Typically, this involves microwaving in 30-second intervals, stirring well after each, until smooth and fully melted. The goal is a smooth, pourable consistency, not too thick or too thin.
**Step 4: Dip and Decorate.** Once the bananas are firm and the candy melts are ready, it’s time for the fun part! Take the frozen banana halves from the freezer. Dip each banana into your chosen color of melted candy, ensuring it’s completely coated. Gently tap off any excess chocolate against the edge of the bowl. Immediately after dipping, while the candy melt is still wet, lightly drizzle with another contrasting color of candy melt (e.g., blue banana with a white drizzle) and generously sprinkle with your red, white, and blue sprinkles. Work quickly, as the cold banana will cause the candy melts to set almost instantly.
**Step 5: Final Freeze and Serve.** Place the decorated banana pops back onto the parchment-lined baking sheet. Return them to the freezer for another 15-30 minutes, or until the candy coating is completely hardened. These pops are best enjoyed straight from the freezer for a truly firm and refreshing experience. If you prefer a slightly softer texture, allow them to sit at room temperature for about 5-10 minutes before eating. Enjoy your vibrant and delicious patriotic treat!
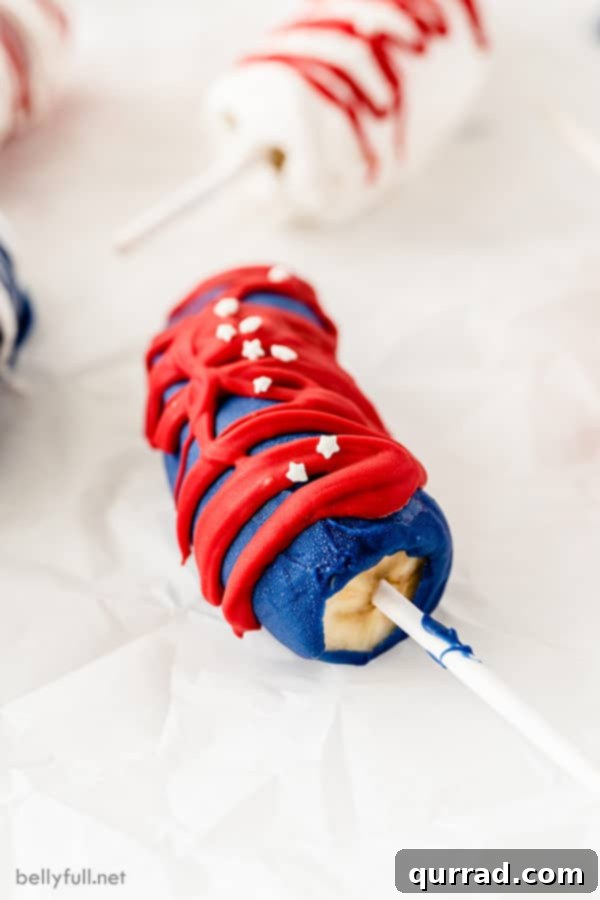
Unleash Your Creativity: Recipe Variations
These frozen chocolate banana pops are incredibly versatile, allowing for endless customization beyond the patriotic theme. Feel free to get creative and adapt them to your taste or any occasion:
- **Toppings Galore:** While sprinkles are fantastic, you can elevate your banana pops with a variety of other toppings. Consider rolling them in finely chopped nuts like peanuts, almonds, or pecans for added crunch. Shredded coconut (toasted or plain), toffee bits, granola, or even crushed cookies like Oreos or graham crackers make excellent additions. For an extra sweet touch, use mini chocolate chips or different colored jimmies.
- **Themed for Any Holiday or Event:** Don’t limit yourself to red, white, and blue! Swap out the candy melt colors to suit any holiday or party theme. Think orange and black for Halloween, red and green for Christmas, pastels for Easter, or even school colors for graduation parties. The possibilities are truly endless, making these a year-round treat.
- **Popsicle Sticks for a Different Grip:** If you prefer a wider stick, standard popsicle sticks can be used instead of lollipop sticks. Just ensure they are inserted securely into the banana halves for stability.
- **Why Candy Melts Rule (and Alternatives):** Candy melts are highly recommended for this recipe because they melt smoothly, offer vibrant colors, set quickly, and create a firmer, more stable coating that holds up better out of the freezer than traditional chocolate. This also makes them less prone to melting in your hands. If you must use regular chocolate, opt for melting wafers or chocolate bars specifically designed for dipping, and consider adding a tablespoon of coconut oil per cup of chocolate to thin it slightly and help it set firmer.
Achieving Perfection: Essential Tips for Success
To ensure your frozen chocolate banana pops turn out perfectly every time, keep these expert tips in mind:
- **Banana Ripeness is Key:** Always use bananas that are just ripe—bright yellow, but without any brown spots. Overripe bananas will be too soft and mushy, making them difficult to slice and handle, while green bananas won’t have the desired sweetness or creamy texture when frozen.
- **Slice Crosswise for Stability:** It’s crucial to slice your peeled bananas in half crosswise, not lengthwise. A lengthwise cut will make the banana pieces too long and unstable on the lollipop stick, leading to them breaking or falling off. The shorter, sturdier crosswise halves provide a much better foundation.
- **Choose the Right Stick Length:** For optimal stability, use lollipop sticks that are approximately 4 inches long. This length provides enough grip without being overly cumbersome, ensuring the banana remains upright and secure during dipping and eating.
- **Insert Sticks BEFORE Freezing:** This is a golden rule! Always insert the lollipop sticks into the banana halves before you freeze them. Attempting to push a stick into a rock-hard frozen banana can cause the banana to split apart, ruining its structural integrity and making it difficult to coat.
- **Double Freeze for Best Results:** Freeze the bananas BEFORE you dip them in the melted chocolate AND AFTER they’ve been dipped. The initial freeze ensures the bananas are firm and cold, allowing the candy melts to set almost instantly for a smooth, even coating. The second freeze fully hardens the chocolate shell, preventing stickiness and making the pops easier to store and enjoy.
- **Work Quickly:** Once you take the bananas out of the freezer for dipping, work efficiently. The cold bananas will quickly solidify the candy melts, so have all your colors melted and sprinkles ready before you begin dipping.
- **Pre-Line Your Baking Sheet:** Always use parchment paper or a silicone baking mat on your baking sheet. This prevents the dipped bananas from sticking, making transfer easy once they’re frozen.
Storing Your Delicious Frozen Delights
One of the best things about these frozen chocolate banana pops is that they can be made ahead of time, making them perfect for parties or for having a sweet treat on hand. To keep them at their best:
Keep these frozen until you’re ready to serve. Store them in an airtight container or a freezer-safe plastic bag. Layer them with parchment paper in between to prevent sticking. Properly stored, they will maintain their deliciousness and texture for up to 2 weeks in the freezer. This allows you to enjoy them at your leisure, pulling one out whenever a craving strikes for a refreshing, sweet snack.
Why These Frozen Chocolate Banana Pops Are a Must-Try
These frozen chocolate banana pops are more than just a dessert; they are a delightful experience! Quick to prepare, incredibly easy to customize, and wonderfully refreshing, they are the ideal treat to satisfy your sweet tooth on a hot summer day. Whether you’re celebrating the 4th of July, hosting a backyard BBQ, or simply looking for a fun and fruity snack, these patriotic pops hit all the right notes. Their vibrant colors and delicious combination of sweet banana and crisp chocolate coating make them an instant favorite for both kids and adults alike. Get ready to impress your guests and treat your family to a burst of summer joy!
Frequently Asked Questions About Frozen Chocolate Banana Pops
Here are some common questions to help you perfect your frozen chocolate banana pops:
- **Can I use regular chocolate instead of candy melts?** Yes, you can, but candy melts are generally preferred for their smoother finish, vibrant colors, and quicker setting time. If using regular chocolate chips or bars, you might want to add a teaspoon of coconut oil or shortening per cup of chocolate to help it melt more smoothly and set more firmly.
- **How long do these frozen banana pops last in the freezer?** When stored in an airtight container or freezer bag, they can last up to 2 weeks. Be sure to separate layers with parchment paper to prevent them from sticking together.
- **Can I prepare them completely ahead of time for a party?** Absolutely! These are a fantastic make-ahead treat. Prepare them fully and store them in the freezer until about 5-10 minutes before you plan to serve.
- **Are these considered a healthy snack?** While they contain fruit (bananas), the candy melts add sugar and fat. They are a healthier alternative to many processed desserts, but should still be enjoyed in moderation as a treat.
- **What if my candy melts seize or become too thick?** If your candy melts become too thick or seize, they might have overheated or come into contact with water. To thin them, you can add a tiny bit of vegetable shortening or a specific candy-melt thinning agent, stirring until smooth. Avoid adding water, as it can cause seizing.
More Festive 4th of July Recipes!
Looking for more patriotic treats to complete your holiday spread? Explore these other fun and delicious red, white, and blue recipes:
- (Red White Blue) Cheesecake Mousse Parfaits
- (Patriotic) Muddy Buddies
- Red White Blue Dessert Fruit Kabobs
- Layered Ice Cubes
We hope you adore this delicious and easy recipe! We’d love to hear your thoughts, so be sure to leave a review below. And don’t forget to follow Belly Full on Facebook, Instagram, Pinterest, and YouTube for more culinary inspiration!
Frozen Chocolate Banana Popsicles
Pin
Ingredients
- 4 large bananas
- 12 ounce bag of royal blue candy melts
- 12 ounce bag of red candy melts
- 12 ounce bag of white candy melts
- Red, white, blue sprinkles
- Lollipop sticks
Instructions
-
Line a large baking sheet with parchment paper.
-
Peel bananas and slice in half crosswise (not lengthwise) so you have 8 banana pieces; insert a lollipop stick into the cut end of each one until it’s stable. Place on the baking sheet and transfer to the freezer until firm, about 1 hour.
-
In separate bowls, melt the candy melts according to package directions.
-
Dip each banana into the melted chocolate (2 white, 2 blue, 2 red), making sure they’re smooth and allowing any excess to drip off. Transfer back to the lined baking sheet.
-
Lightly drizzle each one with an opposite colored chocolate and top with a few sprinkles.
-
Freeze until ready to serve. Enjoy straight from the freezer or allow them to sit at room temperature for about 10 minutes before eating.
Notes
Nutrition
Nutritional information given is an automatic calculation and can vary based on the exact products you use and any changes you make to the recipe. If these numbers are very important to you, I would recommend calculating them yourself.